
-
Pair o’ Stools
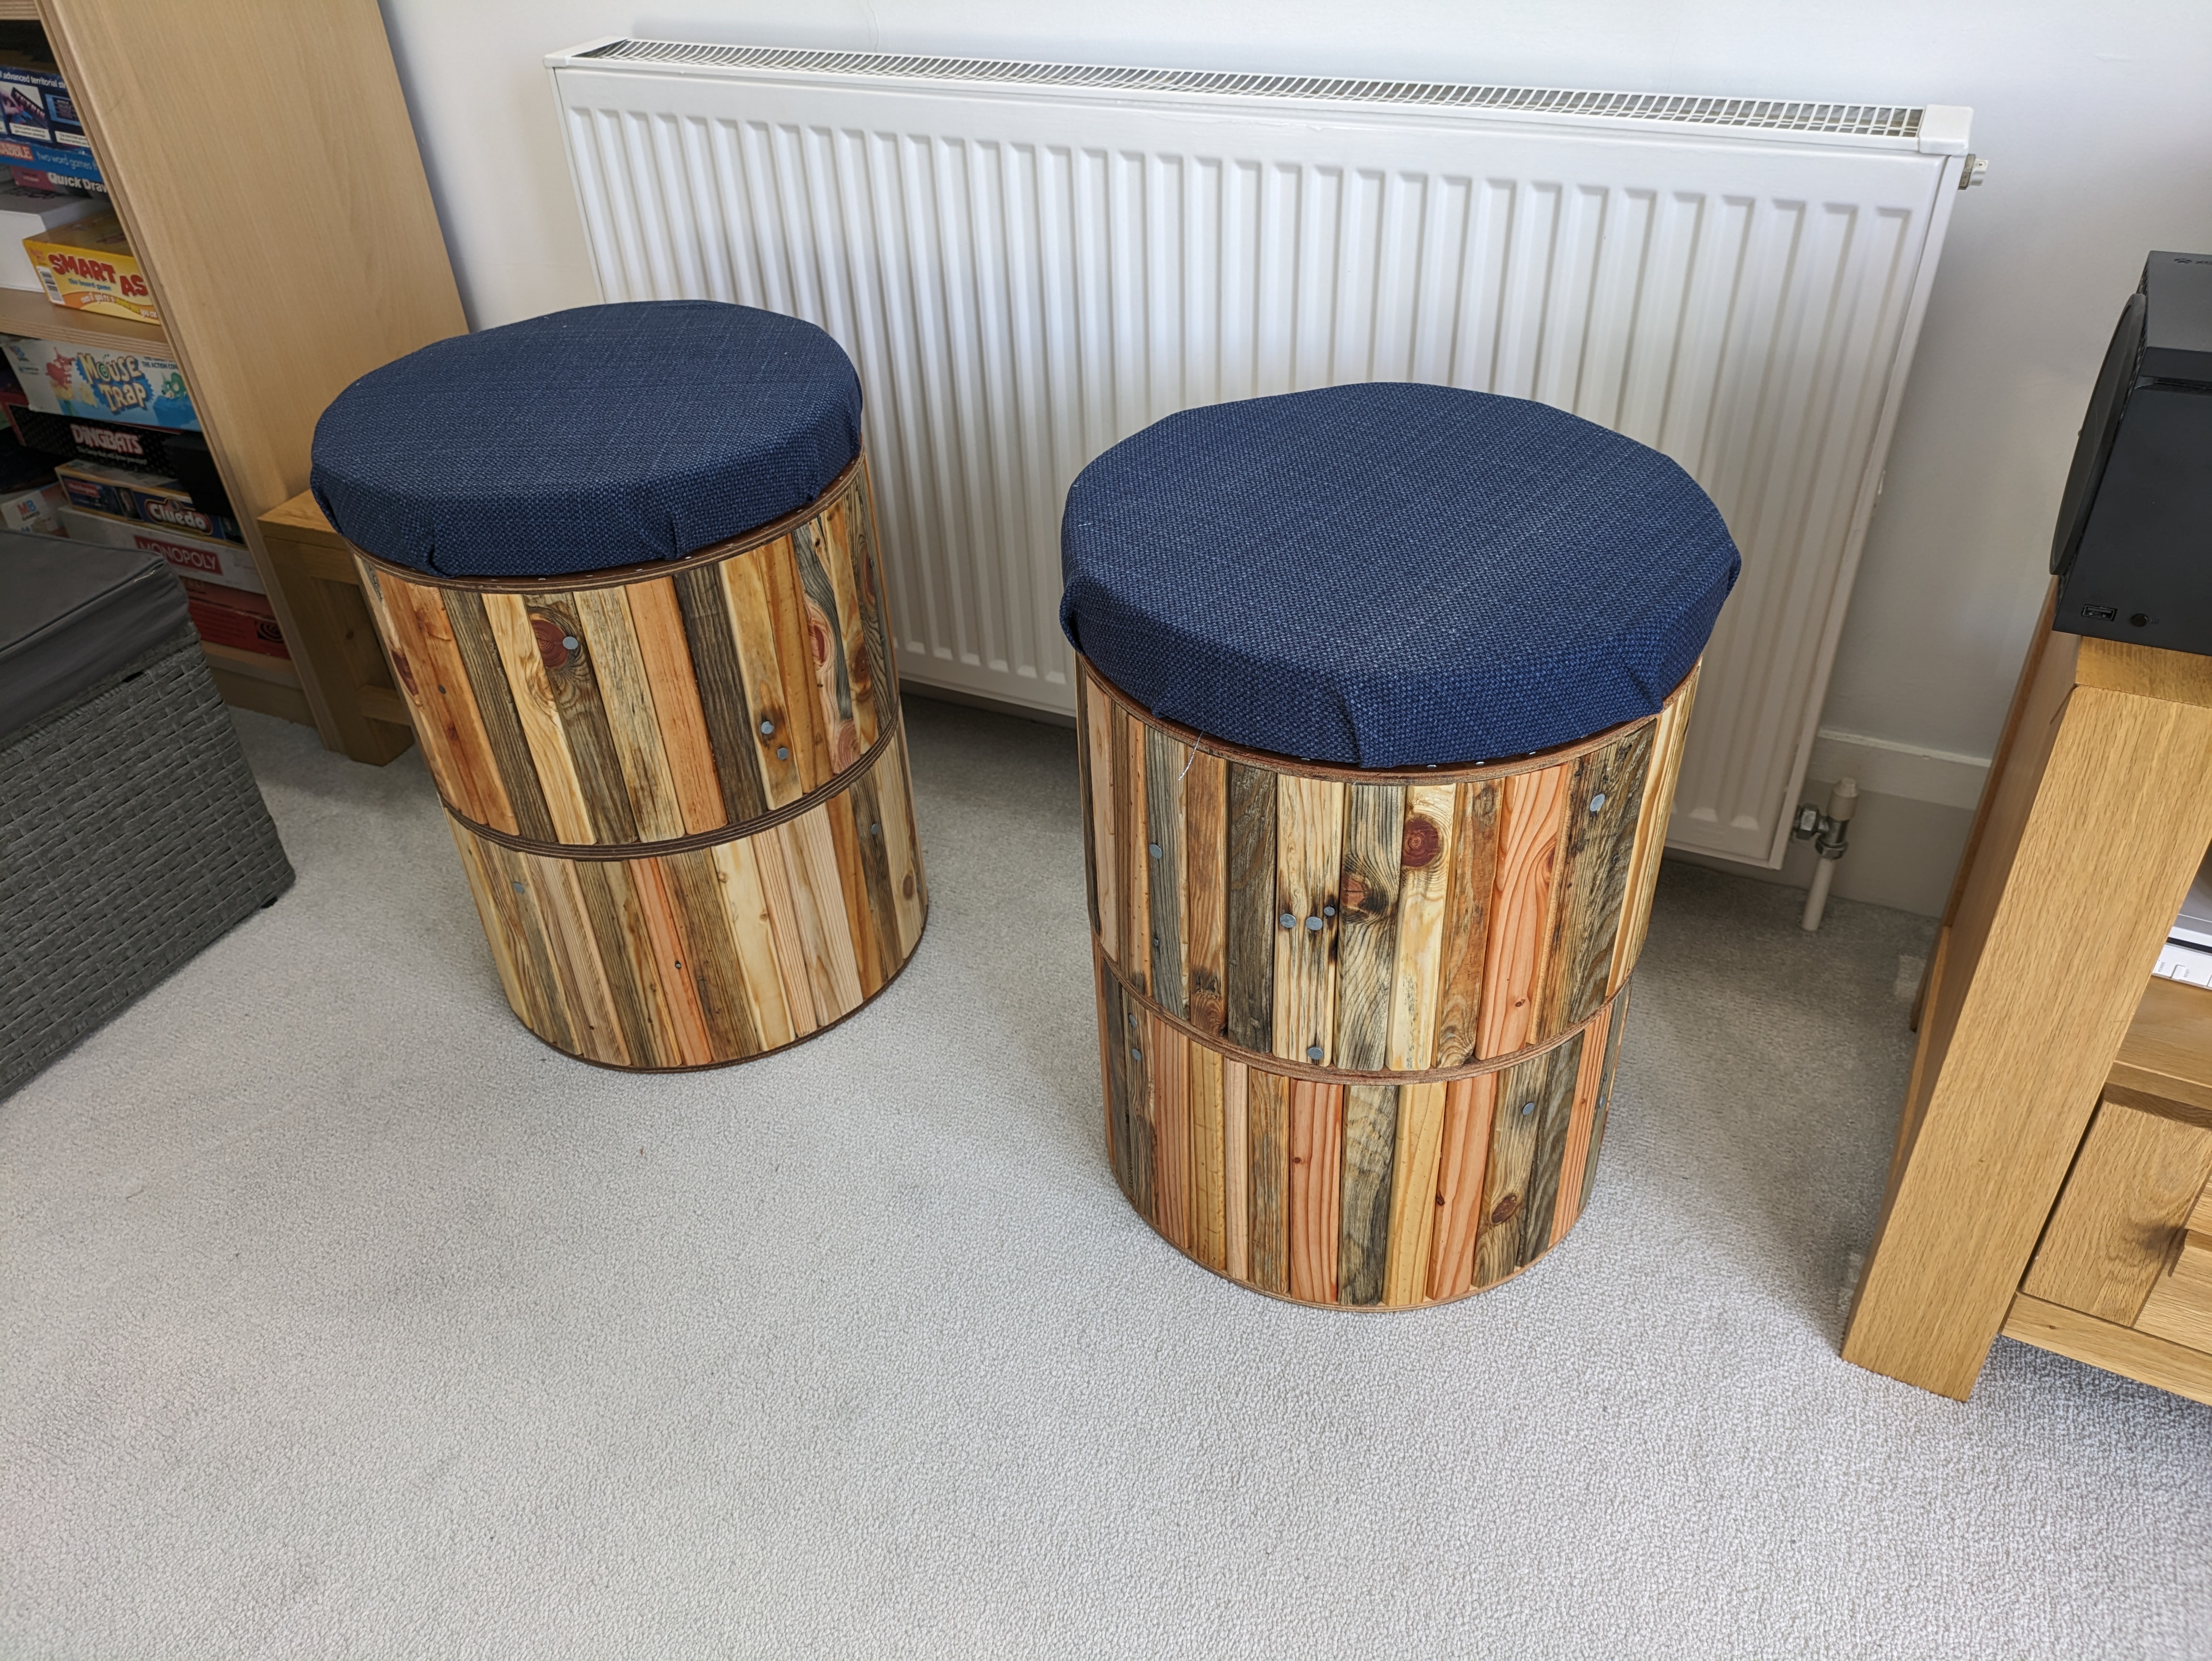
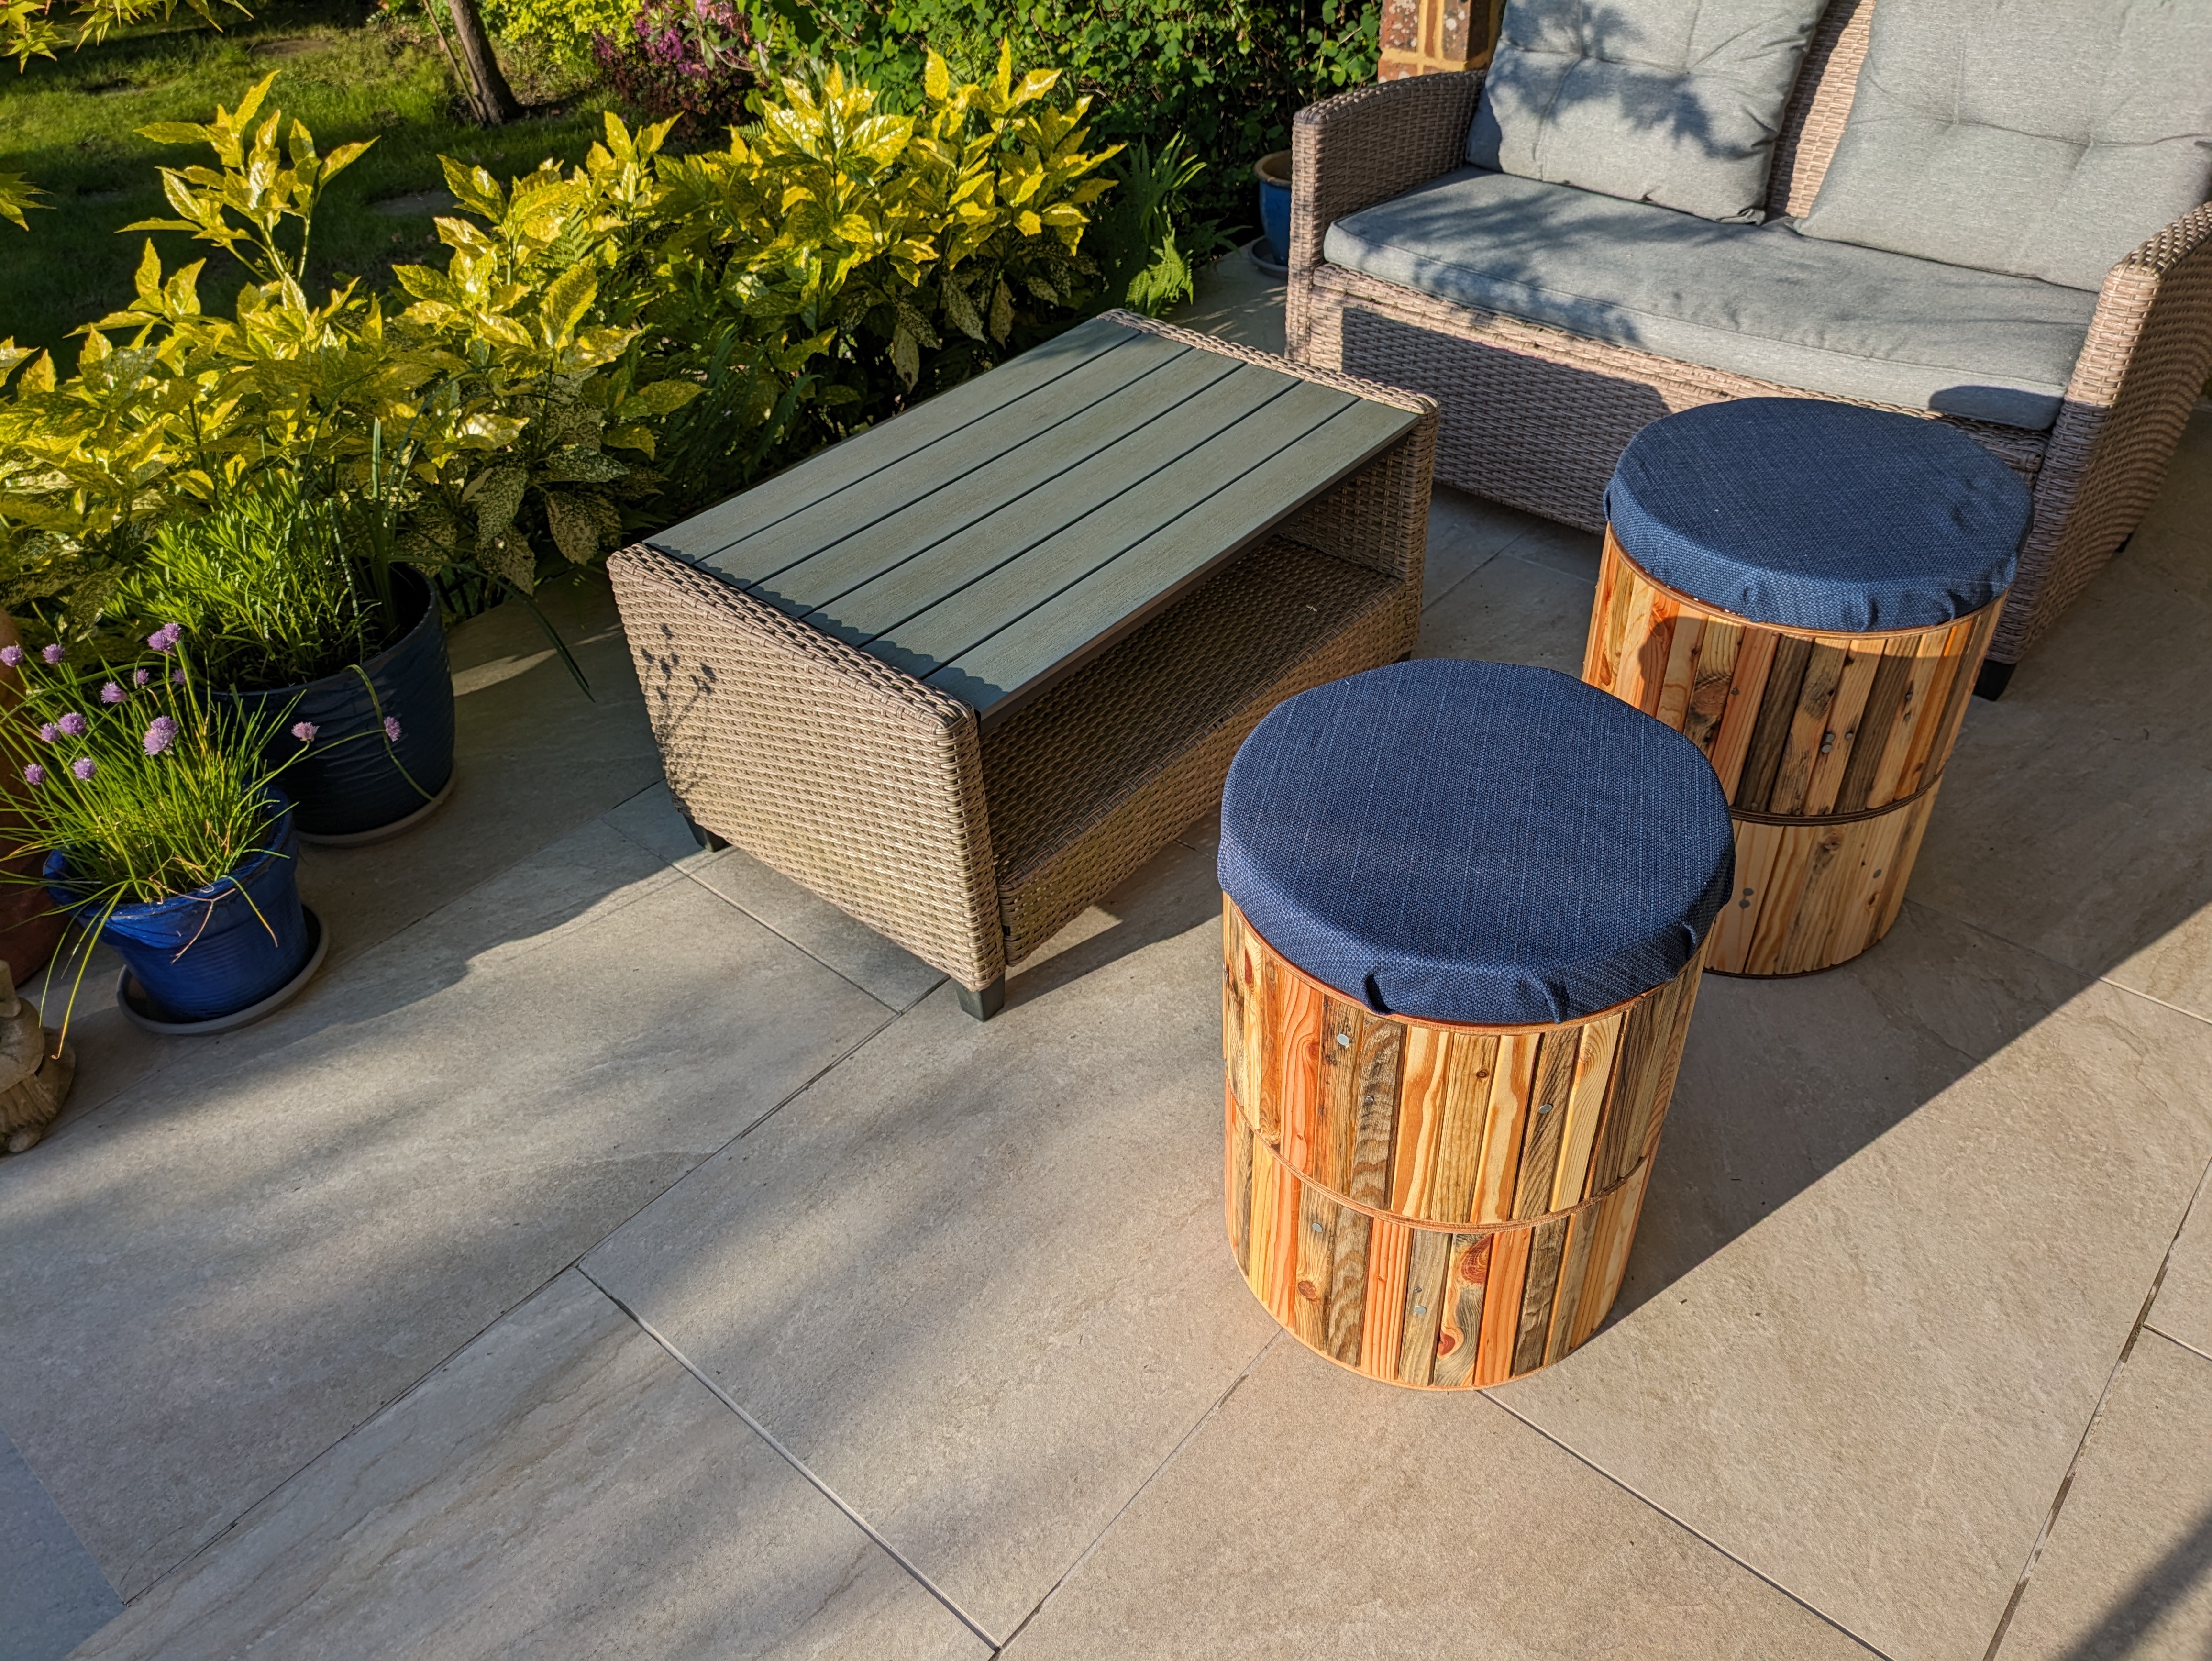
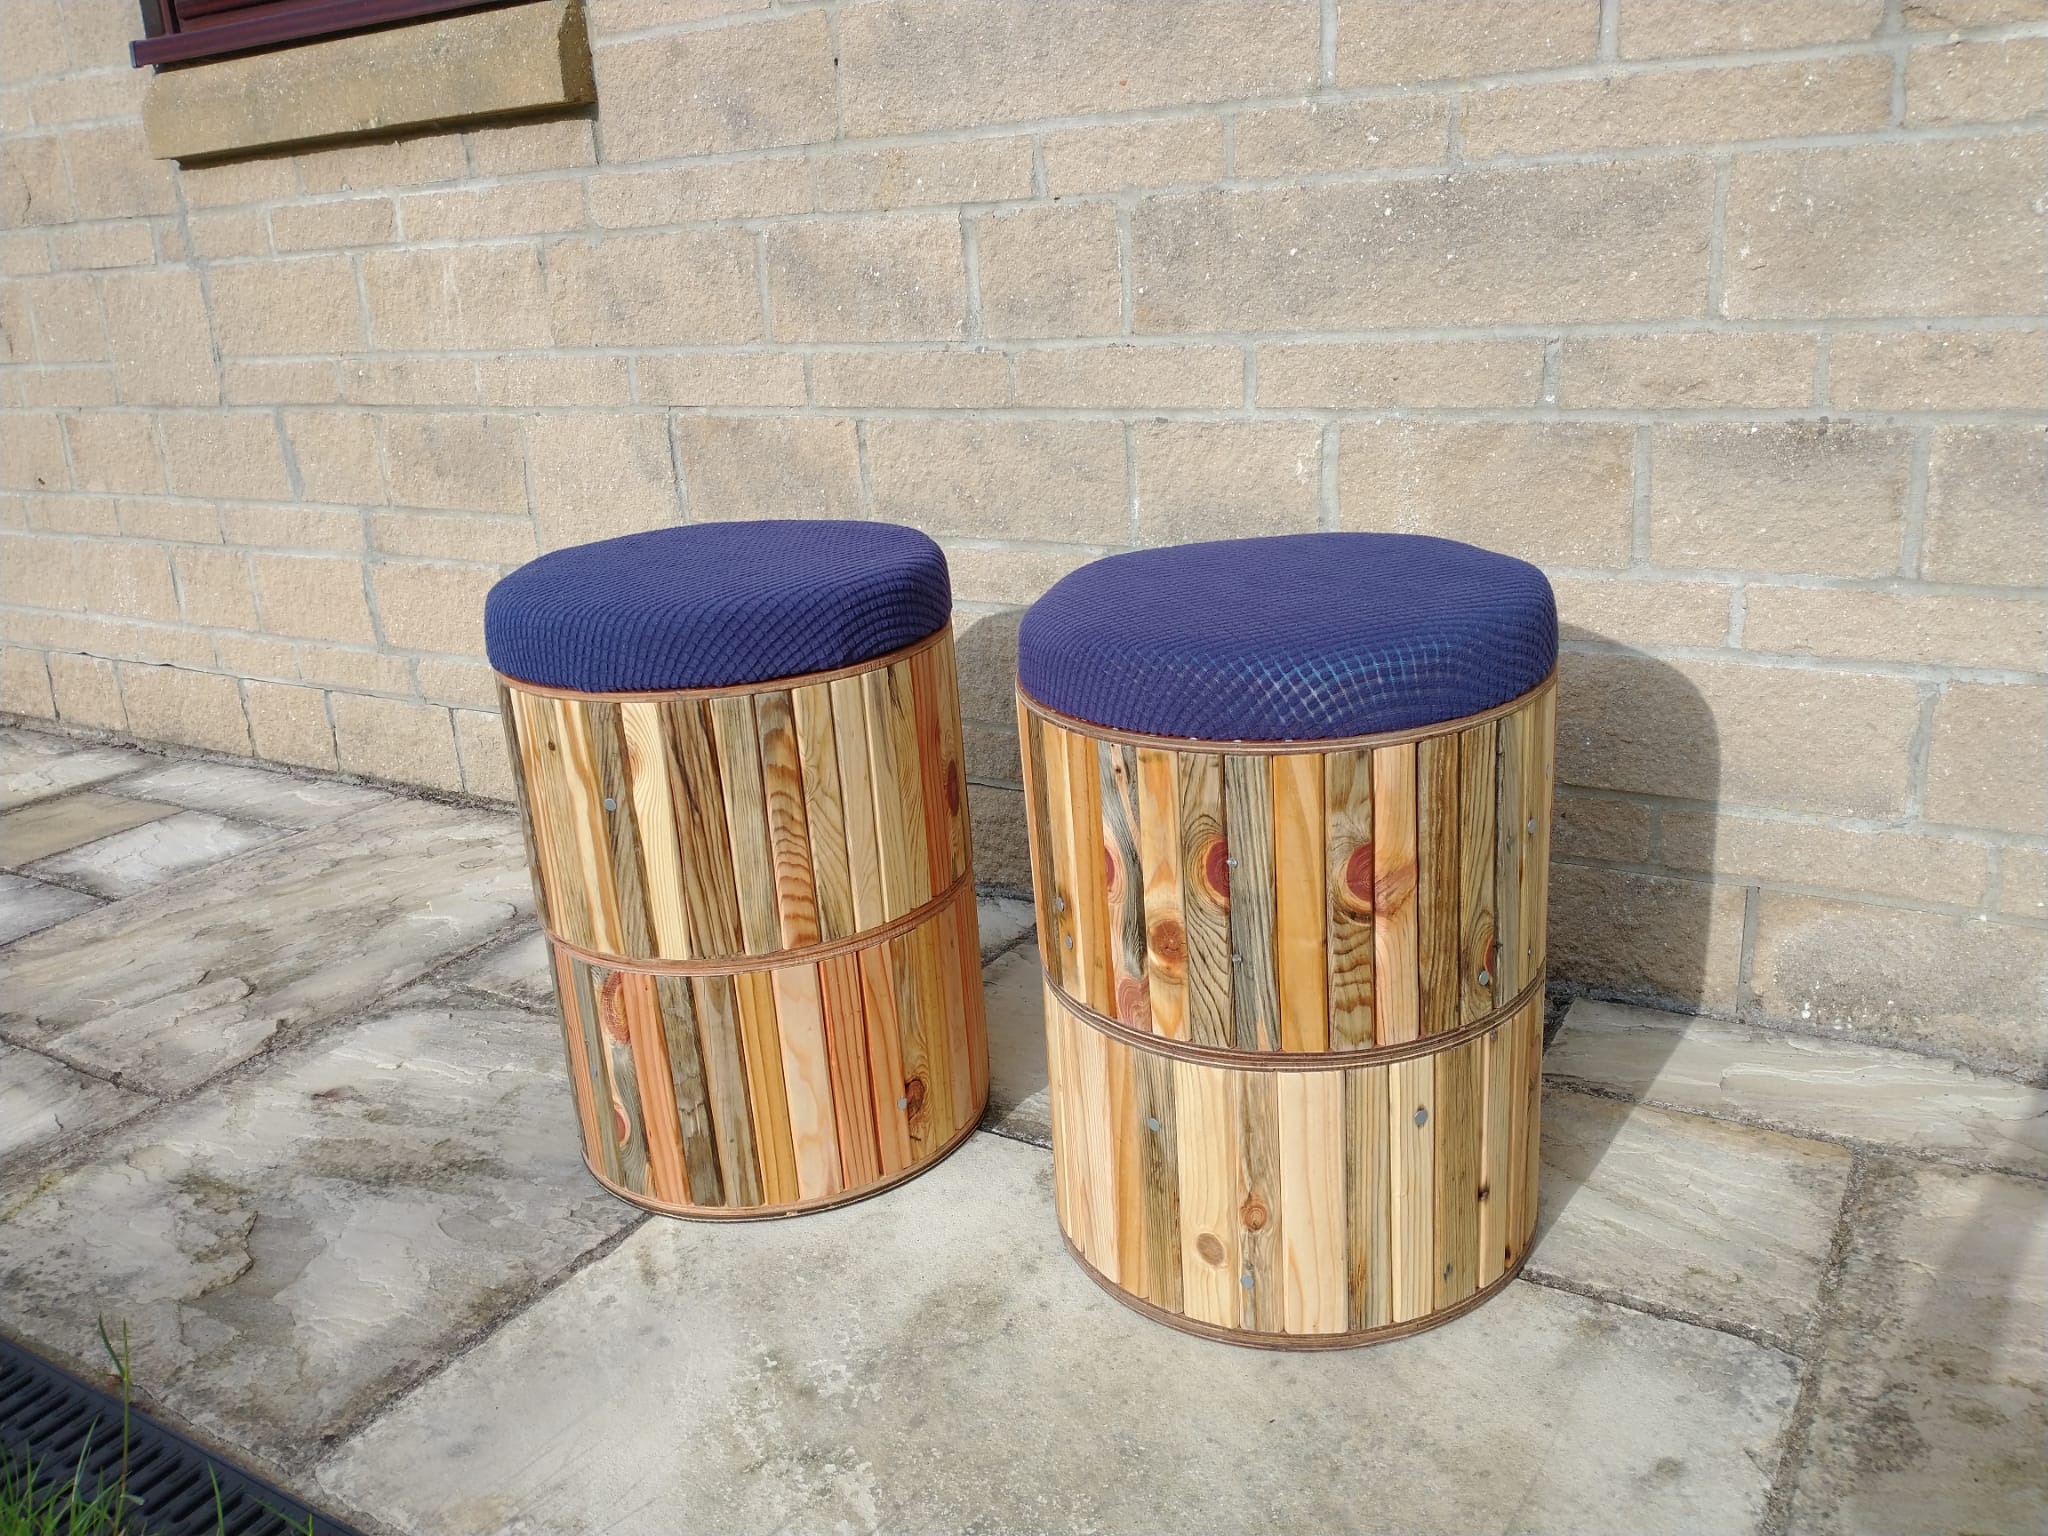
Another little commission! This project is for a couple of stools to sit near a front door for shoe taking off and putting on activities.
I got my hands on a few empty Cat6 ethernet cable drums from work which would be a perfect size to base the stool on. As a rough plan of attack I thought I would prepare a bunch of my pallet stock into rounded over batons and attach them to the inside of the drum. All my current pallett stock is from different types of pallet so it would not be a uniform colour or grain pattern but I figured that “added to the character?”.
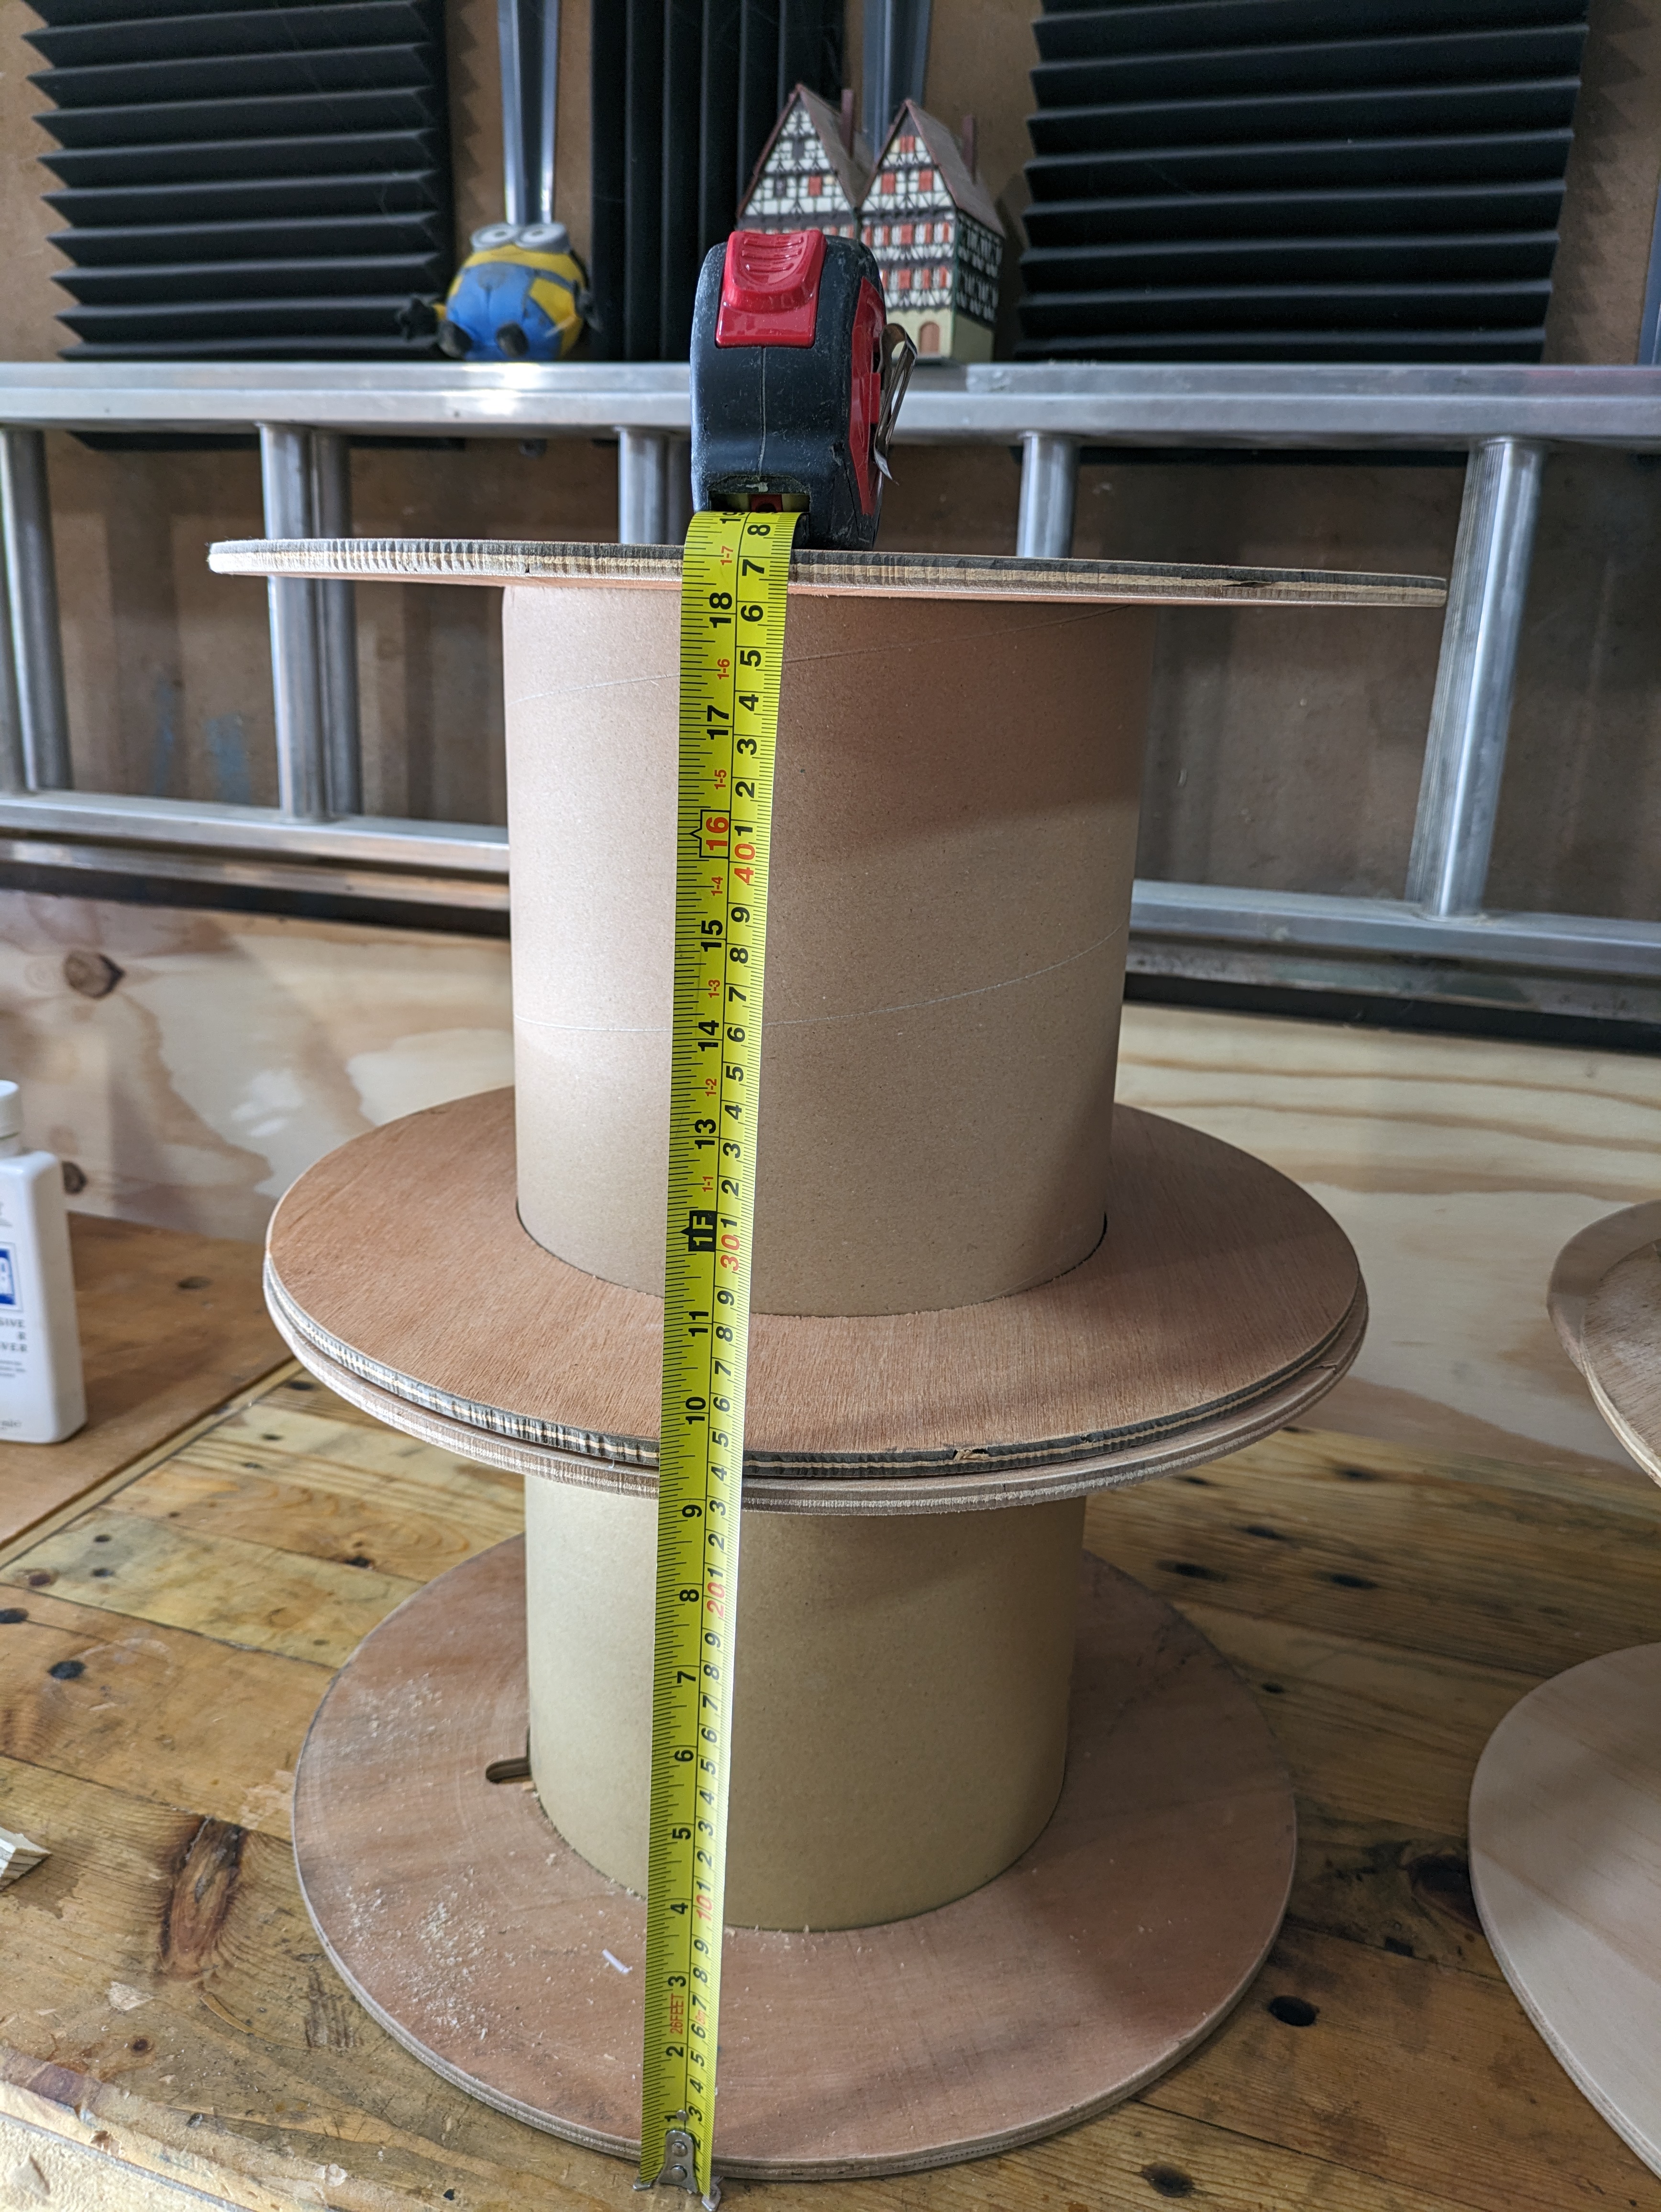
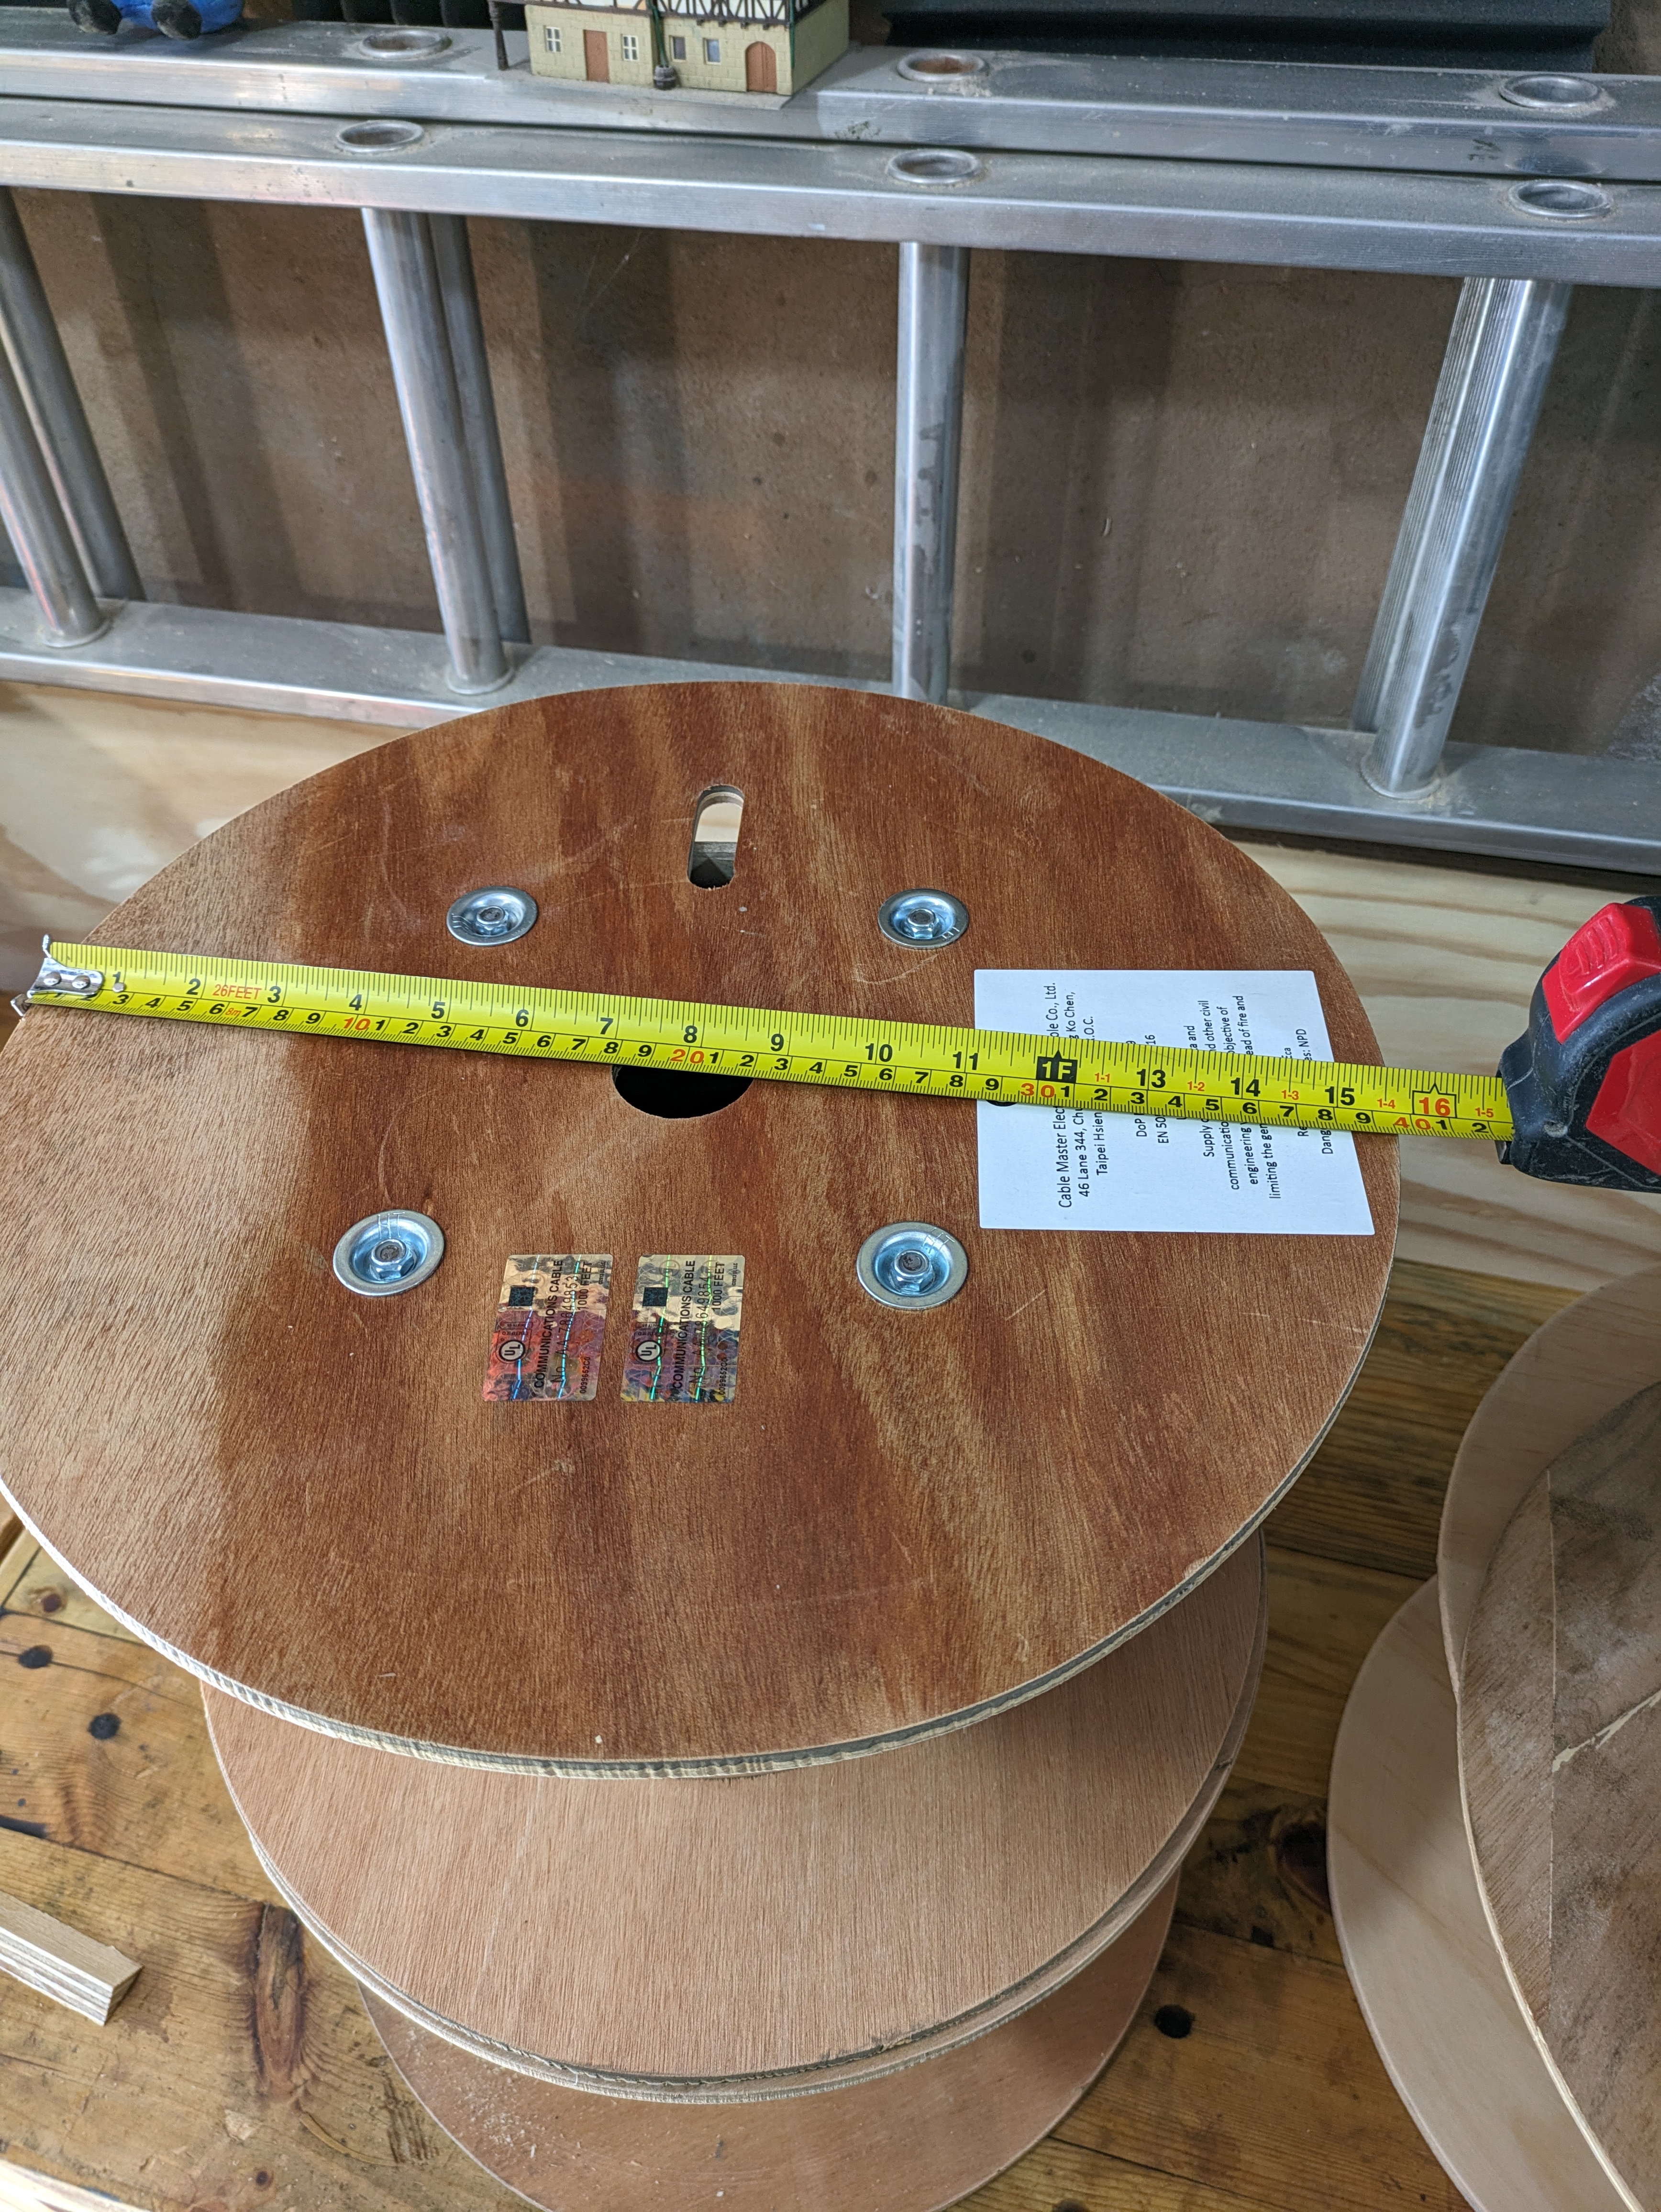
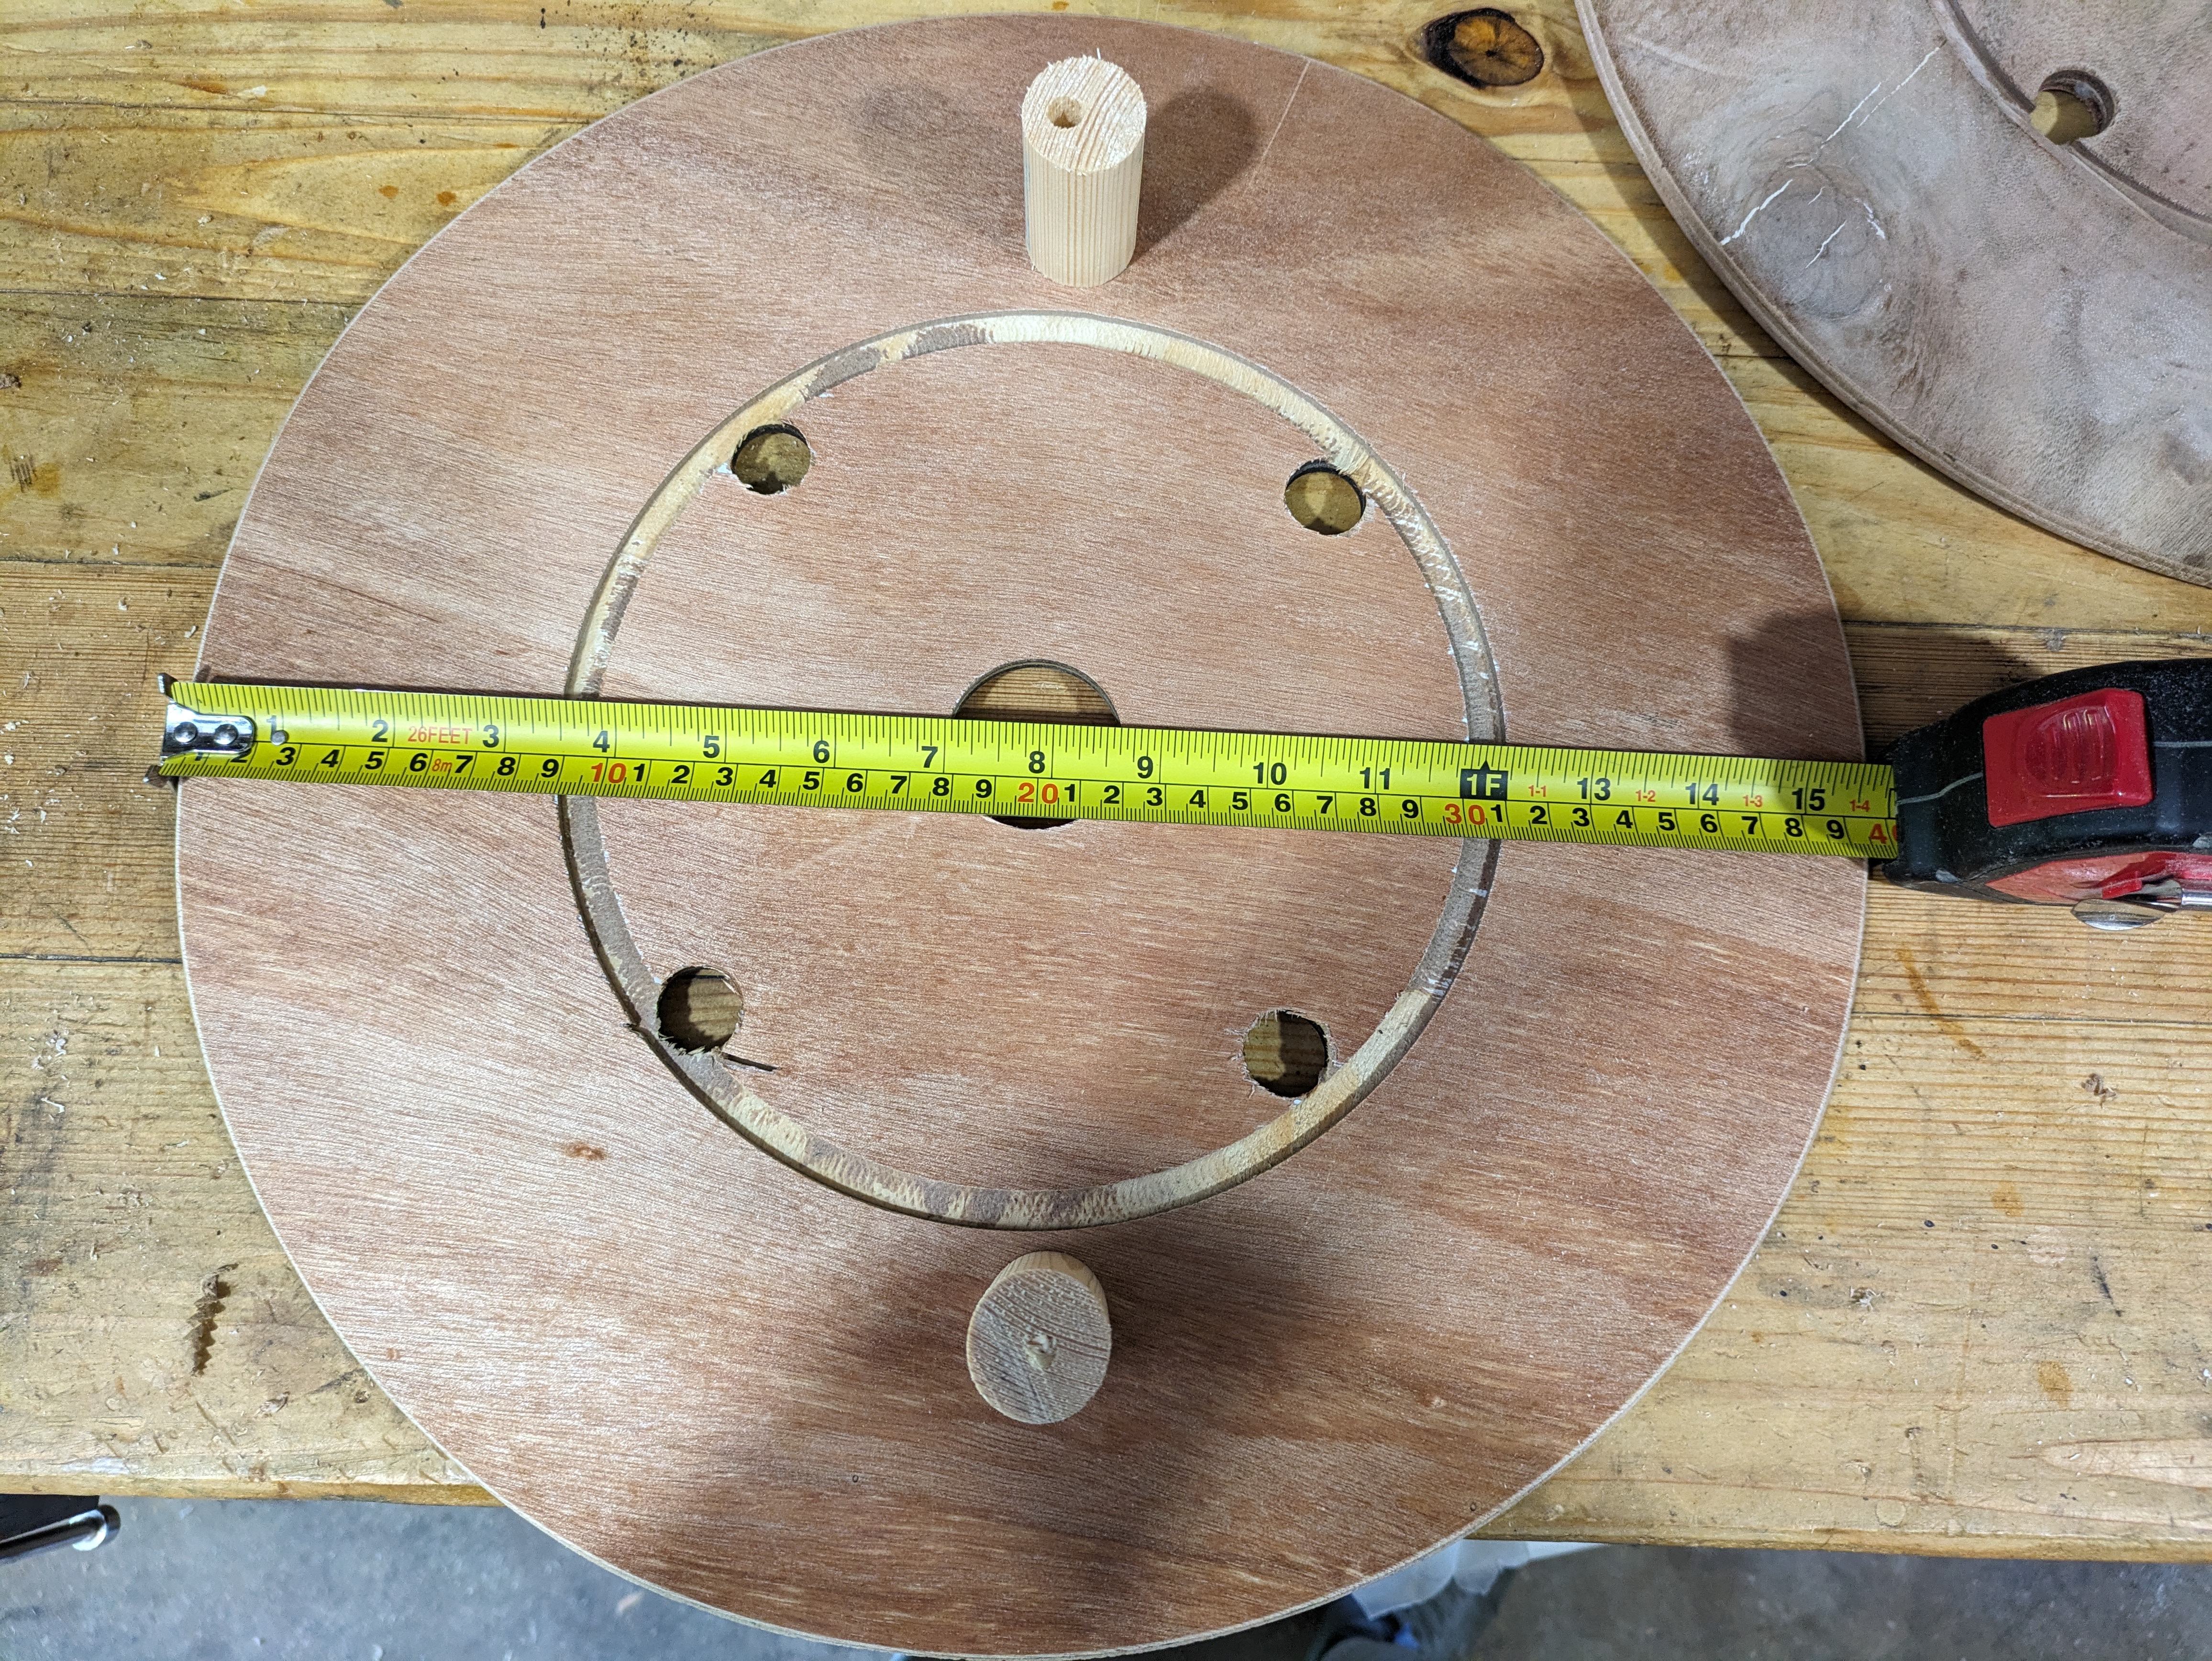
Let us begin. I measured up the drums and found that two stacked on top of each other would be a good seat height.
The first step was to start preparing the pallet slats into uniform lengths and similar widths. Trimming them down length-wise cleaned up the edges nicely. Then I wanted to round over each side to give it some more depth and make it visually more interesting. Lastly I was going to sand all the battons to 120 grit. I didn’t have a router table or bench sander so I had to Macgyver some static tools!
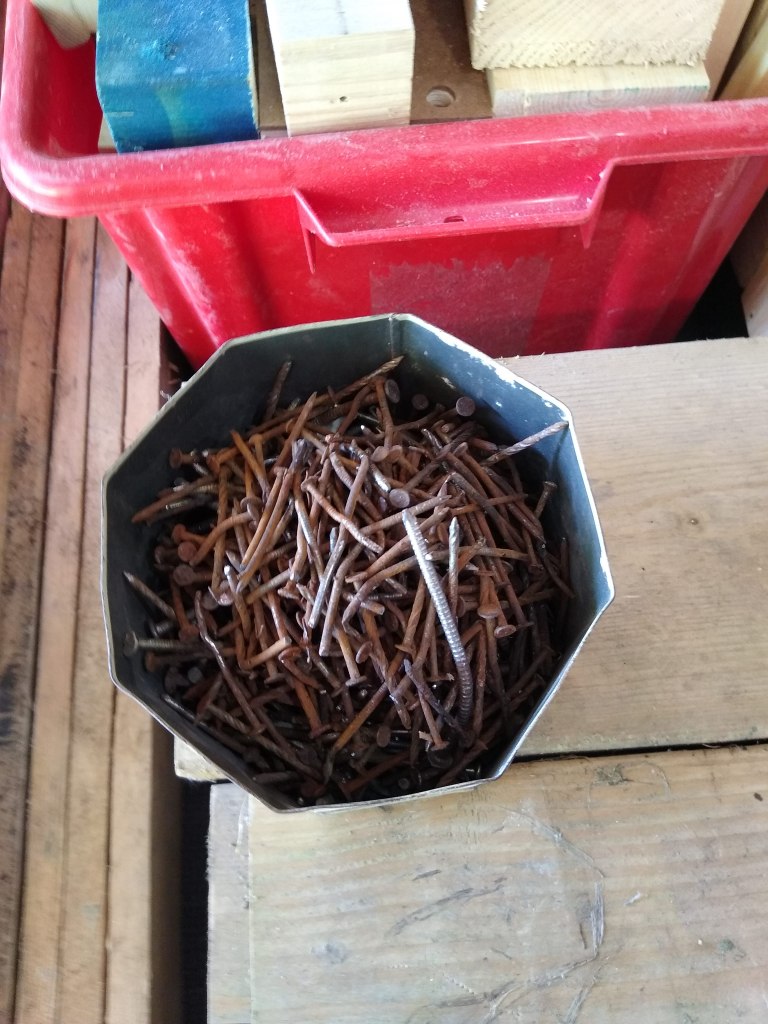
Next on the rosta was to fill the nail holes with some new shiney new nails, either a really dumb idea is potentially genius? I just cleaned up the holes with a drill, cut some nails to length then hammered them in. Simples.
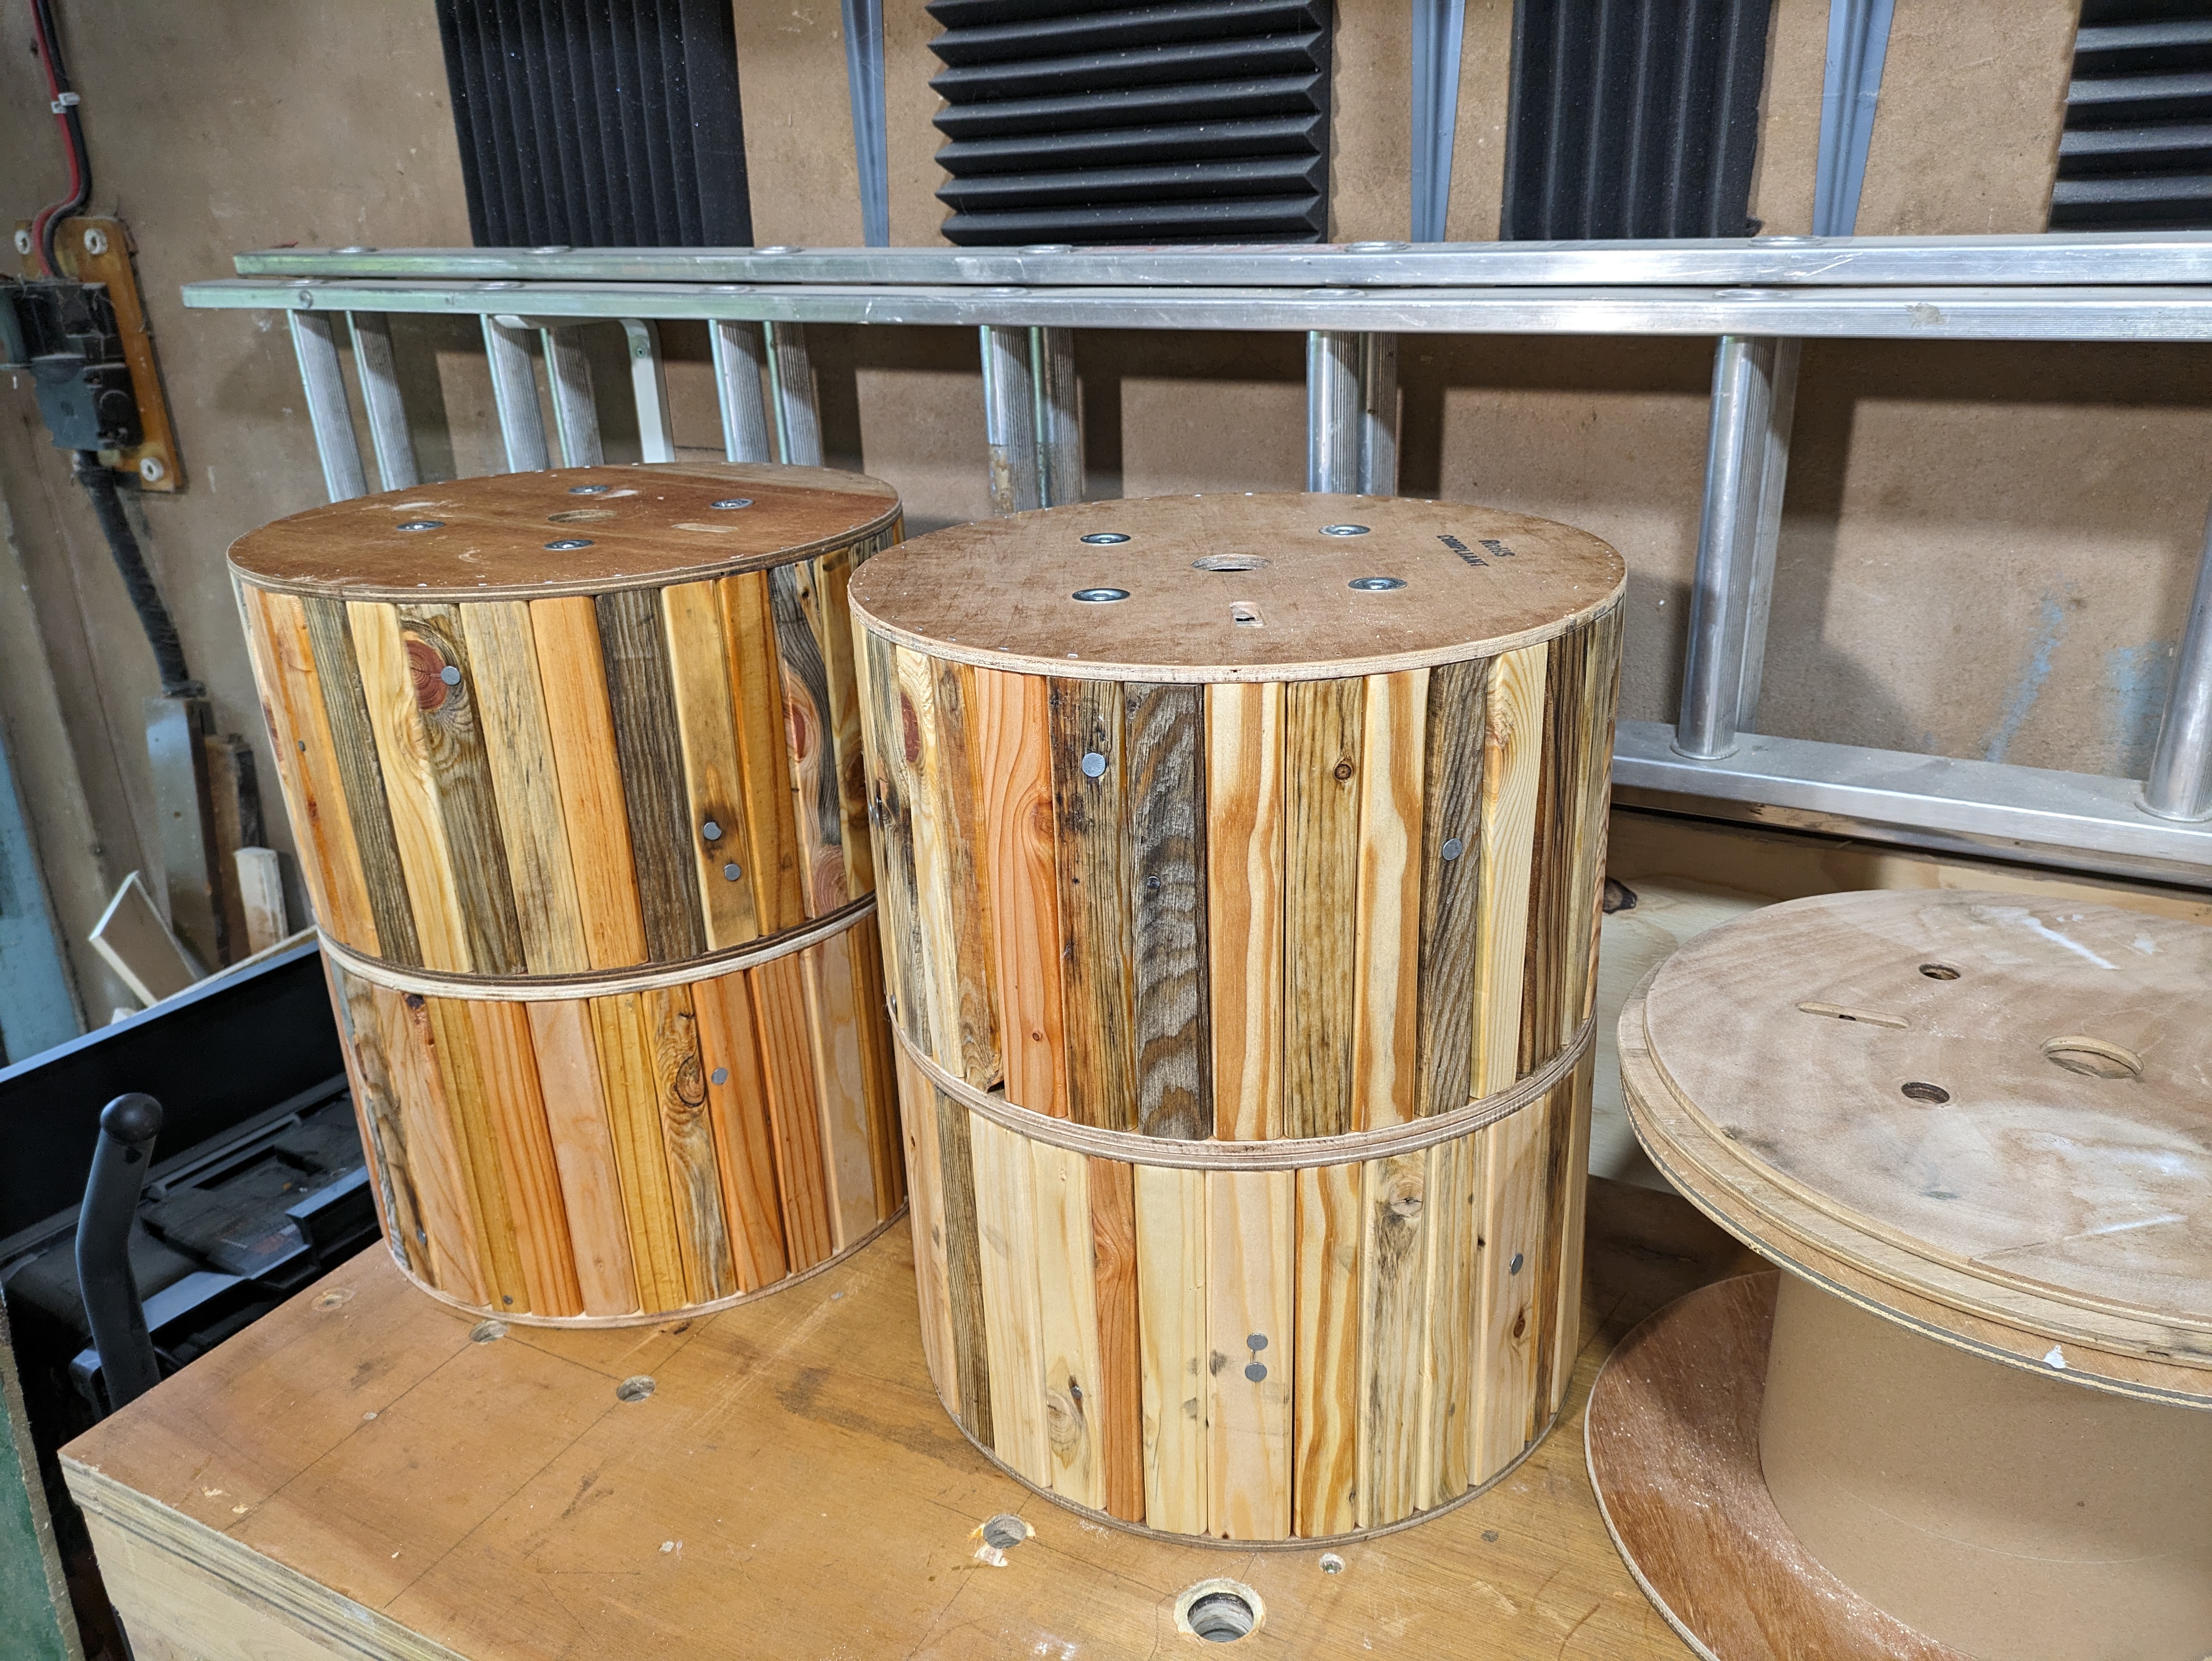
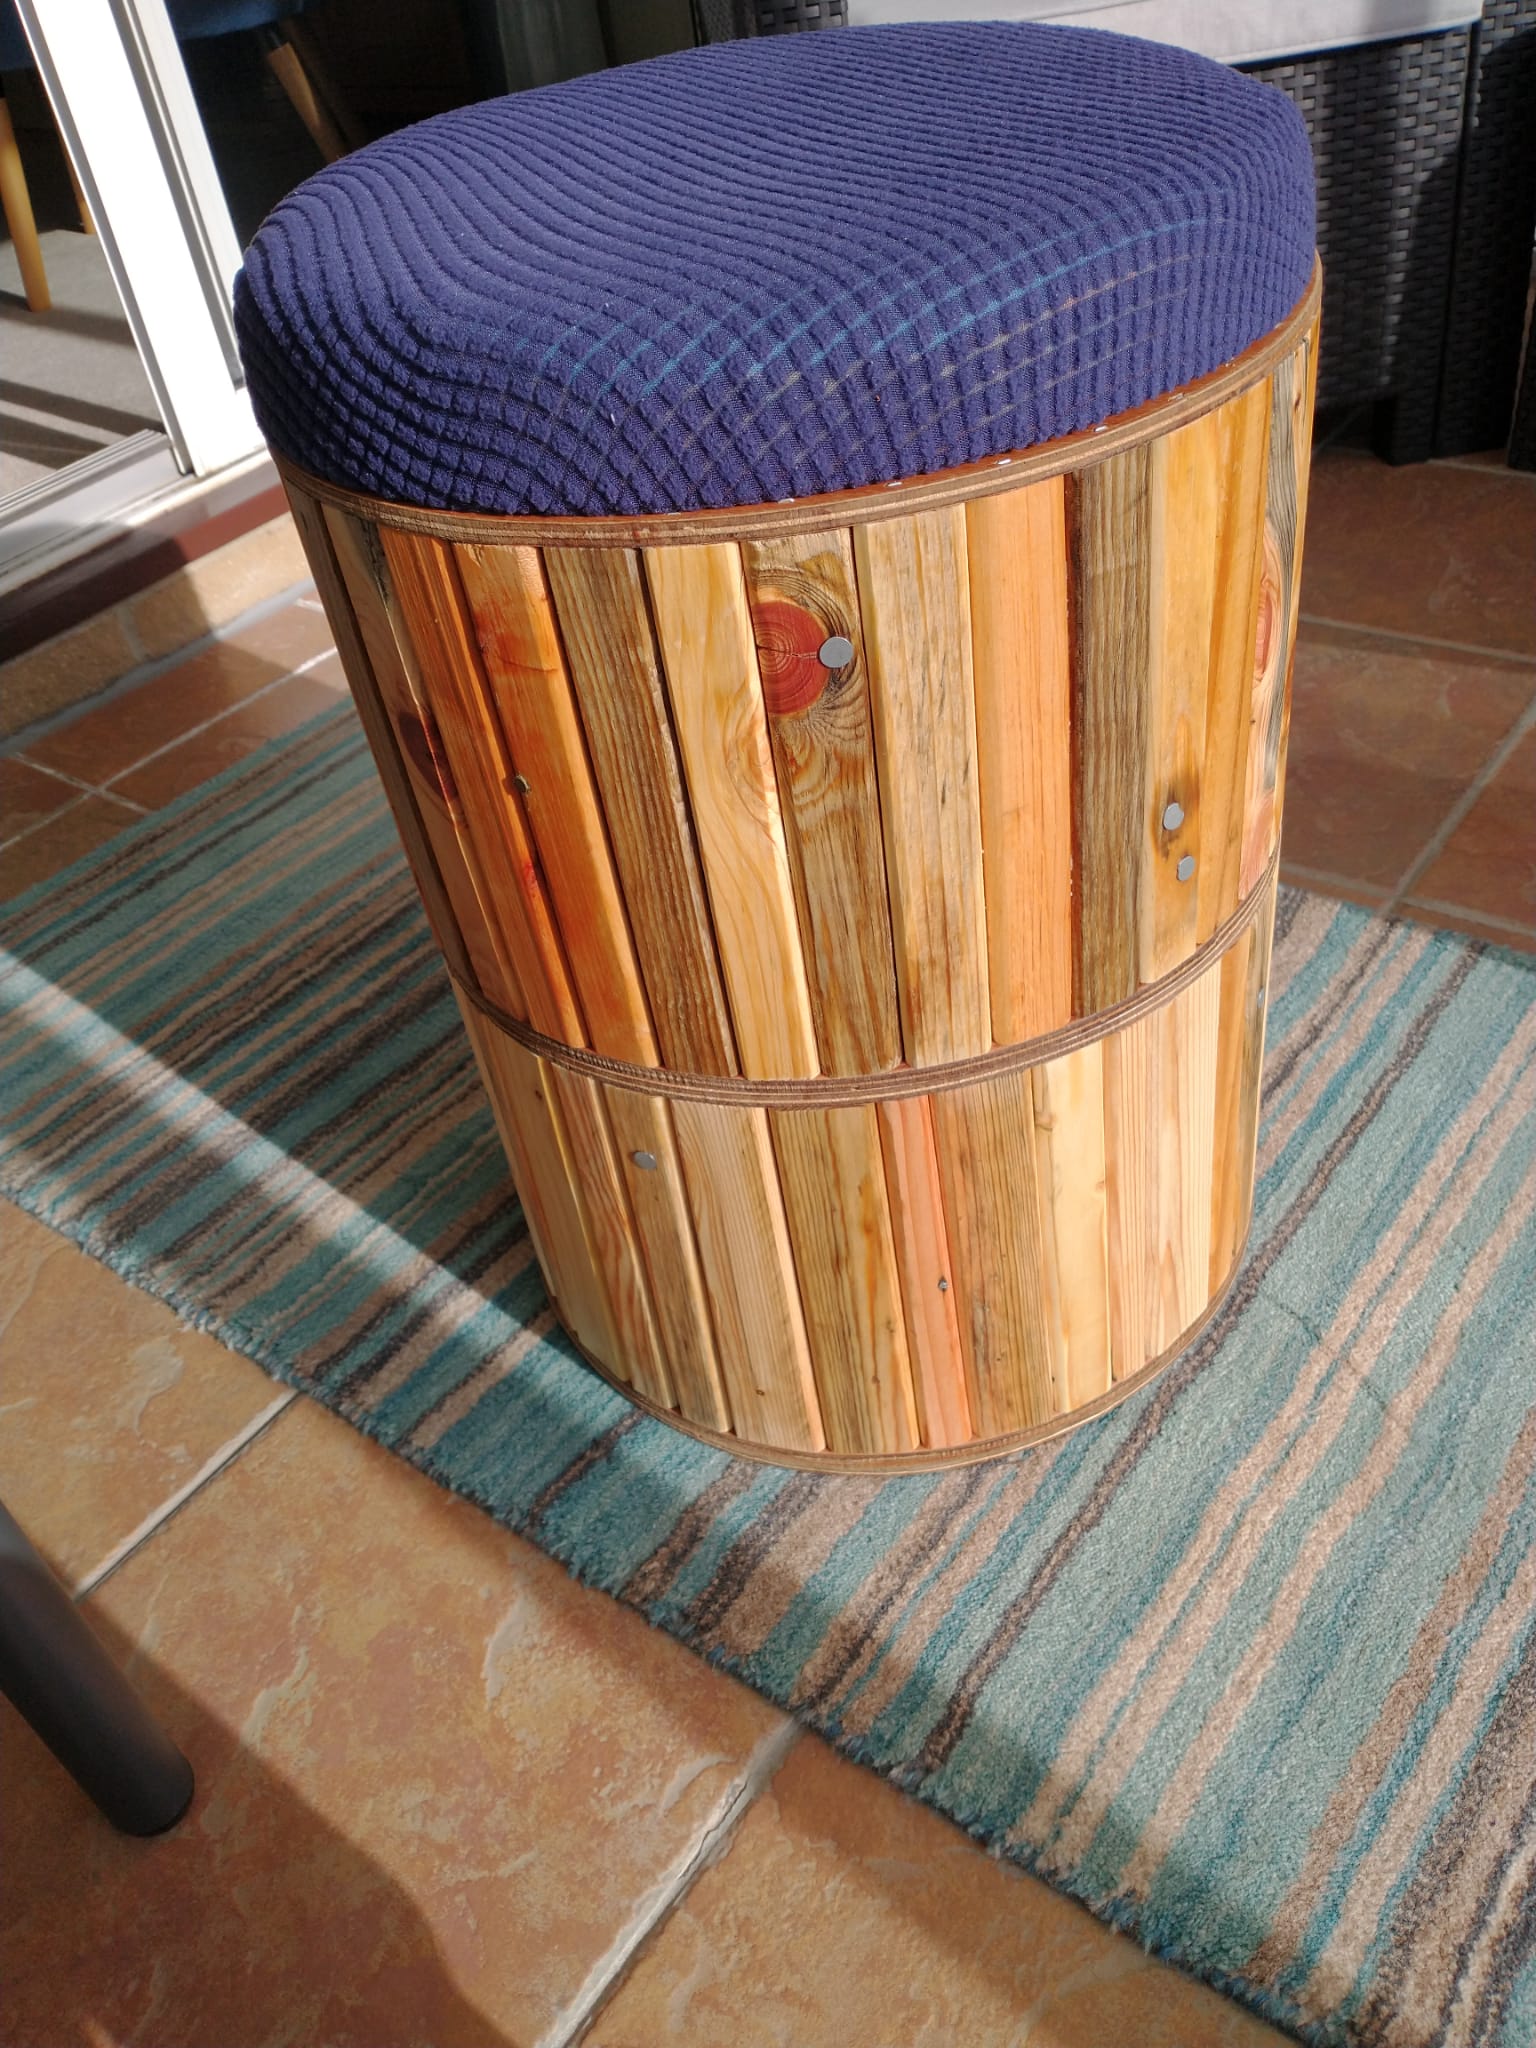
Then it was time to use some trusty ol’ linseed oil on all the battons and start to attach them to the empty drums. I used a nail gun to drive the nail/staple through the top of the ply into the ends of the batons. I didn’t use glue as I didnt think it was necessary due to only be subjected to downward force (and just incase I needed to make adjustments during assembly).
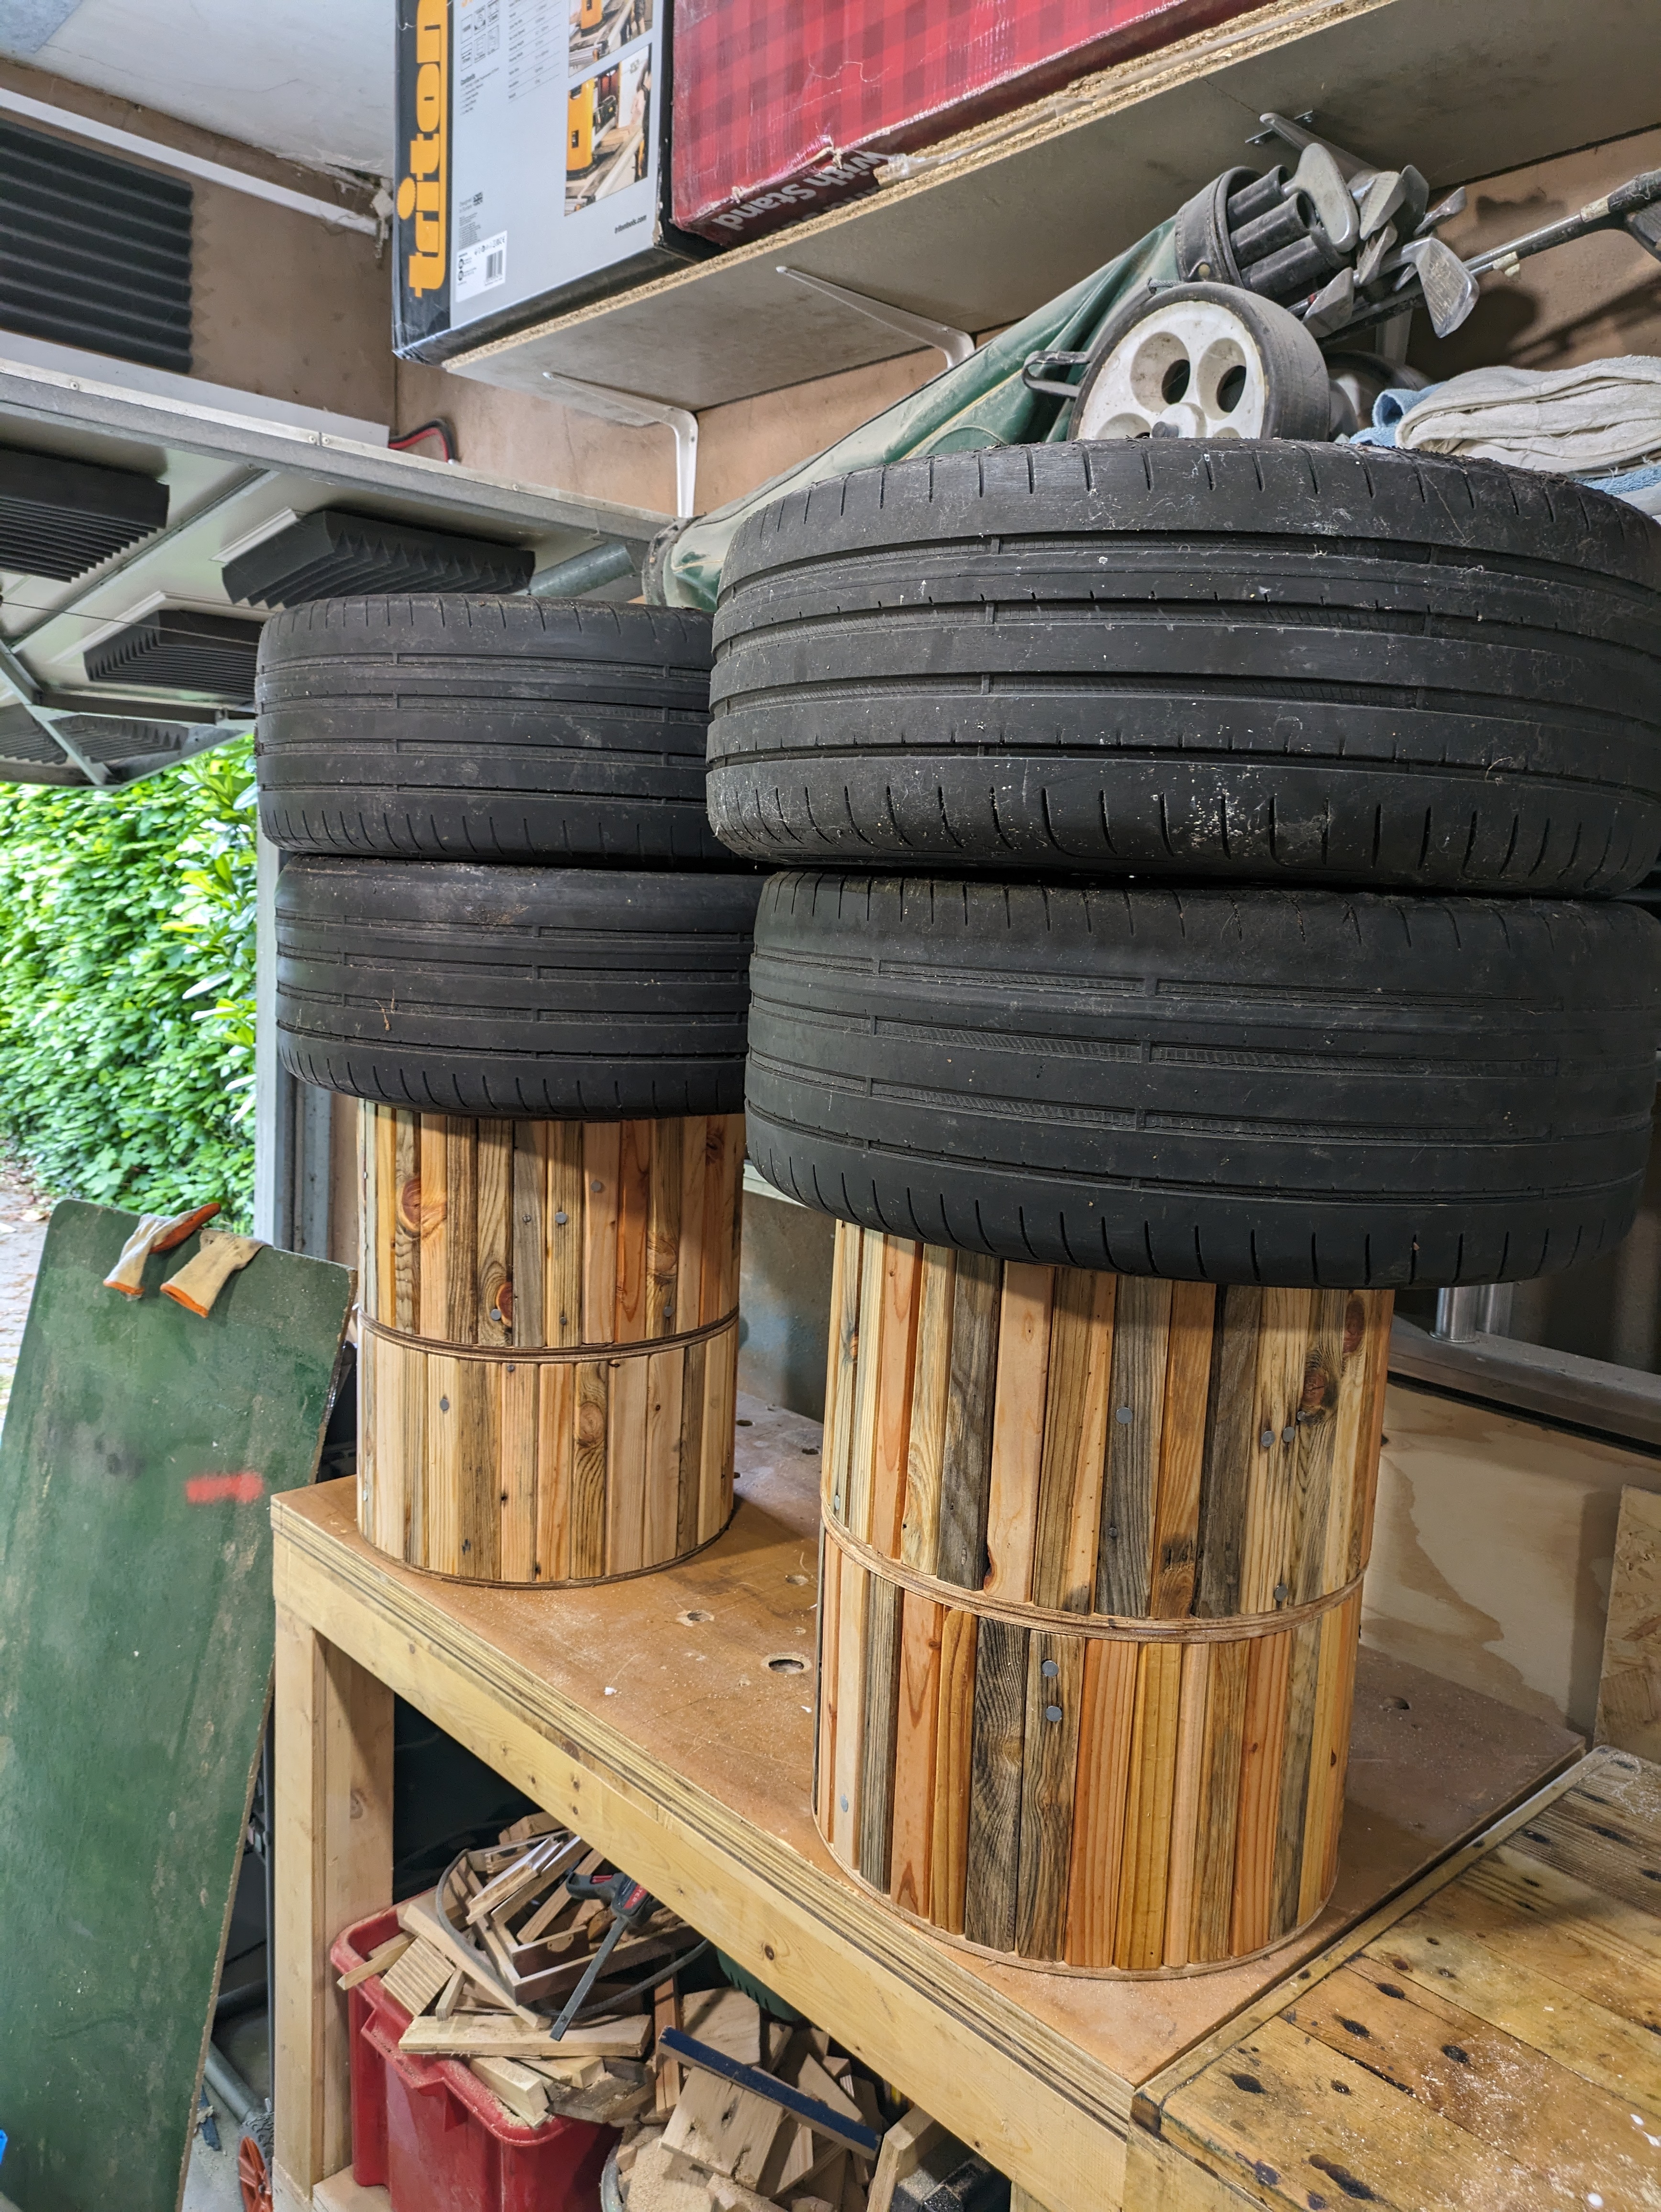
After finishing all 4 drums I needed to attach them in pairs to make 2 seats. I simply used wood glue and stacked some old wheels on top to apply pressure whilst the glue cured.
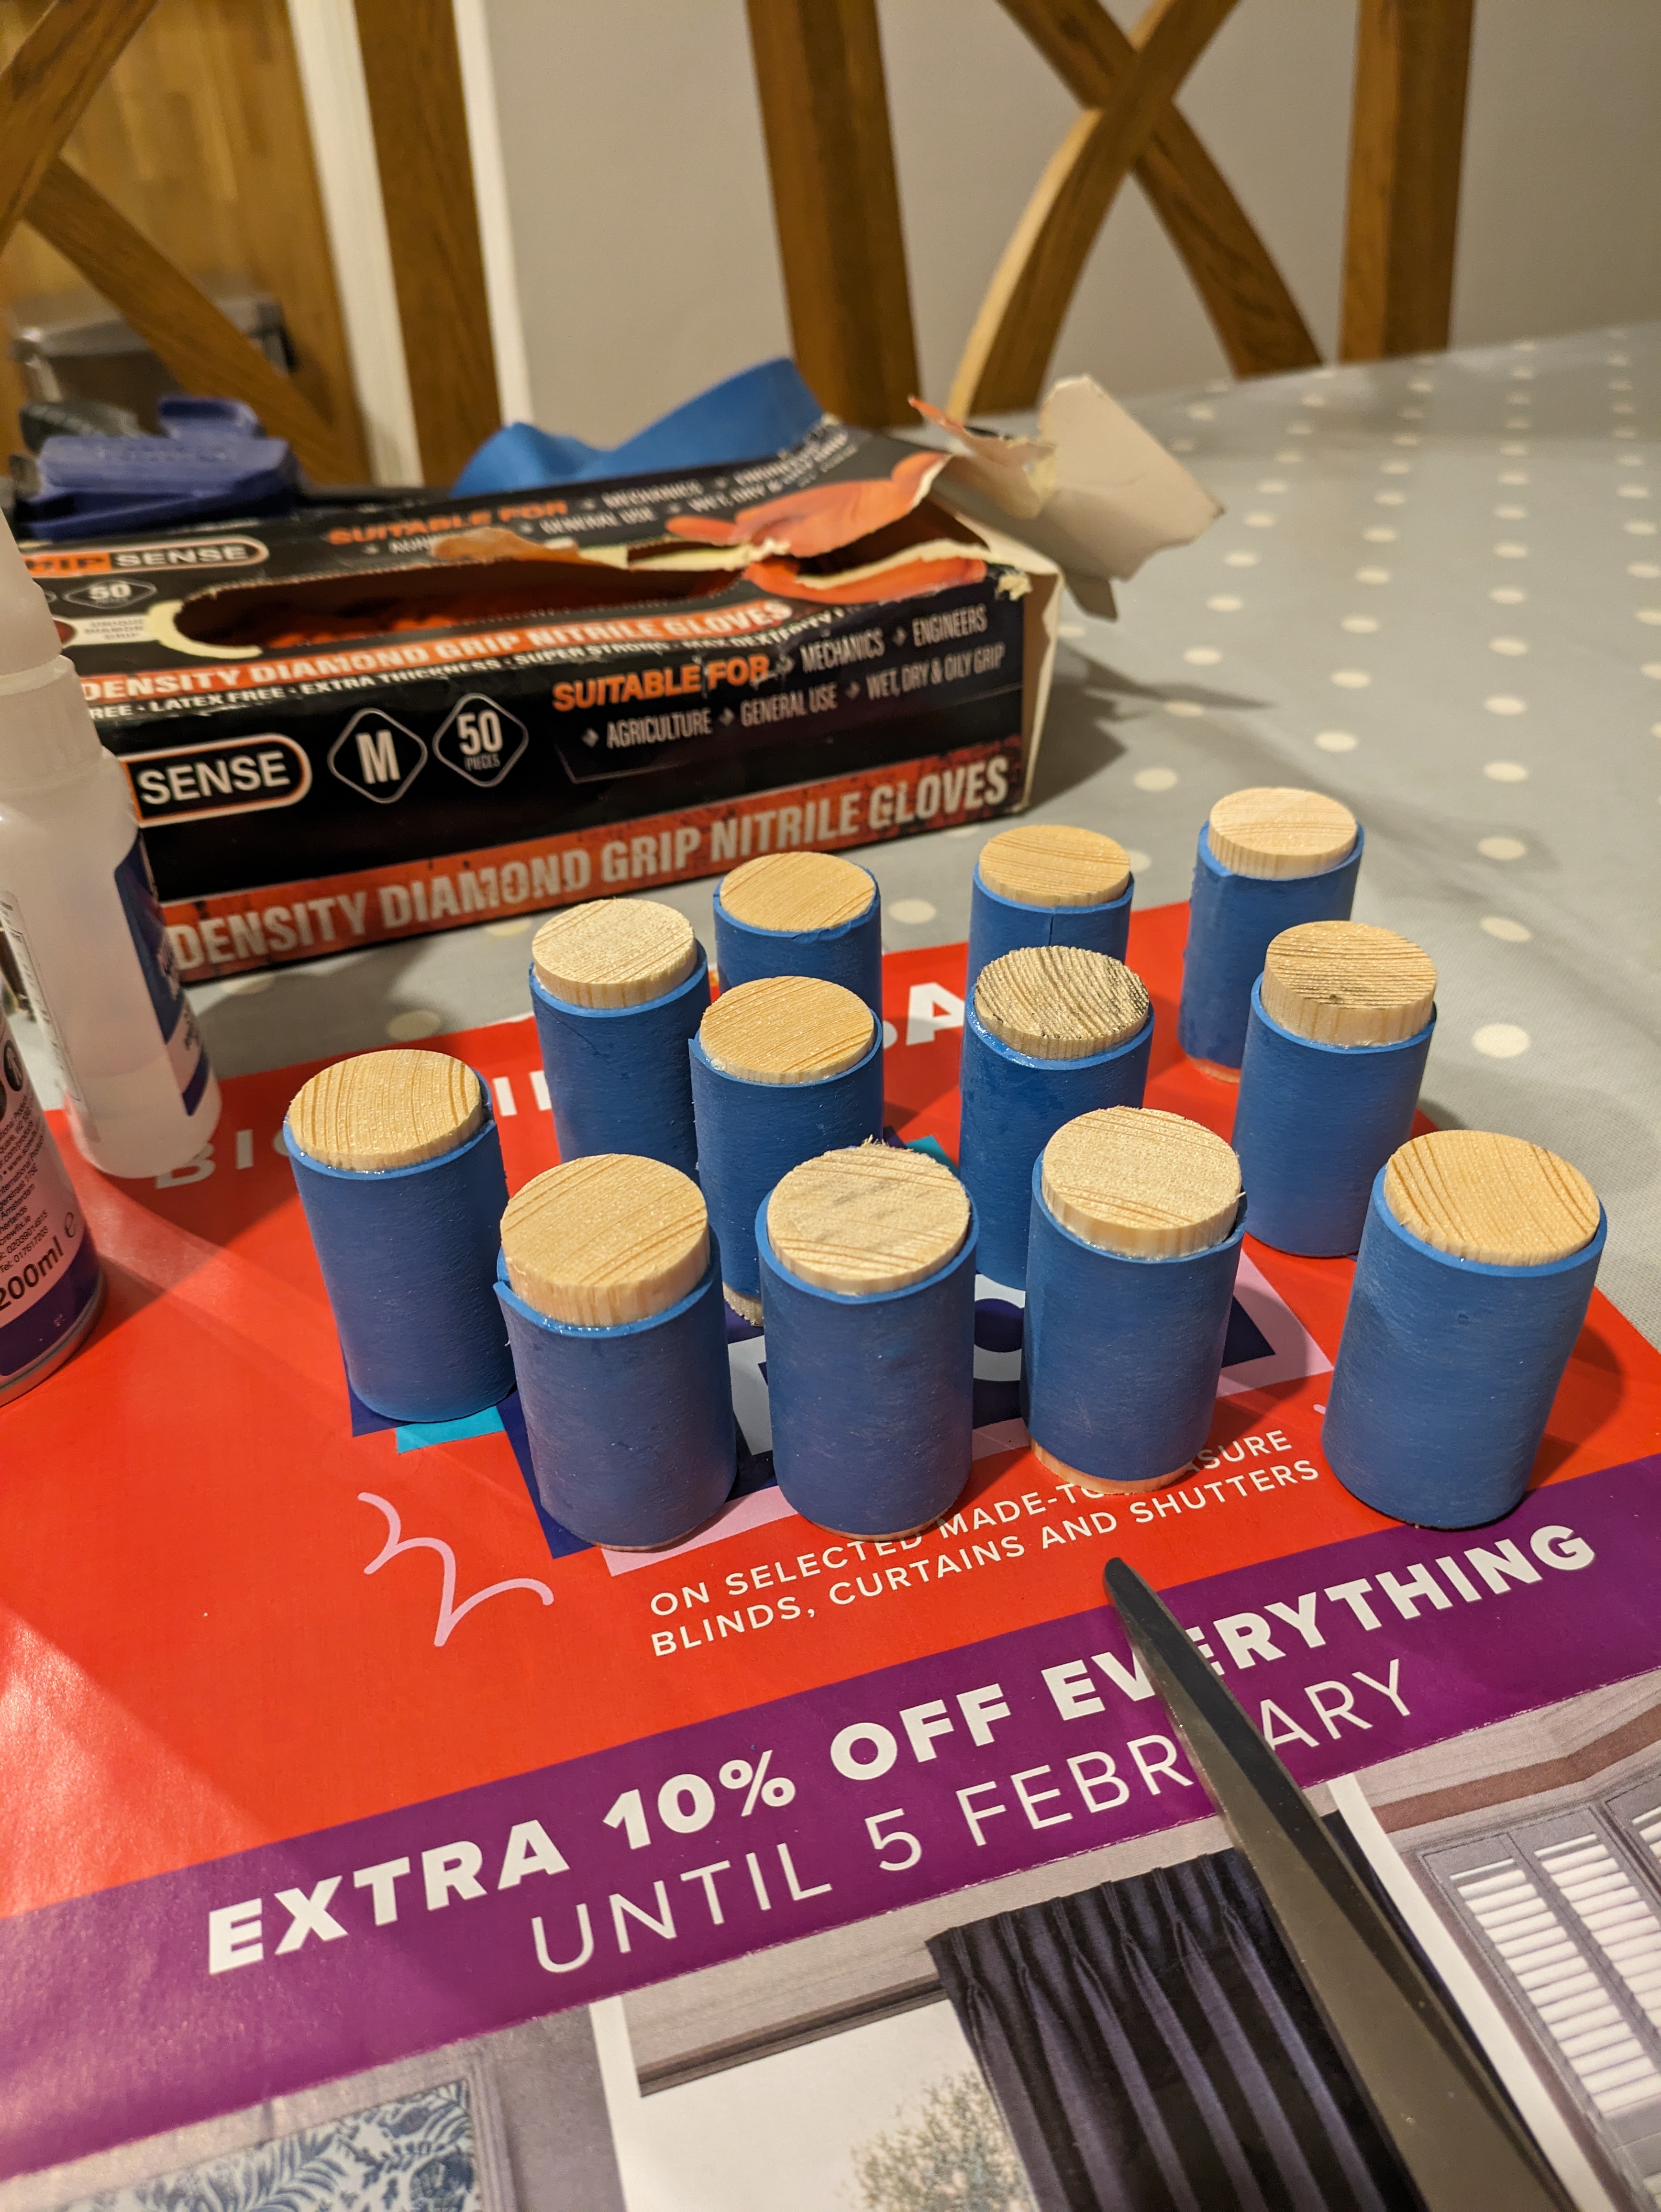
Finally I need to make a removable cushion which meant trying my hand at upholstering some foam. Before upholstering I added some chunky dowels to an end plate of another cable drum and then drilled a hole in top of the stool in the same place which meant they slotted in nicely, but could be removed if needed.
I had some old fairly thick curtains that looked to fit the bill for foam covering purposes. However I wasn’t a huge fan of all the folds that were visible from the side so I opted for some elastic bar stool covers, which gave a slicker look. The last two pics have the other seat covers on

-
Workshop V2.0
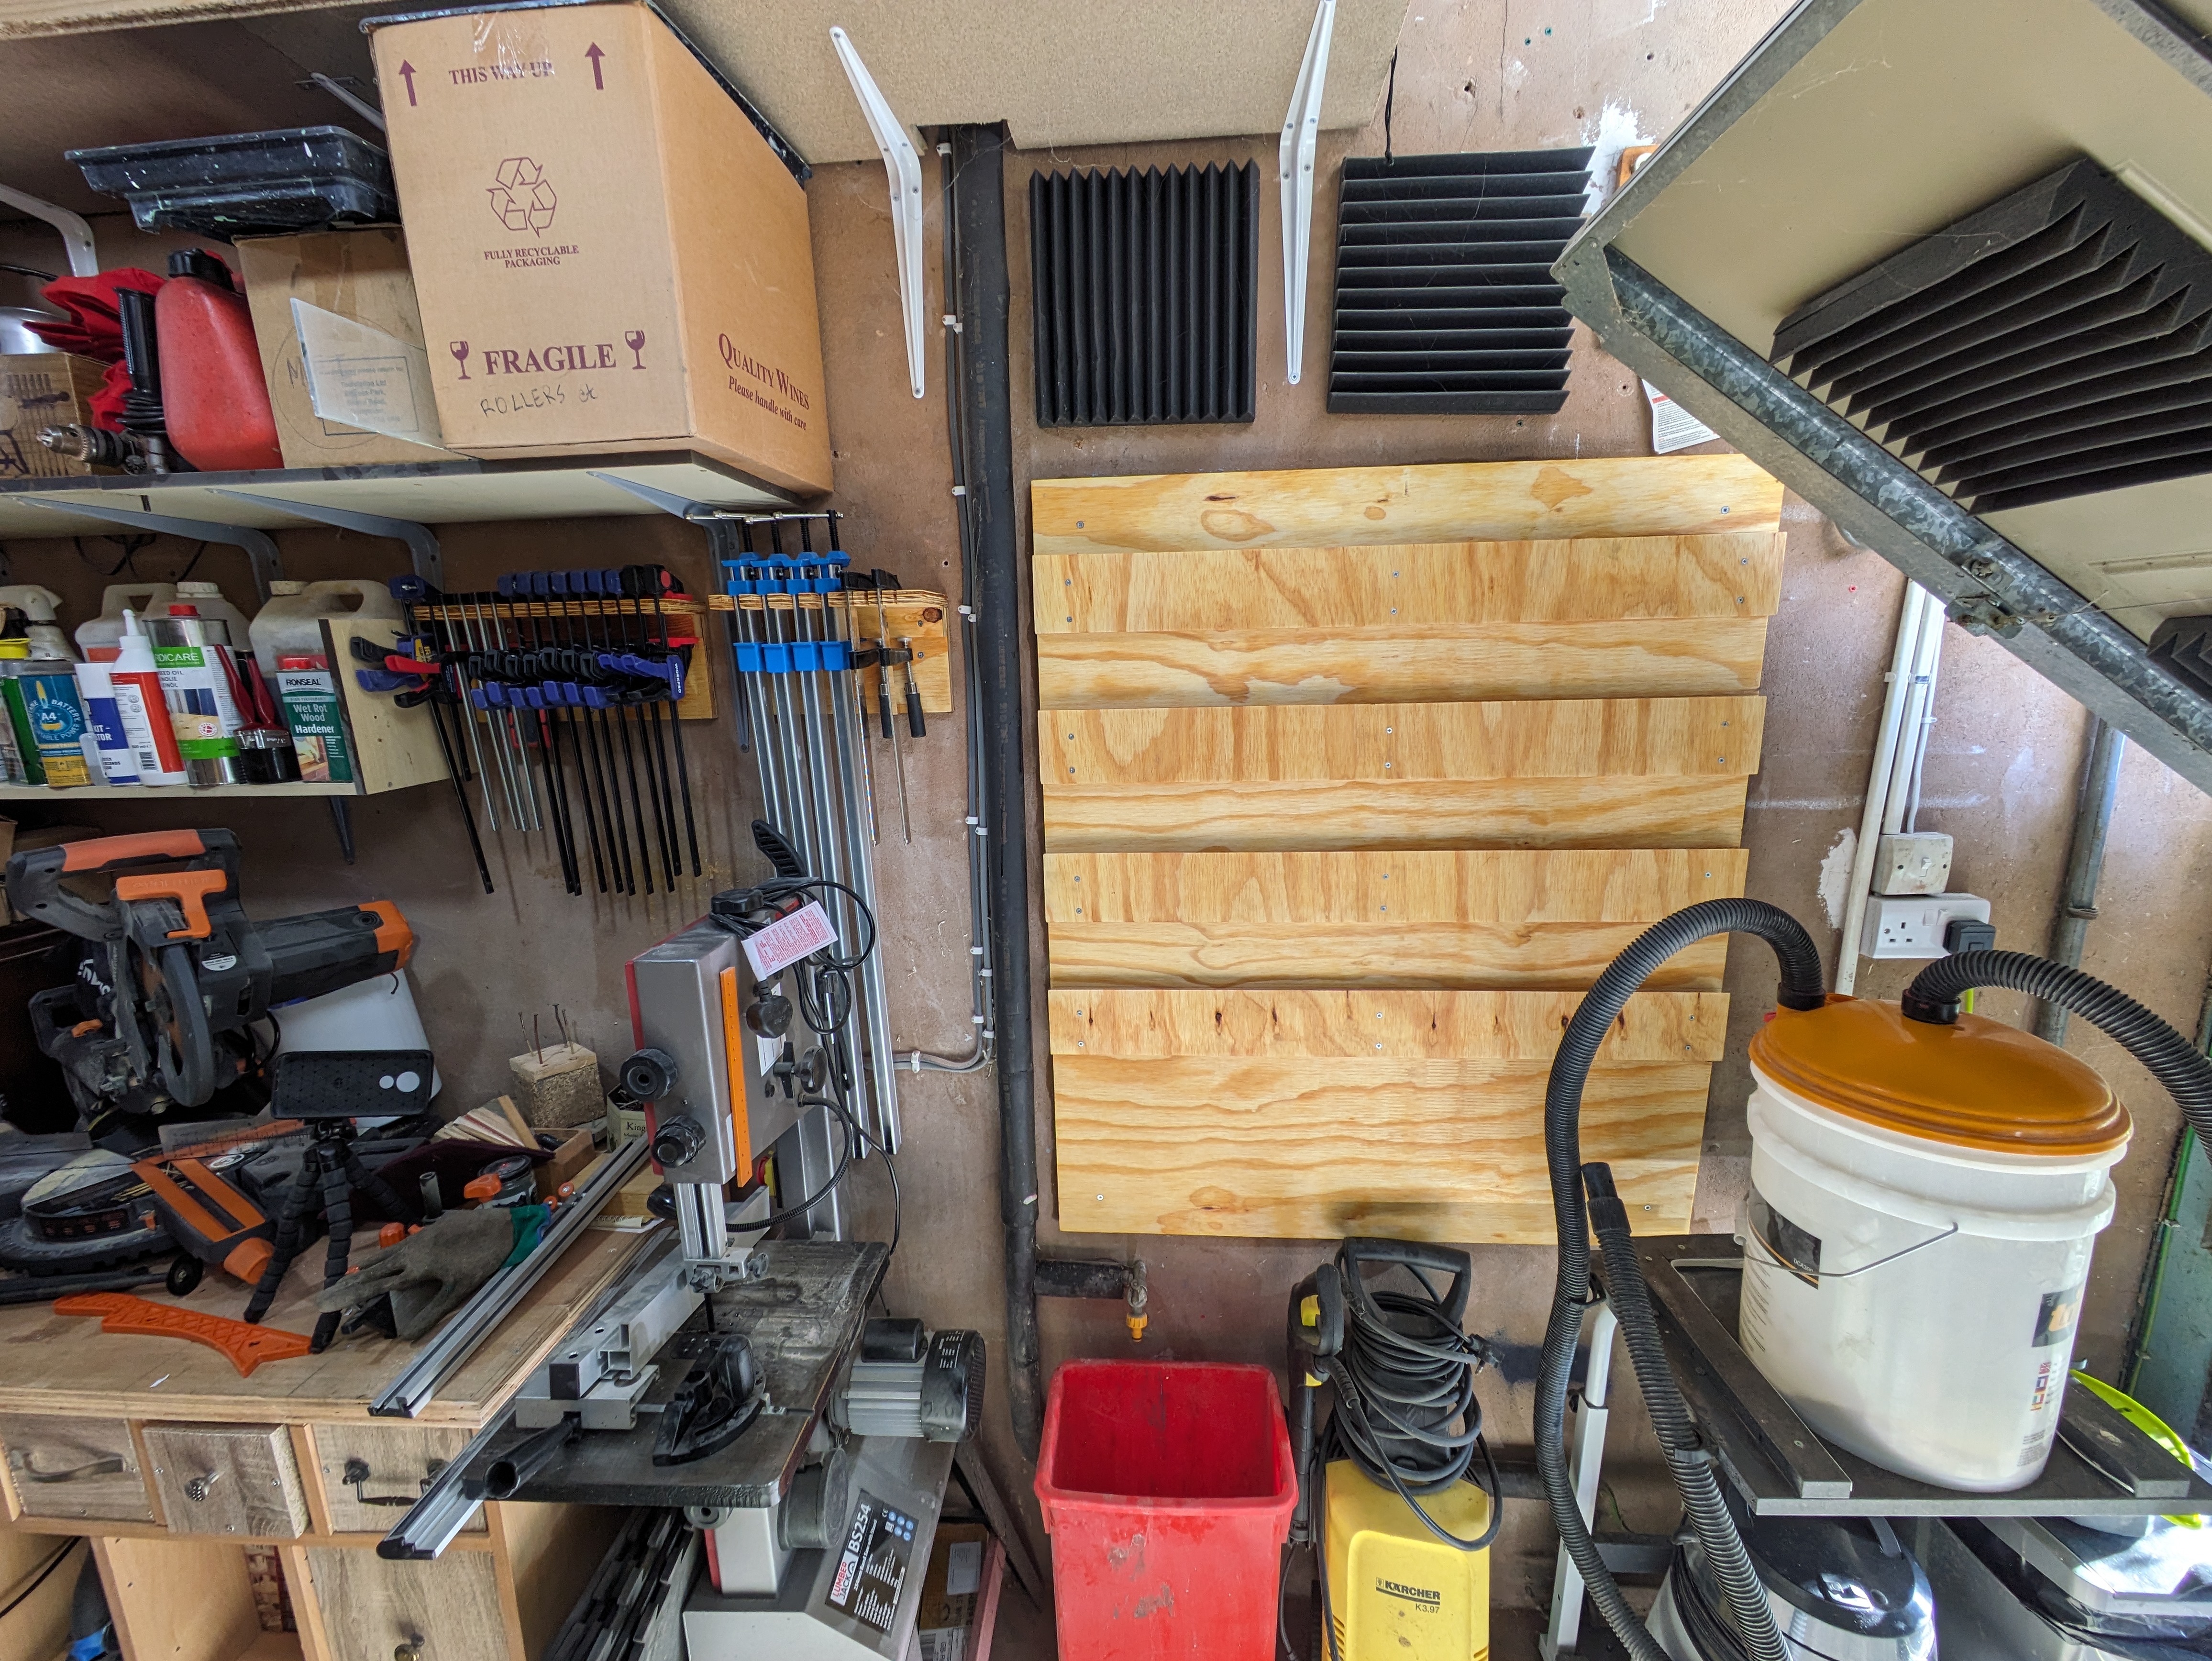
As I’ve made more things over the last year or so I’ve chipped away at improving the efficiency and flow of my little workshop space. Tool storage was on the top of the list now. I wanted some kind of racking to enable quickly grabbing a commonly used tool. I have buckets of offcuts so put alot of them to good use in this project.
First thing was to decide where this racking would actually fit in the single garage. I took a picture and some measurements and whipped up a quick sketch in designspark to help visualize it.


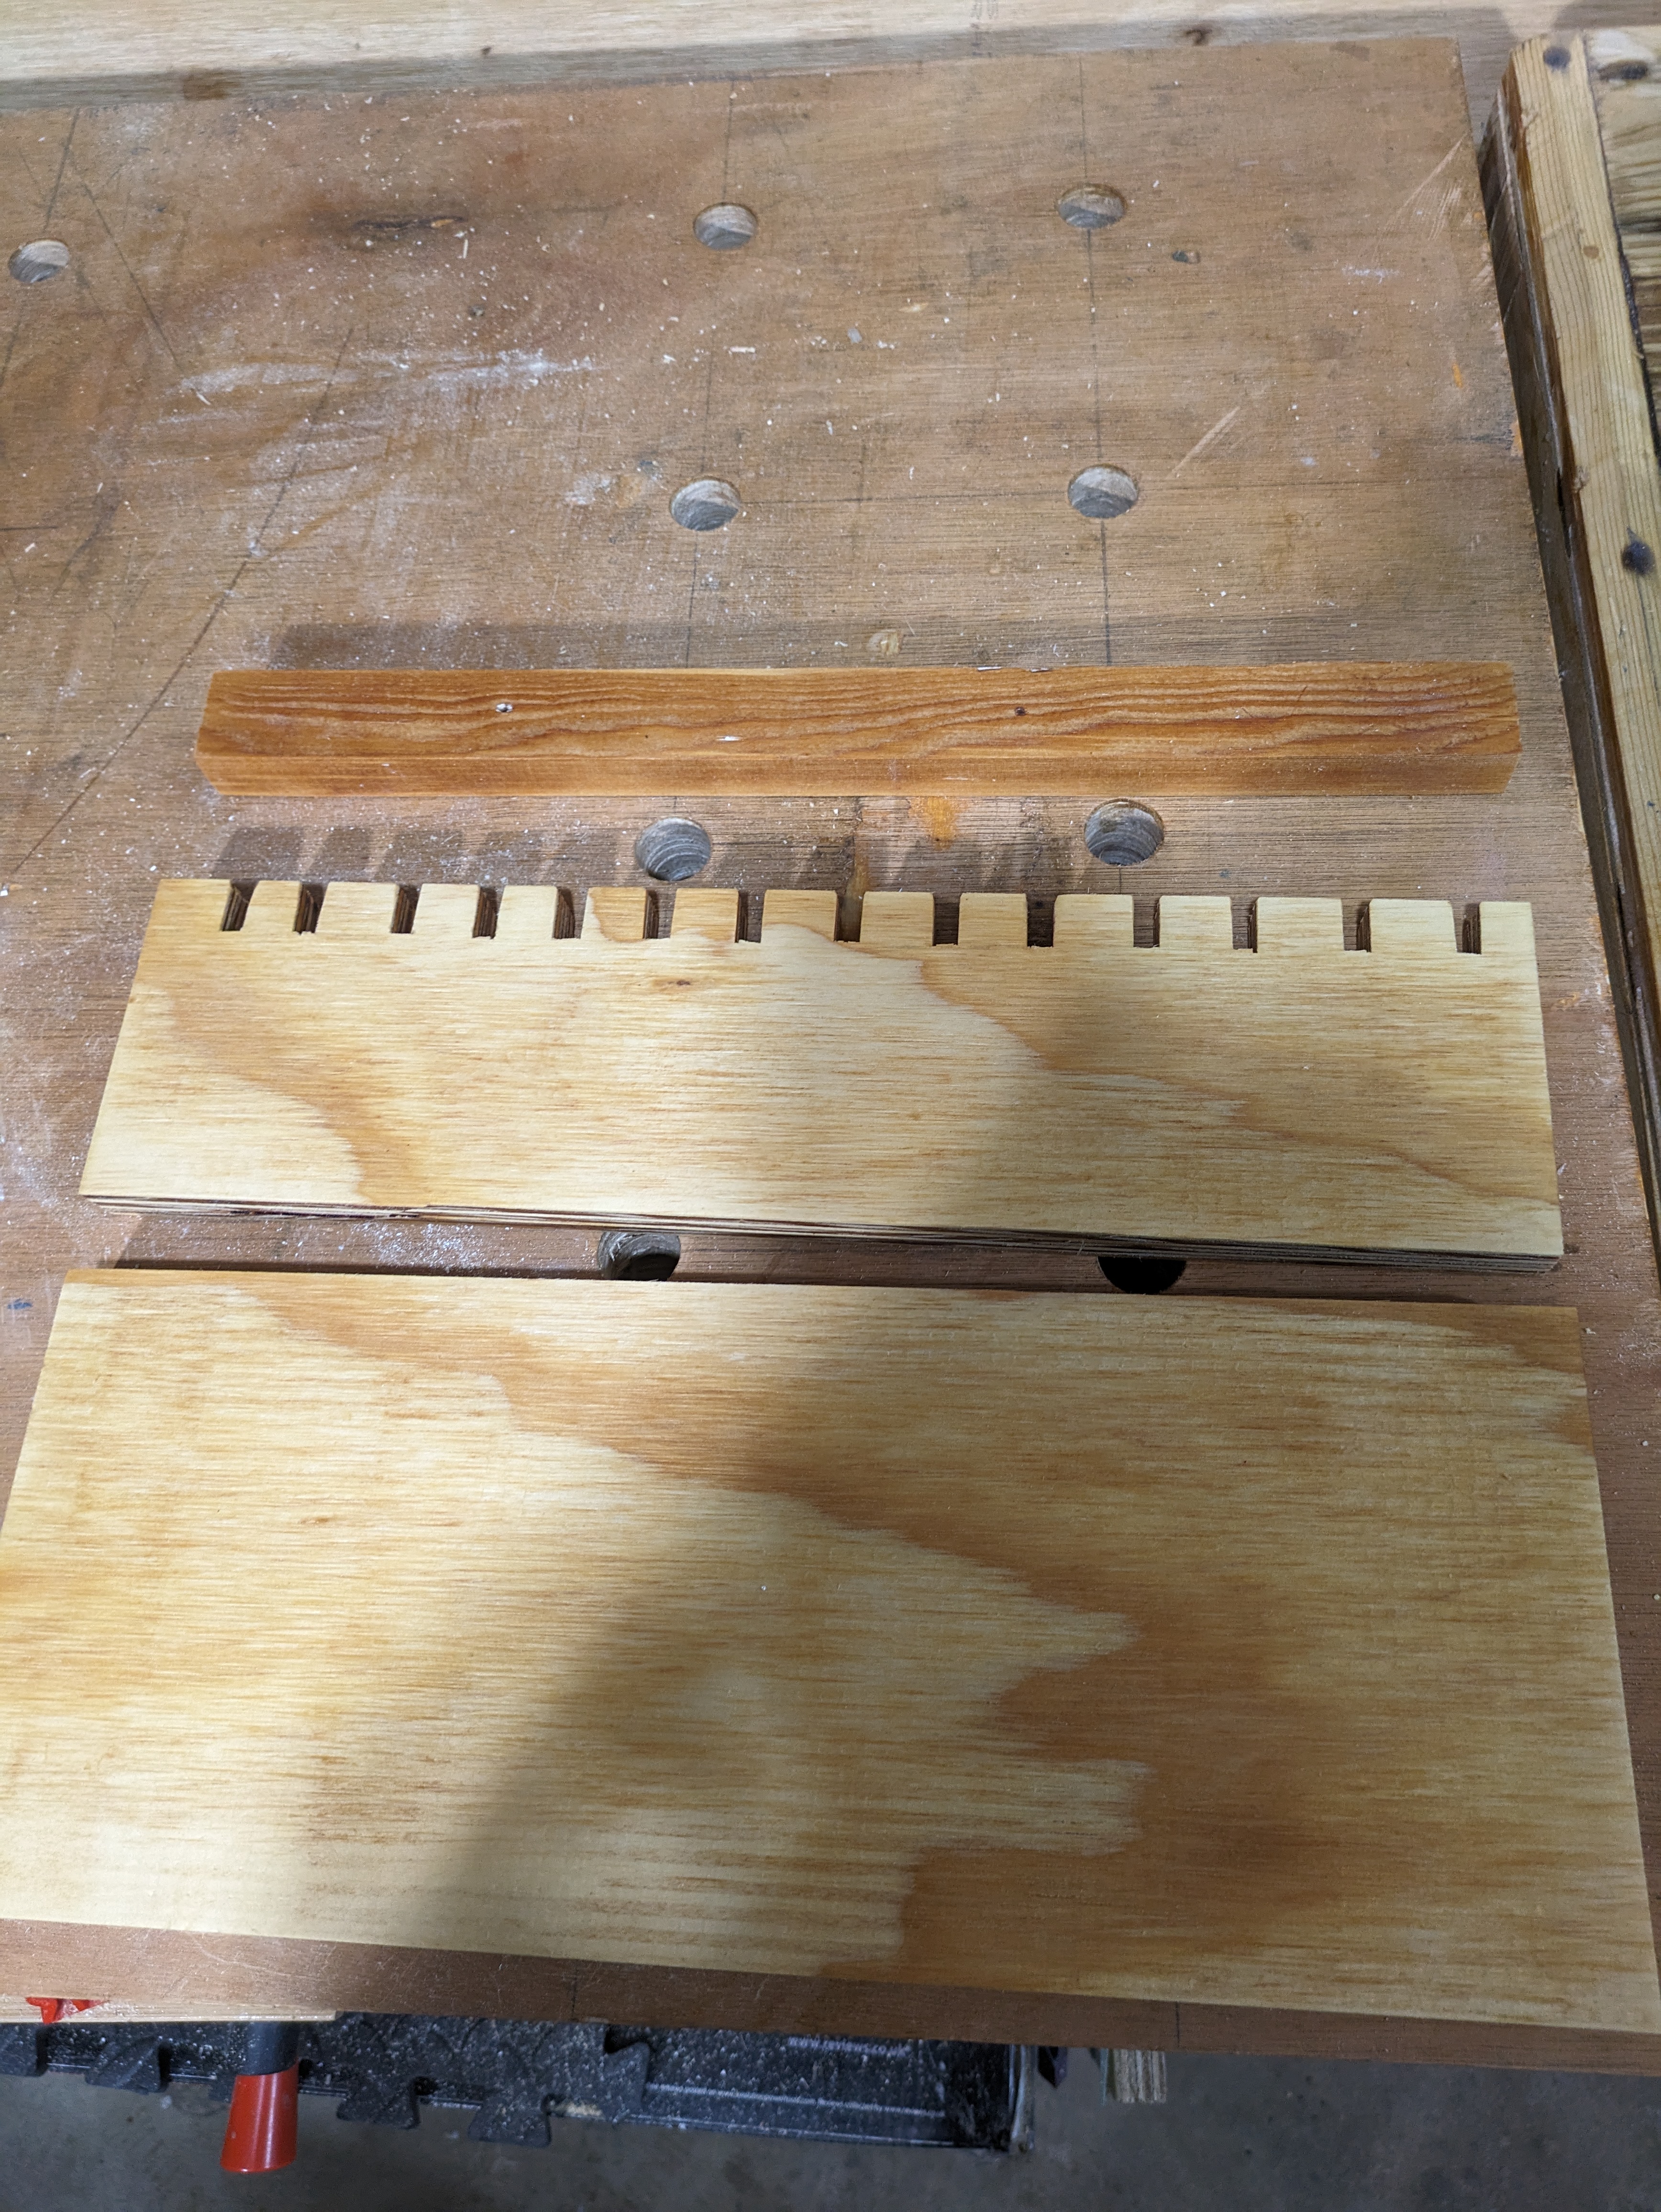
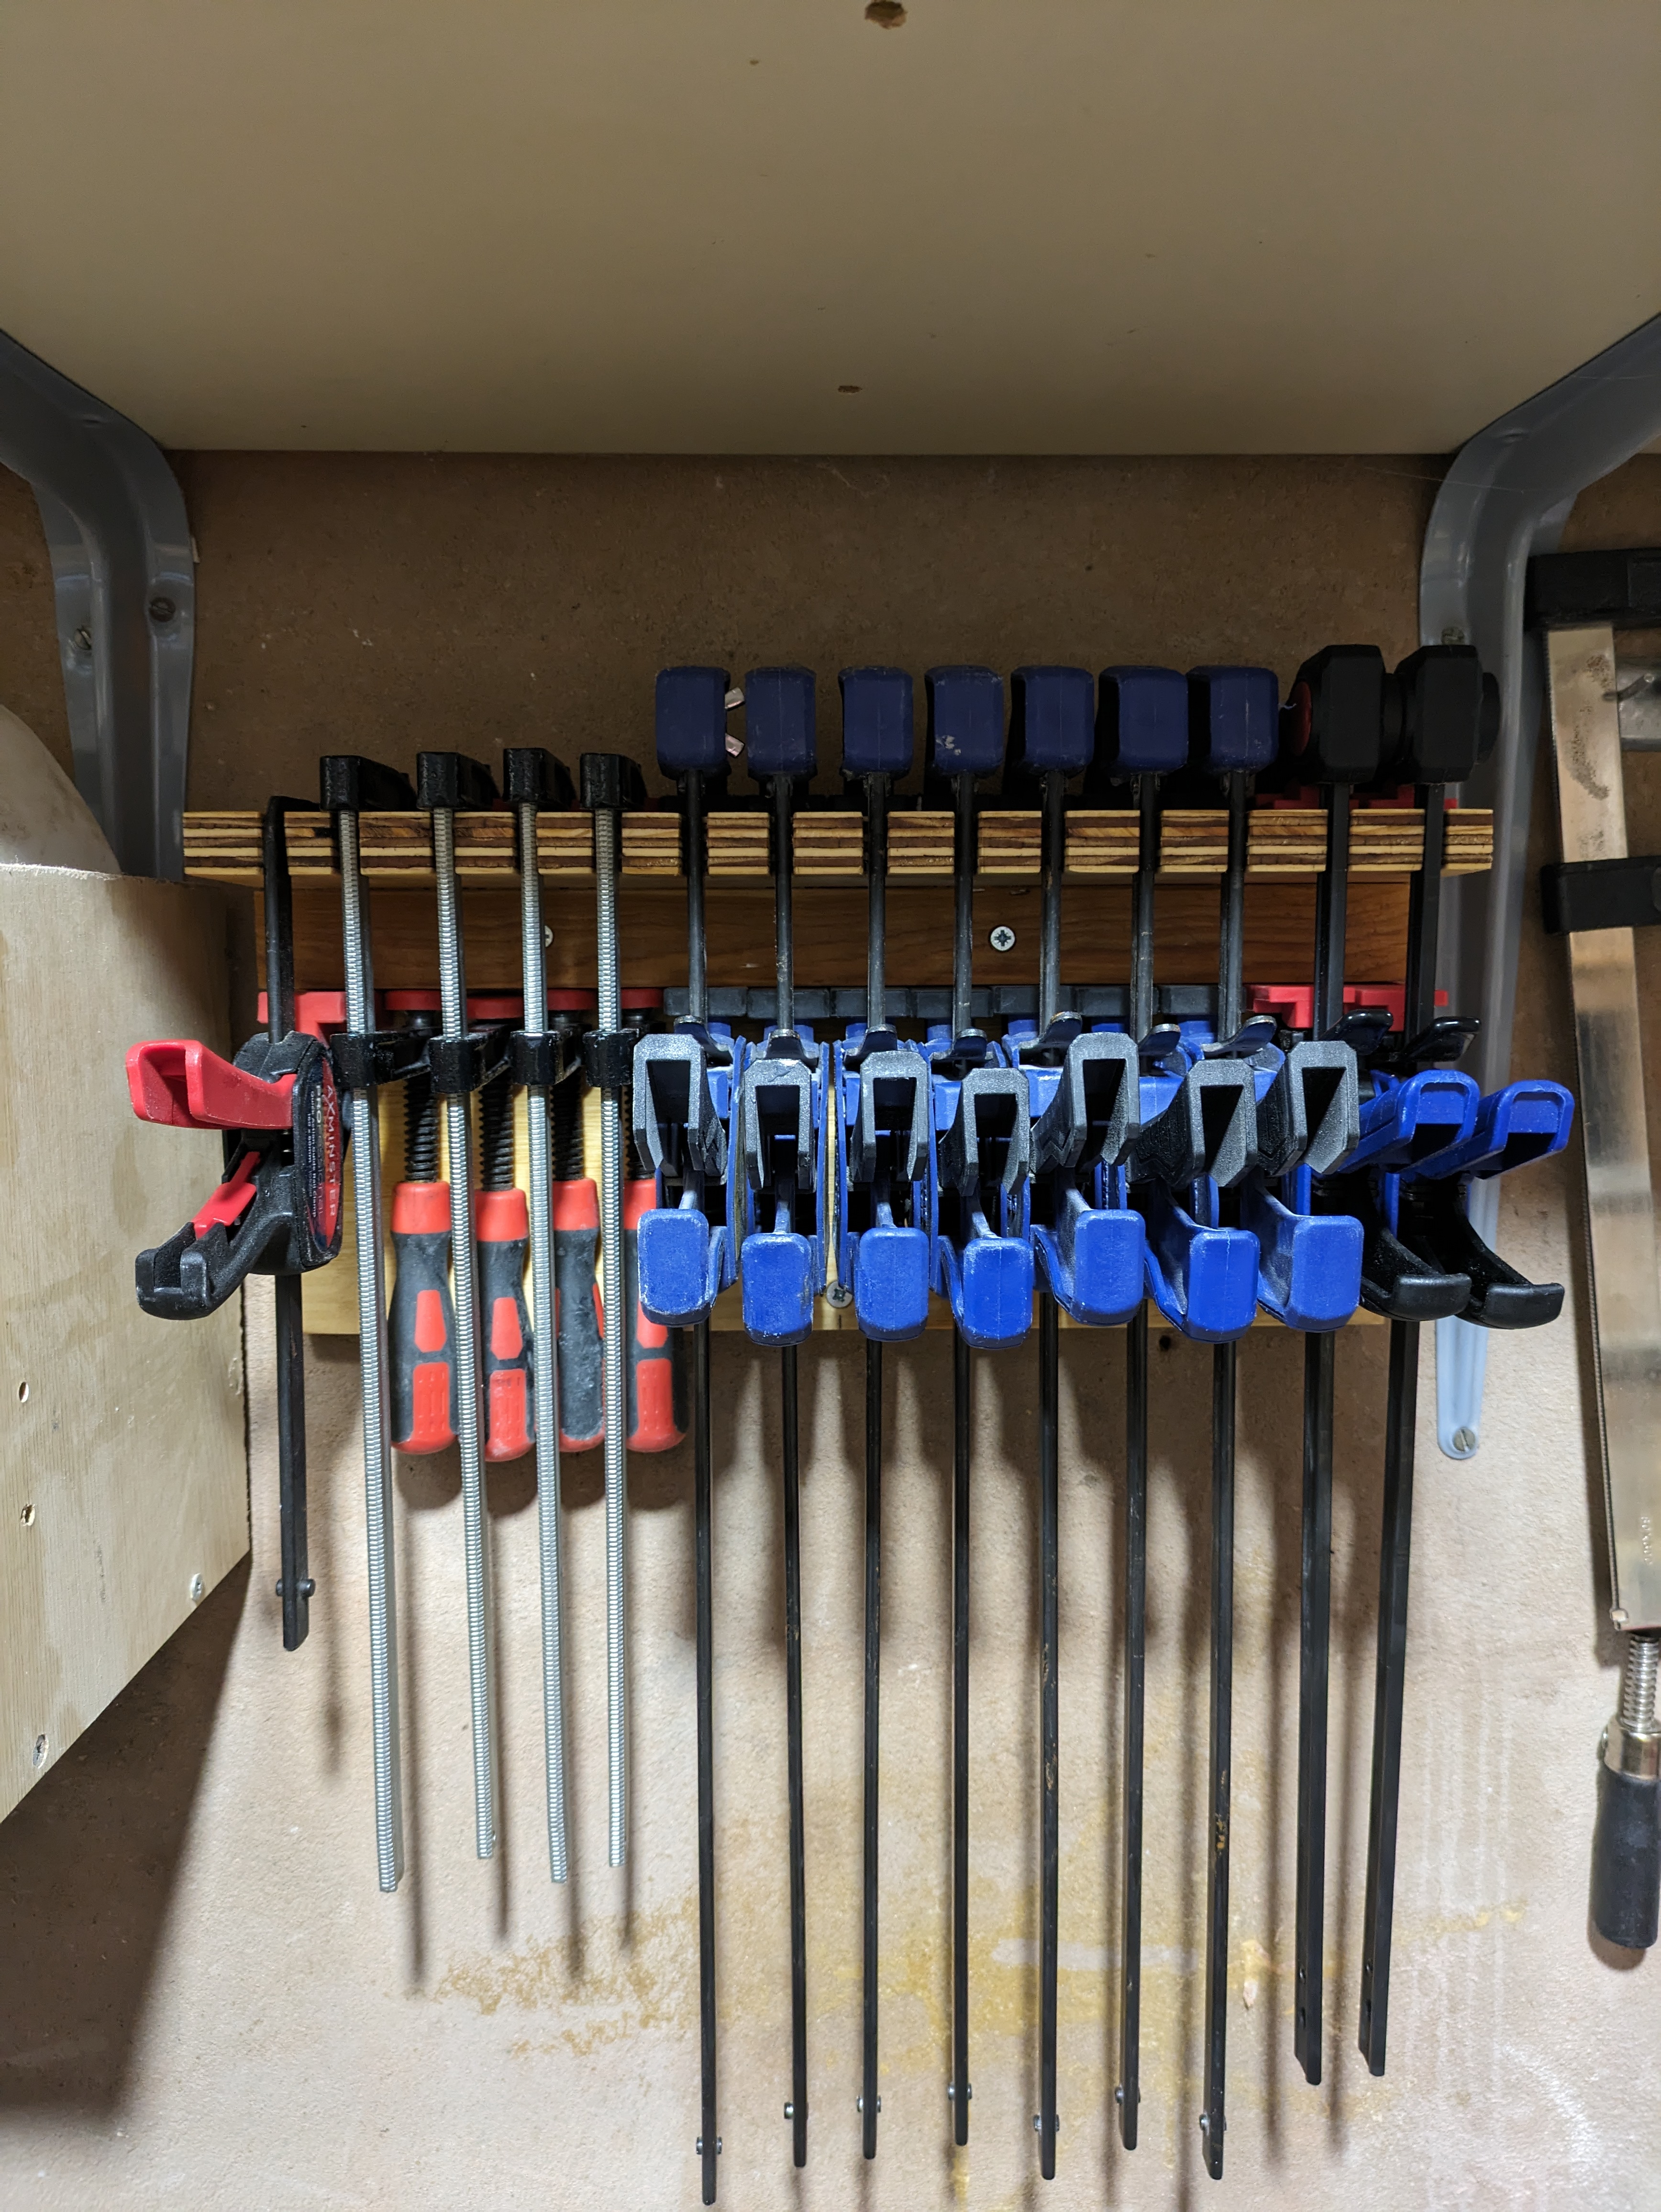
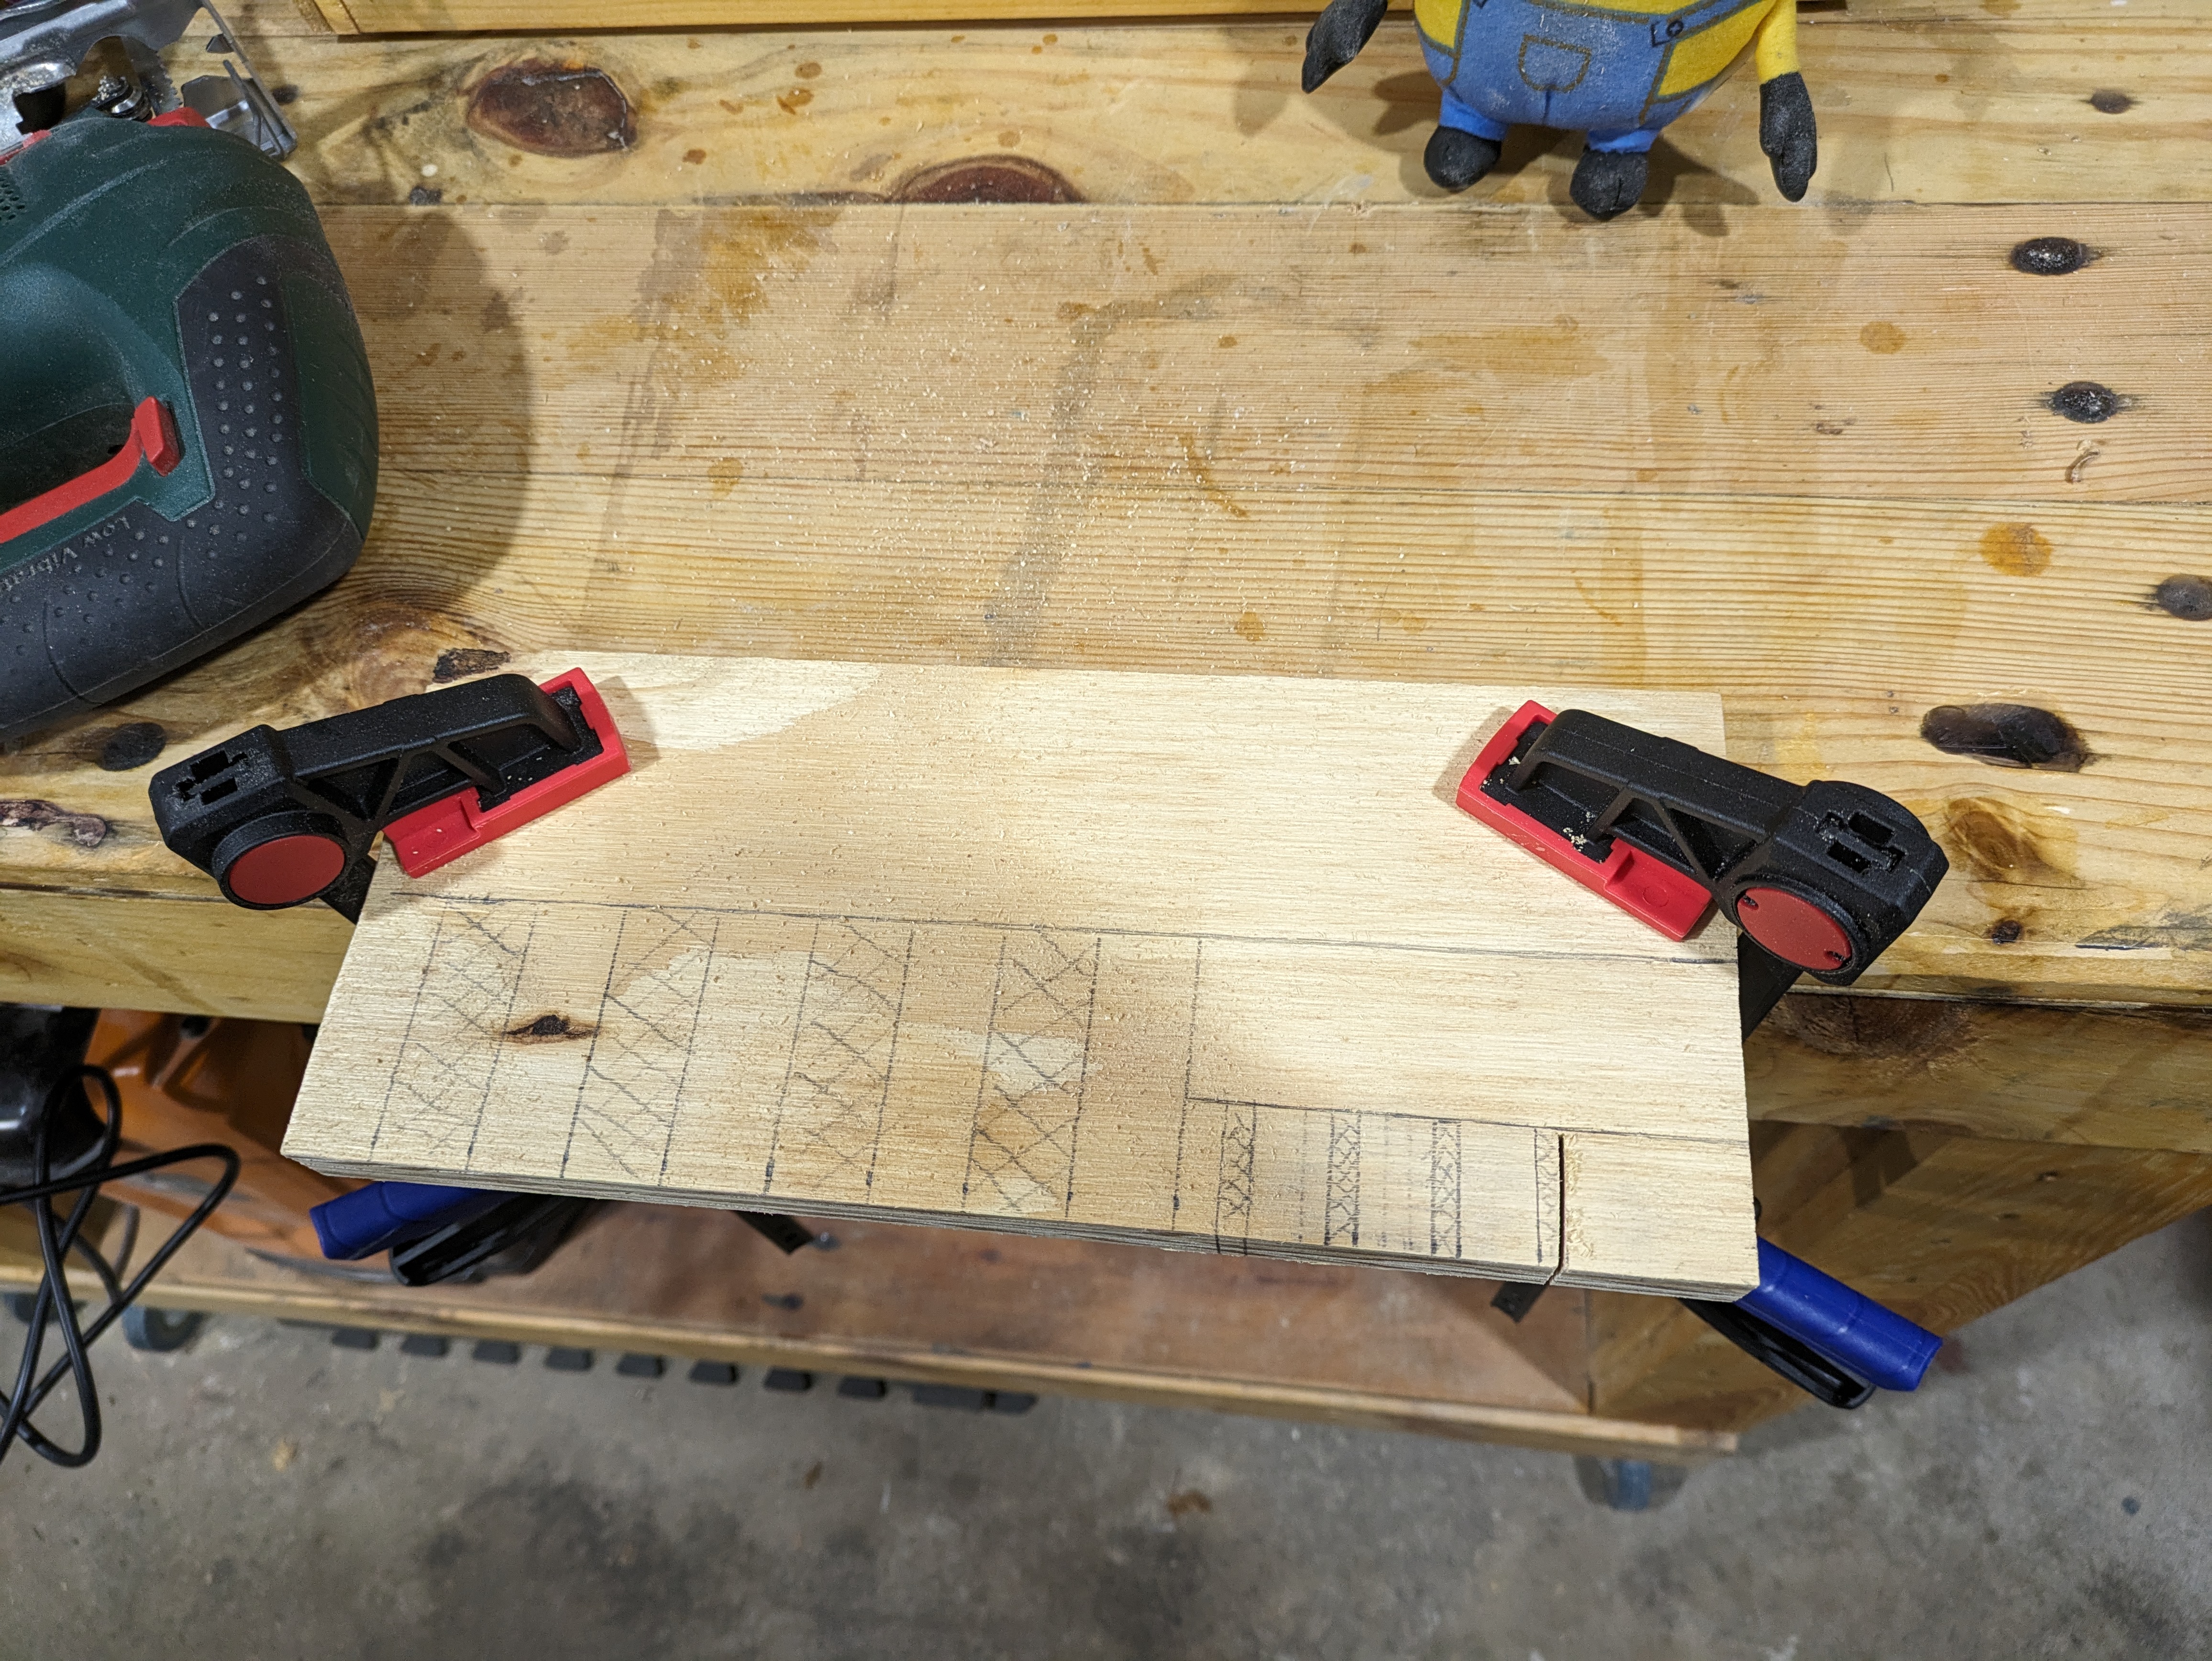
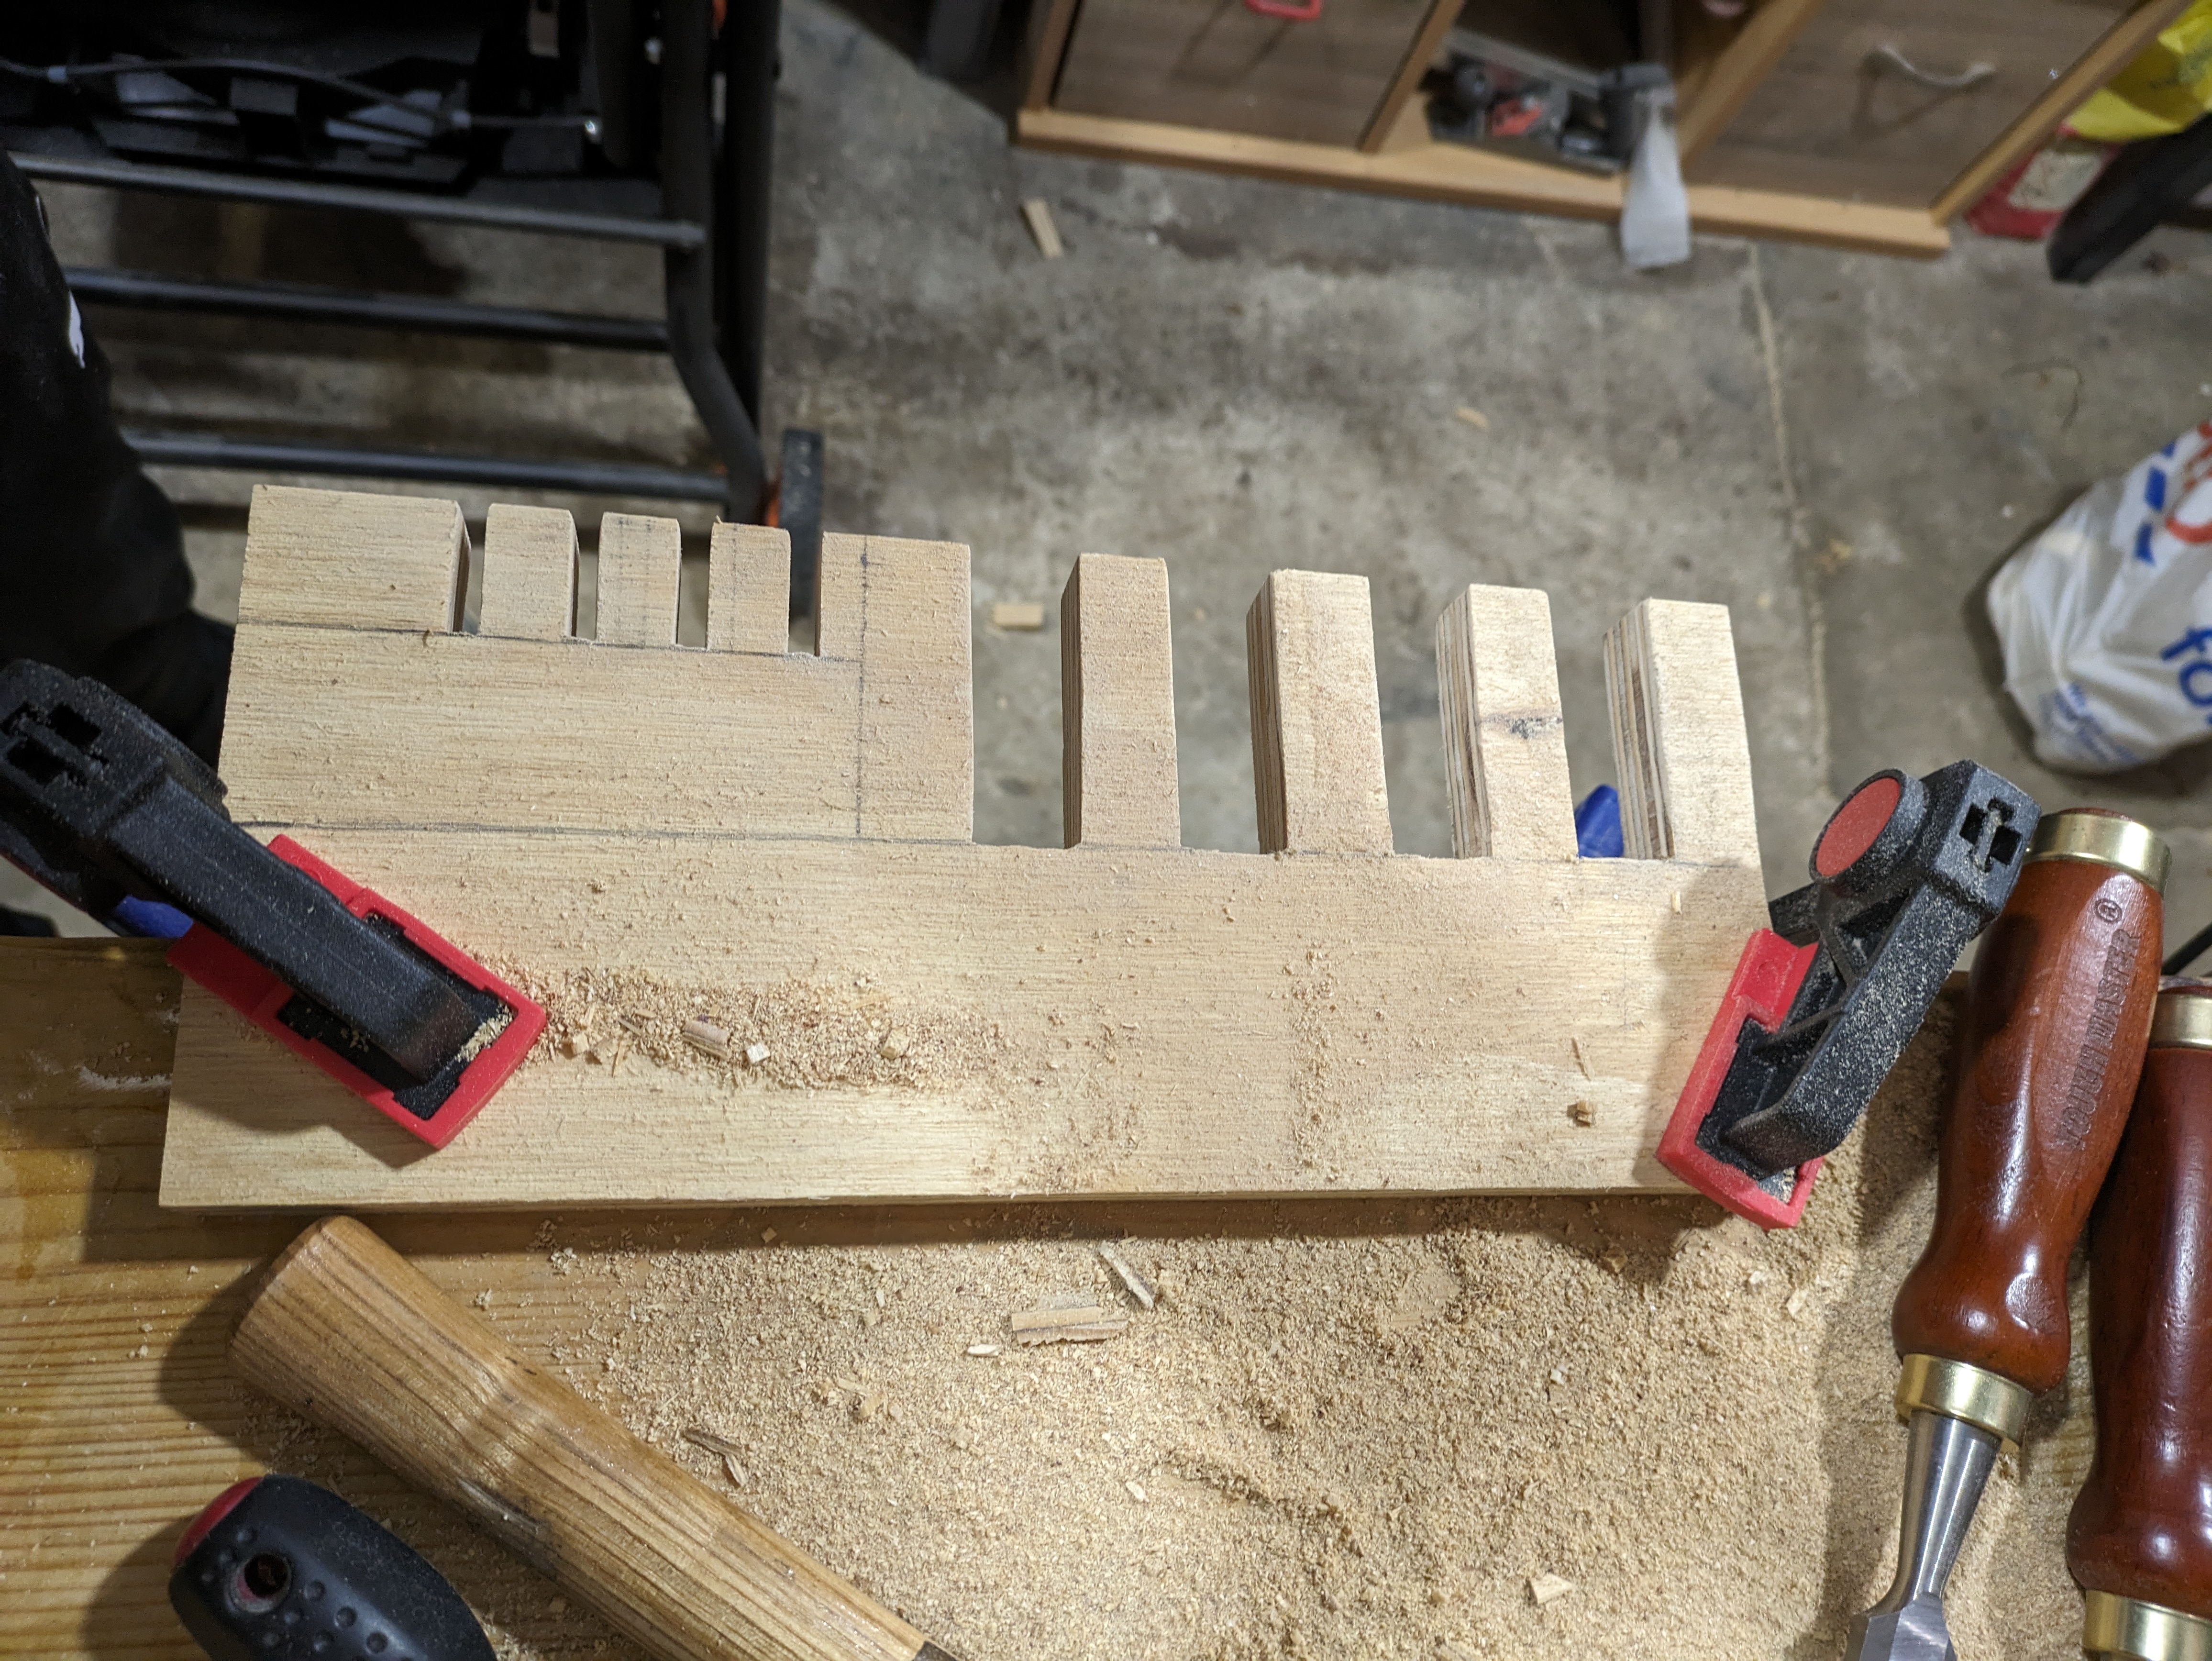
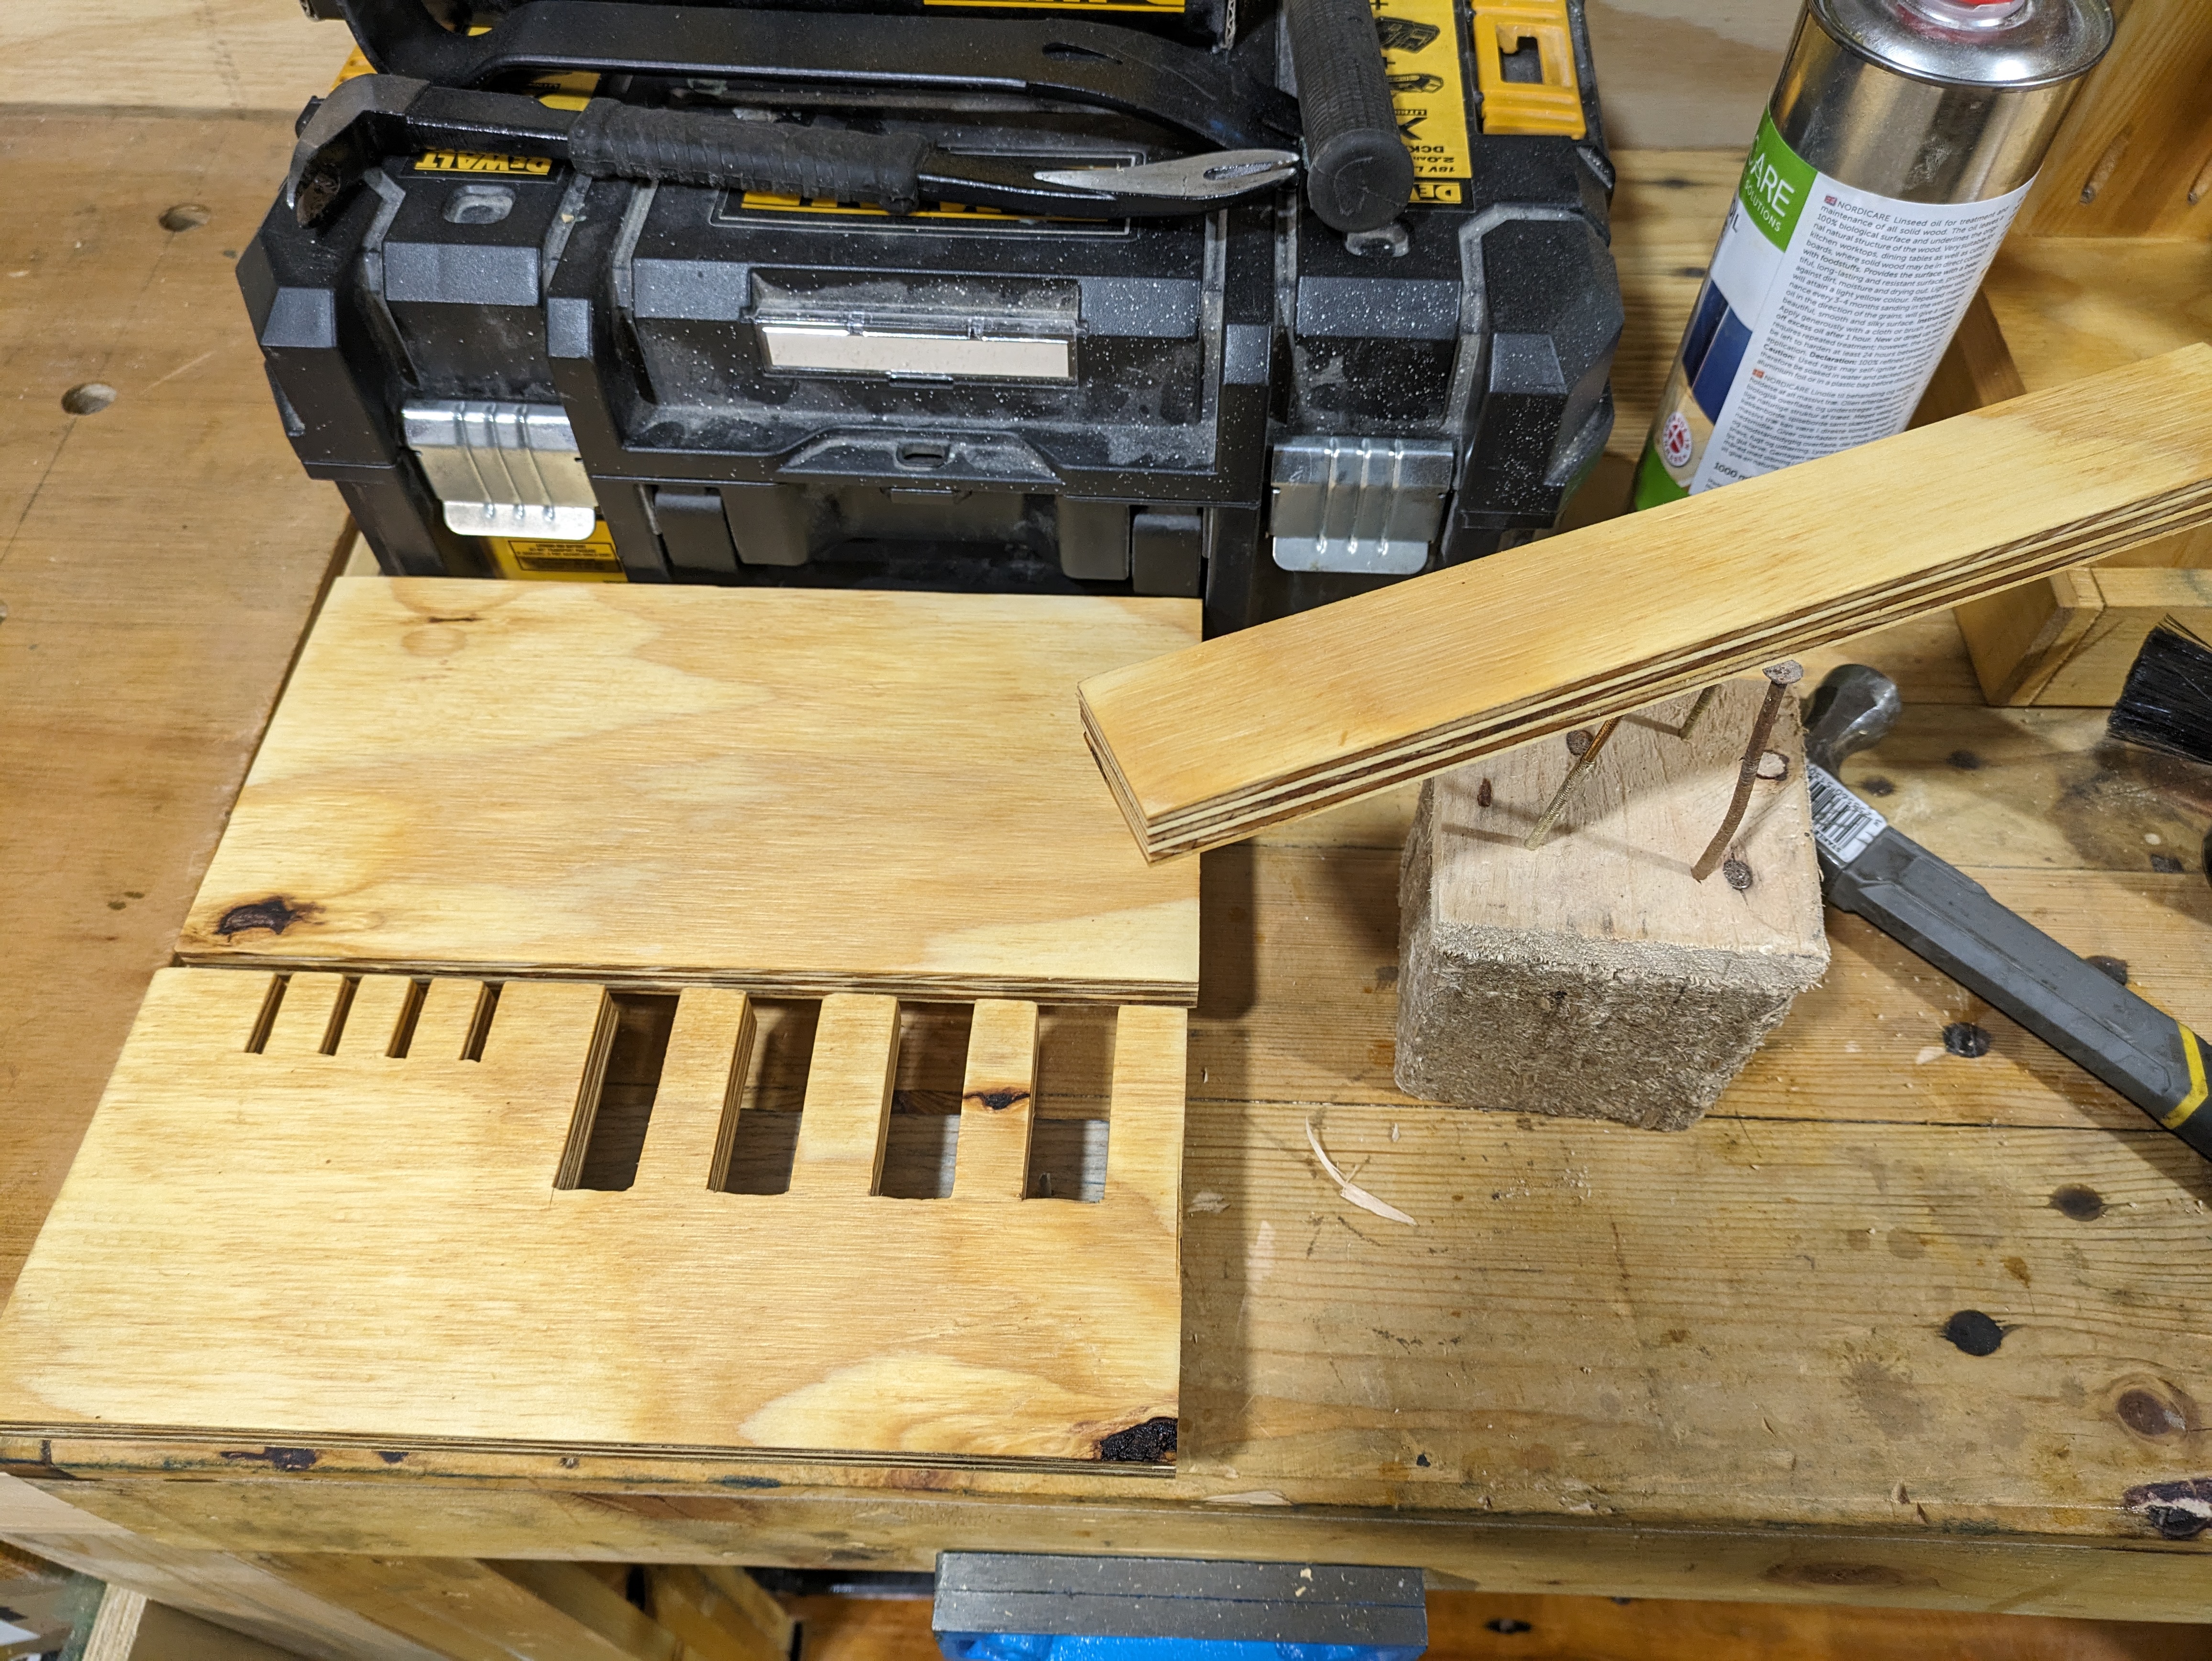
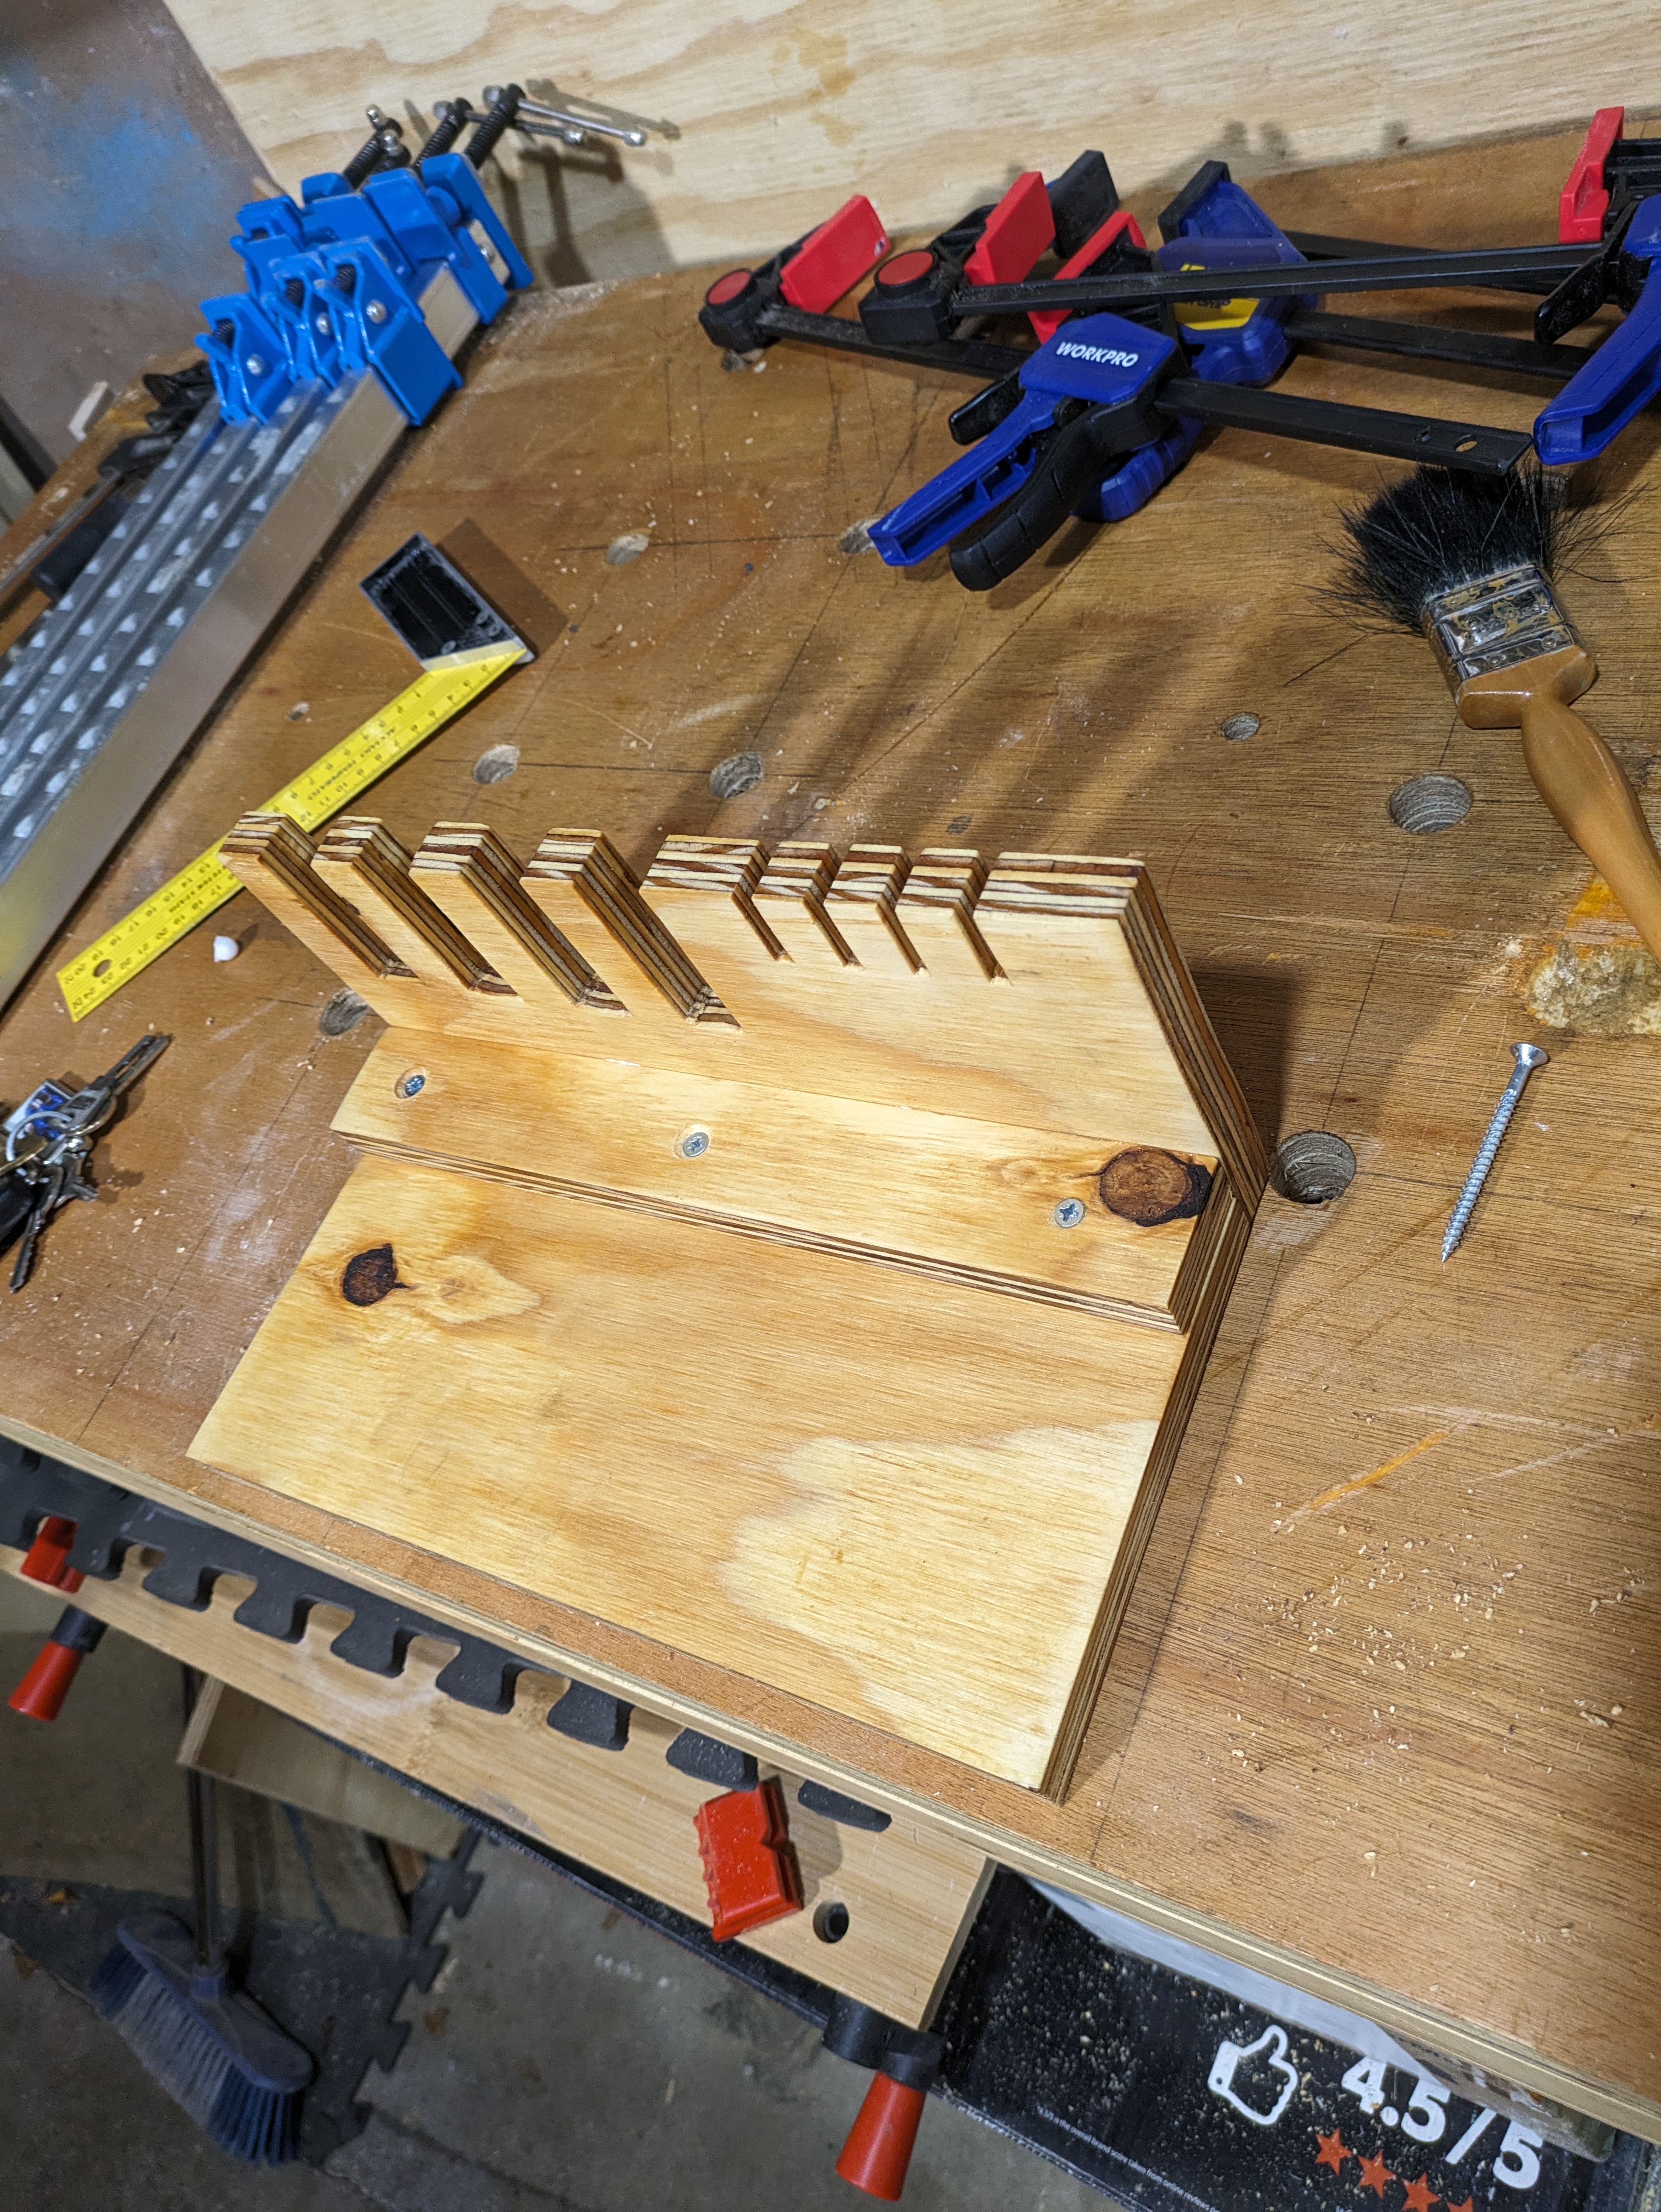
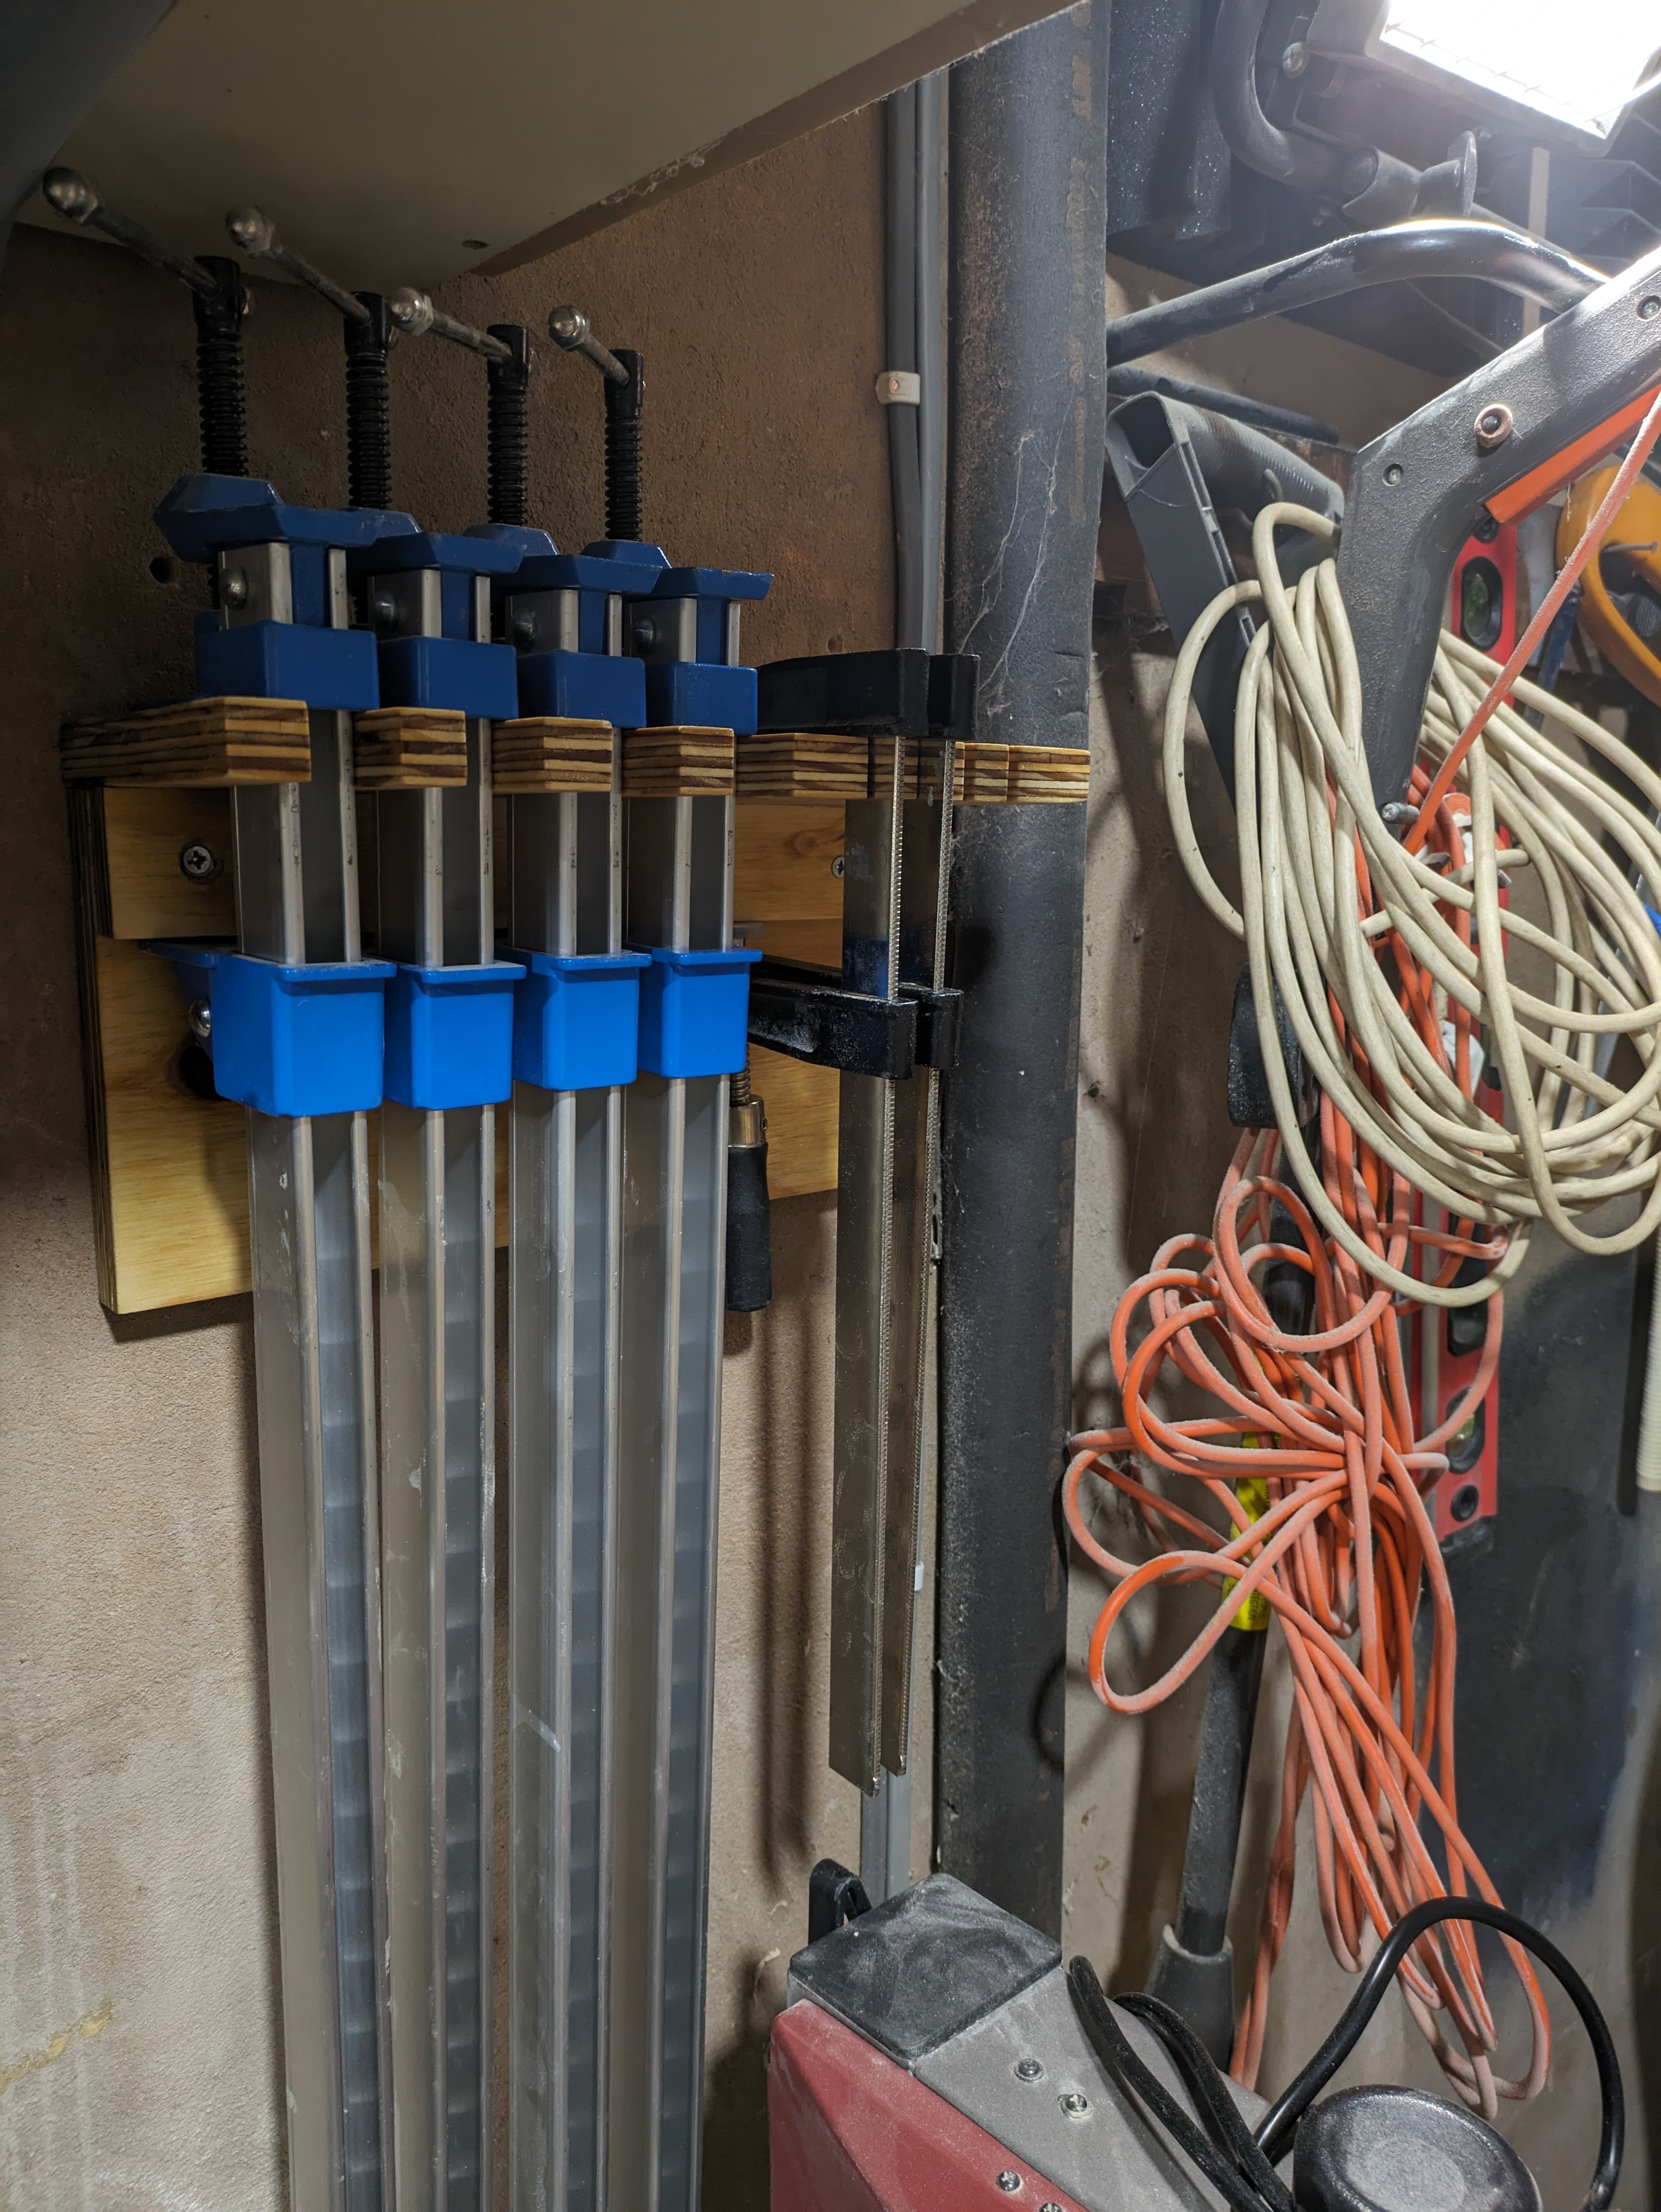
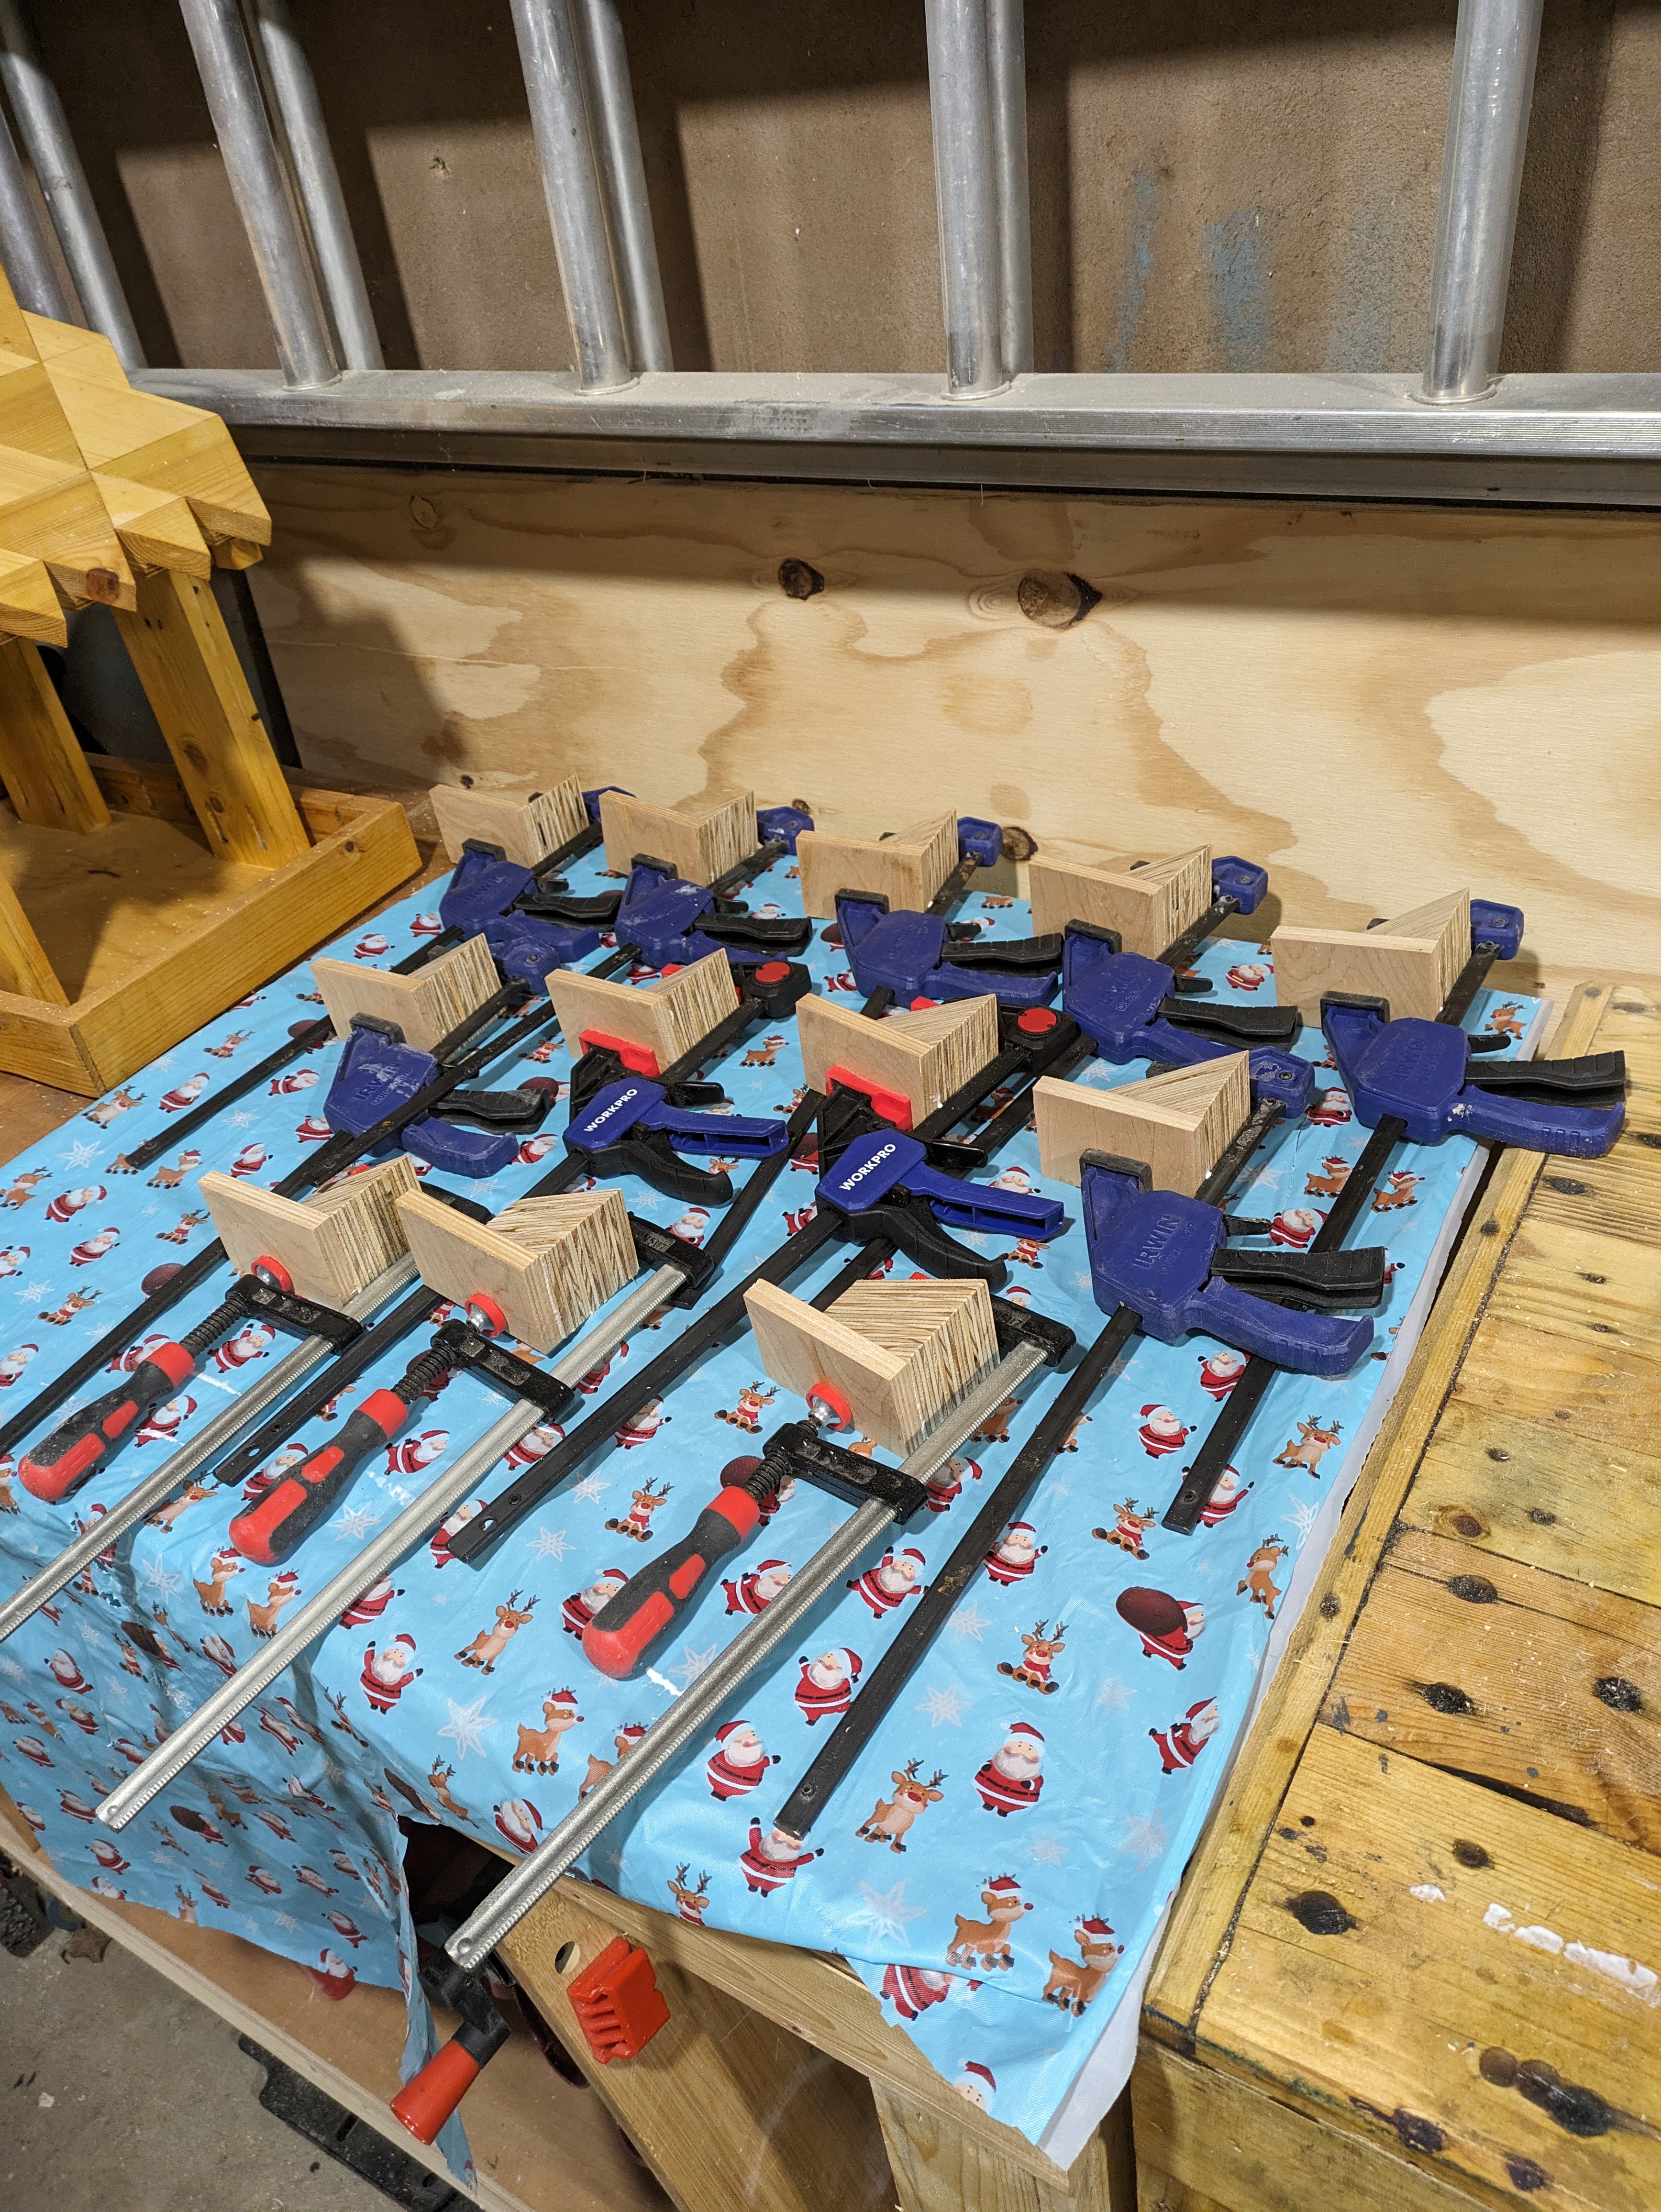
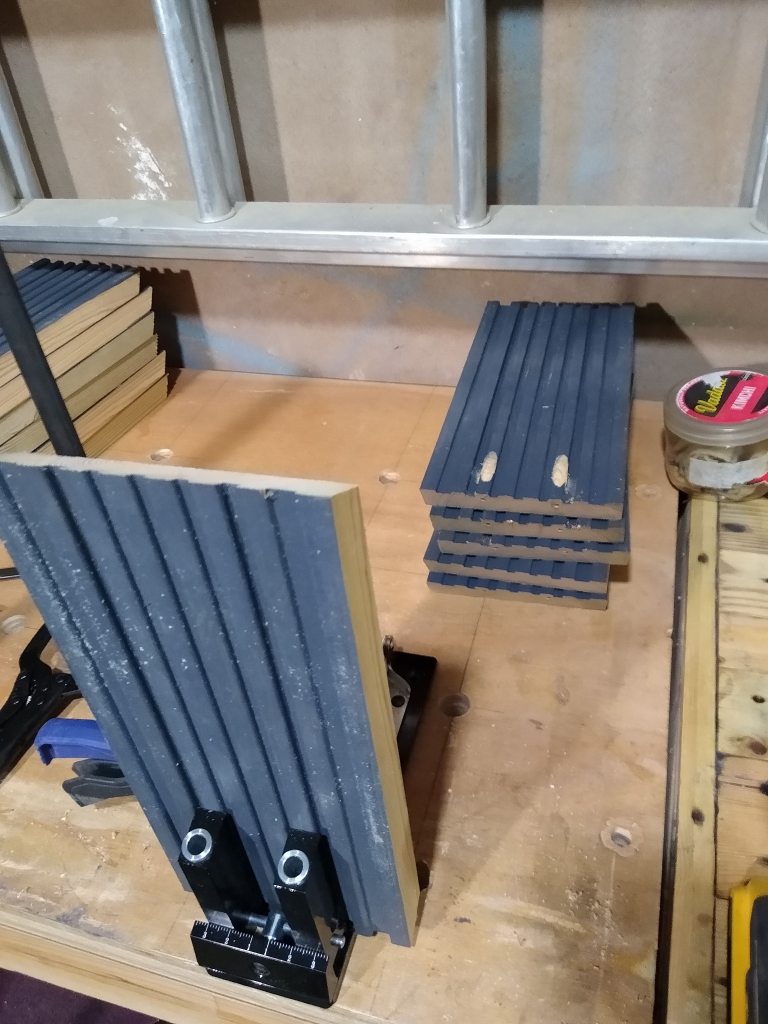
The most annoying thing to store are the various clamps as they all get tangled in cupboard were I was keeping most of them. I decided to have two racks for the different types of clamps. Firstly I layed out the clamps to get an idea of size then cut some to ply to size and started notching out the ends with a saw and chisel. I managed to get 14 clamps neatly stored and easily accessible, so marked that up as a win!
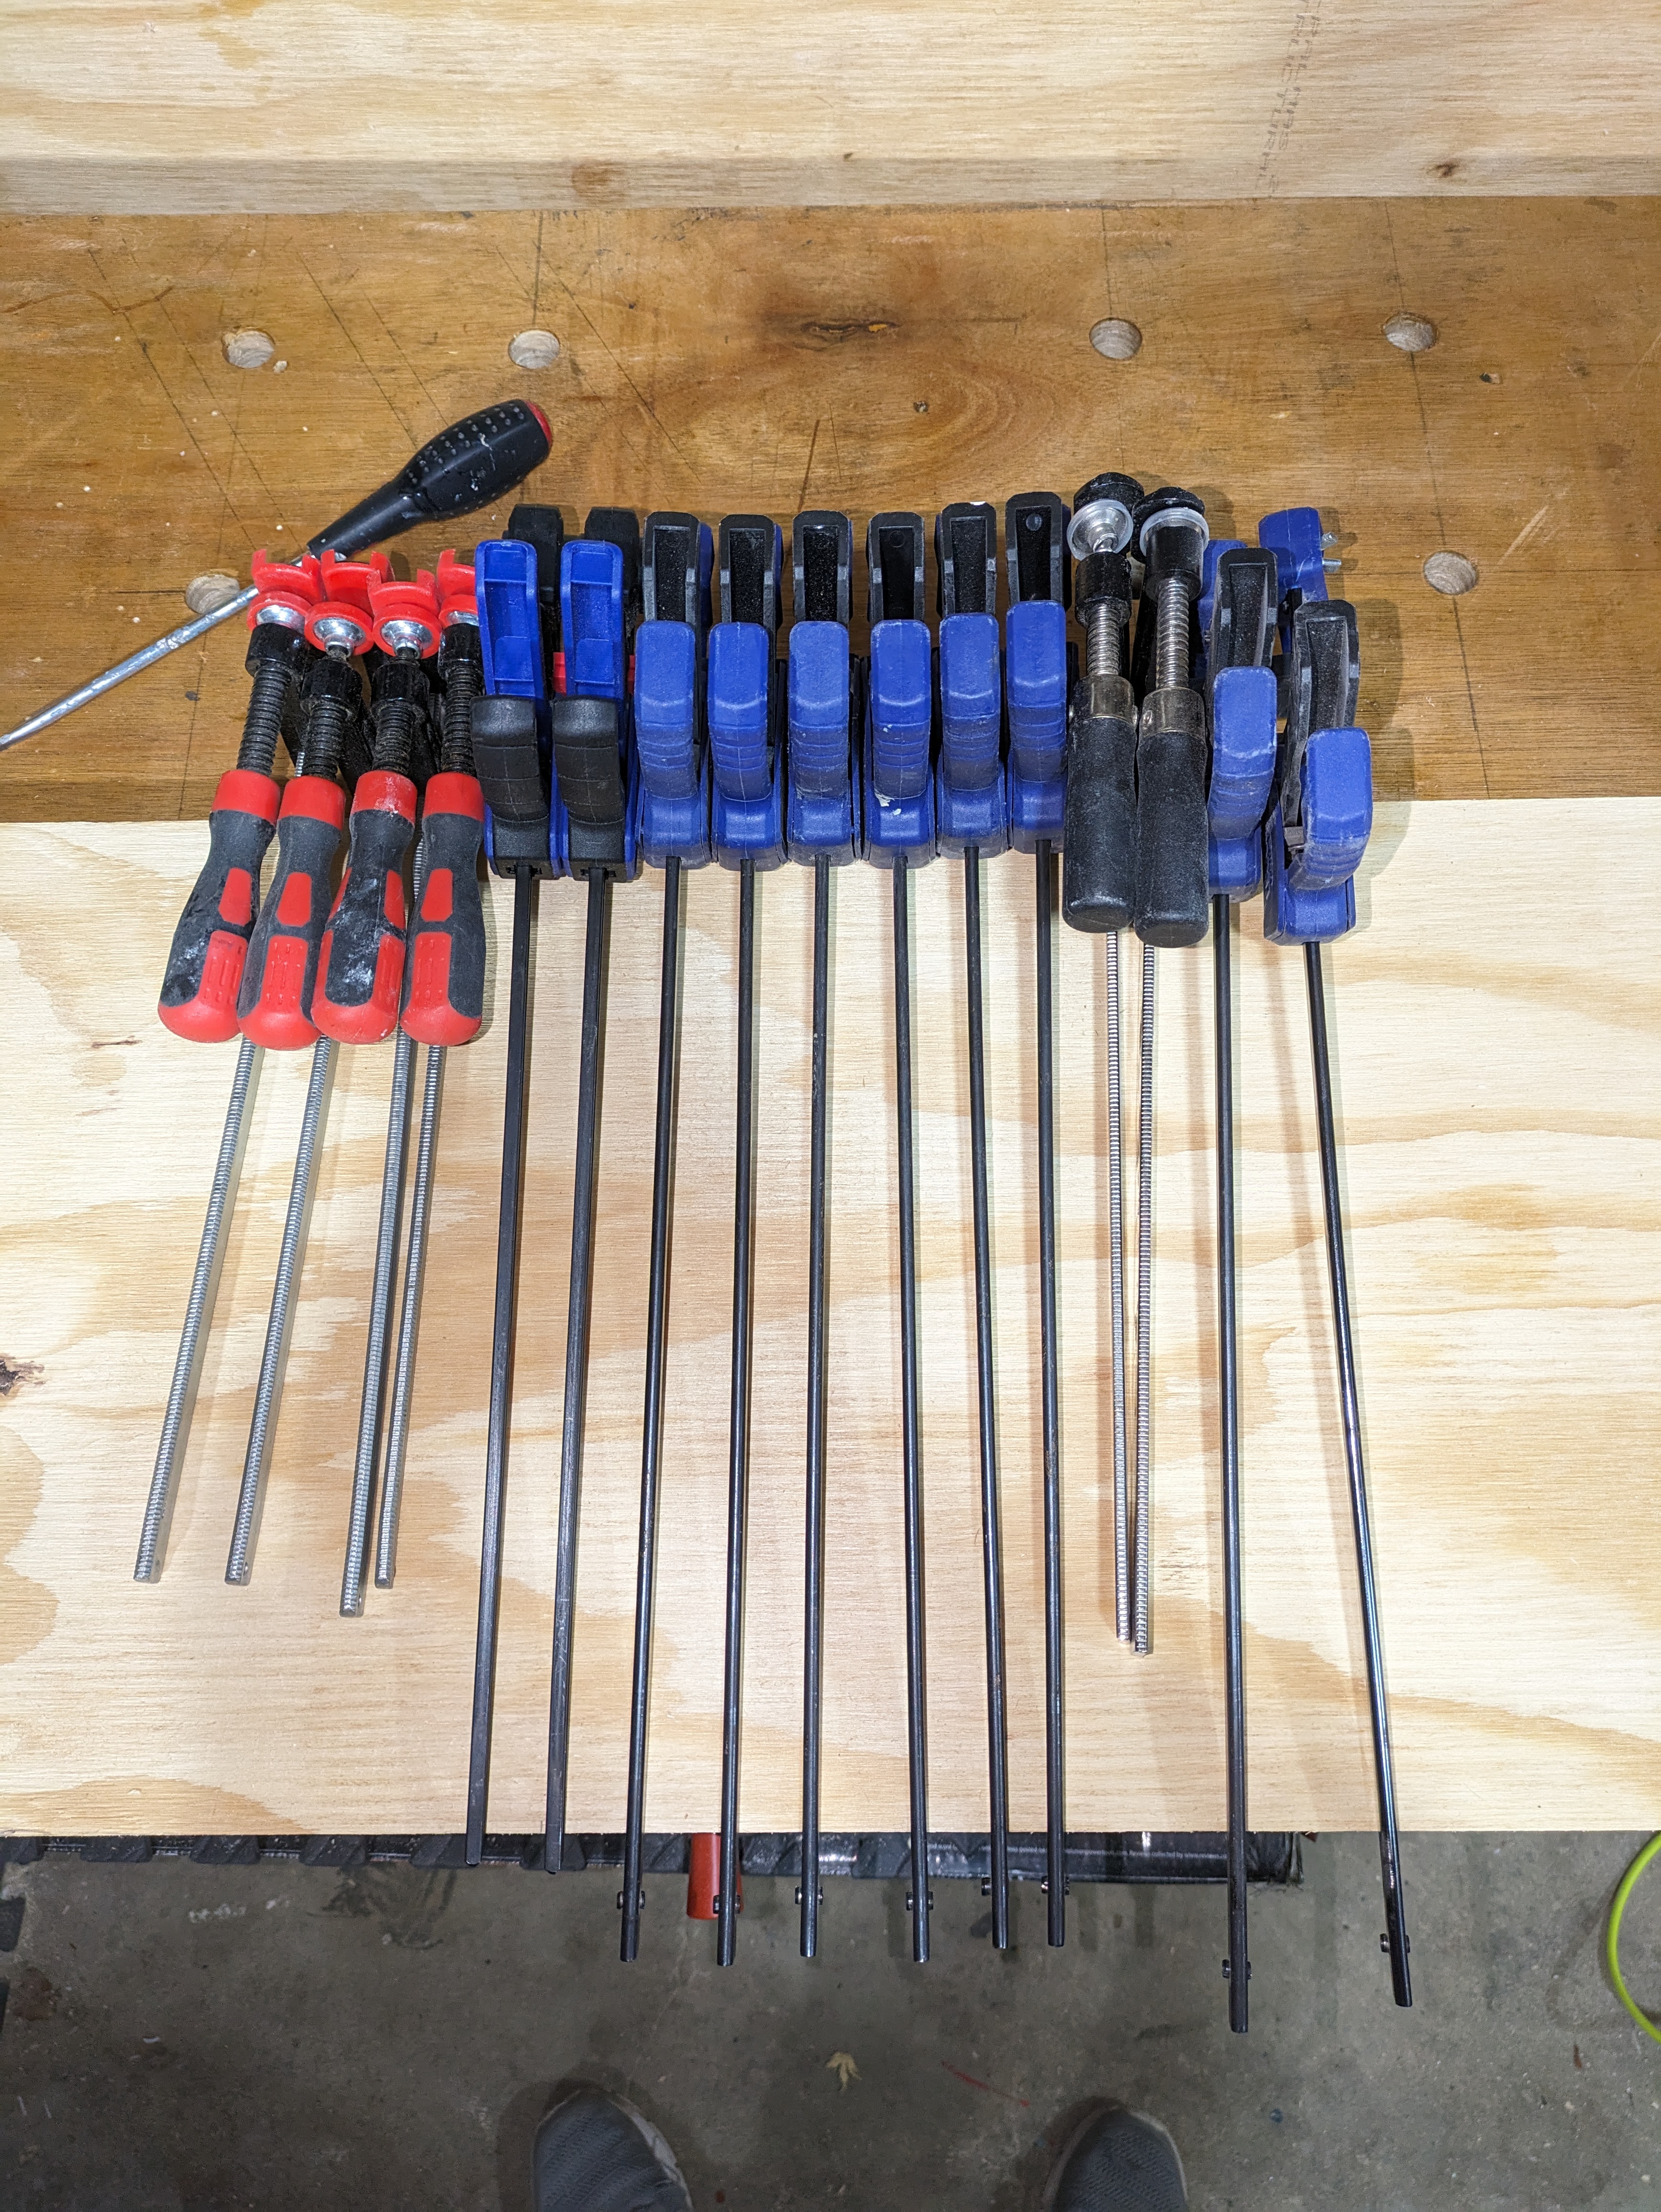
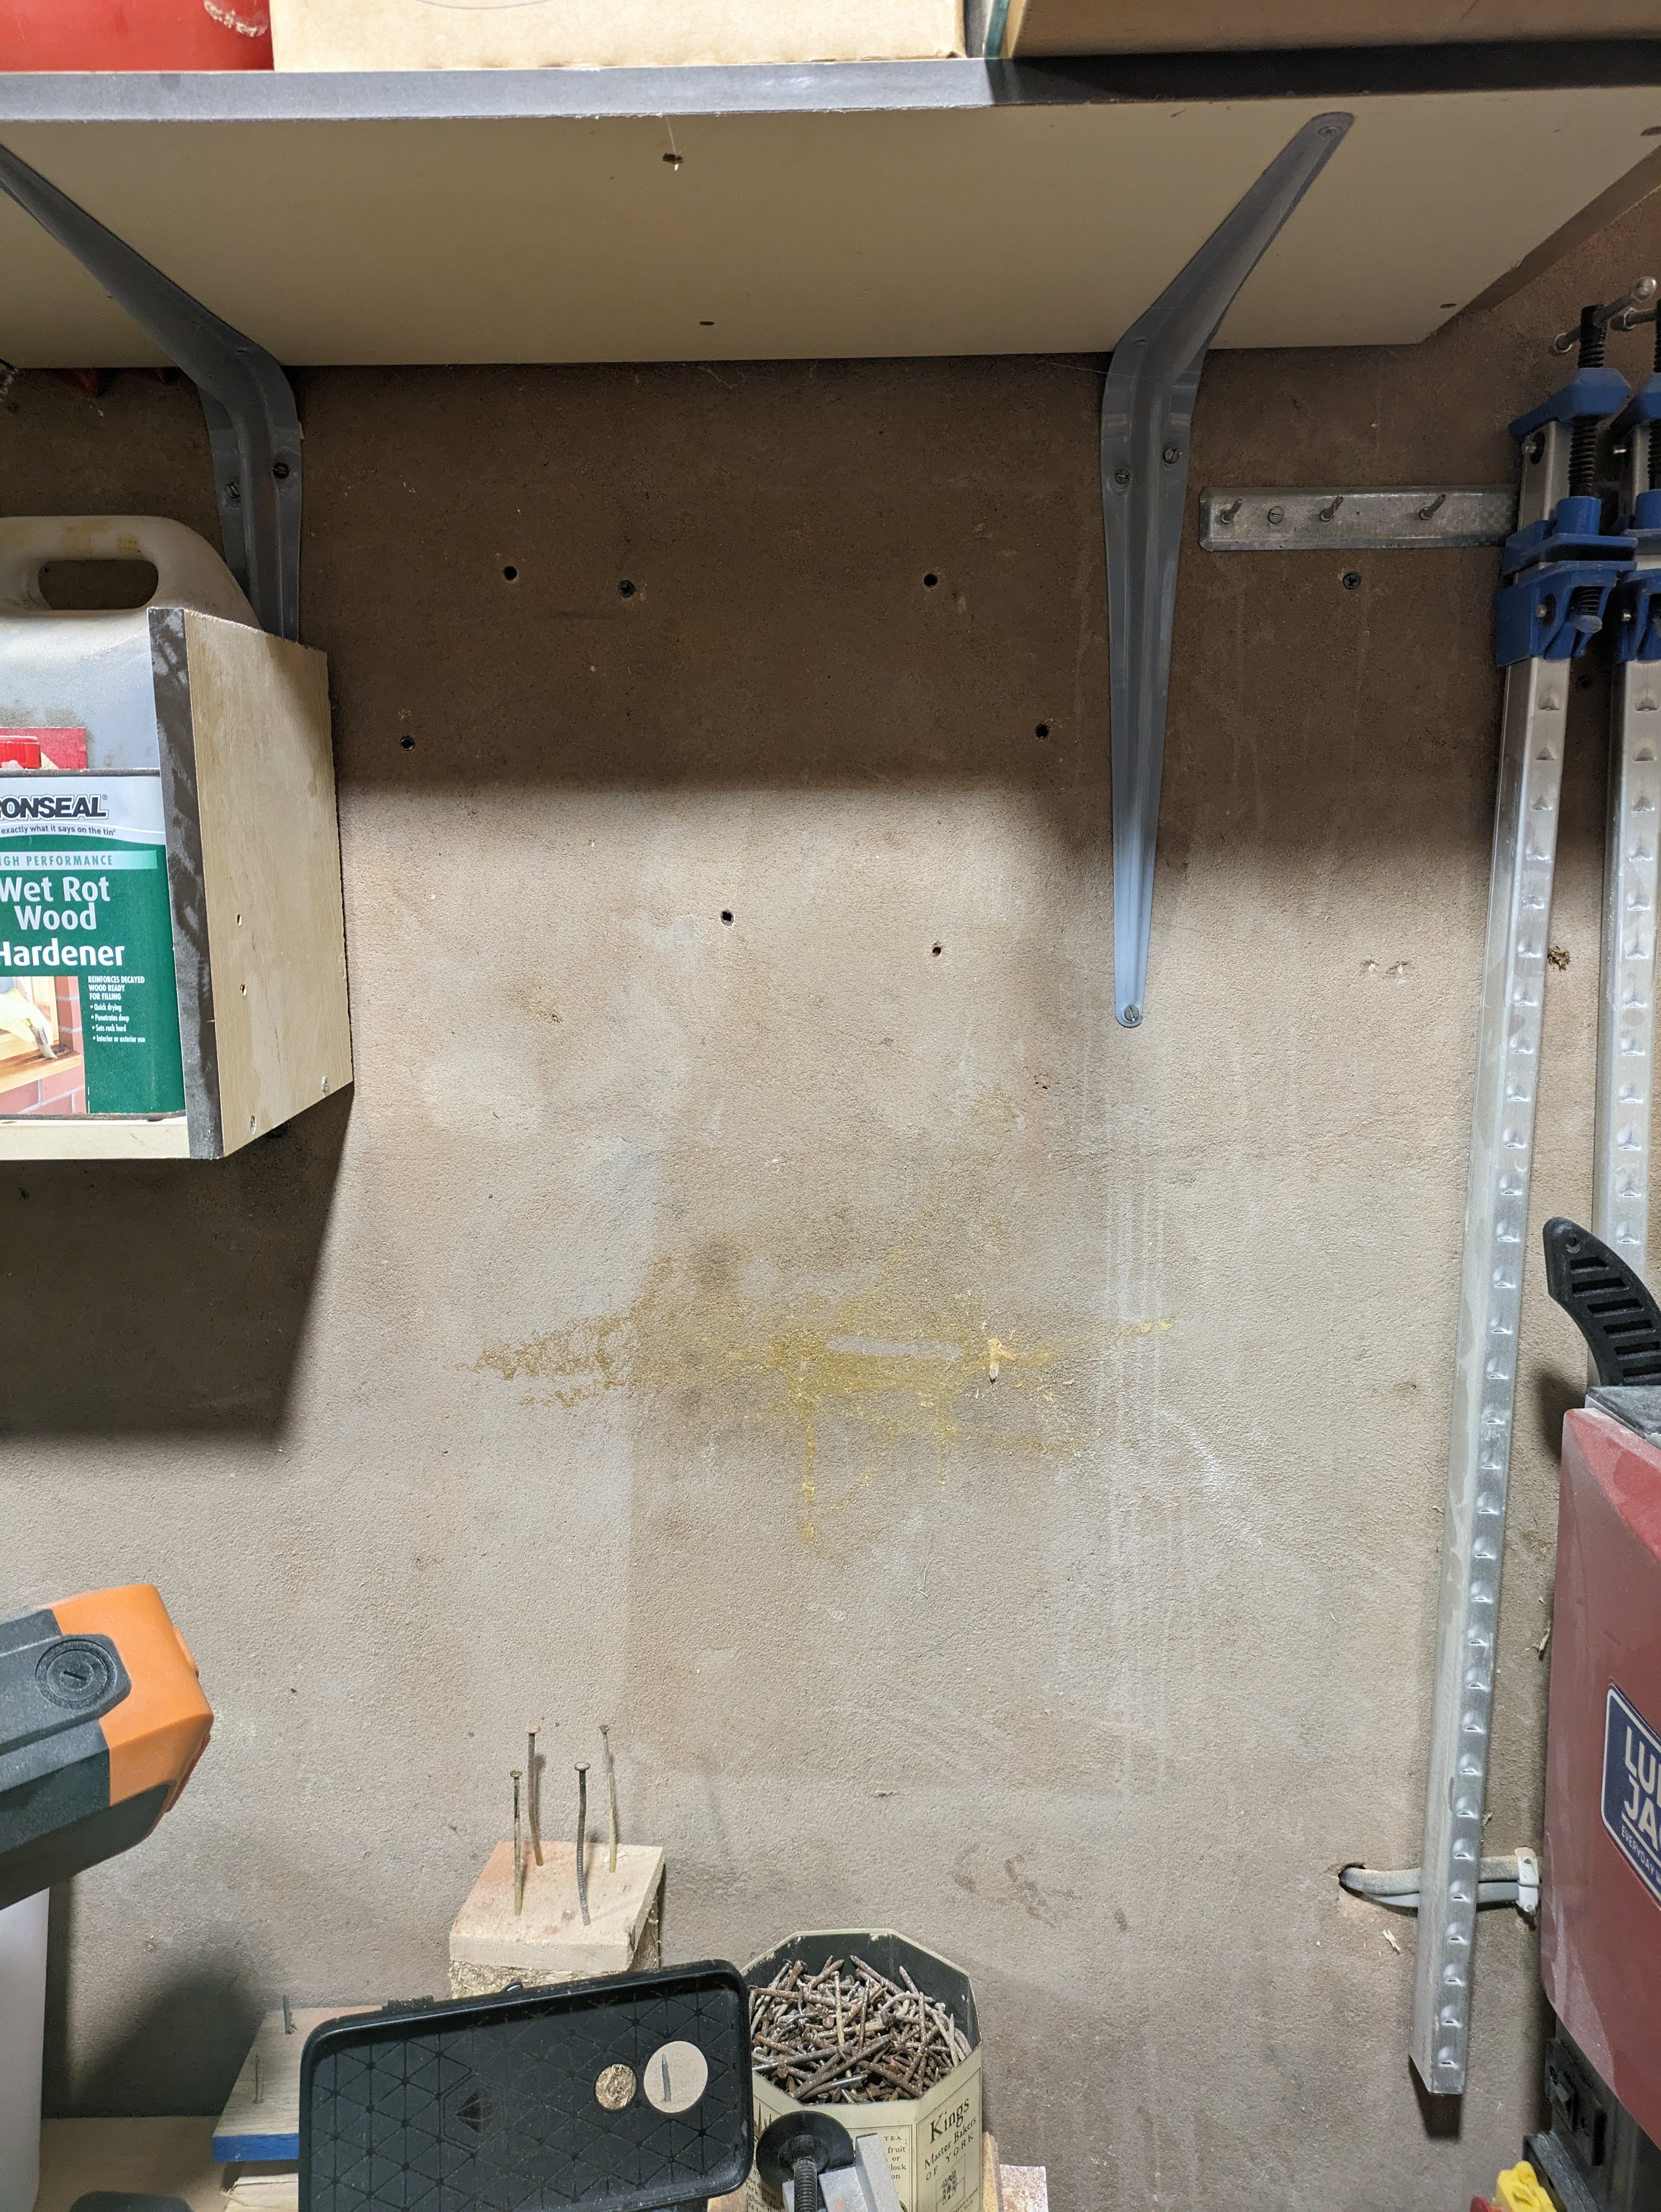
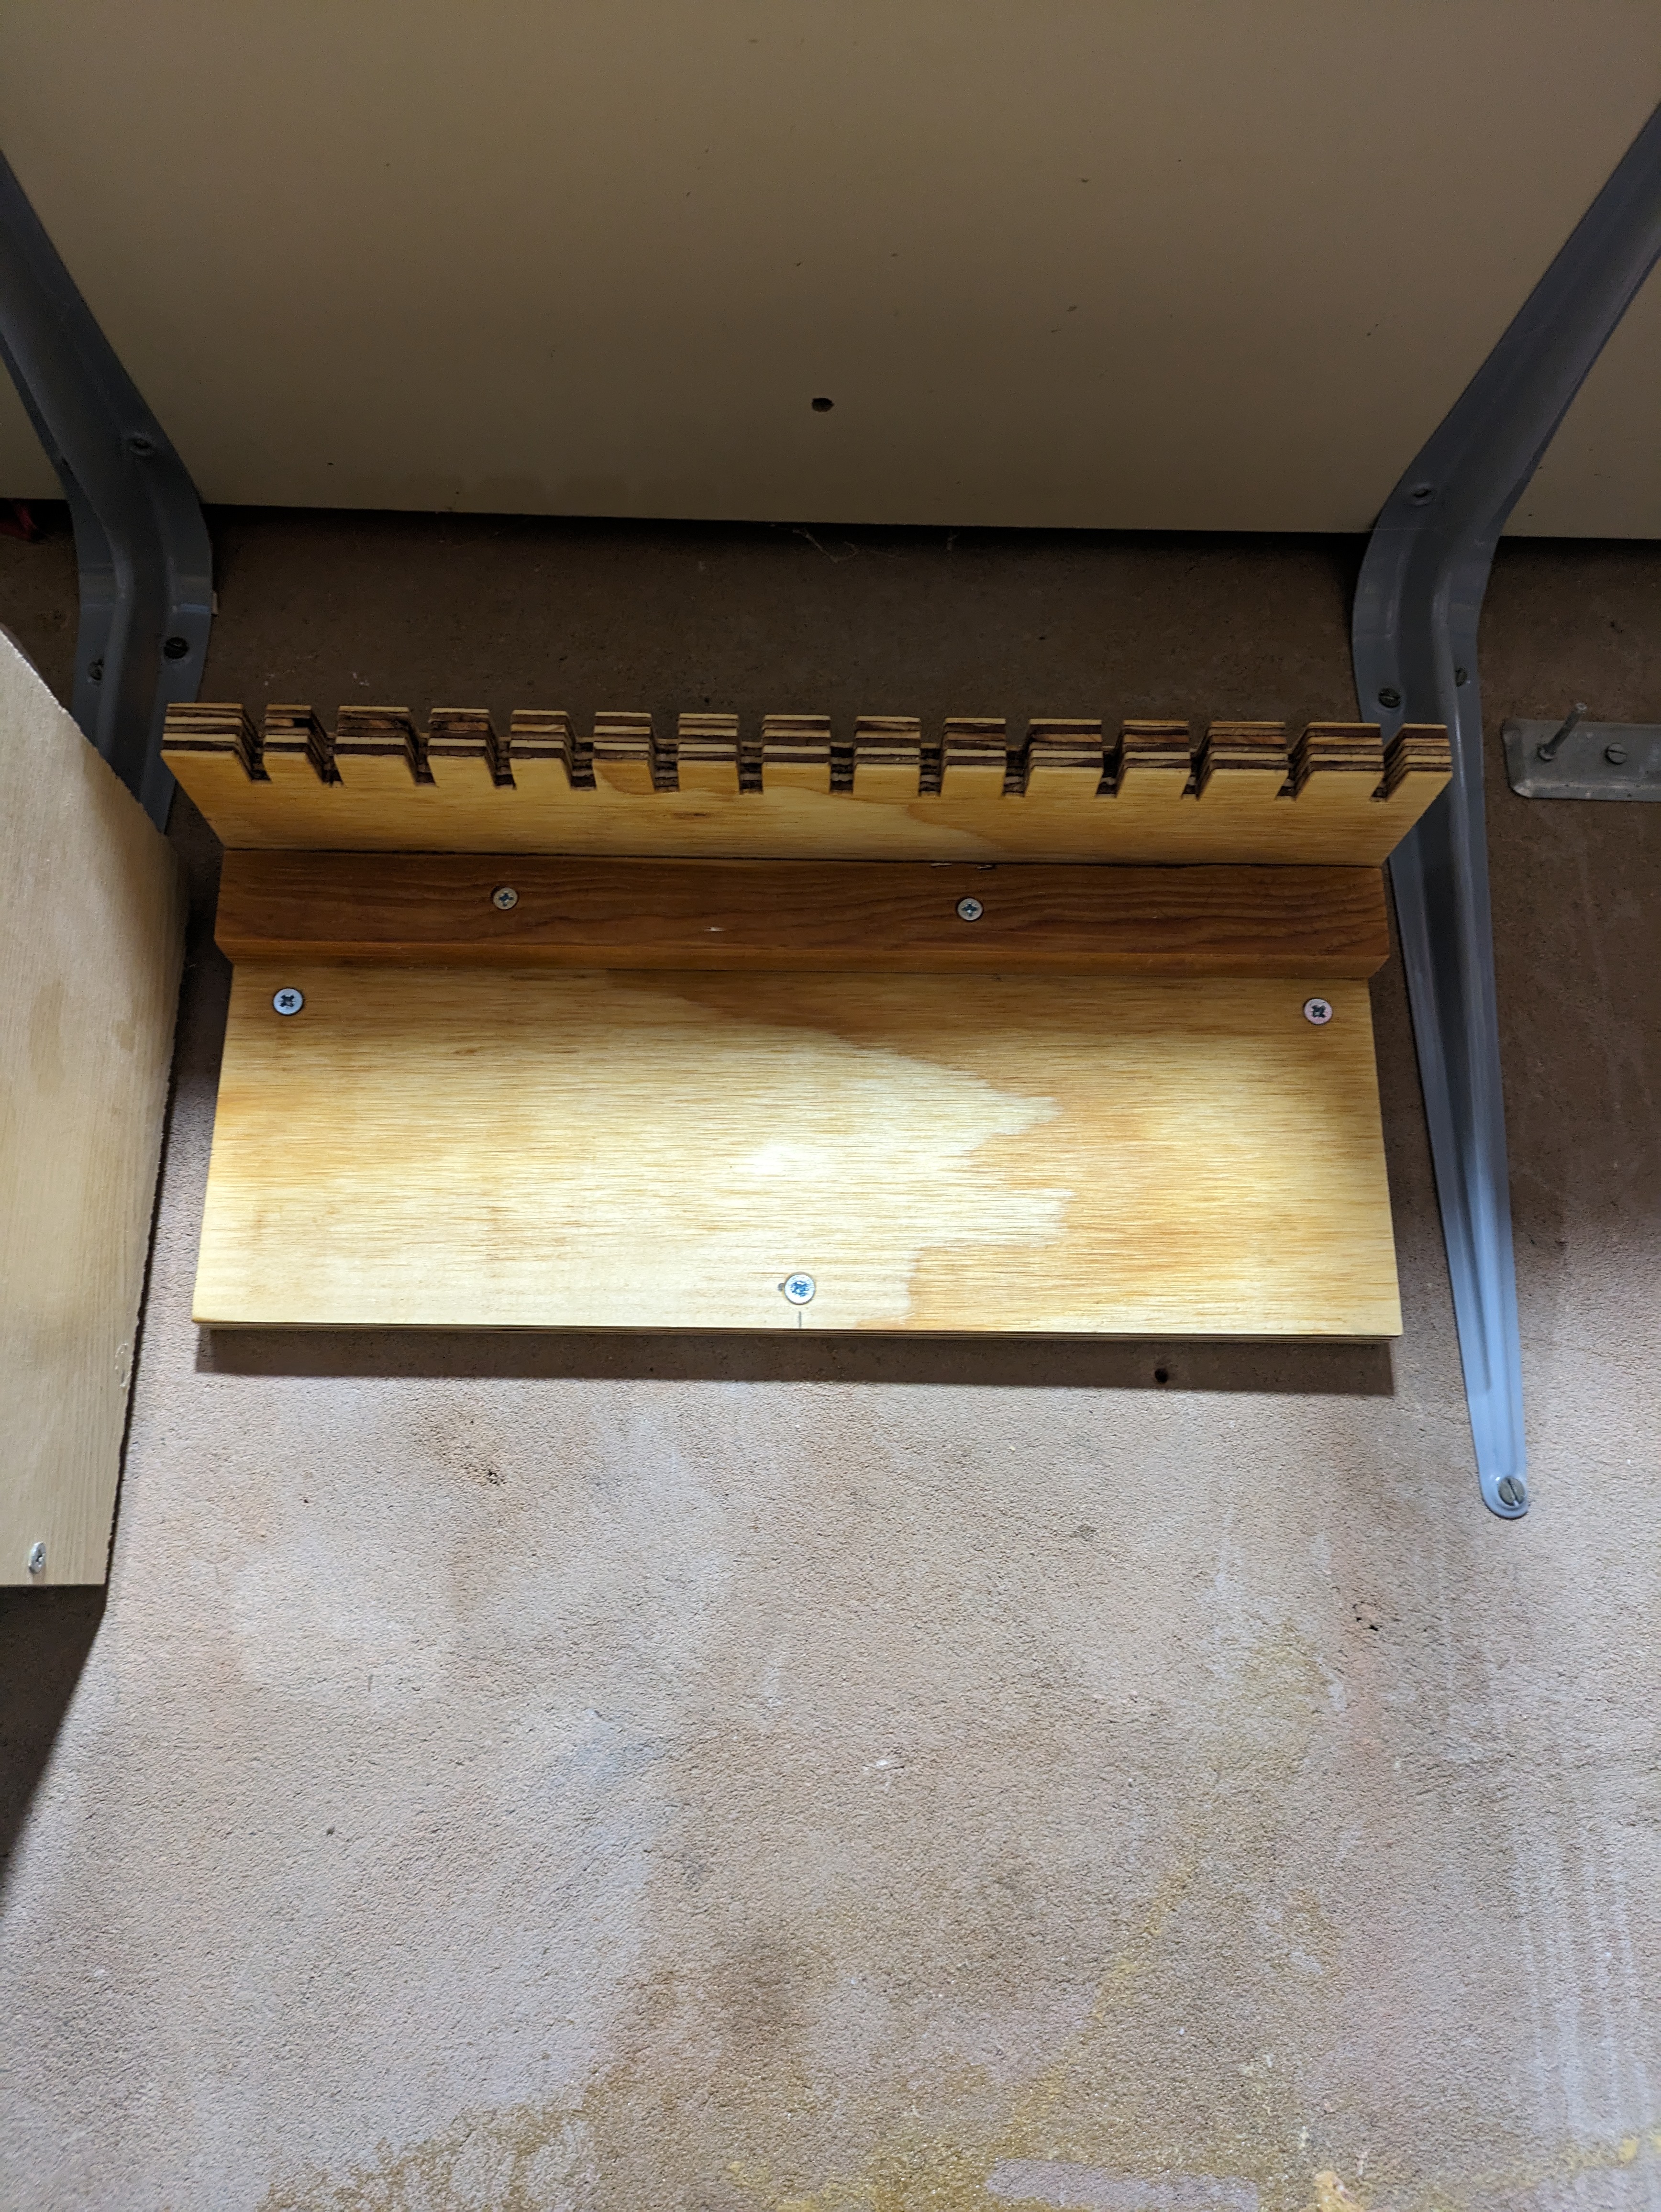

Next was to make some storage for the bigger clamps. Previously they had been precariously dangling off an old coat hook. In a similar way to the other rack, I cut some slots in the ply, added a backing piece and a drop of linseed oil then attached it to the wall. Simples. Nothing fancy but it works
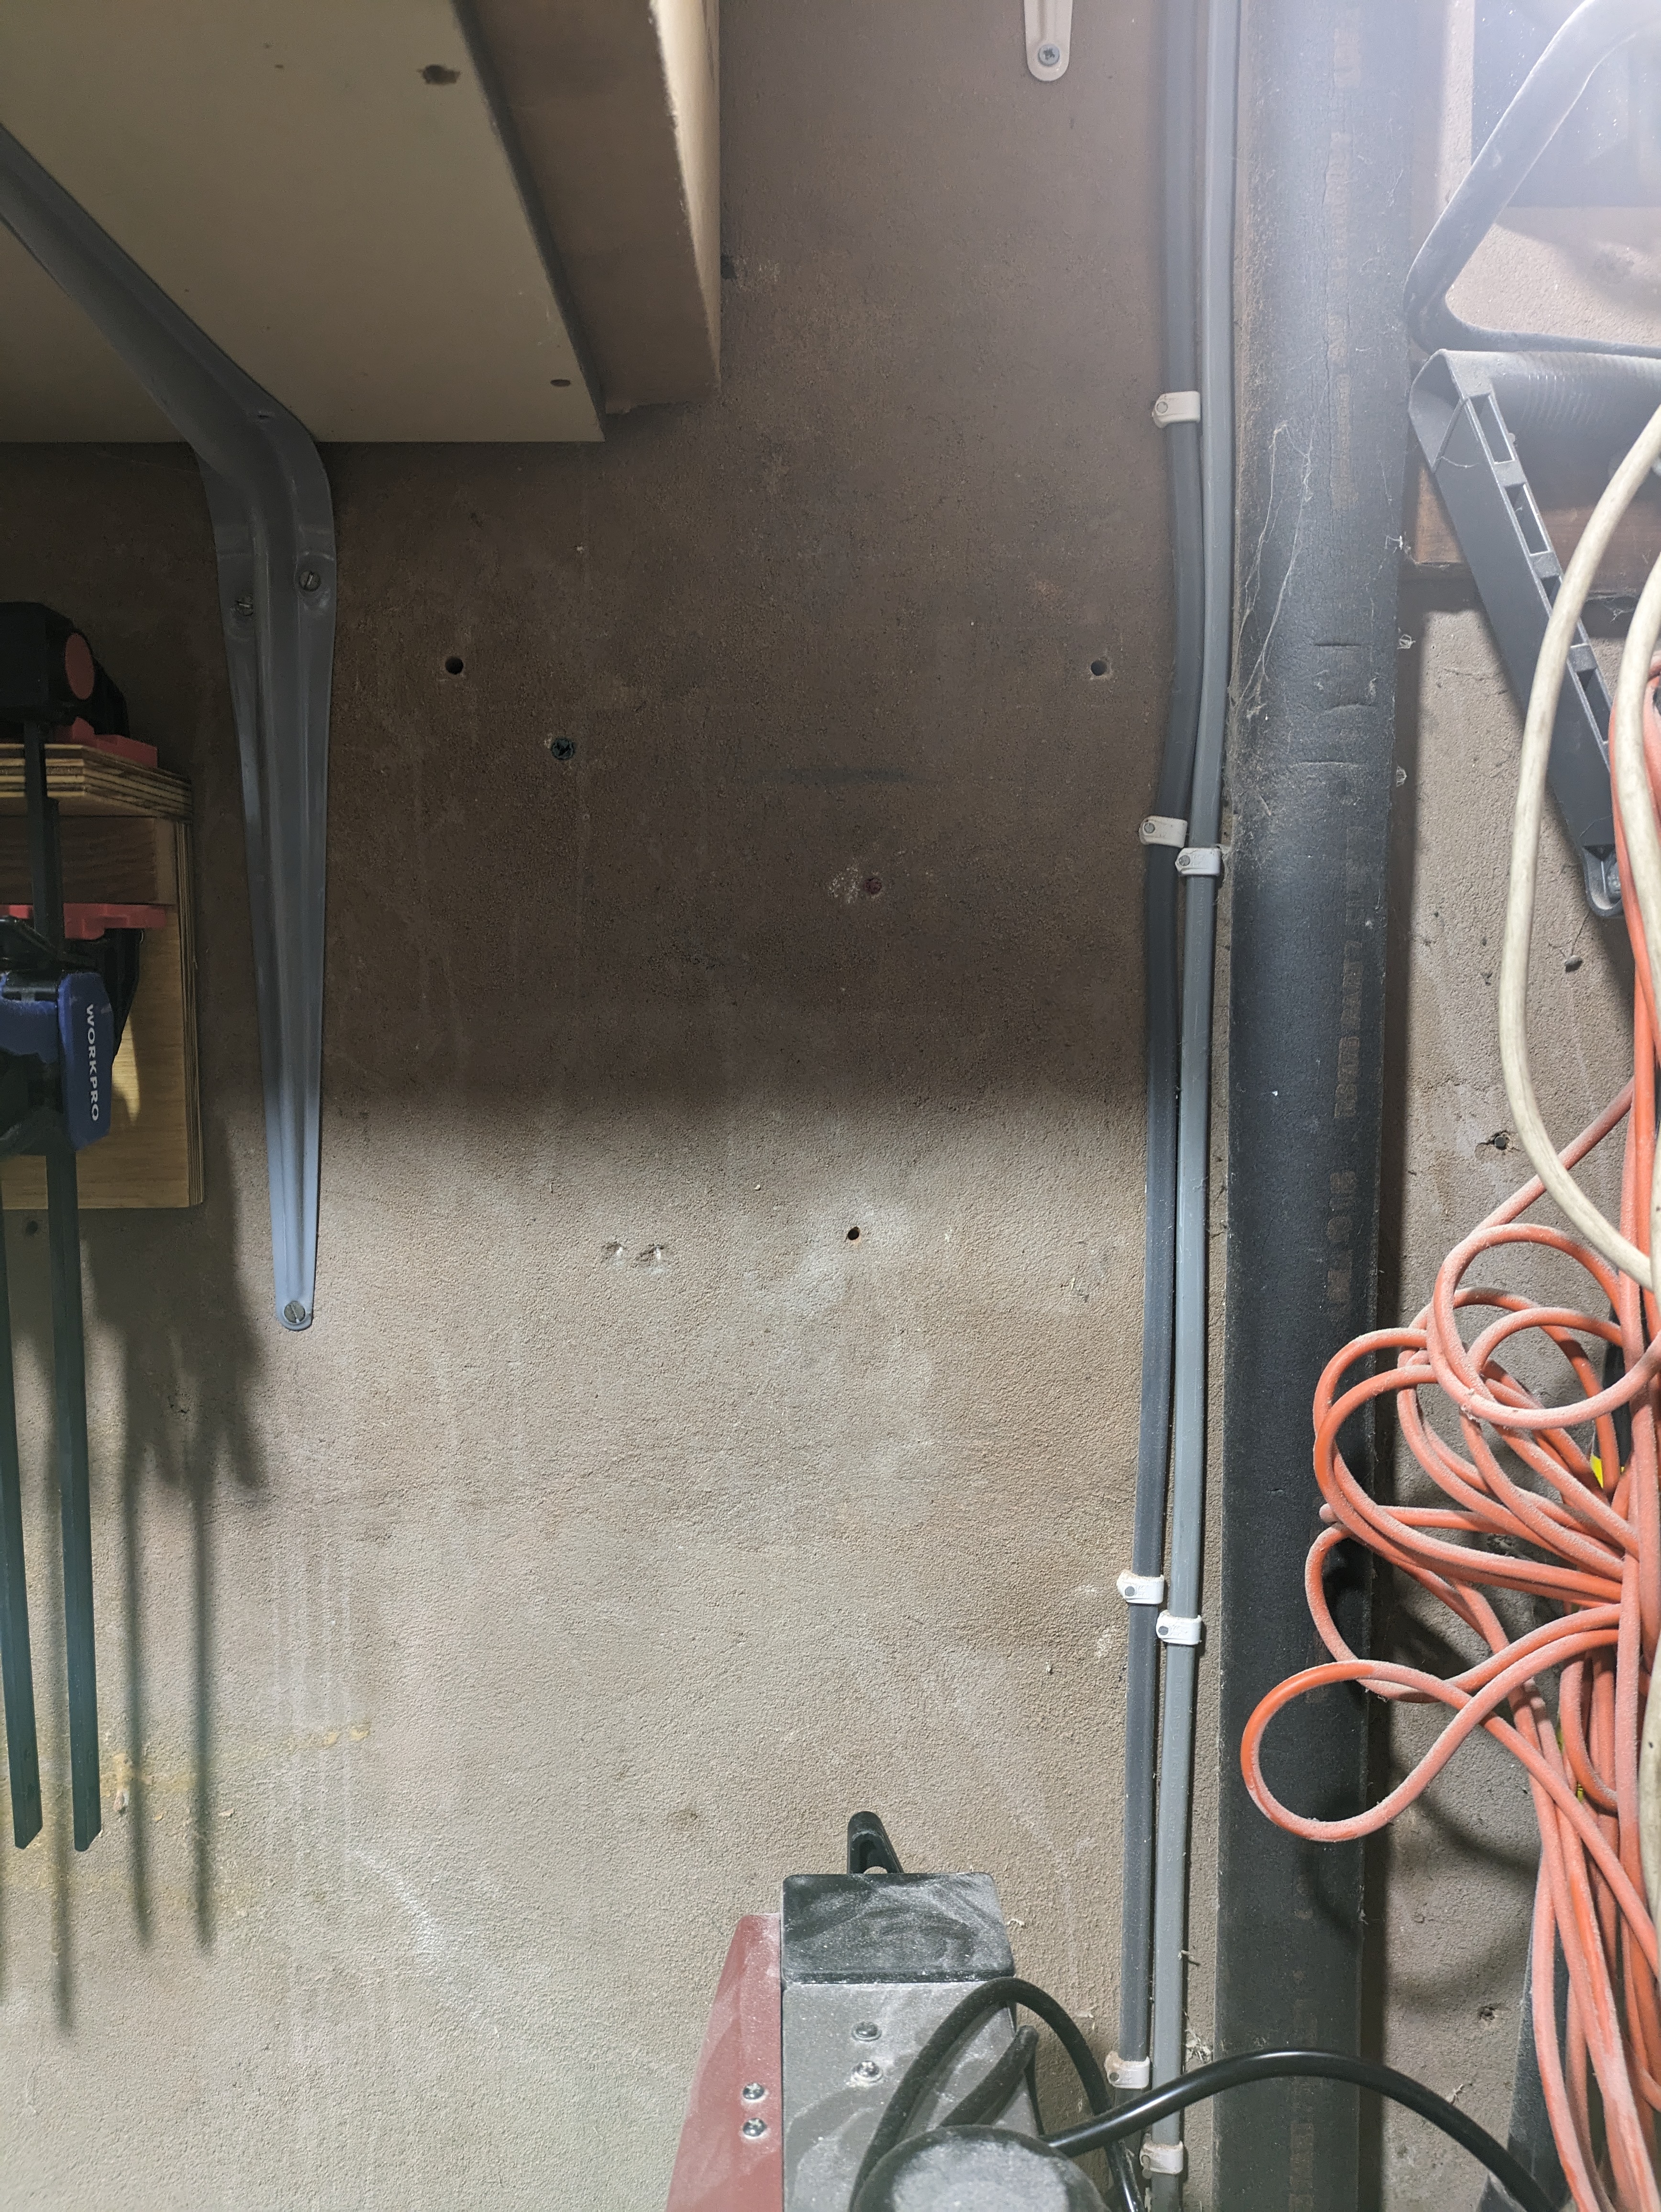
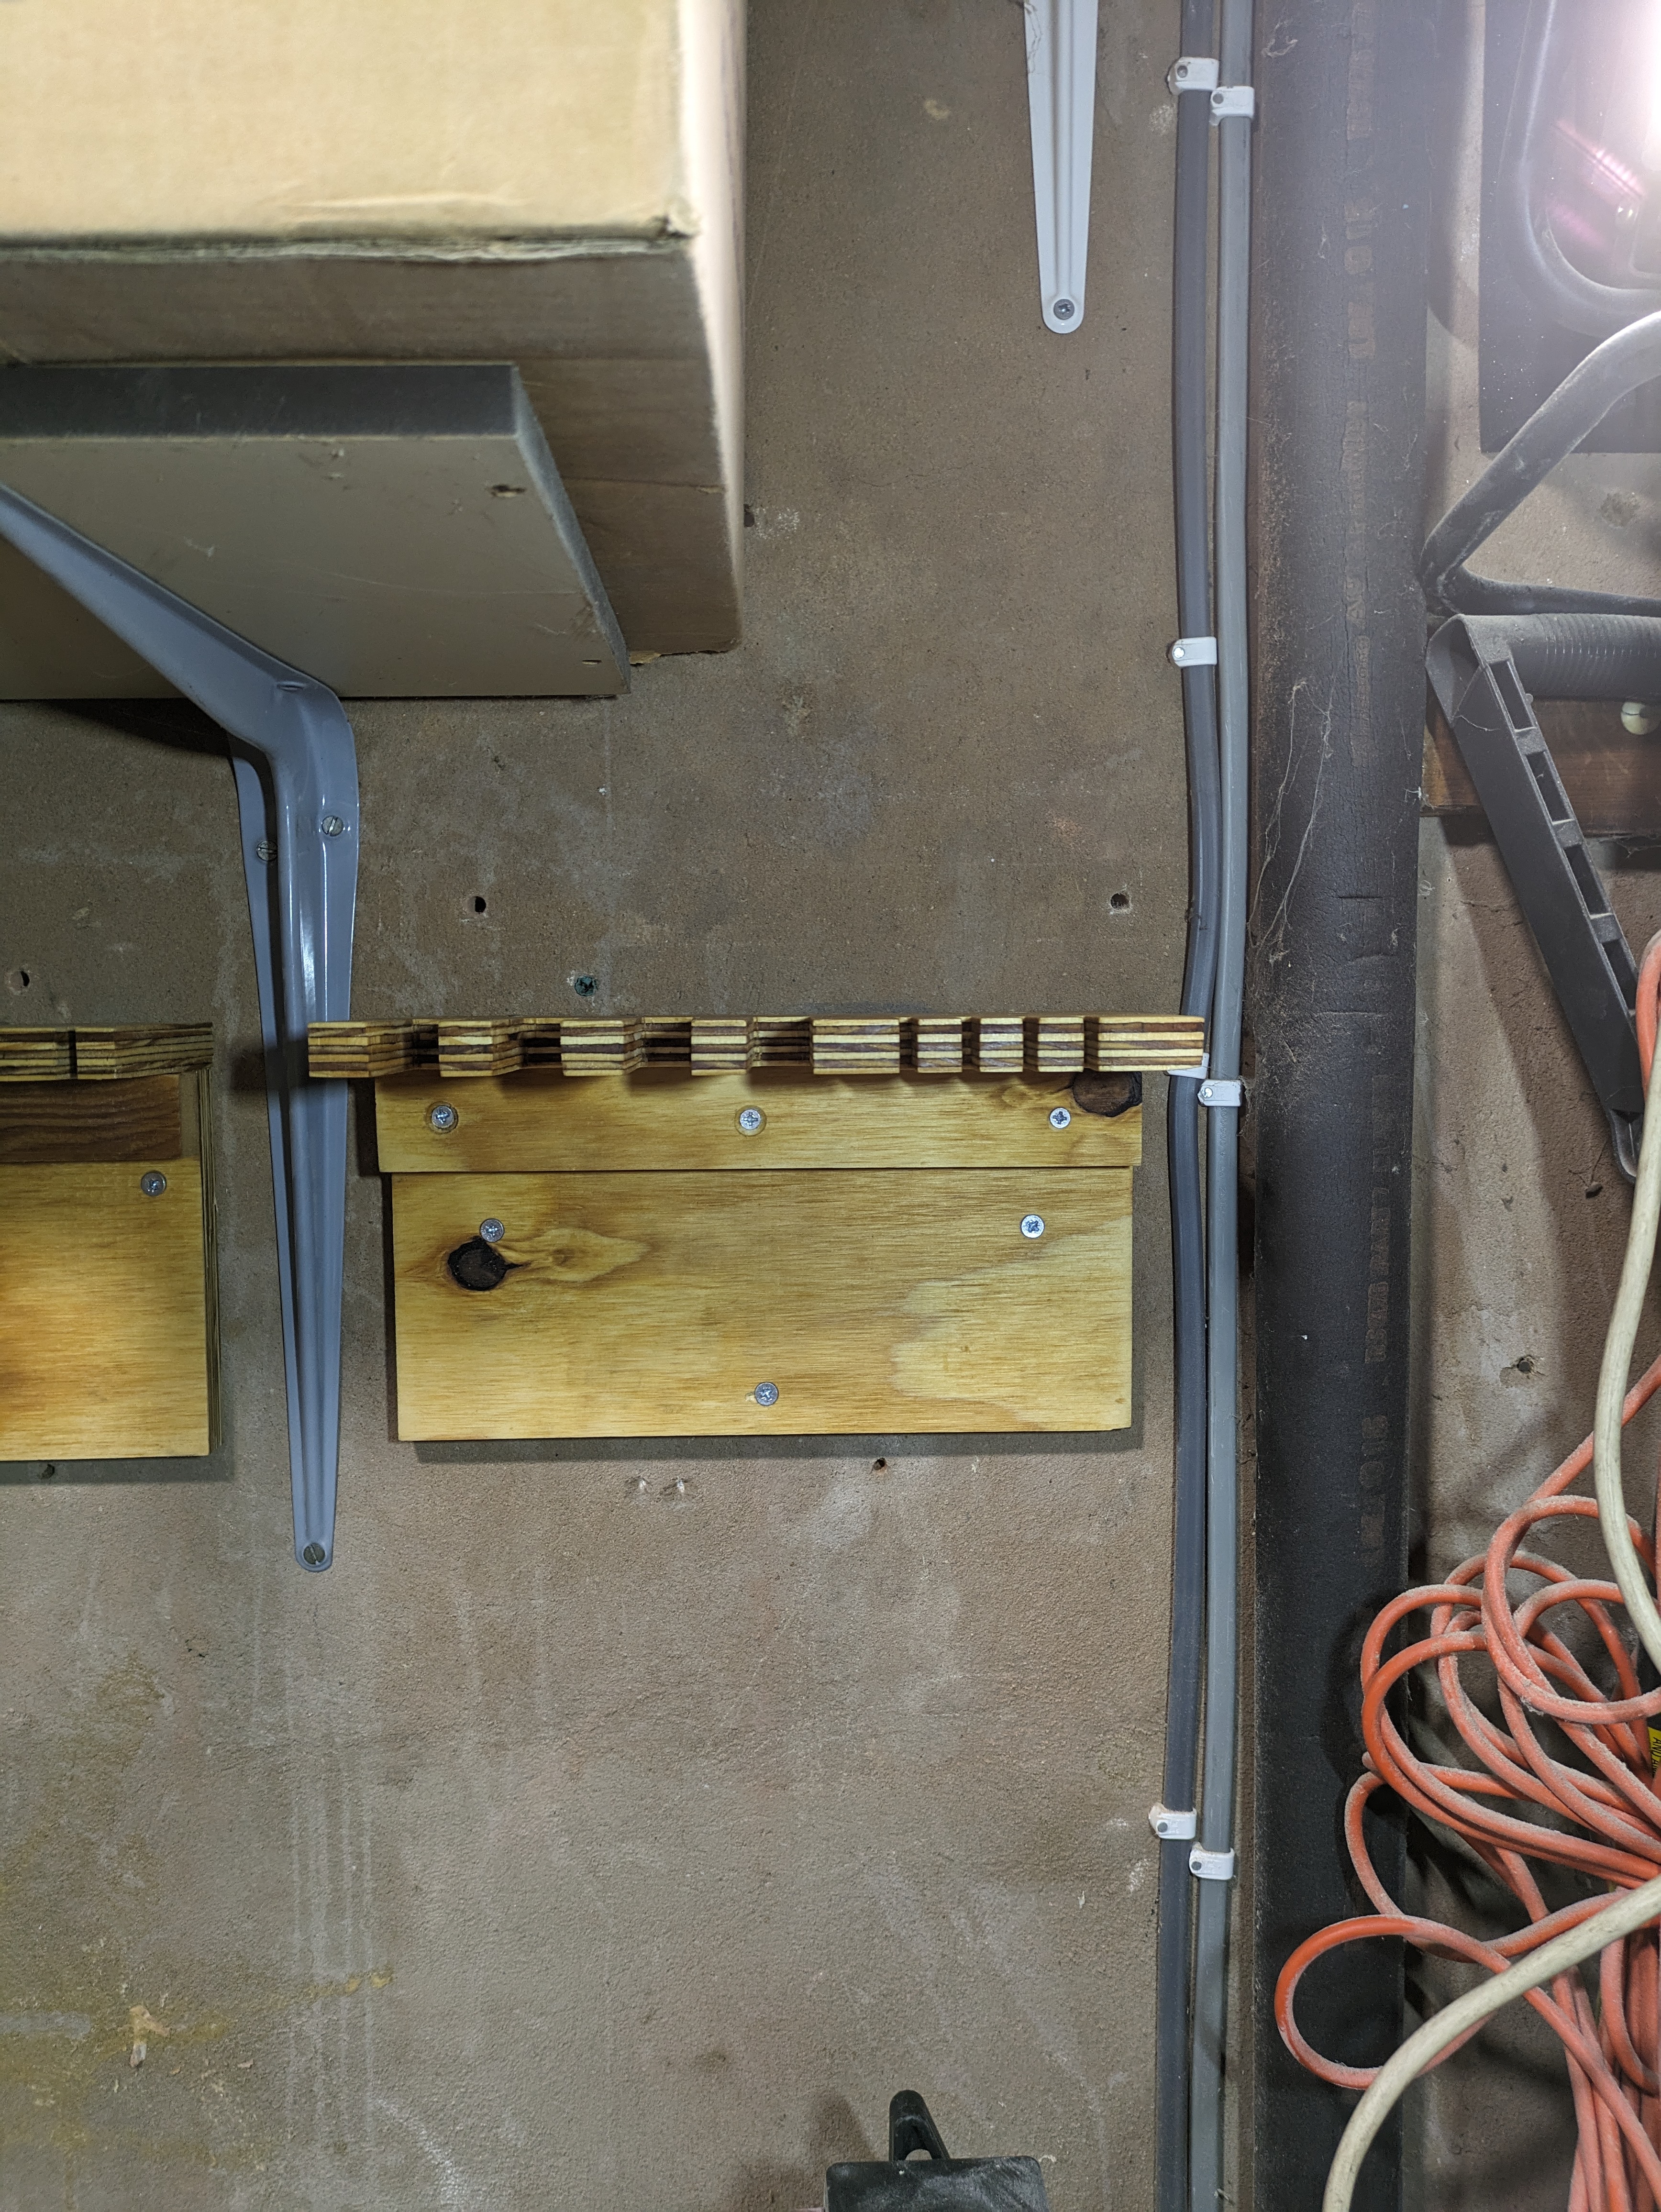

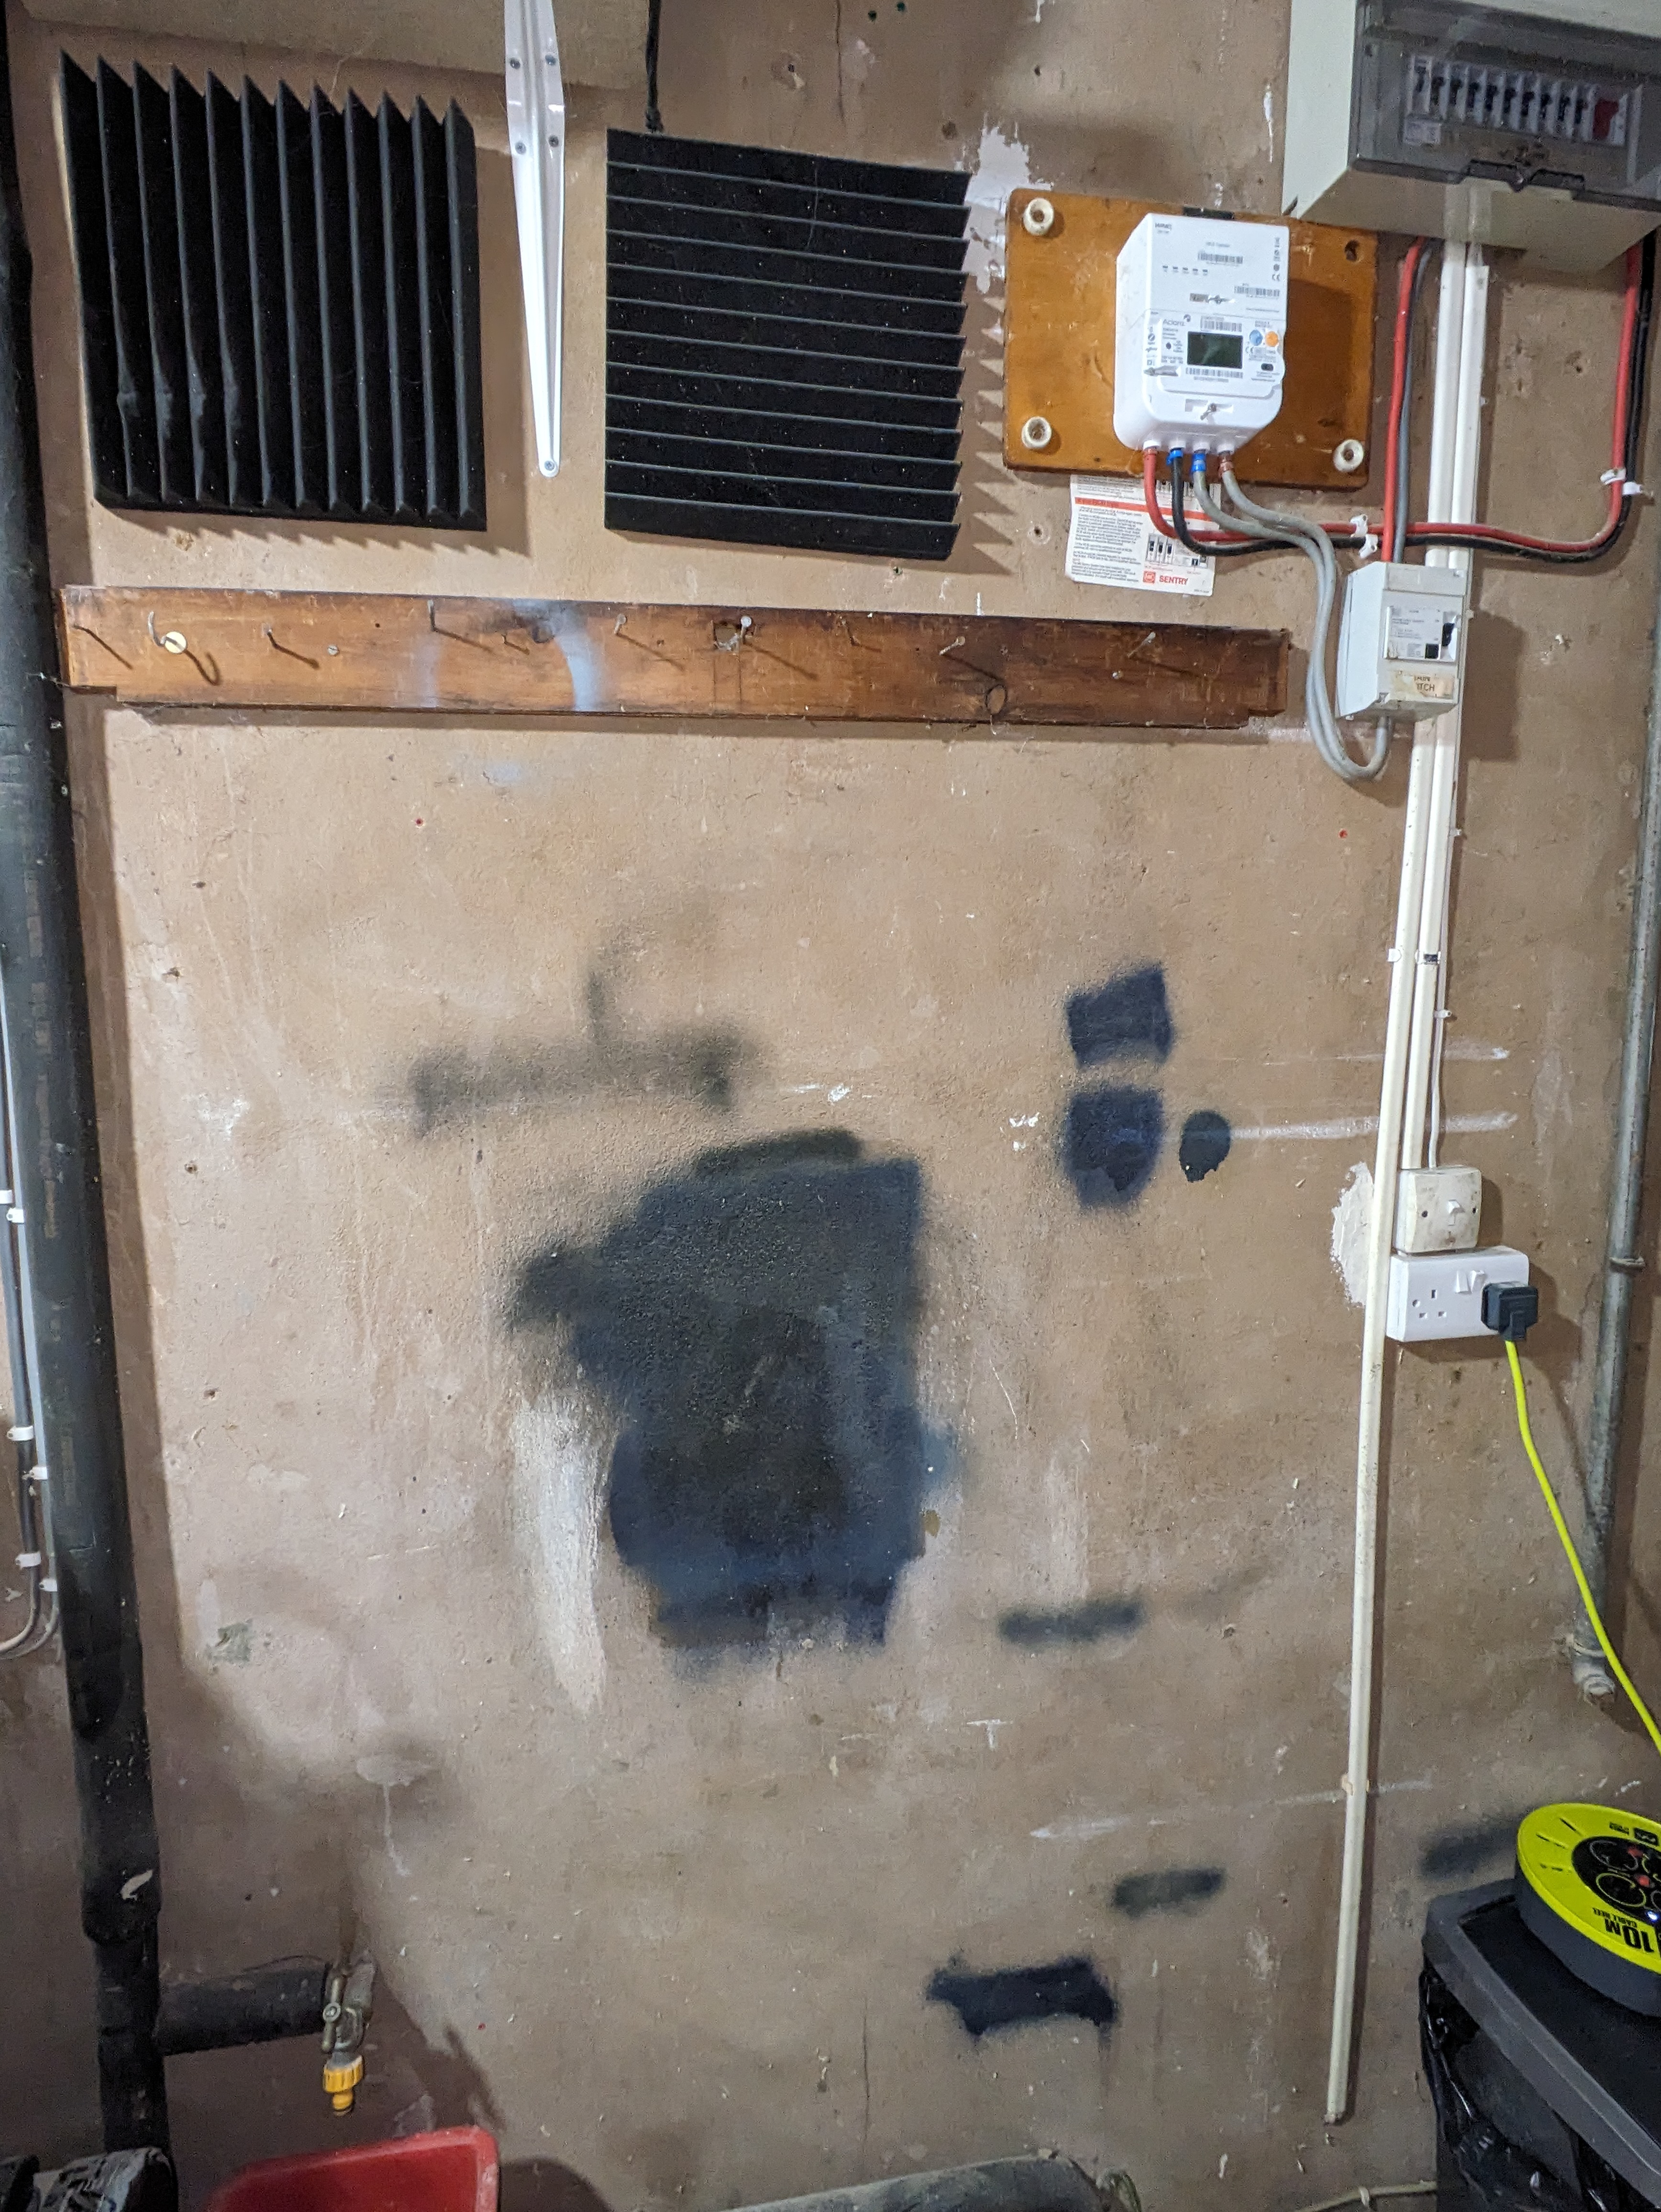
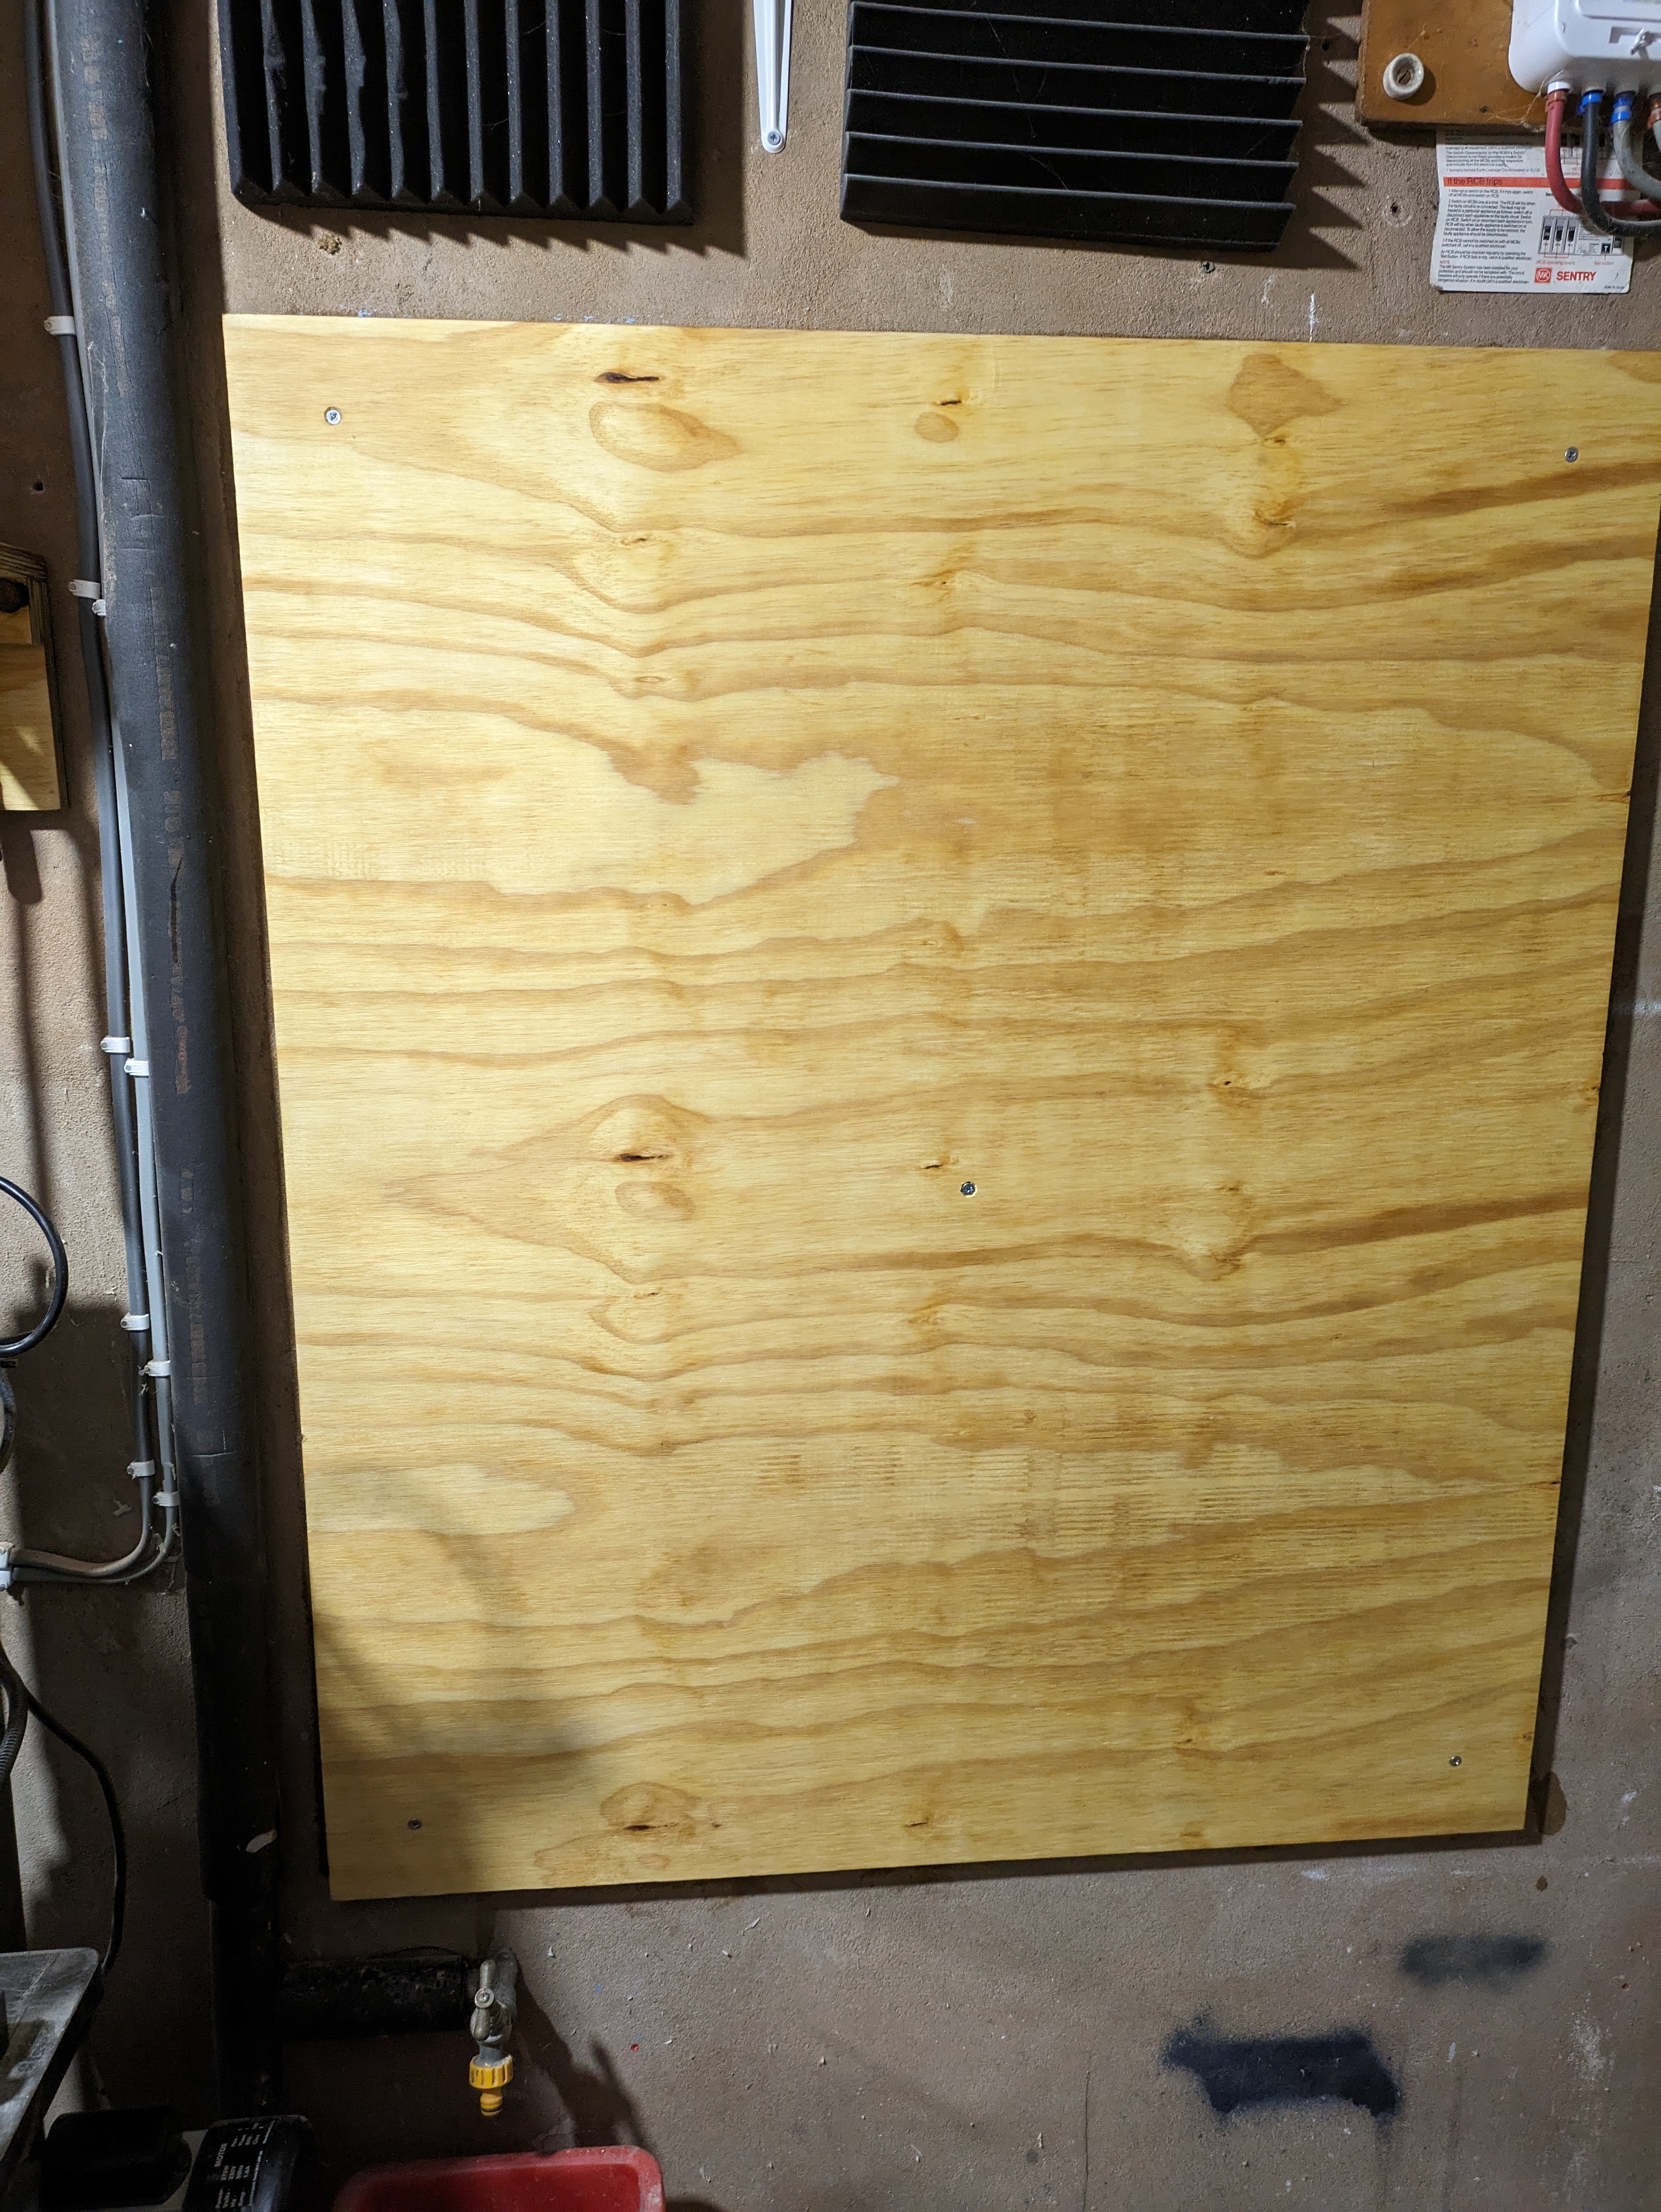
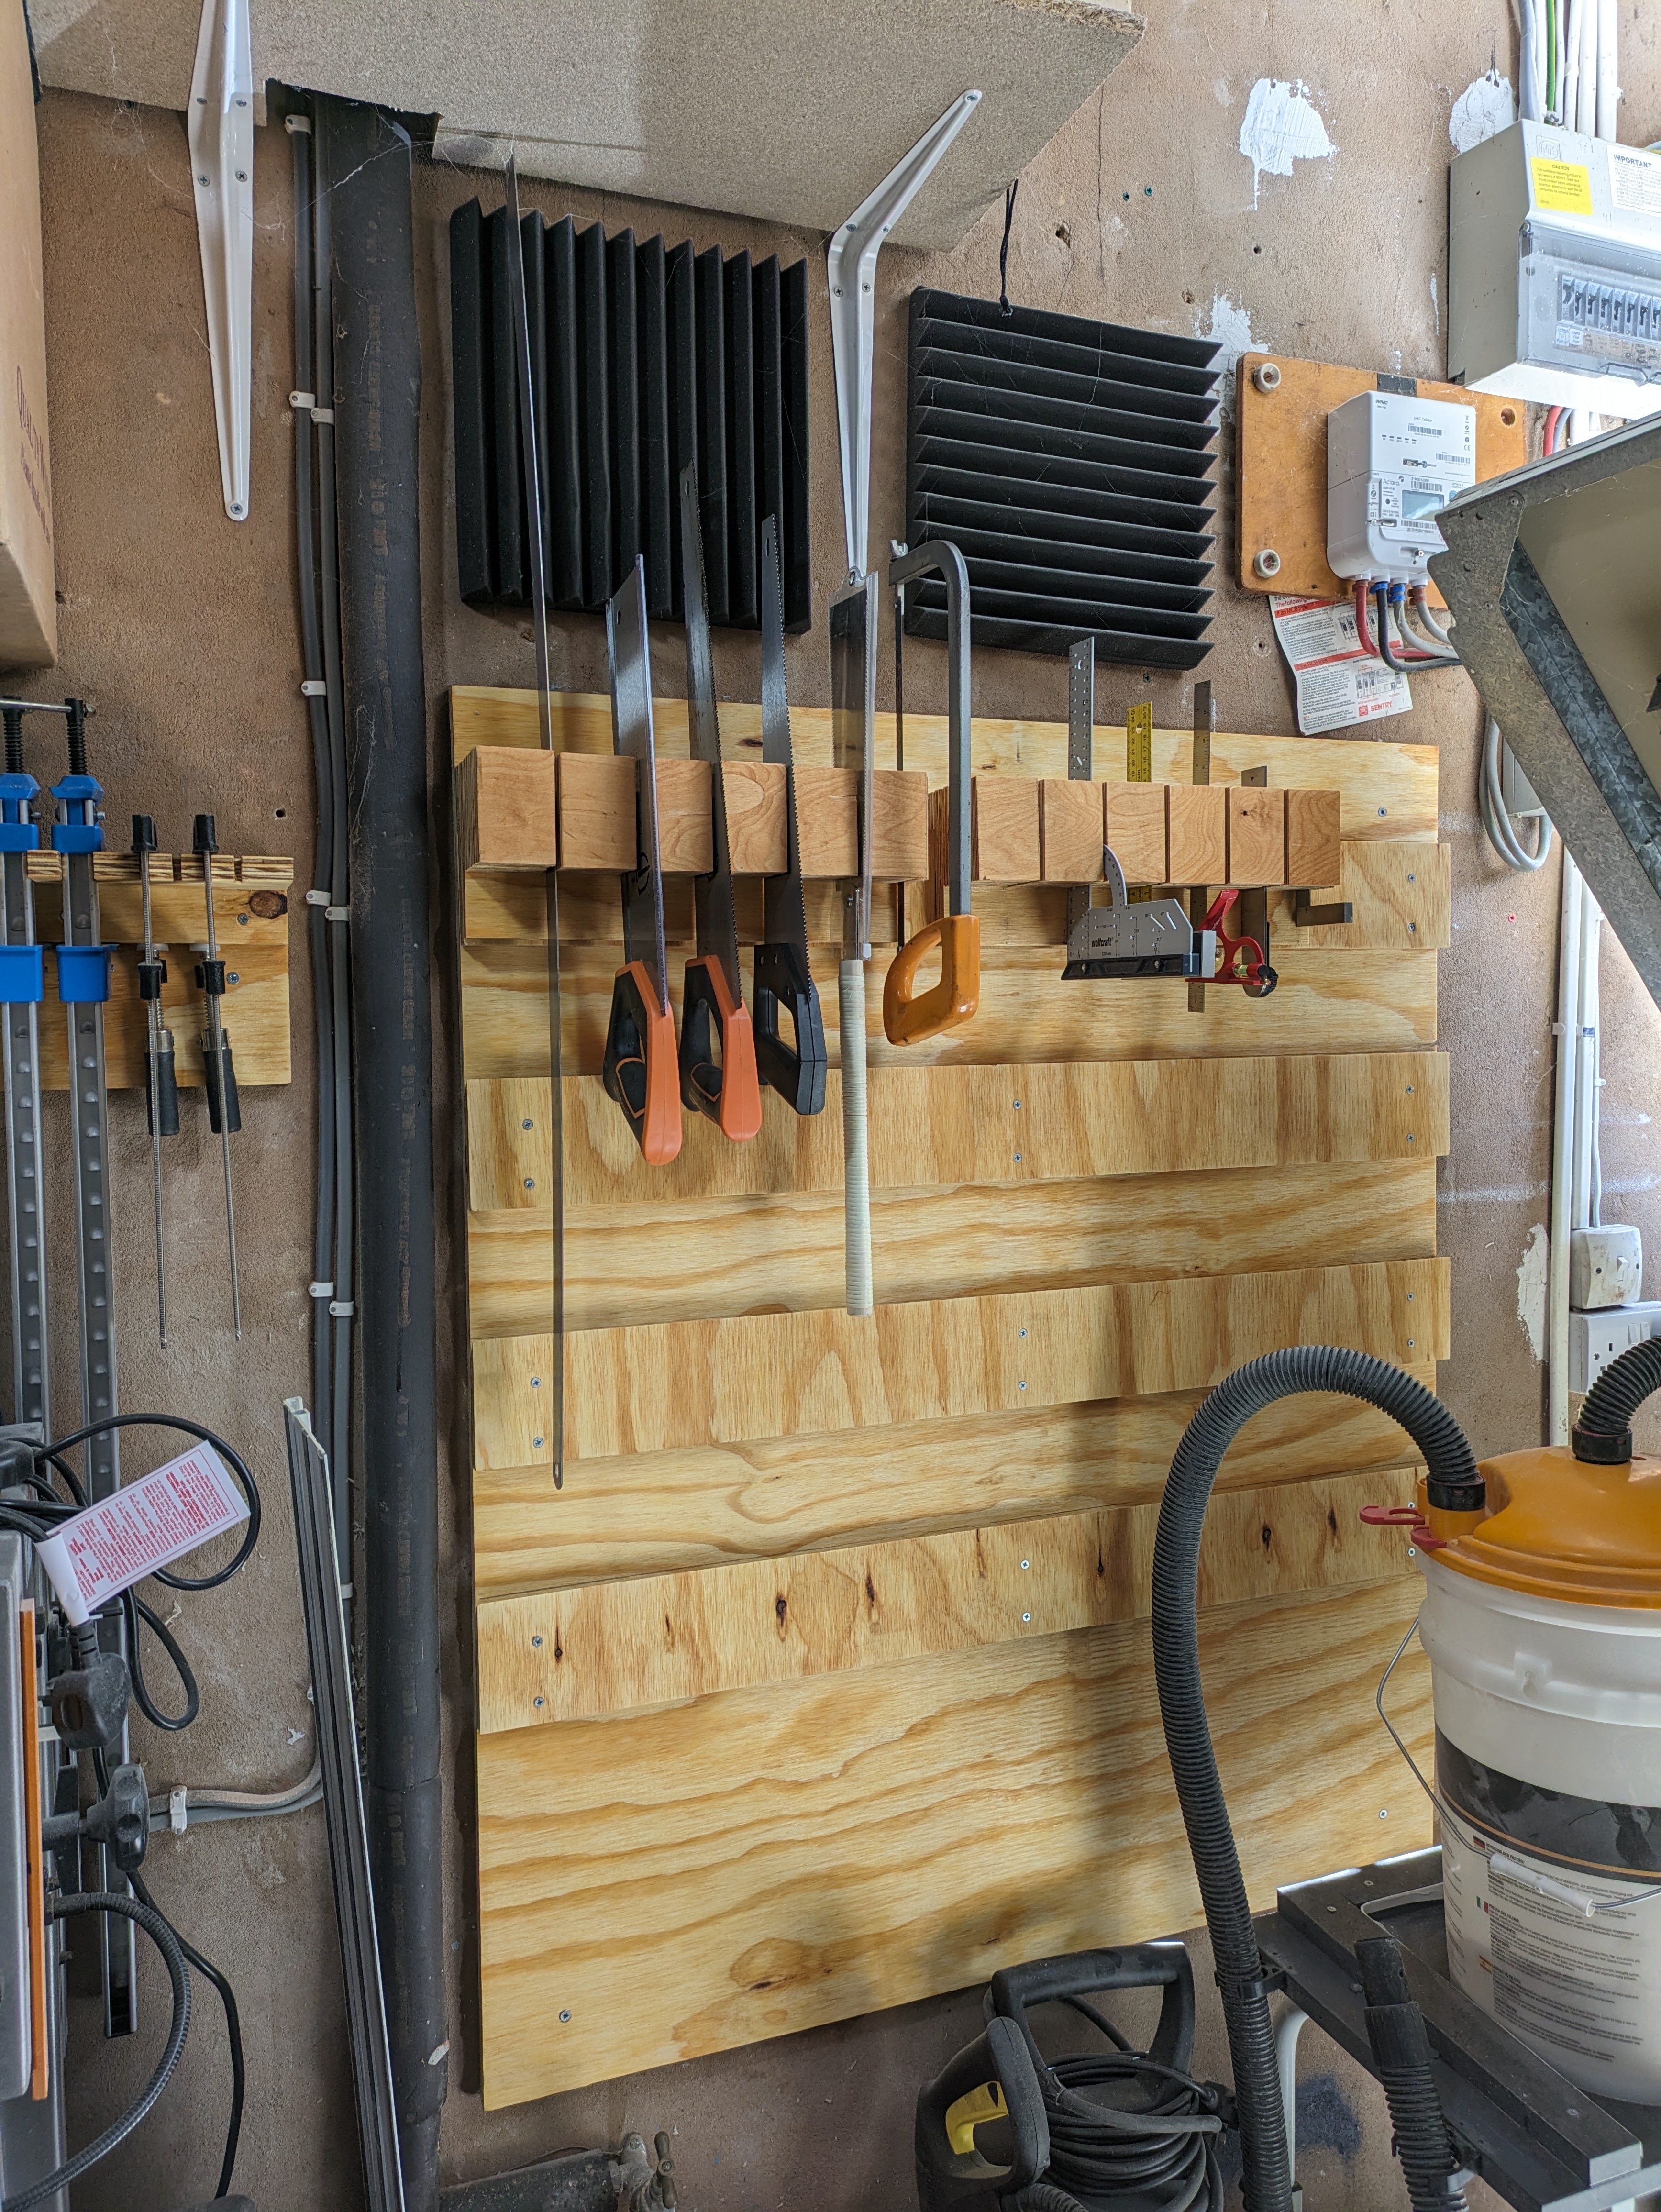
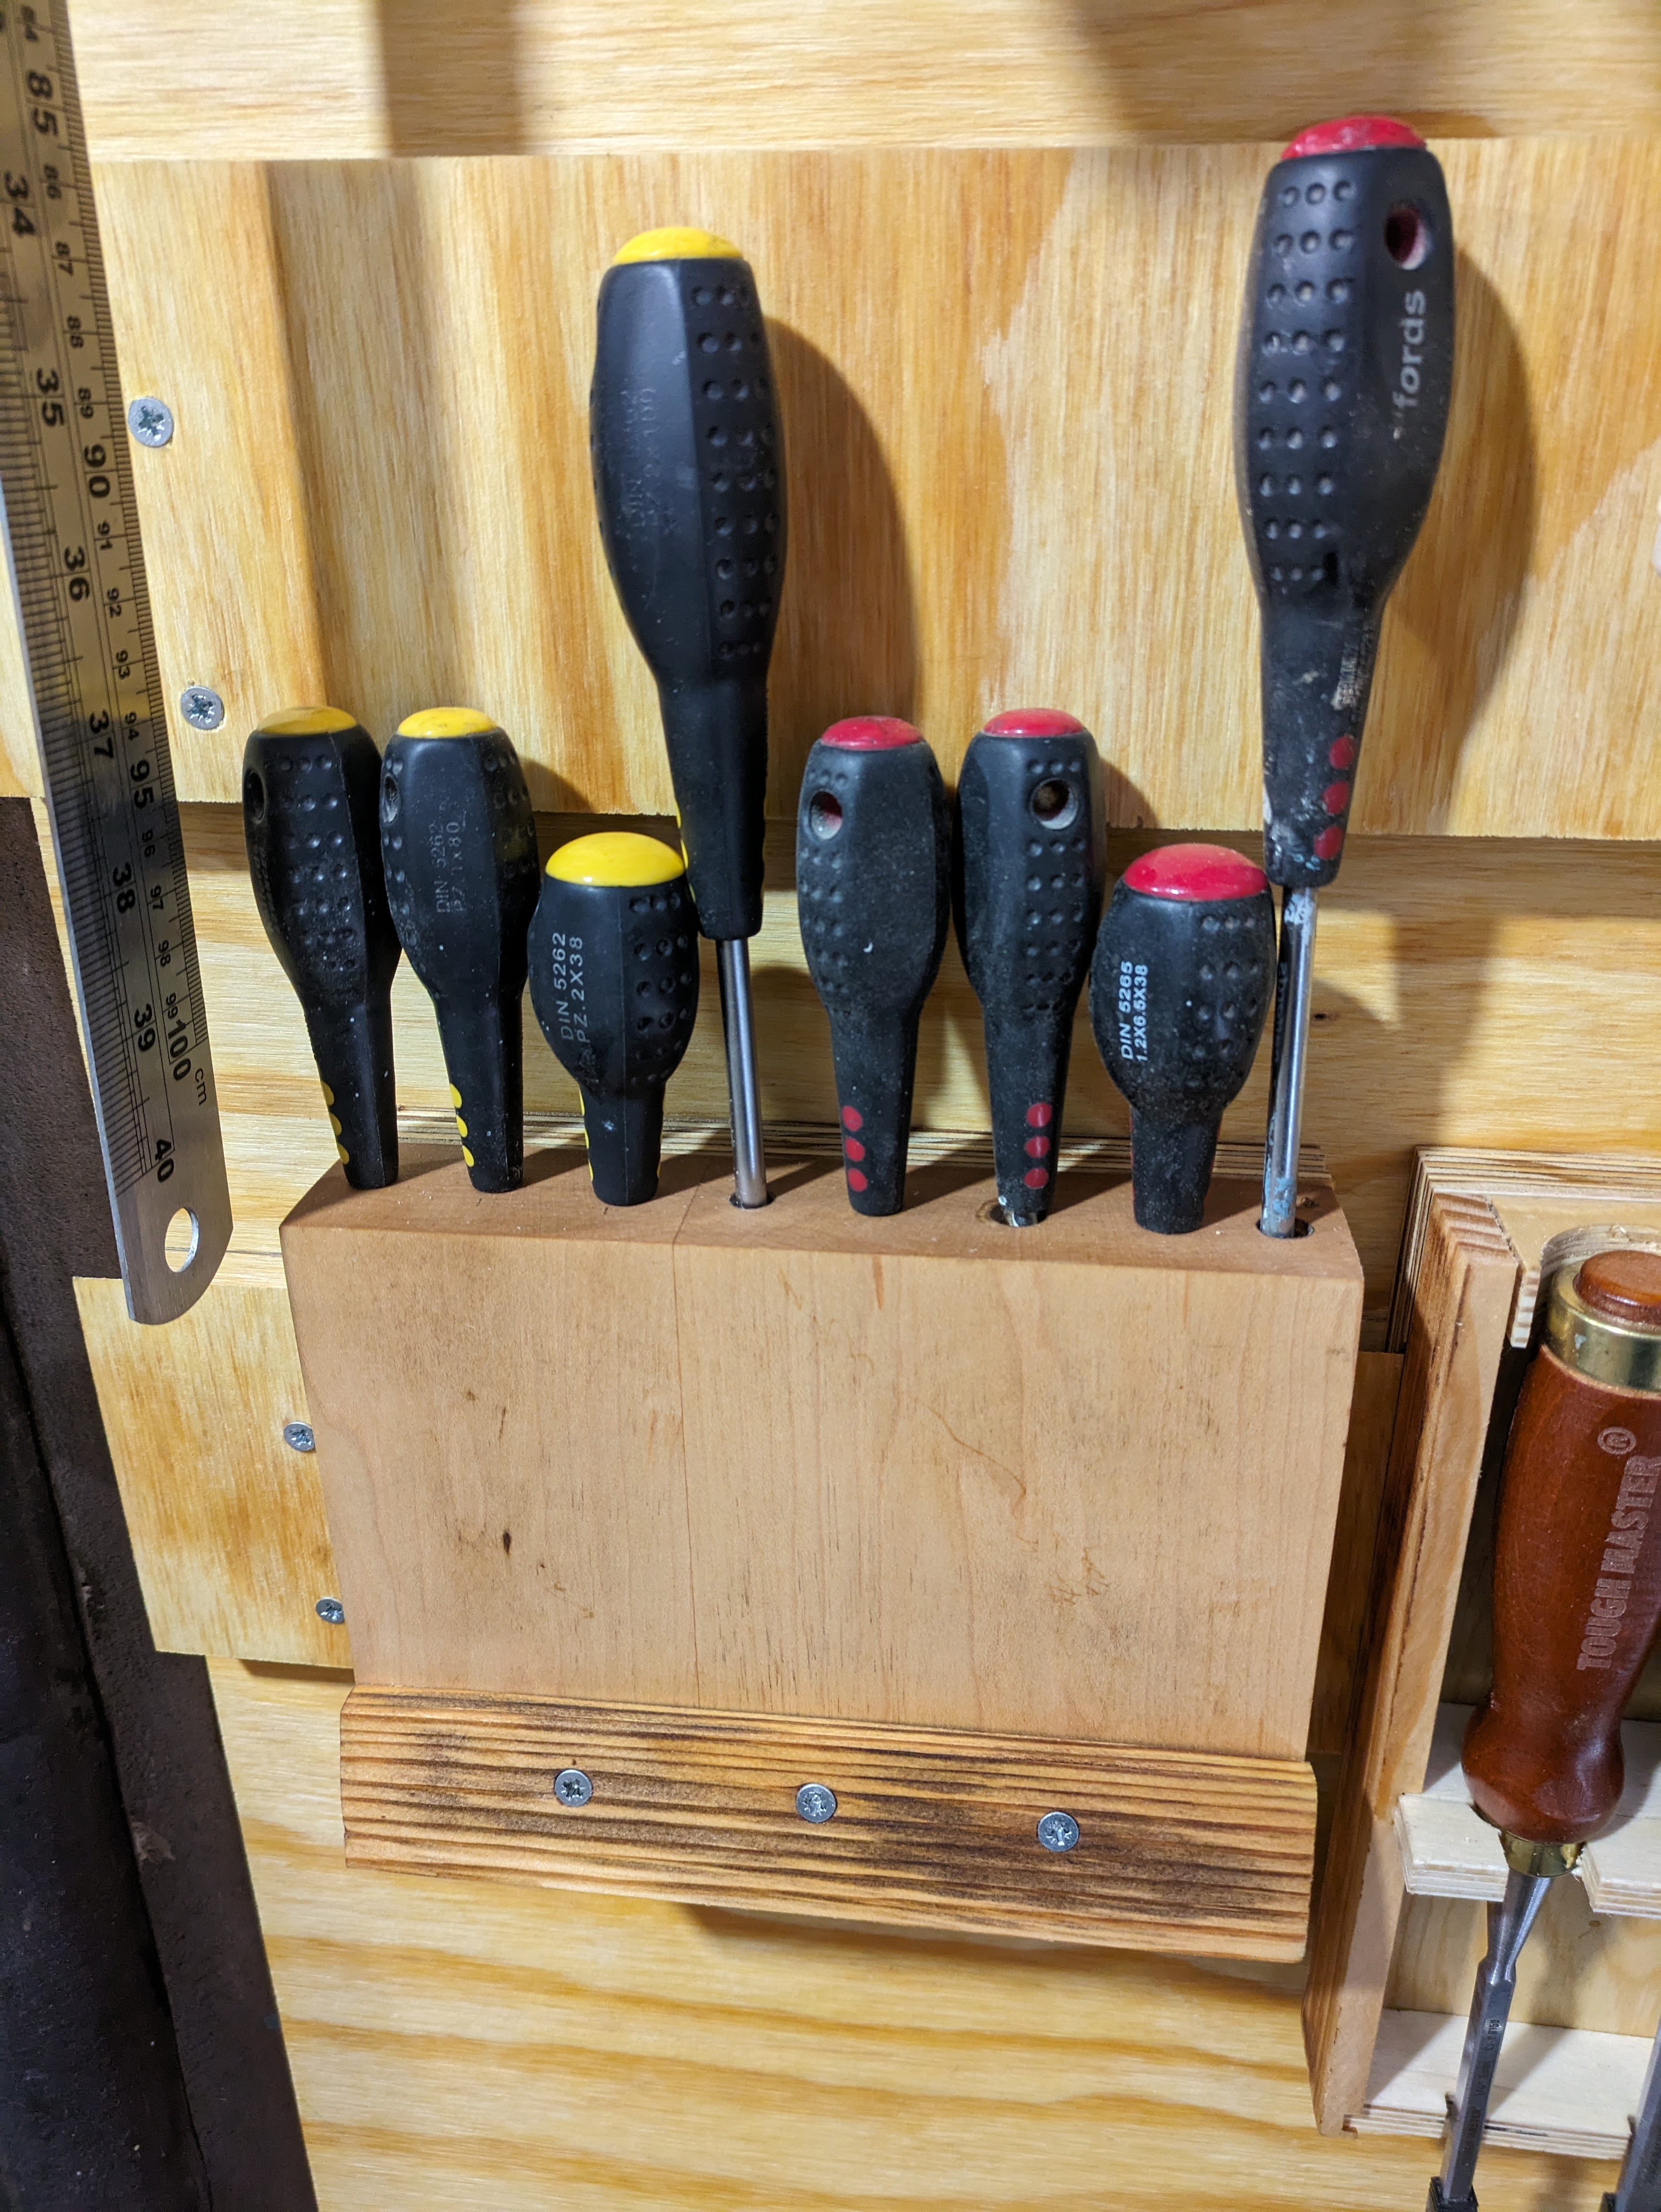
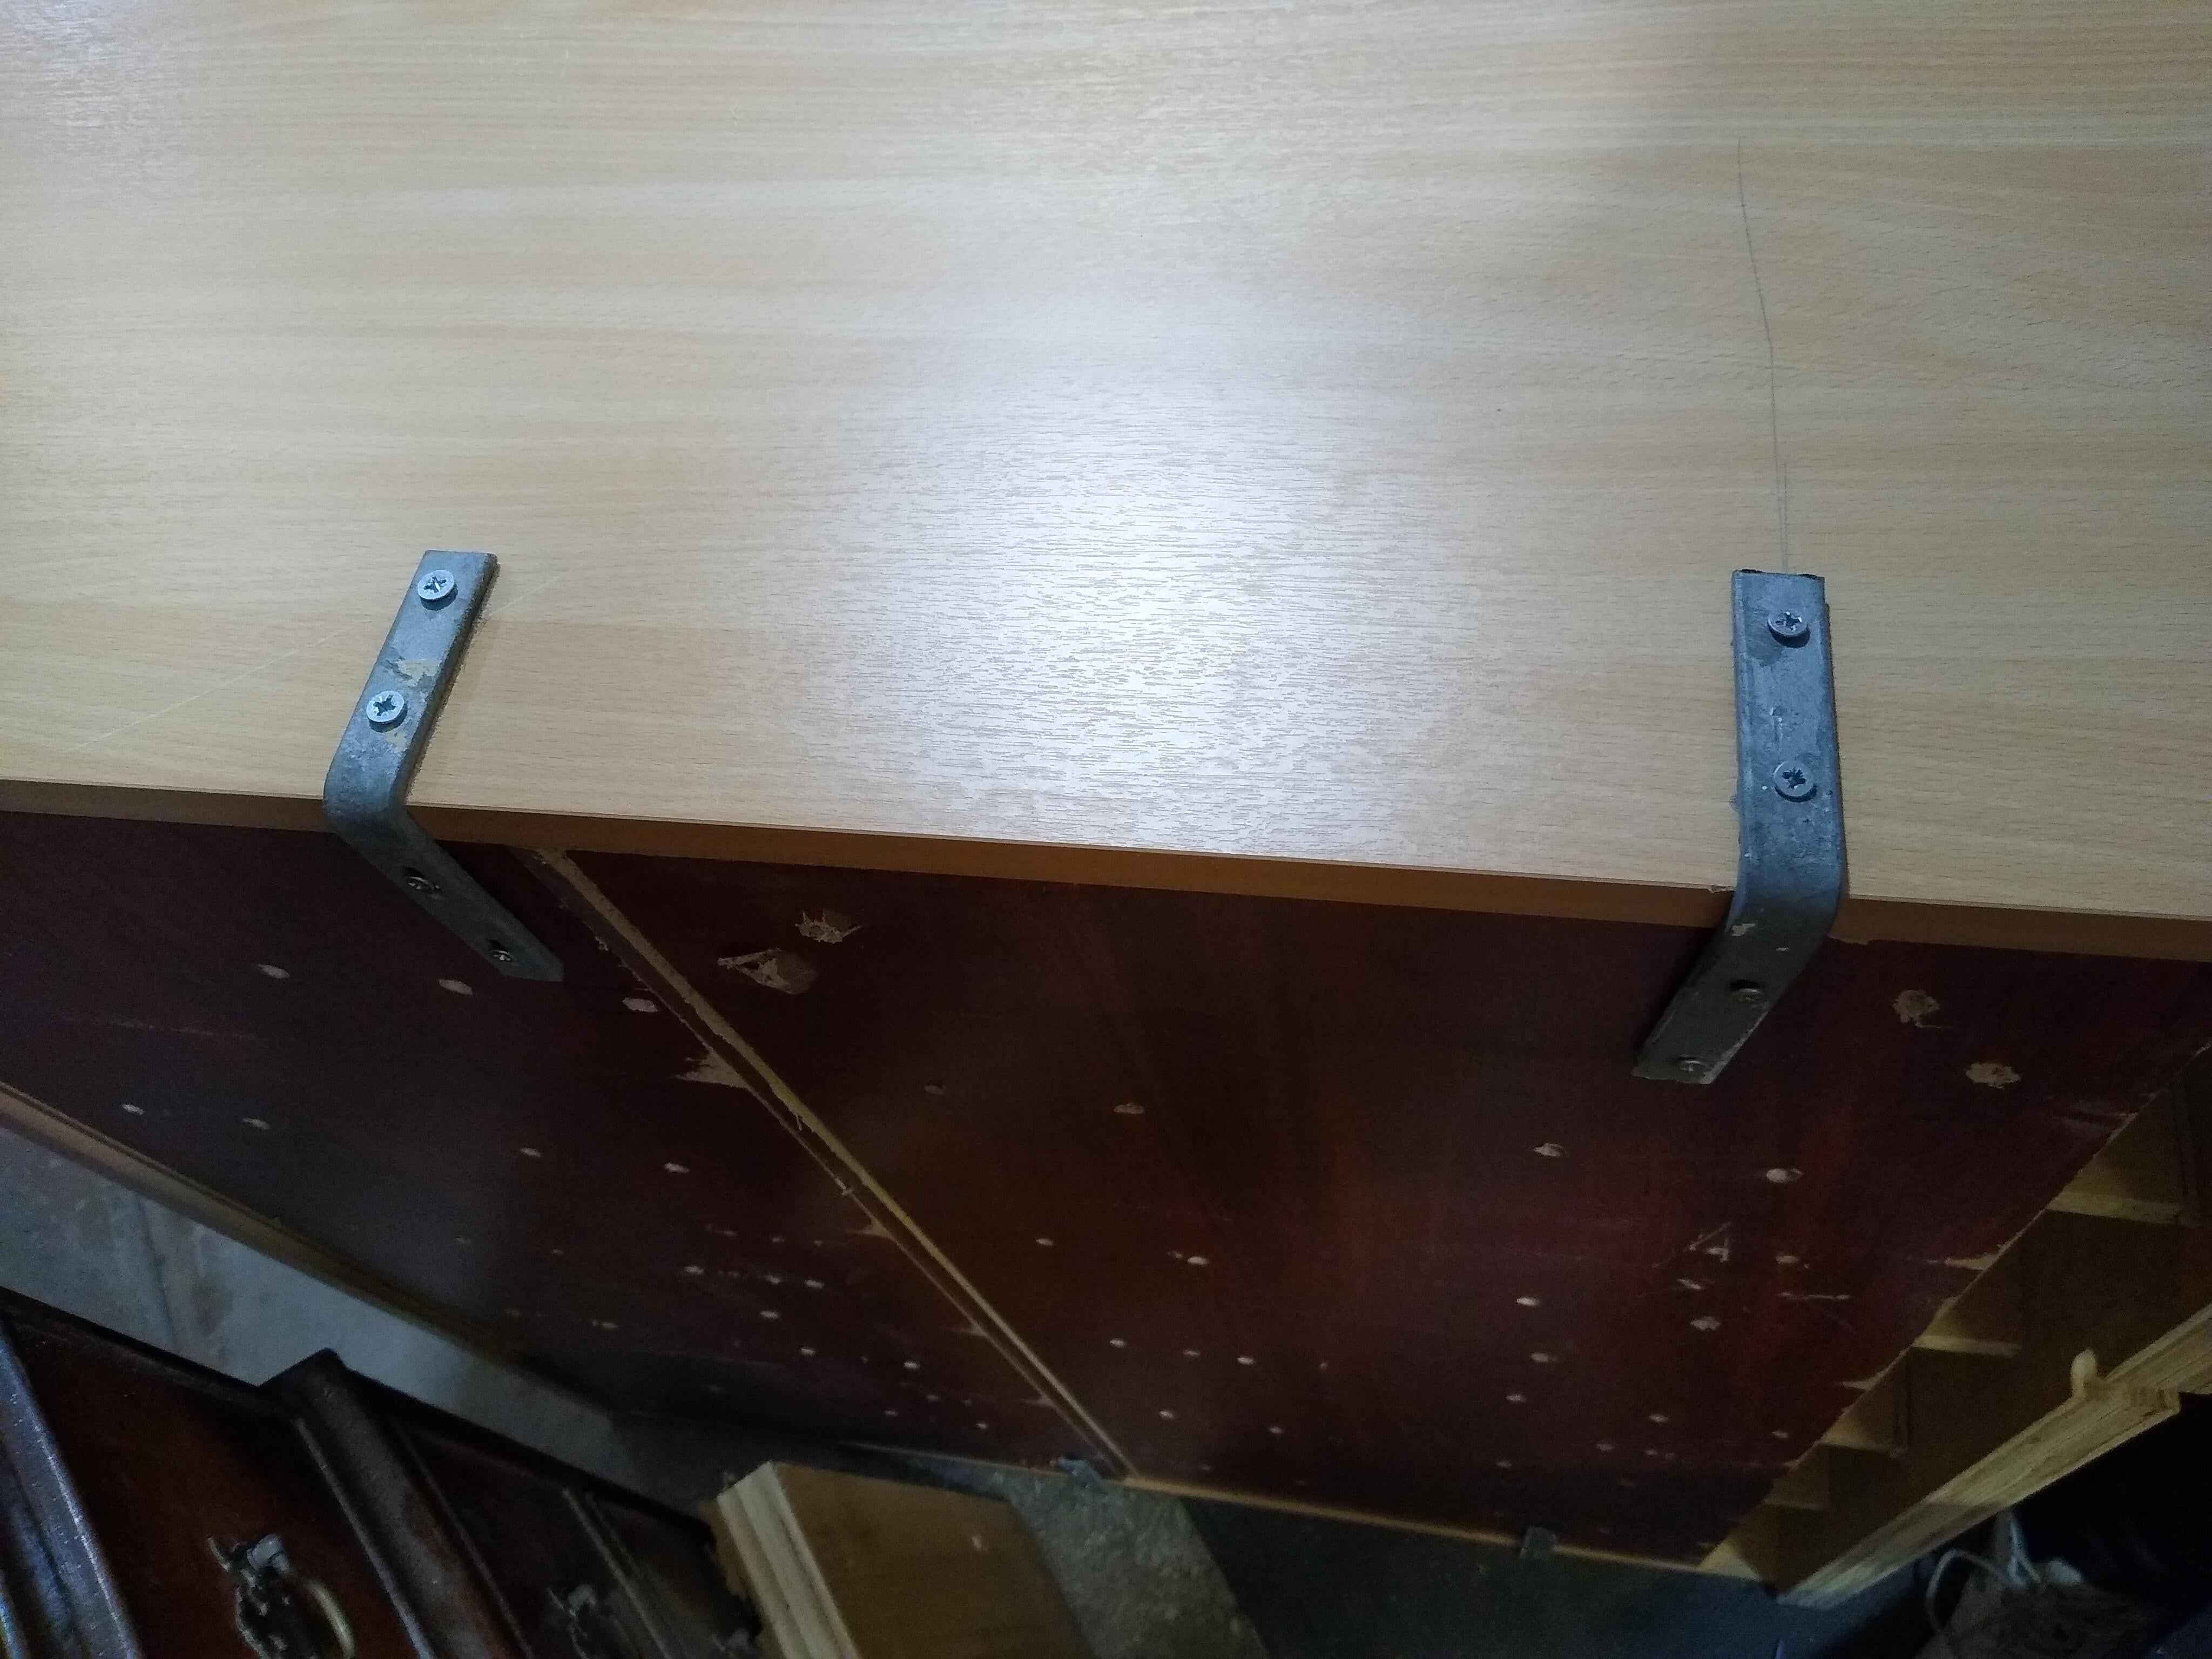
Now onto the tool wall! Using a french cleat wall seemed to be pretty popular for it’s flexibility and modular tool holding capabilities. I figured 4 rails would be enough to get me started and let me get most of the common tools out of the draws and onto the wall. First step was to take down the old storage system (bit of wood with a few nails sticking out!).
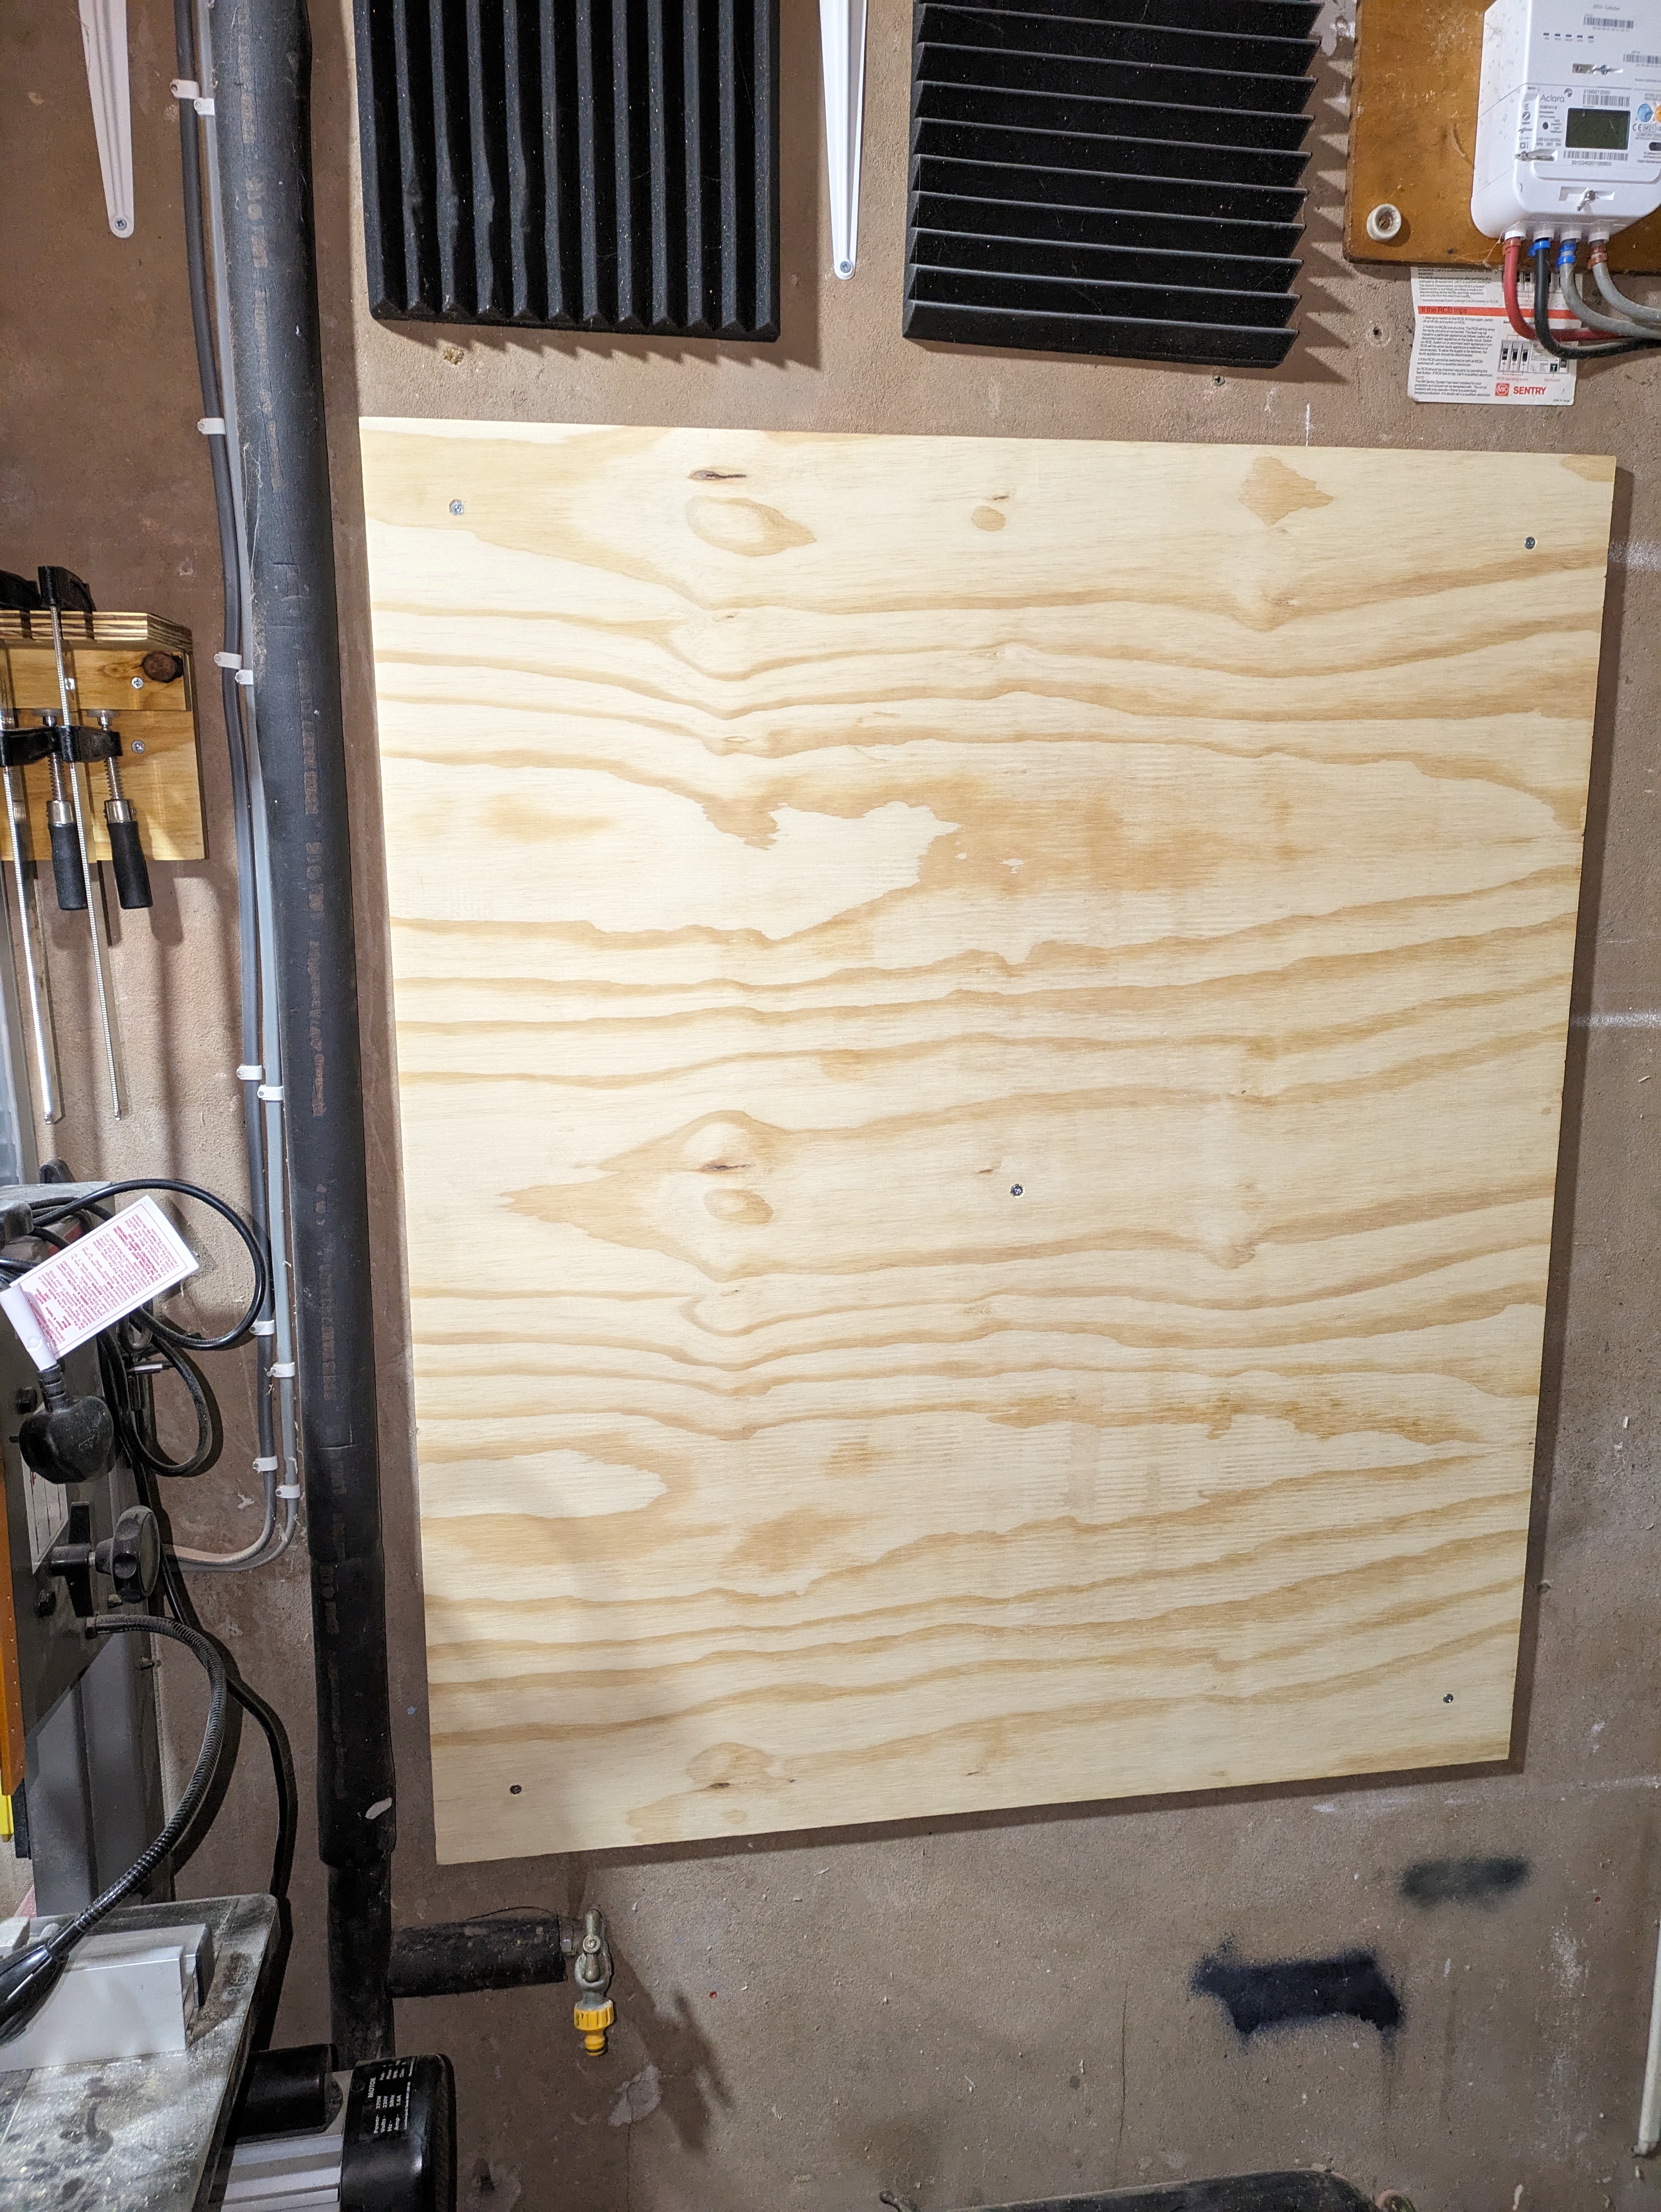
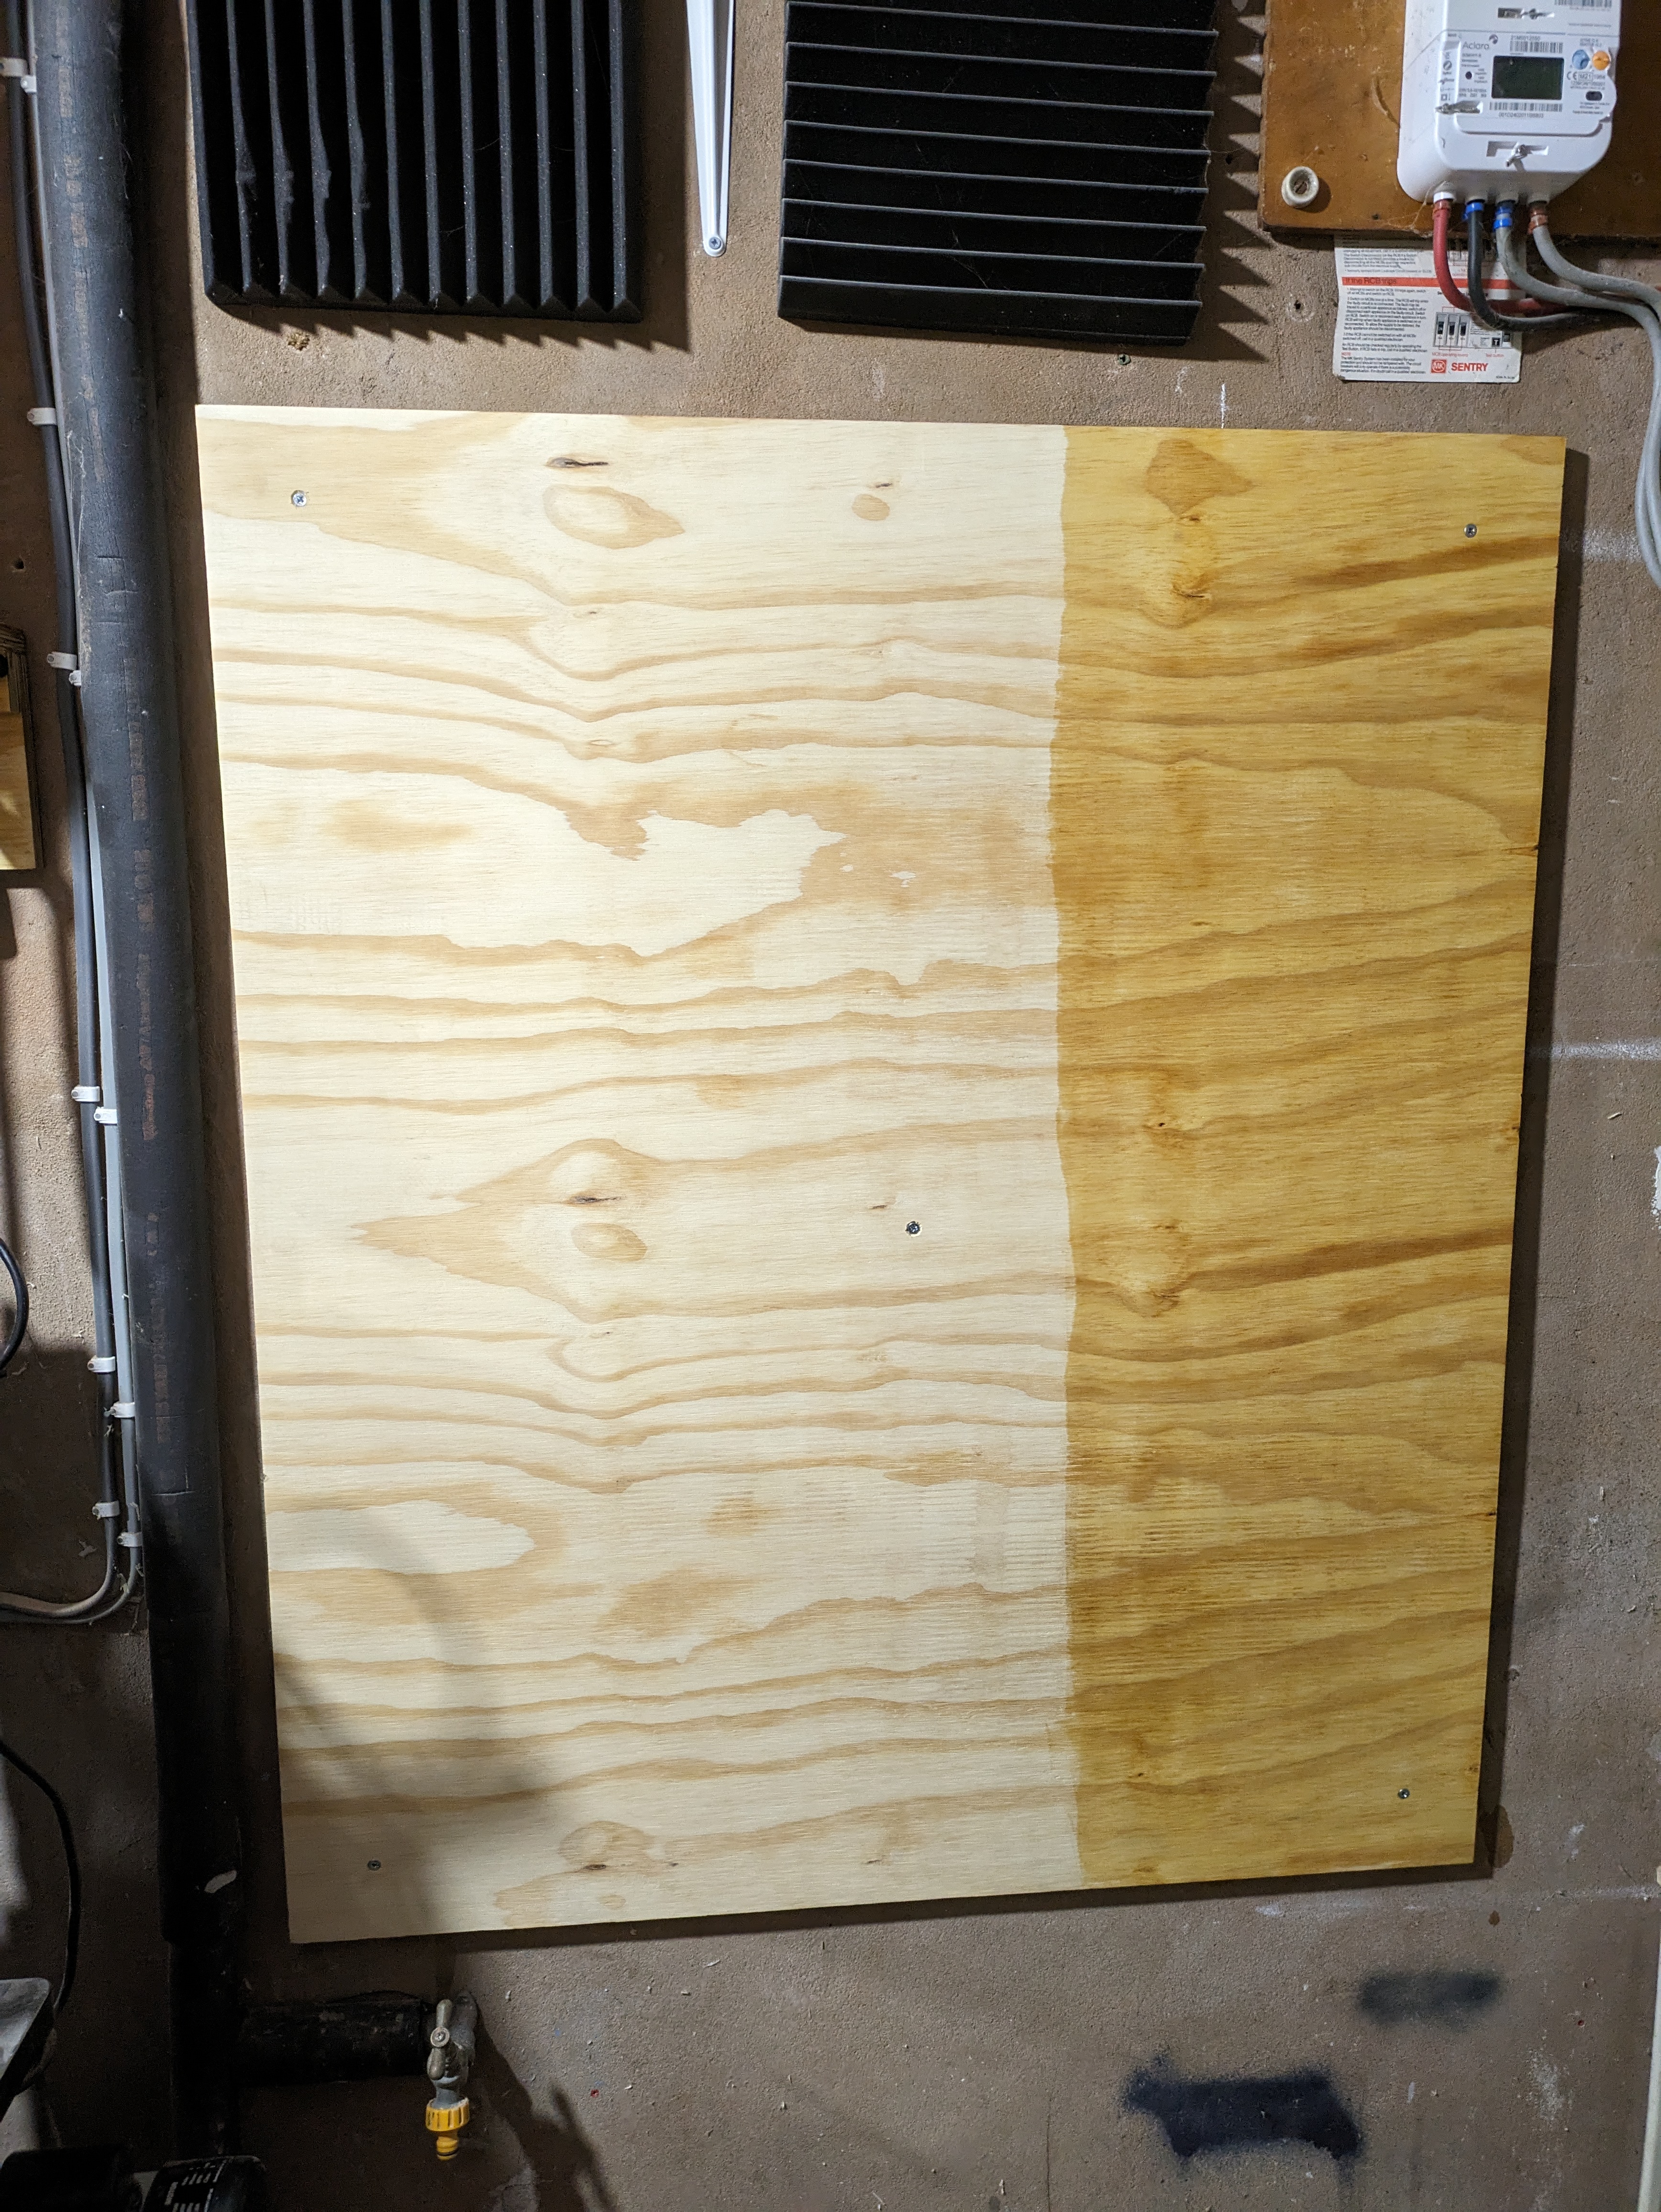
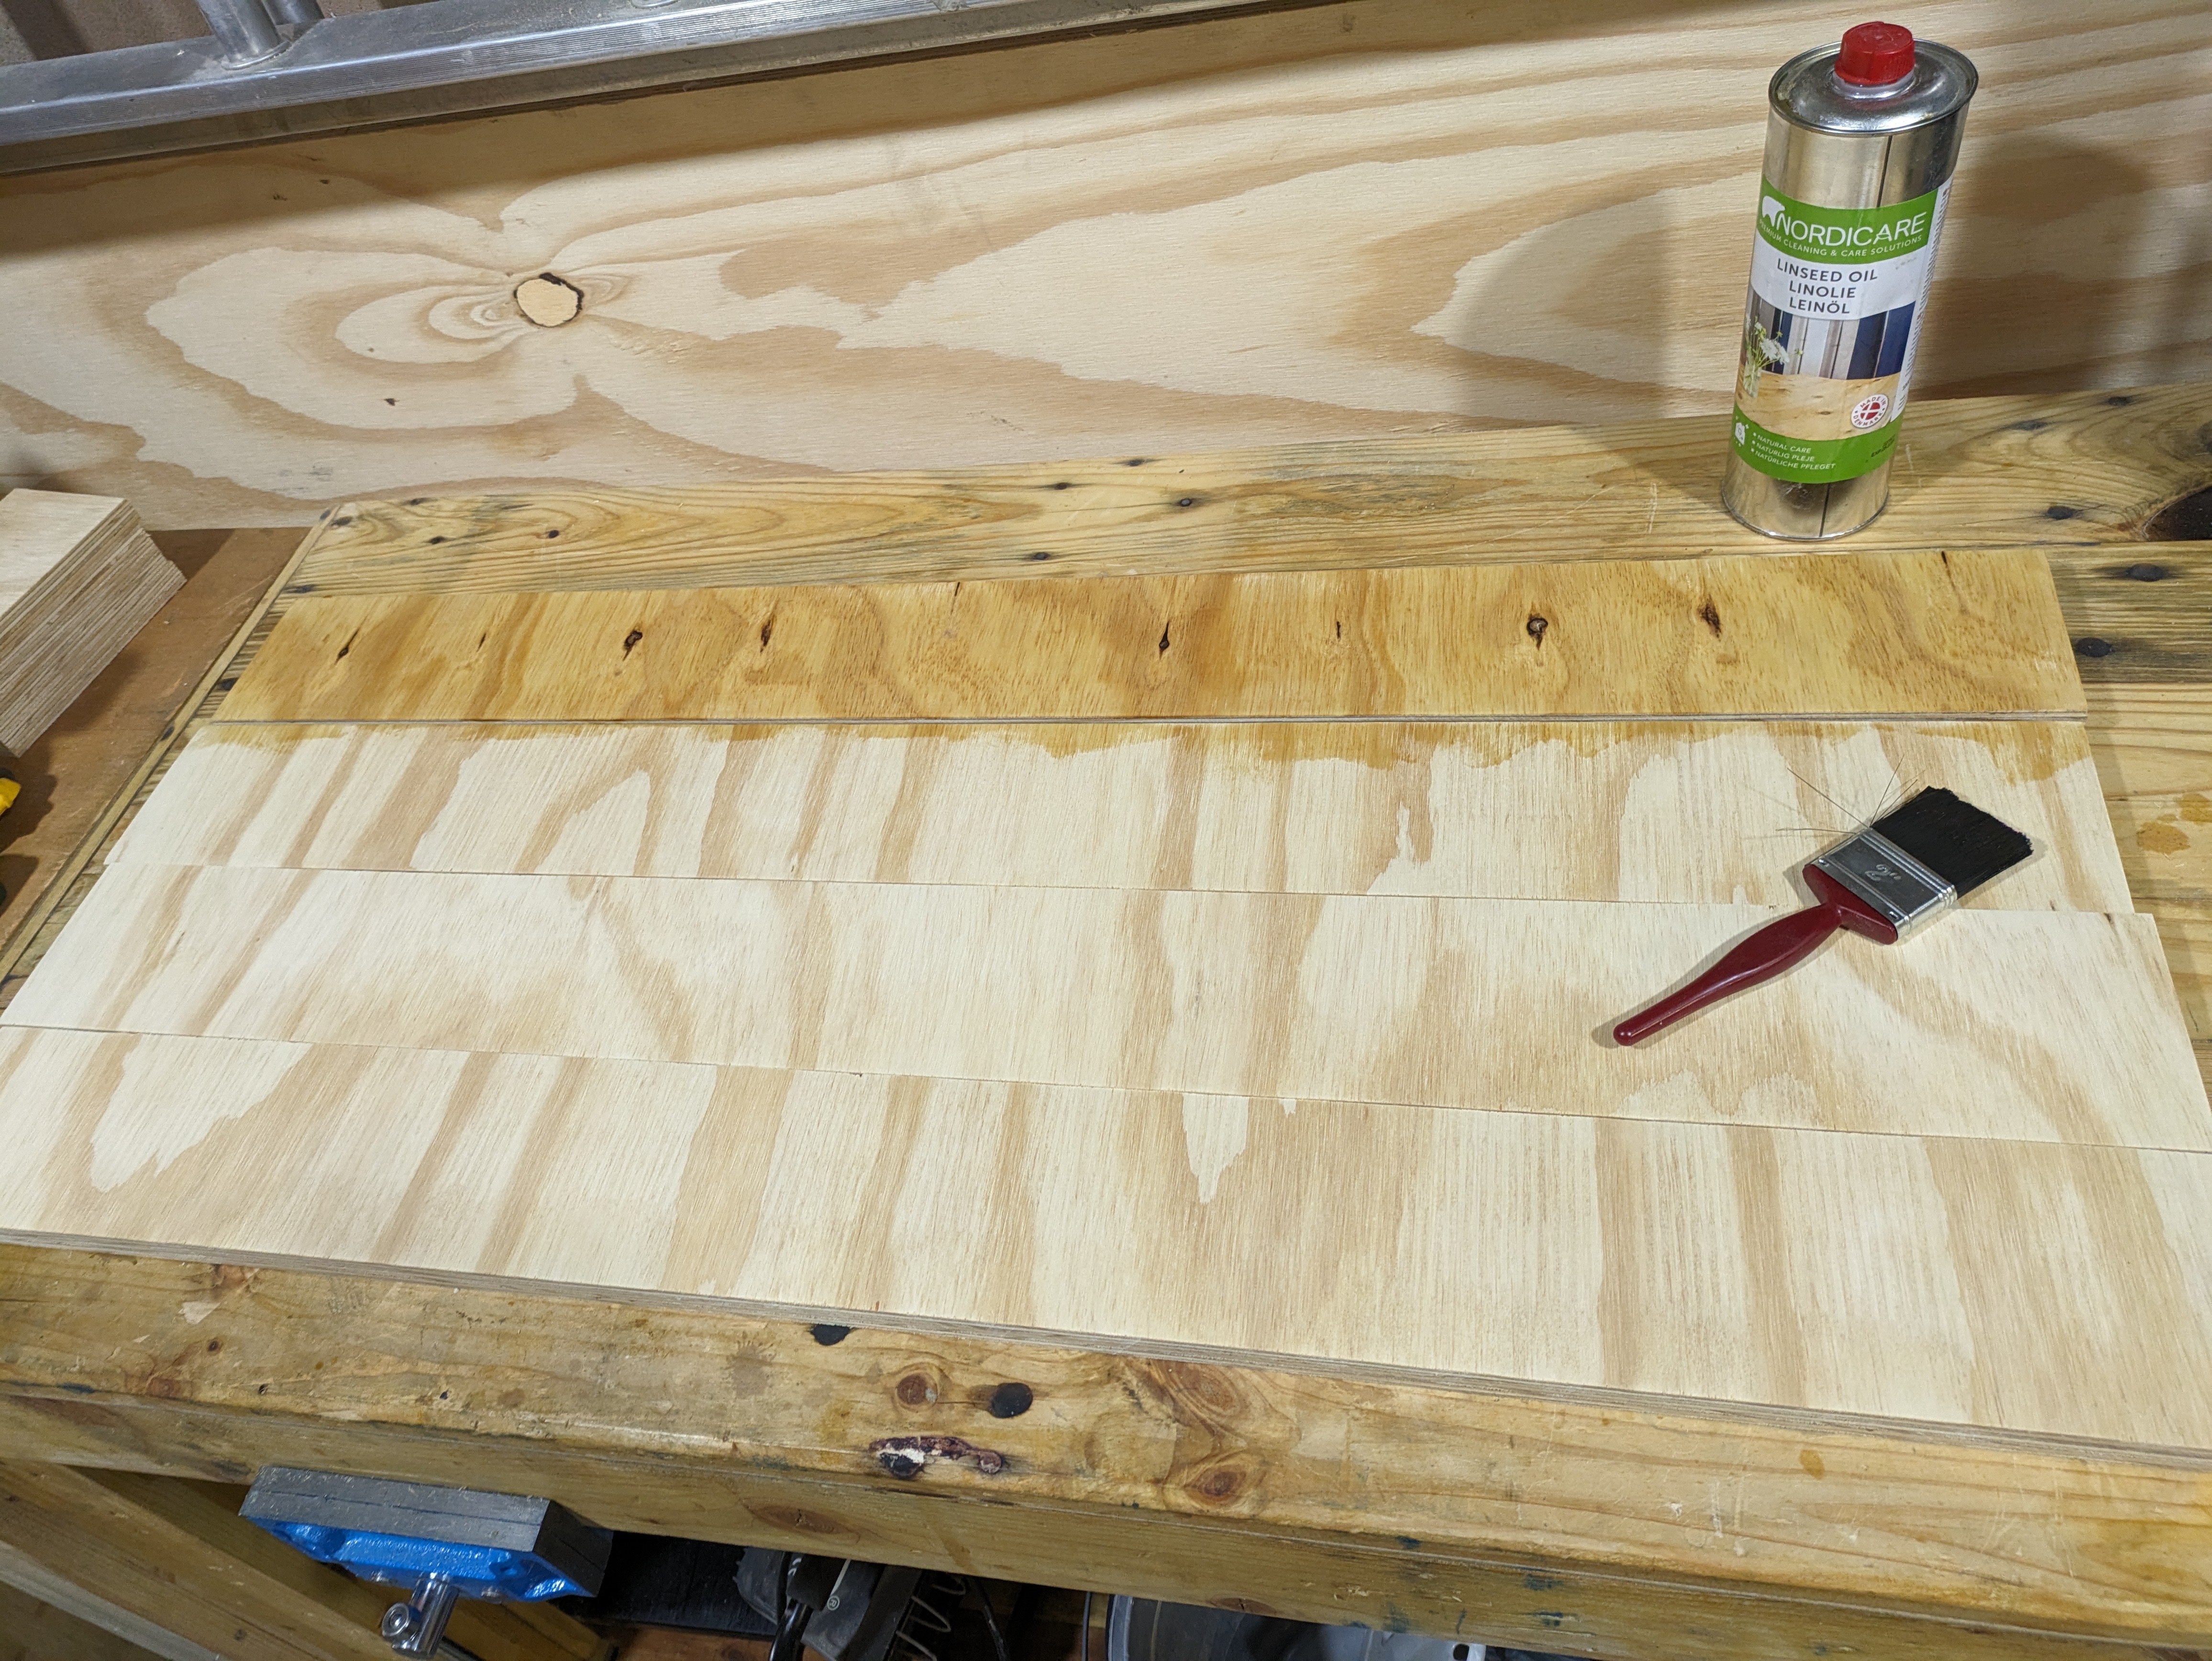
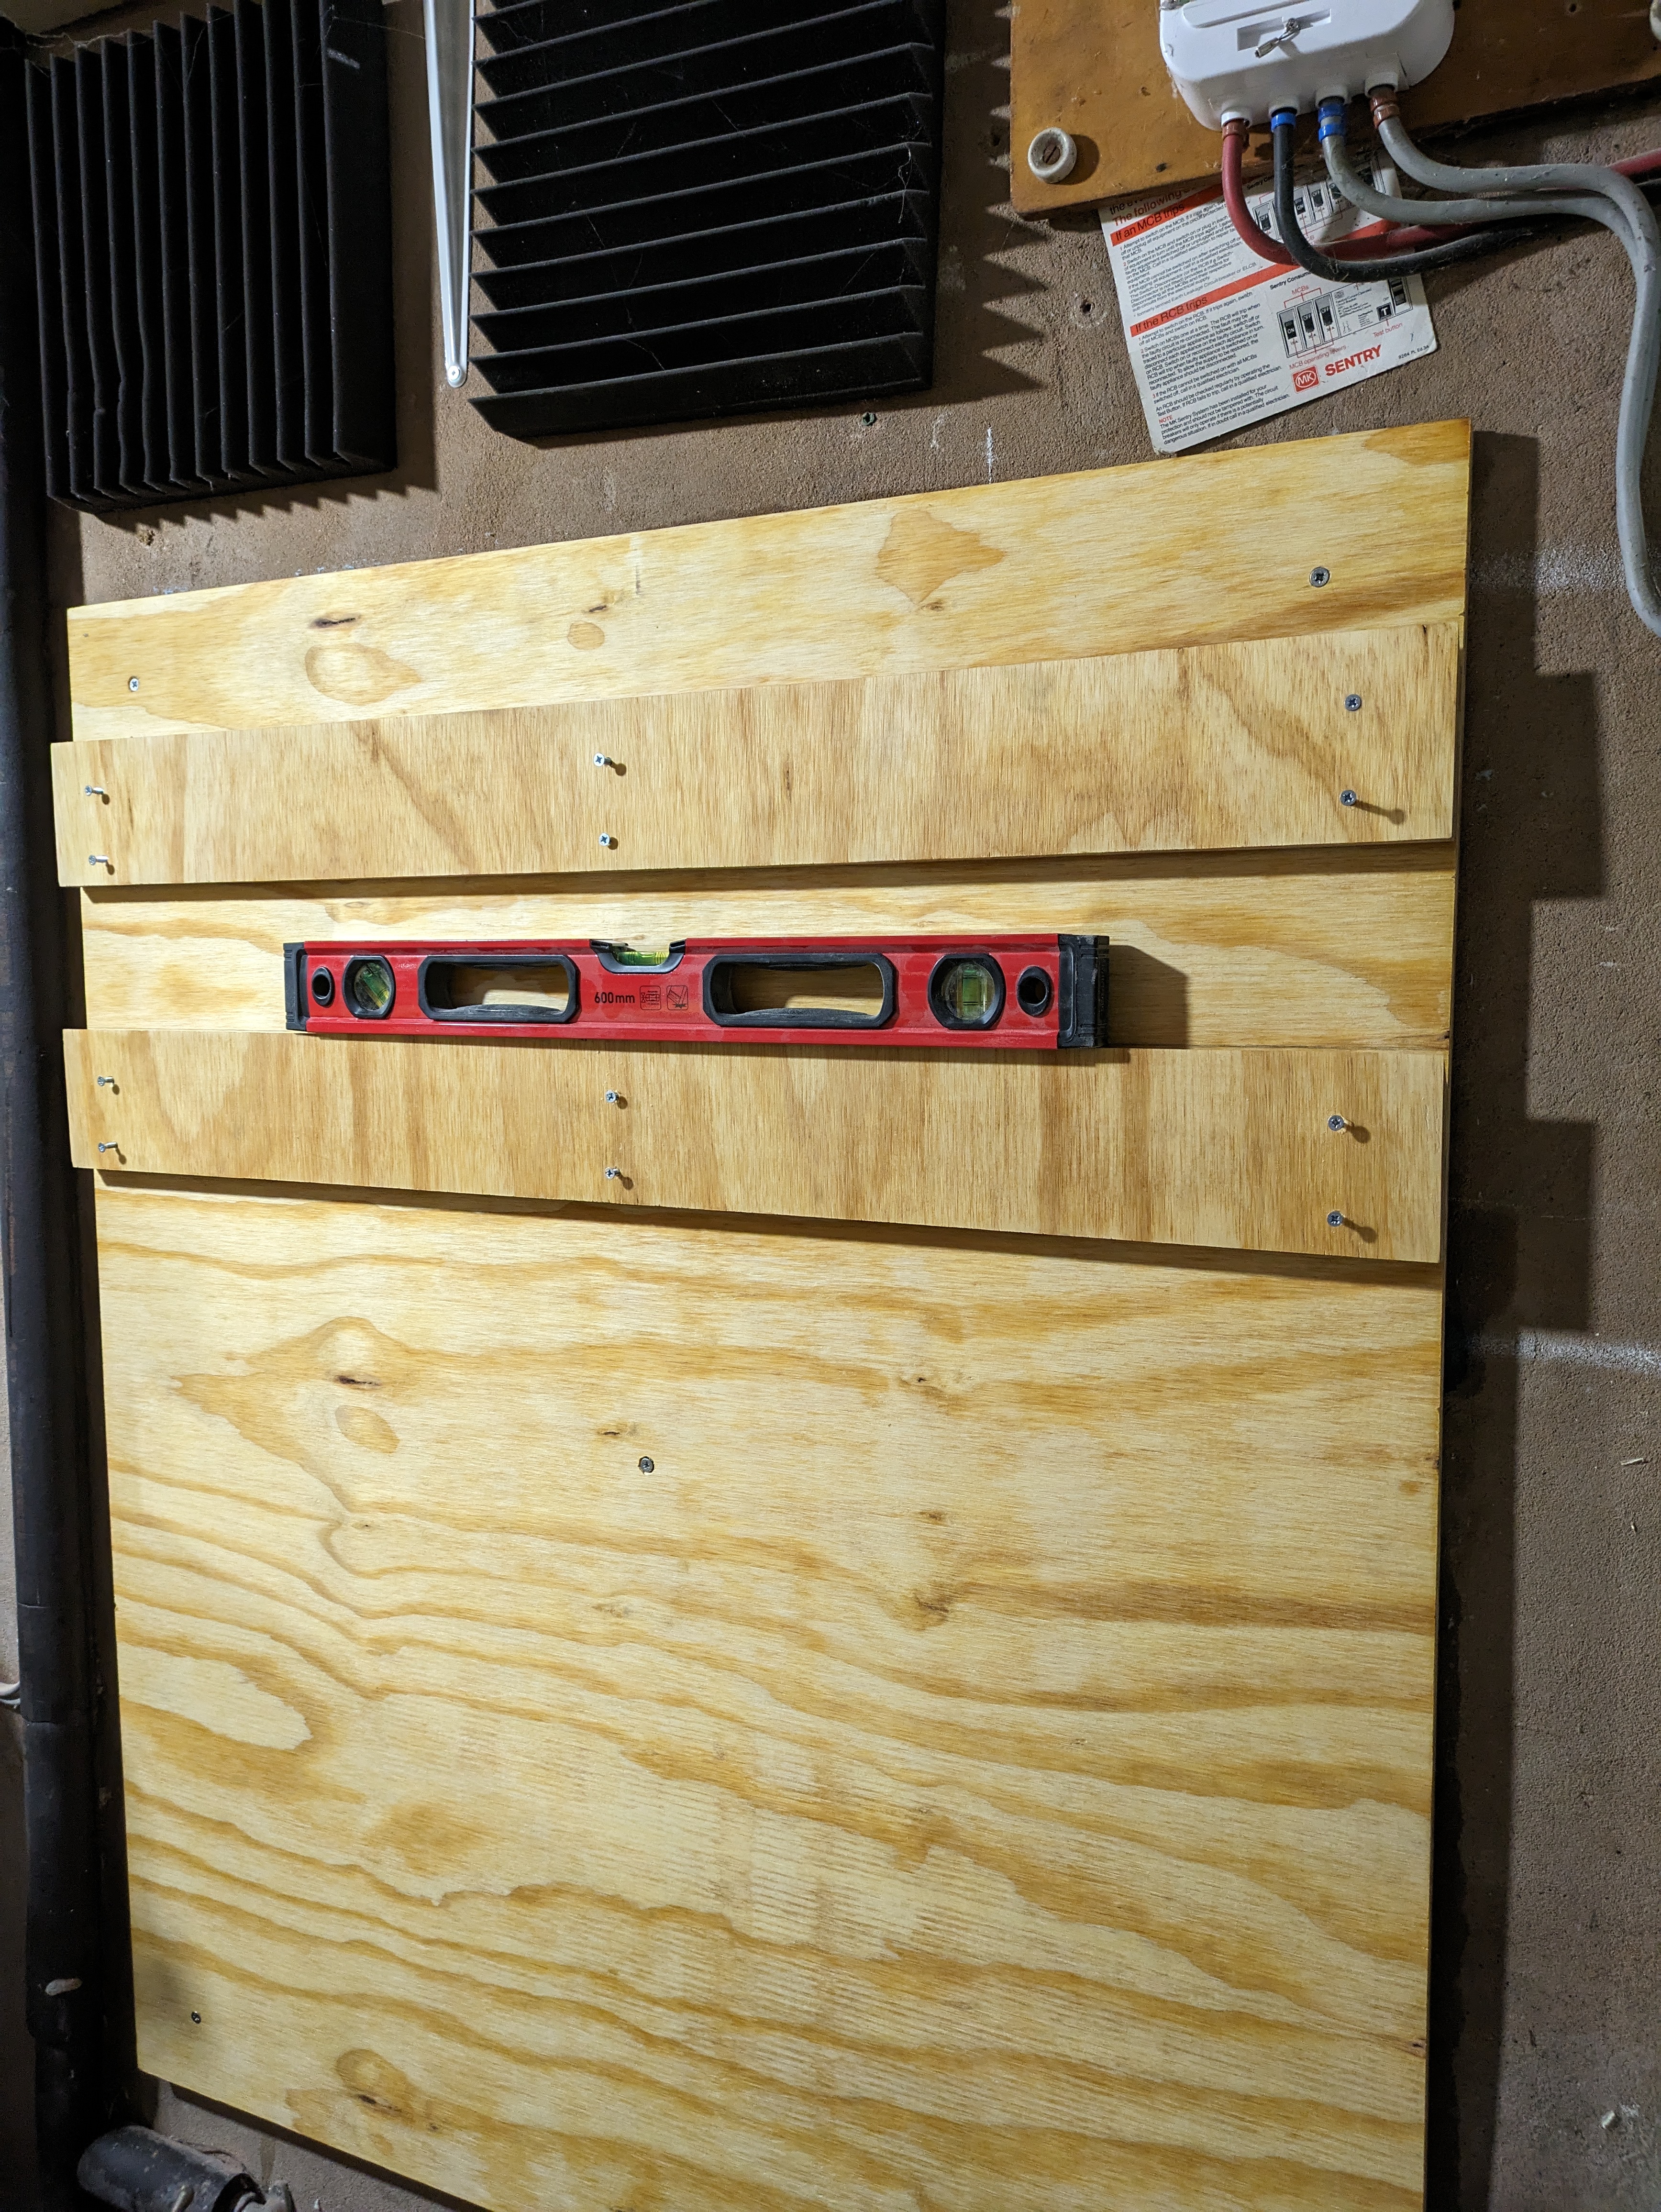
Then I measure my ply to fit the size from my sketch and trimmed it to size, screwed it to the wall and brushed on some linseed (probably not really needed but it looked nice on the clamp racks). I cut 4 rails and added a 45 degree angle on one side as this is what would hold the future tool holders. The rails were levelled and screwed to the backing ply and ready for some tool holders to be built.


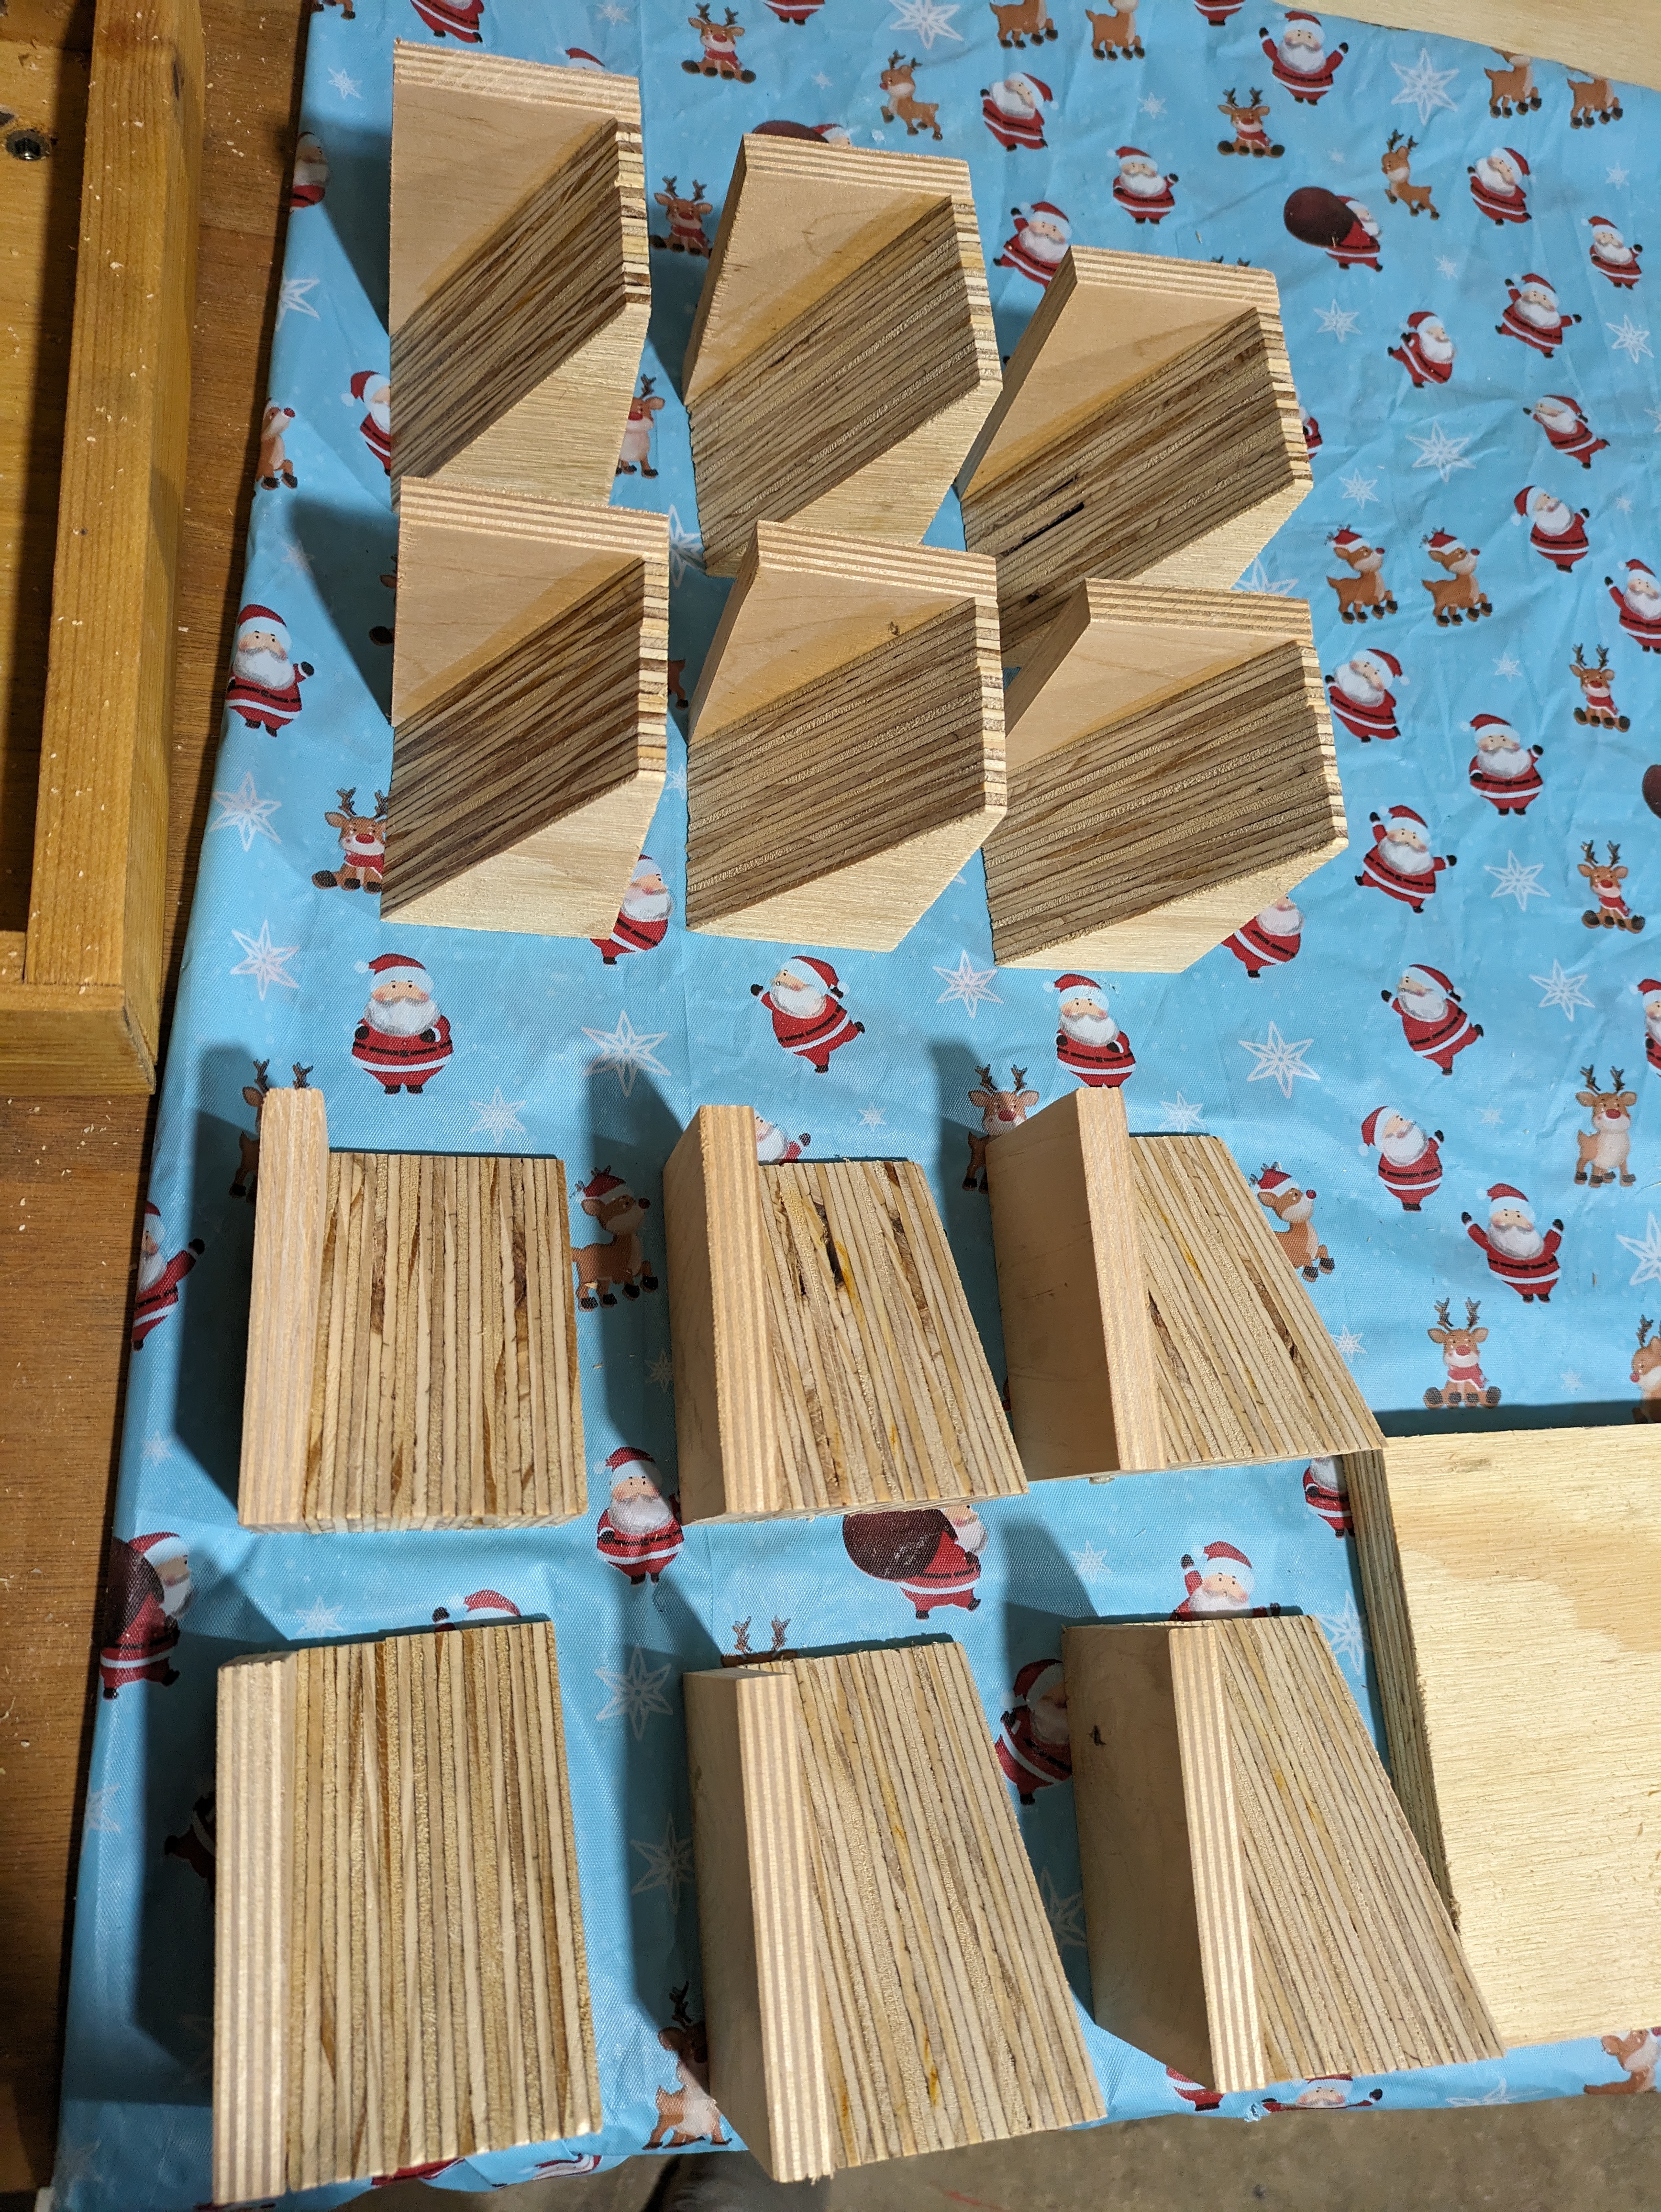
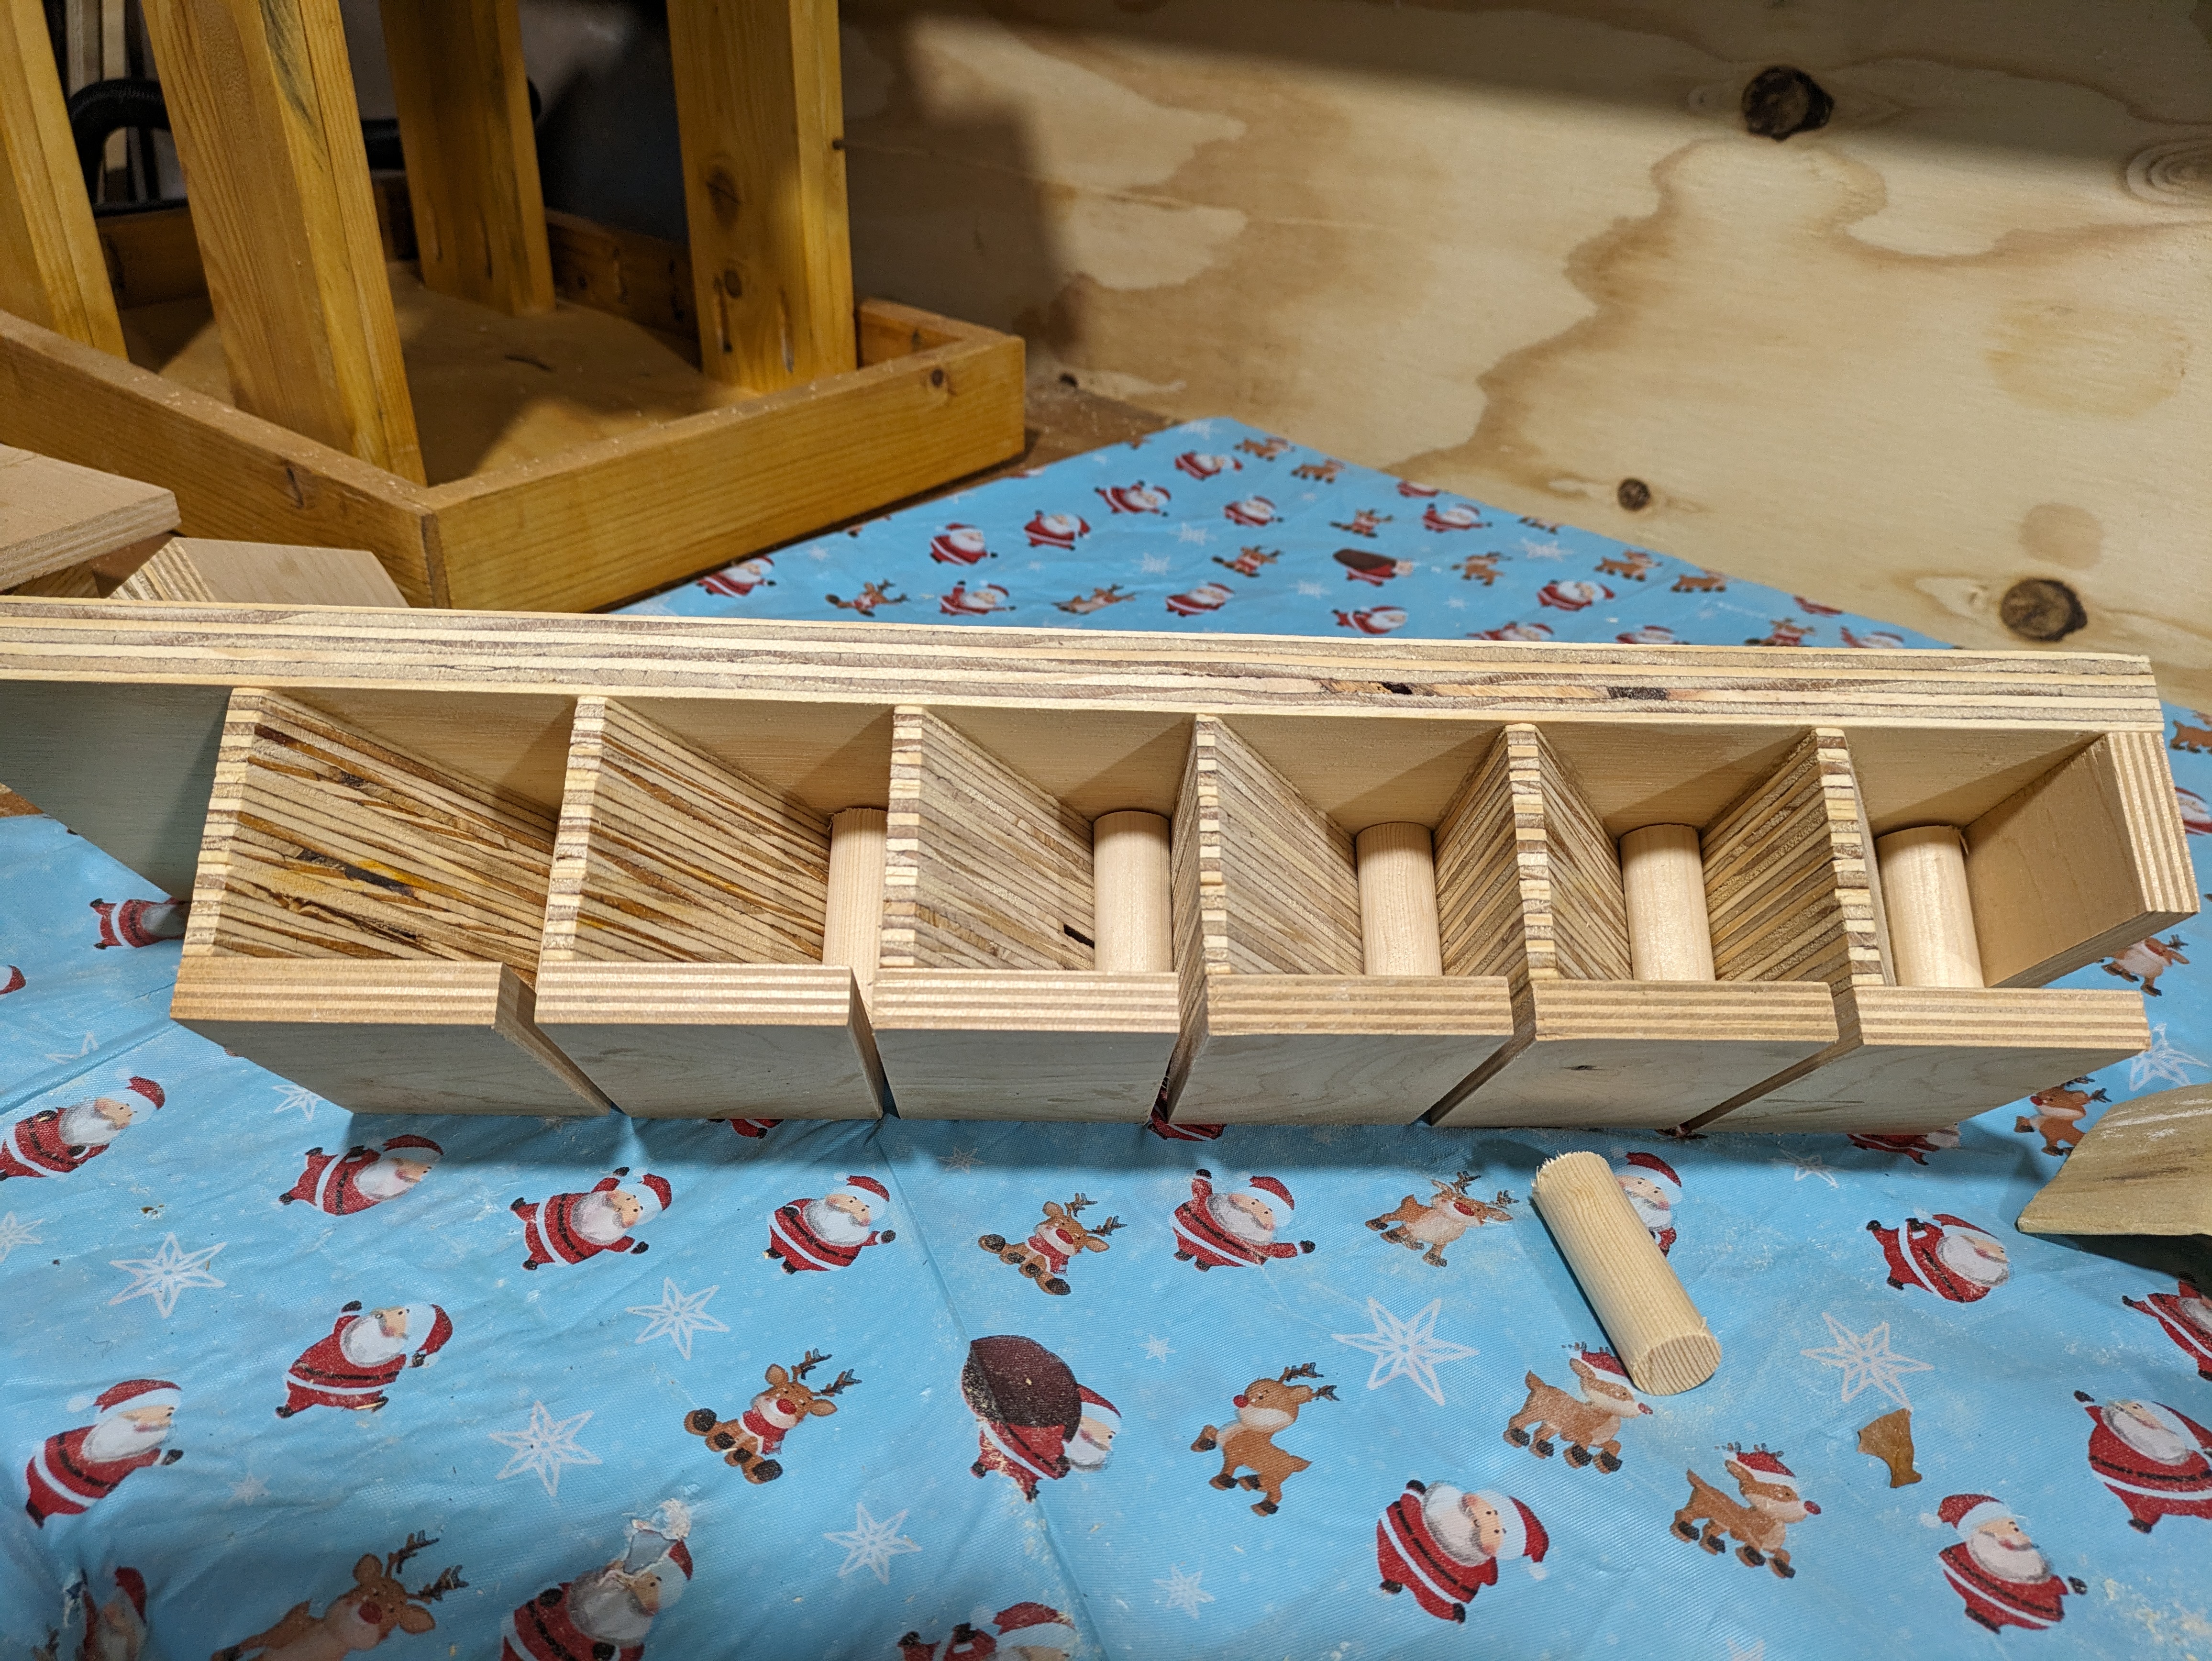
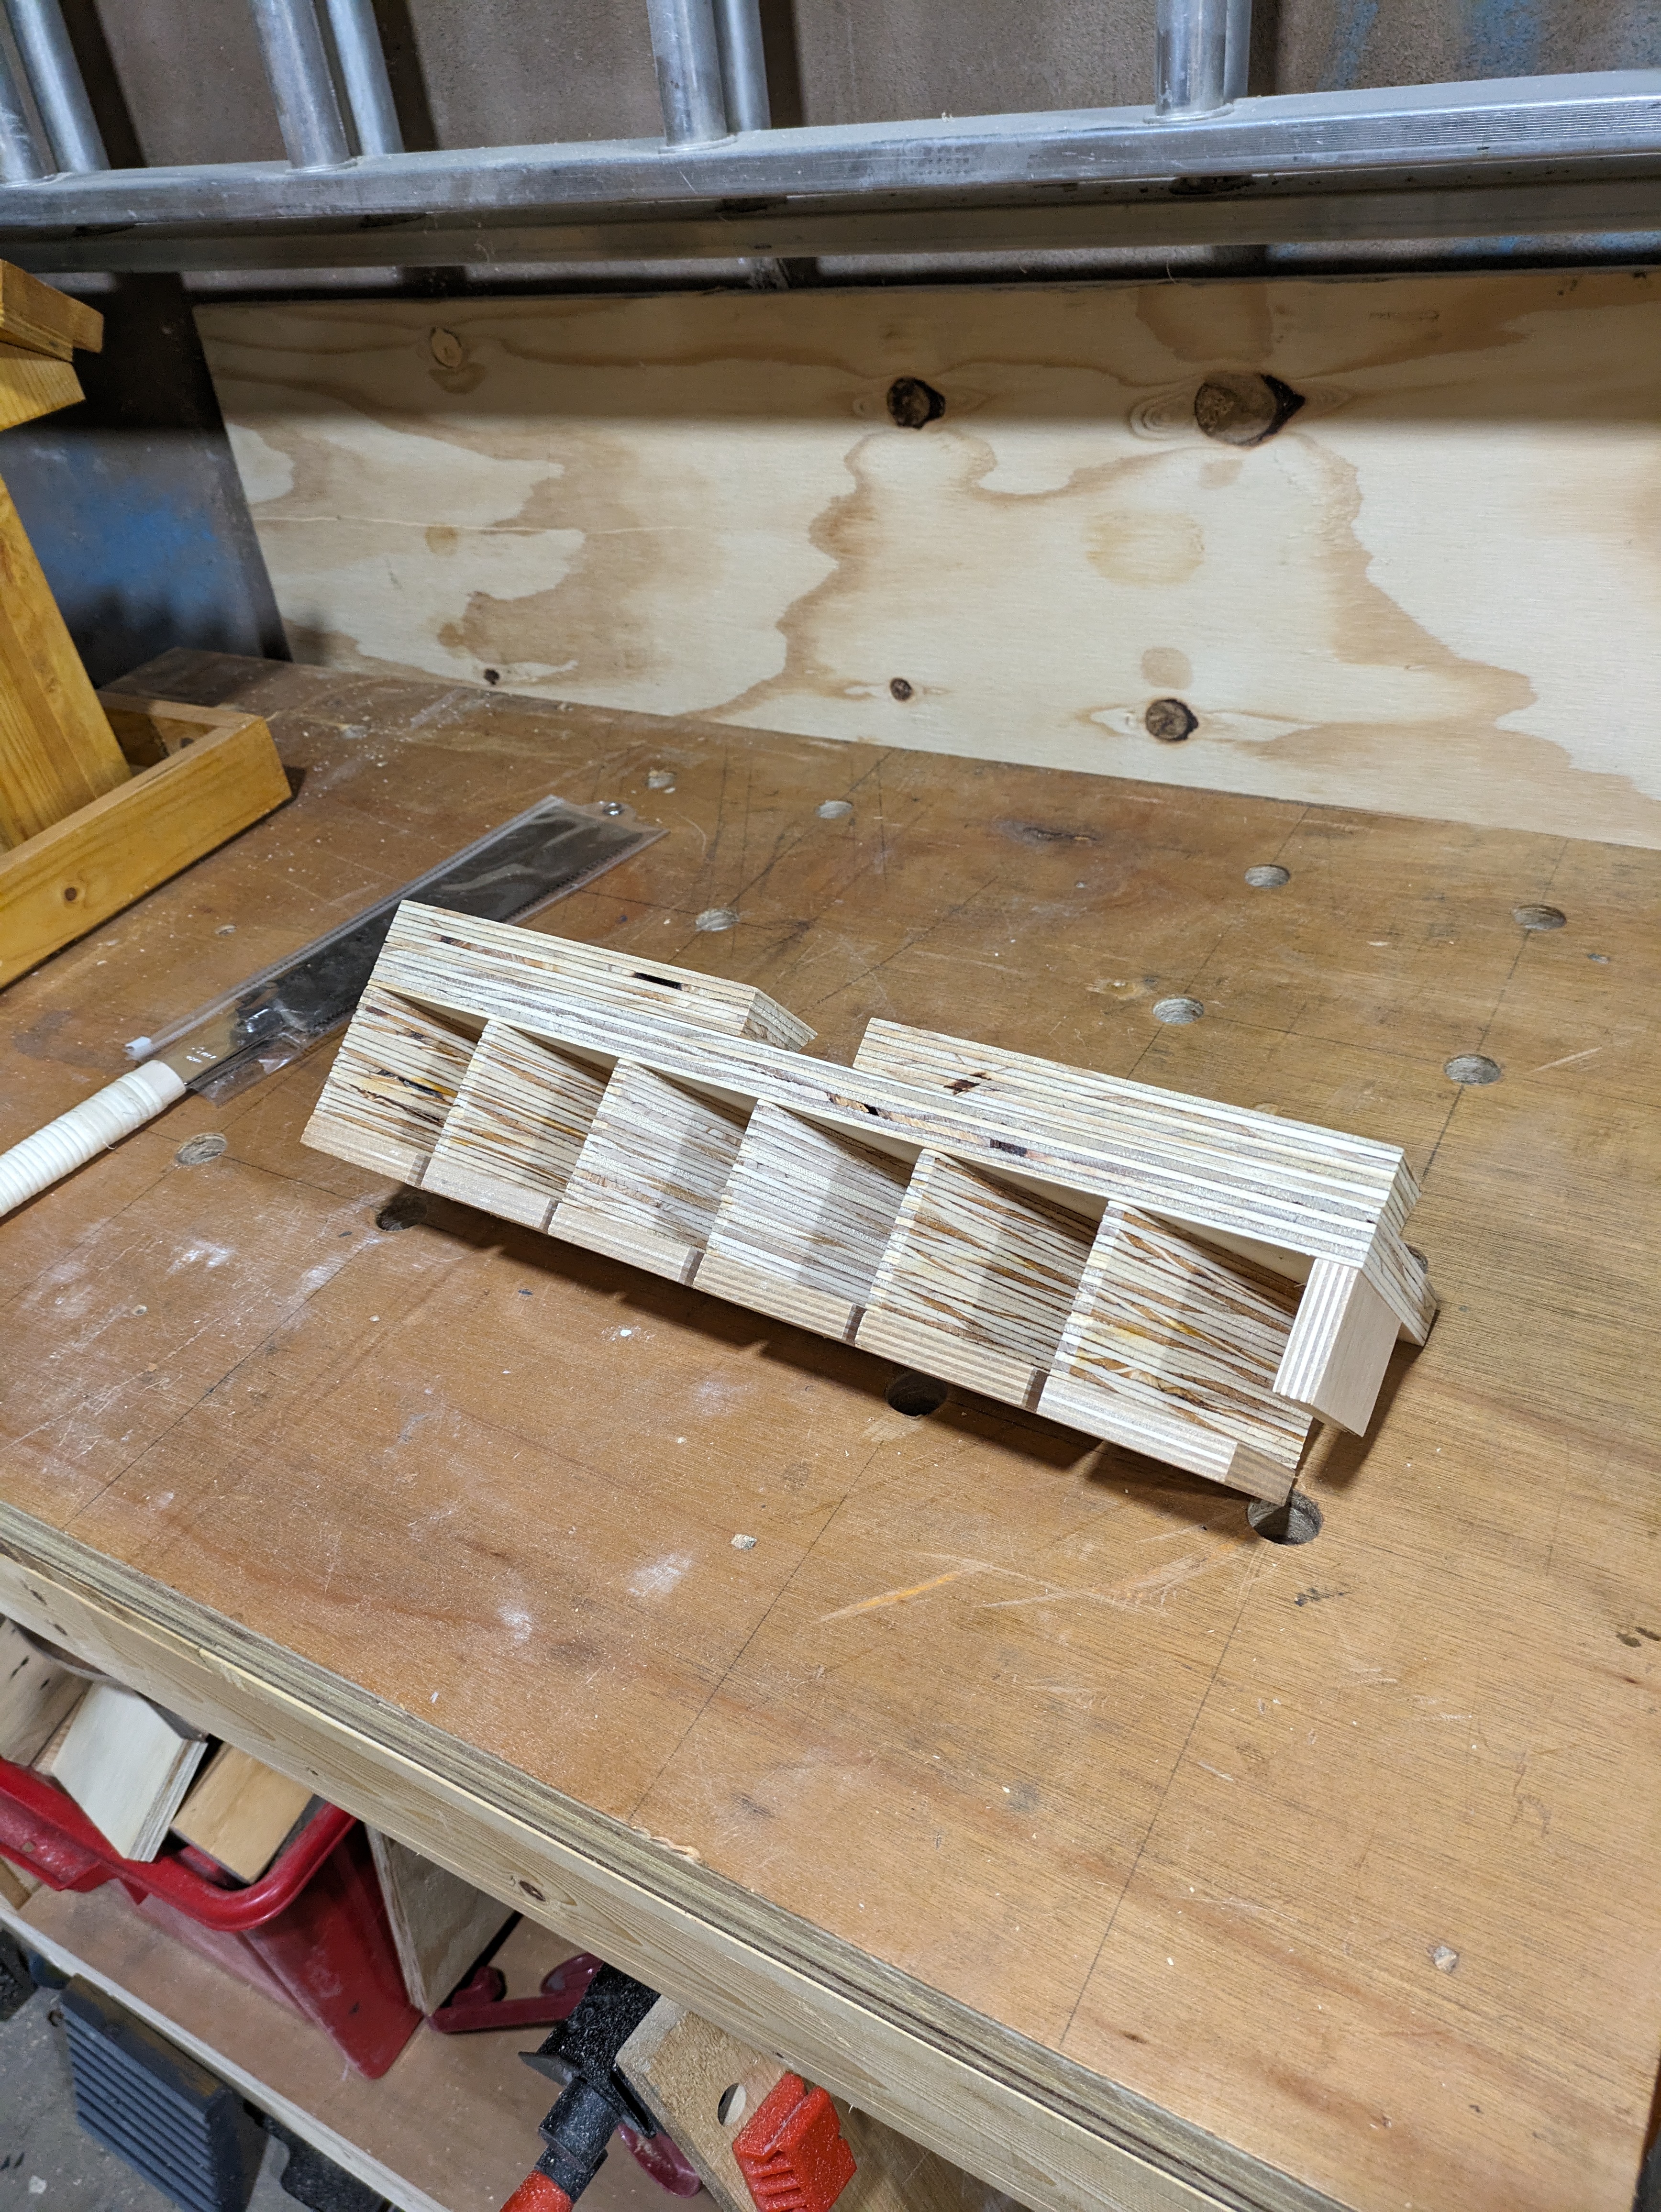
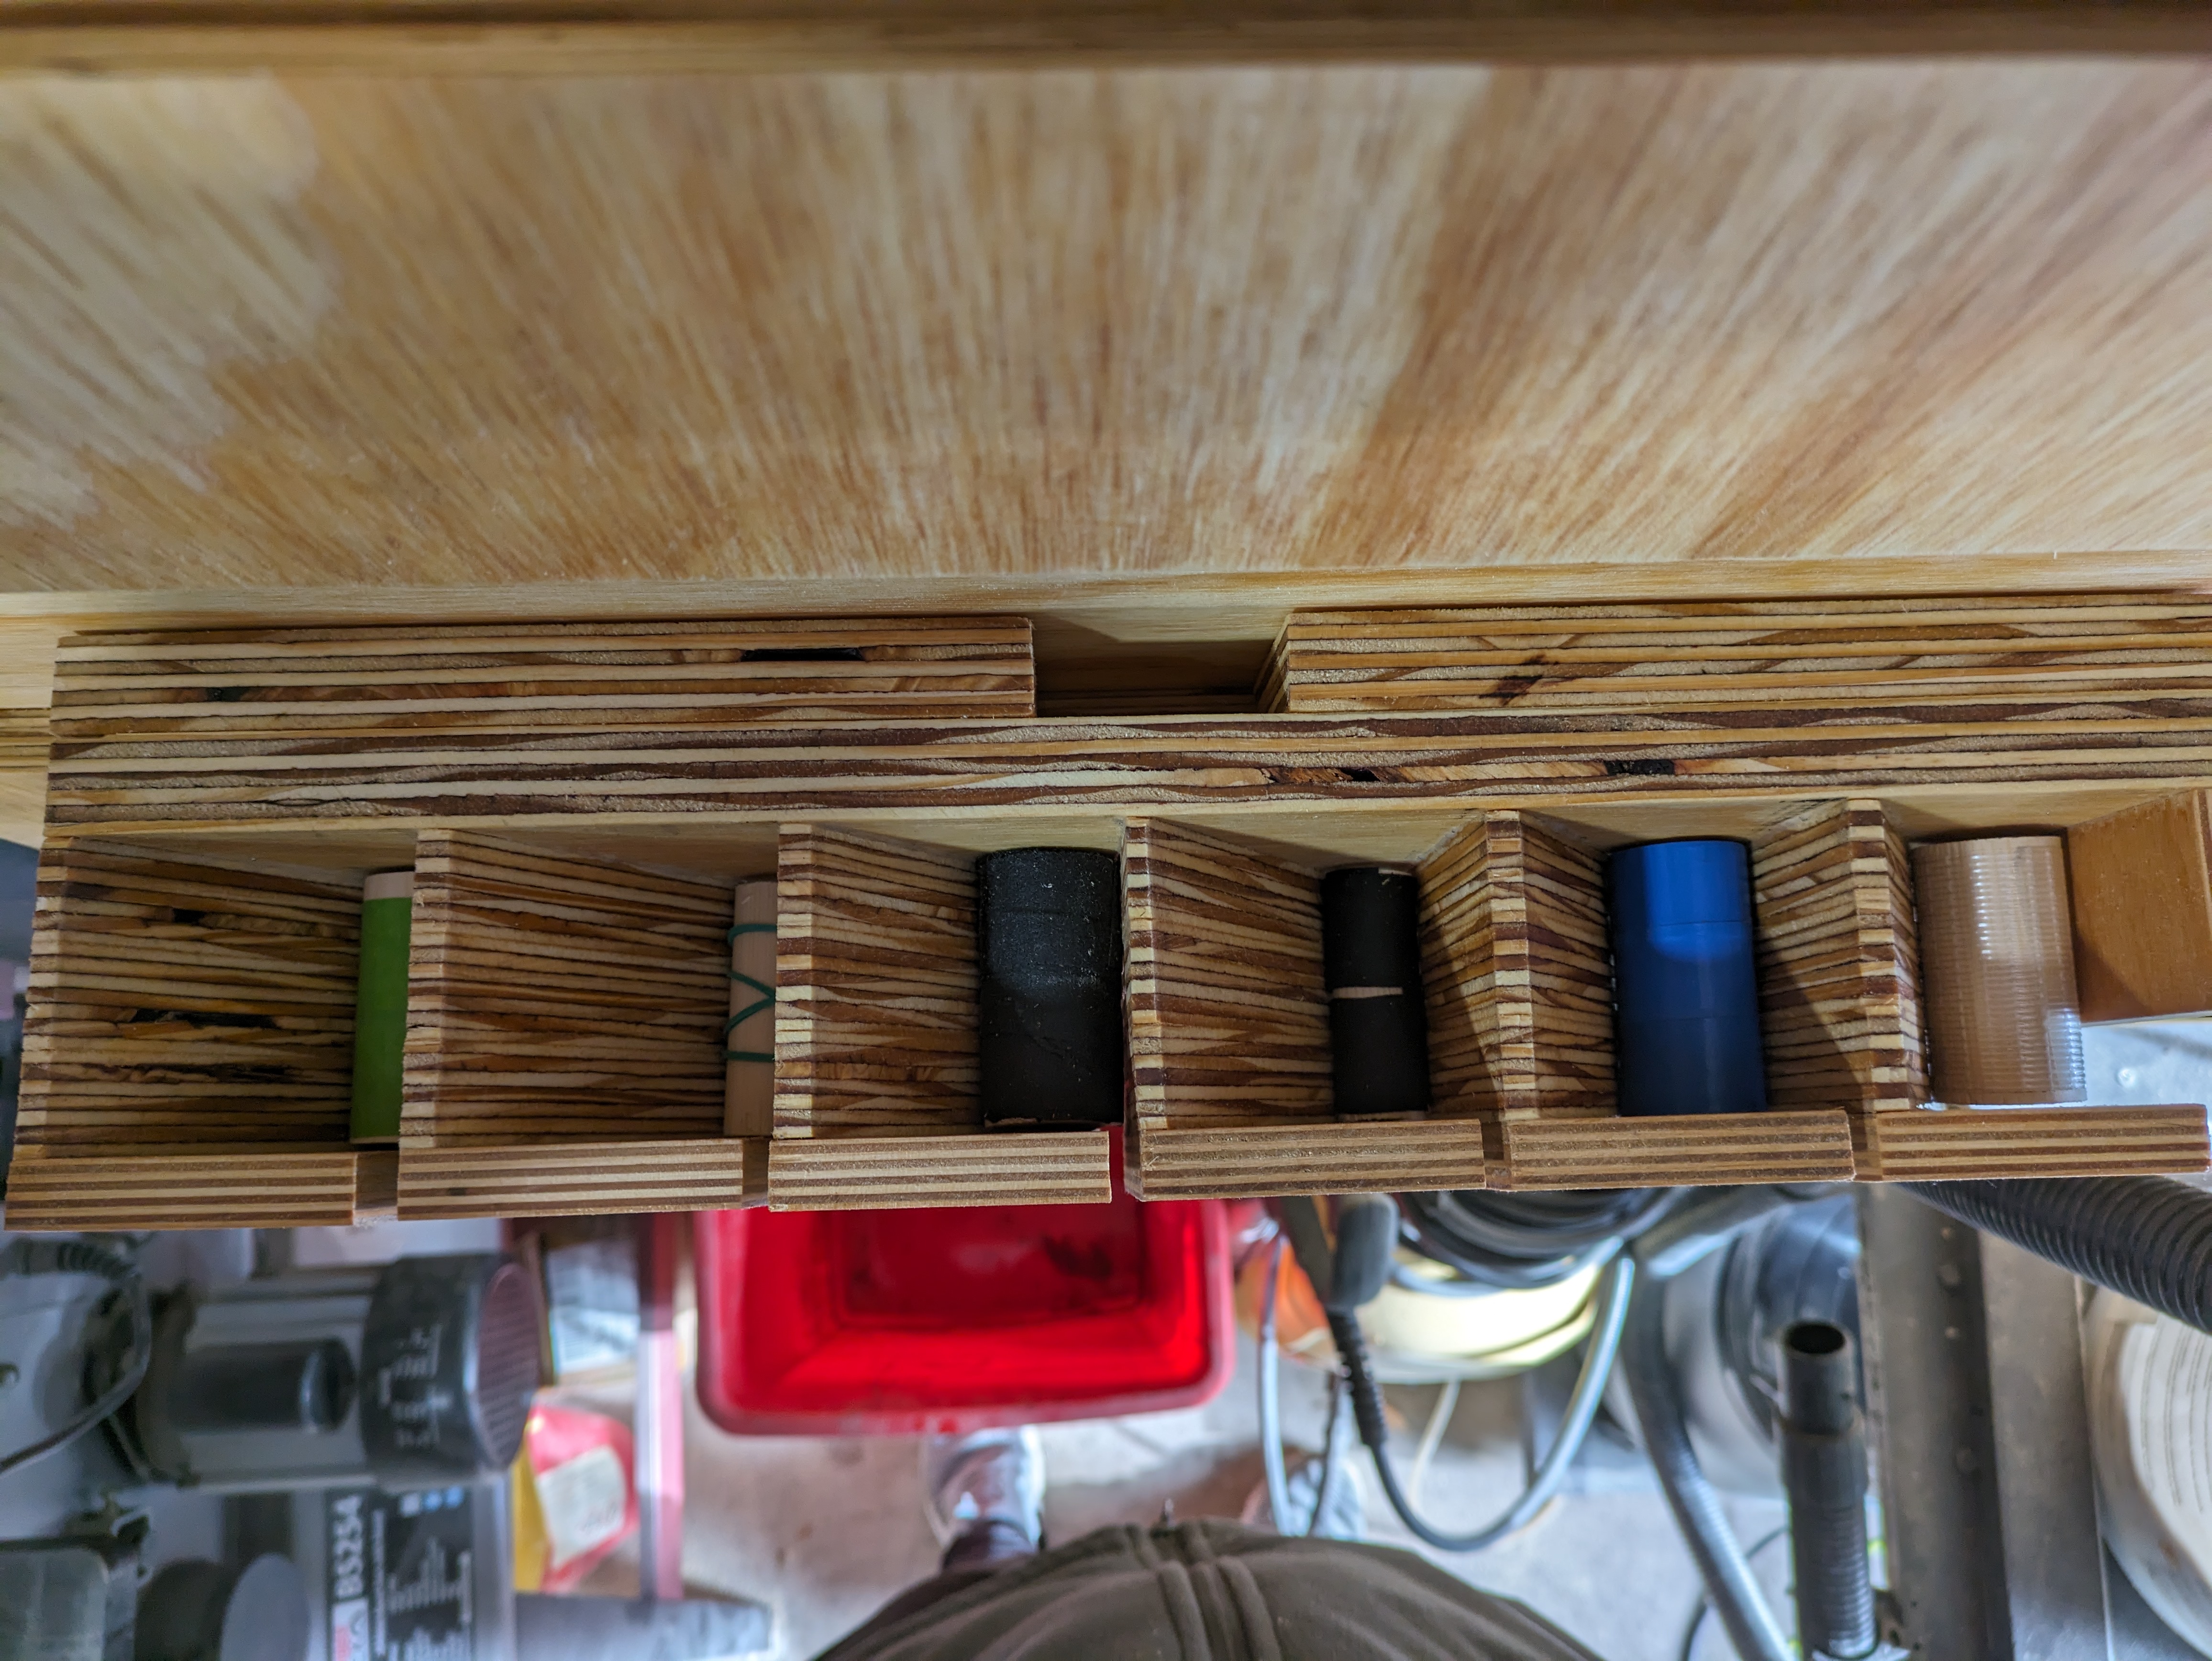
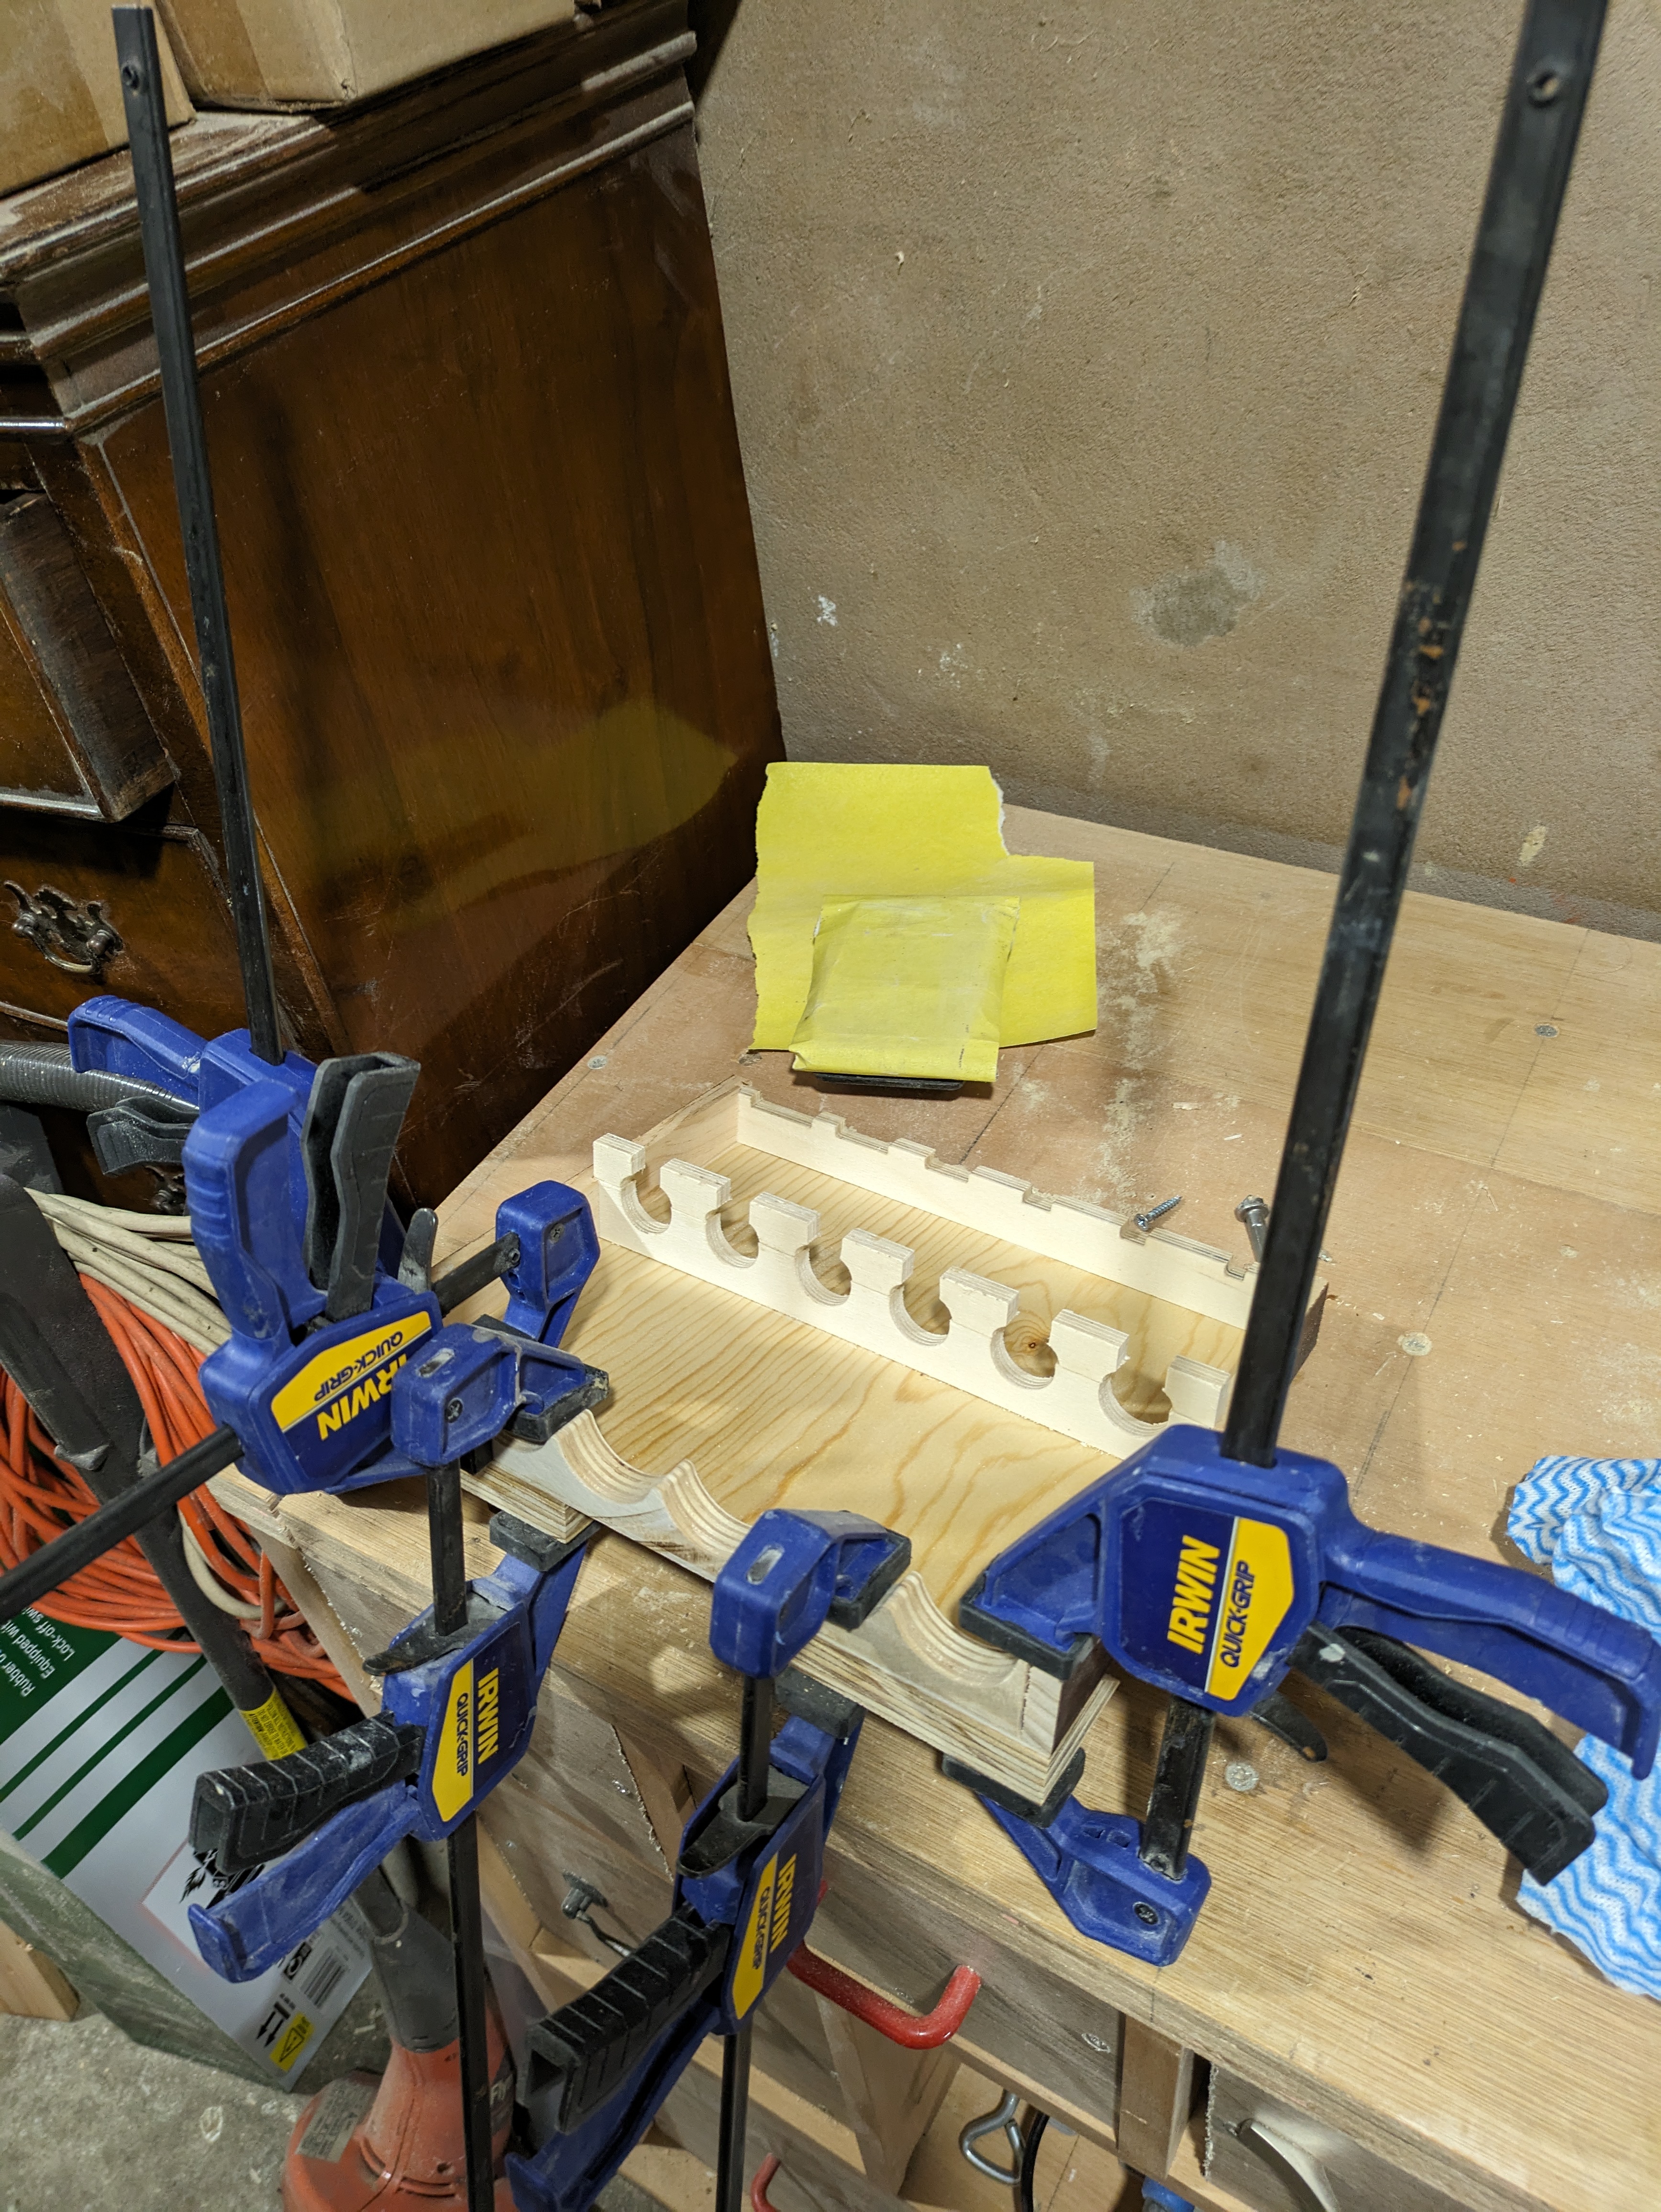
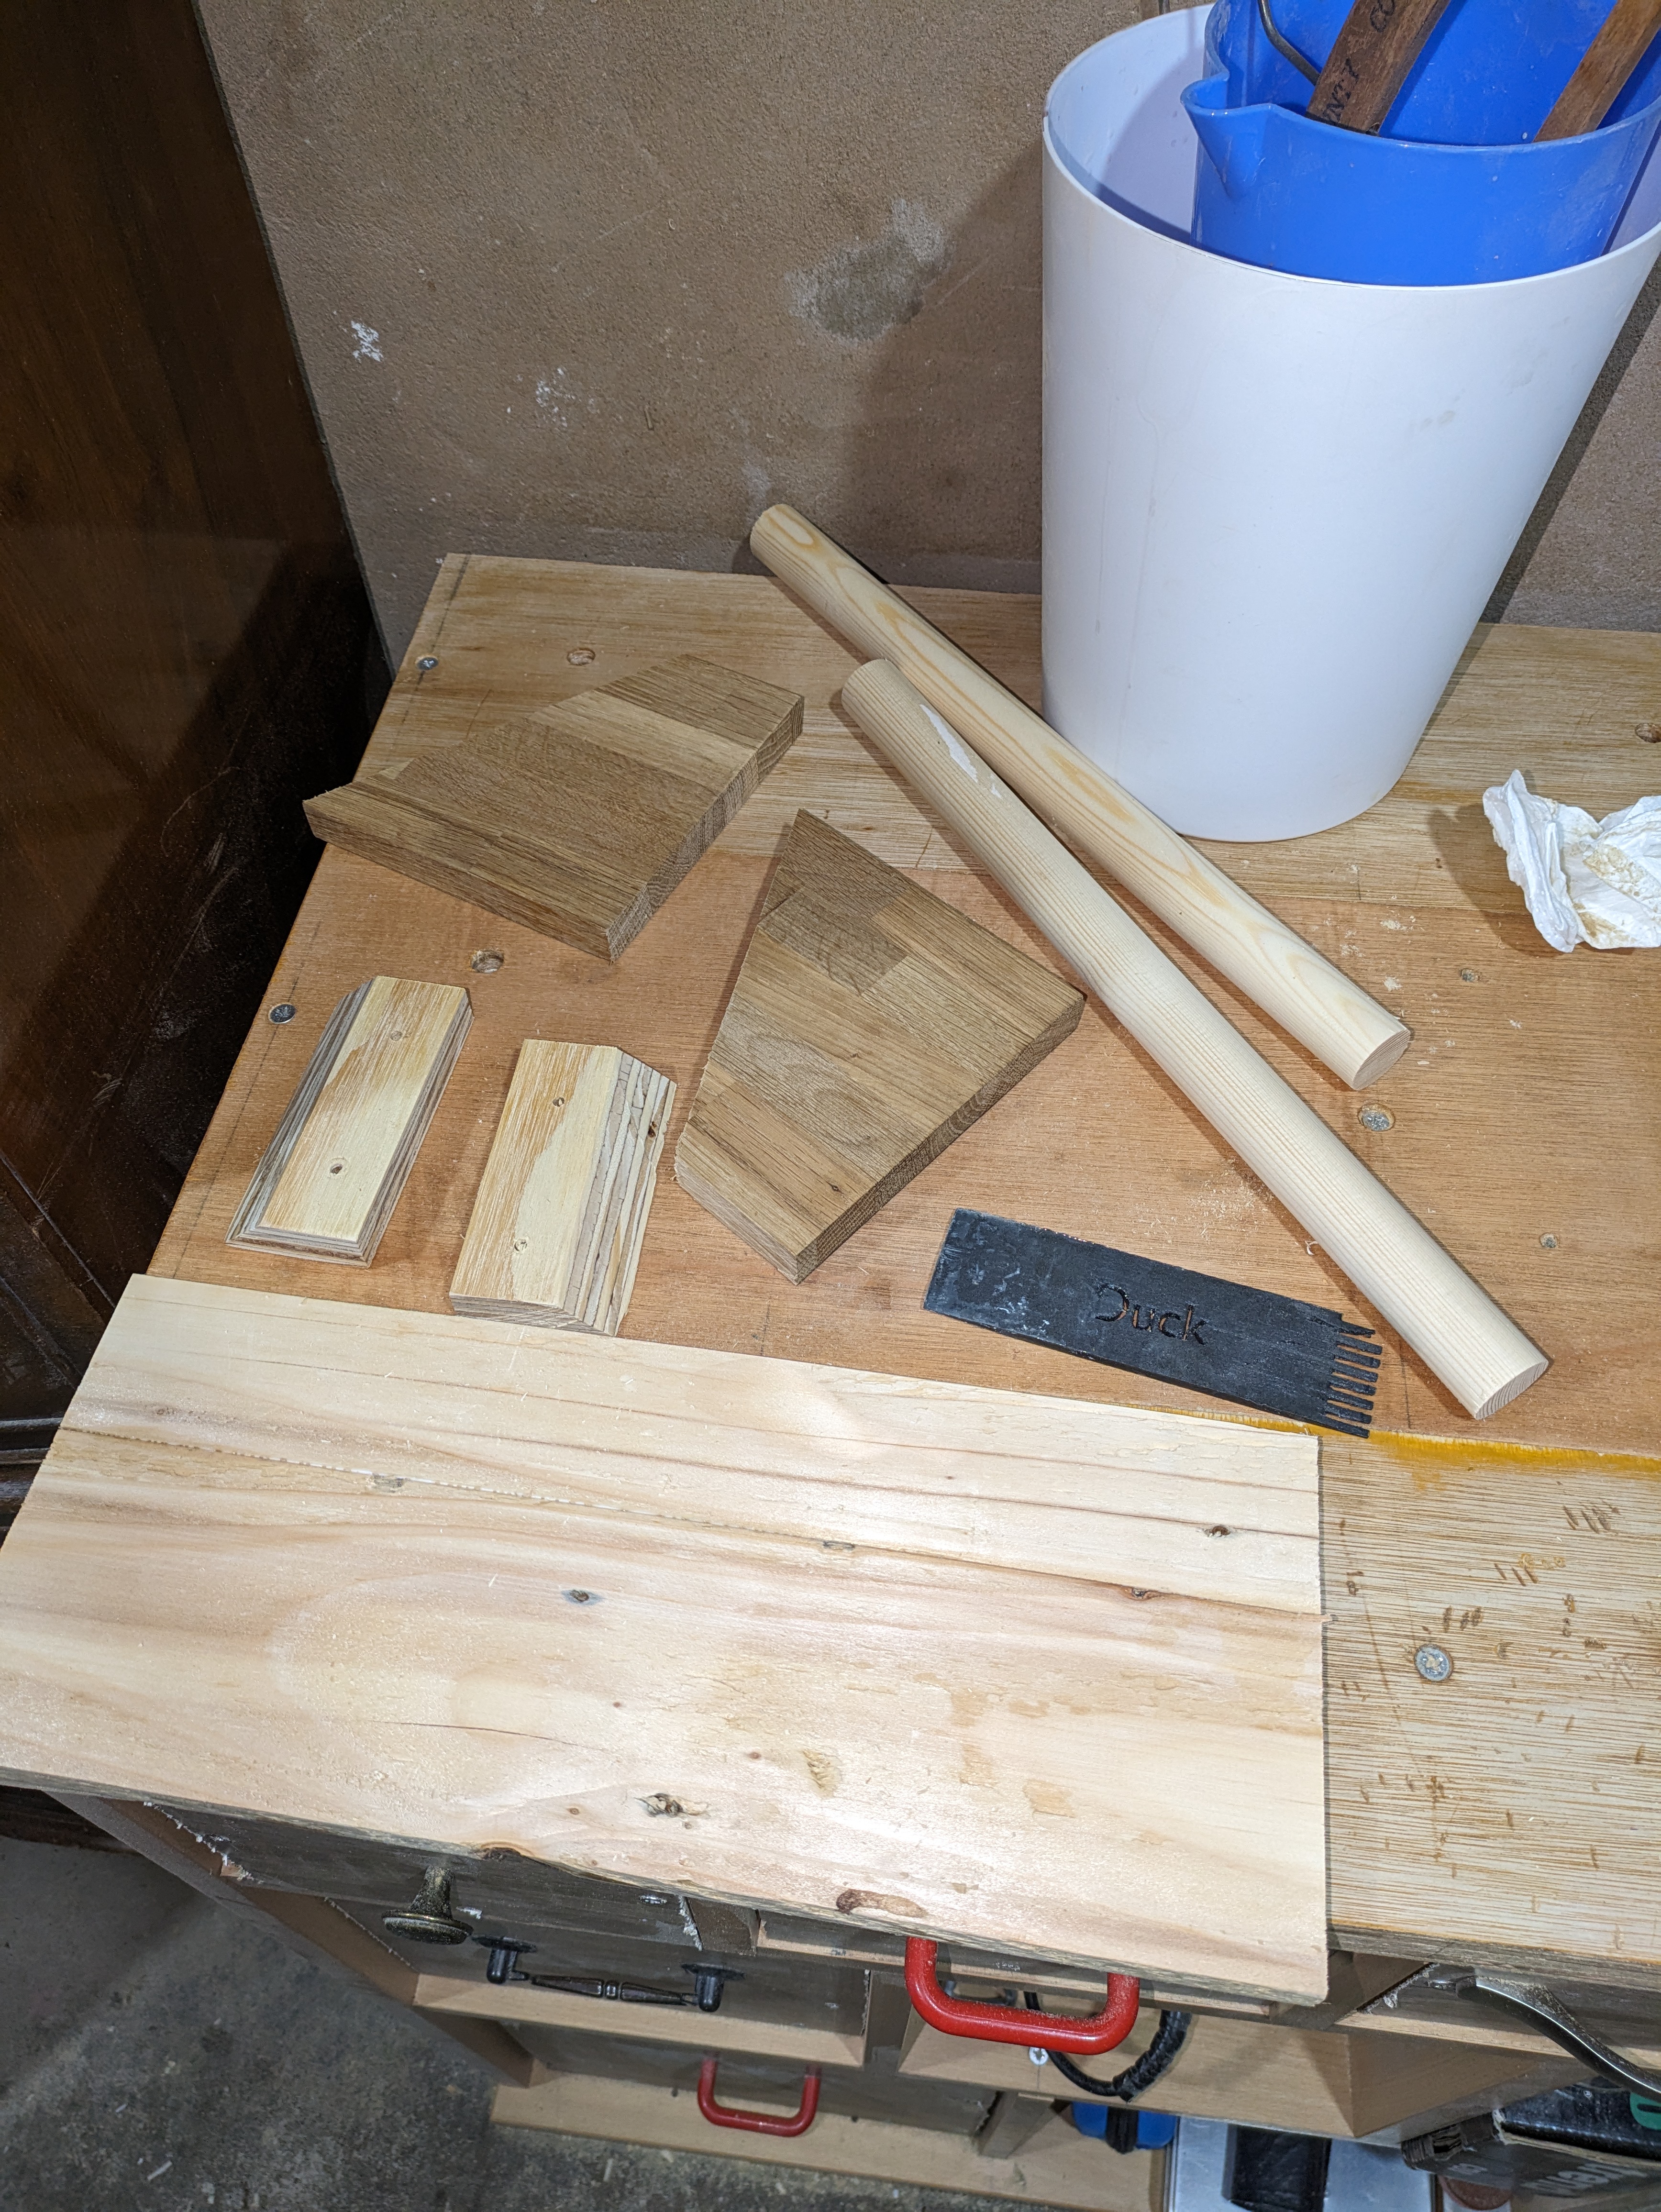
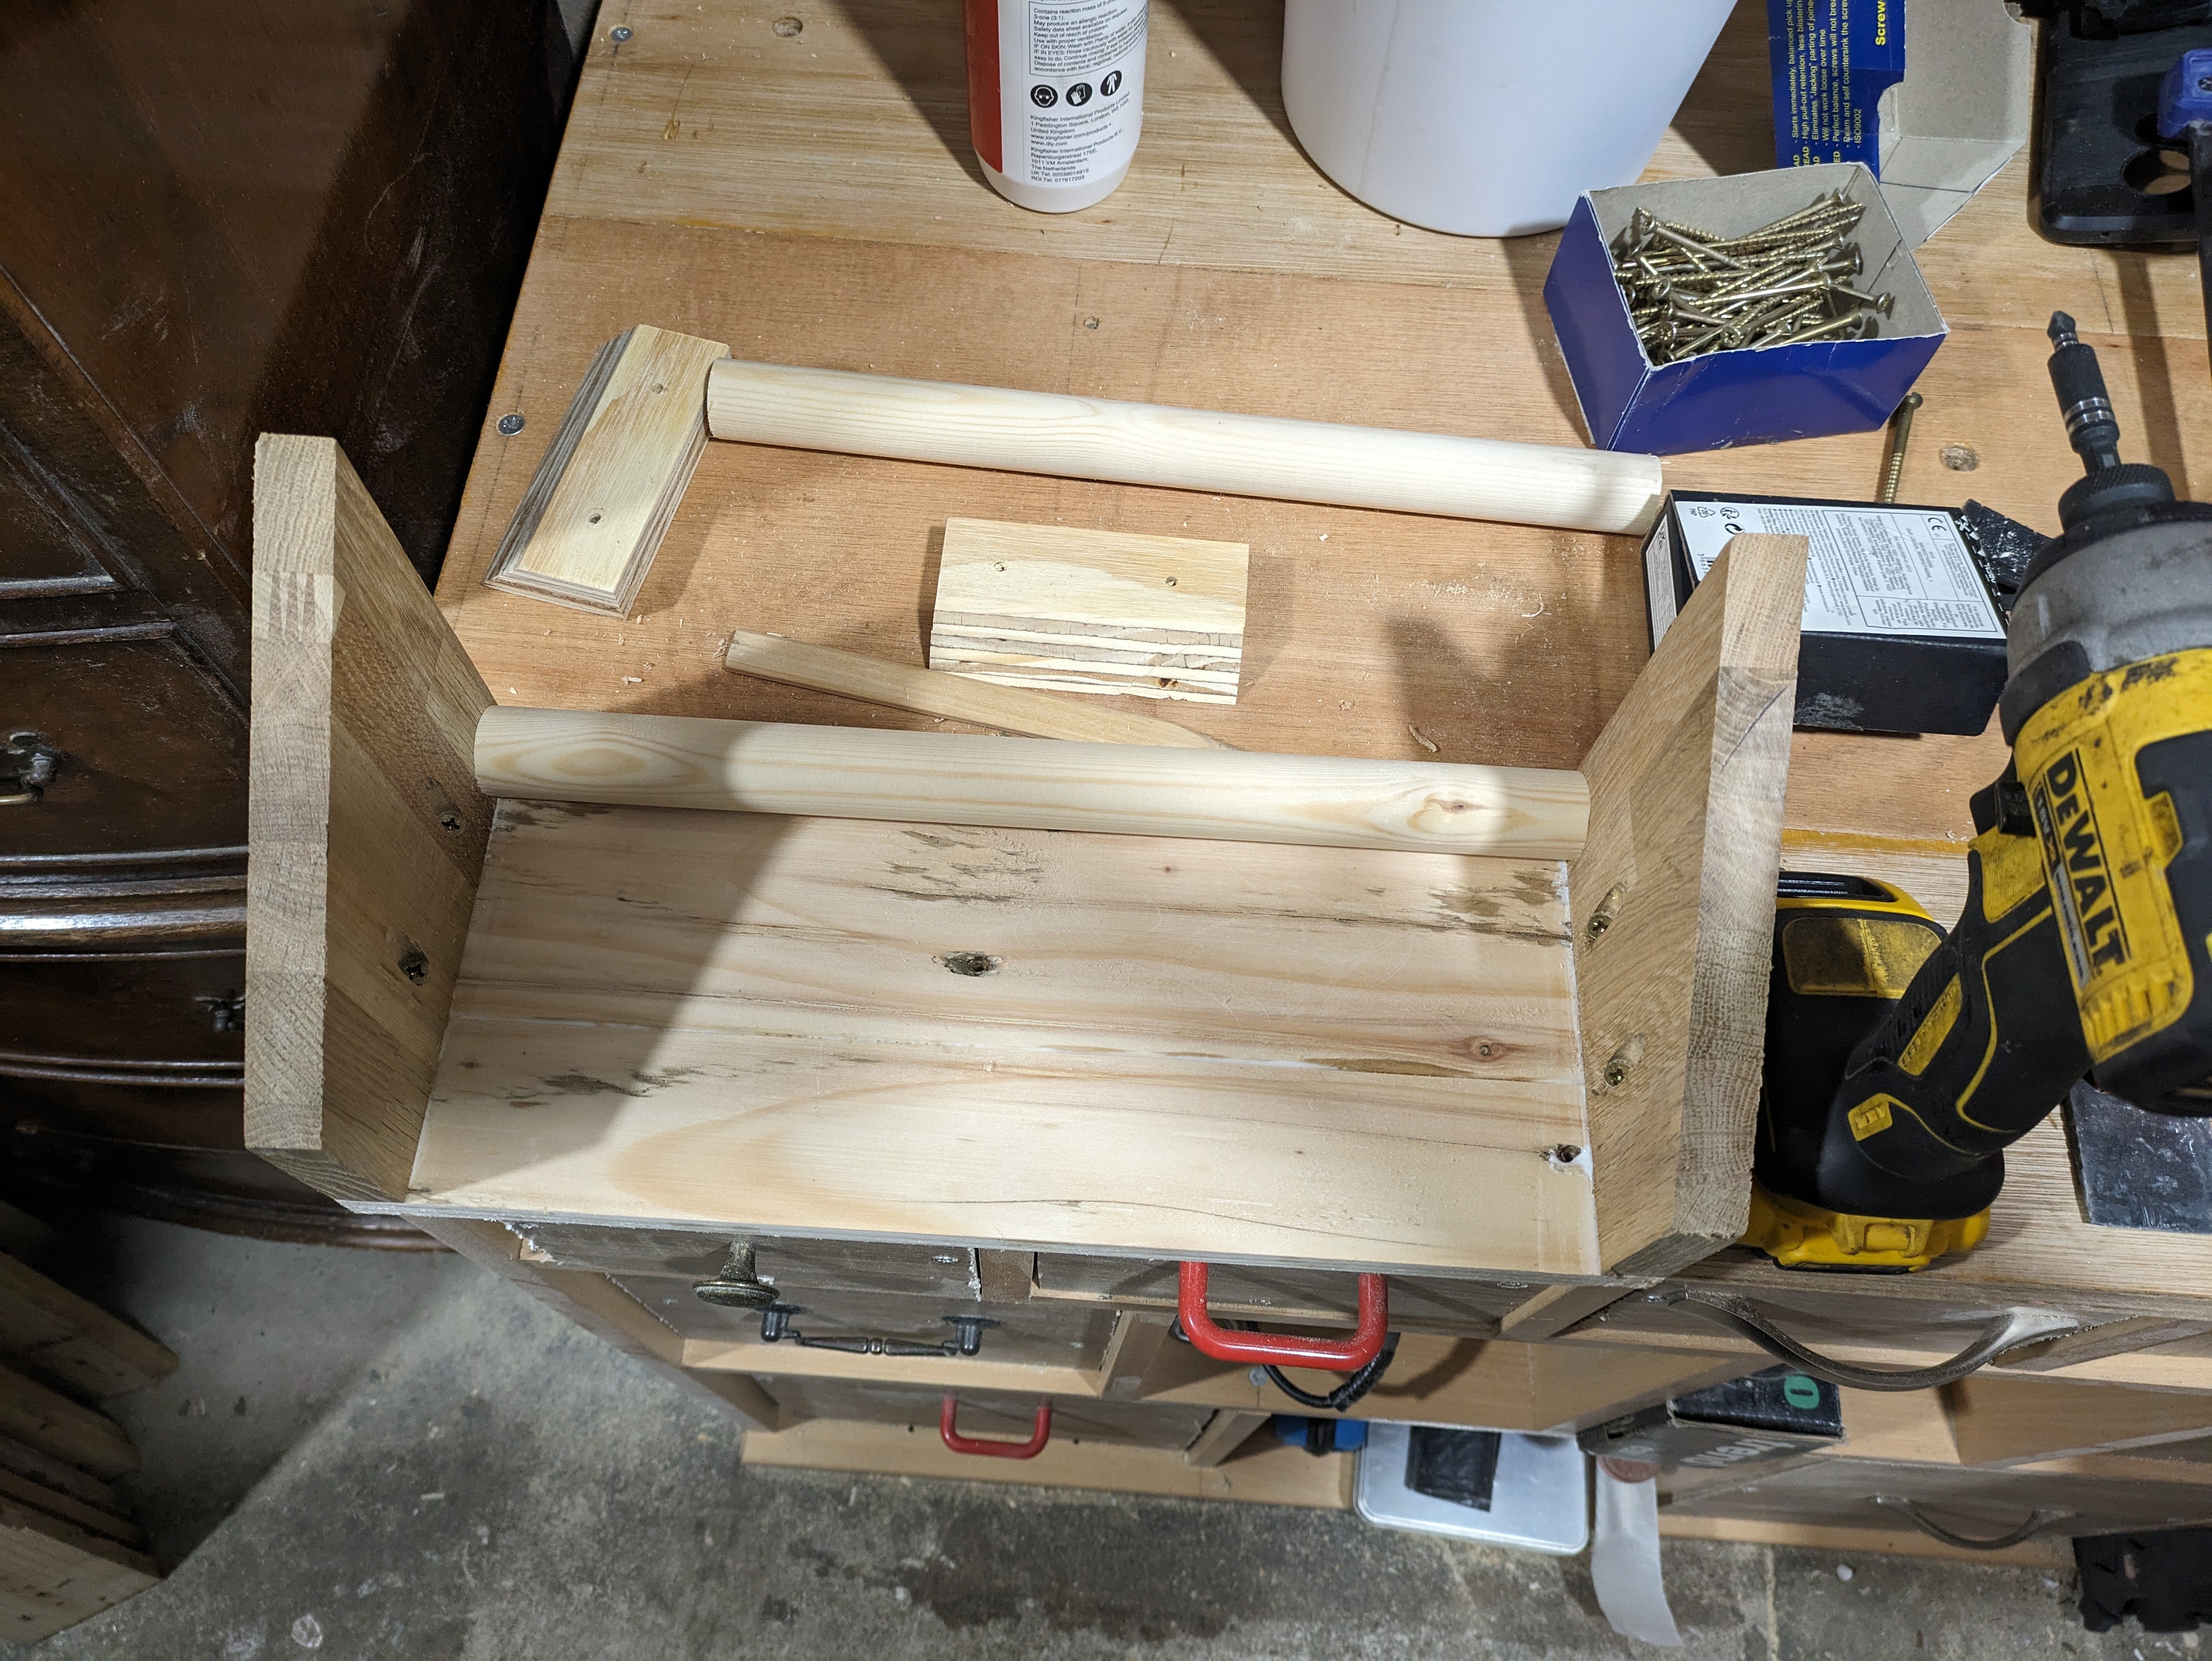
Now onto the tool holders! I really didn’t know how I would go about making the holders so I just typed “french cleat *insert tool* holder” into google and attempted to replicate a design. The first tool holder was for the saws, I kept seeing a floating saw holder which looked pretty awesome and could also be used for holding squares. This turned out to be quite involved but was worth the effort for the end result.
The floating saw holder basically used a bit of dowle in an angled box that locks the saw in place with gravity and friction of the dowle. In theory.
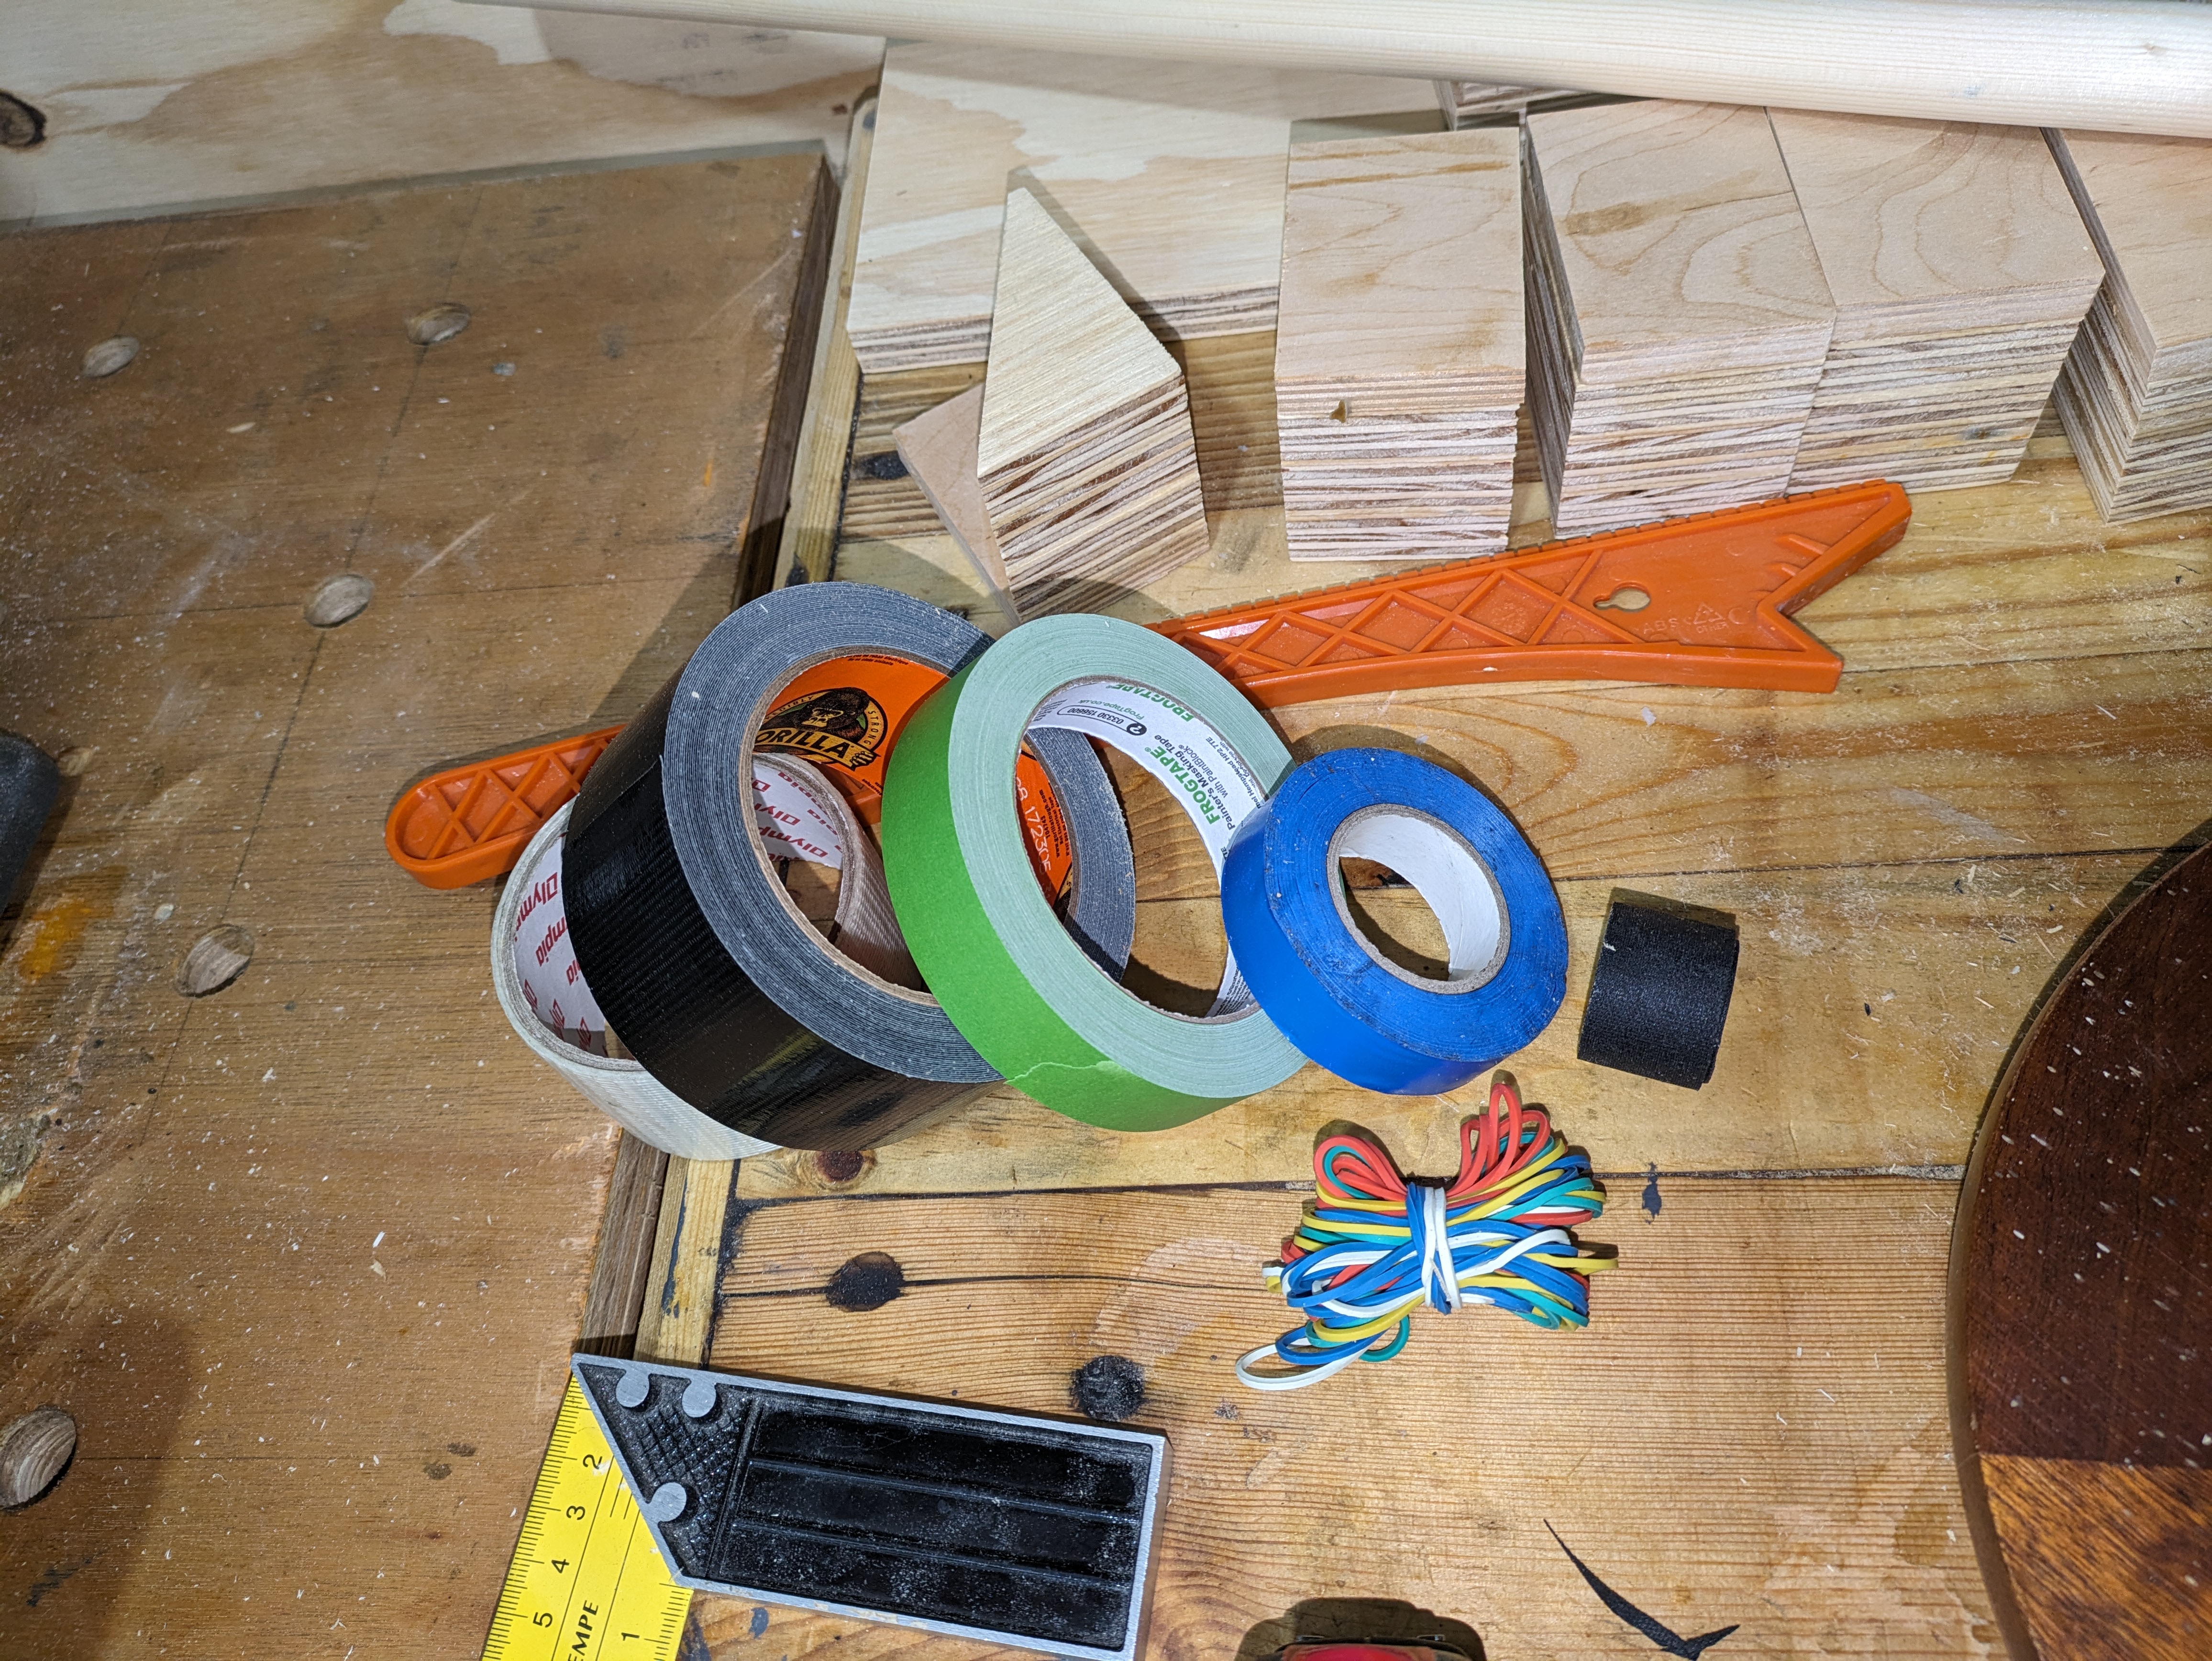
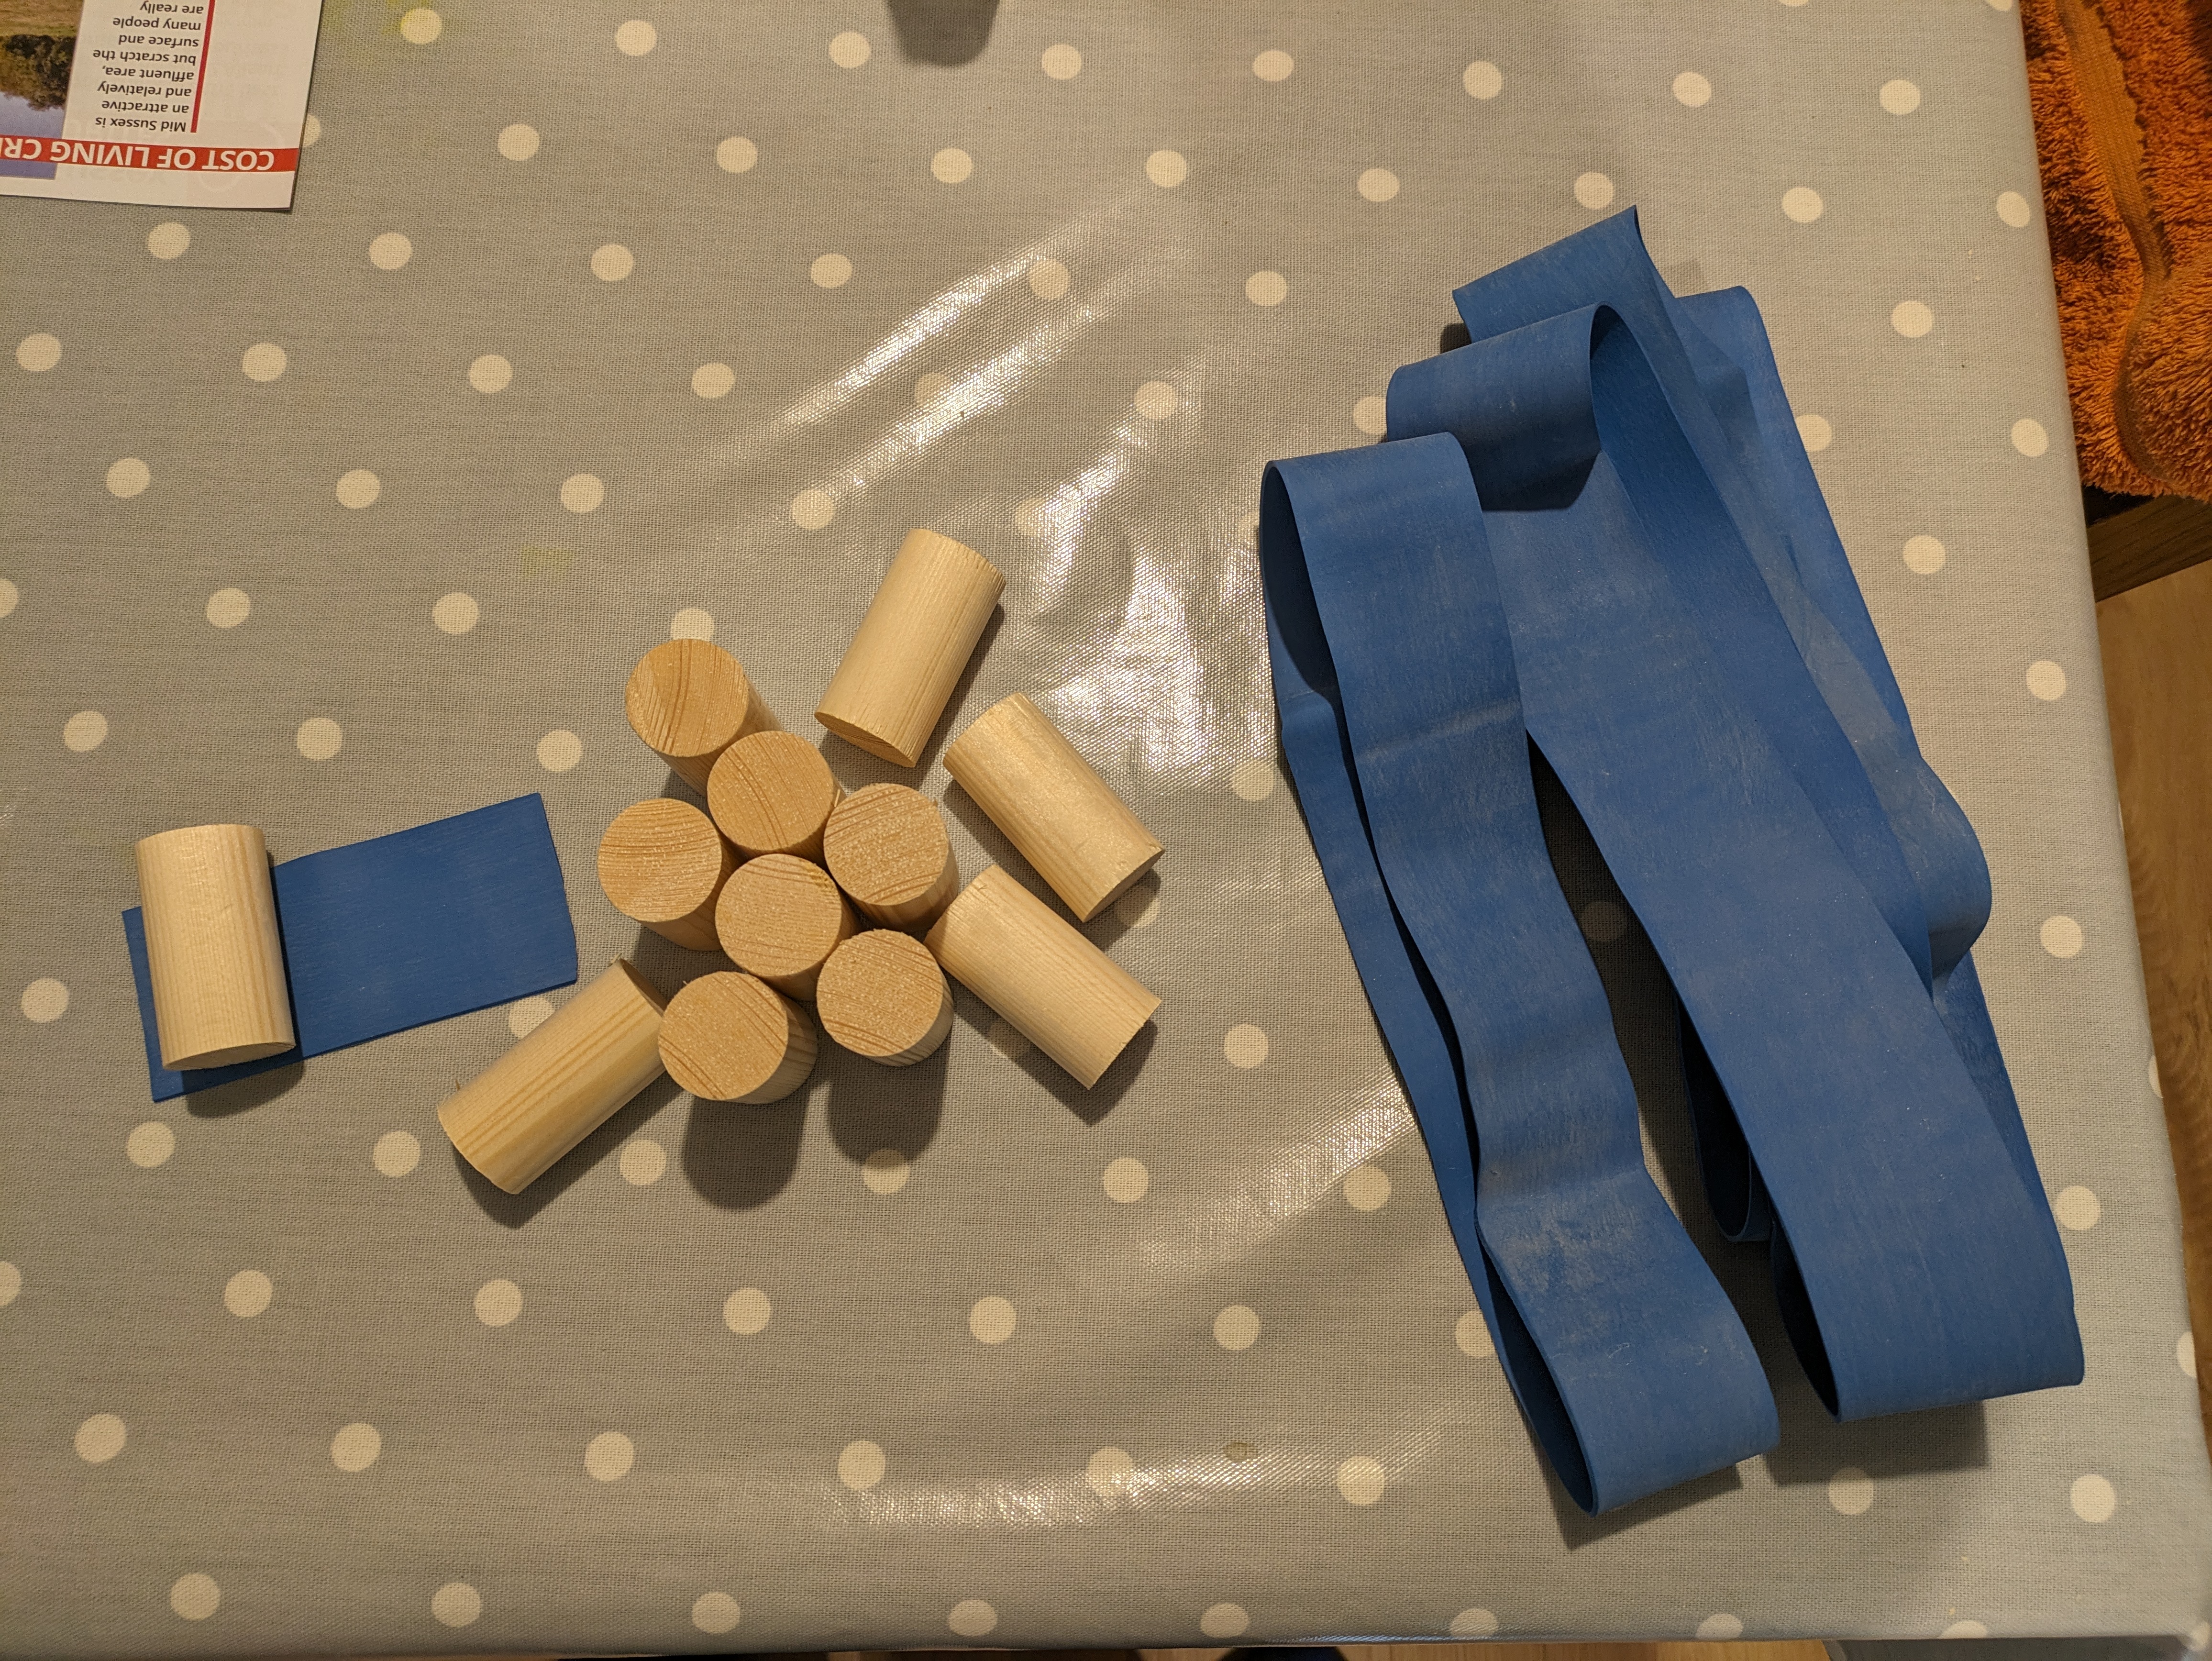
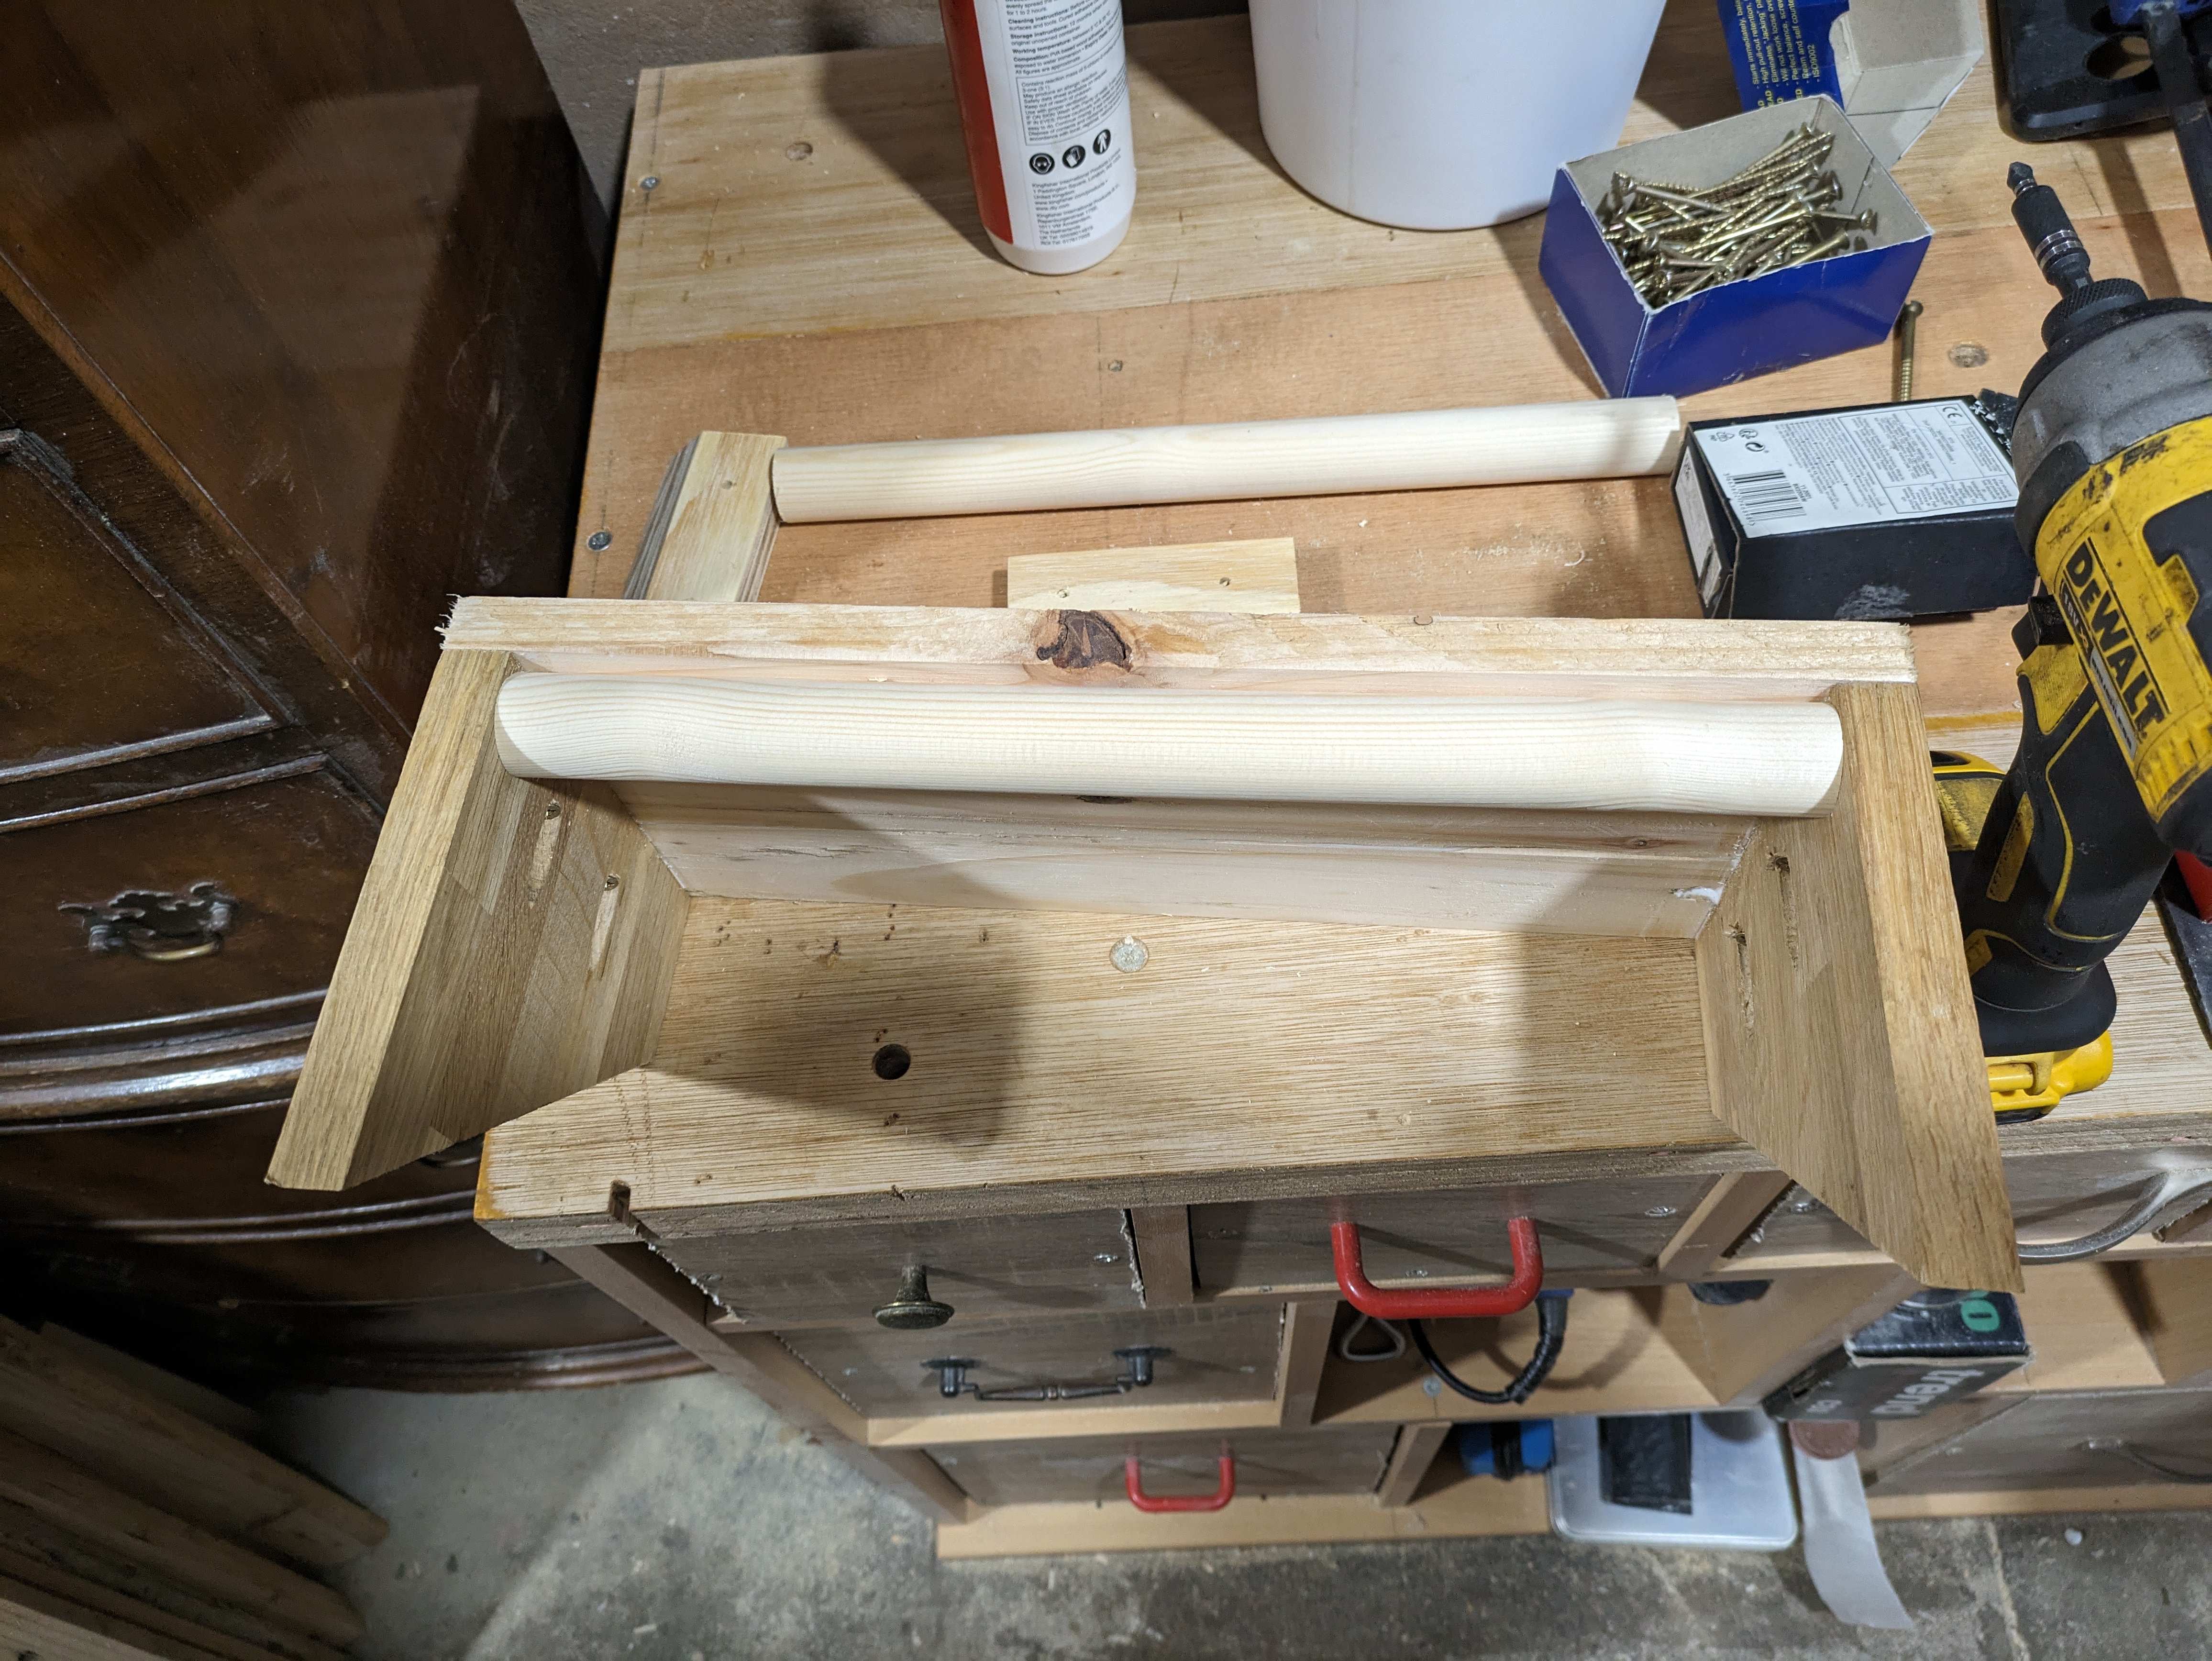
I set about making the boxes and glueing them to a backing board and dropping a dowle the same width of the box into it. This was partially successful, but I found that there was not enough friction on the dowles so I tried adding a bunch of different tapes to the dowels to create more friction. In the end I bought a larger diameter dowel and a massive elastic band and cut it to size to wrap around the dowel. This probably makes no sense but the pictures really explain it better that I could!

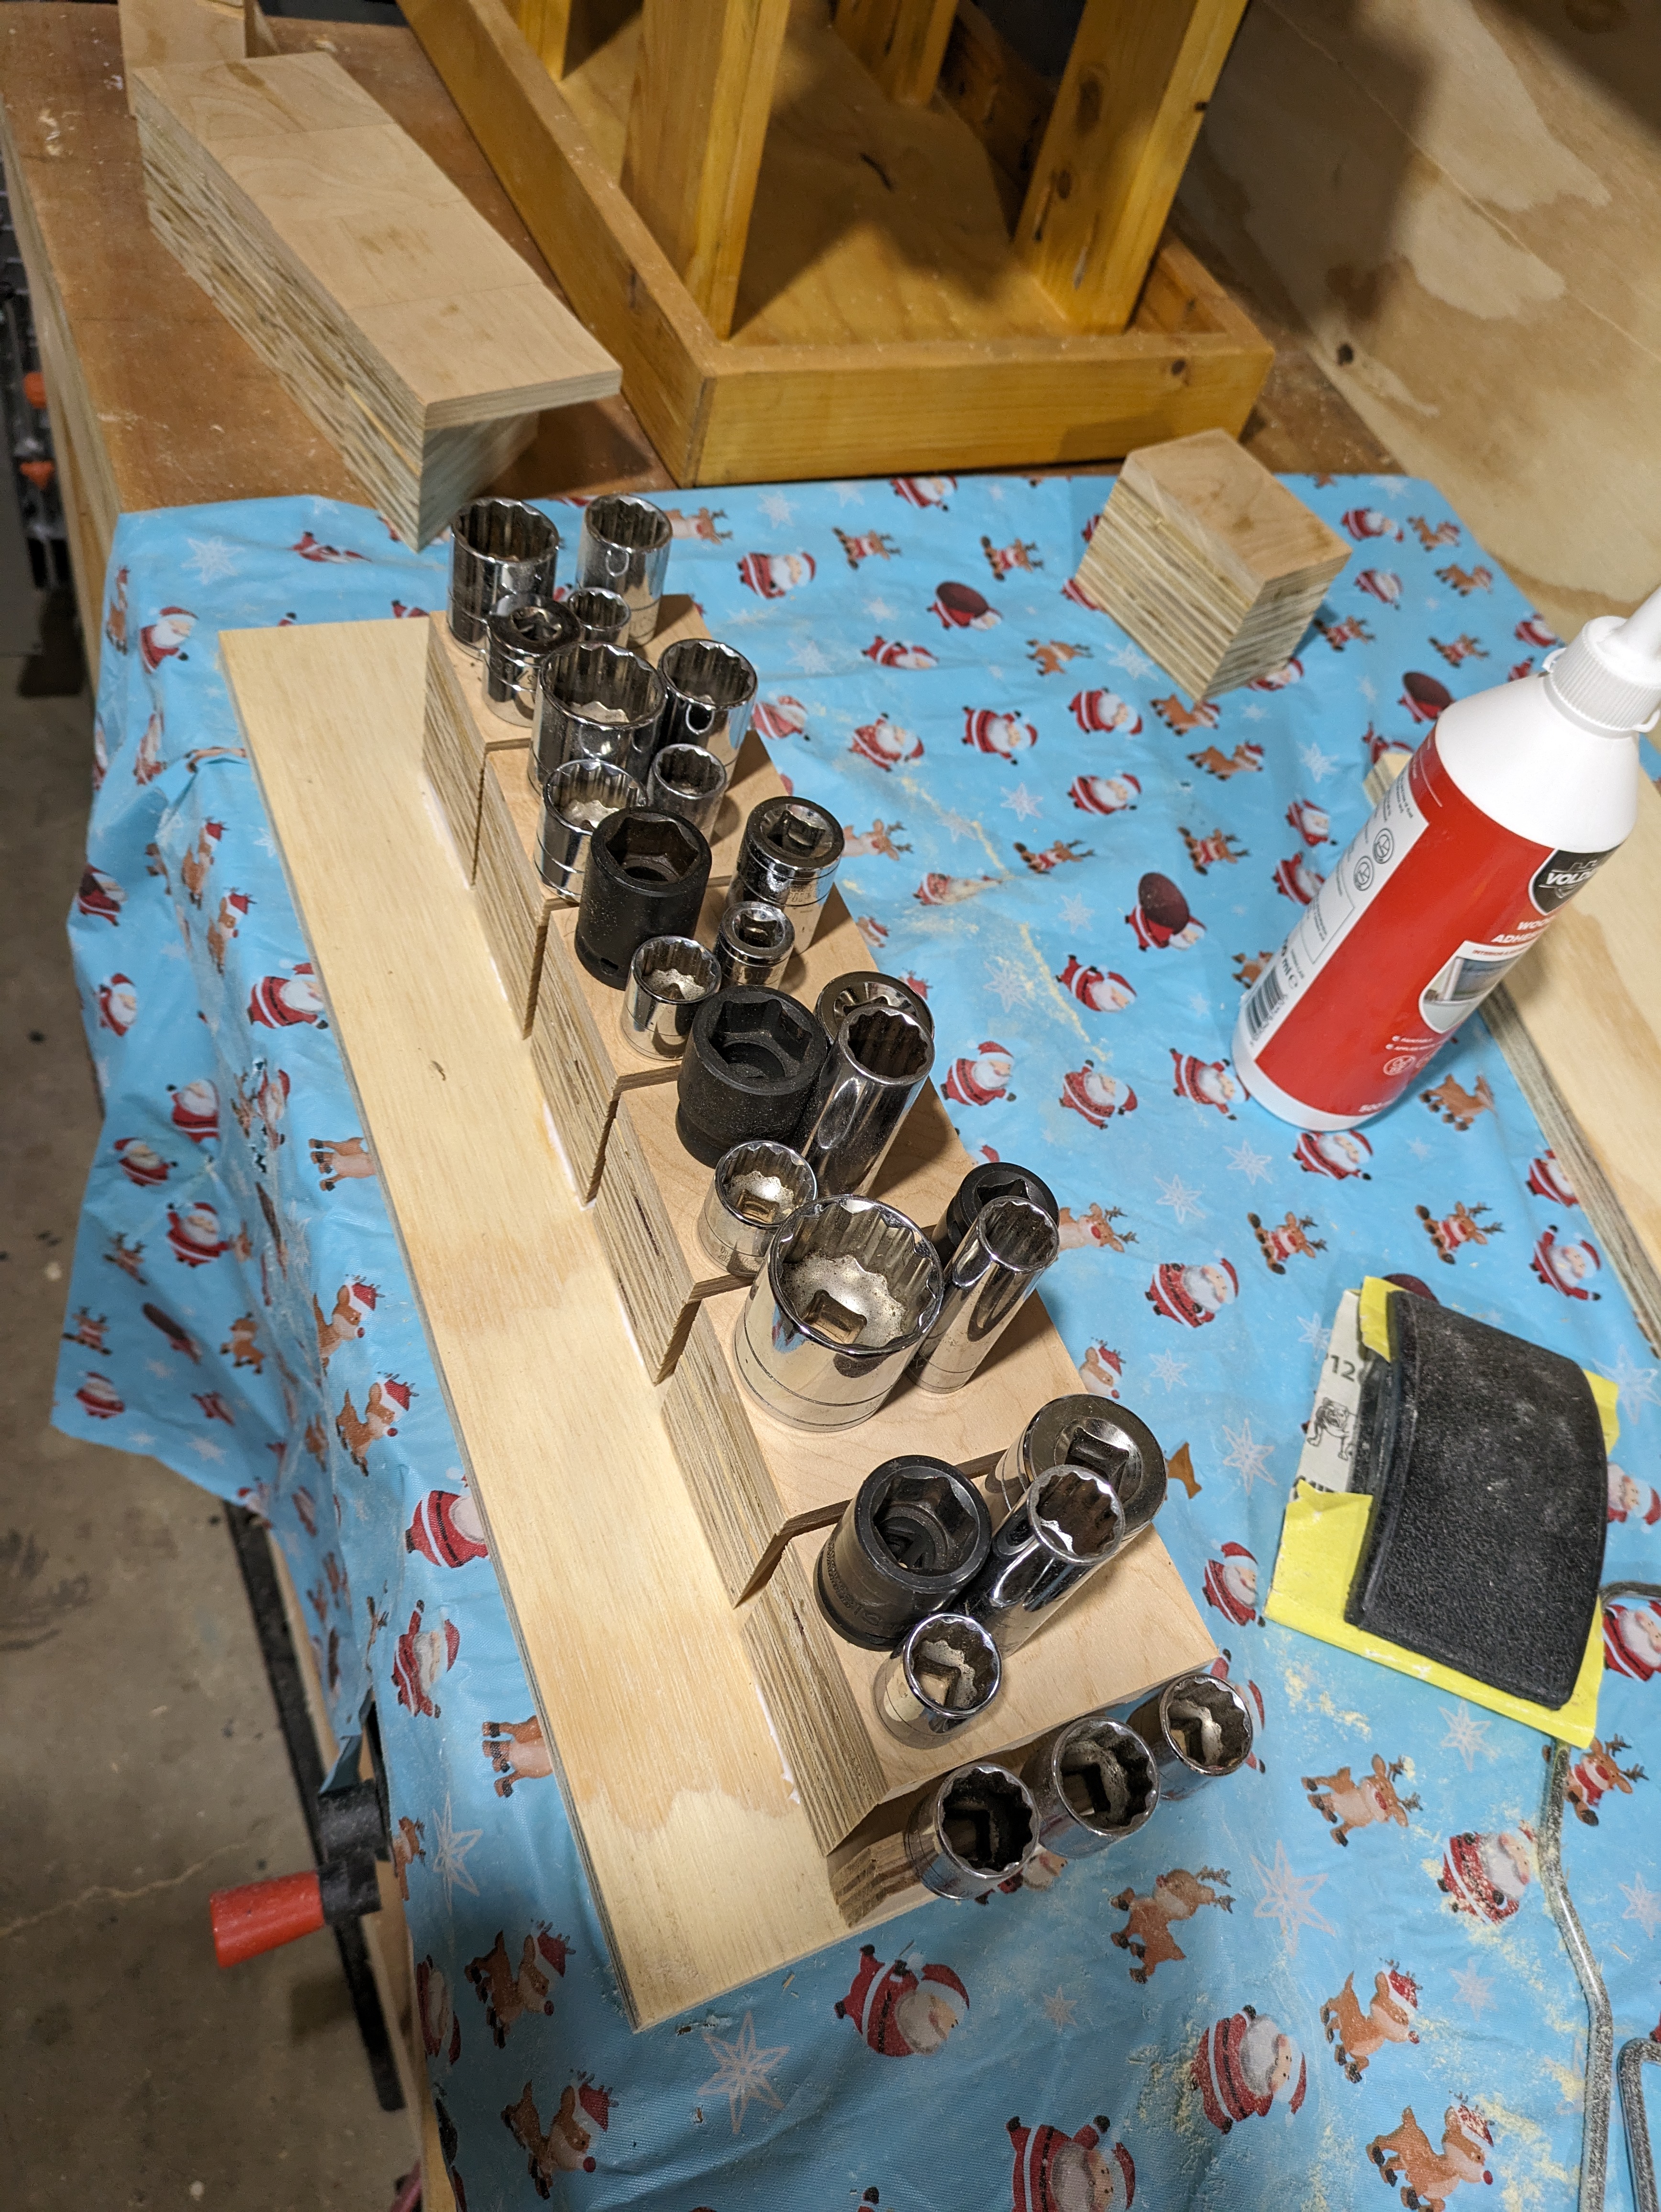

The next tool holders were made in fairly quick succession. I already had a screwdriver holder on the workbench so I slapped a 45 degree rail on the back and stuck it straight on the wall.
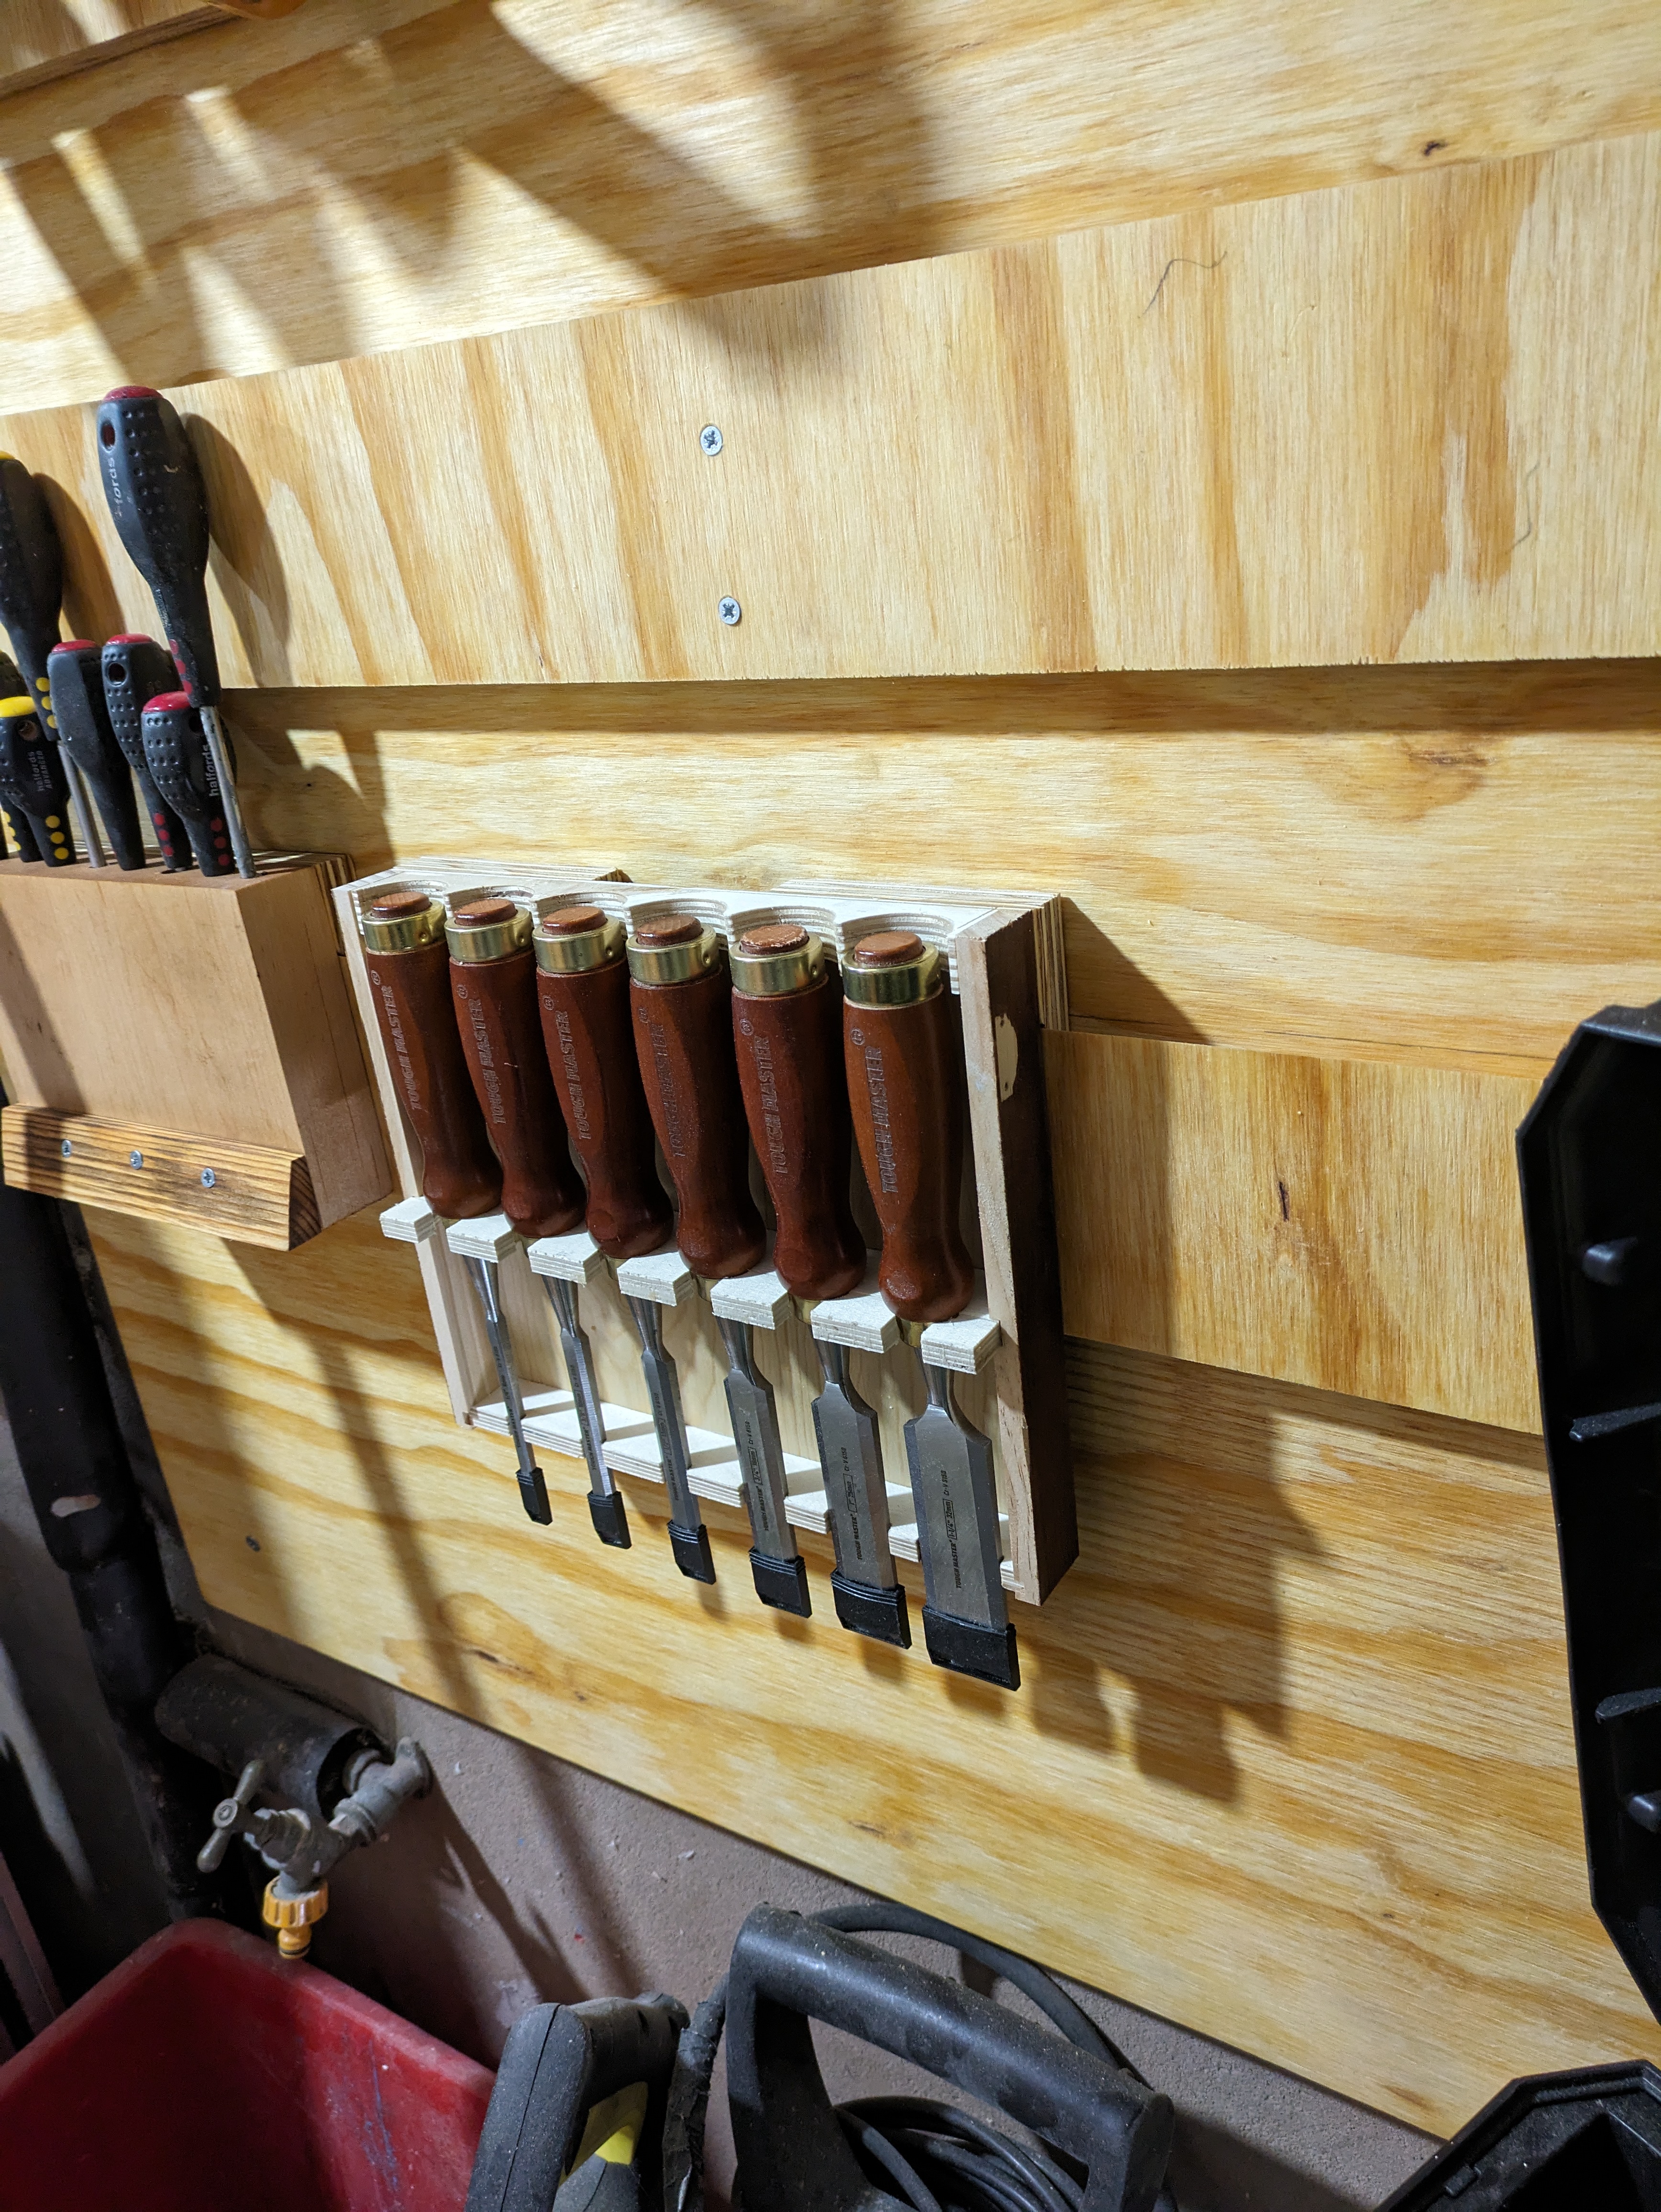
Then I used my chisel box to make a quick tool holder by taking the lid off and adding a collar to it to hold the chisels in place the slapping a 45 degree rail on the back.
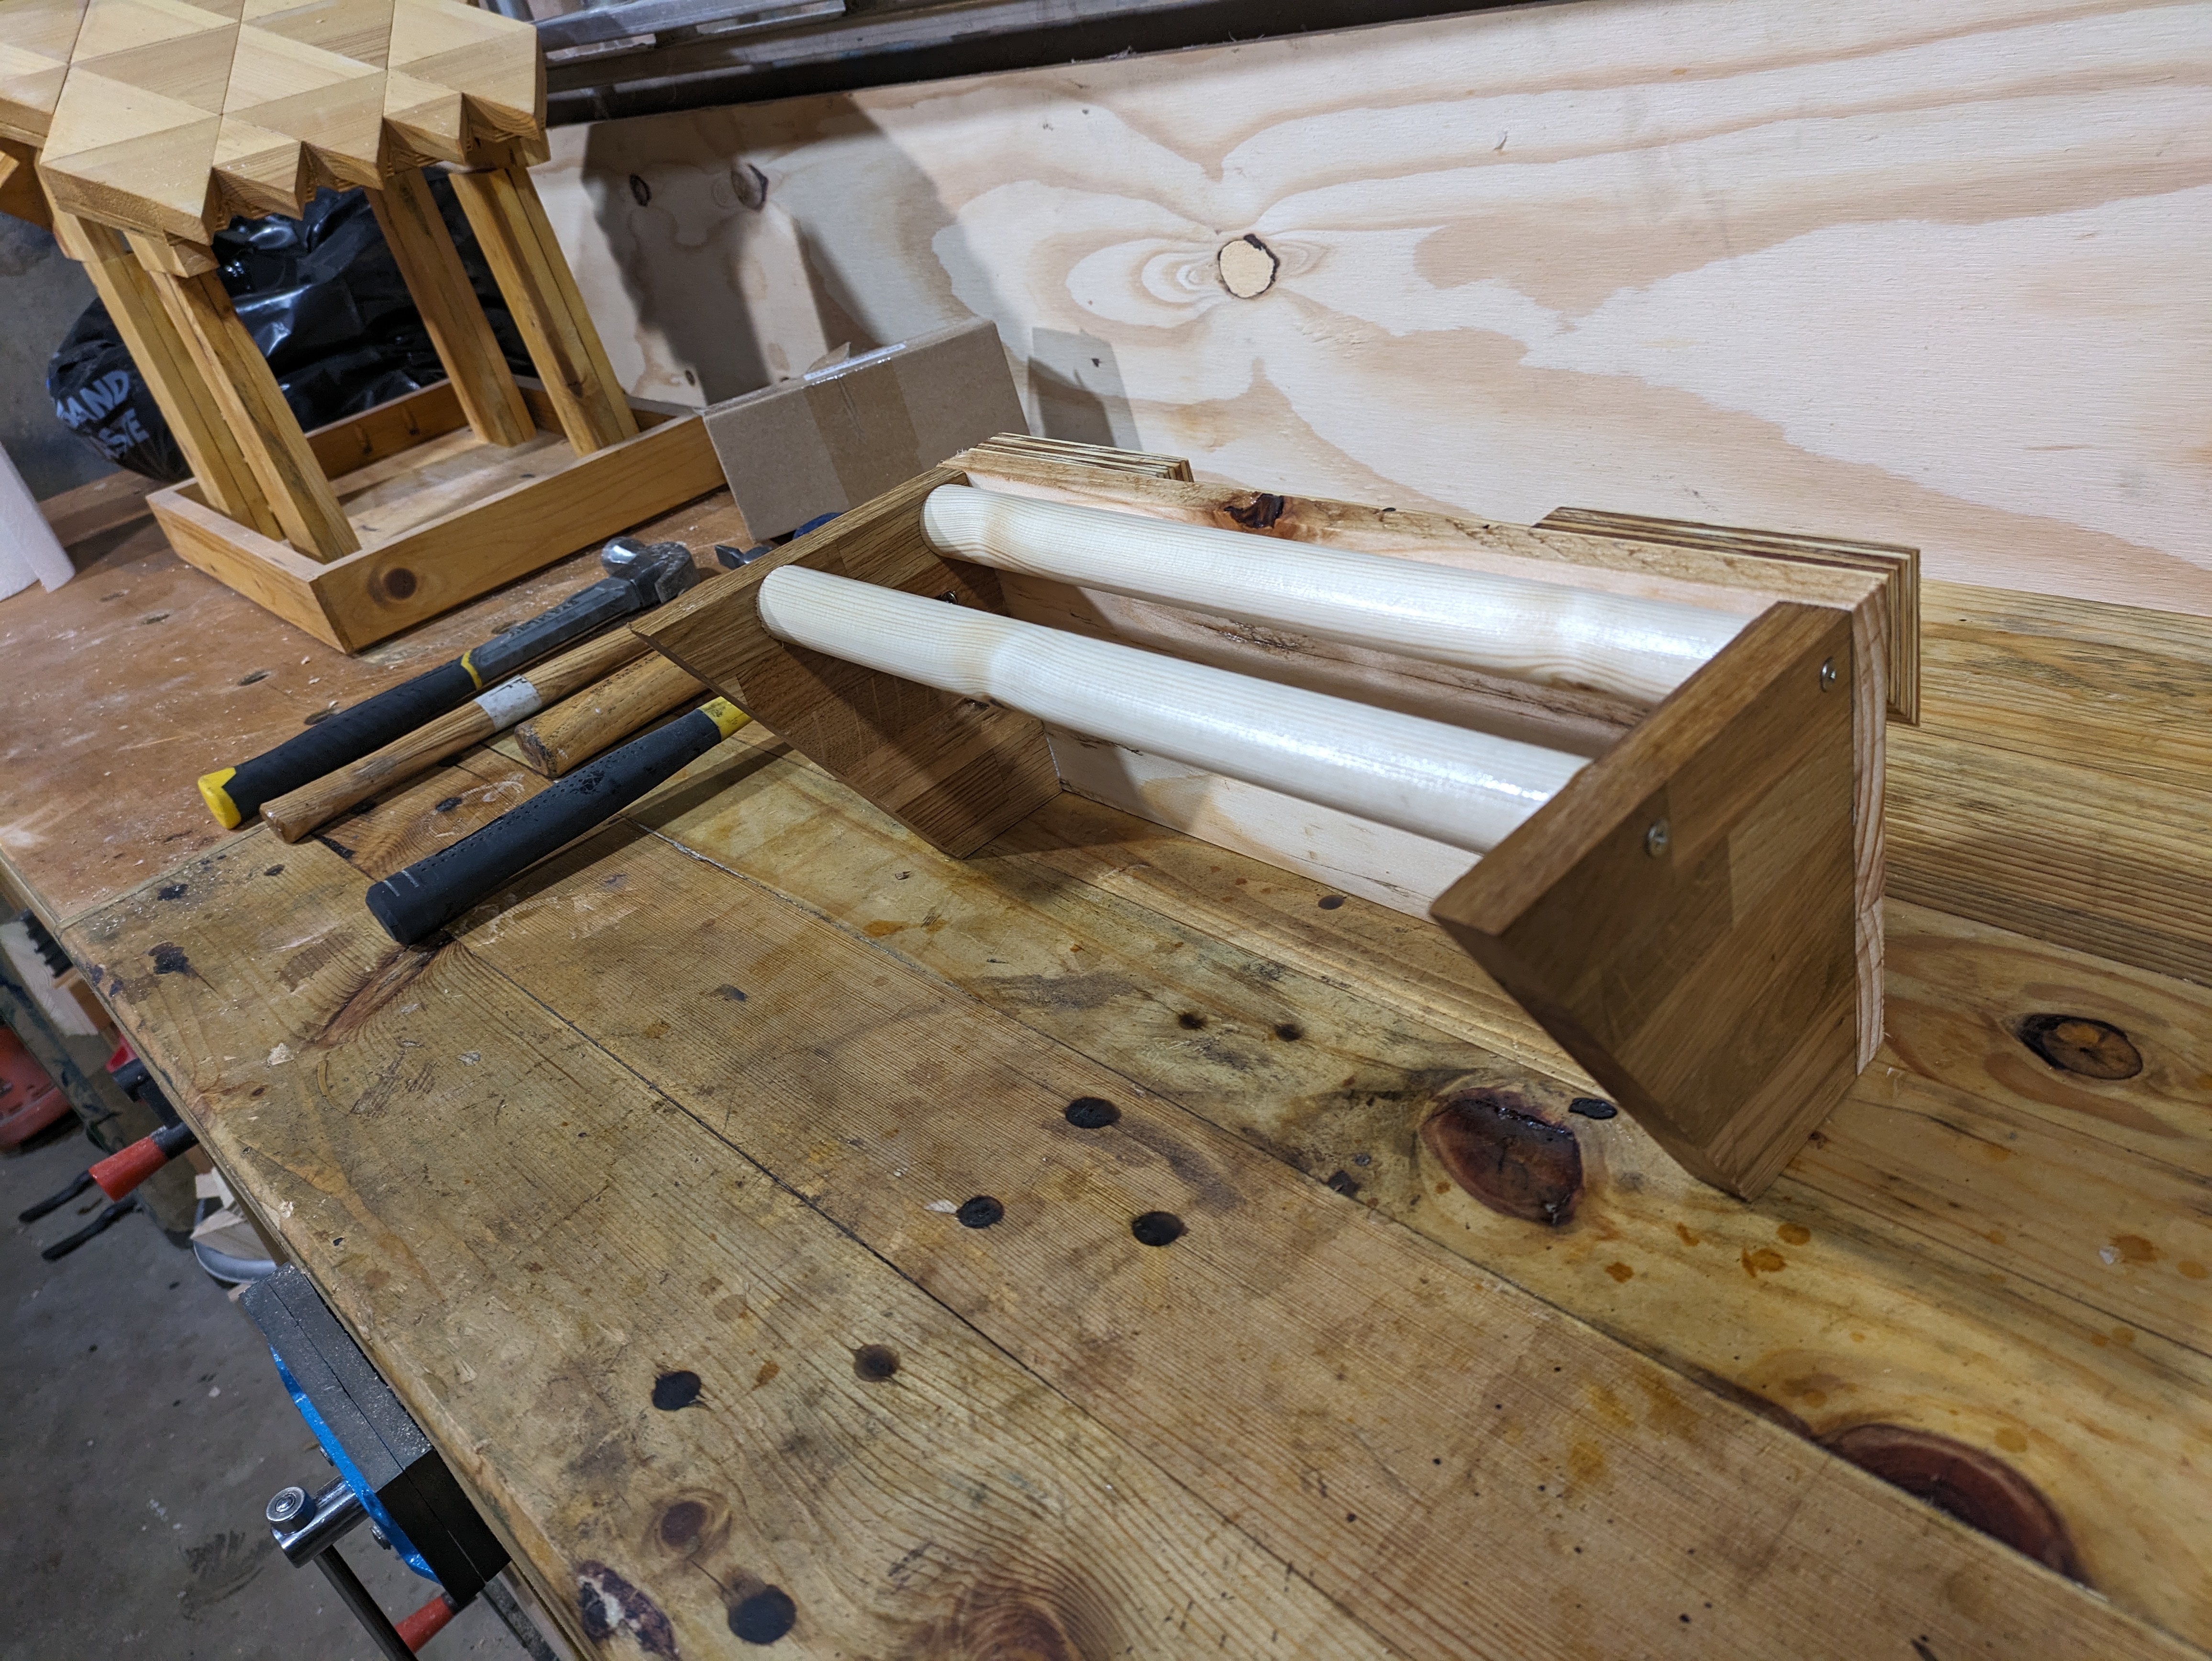
Lastly I made a hammer holder which was made from 3 different off-cuts from various projects. A simple holder with two uncut dowels screwed into an angled back plate. Then the hammer simply slot between the dowels.
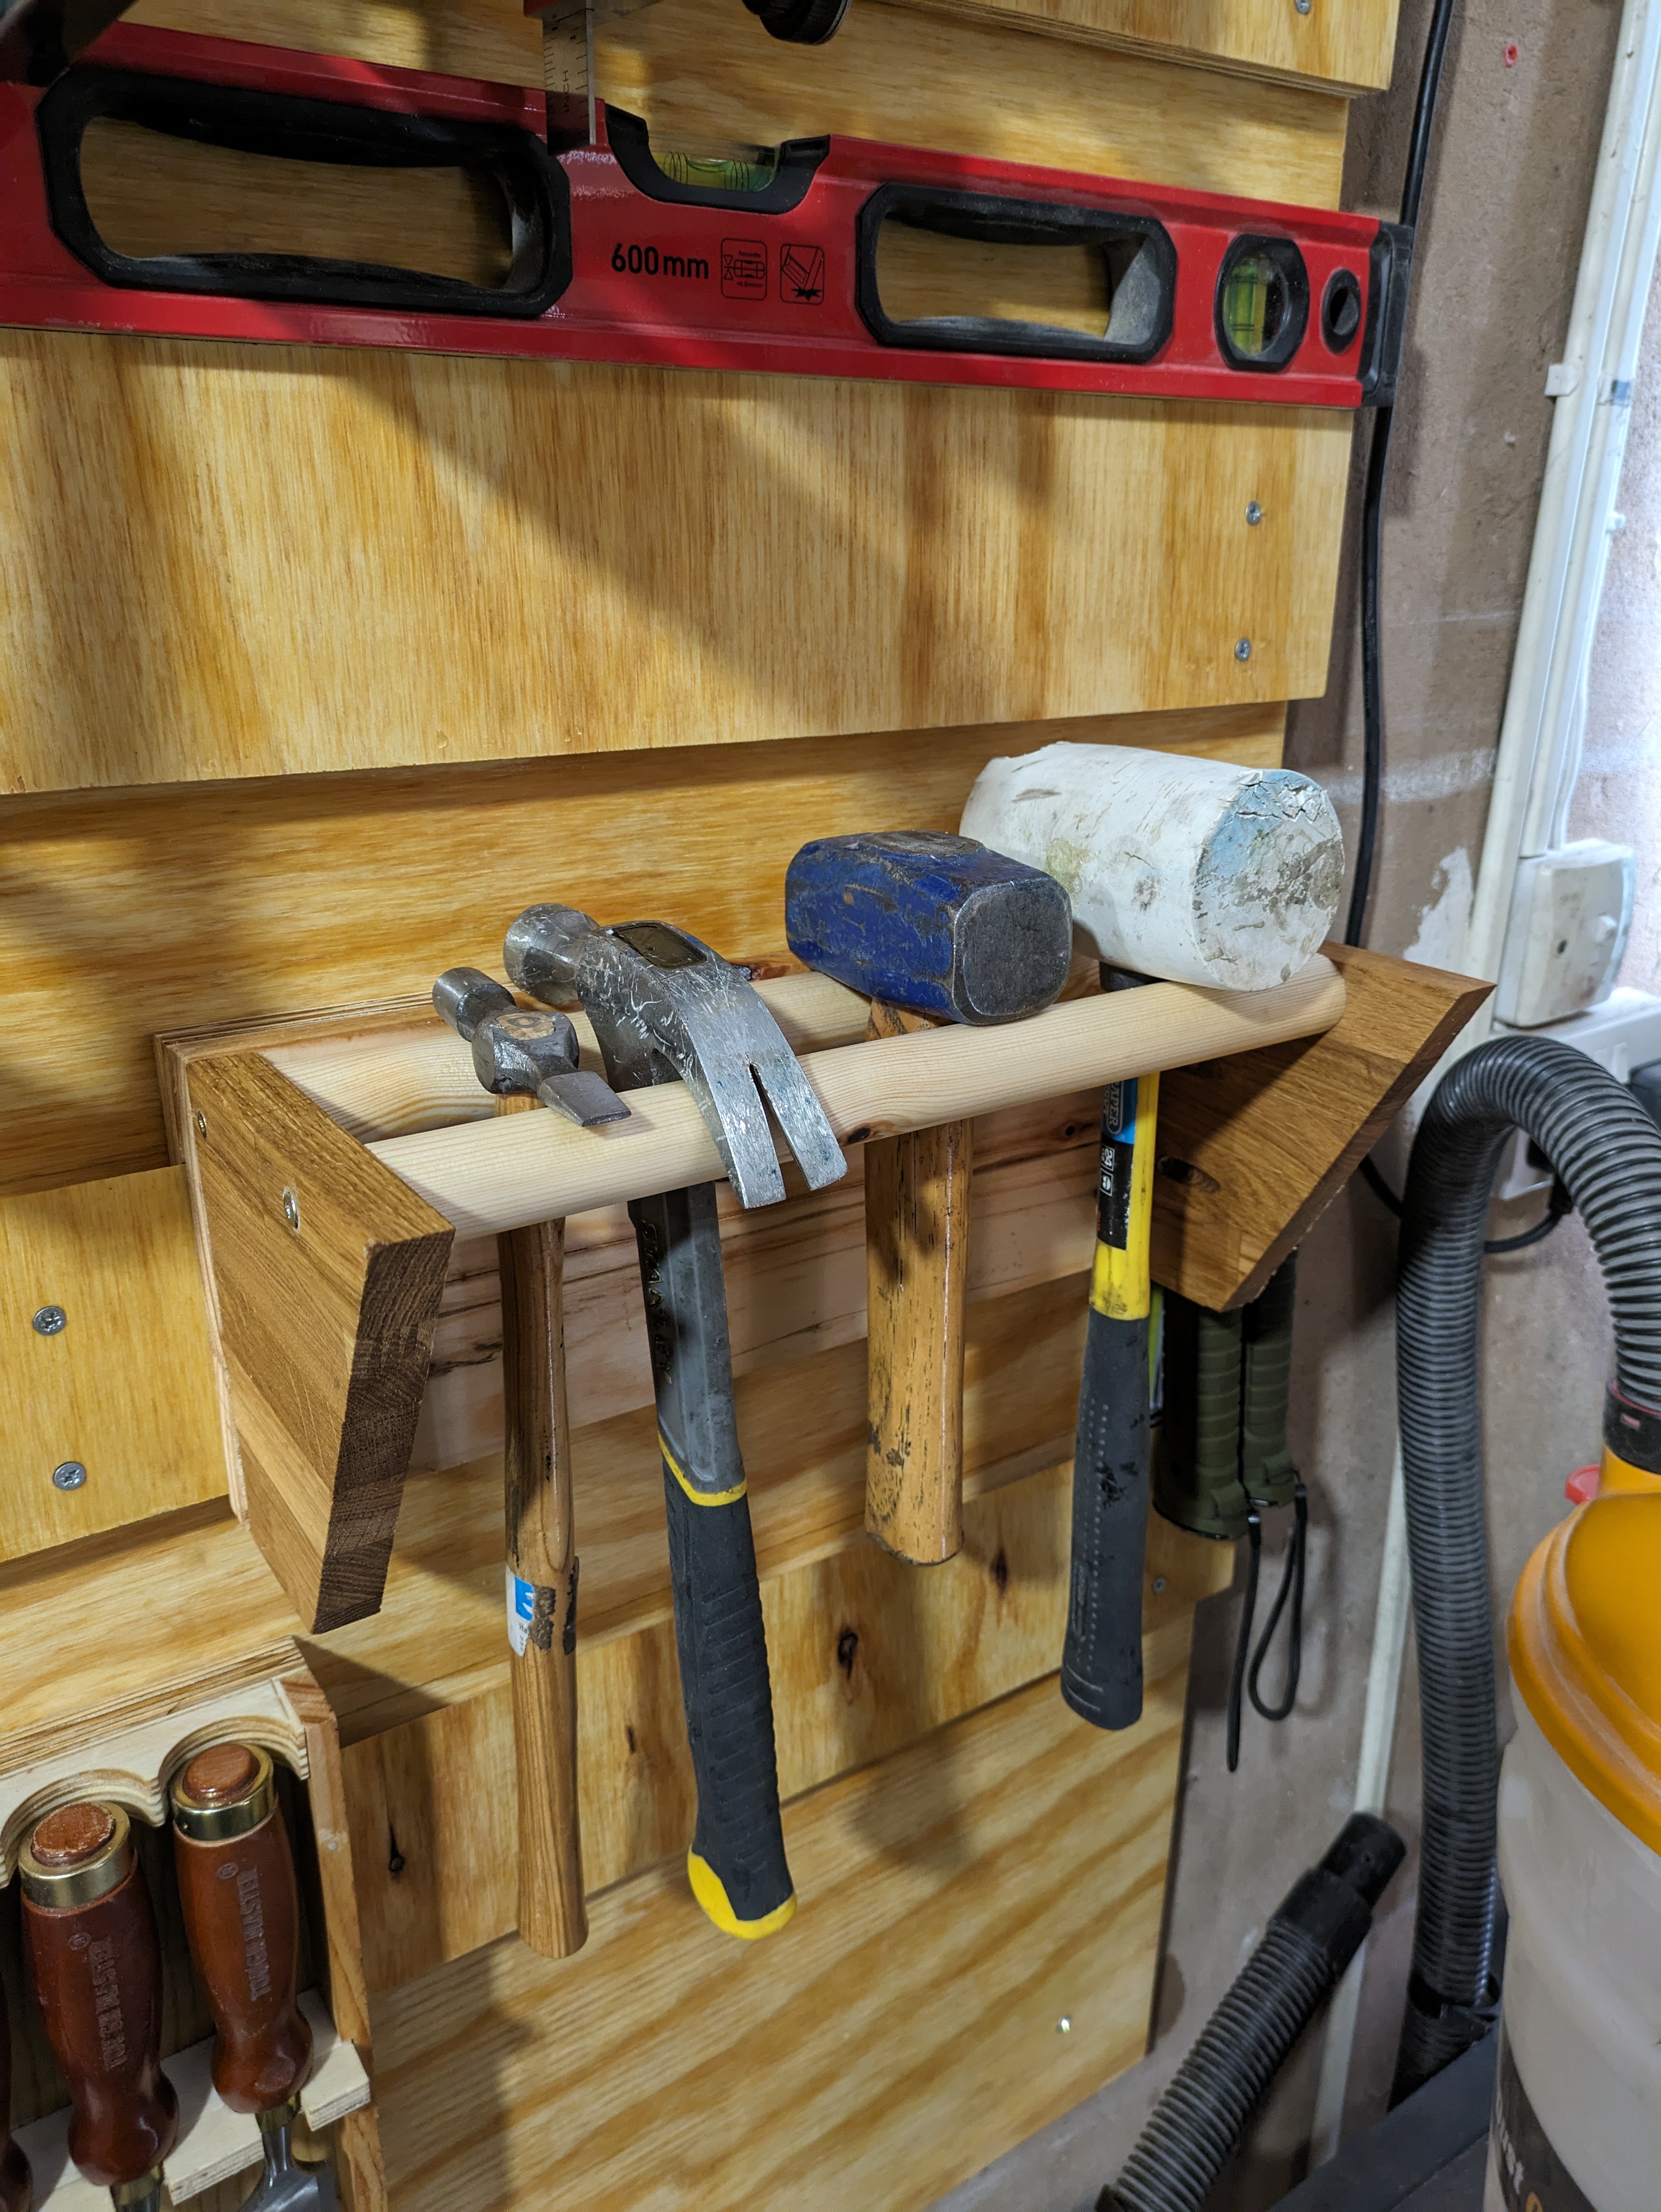
All in all it was pretty fun project and it’s made the workshop an easier place to navigate and looks a little more workshopy! There still space for some other tools to go up on the wall and may replicate something similar this down the other end of the garage at some point.

Before 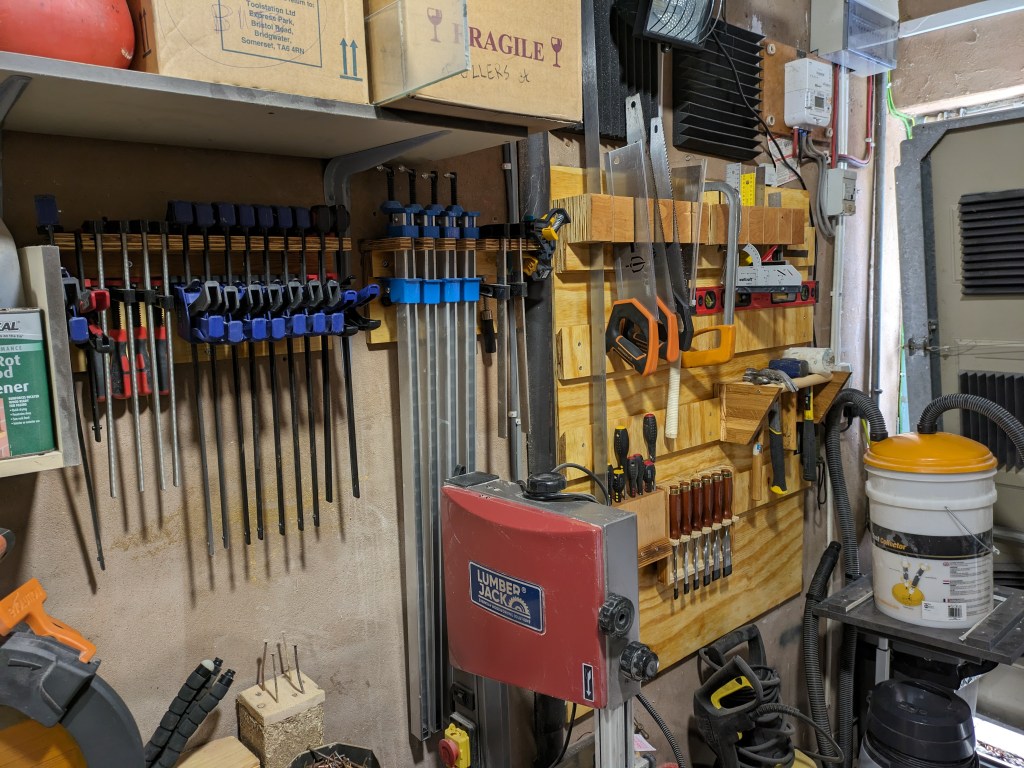
After! -
Bits and Bobs Birdhouse
Over the last year or so I’ve built up alot of offcuts which I’ve been saving up until some inspiration manifested it’s self. After sifting through everything I had the best bits organised-ish.
I neglected to manifest any sort of inspiration but thankfully I got a request to build a birdhouse! It would be to replace a tired looking old birdhouse that has been outgrown by it’s main occupier. This happened to be a cat.
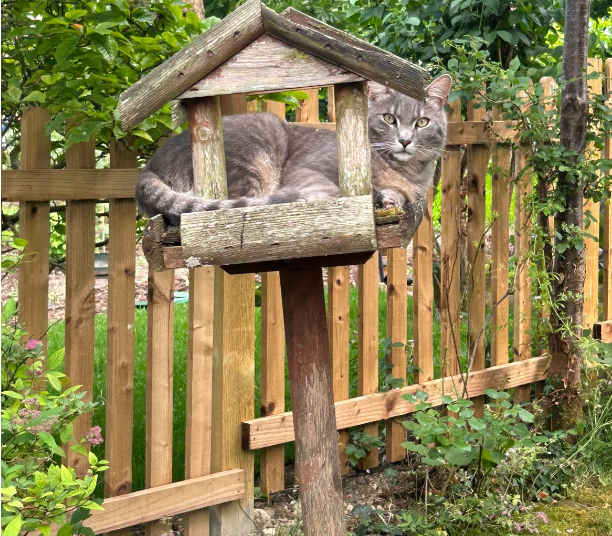
With a vague plan in my head I engaged my child mind and started playing with shapes to find a pretty pattern.
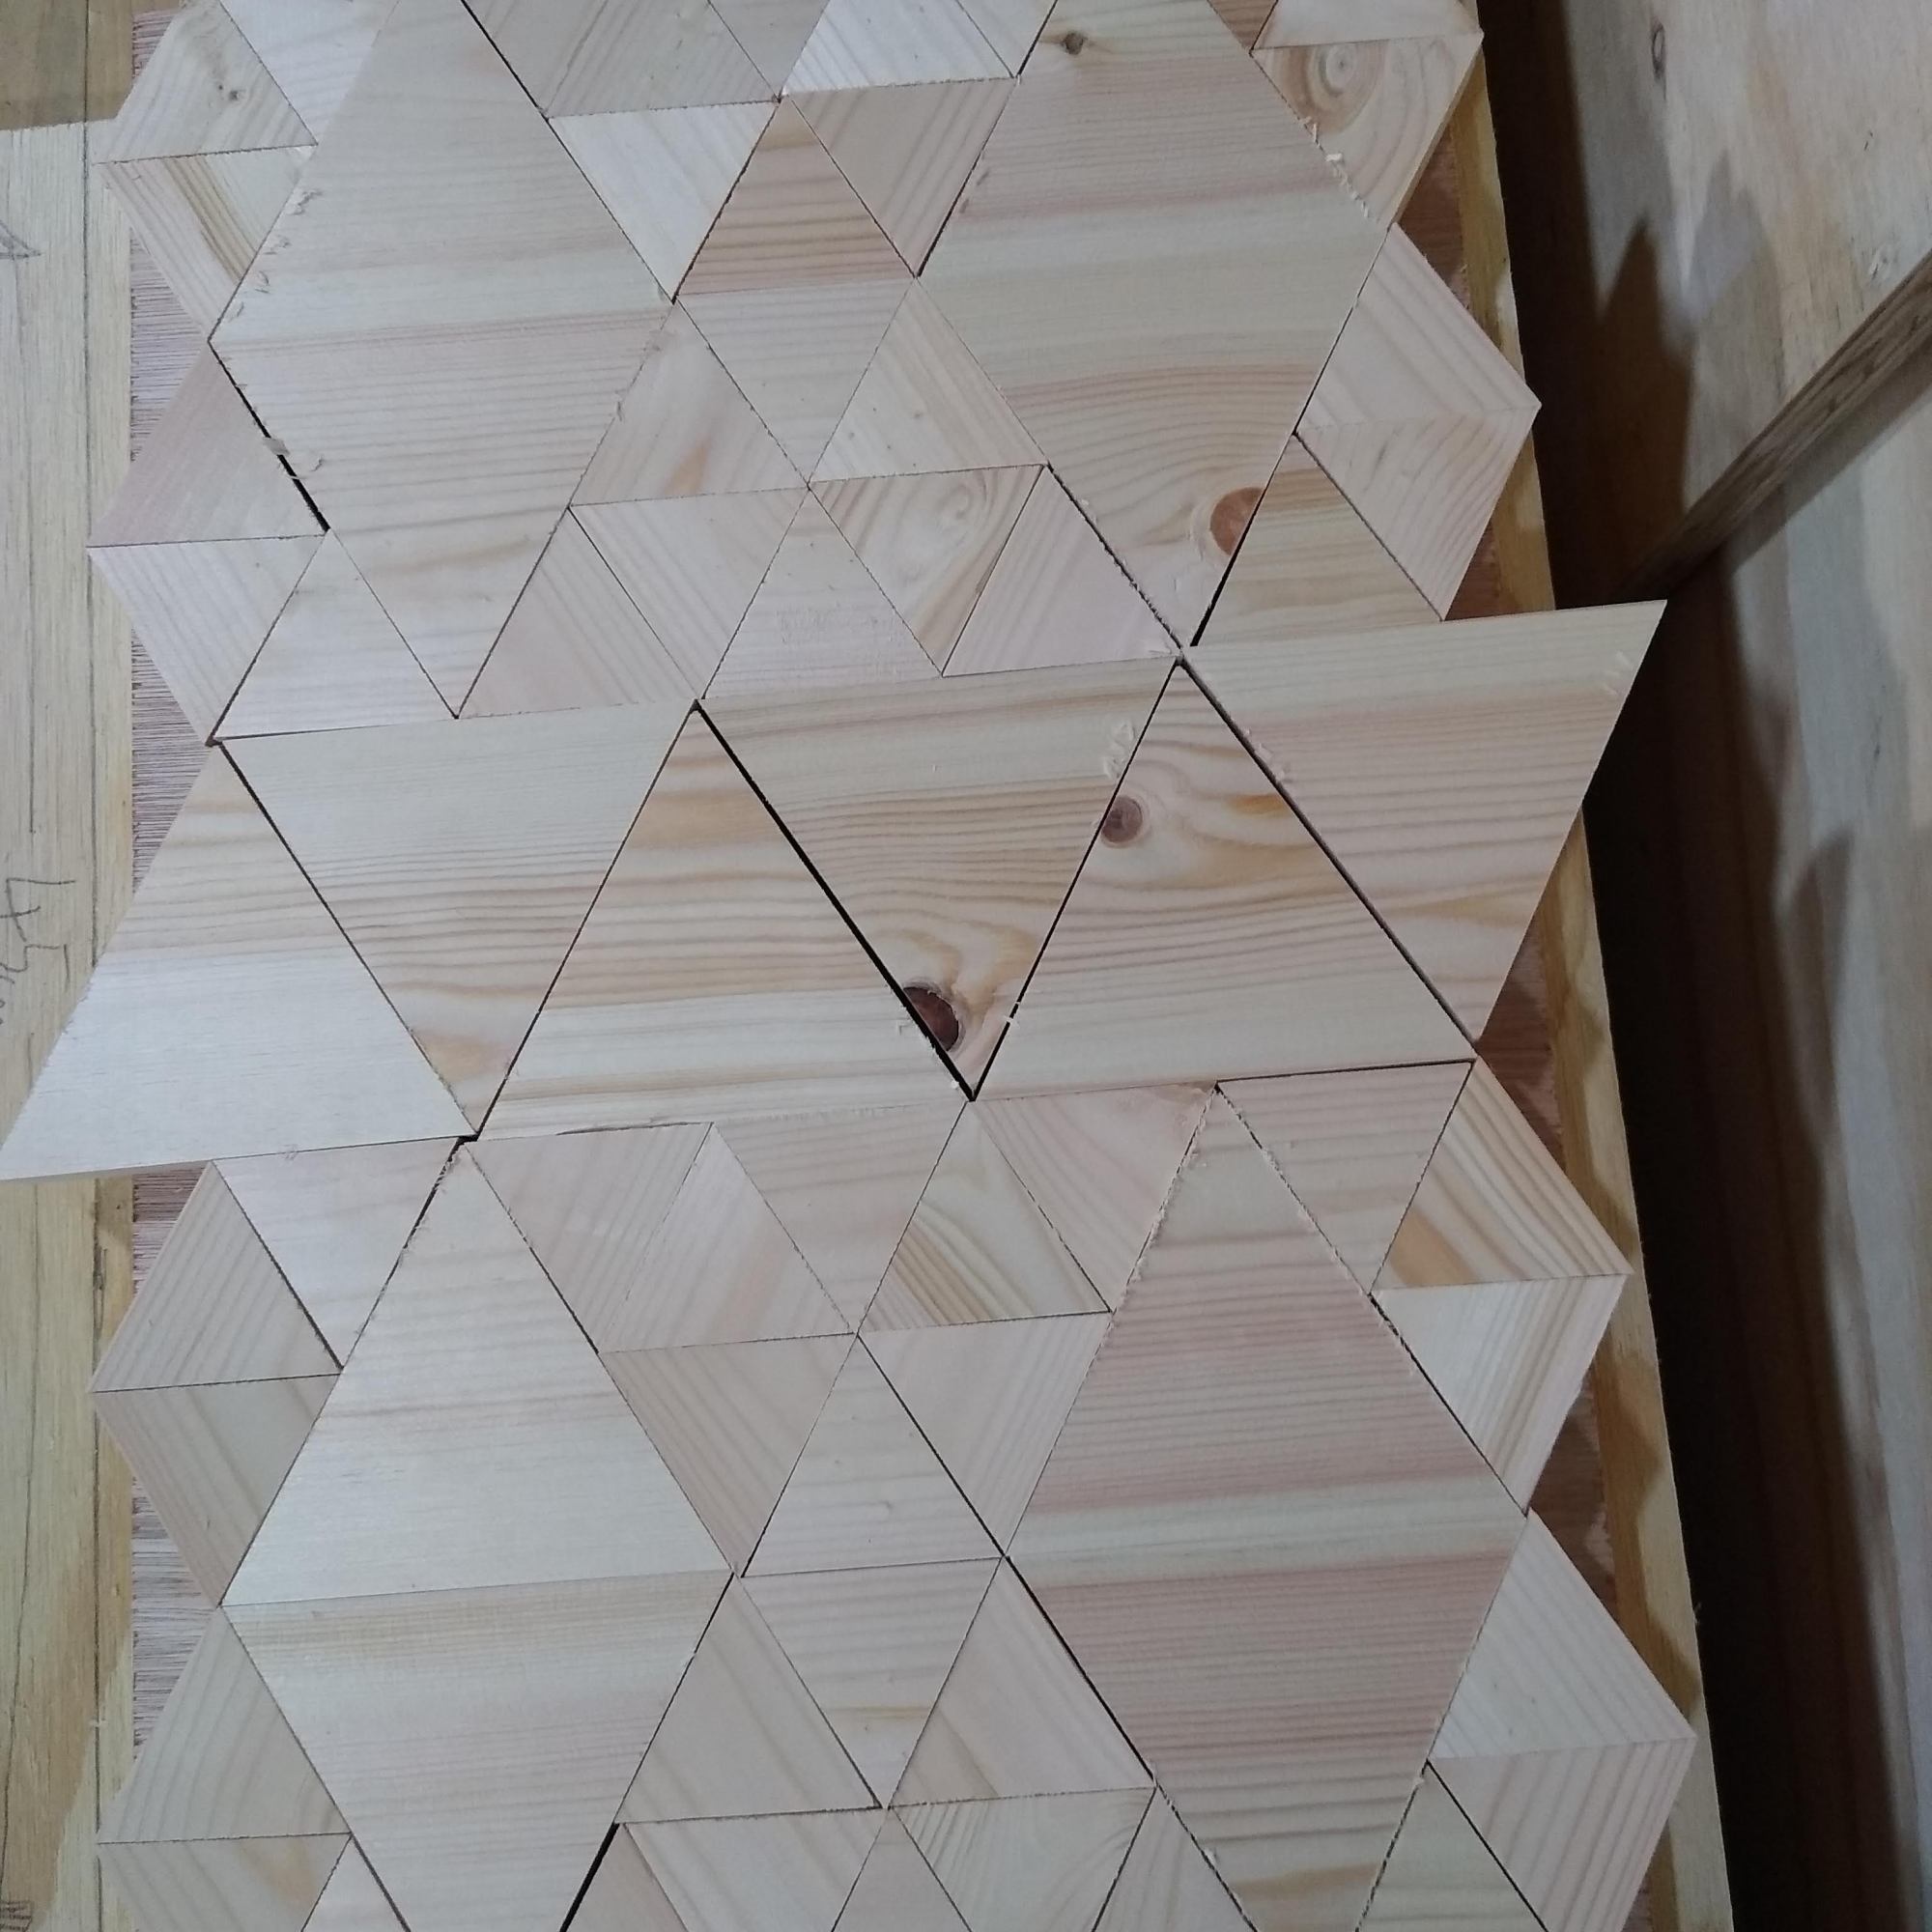
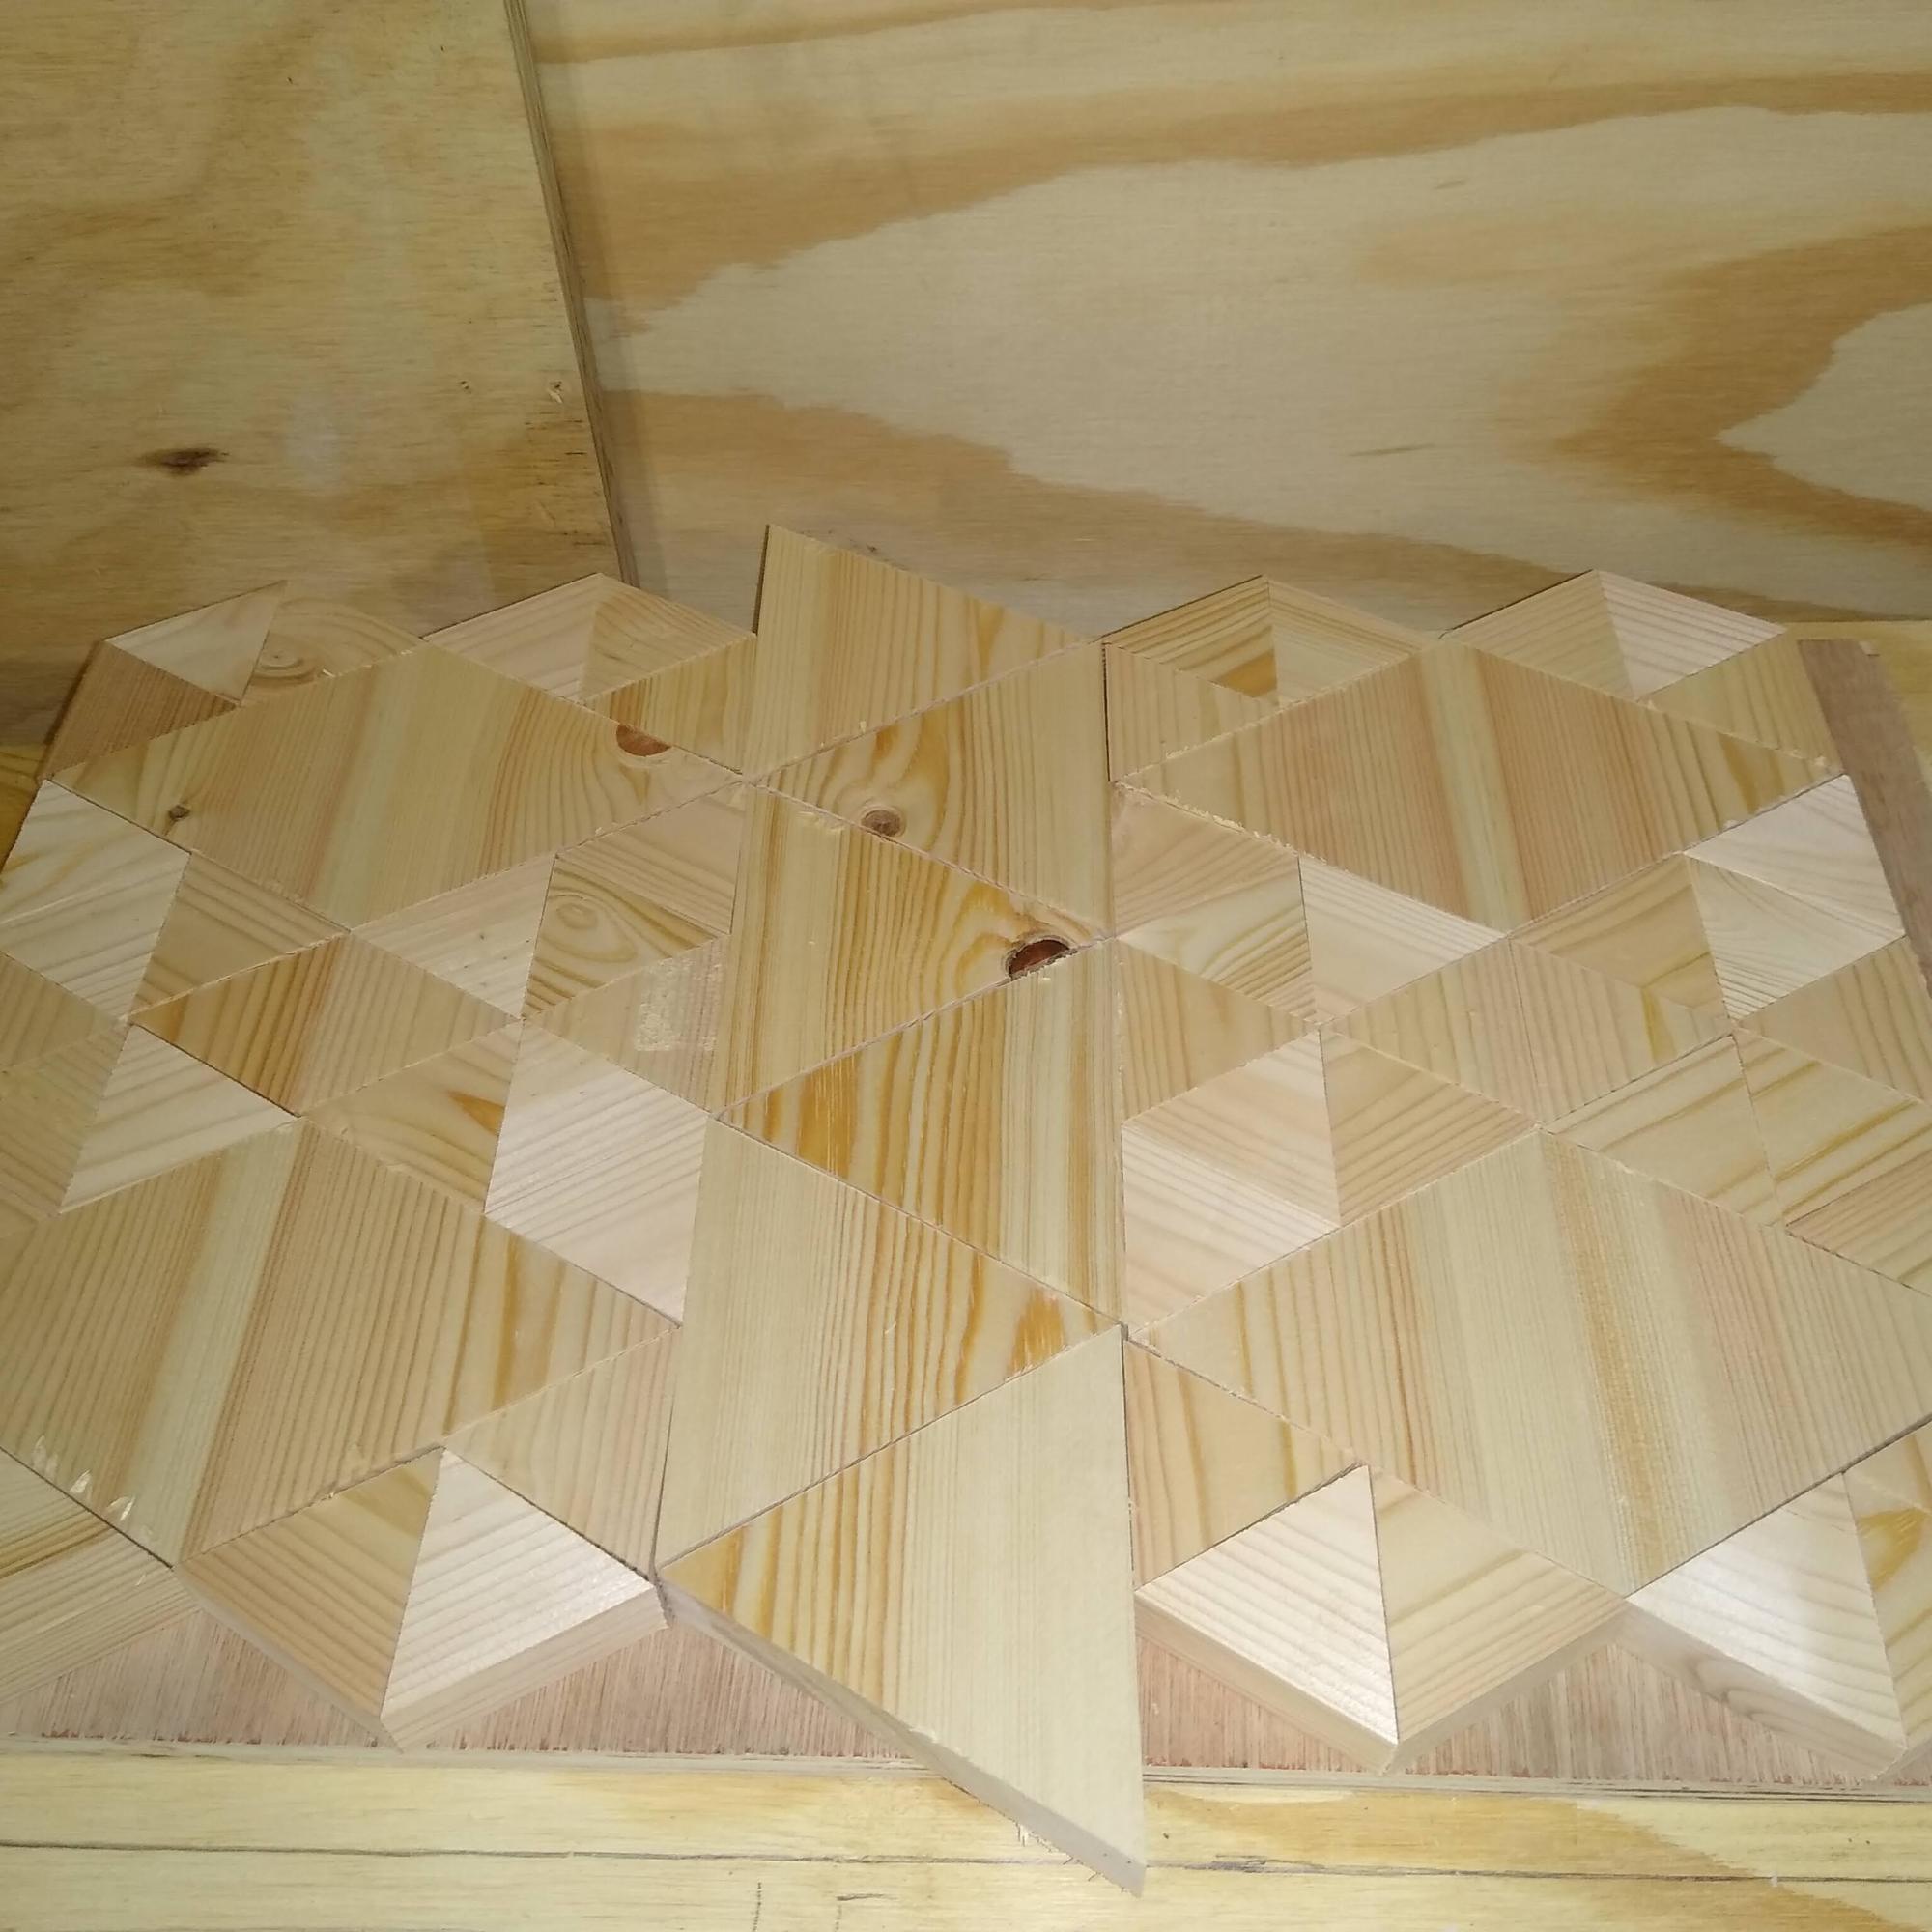
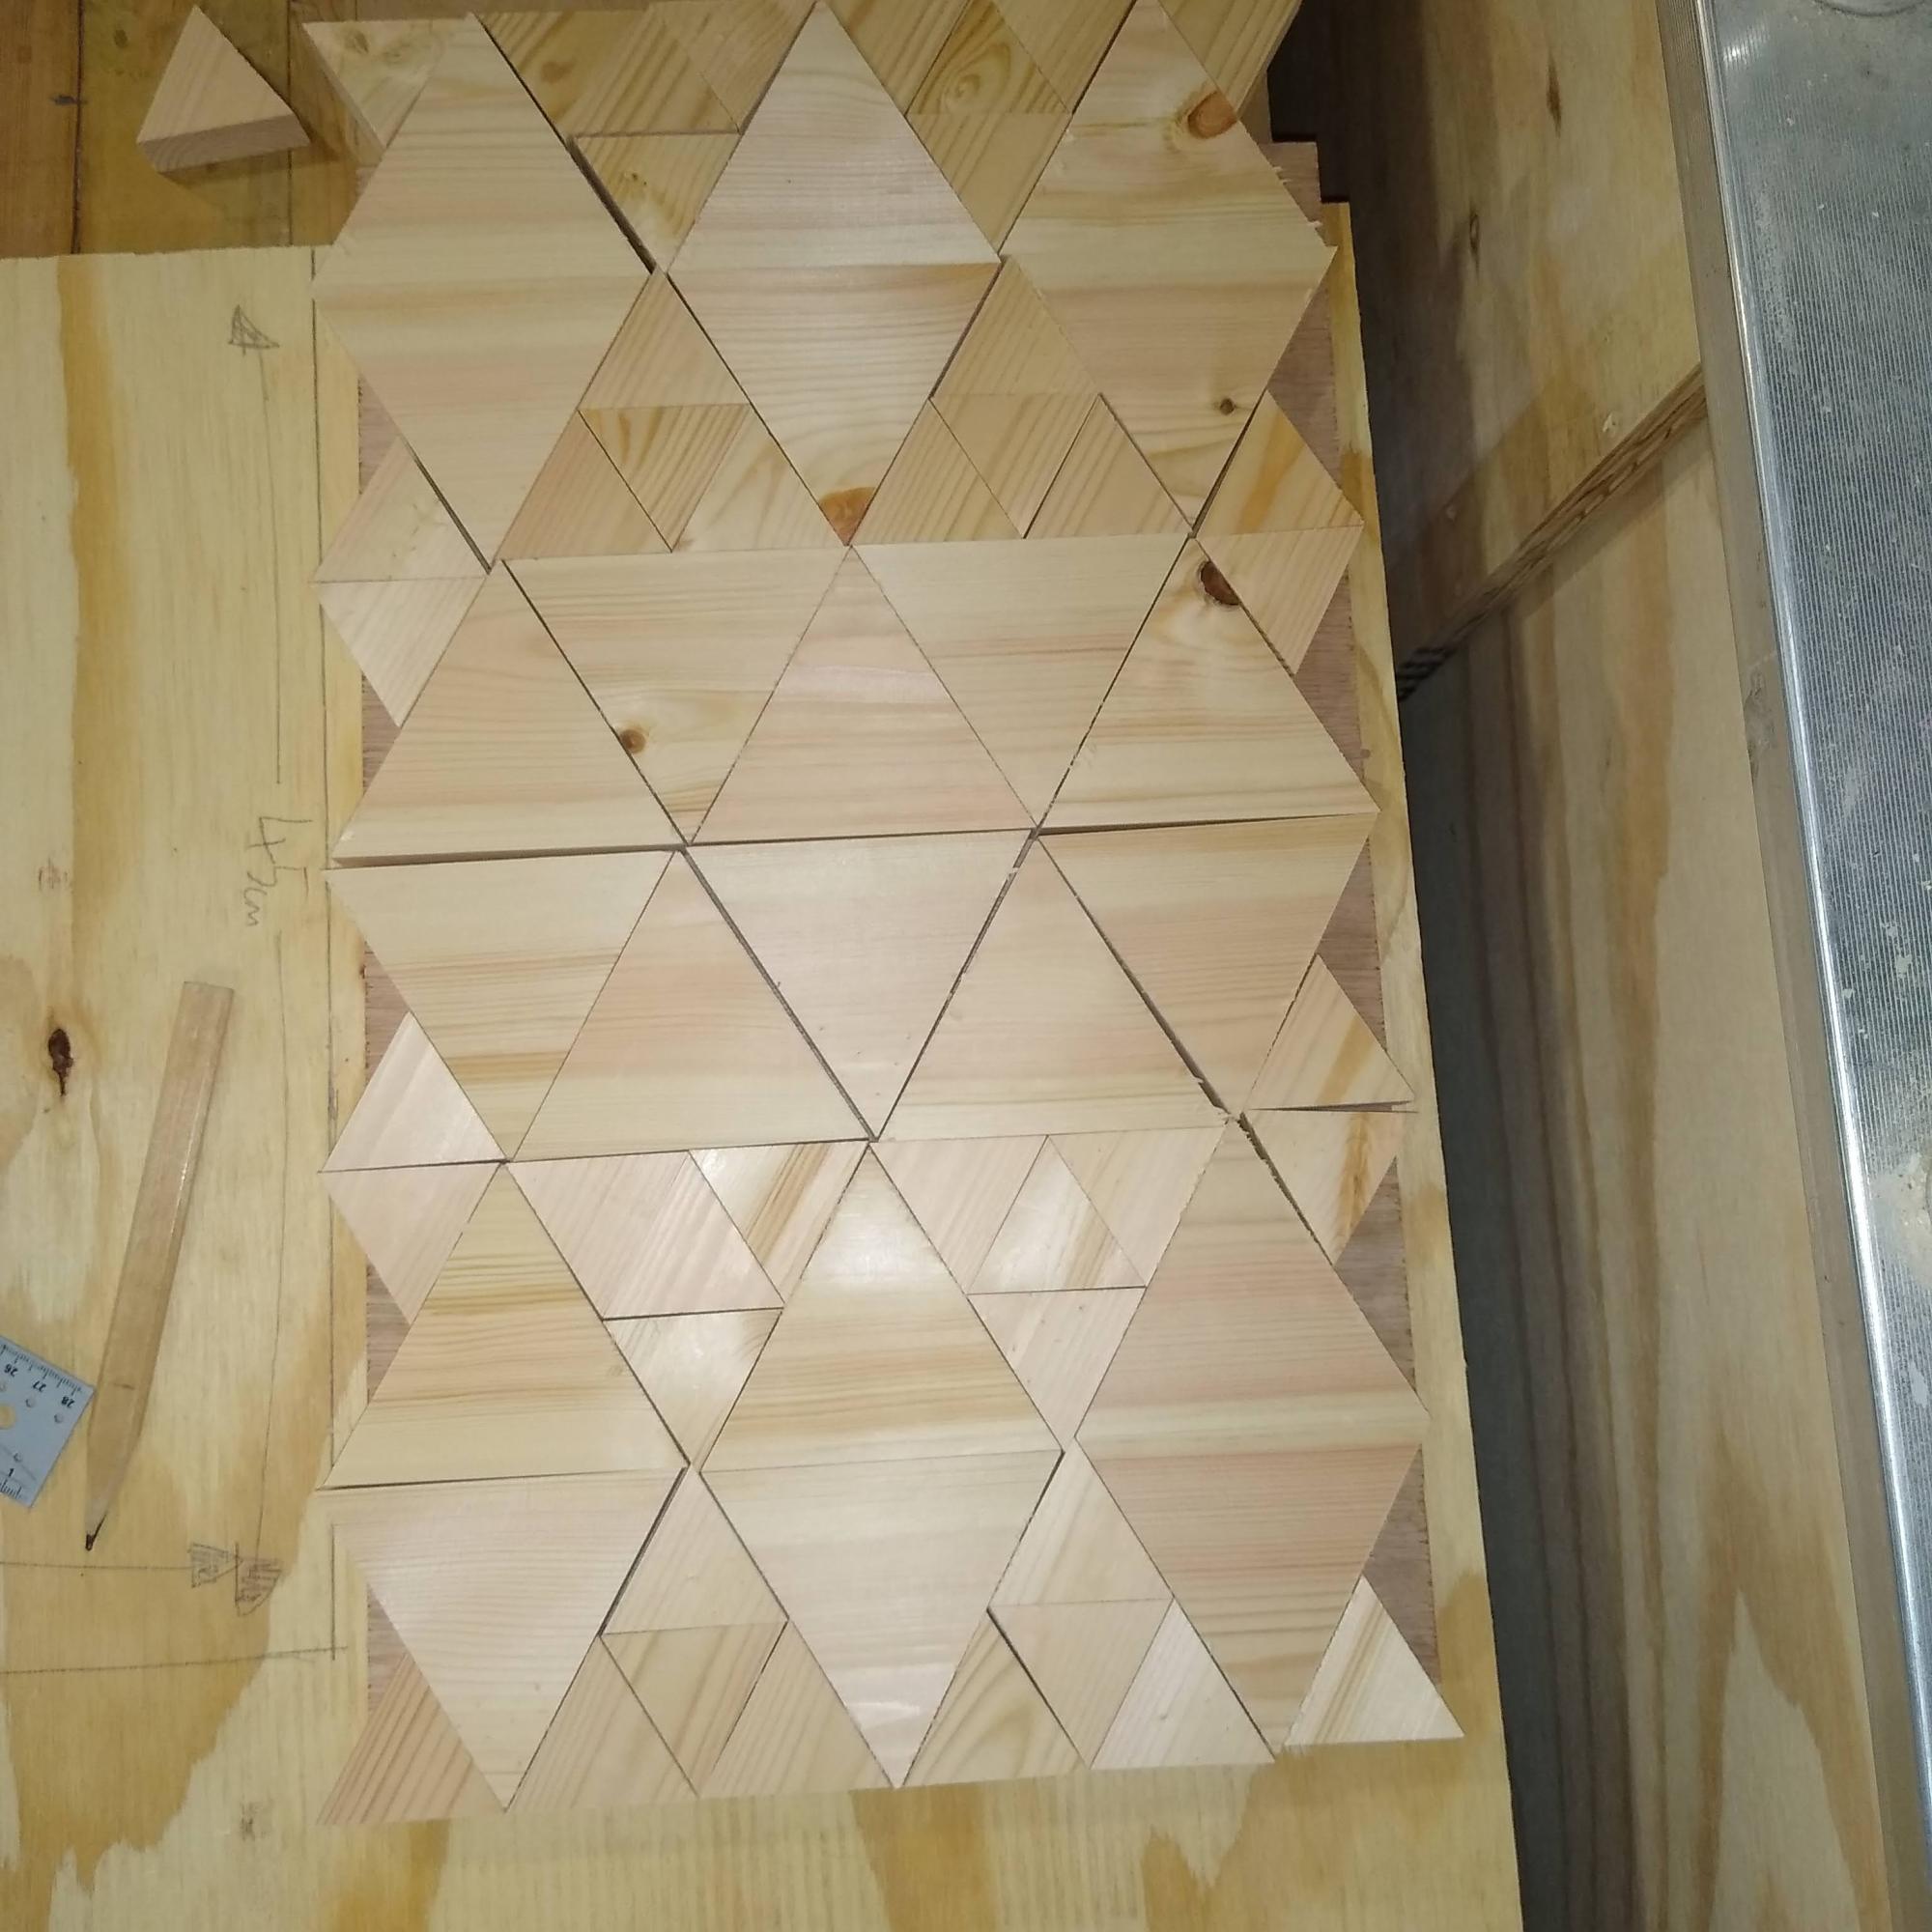
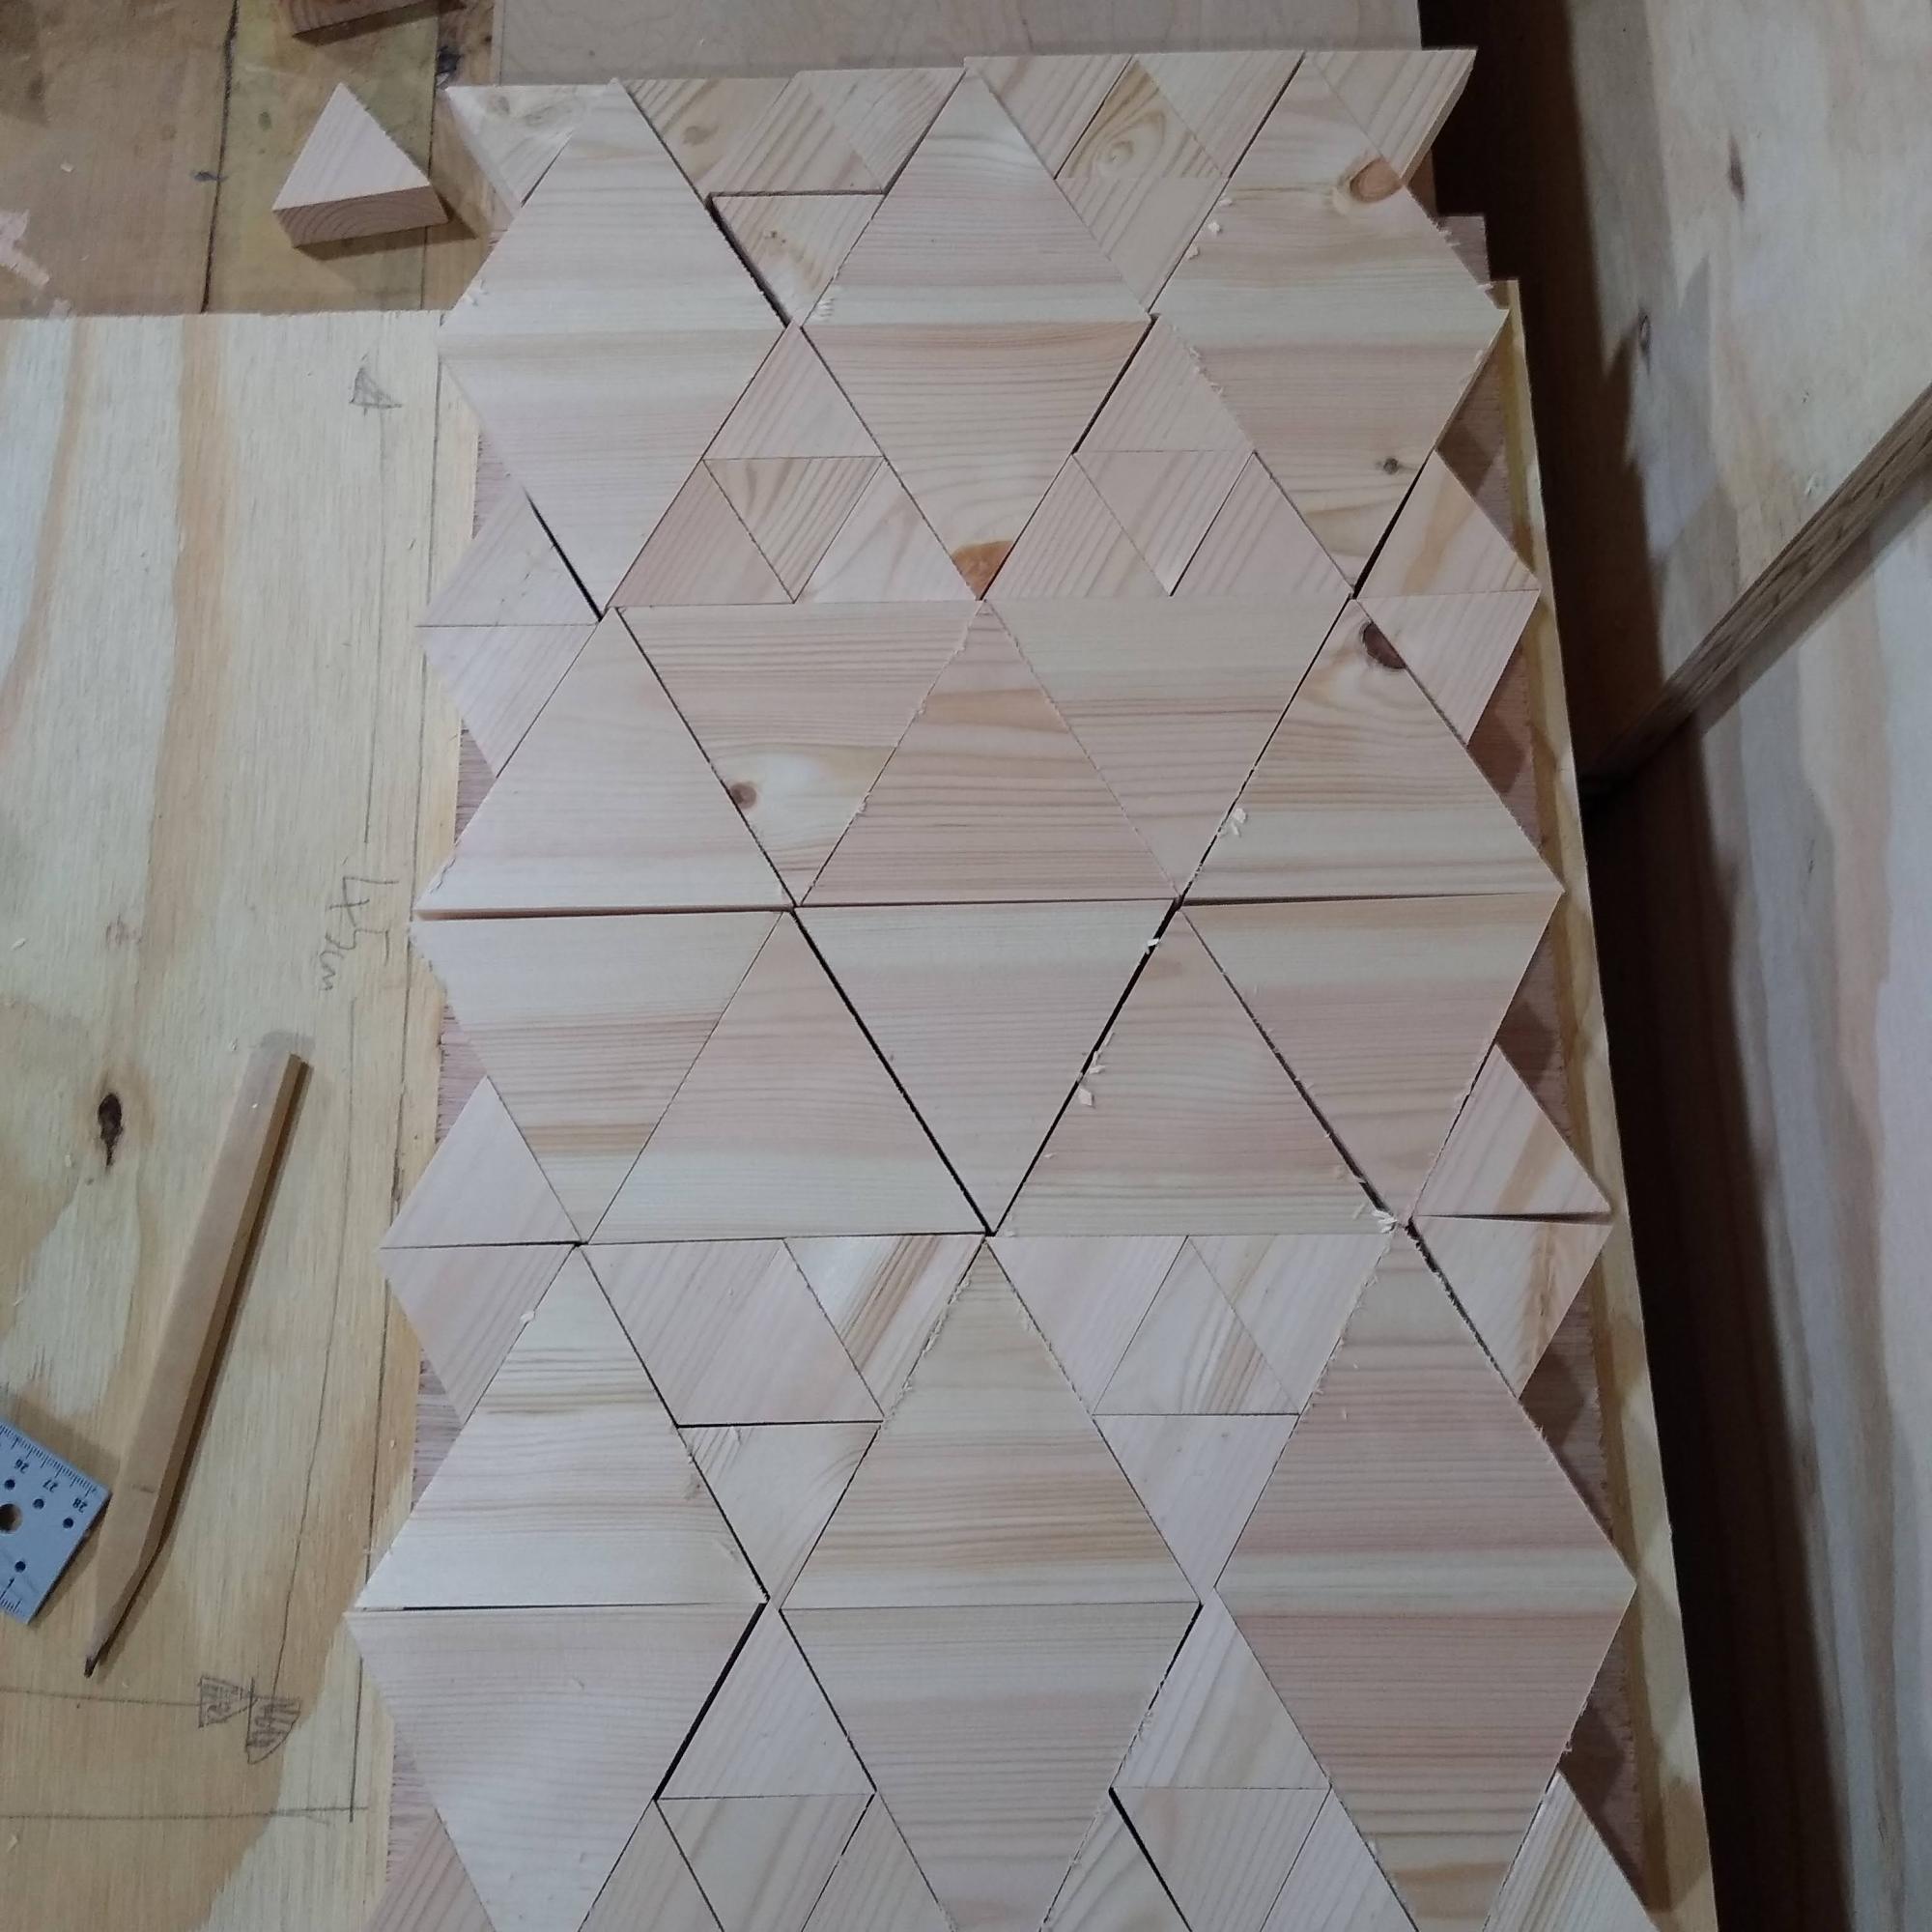
After landing on a nice pattern I alternated the grain direction of the triangles depending on what way they pointed which gave a sort of 3D effect that I’m sure the cat would appreciated.
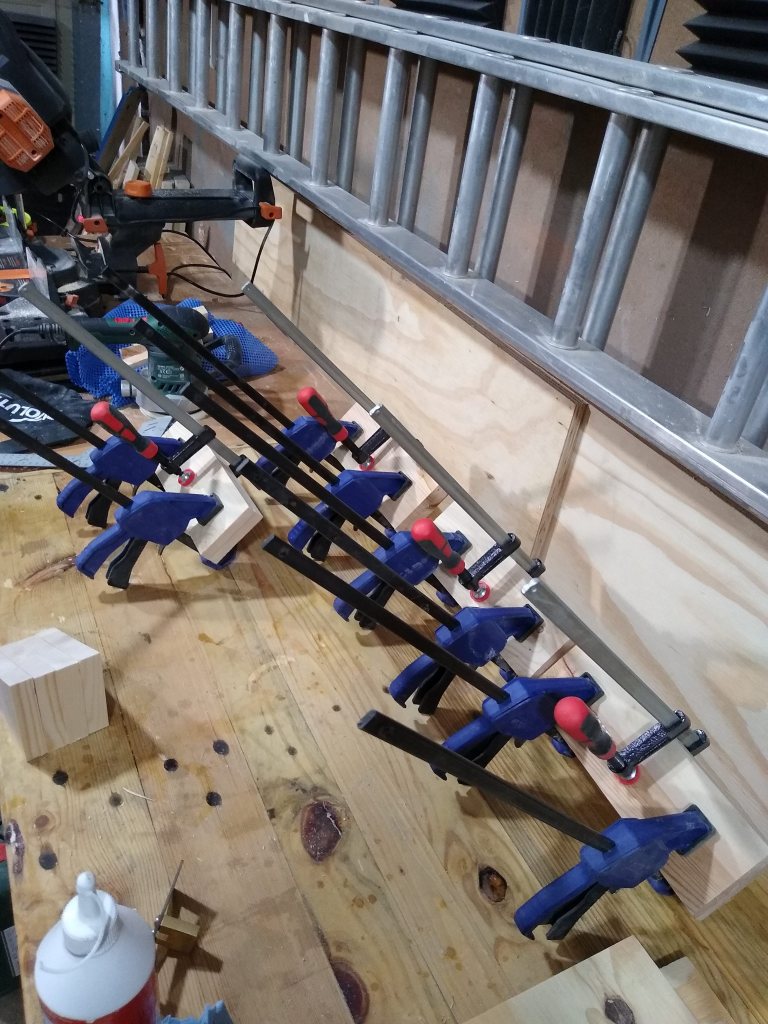
Next was to make the upright/legs to hold the roof at a nice angle. I happened to have 60 degree angle offcuts left from the hex-table so this was perfect. I glued a few bits of pallet wood together and joined them to the angled piece with pocket holes and wood glue.
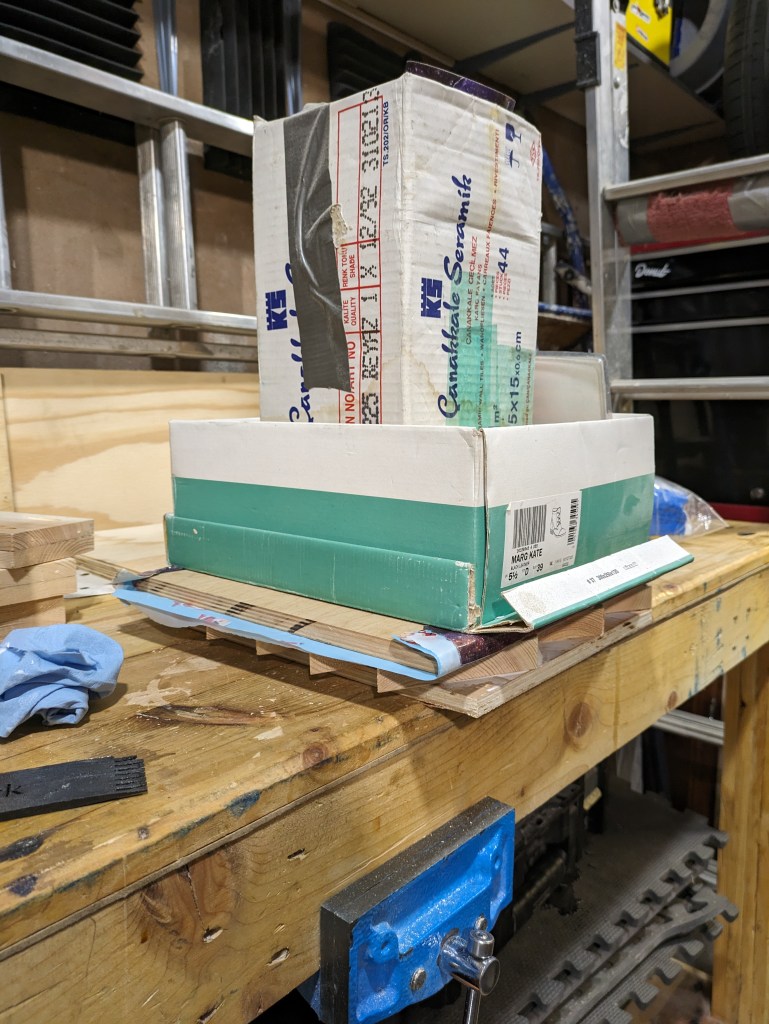
Then I glued down the triangles to some plywood and put some weighty things on it whilst it dried.


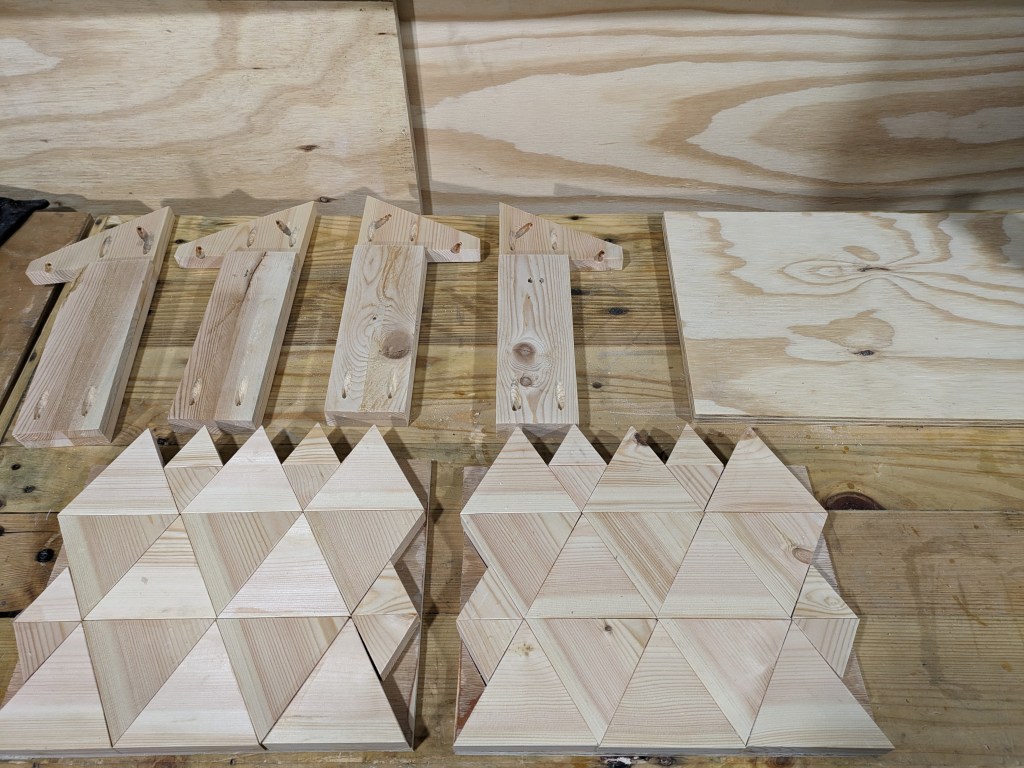
After all the parts where made I just had to trim down the roof section and assemble it all. I decided to add some sides to the birdhouse but made sure to add drain holes to each corner so water wouldn’t collect on the base. Finally I gave it a couple coats of Teak oil and that’s job done! Here’s another high quality video:
-
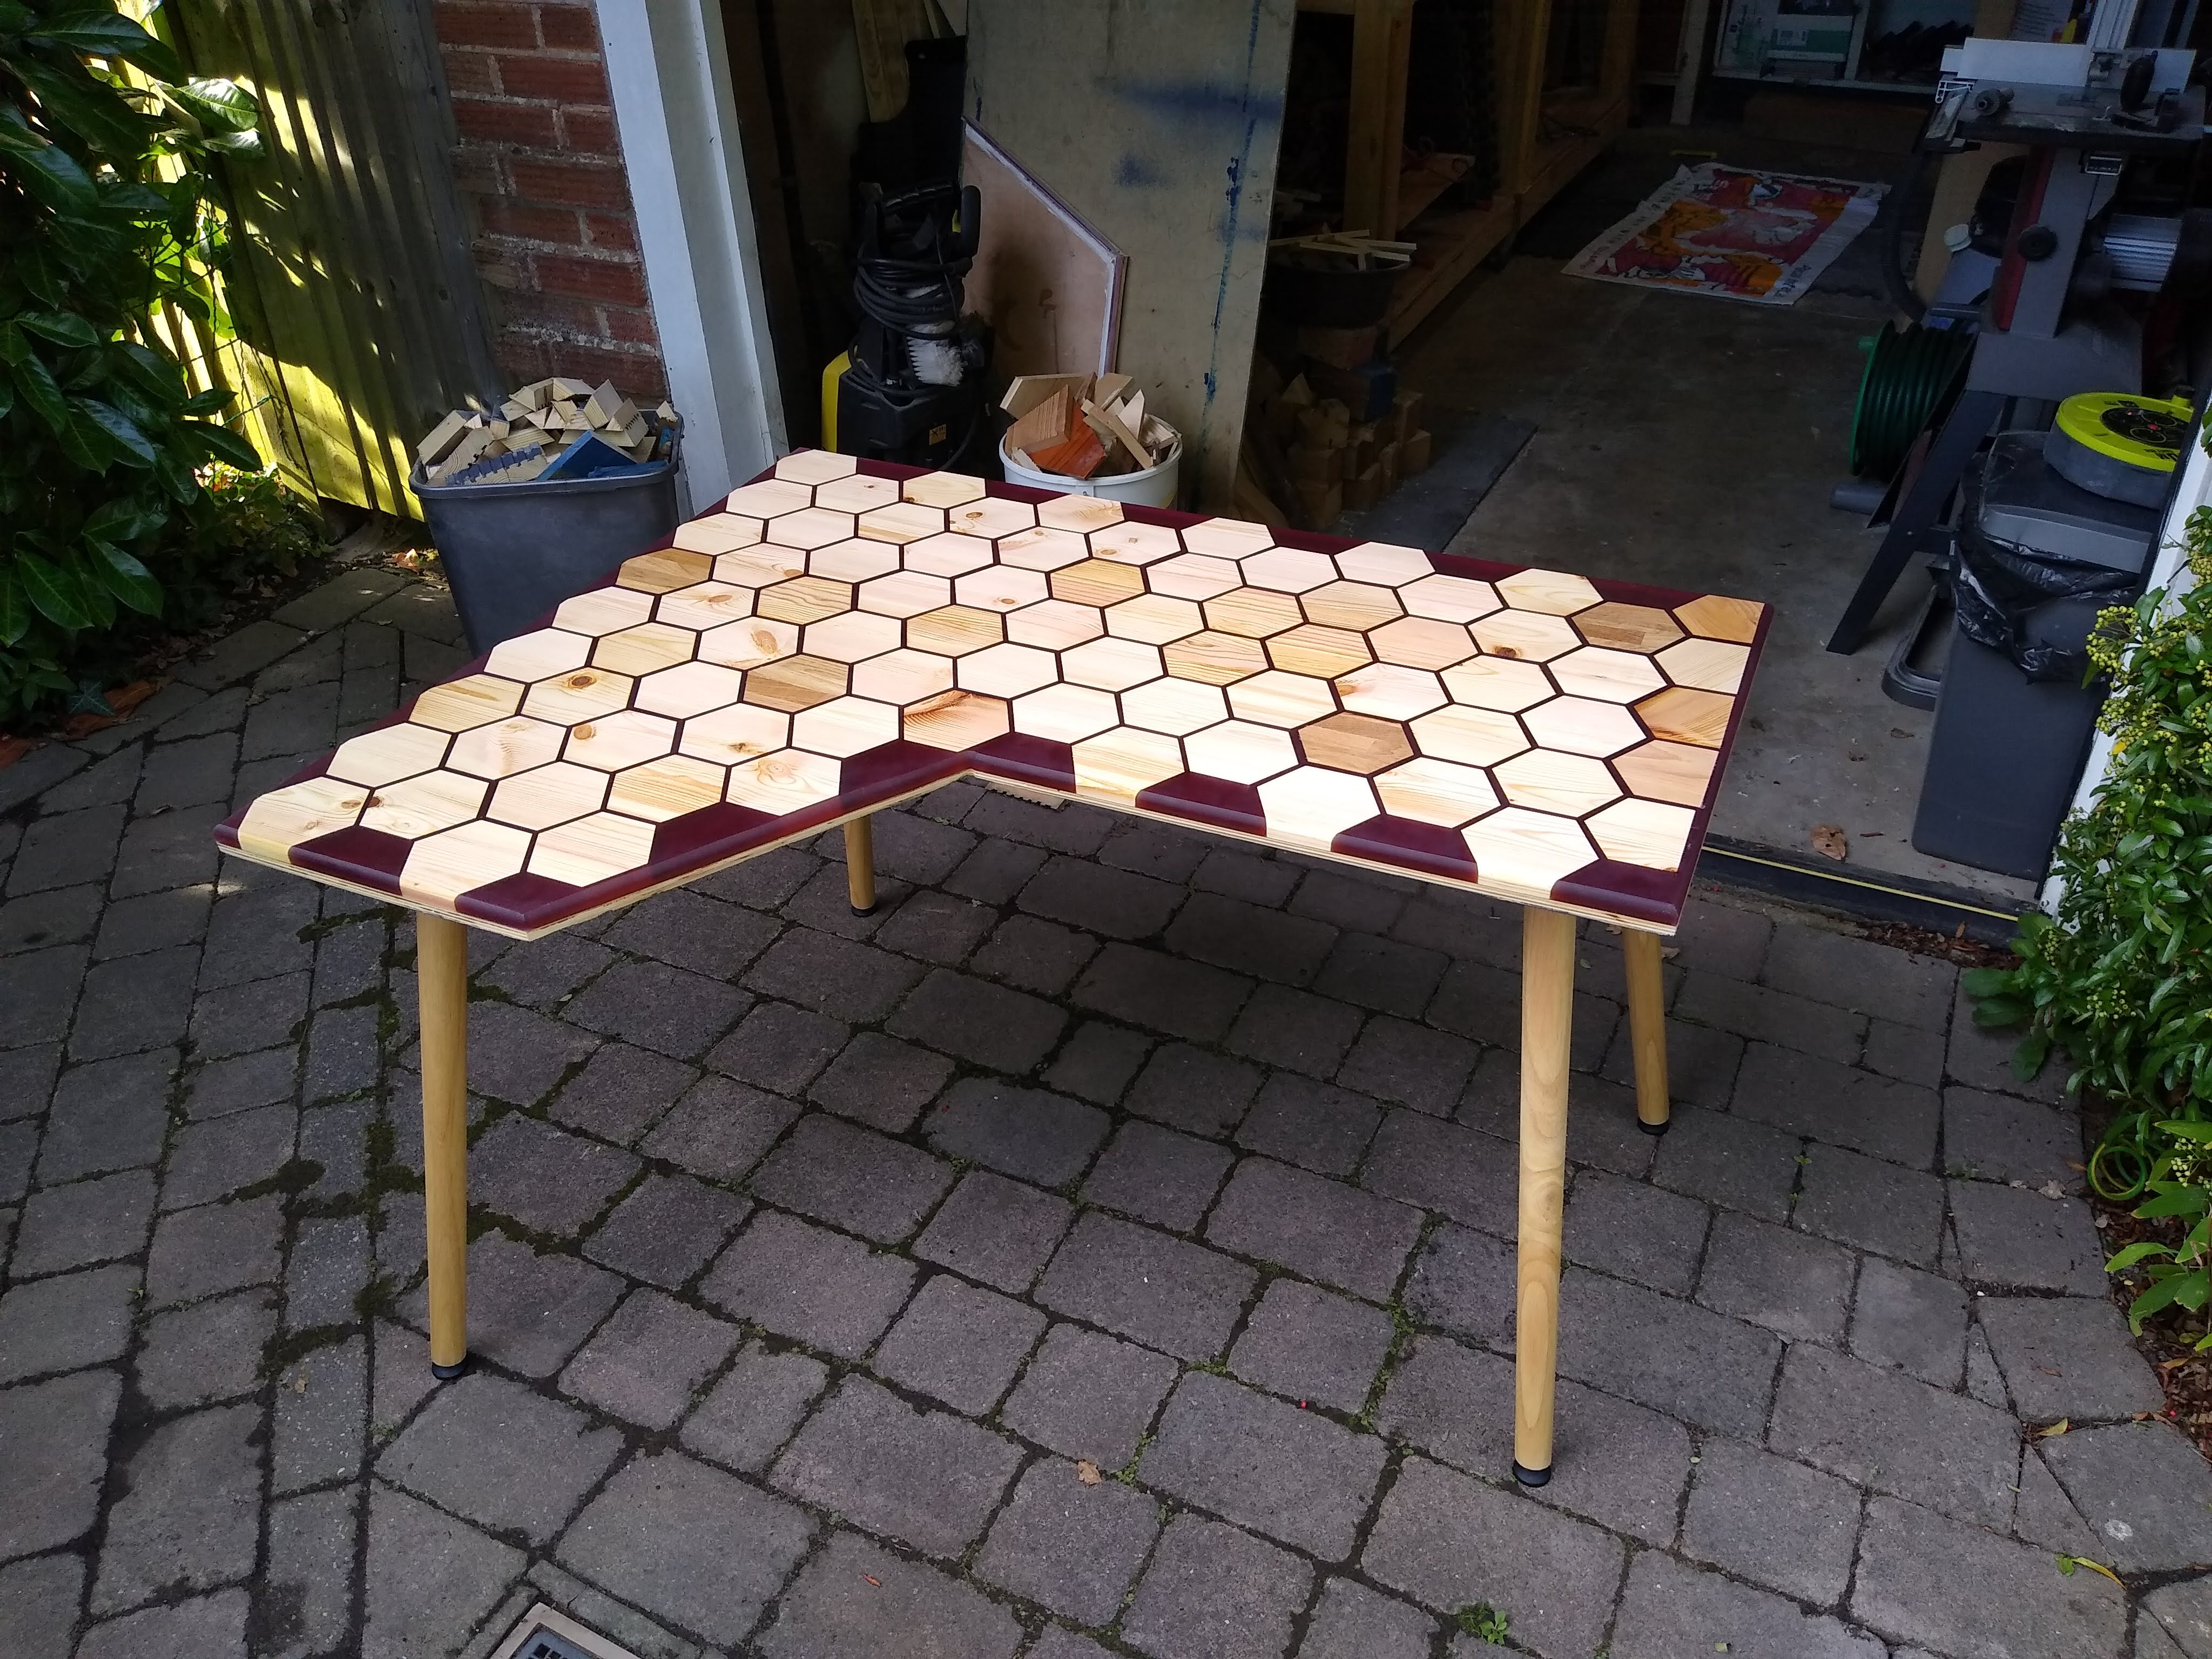
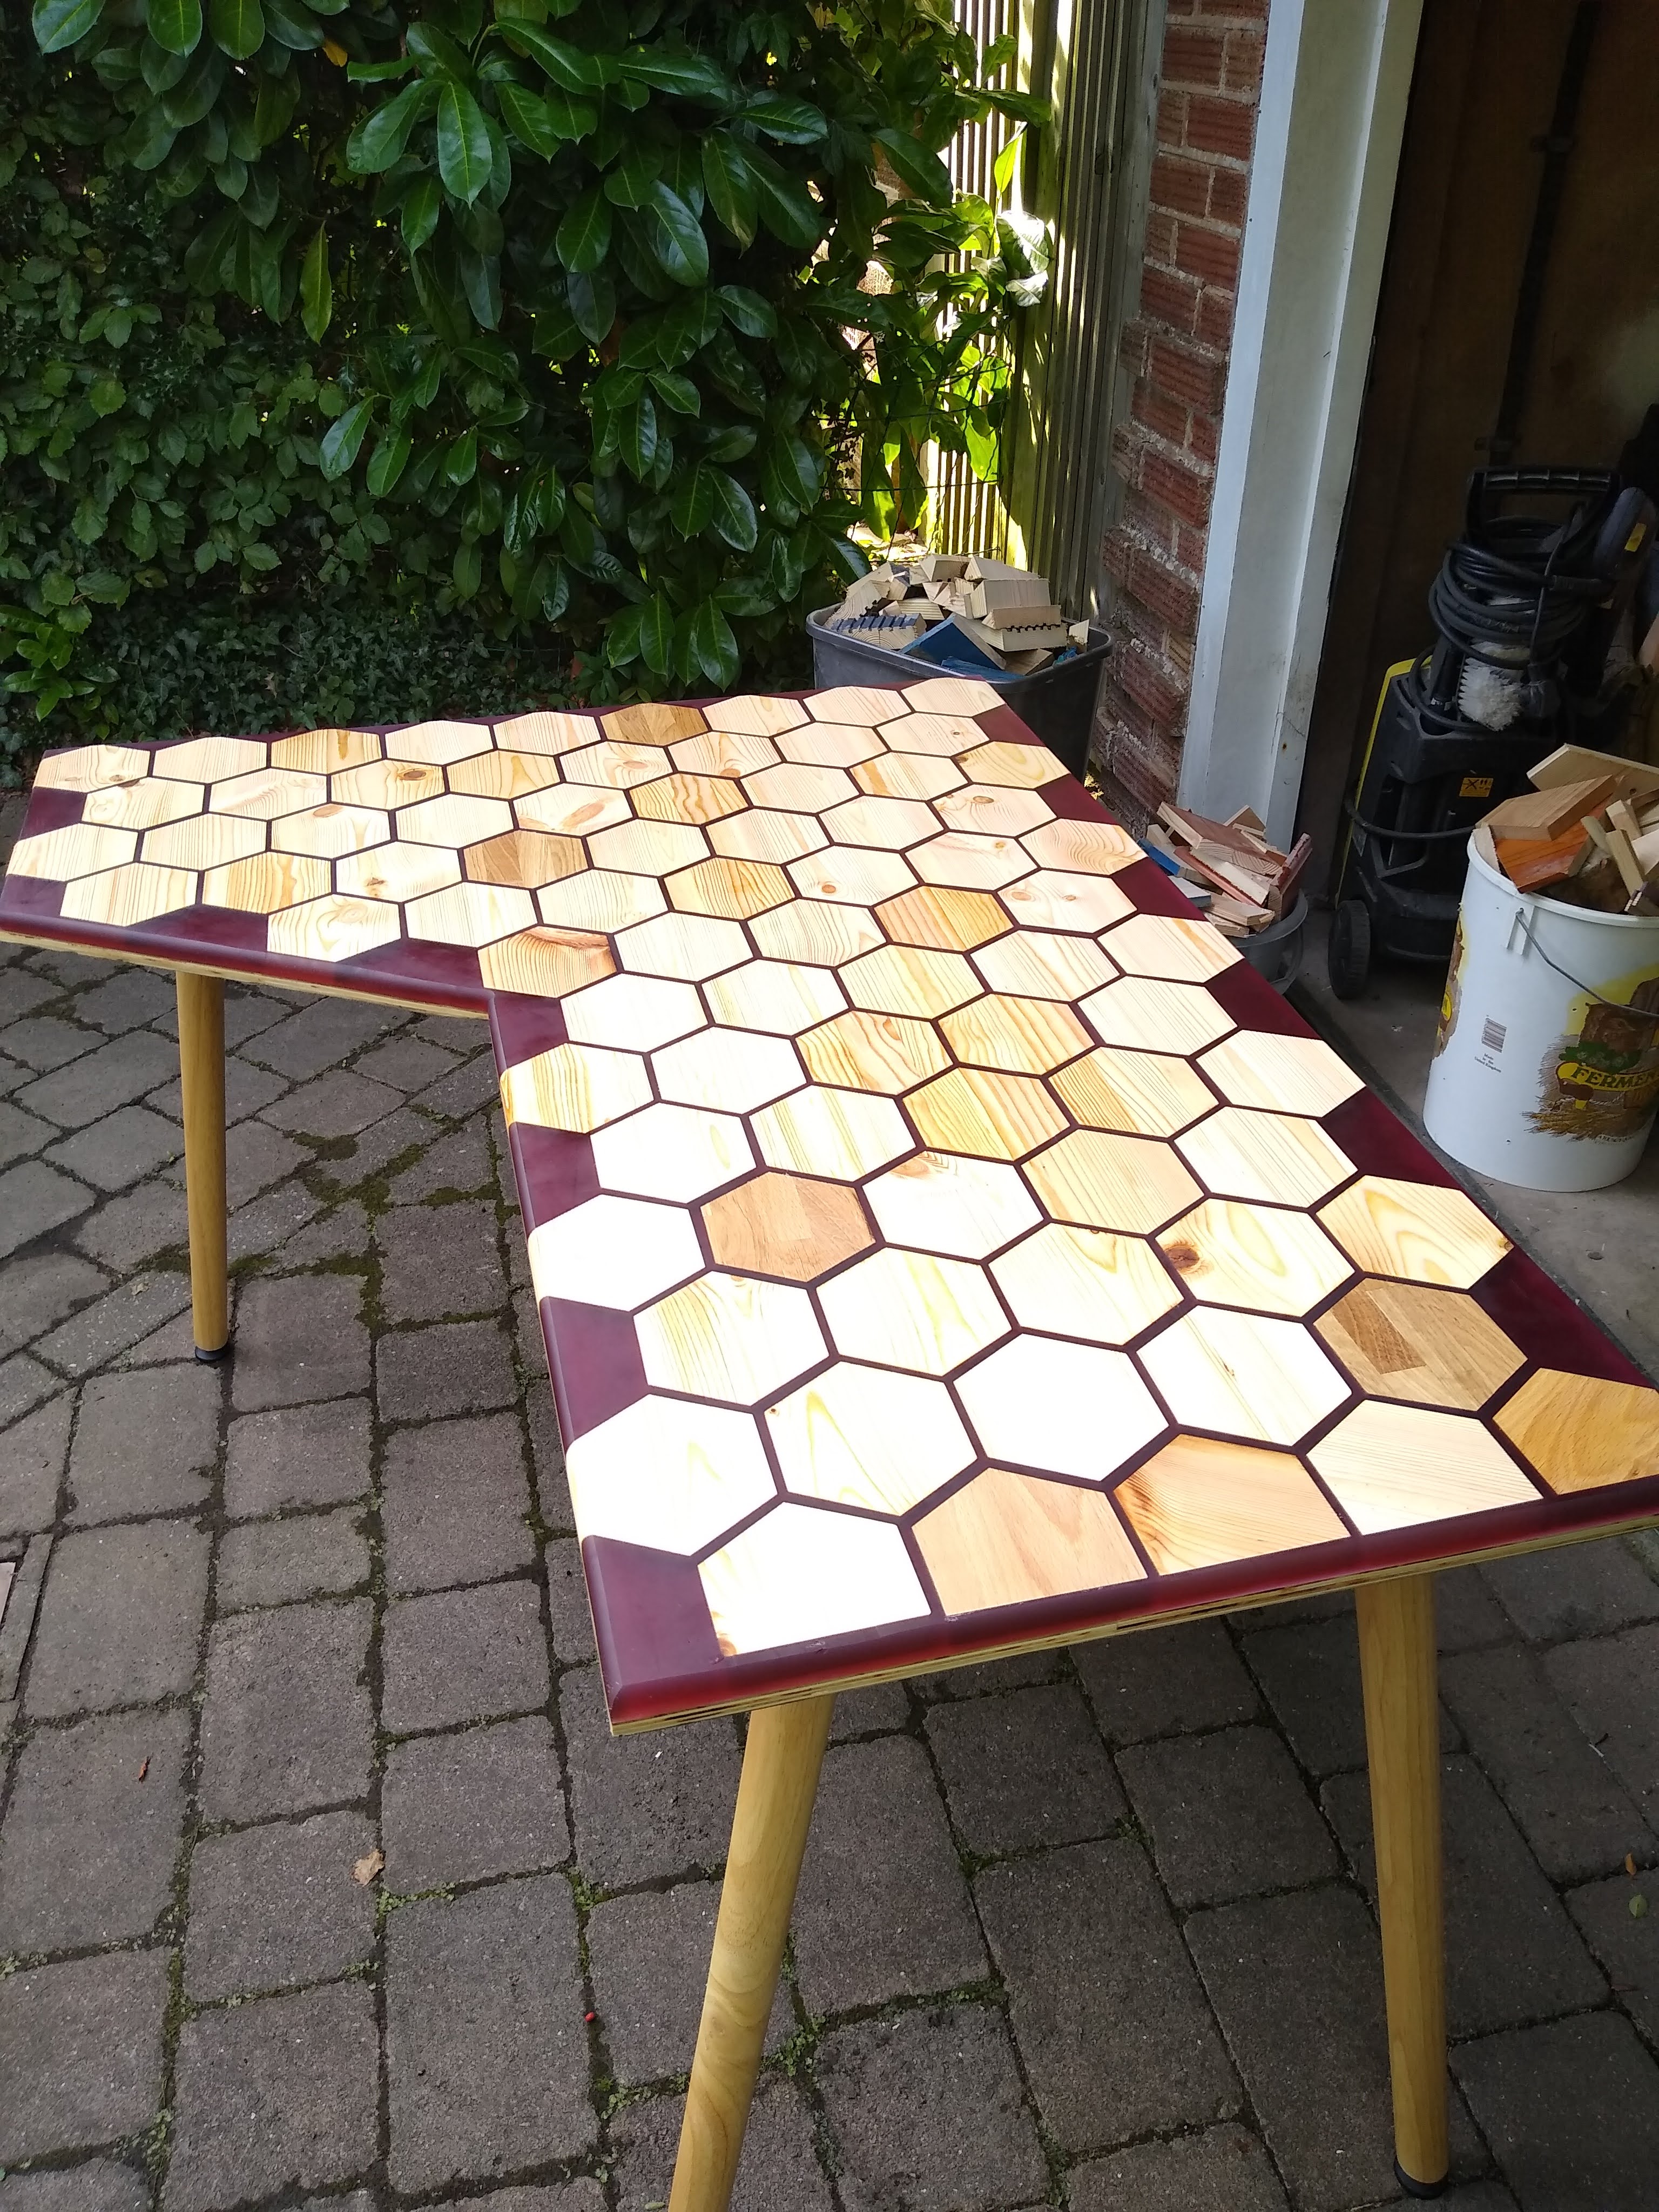
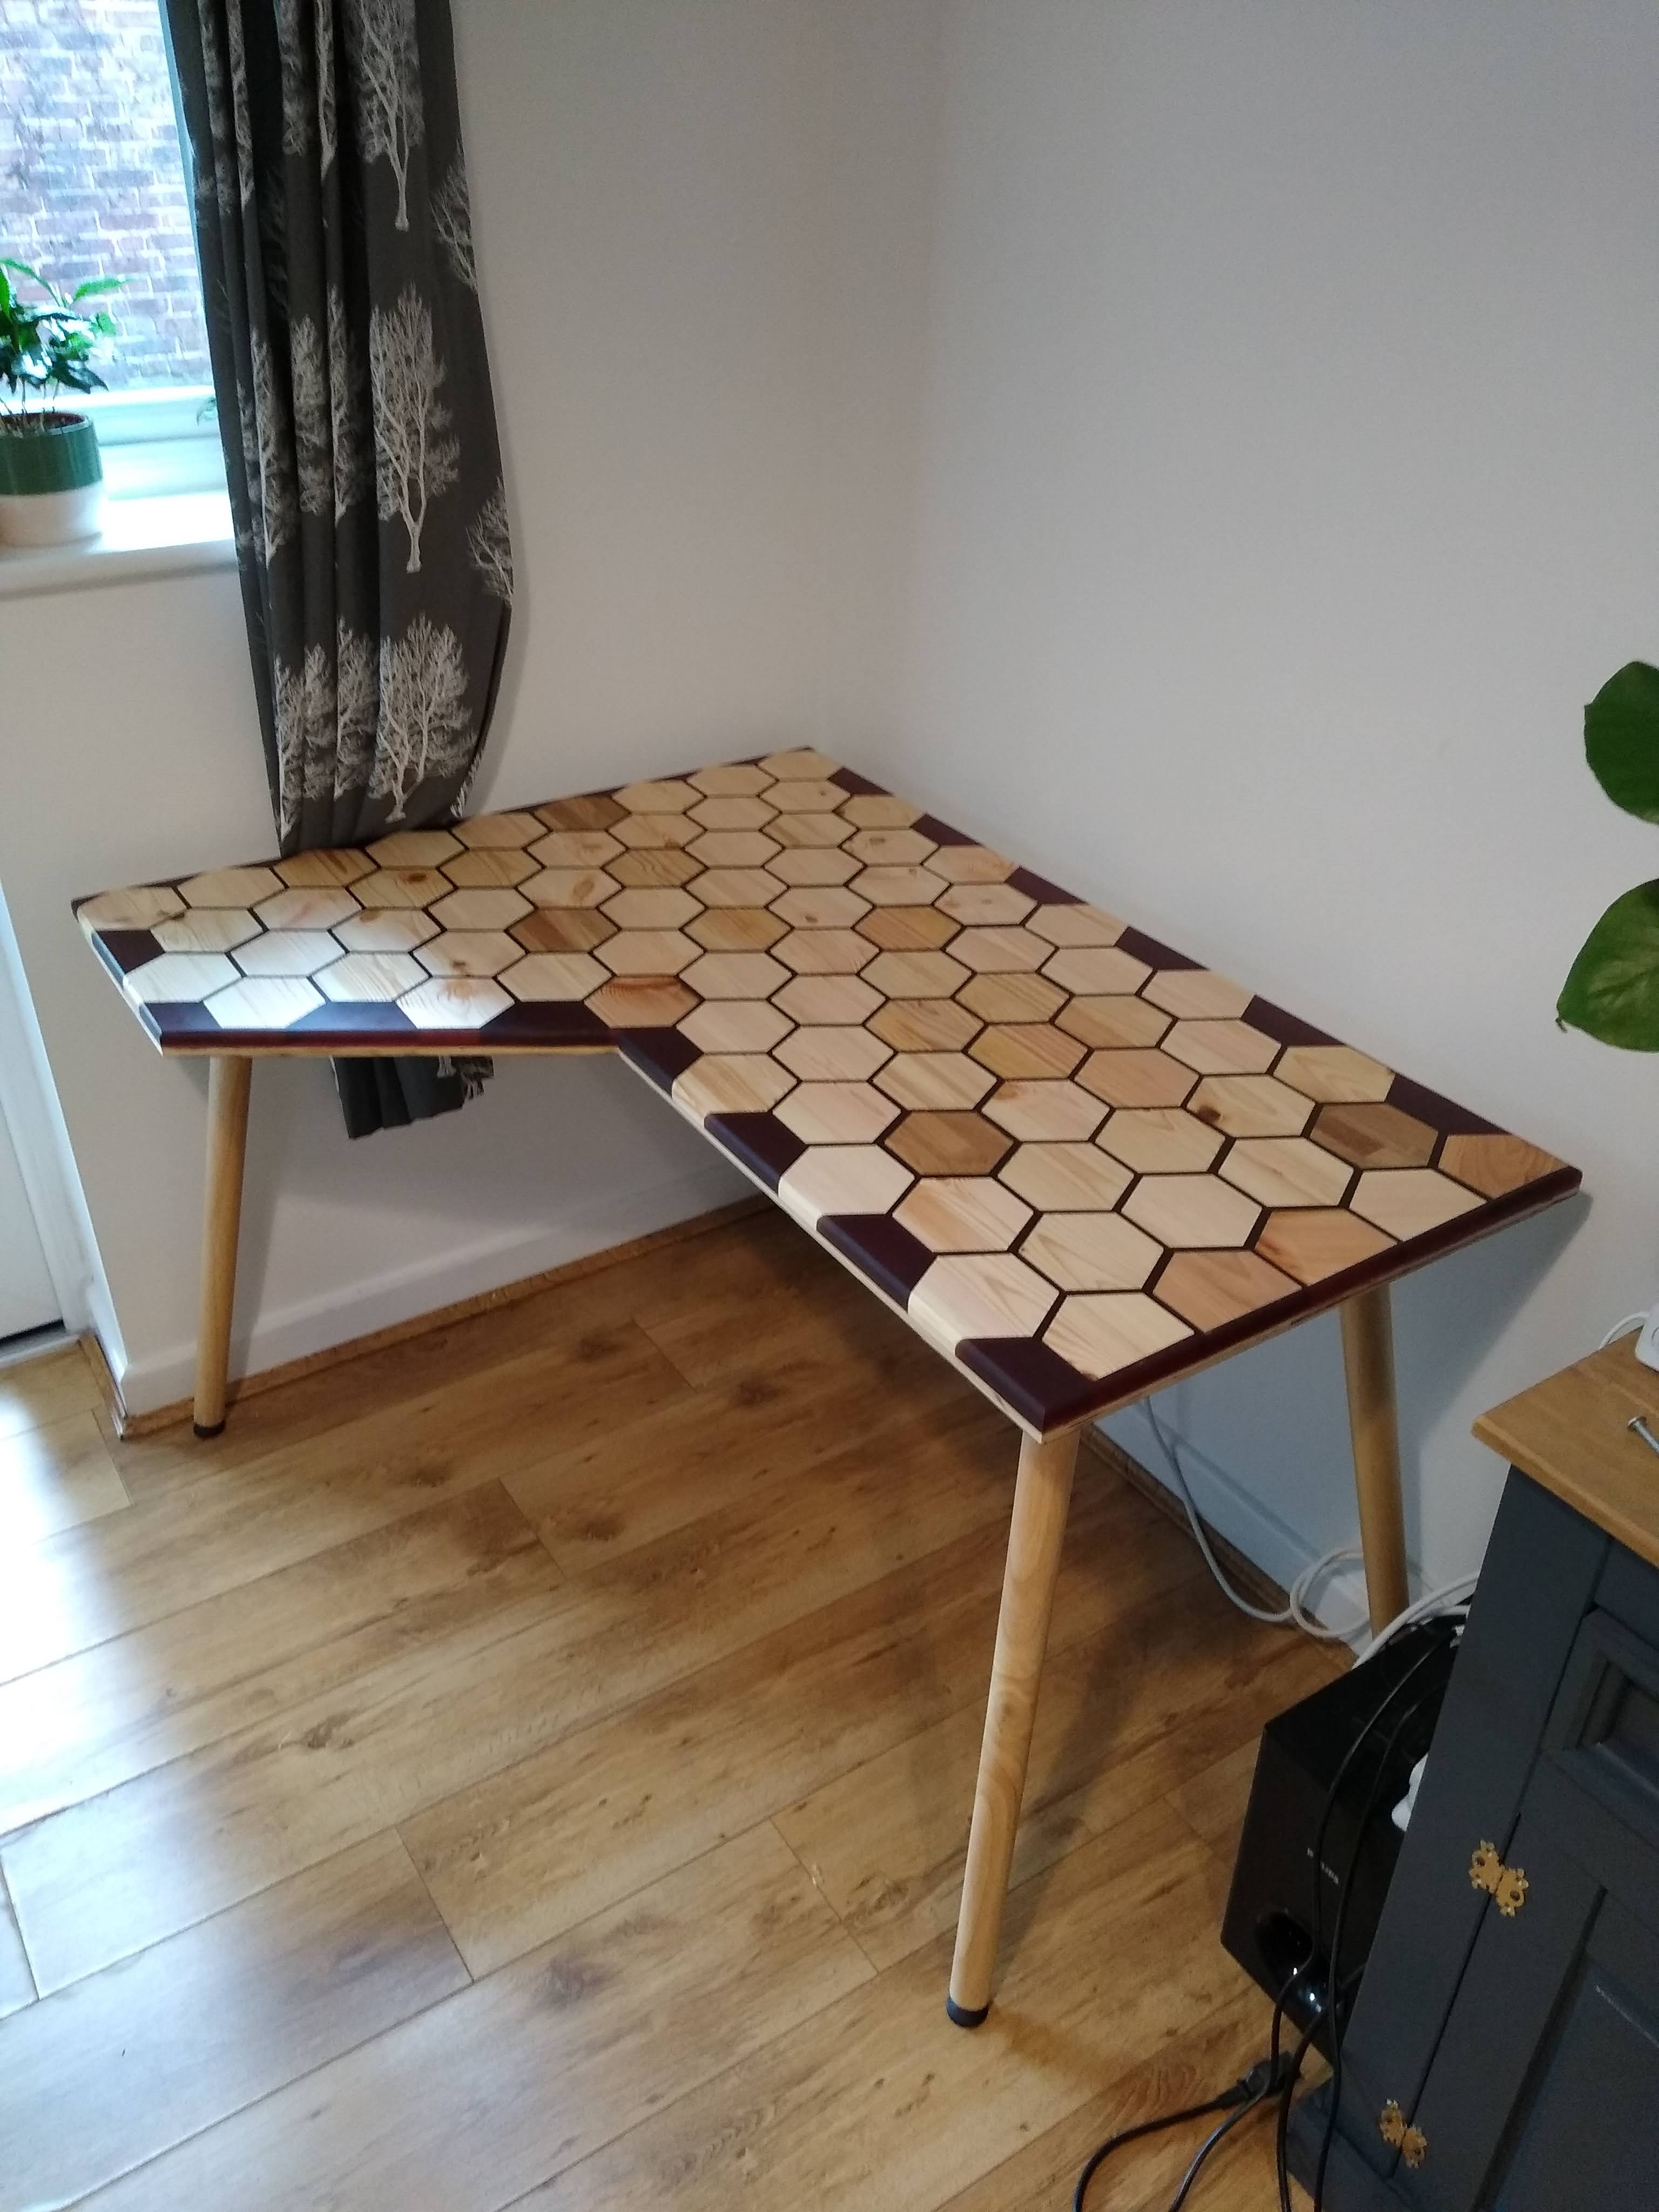
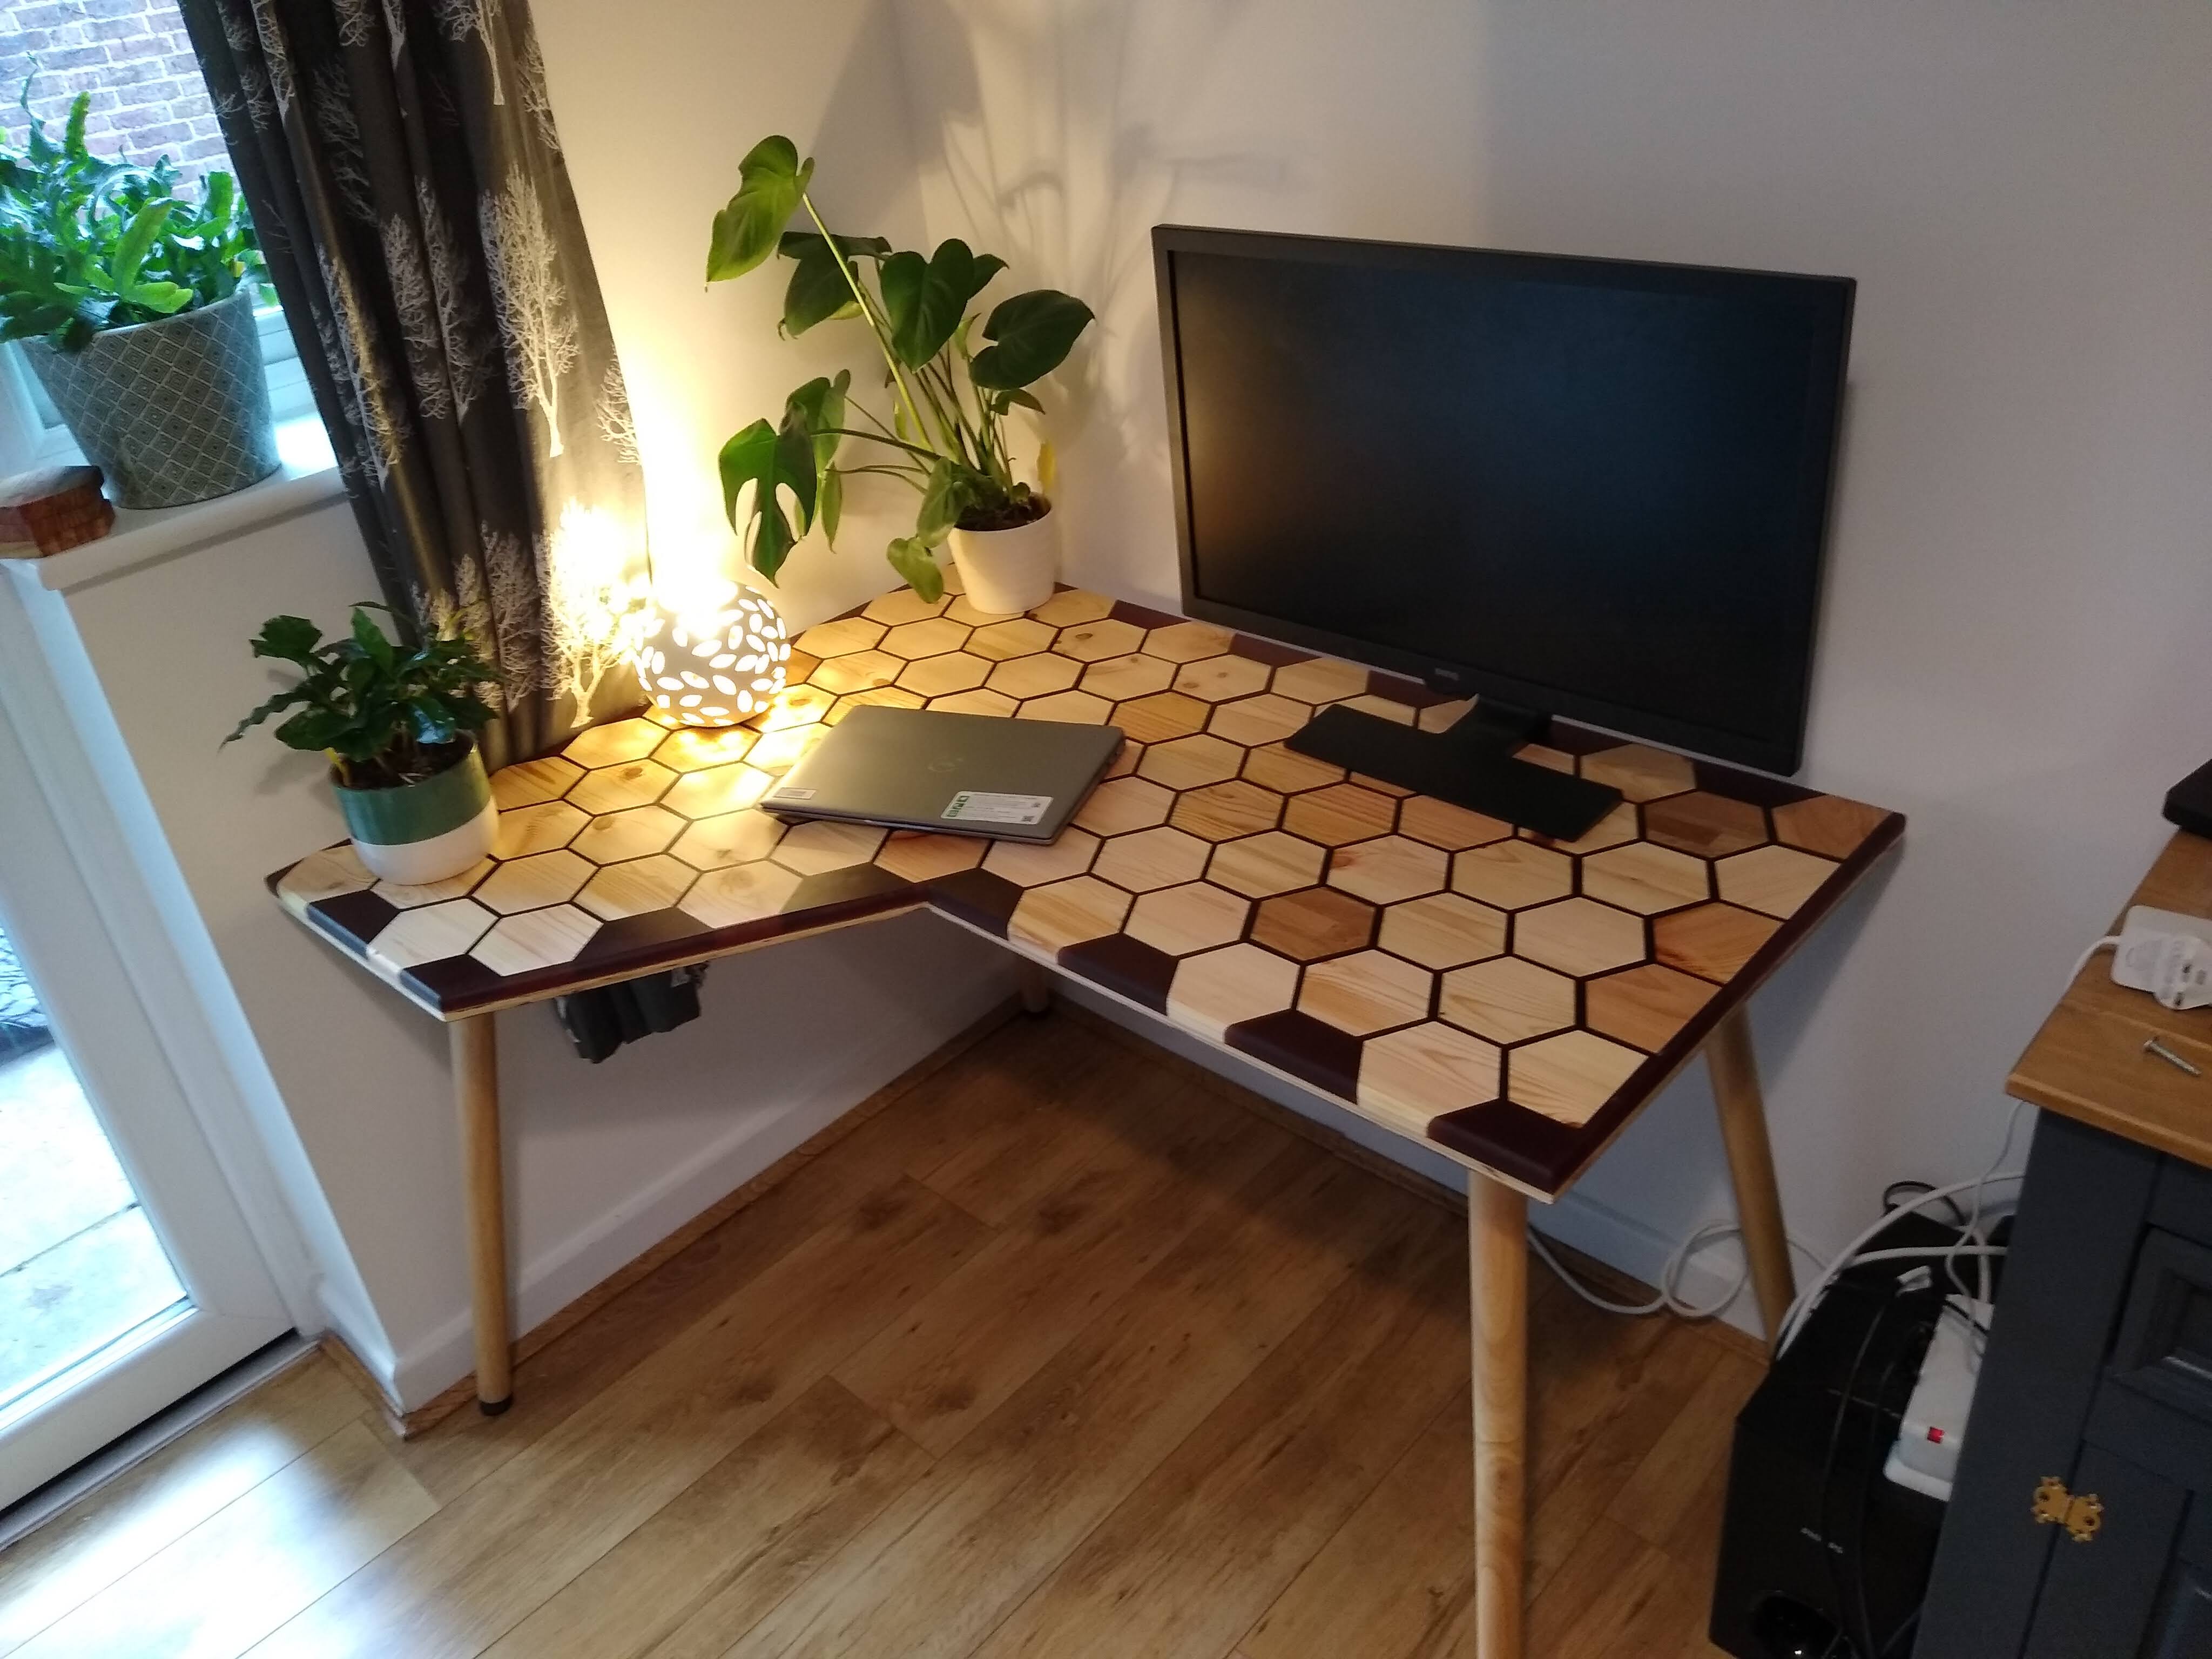
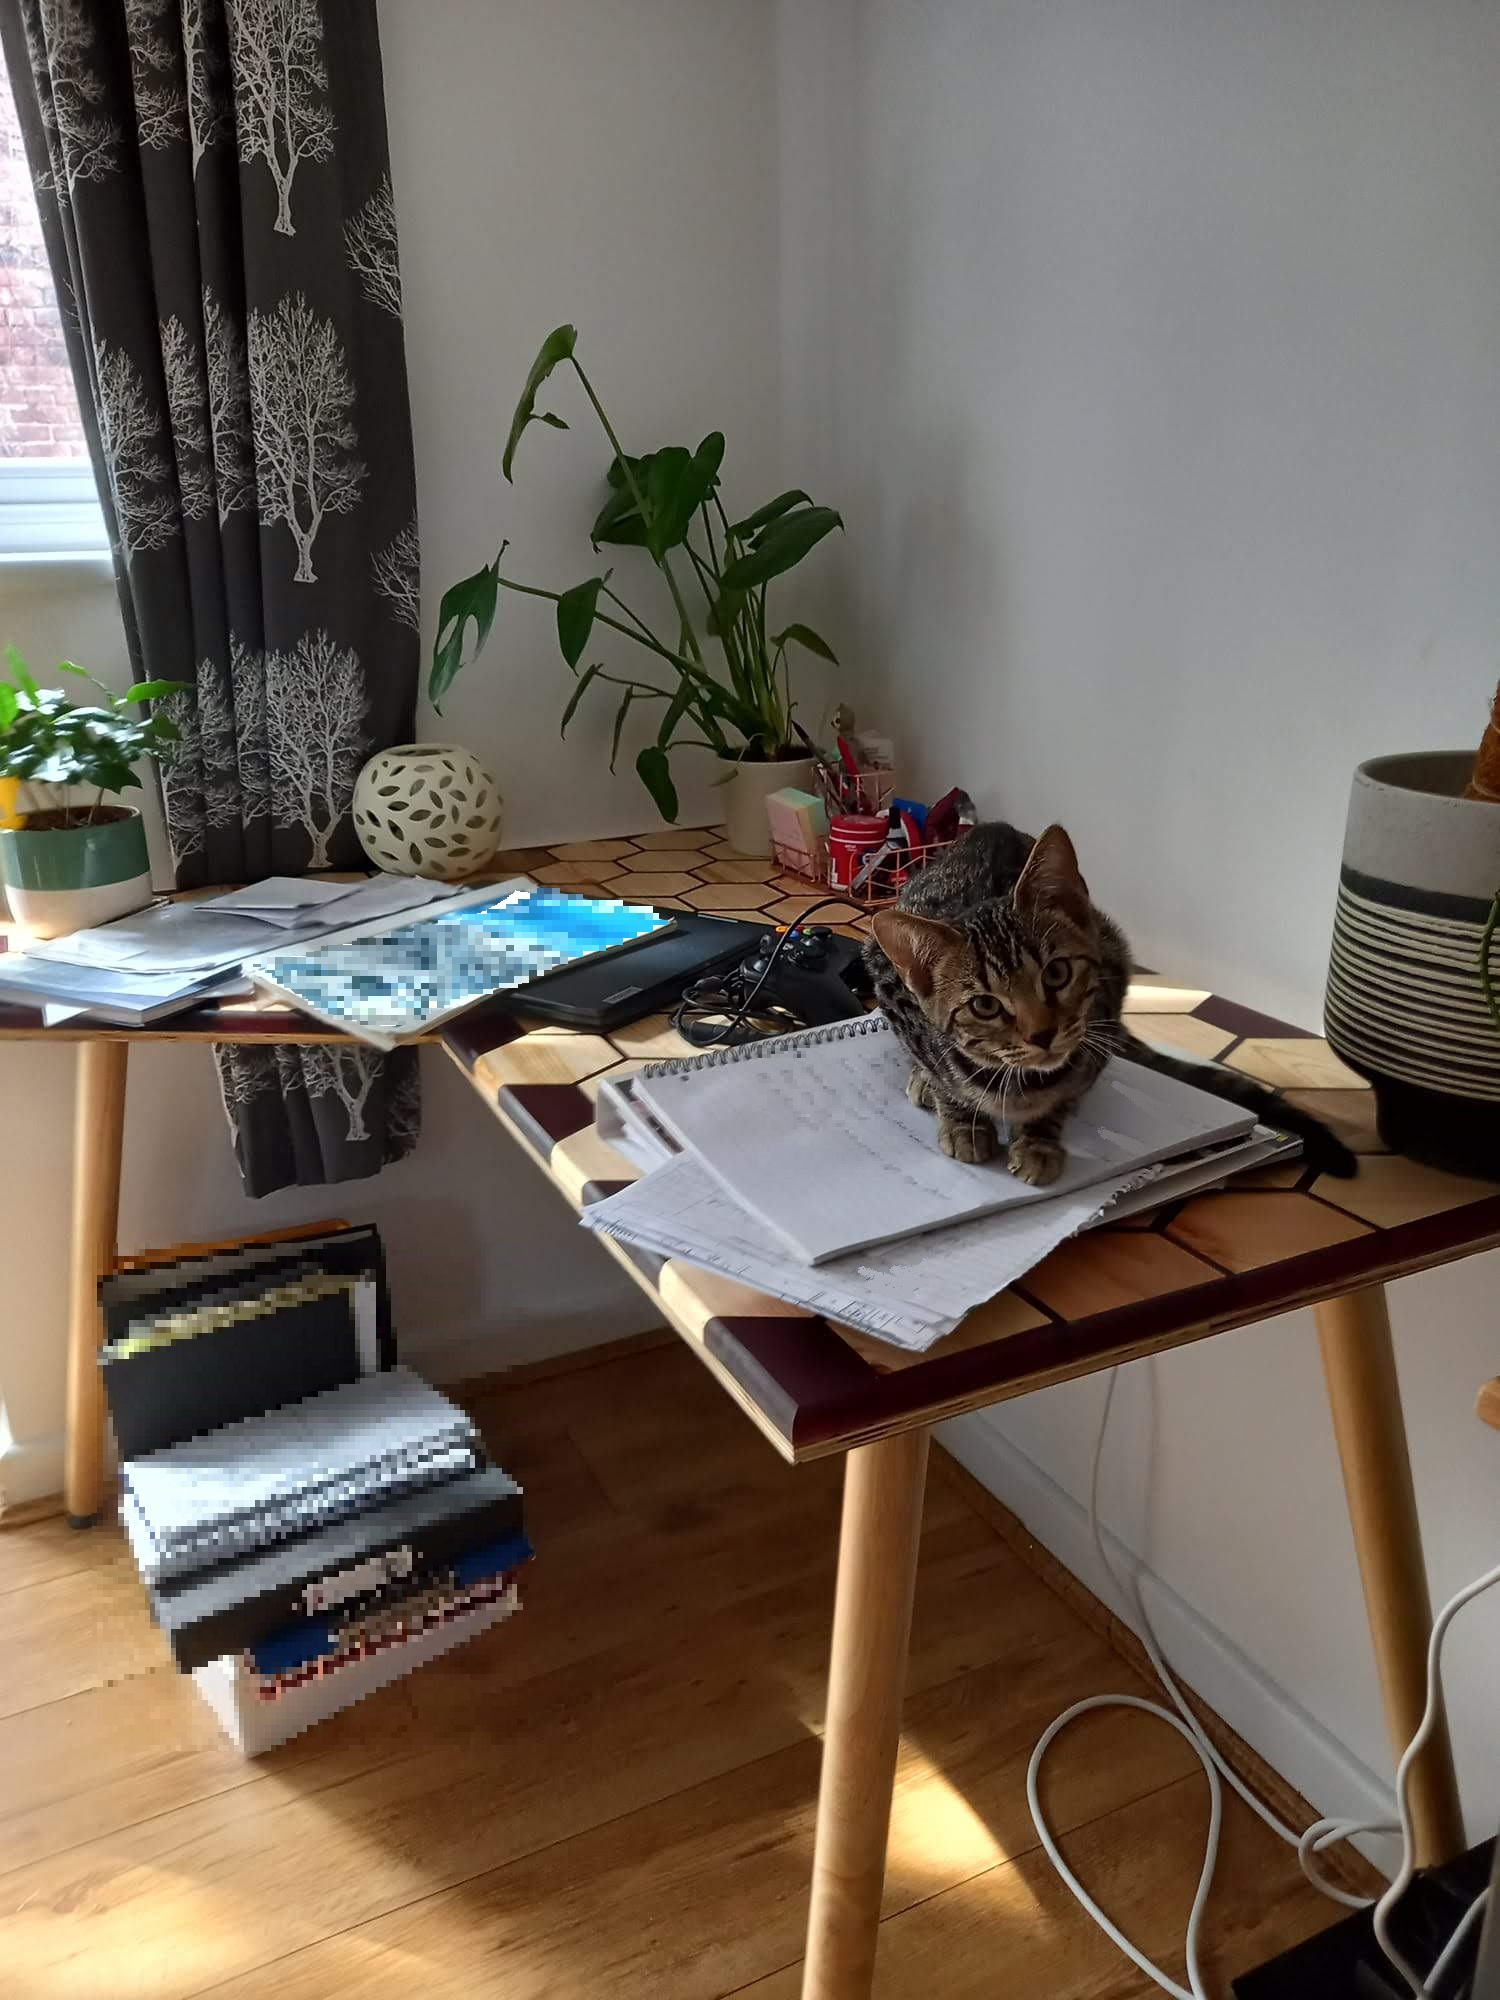
Tessellated Table
This was a challenge. A challenge for a wood working noob like myself at least. Almost as much of a challenge as trying to recall how on earth I pulled this off 2 months after I finished it. Note to self, take notes during the build not months afterwards! FYI this is a bit of a long post.
Step 0
Figure out why on earth I took on a commission before I knew what I was doing. Nothing like some pressure to expedite learning some new skills I guess?
The basic requirements were a corner desk of some sort to fit in a specific corner with a specific size in mind.
Step 1
Design something! I’ve been using DesignSpark for a while as a fusion 360 replacement so I mocked up some drafts in that. We landed on a tessellated hexagon design with a burgundy epoxy running between each hexagon. I also designed a little hexagon template to get the spacing consistent between the hexagons. This is what I came up with:
Step 2
Make a mini prototype to prove that the concept was sound-ish. A rough approach was as follows, make hexagons, make a form, put hexagons in form, pour epoxy in form then sand/plane off excess. Sounds simple enough but I wanted to try it out first. It was worth while spending the time on it as I learnt a few things:
1. I need to make a jig to evenly space the hexagons.
2. I need to do a seal coat first so the wood doesn’t absorb the colour of the resin (like it did here).
3. Remember to always plane with the grain! I had a chunk fly off due to planning against the grain so I had to trim the end off.Step 3
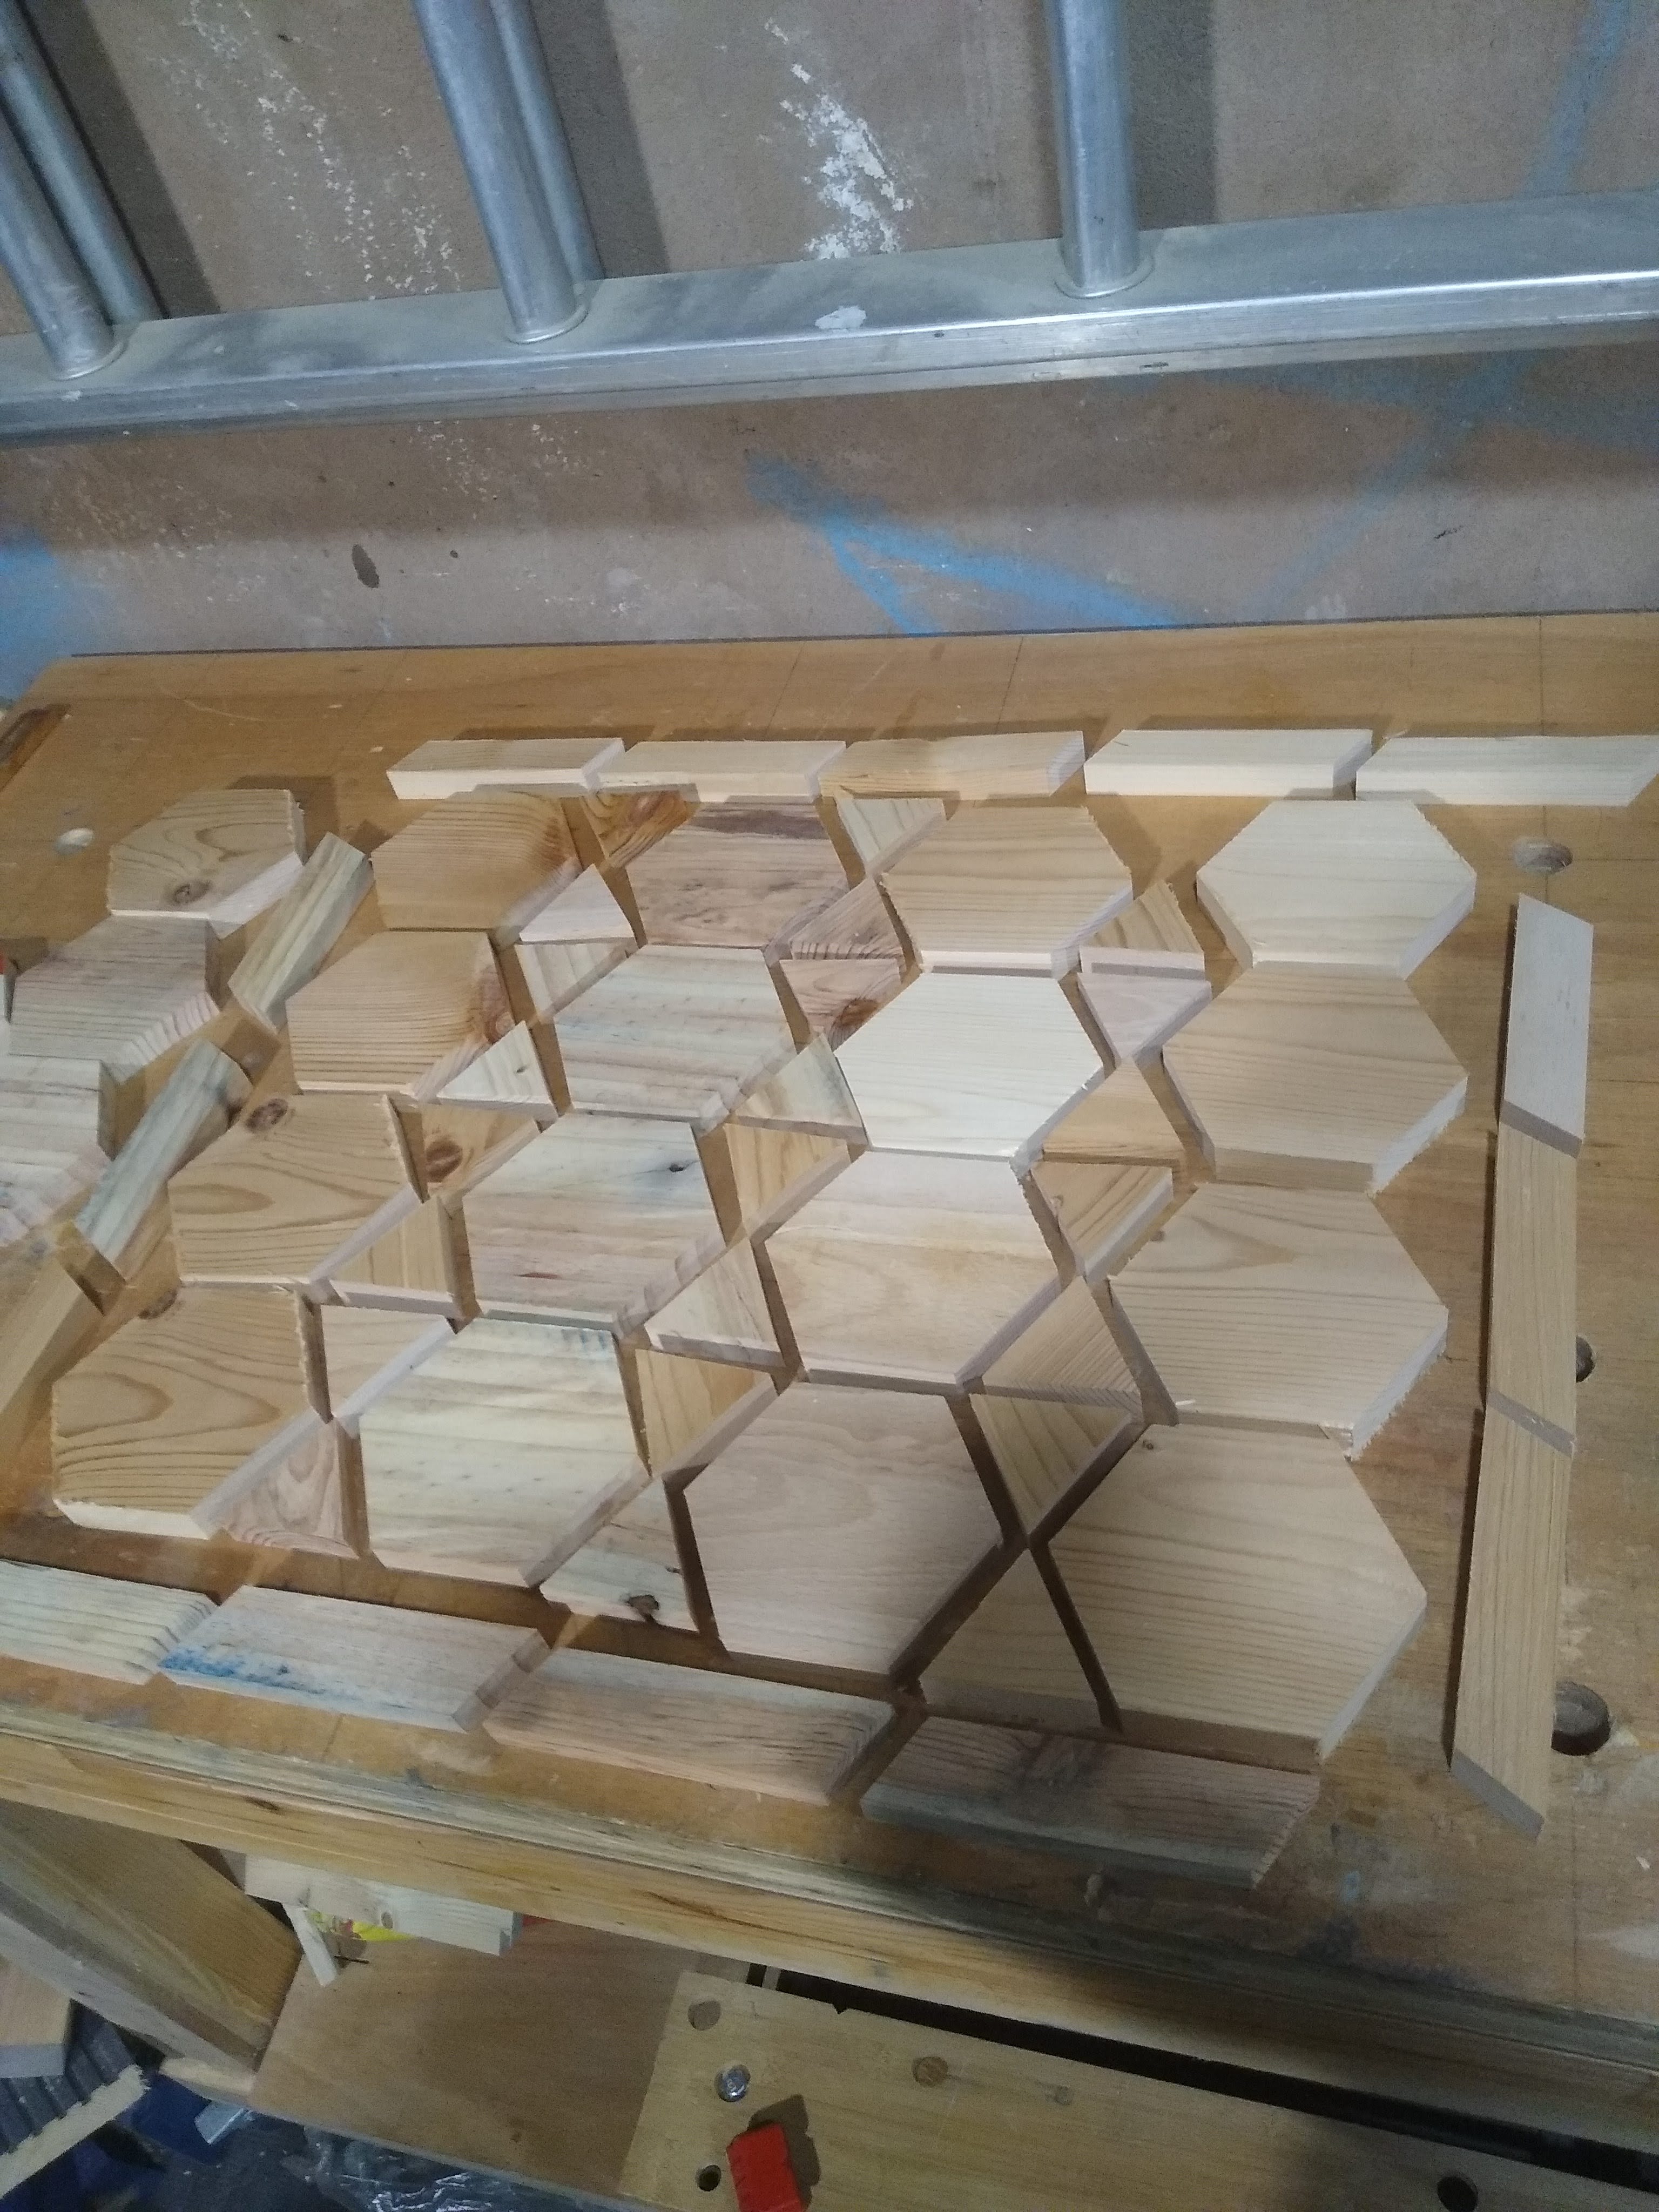
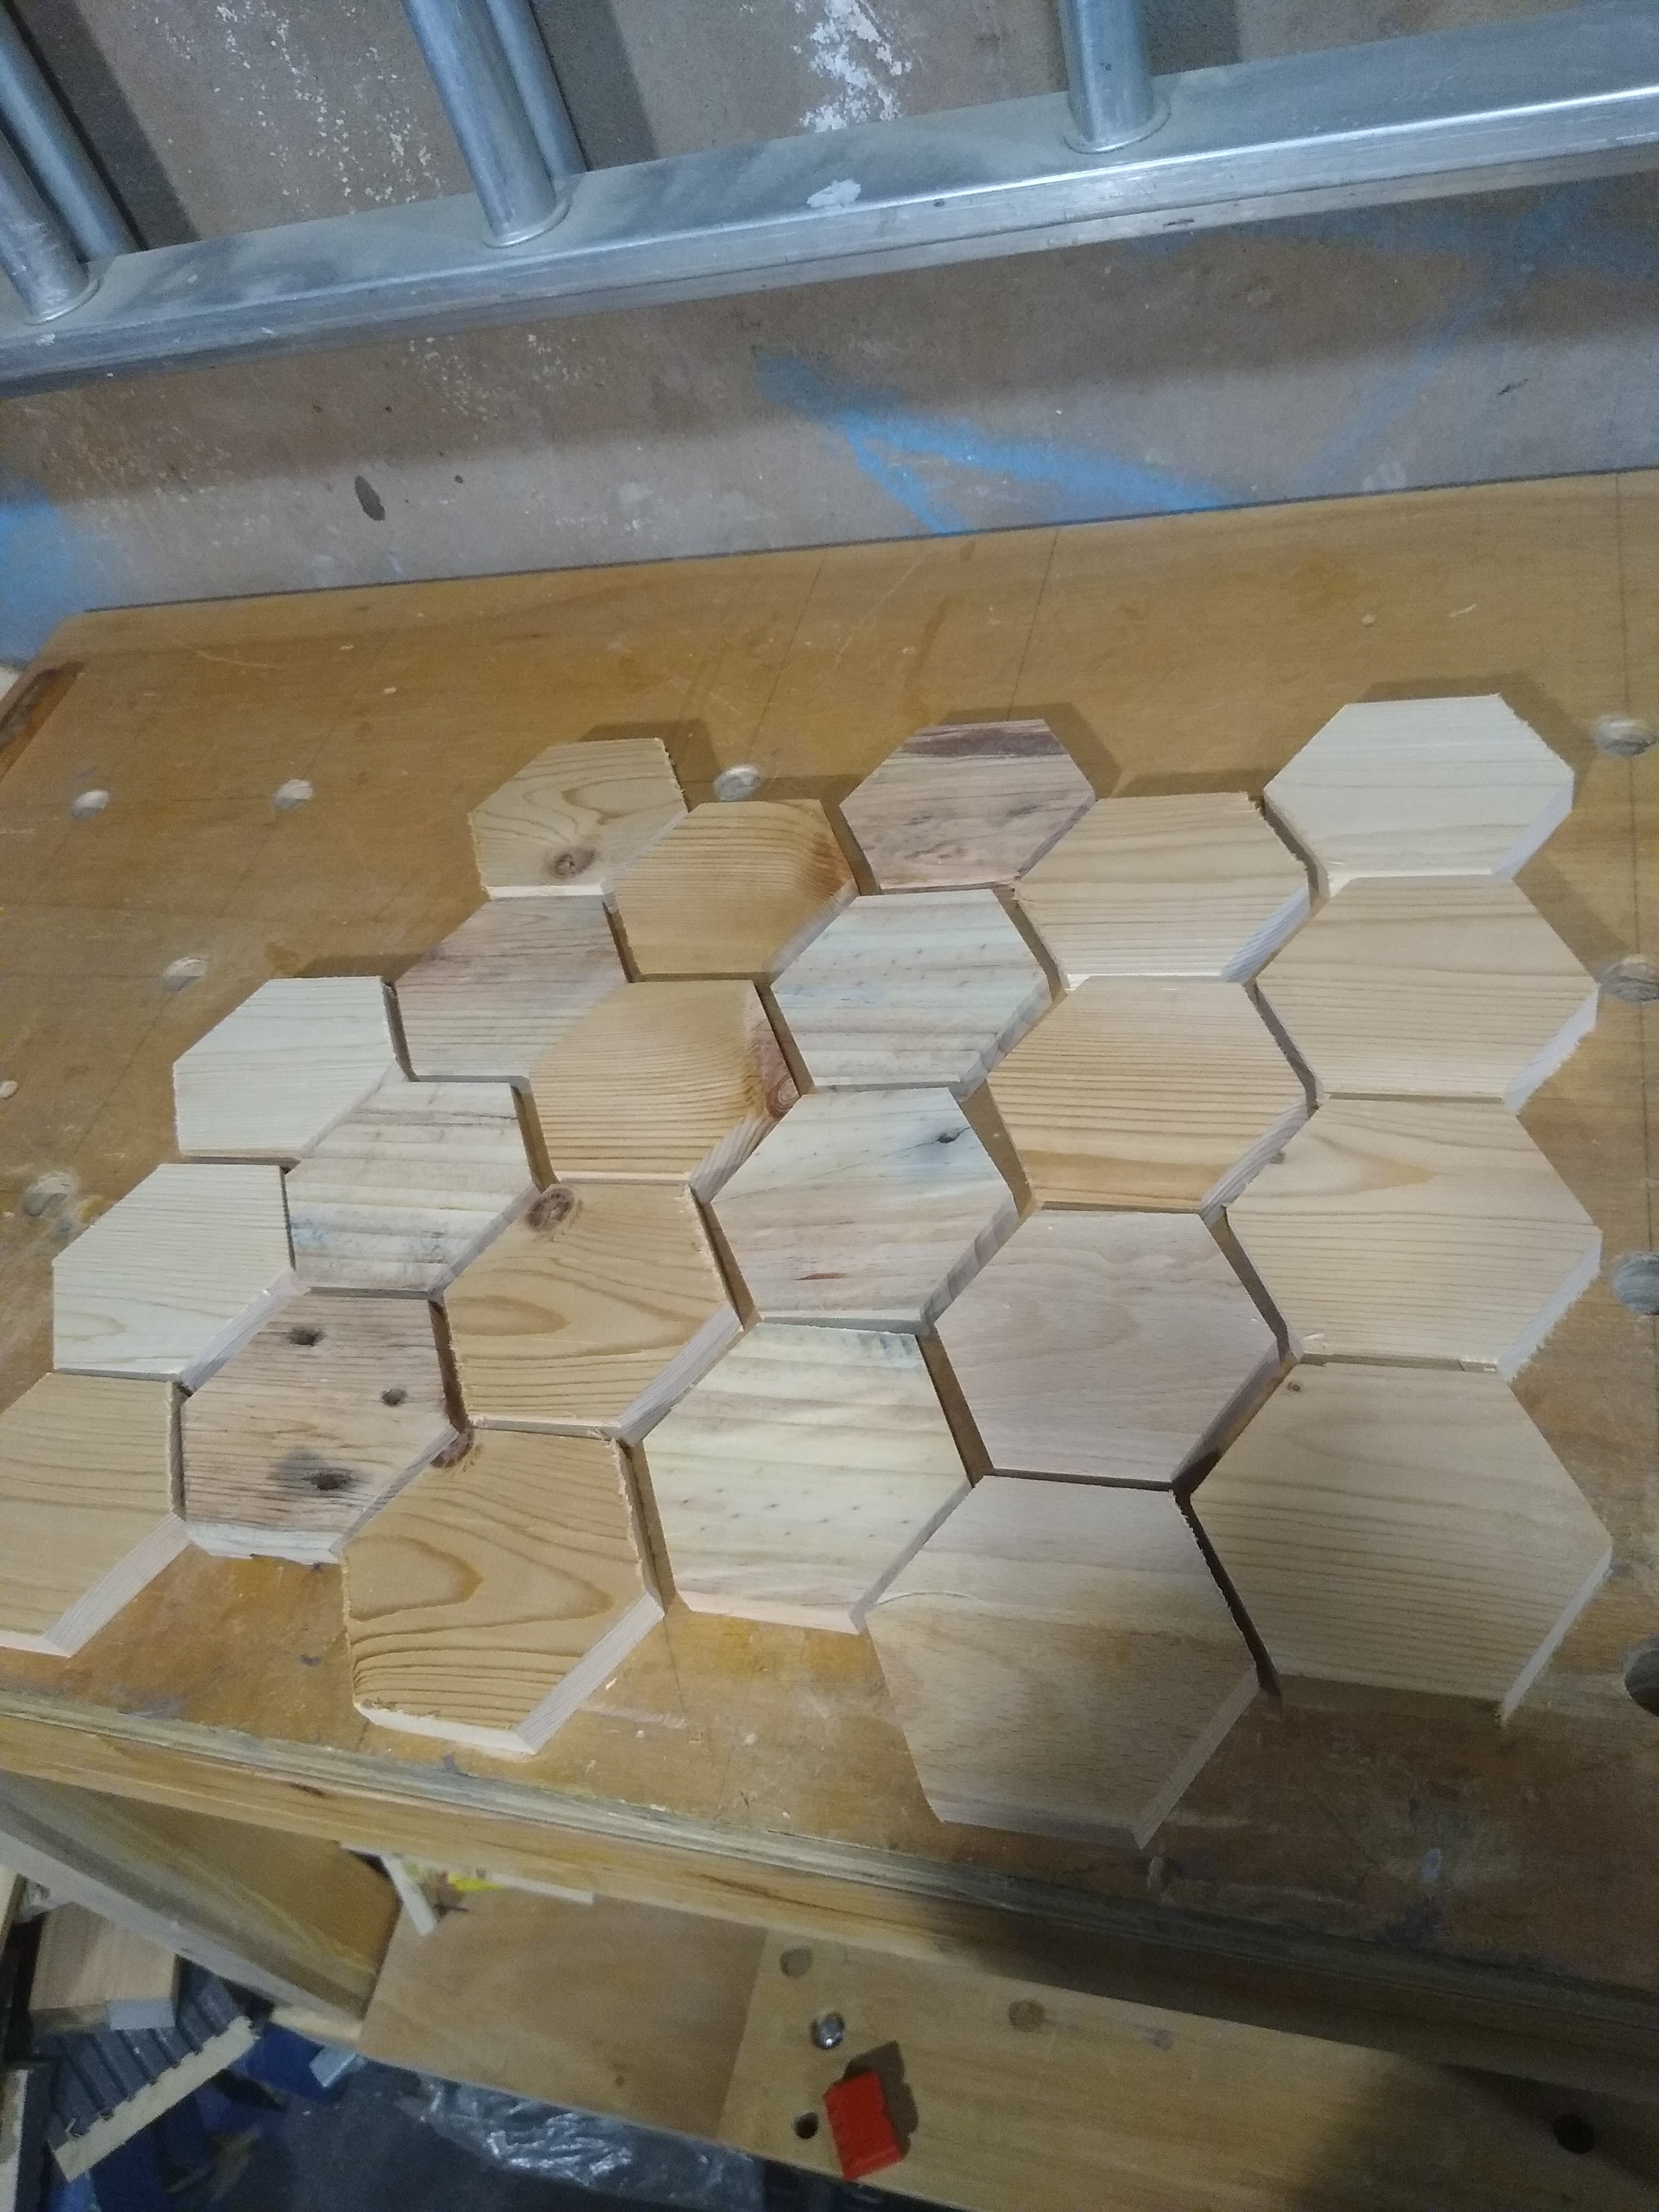
Start hexagon production! My initial thought was to use purely pallet wood for this but I soon ran out of my dry stock and didn’t want to dismantle fresh (potentially wet) pallets. I ended up buying a couple of planks of redwood PSE from wicks. This is the first wood I’ve actually bought, I must admit not needing to remove nails, joint edges and sand each plank was a nice change!
STEP 4
I played around with patterns for a while as I had many different types of wood, in the end I decide a more randomised pattern would be best as I didn’t have enough of each type to have a consistent pattern. Making sure the grain direction was the same on each hexagon but distributing the darker woods gave a nice effect.
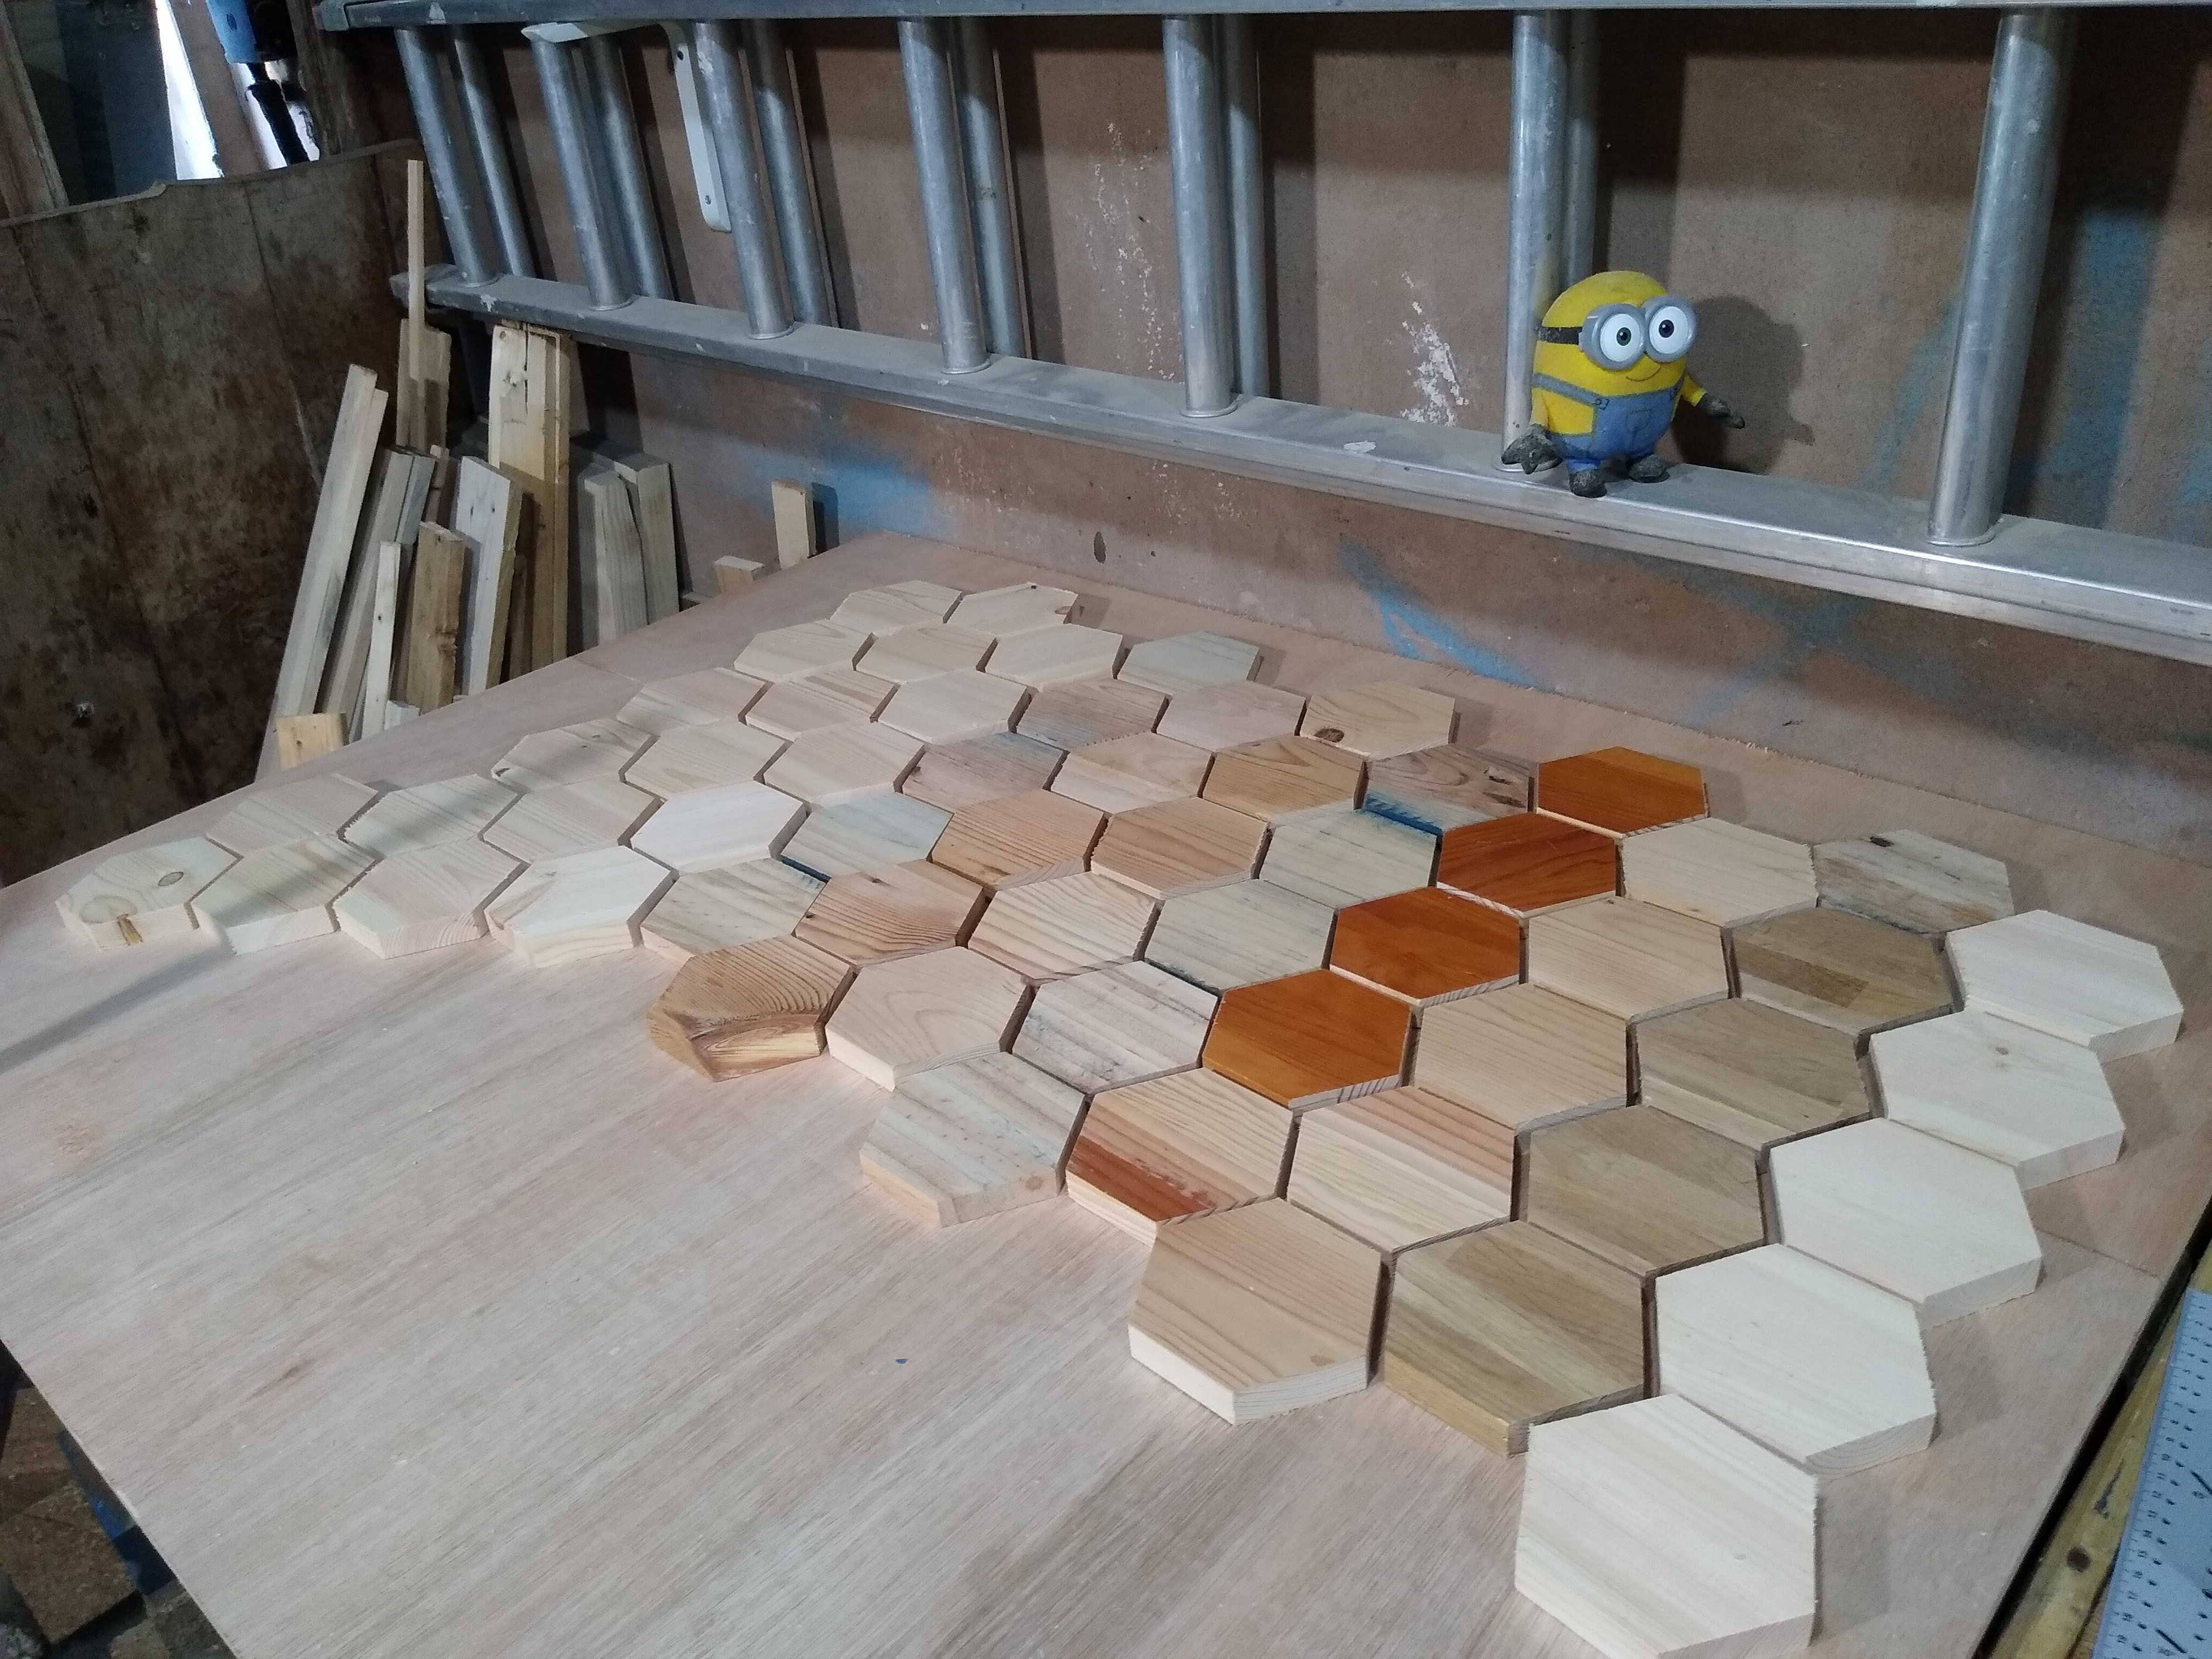
Step 5
After finalizing the pattern I built a form on top of some 12mm hardwood plywood and started to glue down the hexagons with 2-part activated glue. The glue was great as it cured immediately so there was no need for 100’s of clamps on each hexagon. Once this step was complete you could really see what the table could end up looking like.
Step 6
This is the point of no return! Time to mix and pour the epoxy over the desk. I poured a clear sealing coat to begin with as I would be using coloured resin and didn’t want the colour to get absorbed into the wood. I then did the coloured resin in two pours as I was unsure on how much heat would be generated (an potentially warp things) whilst it cured.
Step 7
It warped anyway! So despite trying to mitigate warpage something caused the whole table to slightly warp. After knocking off the form I found that the desk was not flat on the bottom. In hindsight I probably didn’t need to worry too much as you wouldn’t see it and it didn’t effect the top of the desk. However just knowing it wasn’t flat was annoying so I put together a router sled kit and attempted to flatten the bottom. I got flattening router bit and got to it.
Next was to plane away the top layer of epoxy so all the wooden hexagons were exposed. This was required as not all the wood was the same thickness so some of the hexagons got submerged in epoxy. I tried to used the router sled for this but it didn’t work very well as the rail system kept getting bound up. In the end I found success by using an electric hand planer freehand and using a level to check for flatness.
Step 8
Round over the edges. This was a bit nerve racking as I’d had chip-out occur on epoxy before and the thought of damaging the desk at this stage was concerning. However, after getting a new router bit and testing it on my test piece I made earlier it instilled some confidence. Thankfully it went with out a hitch and gave me the finish I wanted!
Step 9
Now the satisfying and relatively pain free part, finishing. I filled any gaps on the back then sanded back both sides (320 top & 120 bottom) then gave it a good clean down. For the bottom I painted it grey, as the nice hardwood veneer was ruined during the flattening process. On the top I used linseed oil as this worked on the epoxy part and the various different woods. I did two coats of linseed with a few days between coats. Finally I used a furniture paste wax after a week had past which should protect it from UV and discolouring.
Step 10
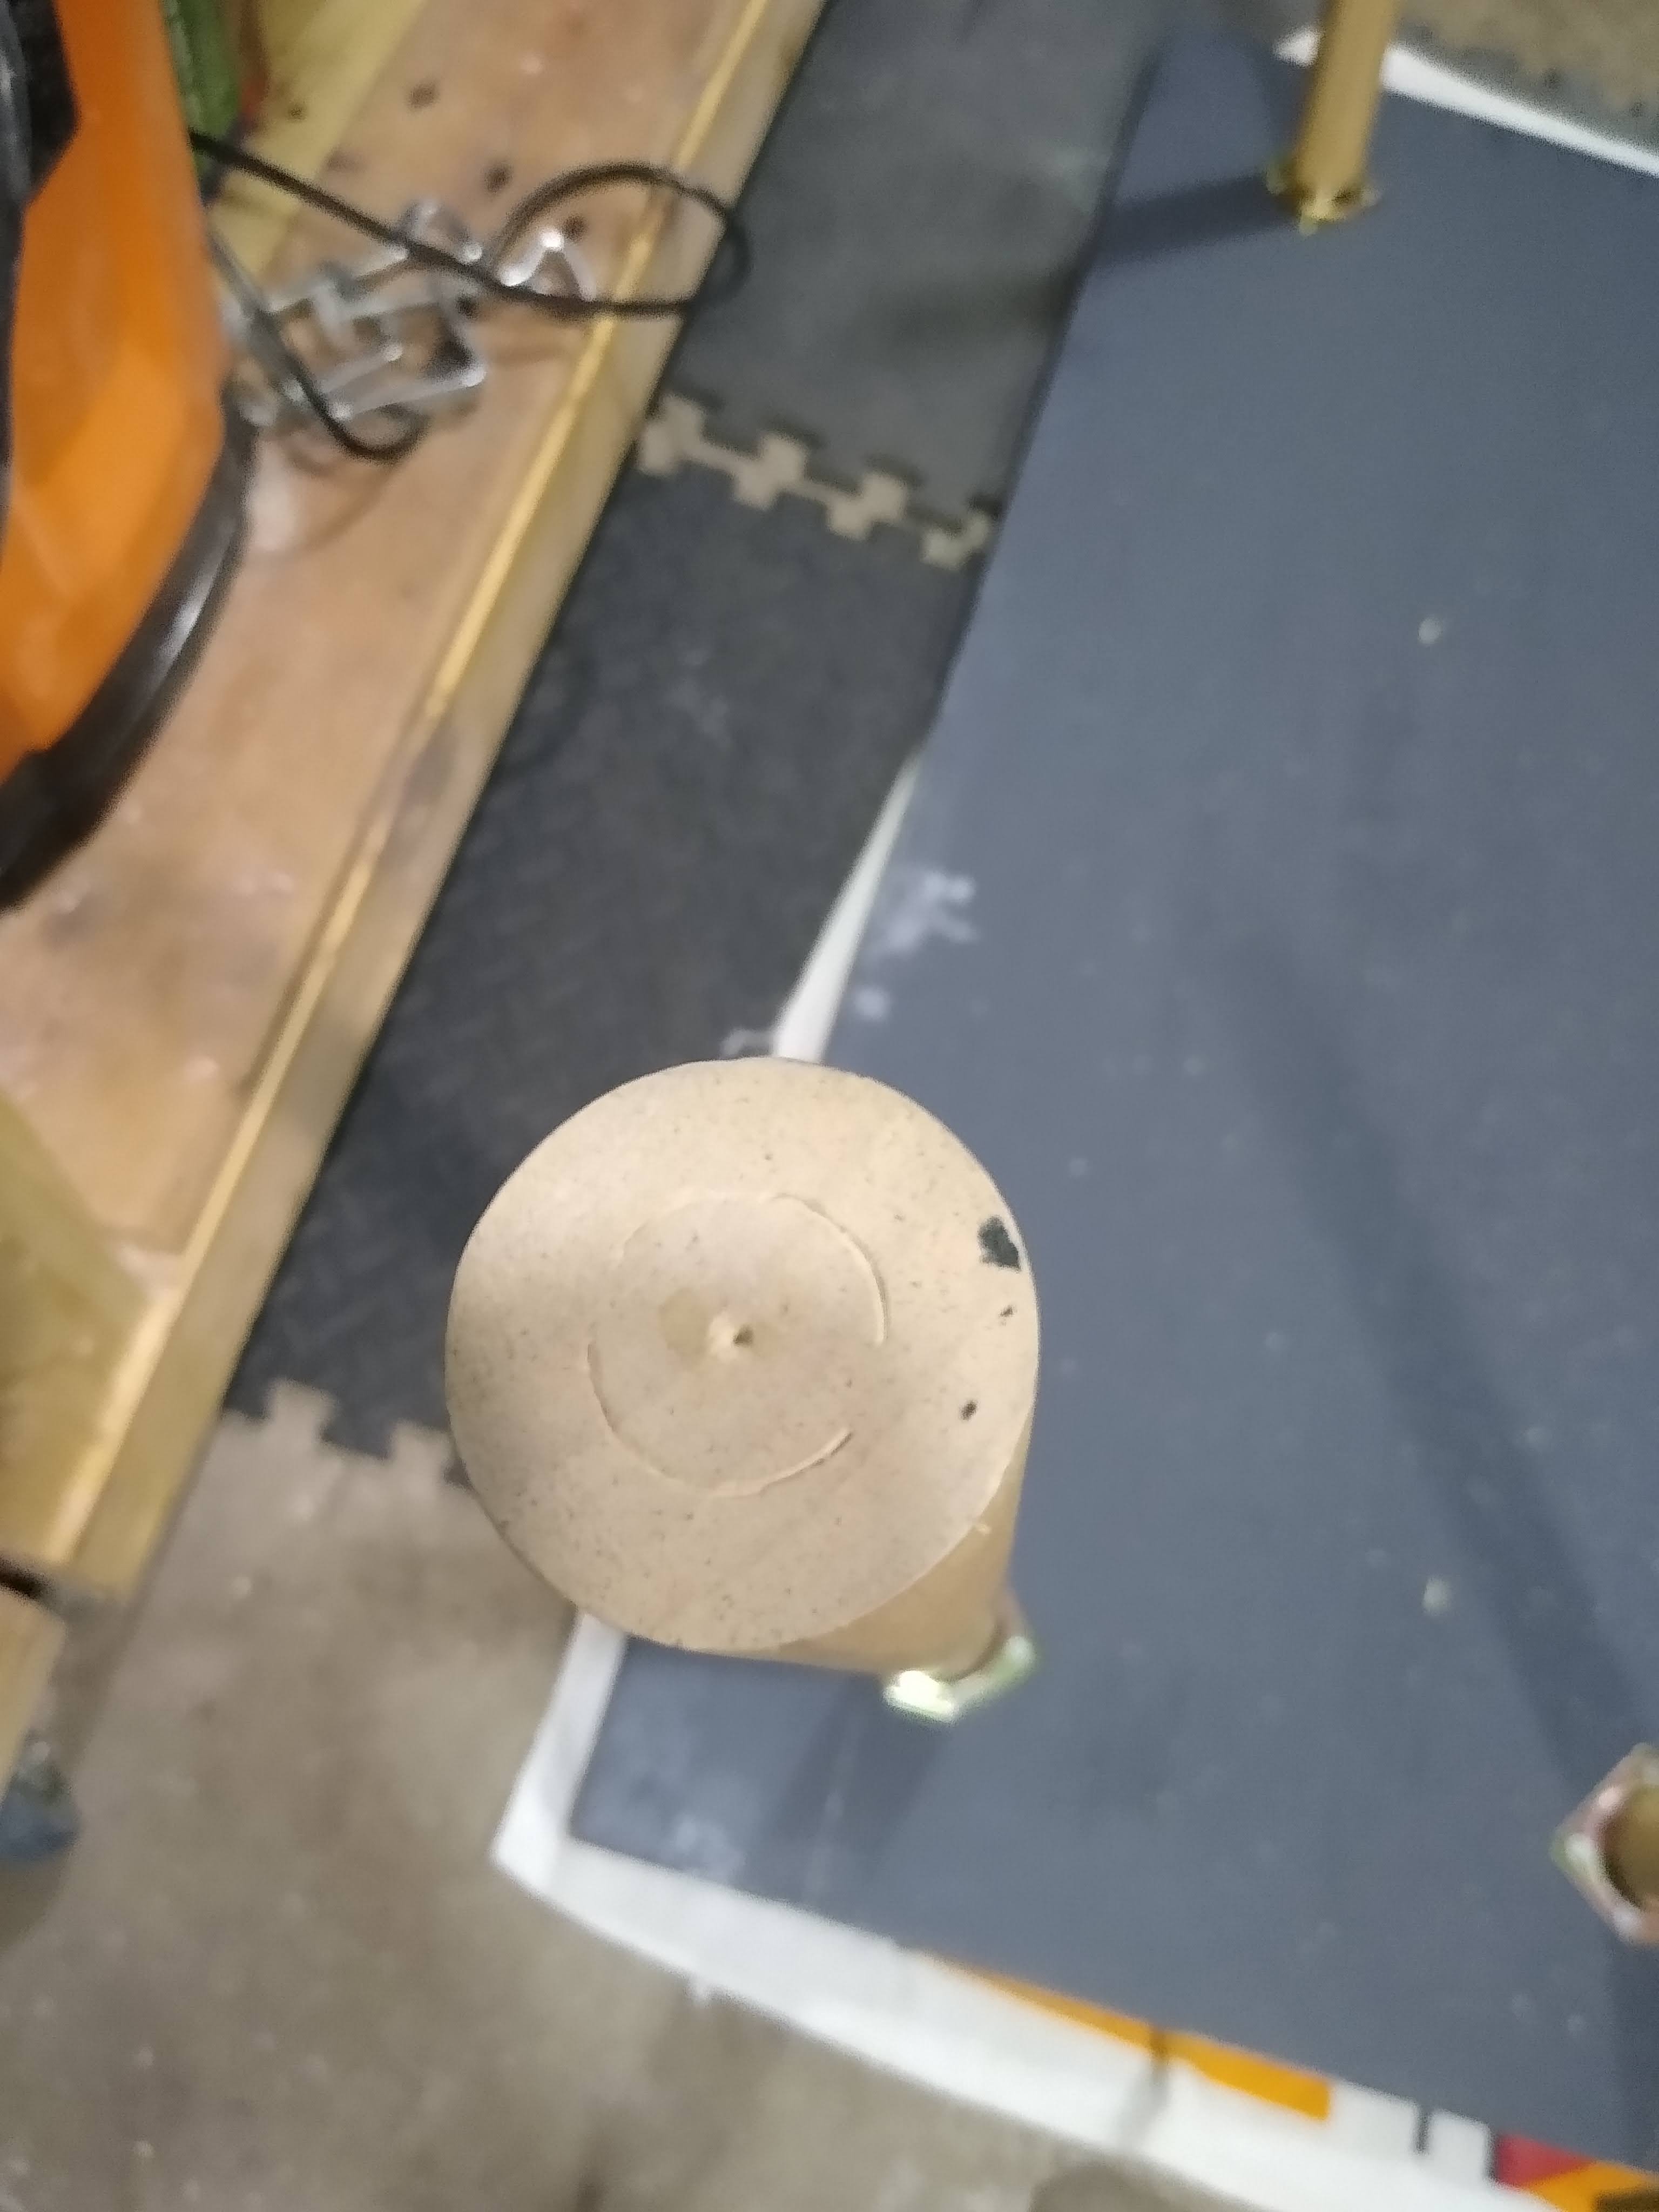
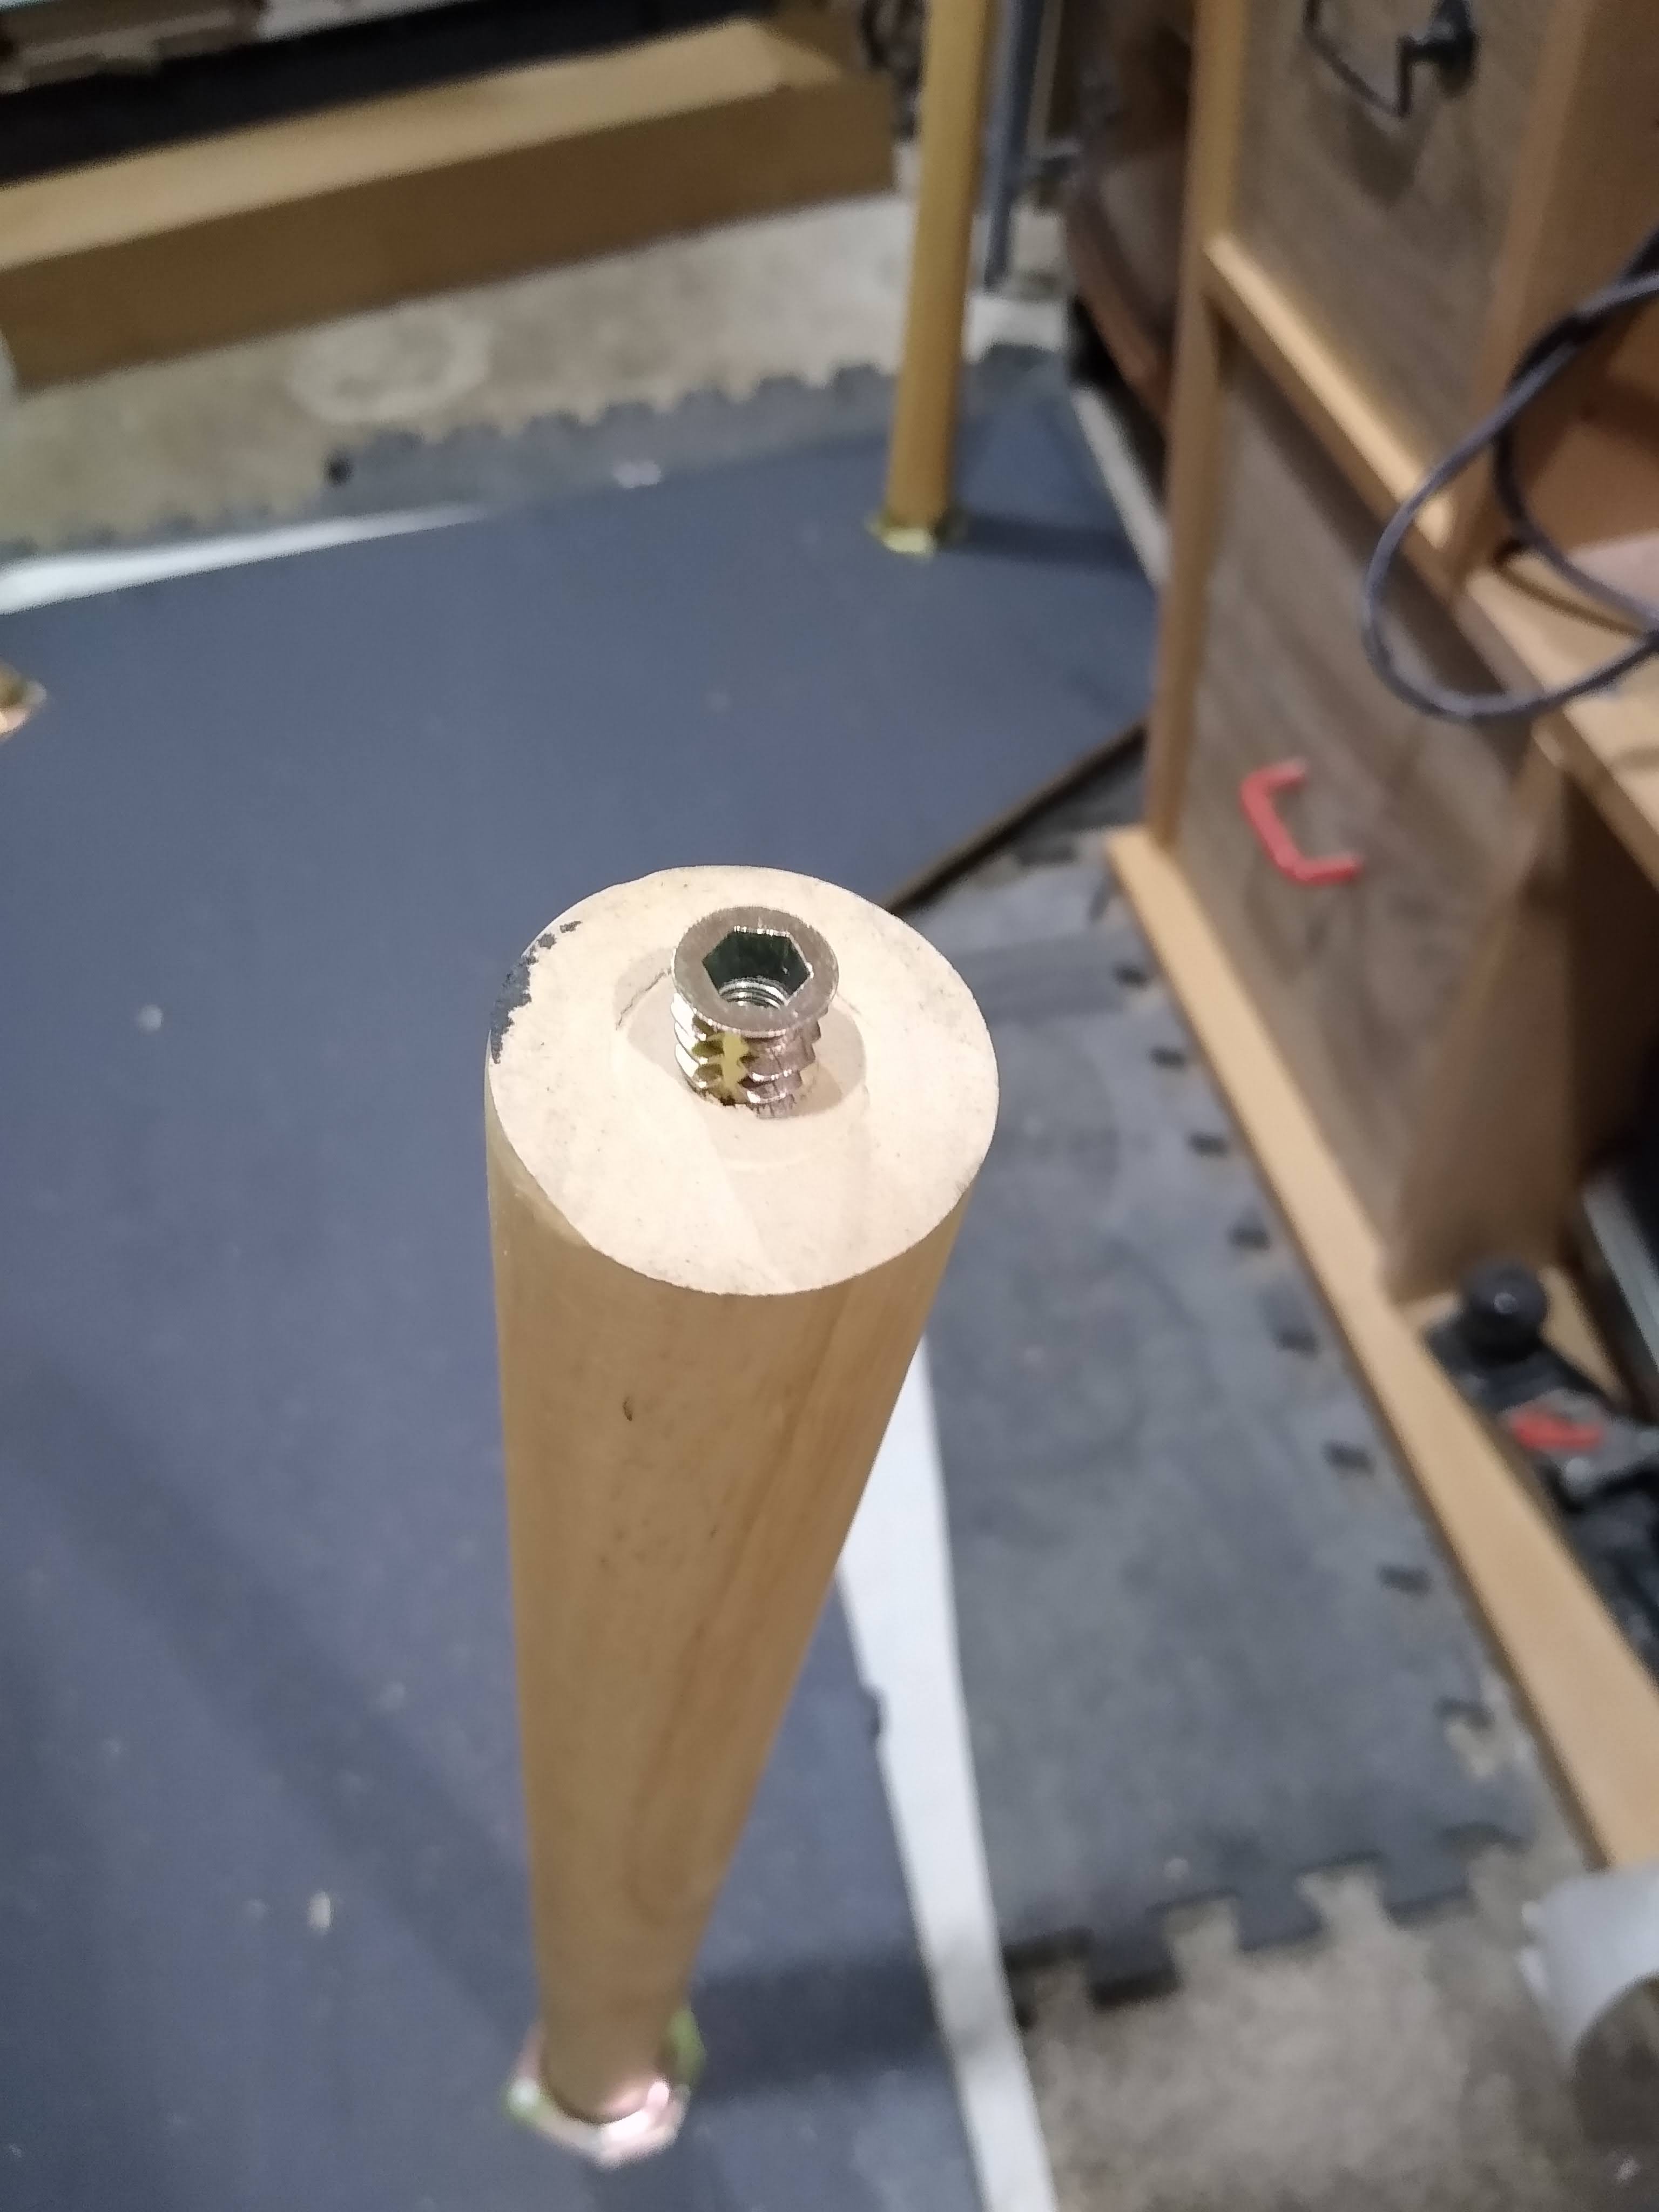
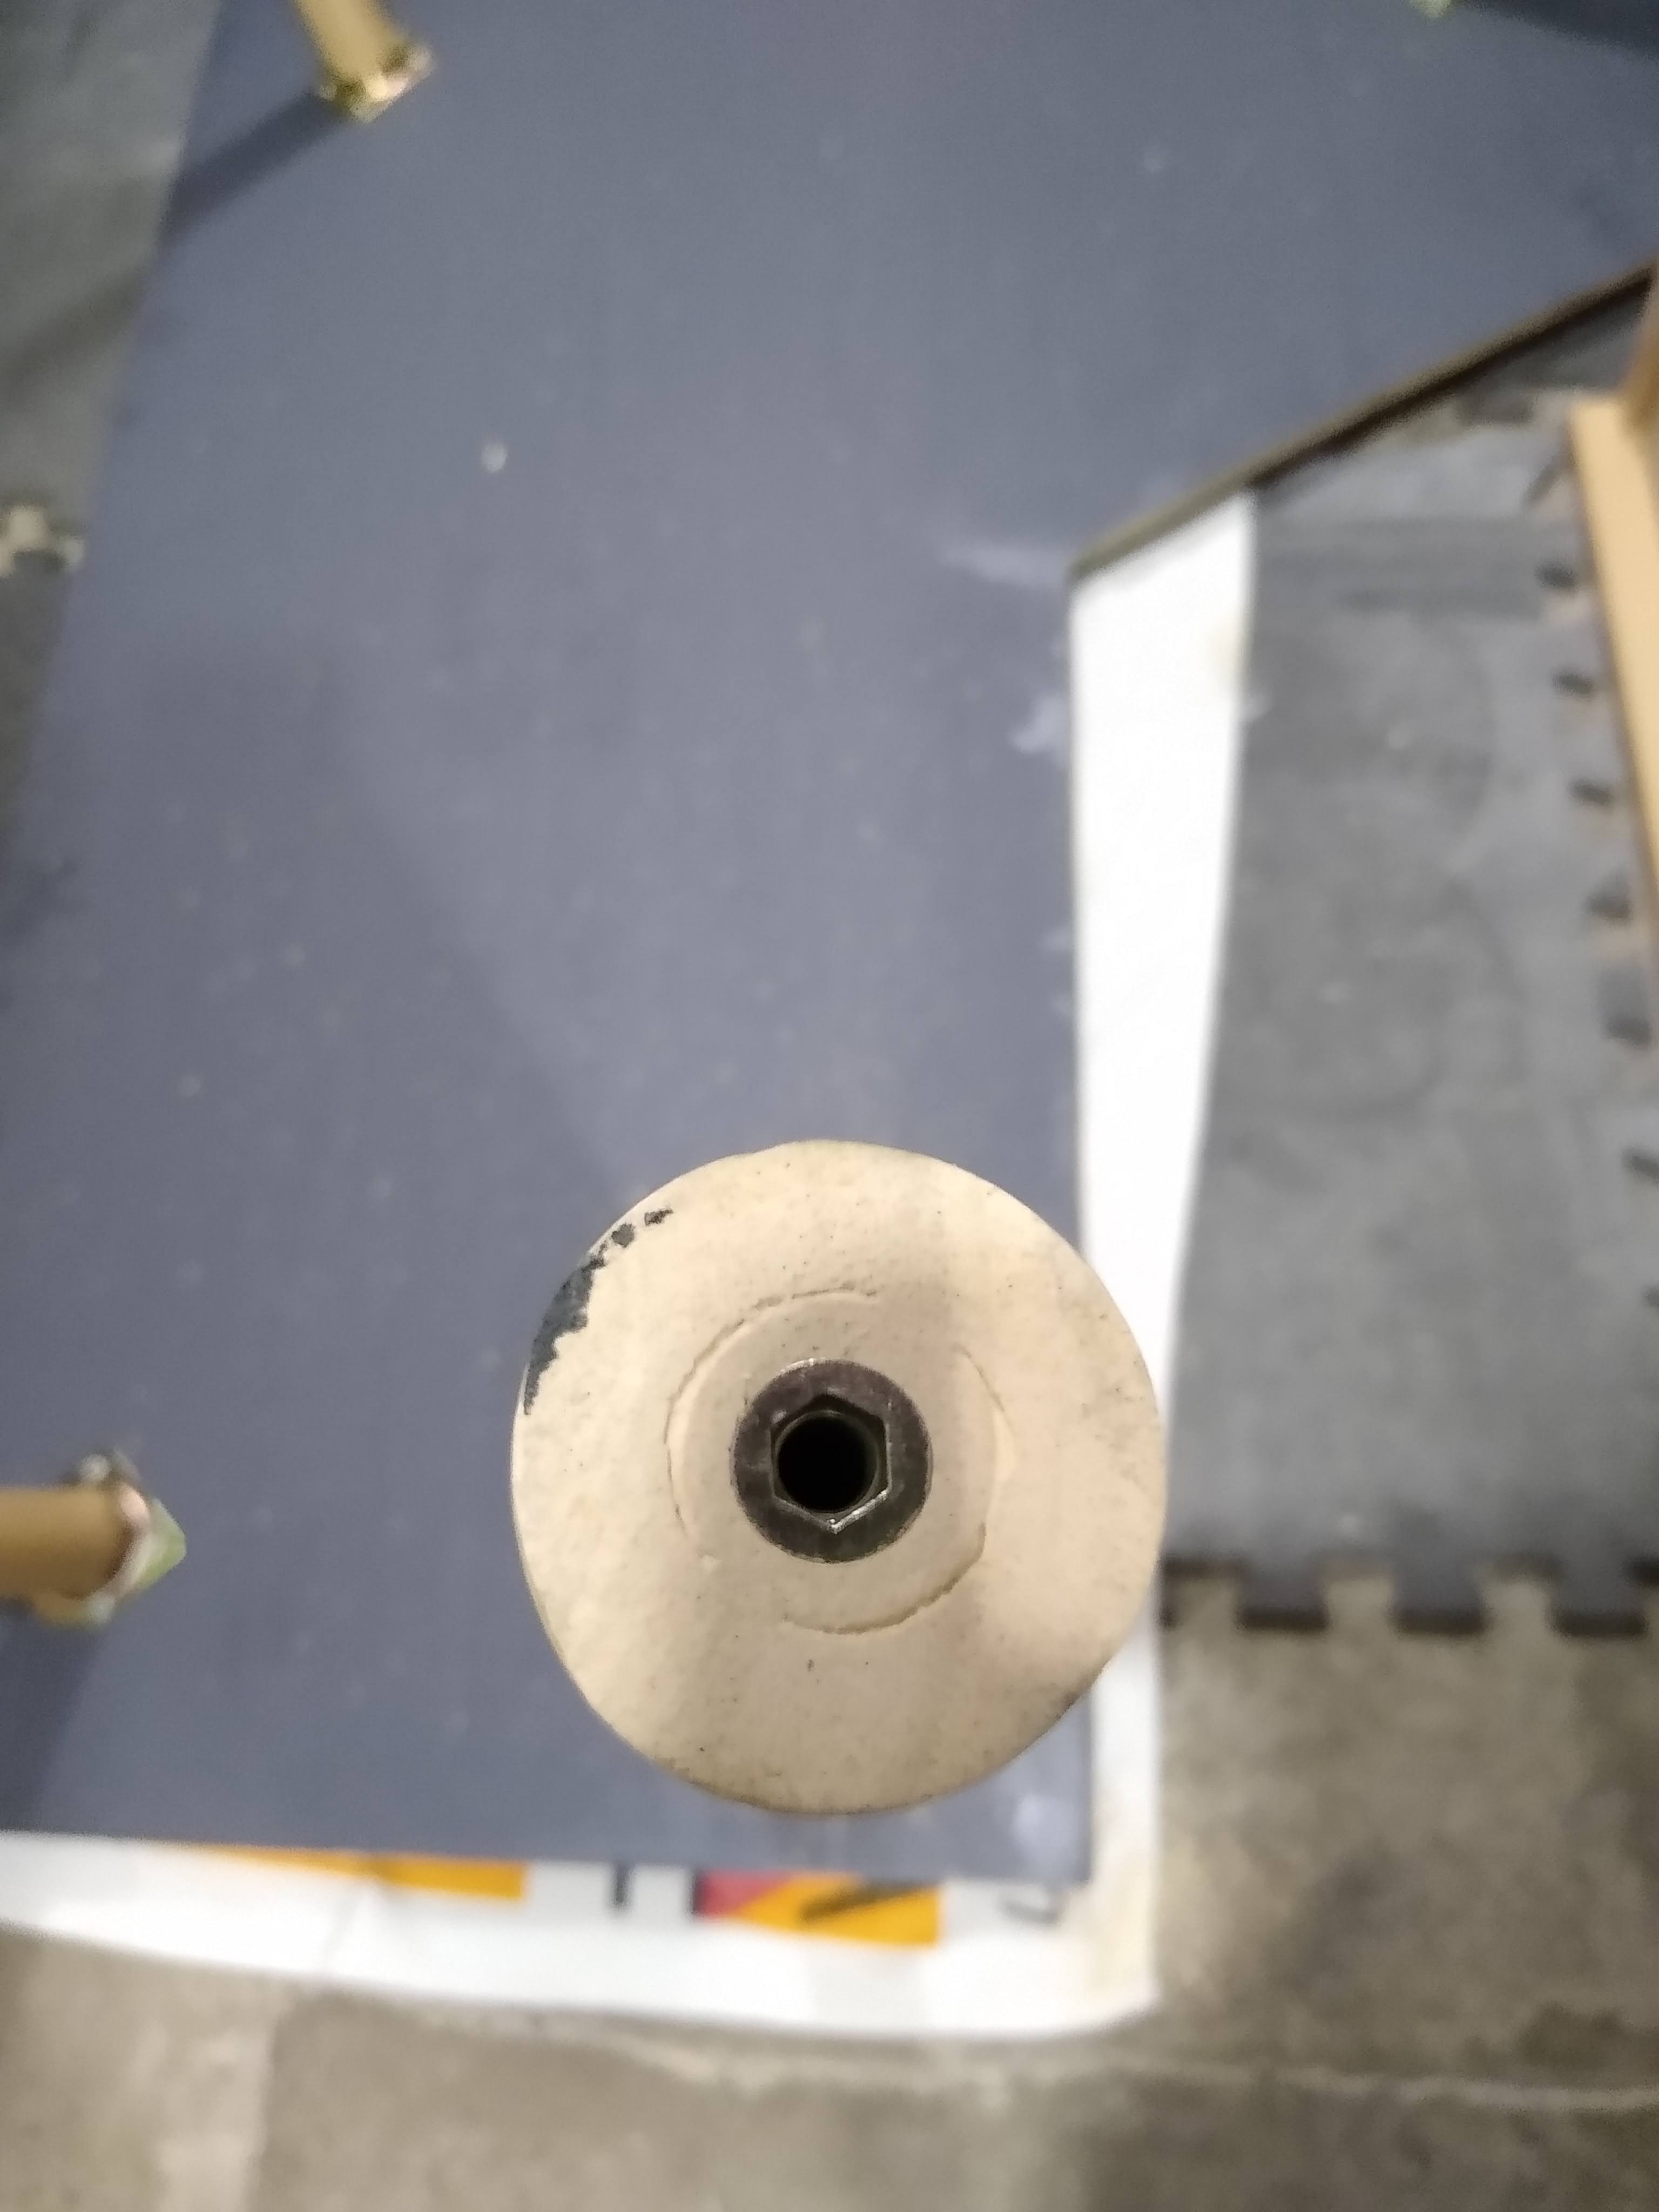
Spend far too long deciding what legs to use. I almost went for some shaped black steel legs but in the end I thought it wouldn’t suit the design so I opted for wooden pins at a slight angle on each corner. The legs are a light oak which looks great but the sadly the mounting system is not very stable so I had to re-enforce them with some 4 inch wood screws going straight though the bracket. I added some adjustable feet that attached via a threaded insert that I installed.
Step 11
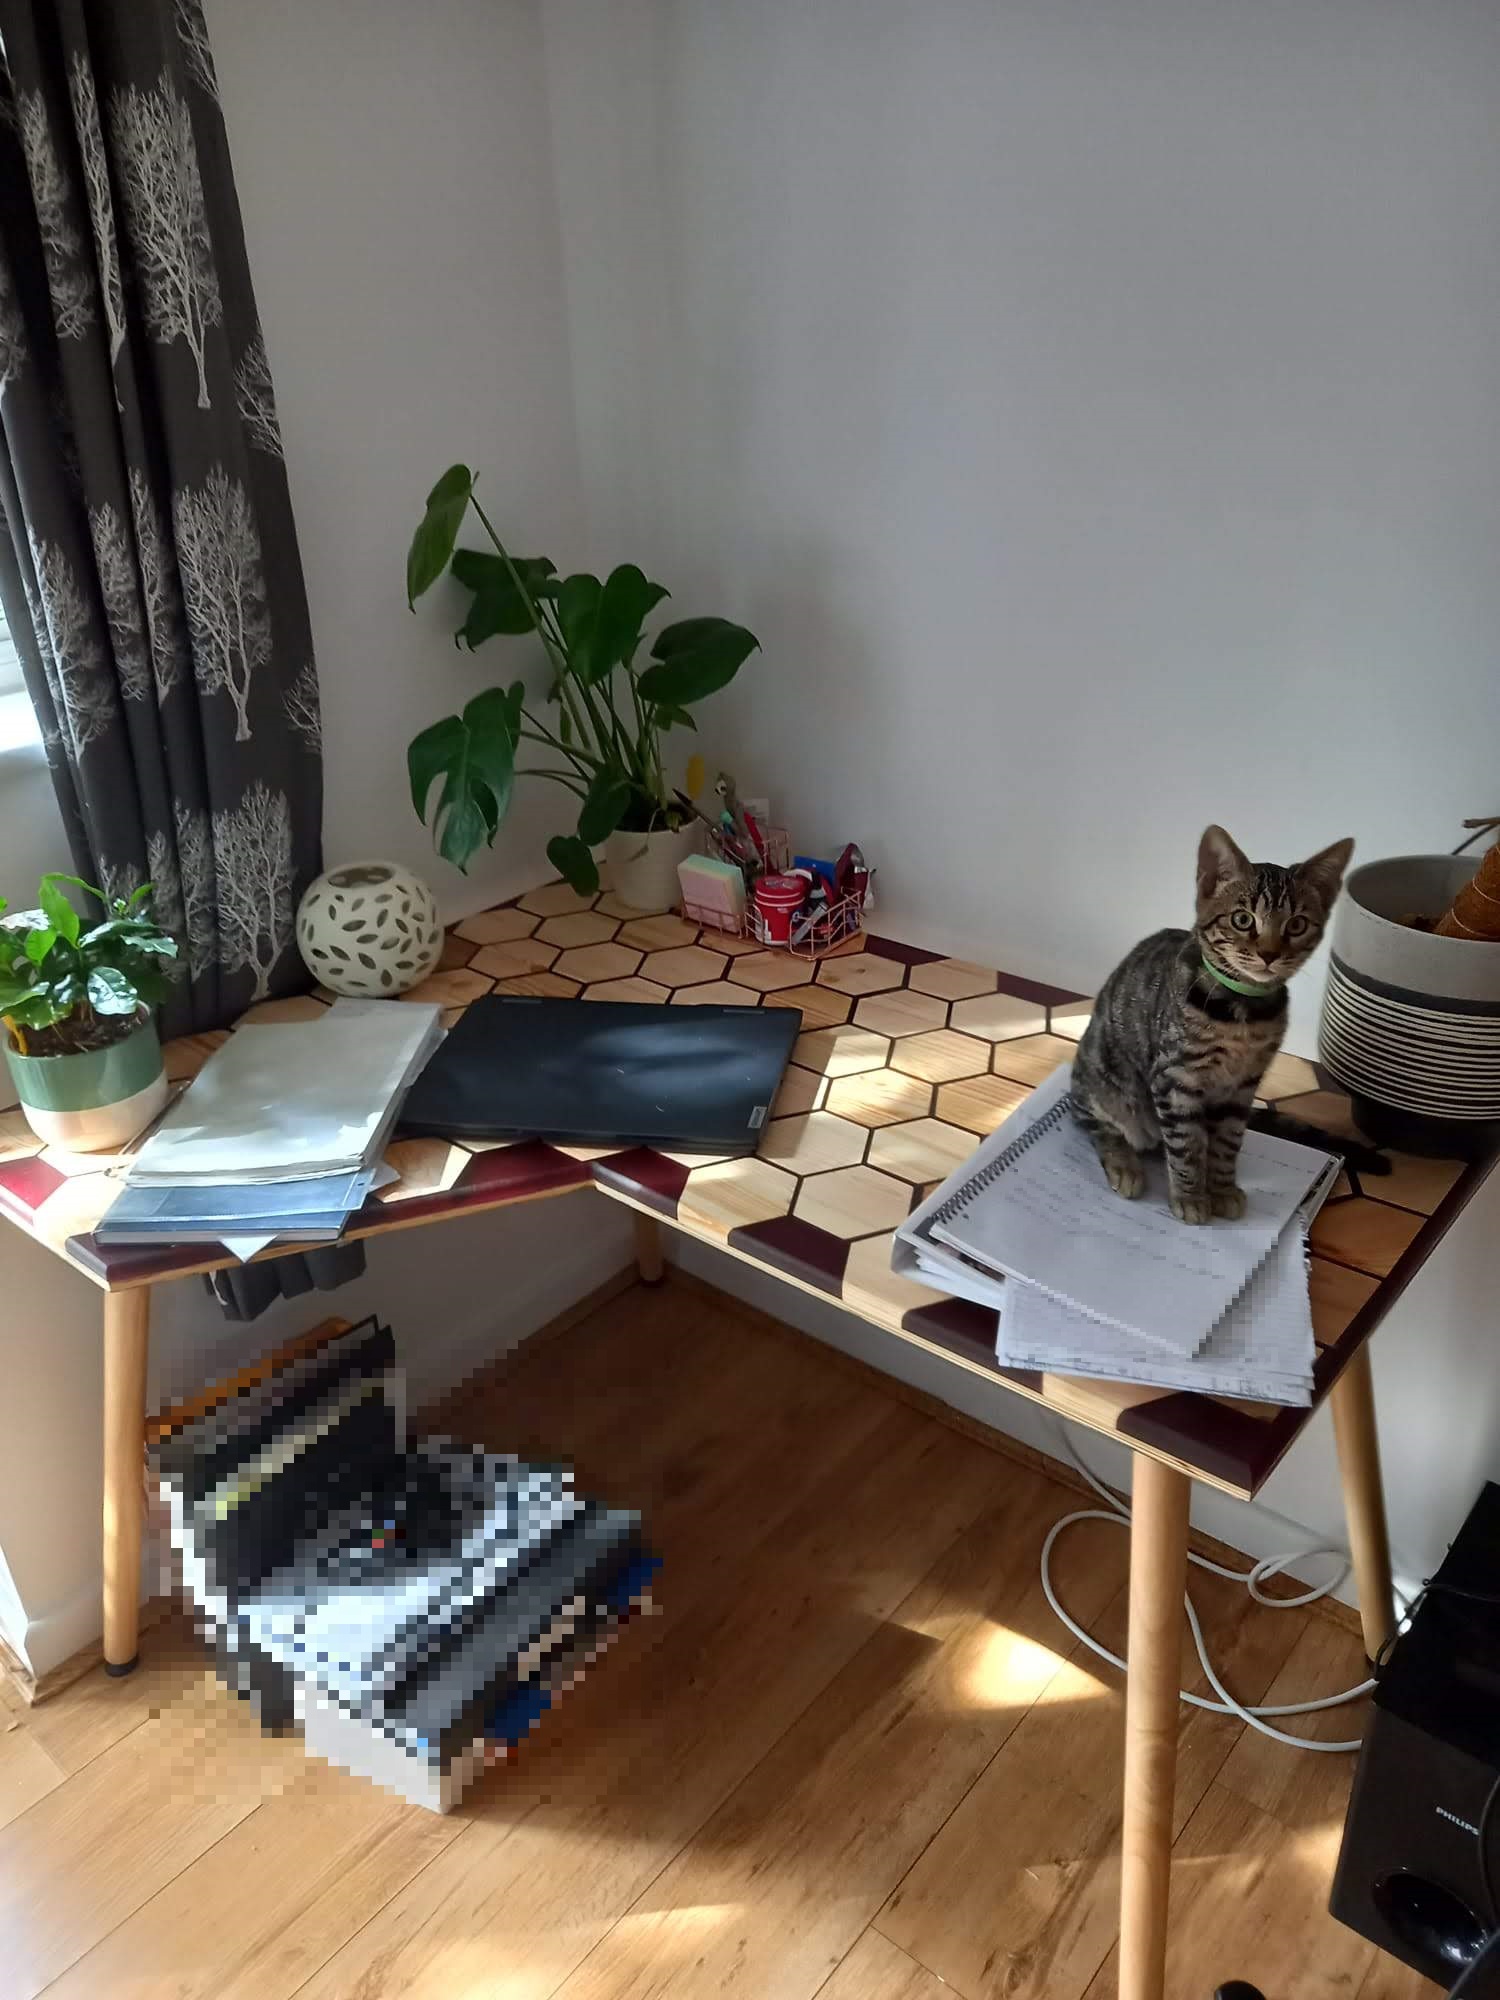
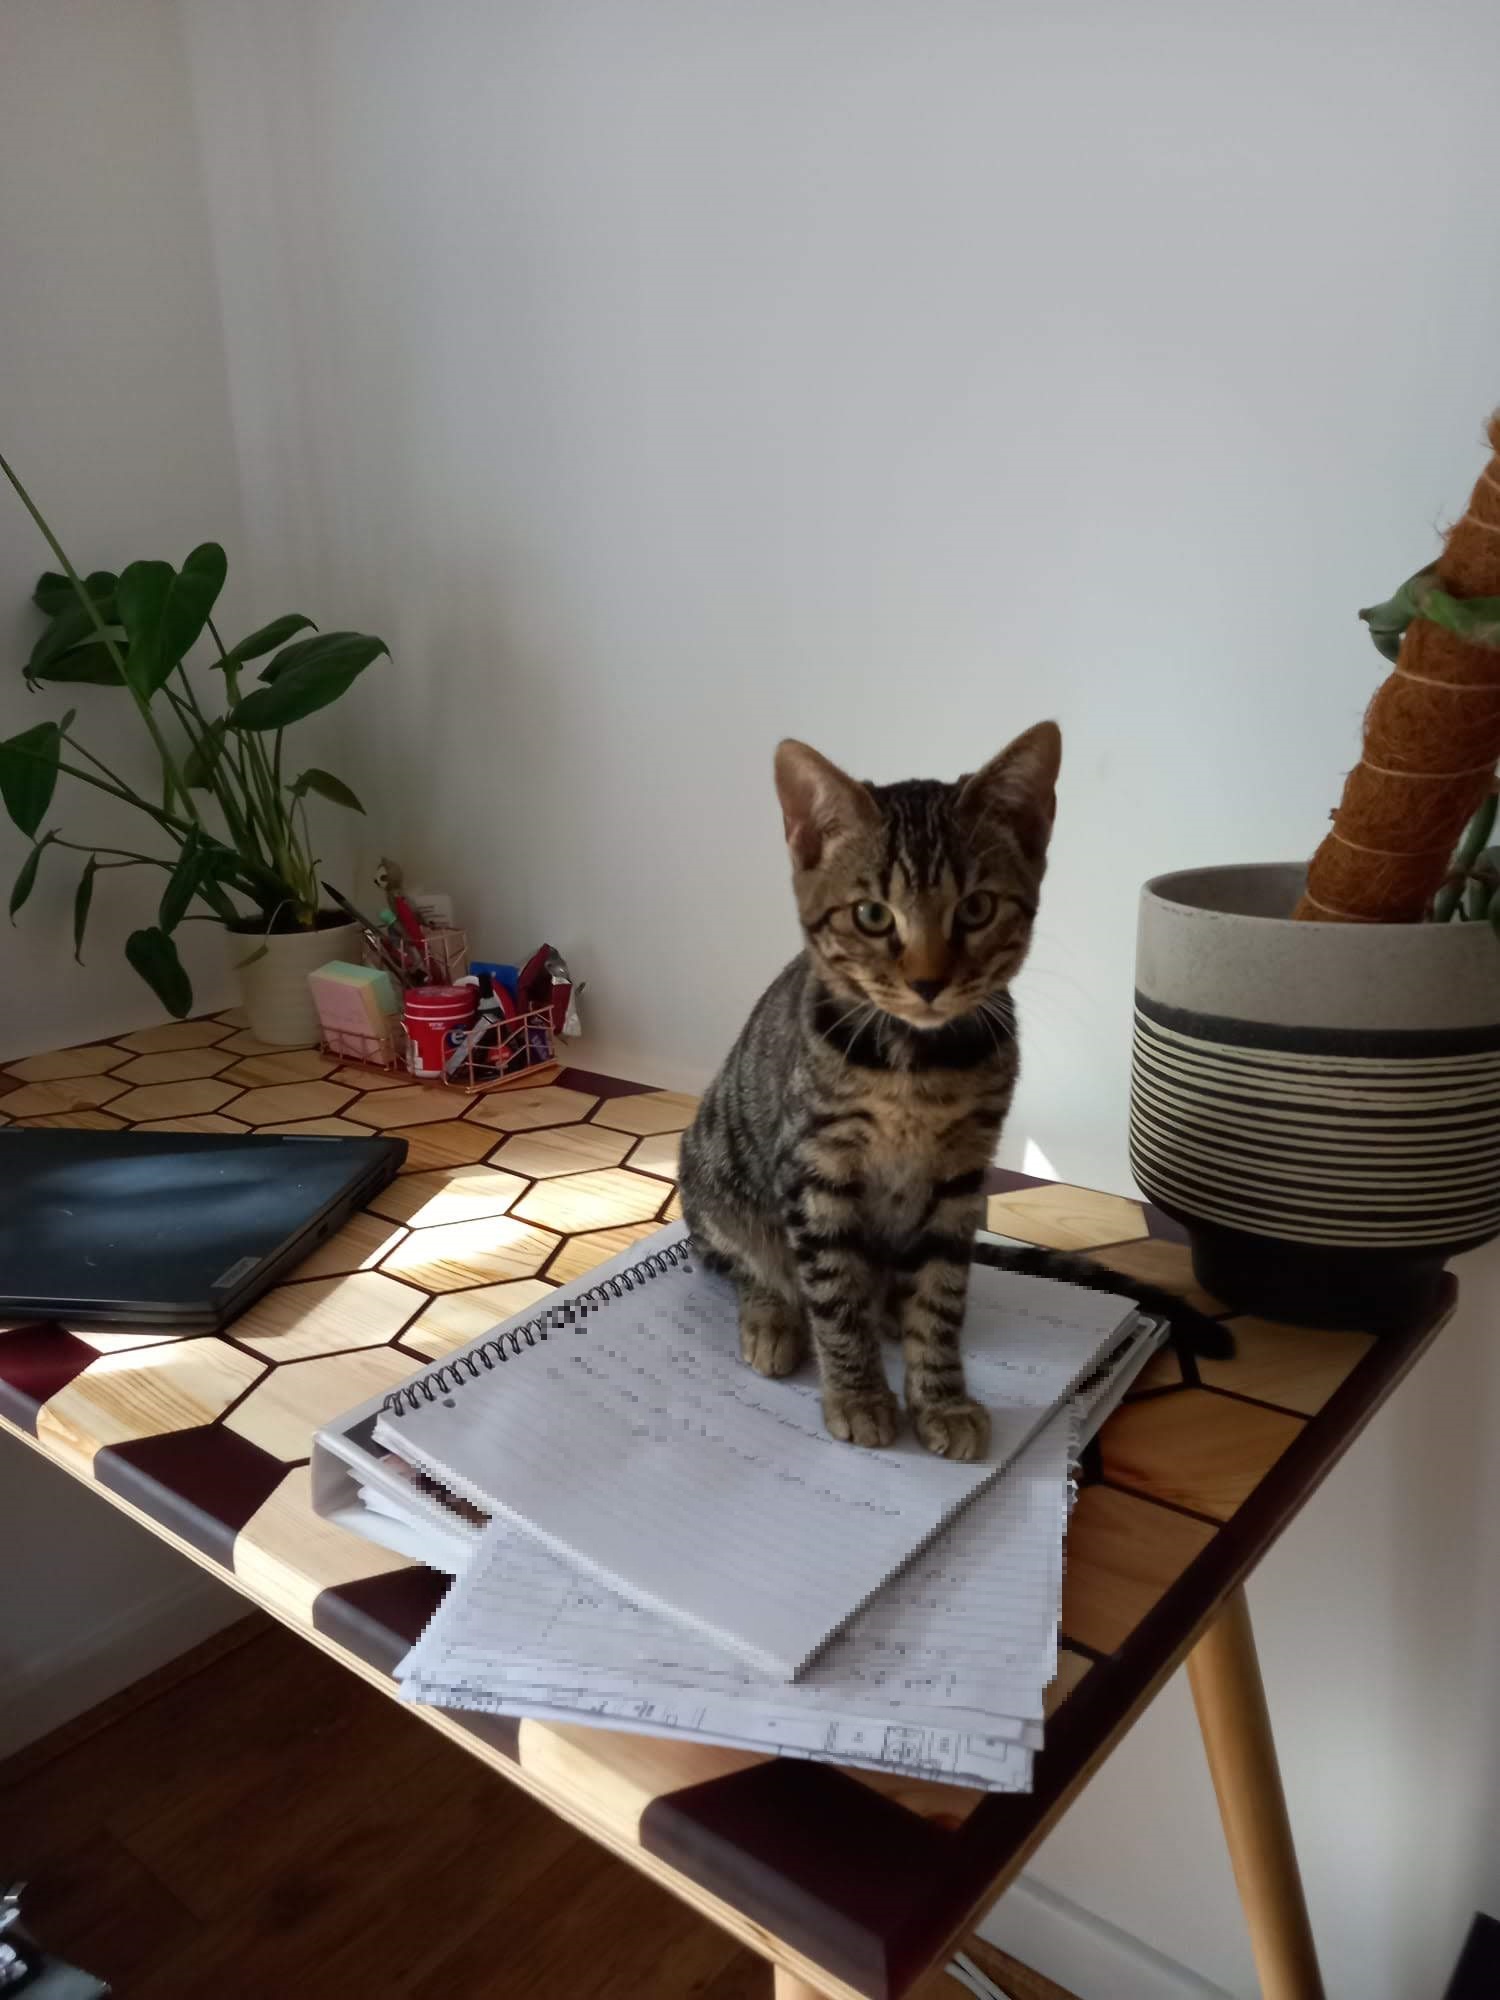
Delivery time! The customers are friends and not too far away so I decided to deliver it myself as I didn’t trust any of our couriers with this. After sticking the legs back on we put in it’s intended corner and it fitted like a glove! Thumbs up all round, including the Mori the cat!
-
Boot Bench
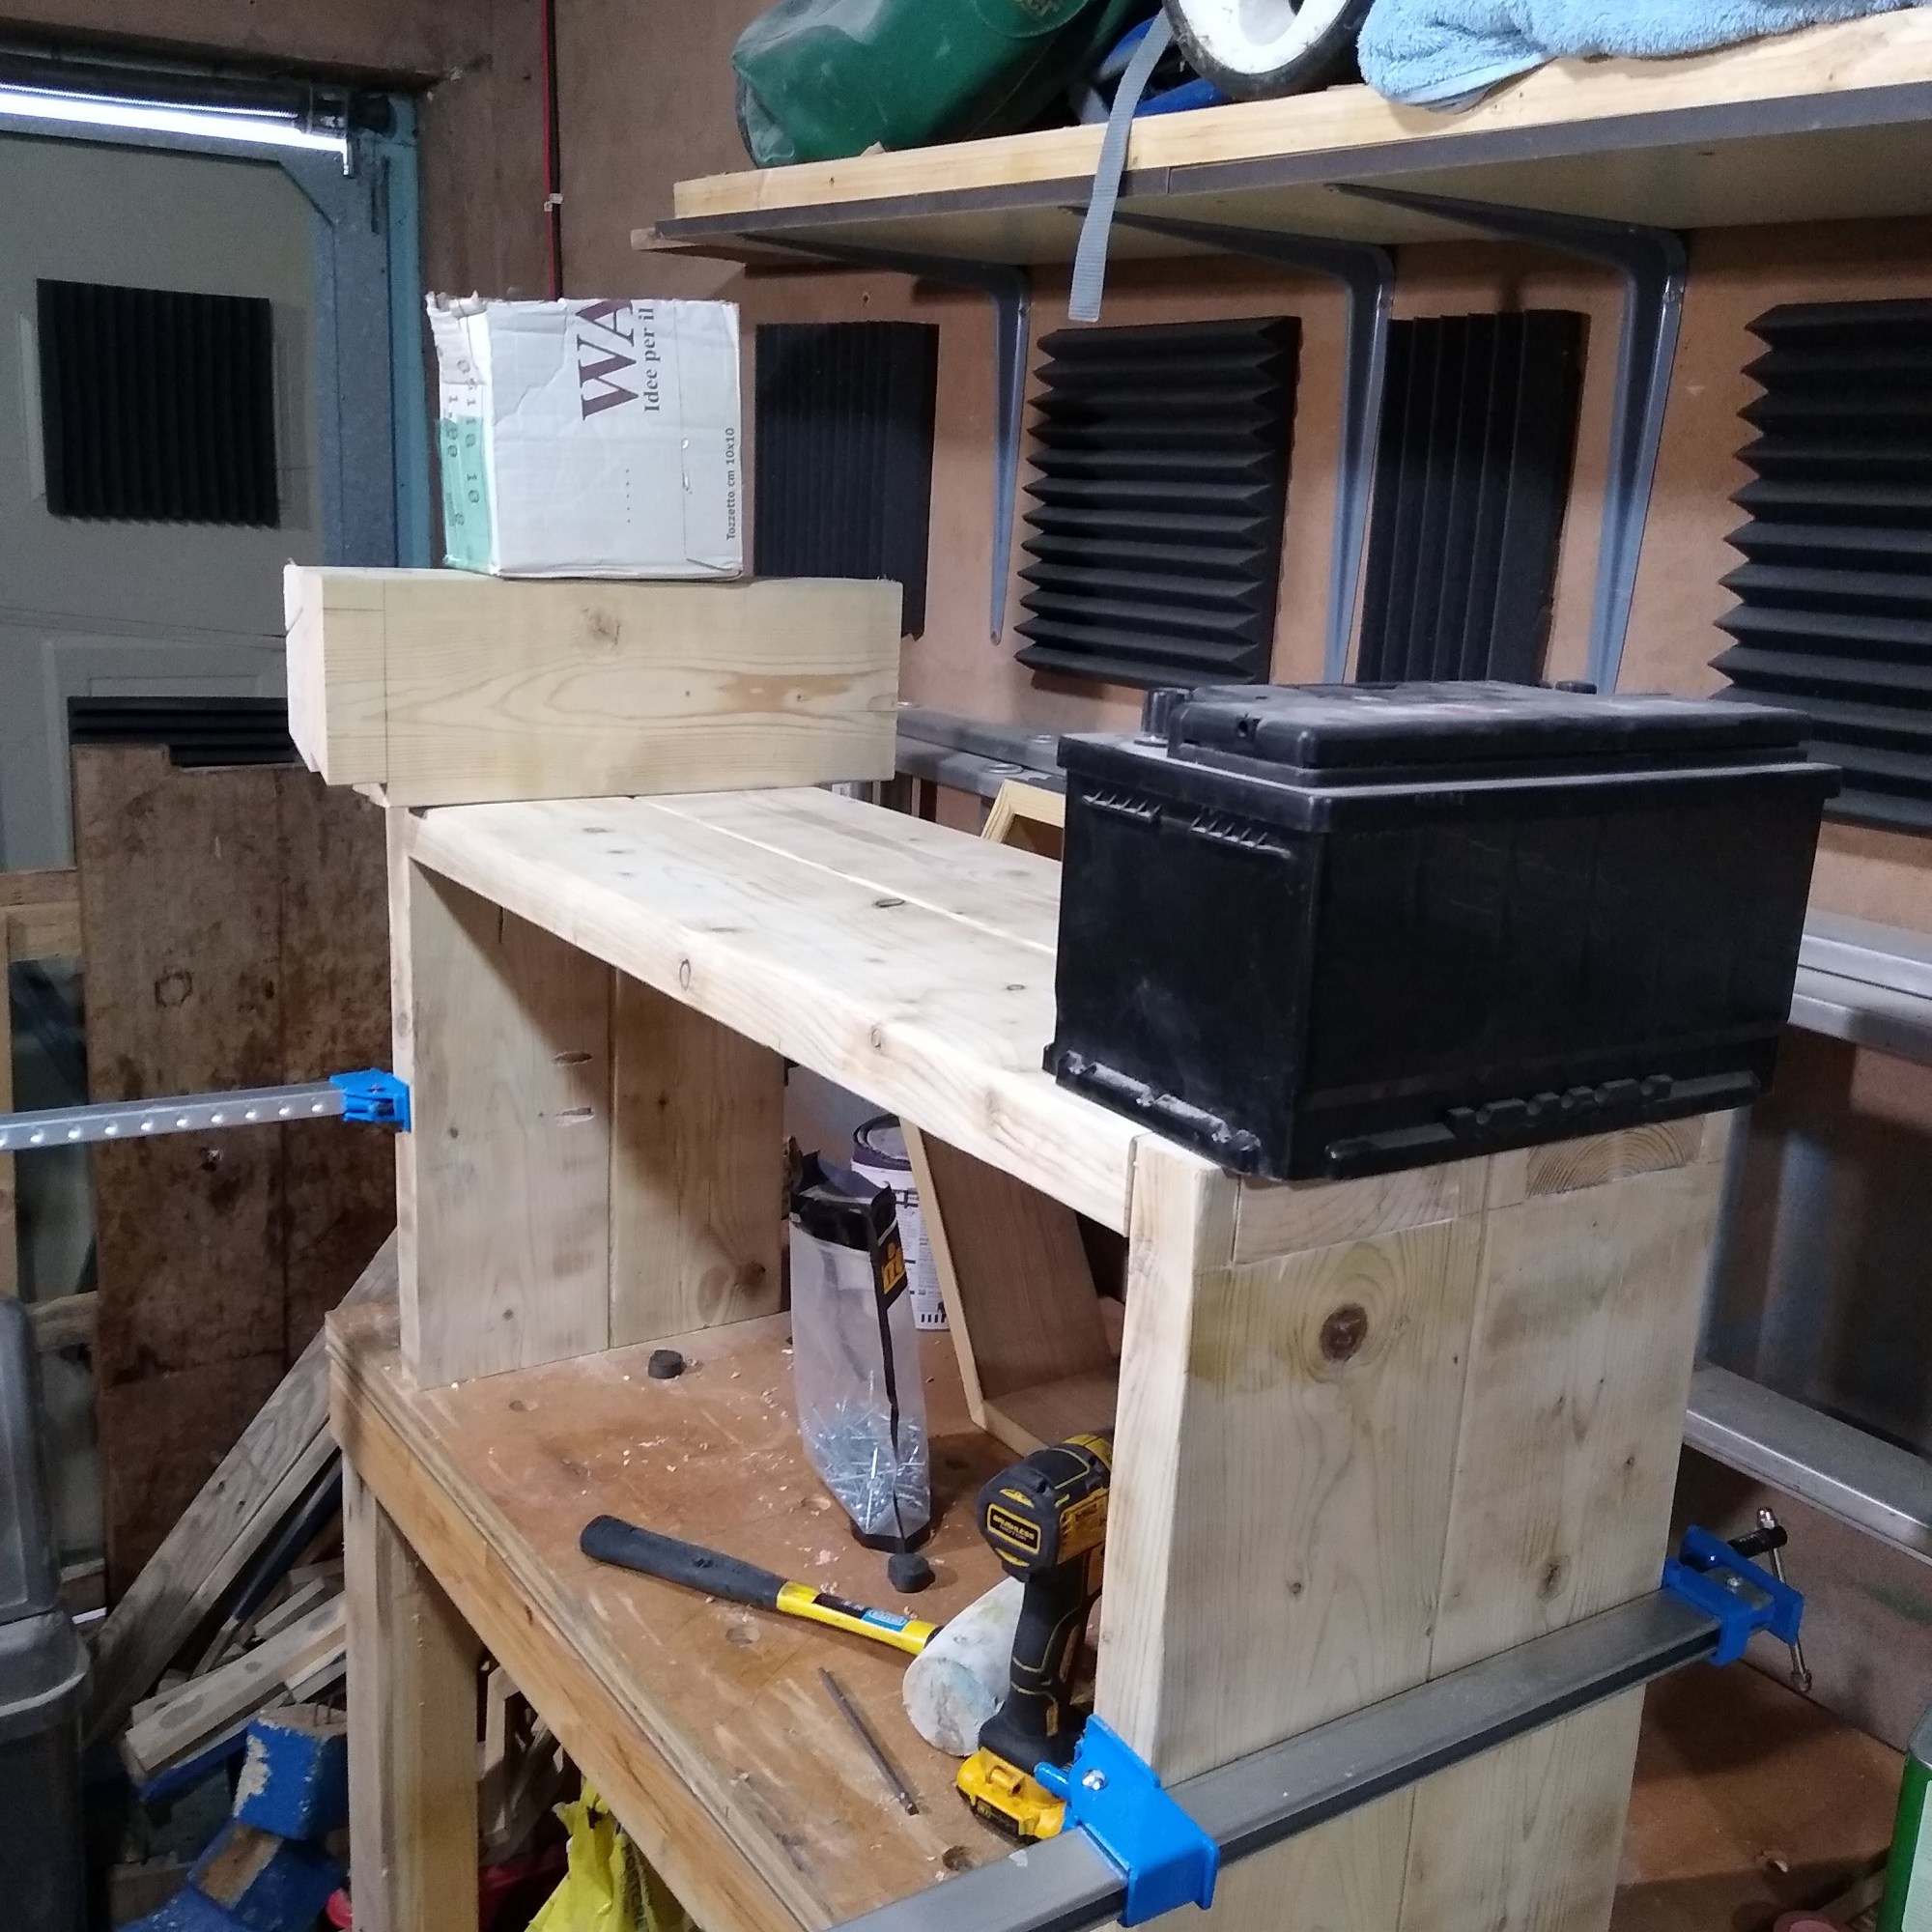
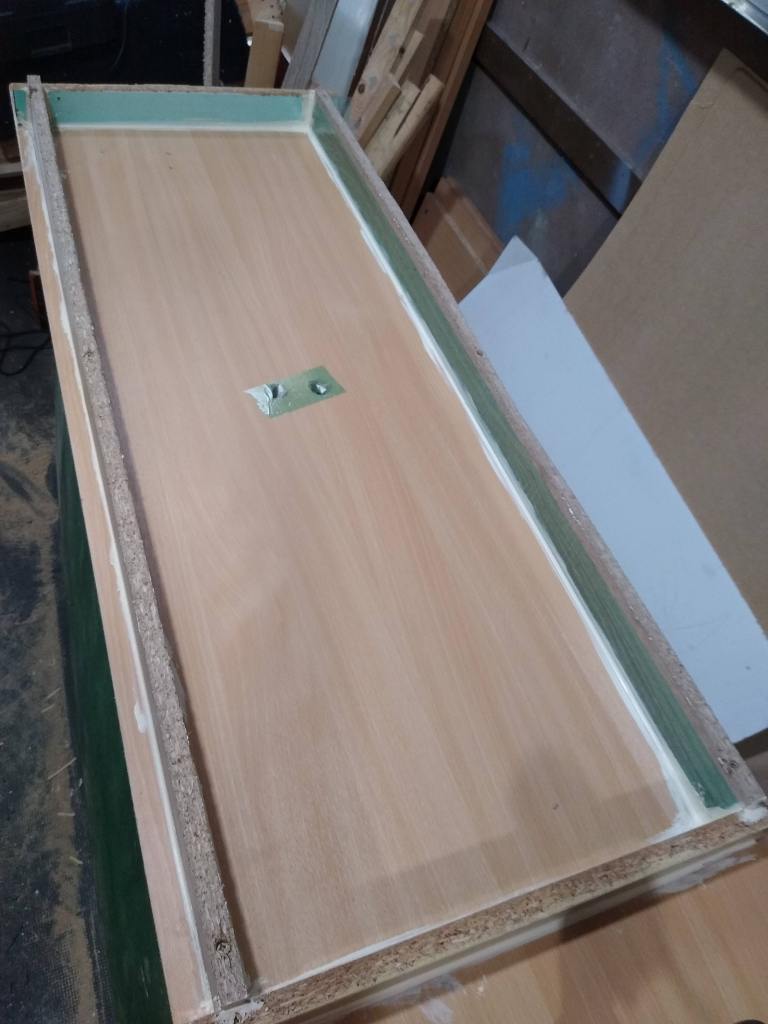
I was tasked to make a simple bench for outdoor use as a perching point for boot removal.
I had some recovered wood that happened to be pressure treated and pretty chunky so I figure this would be perfect project for it.
After sanding back the wood and trimming off the ends,

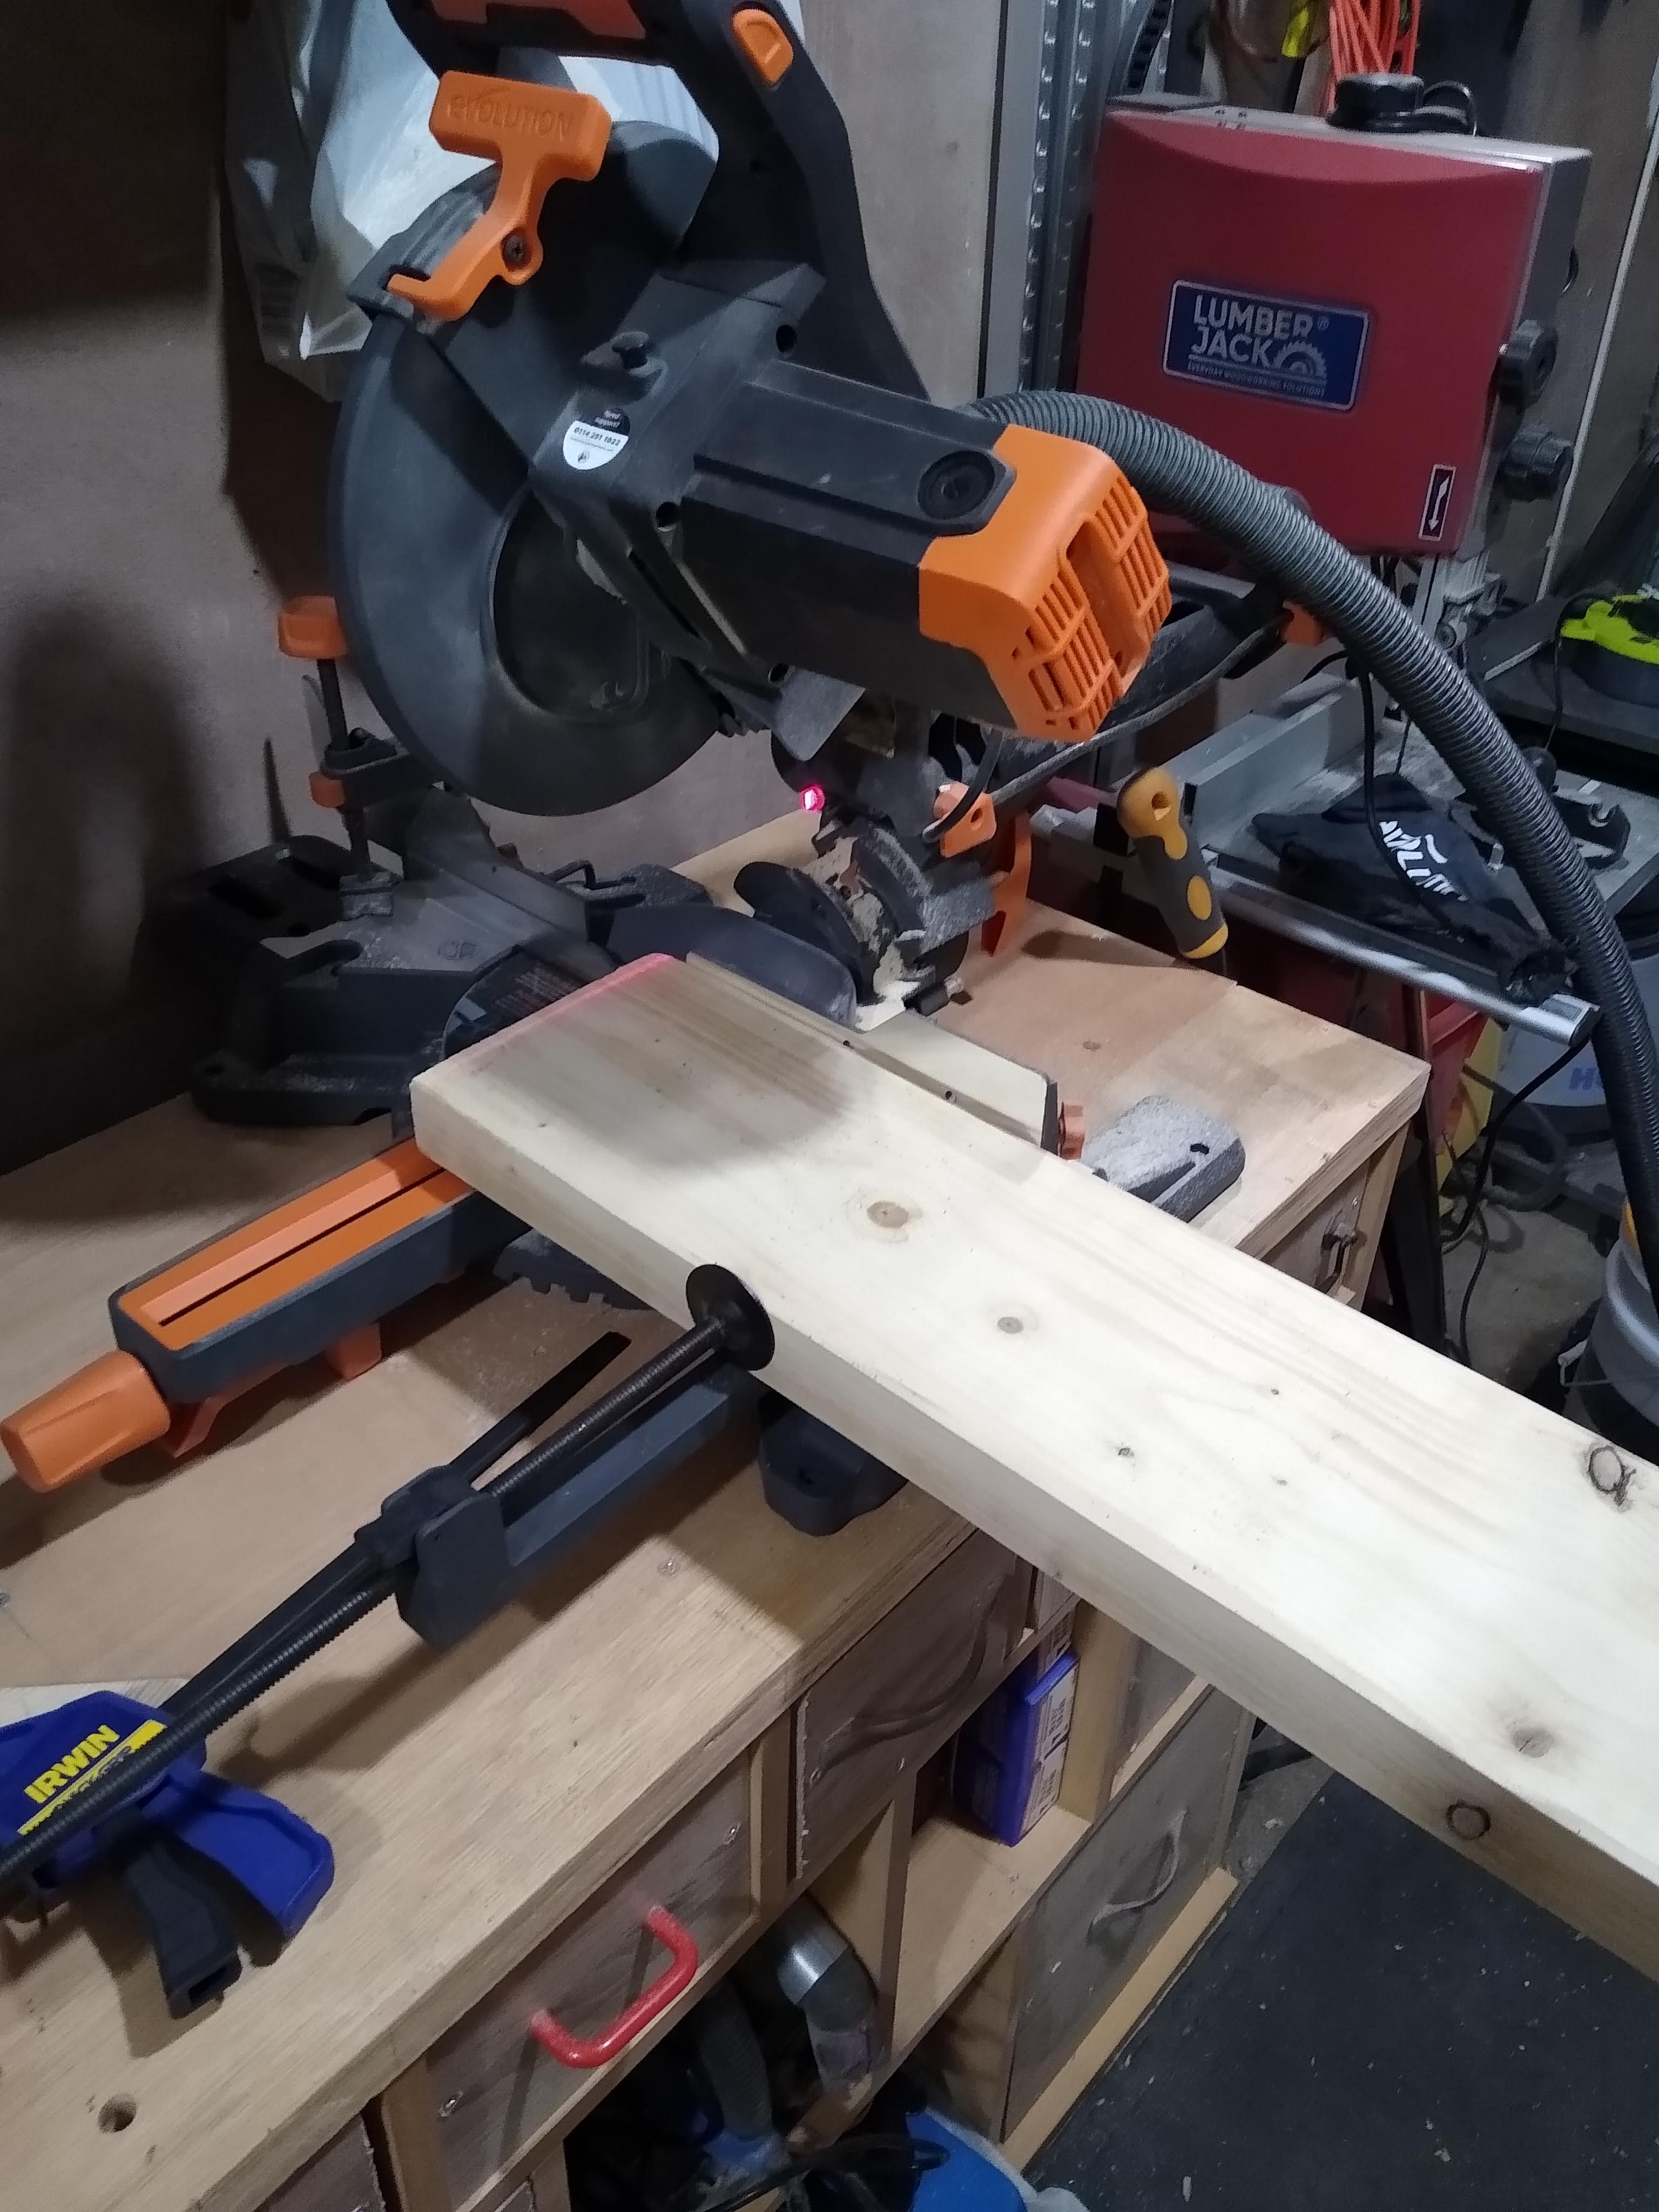
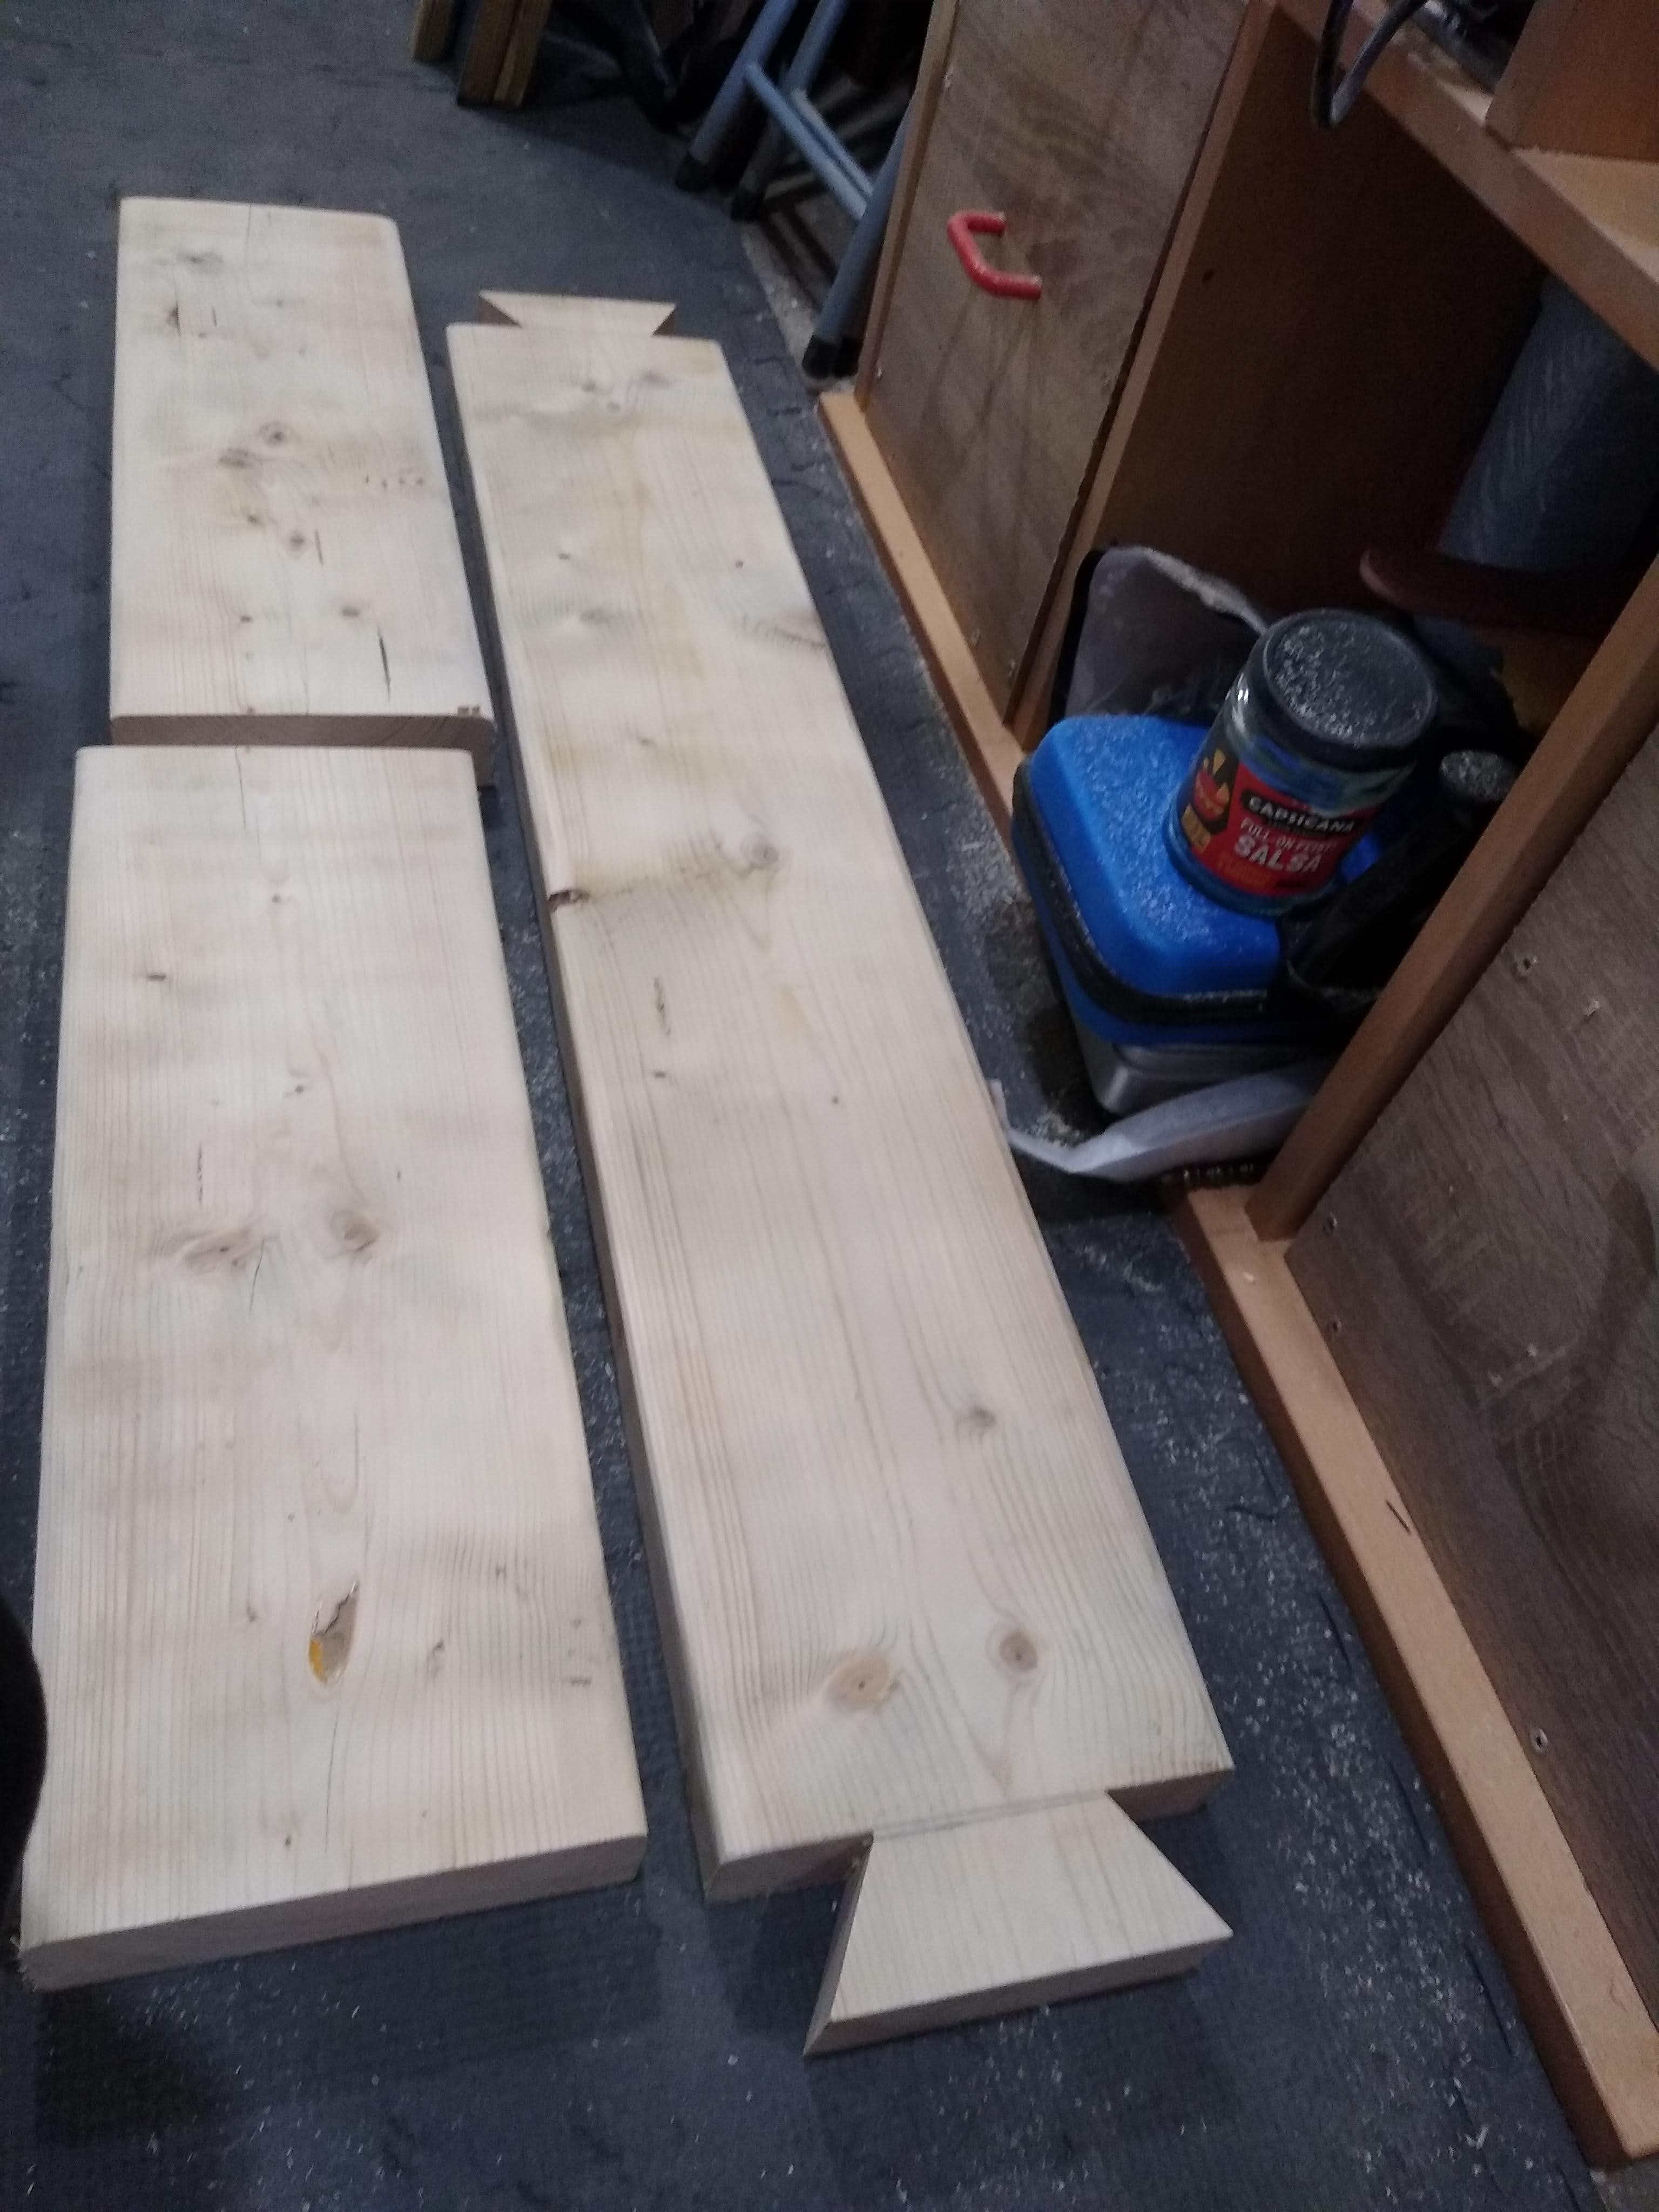
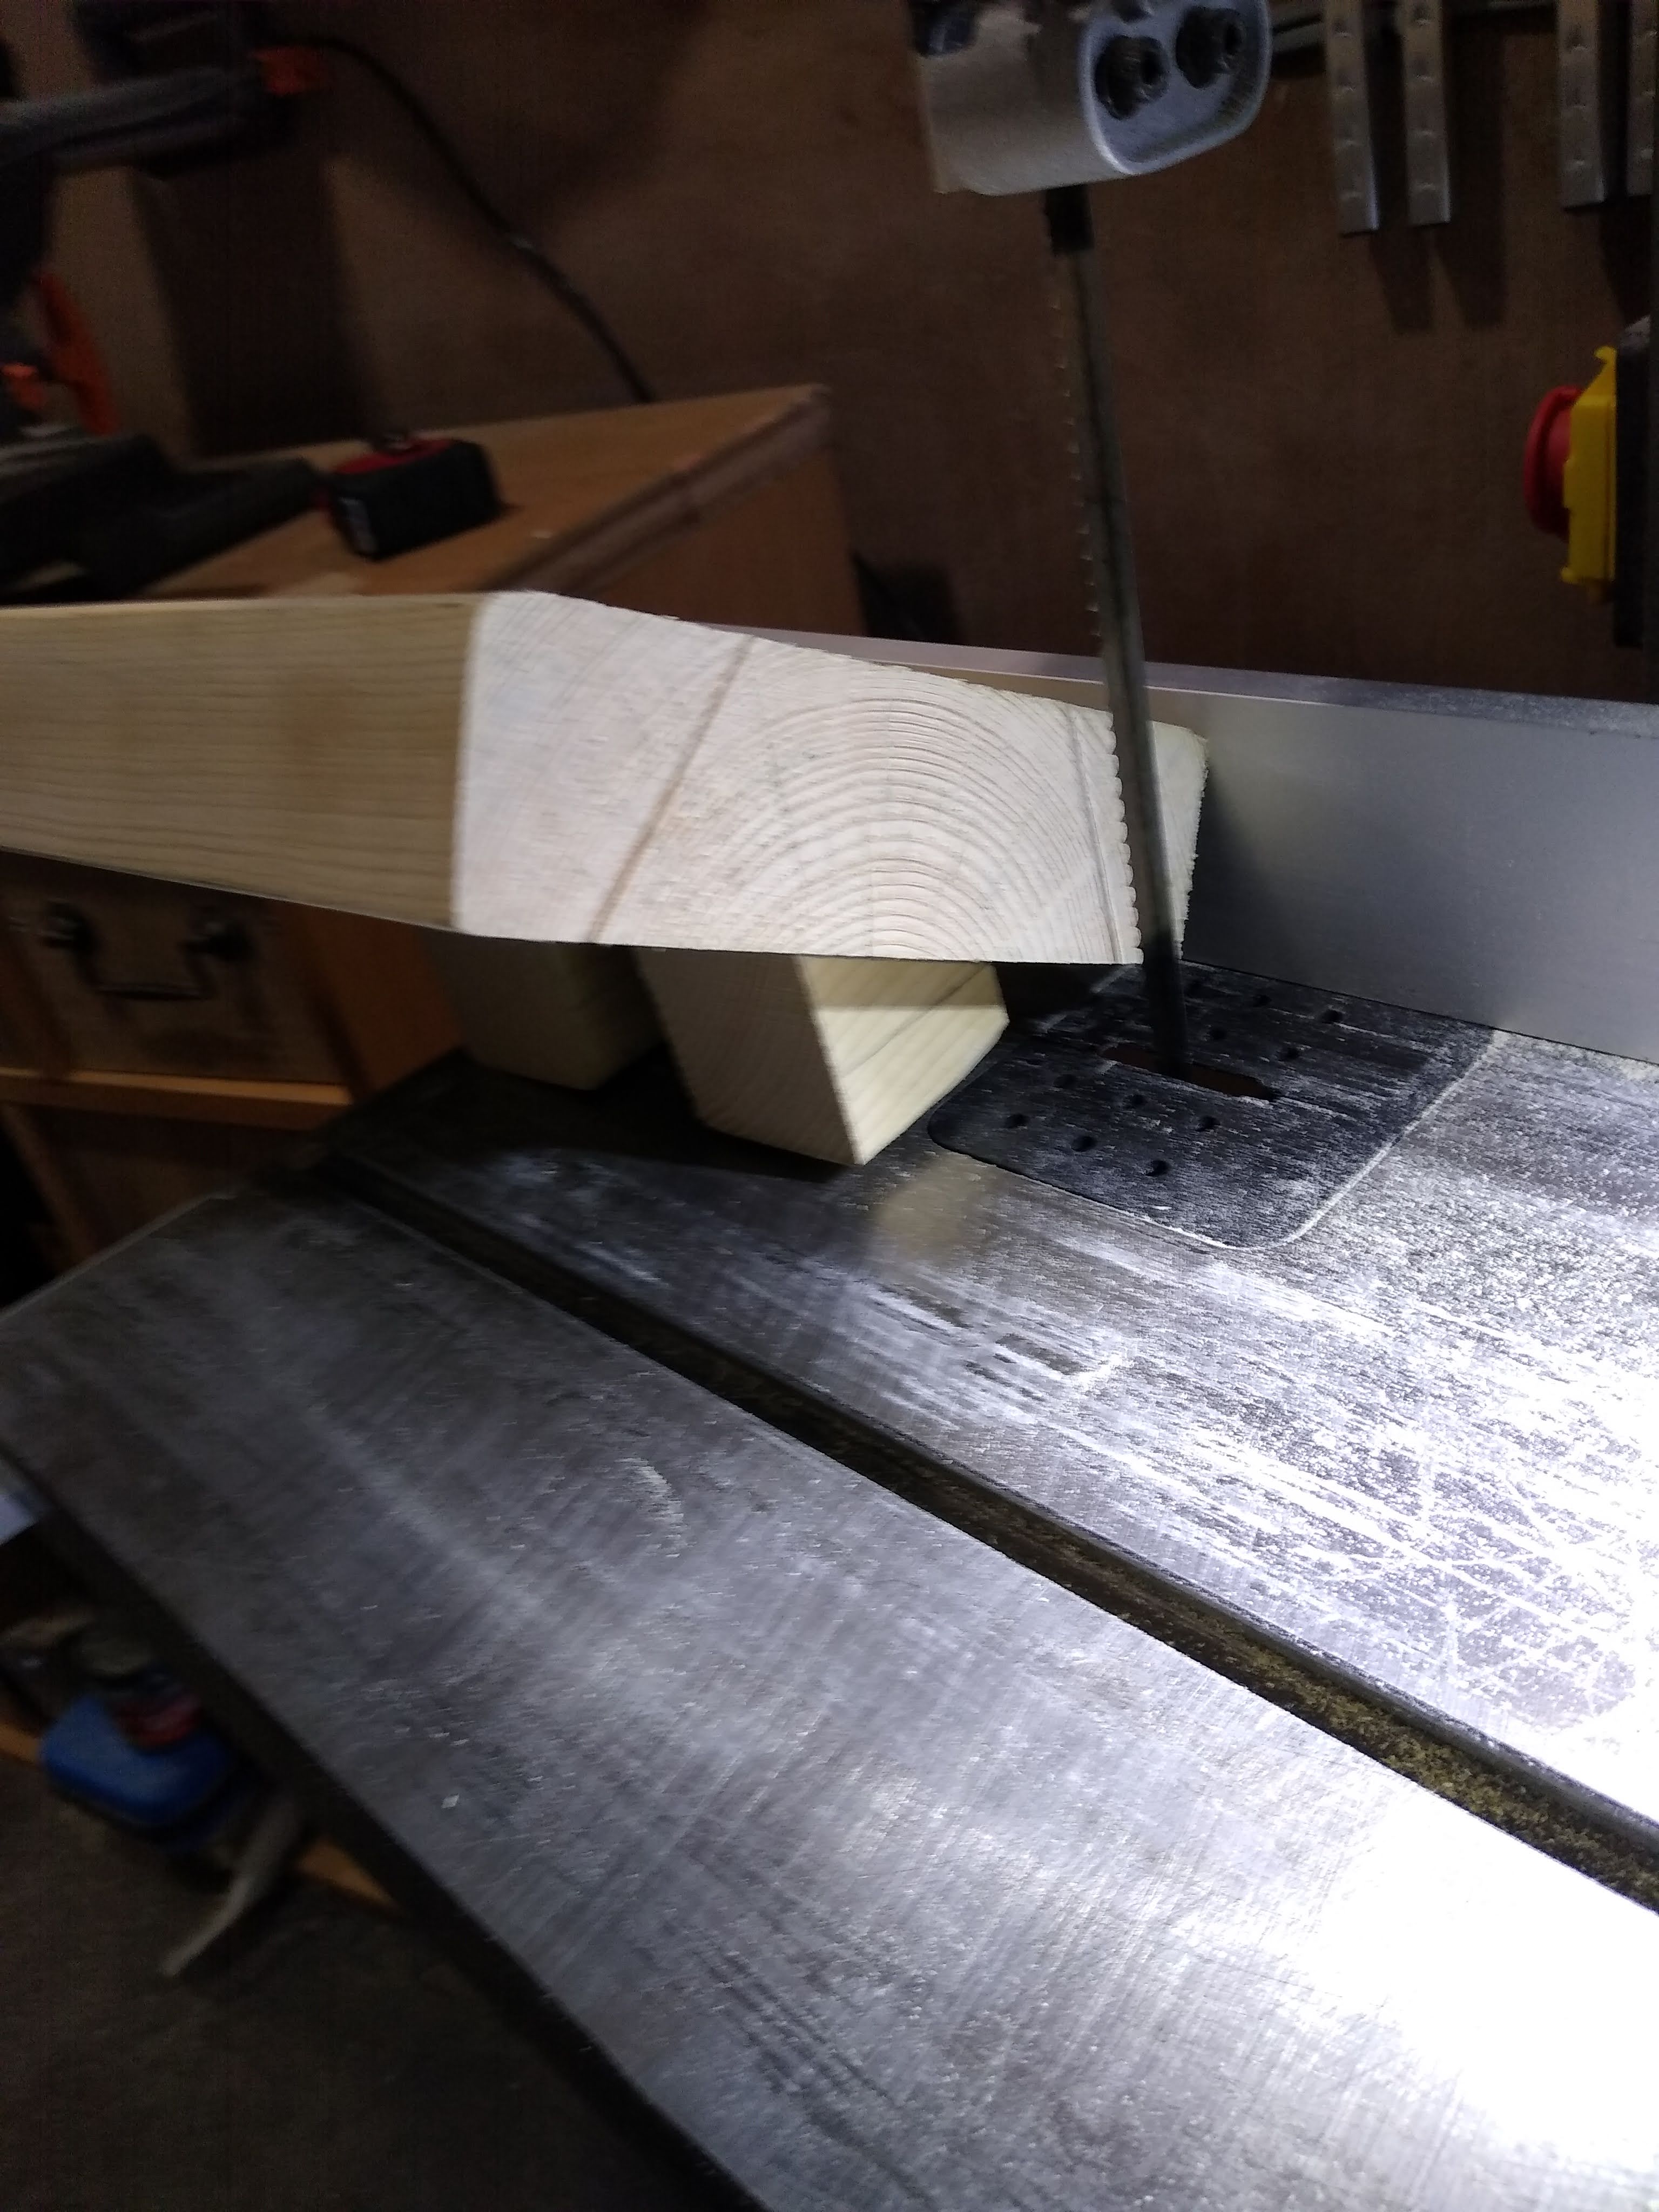
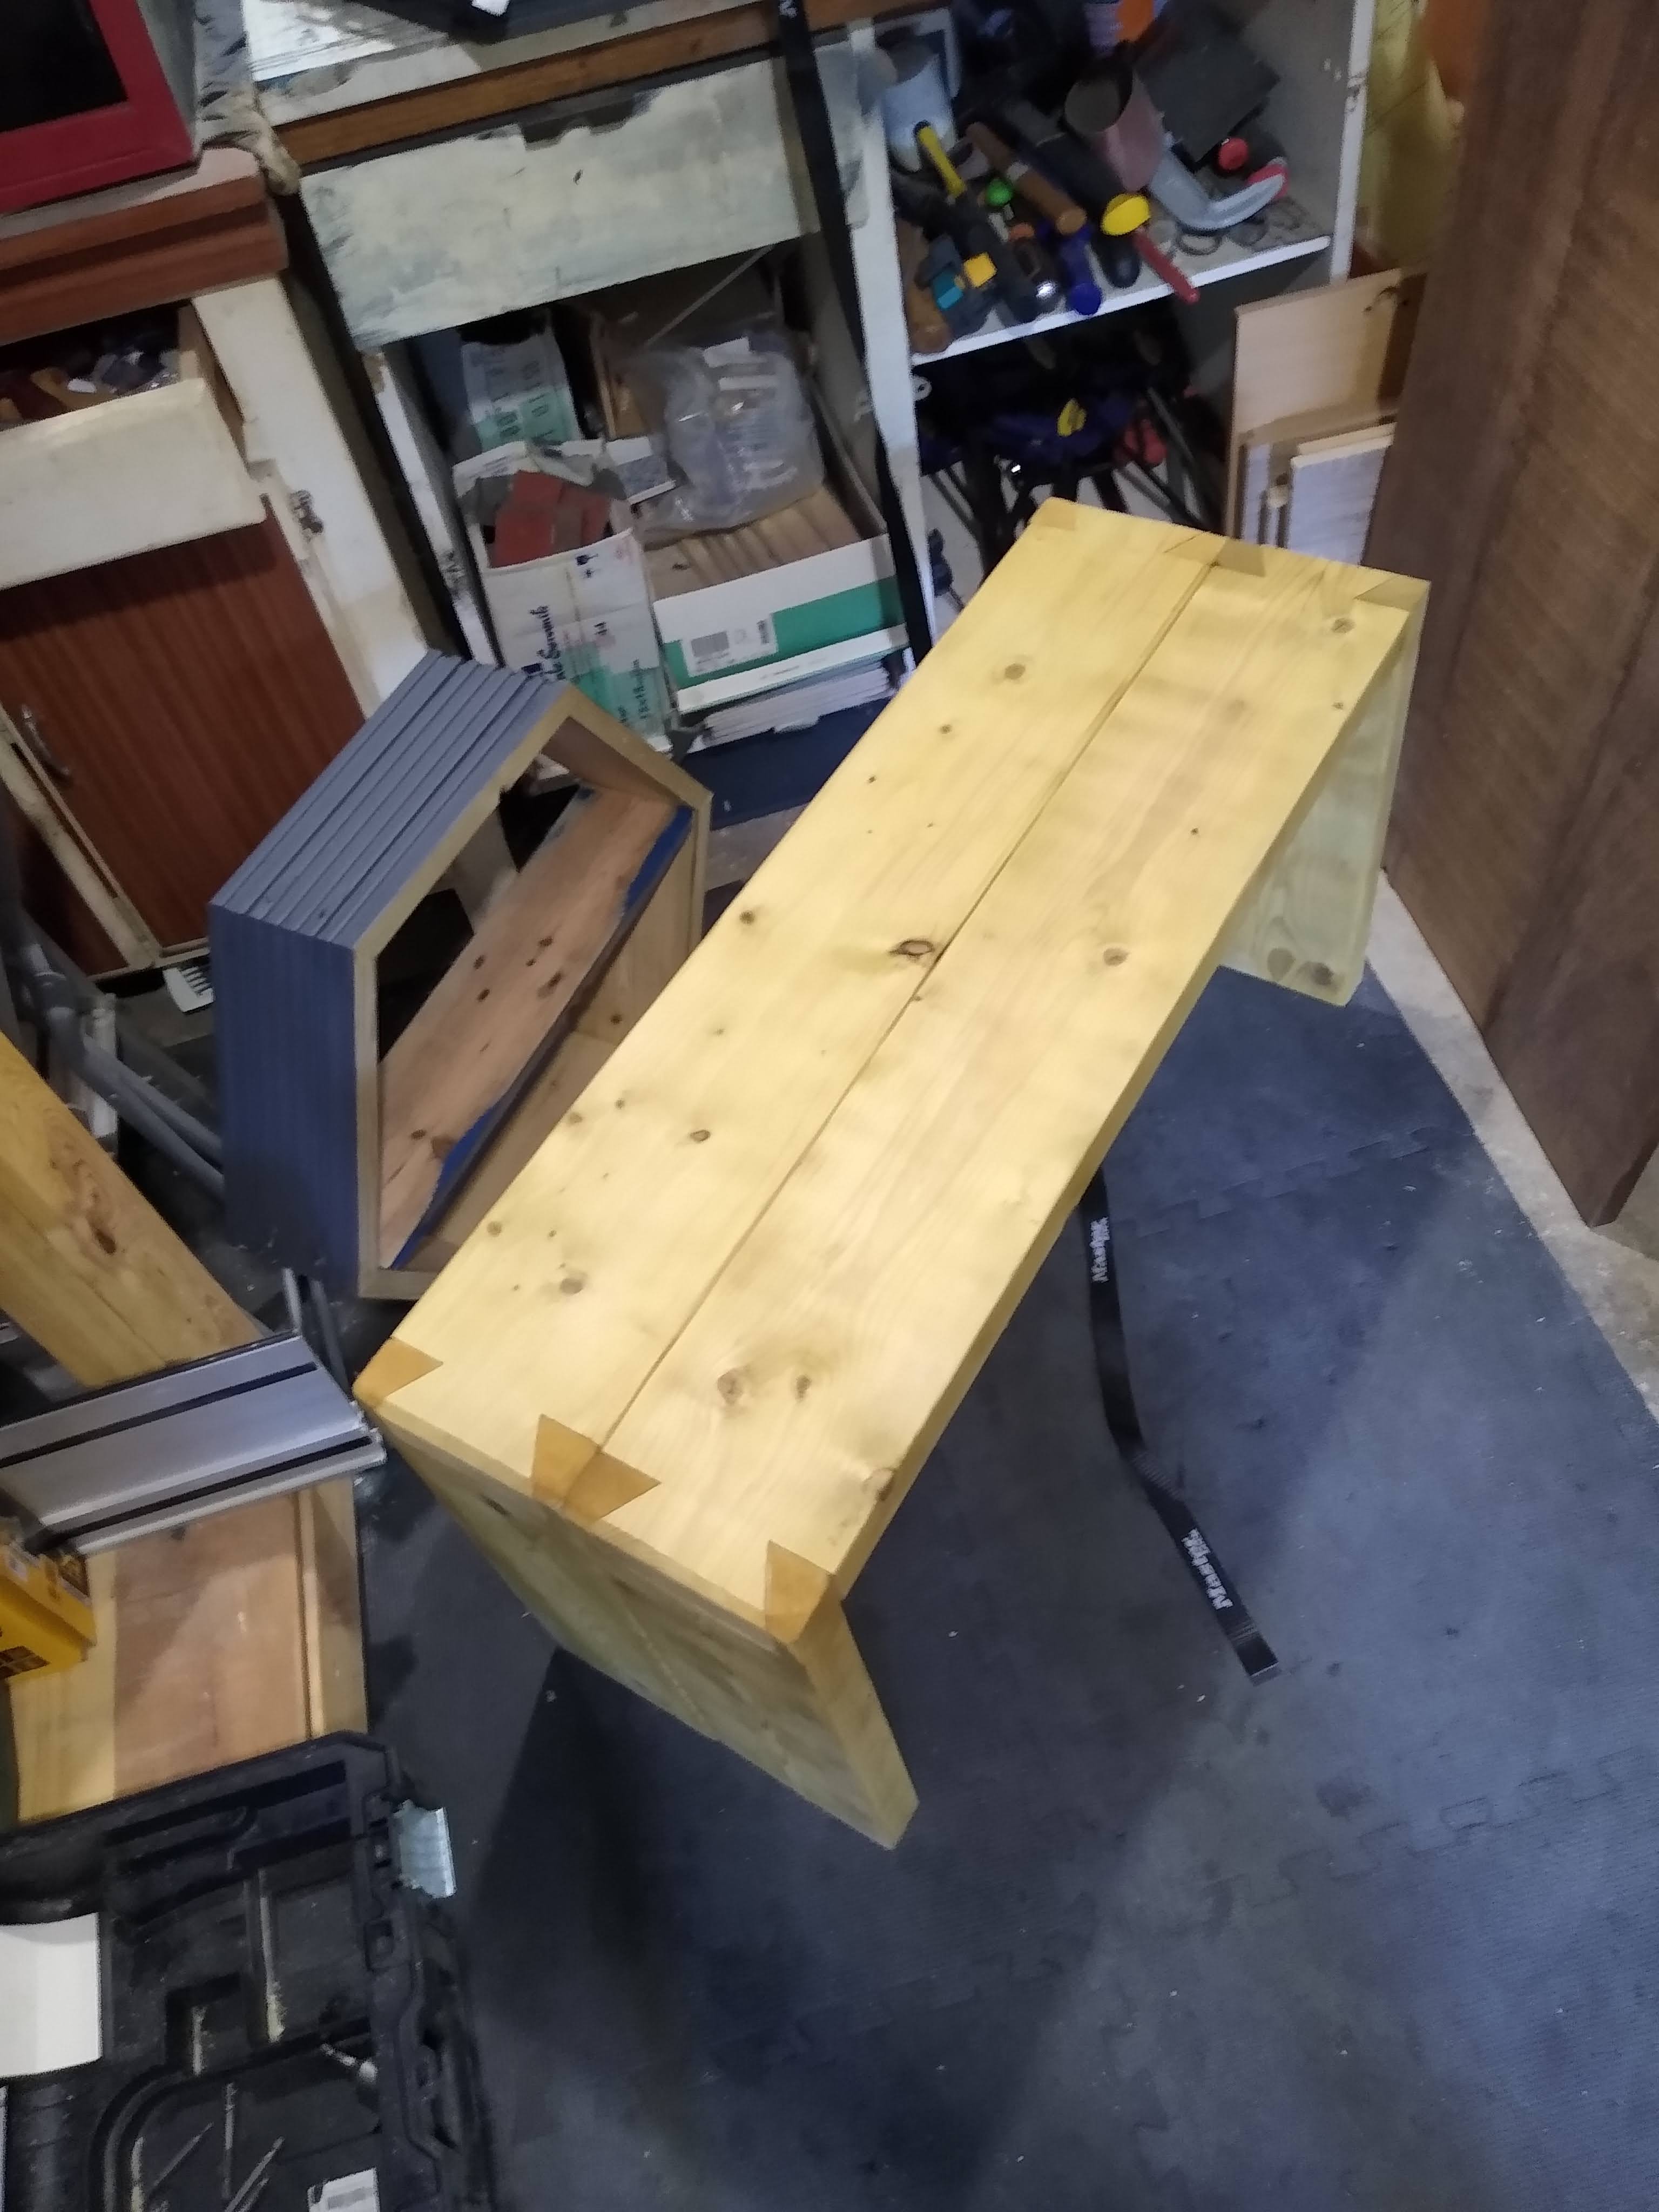
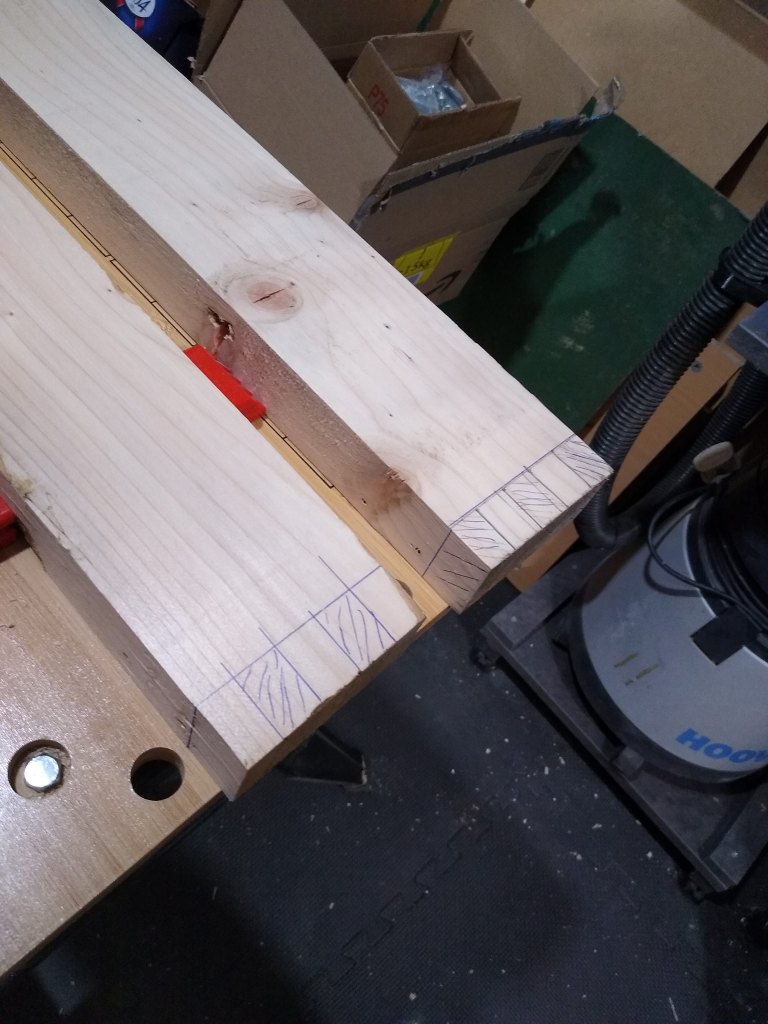
Quick sanding timelapse I had a stab at some chunky dovetail joints. They could be a bit snugger, but not bad for a first attempt. I used a bandsaw to cut the tails and half of the pins. I glued some 60-degree off-cuts to the pin board to achieve the inverse angle as the bandsaw table only tilts one-way (medium-size brain moment). I then did the same thing again to double the bench depth.
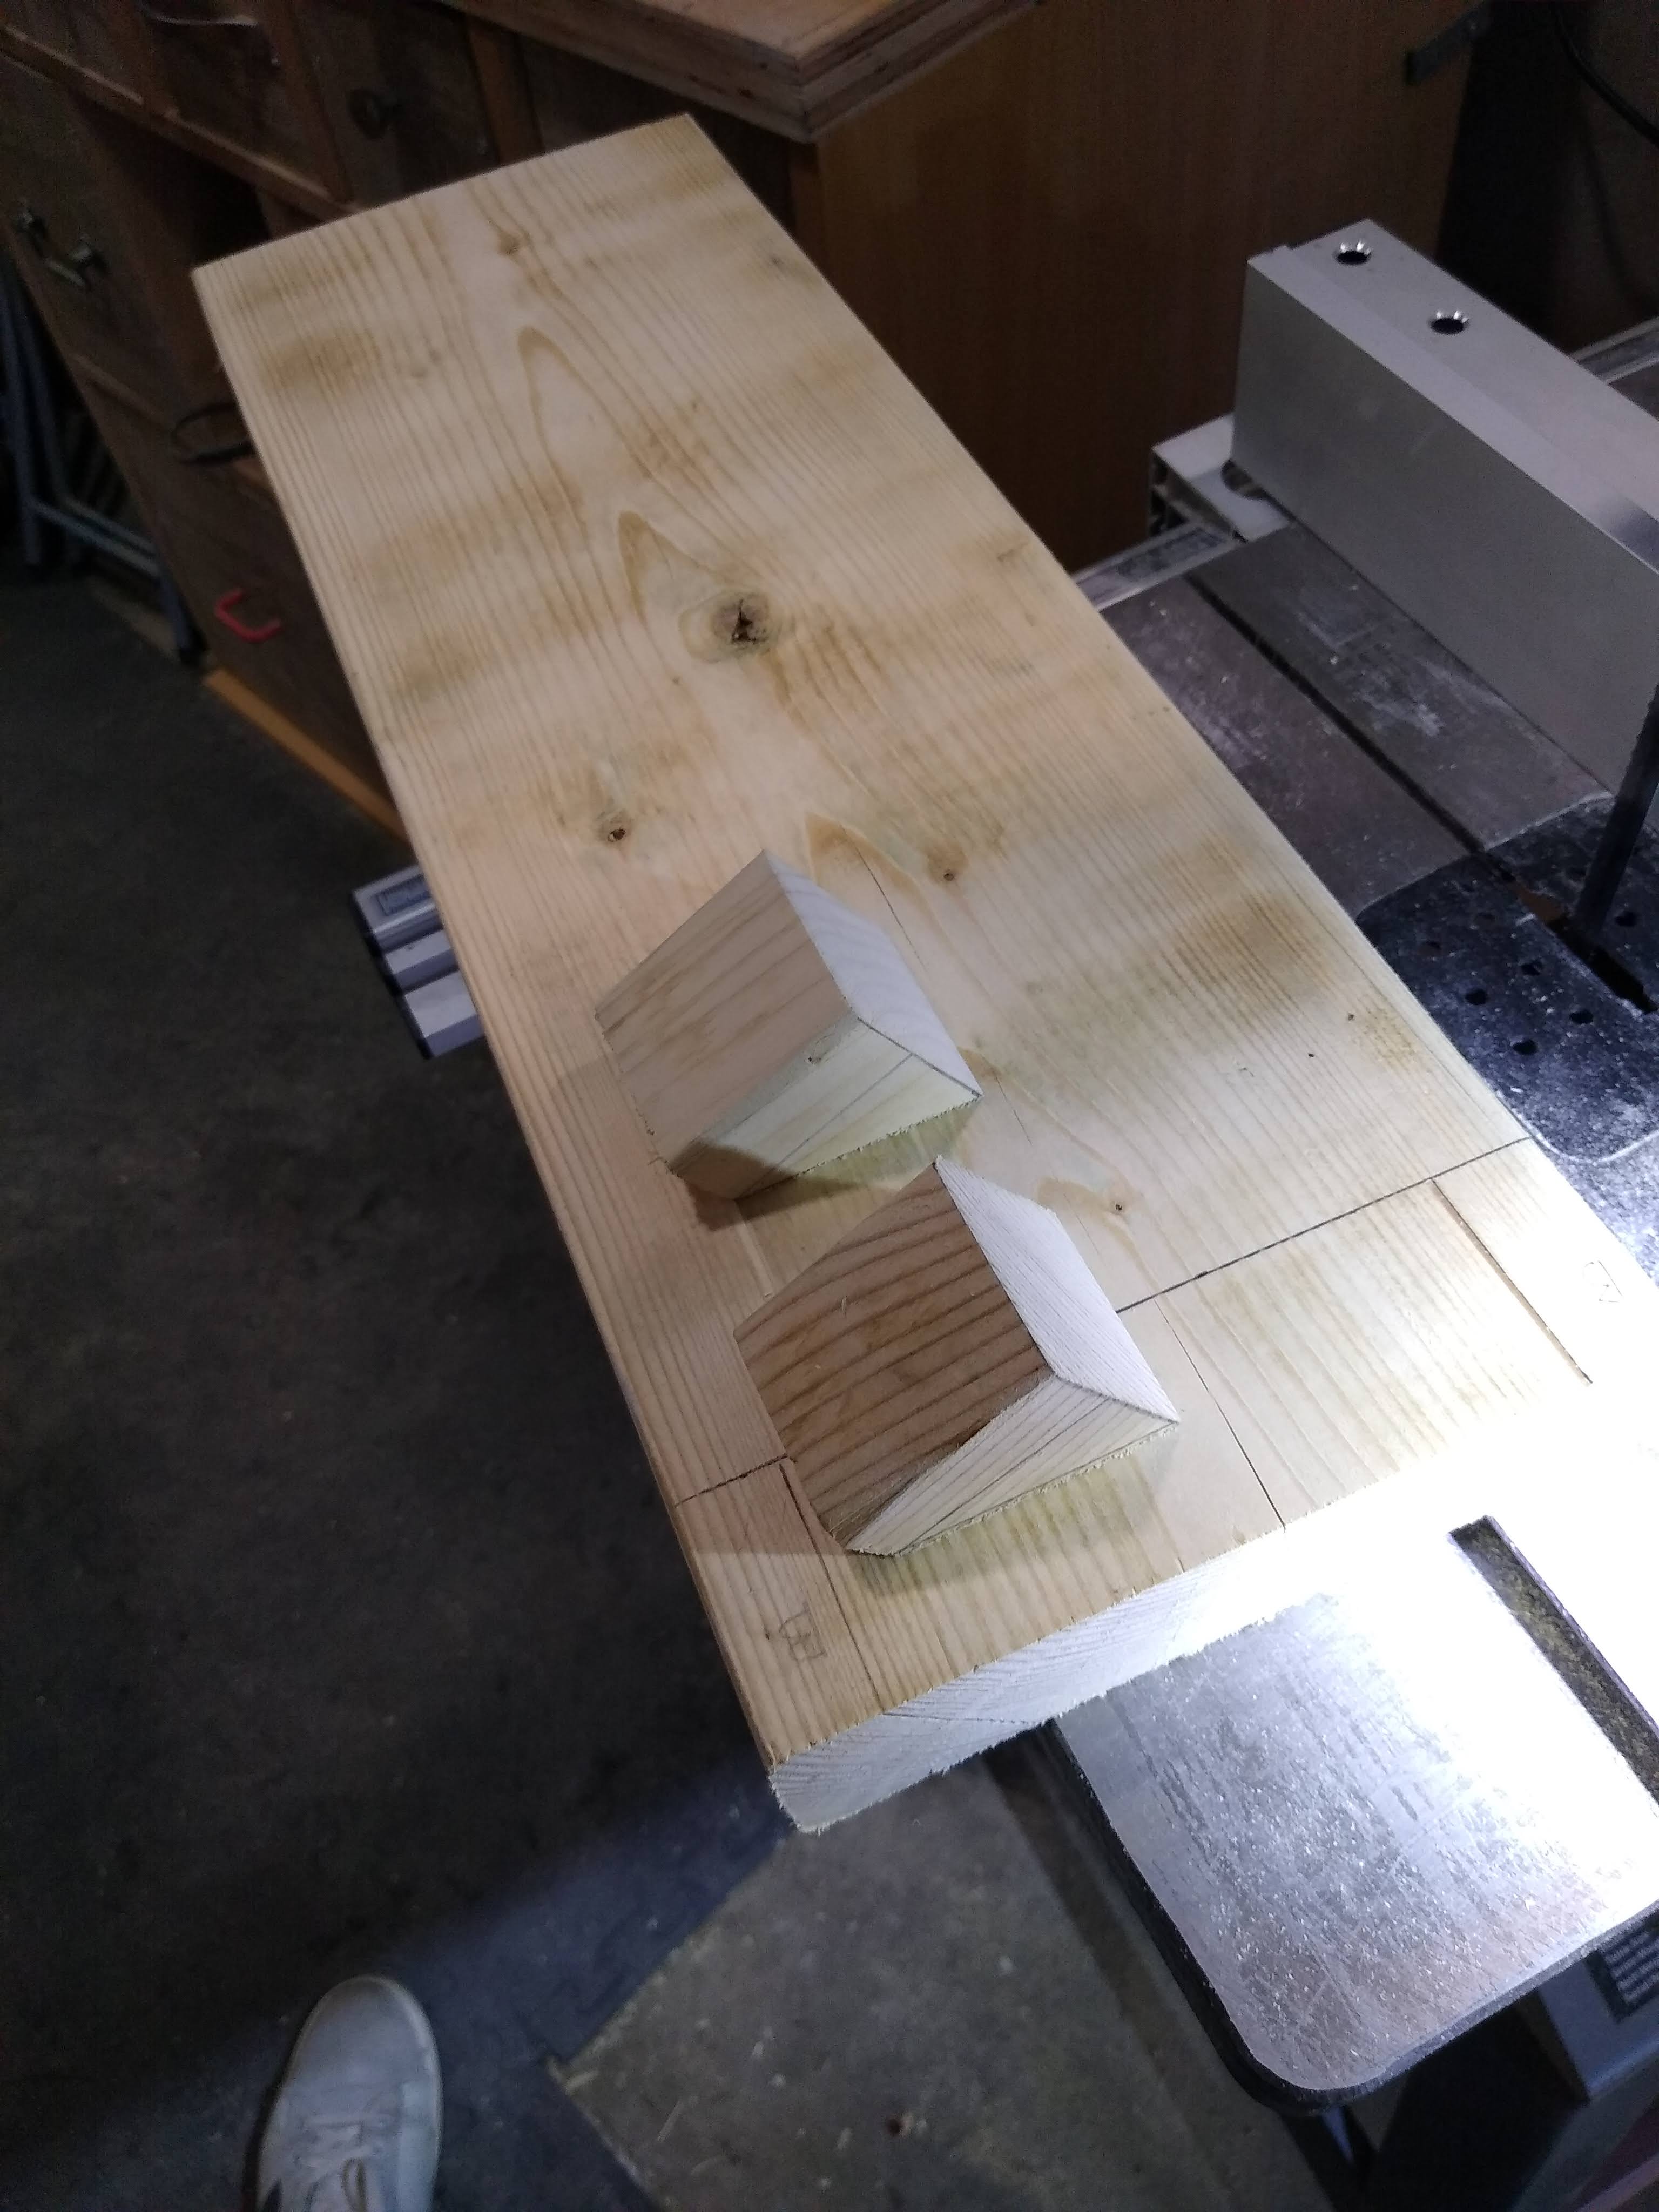

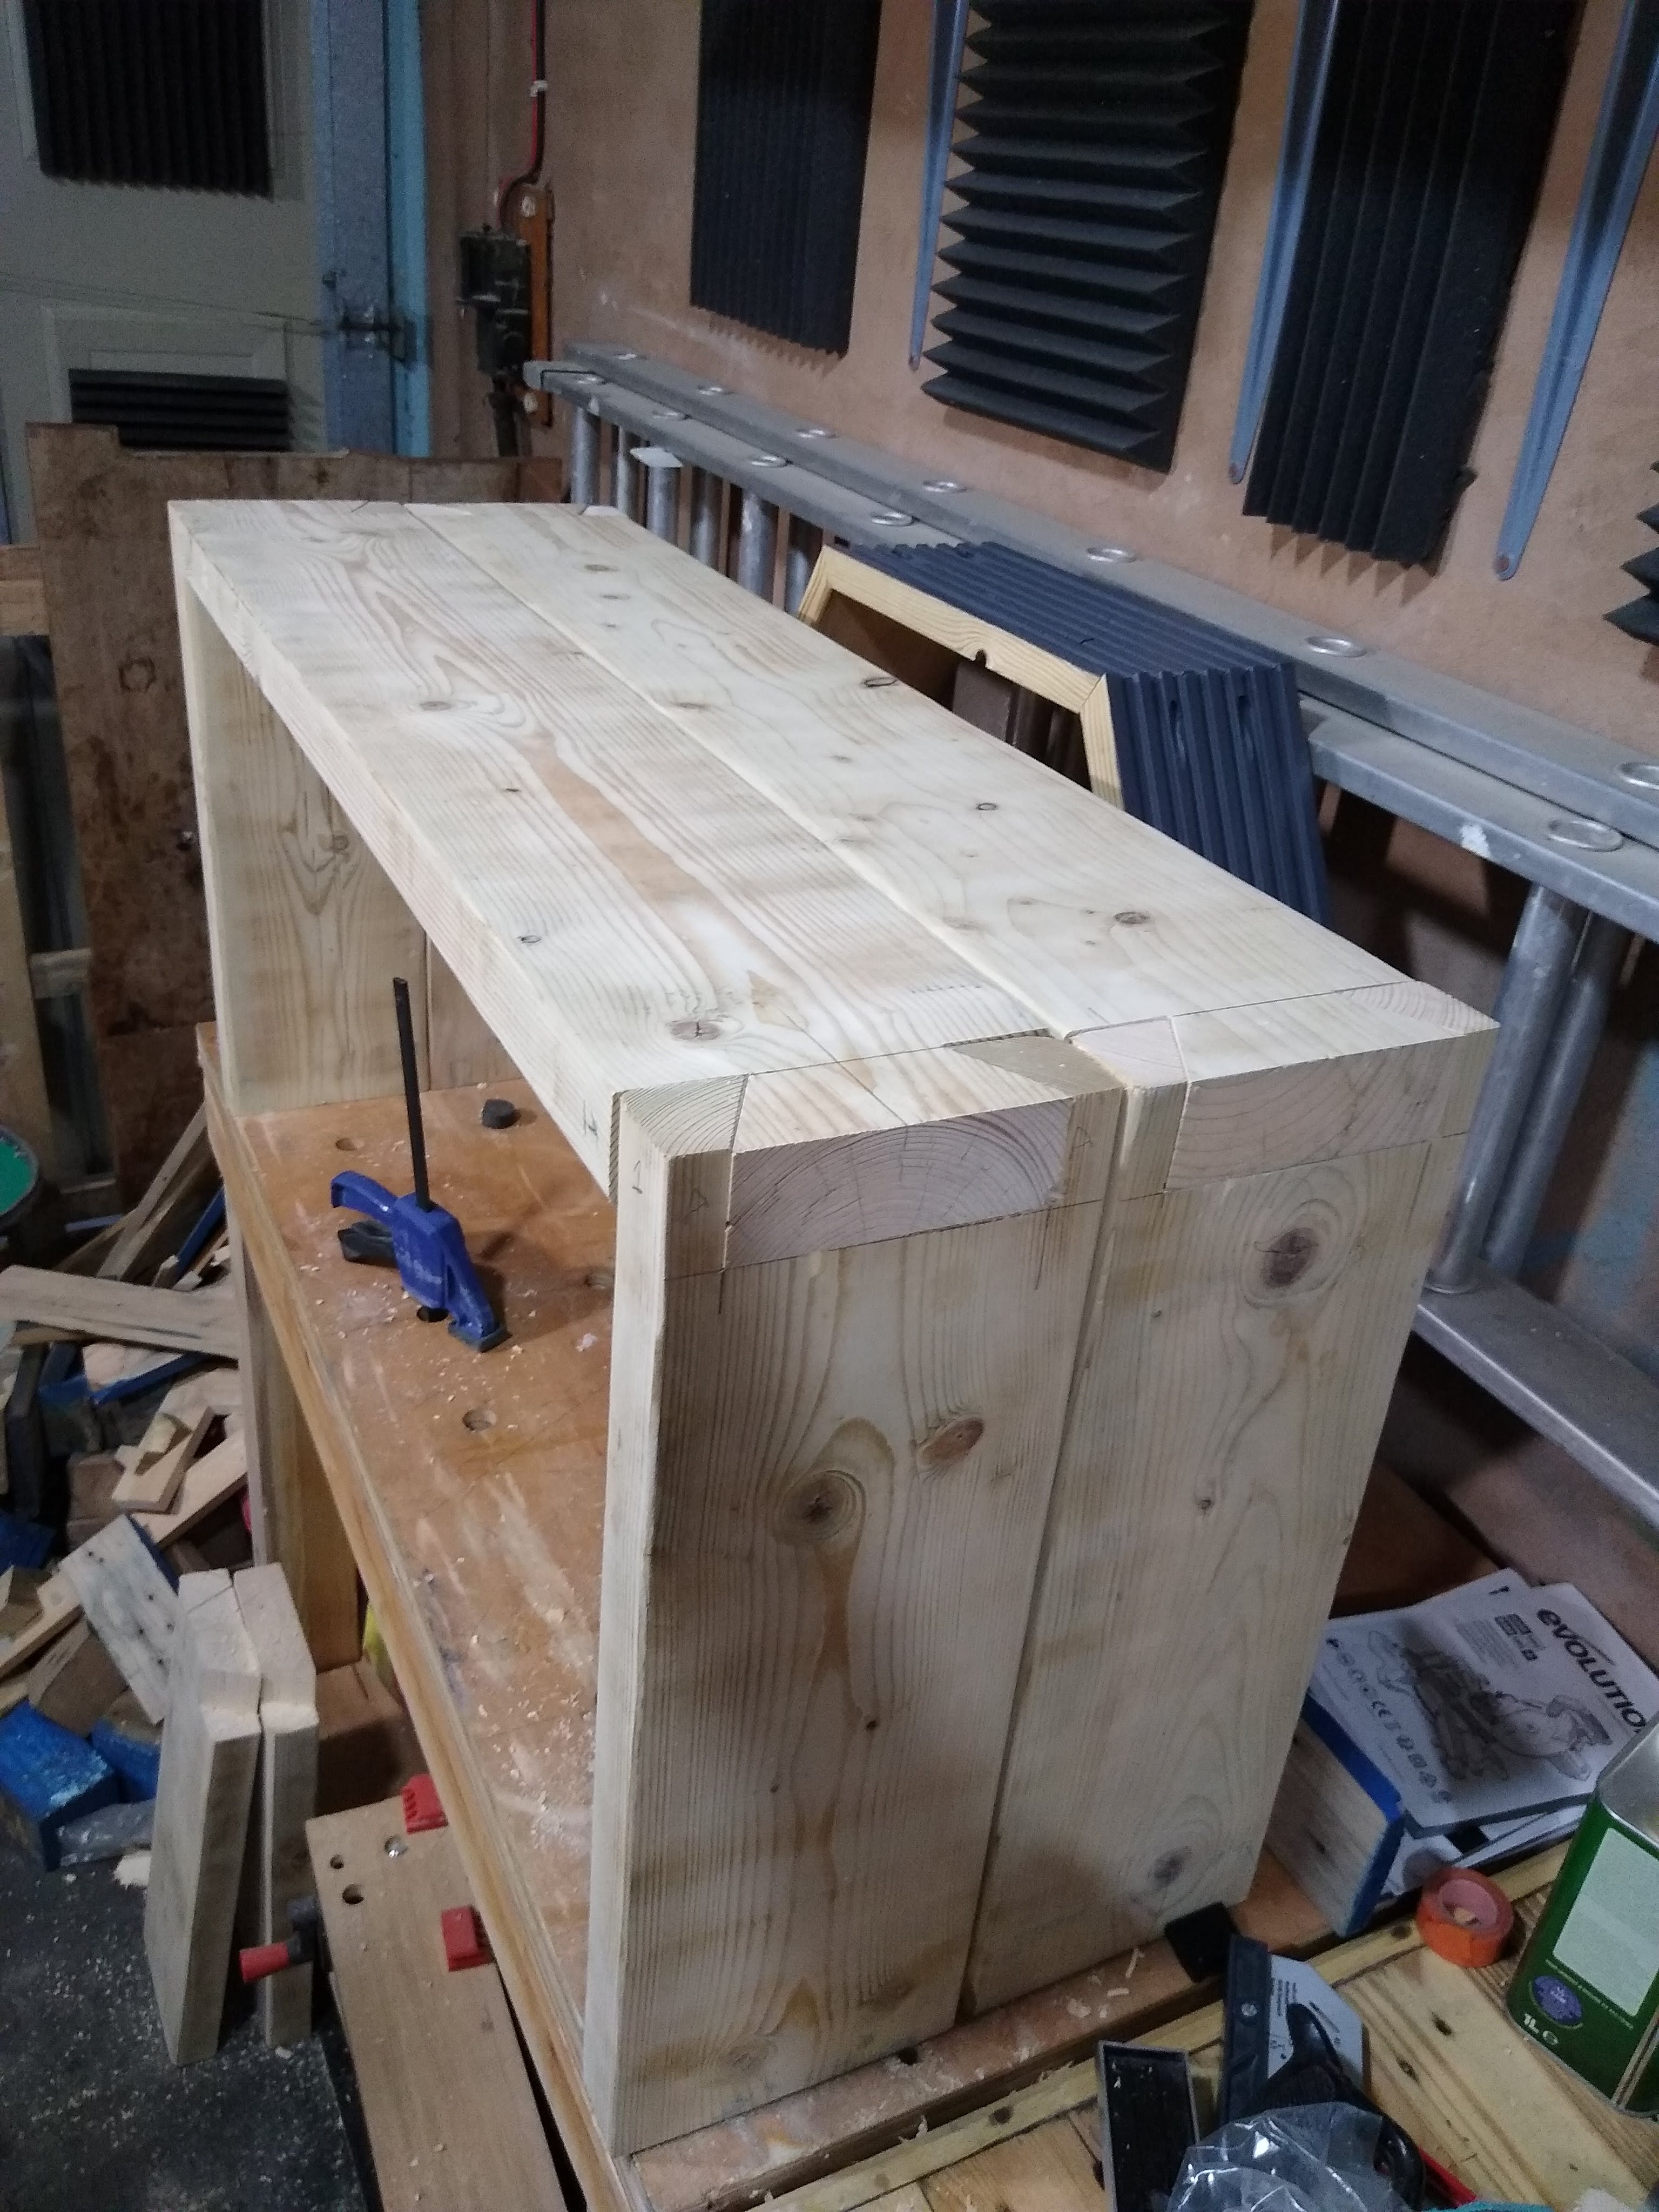
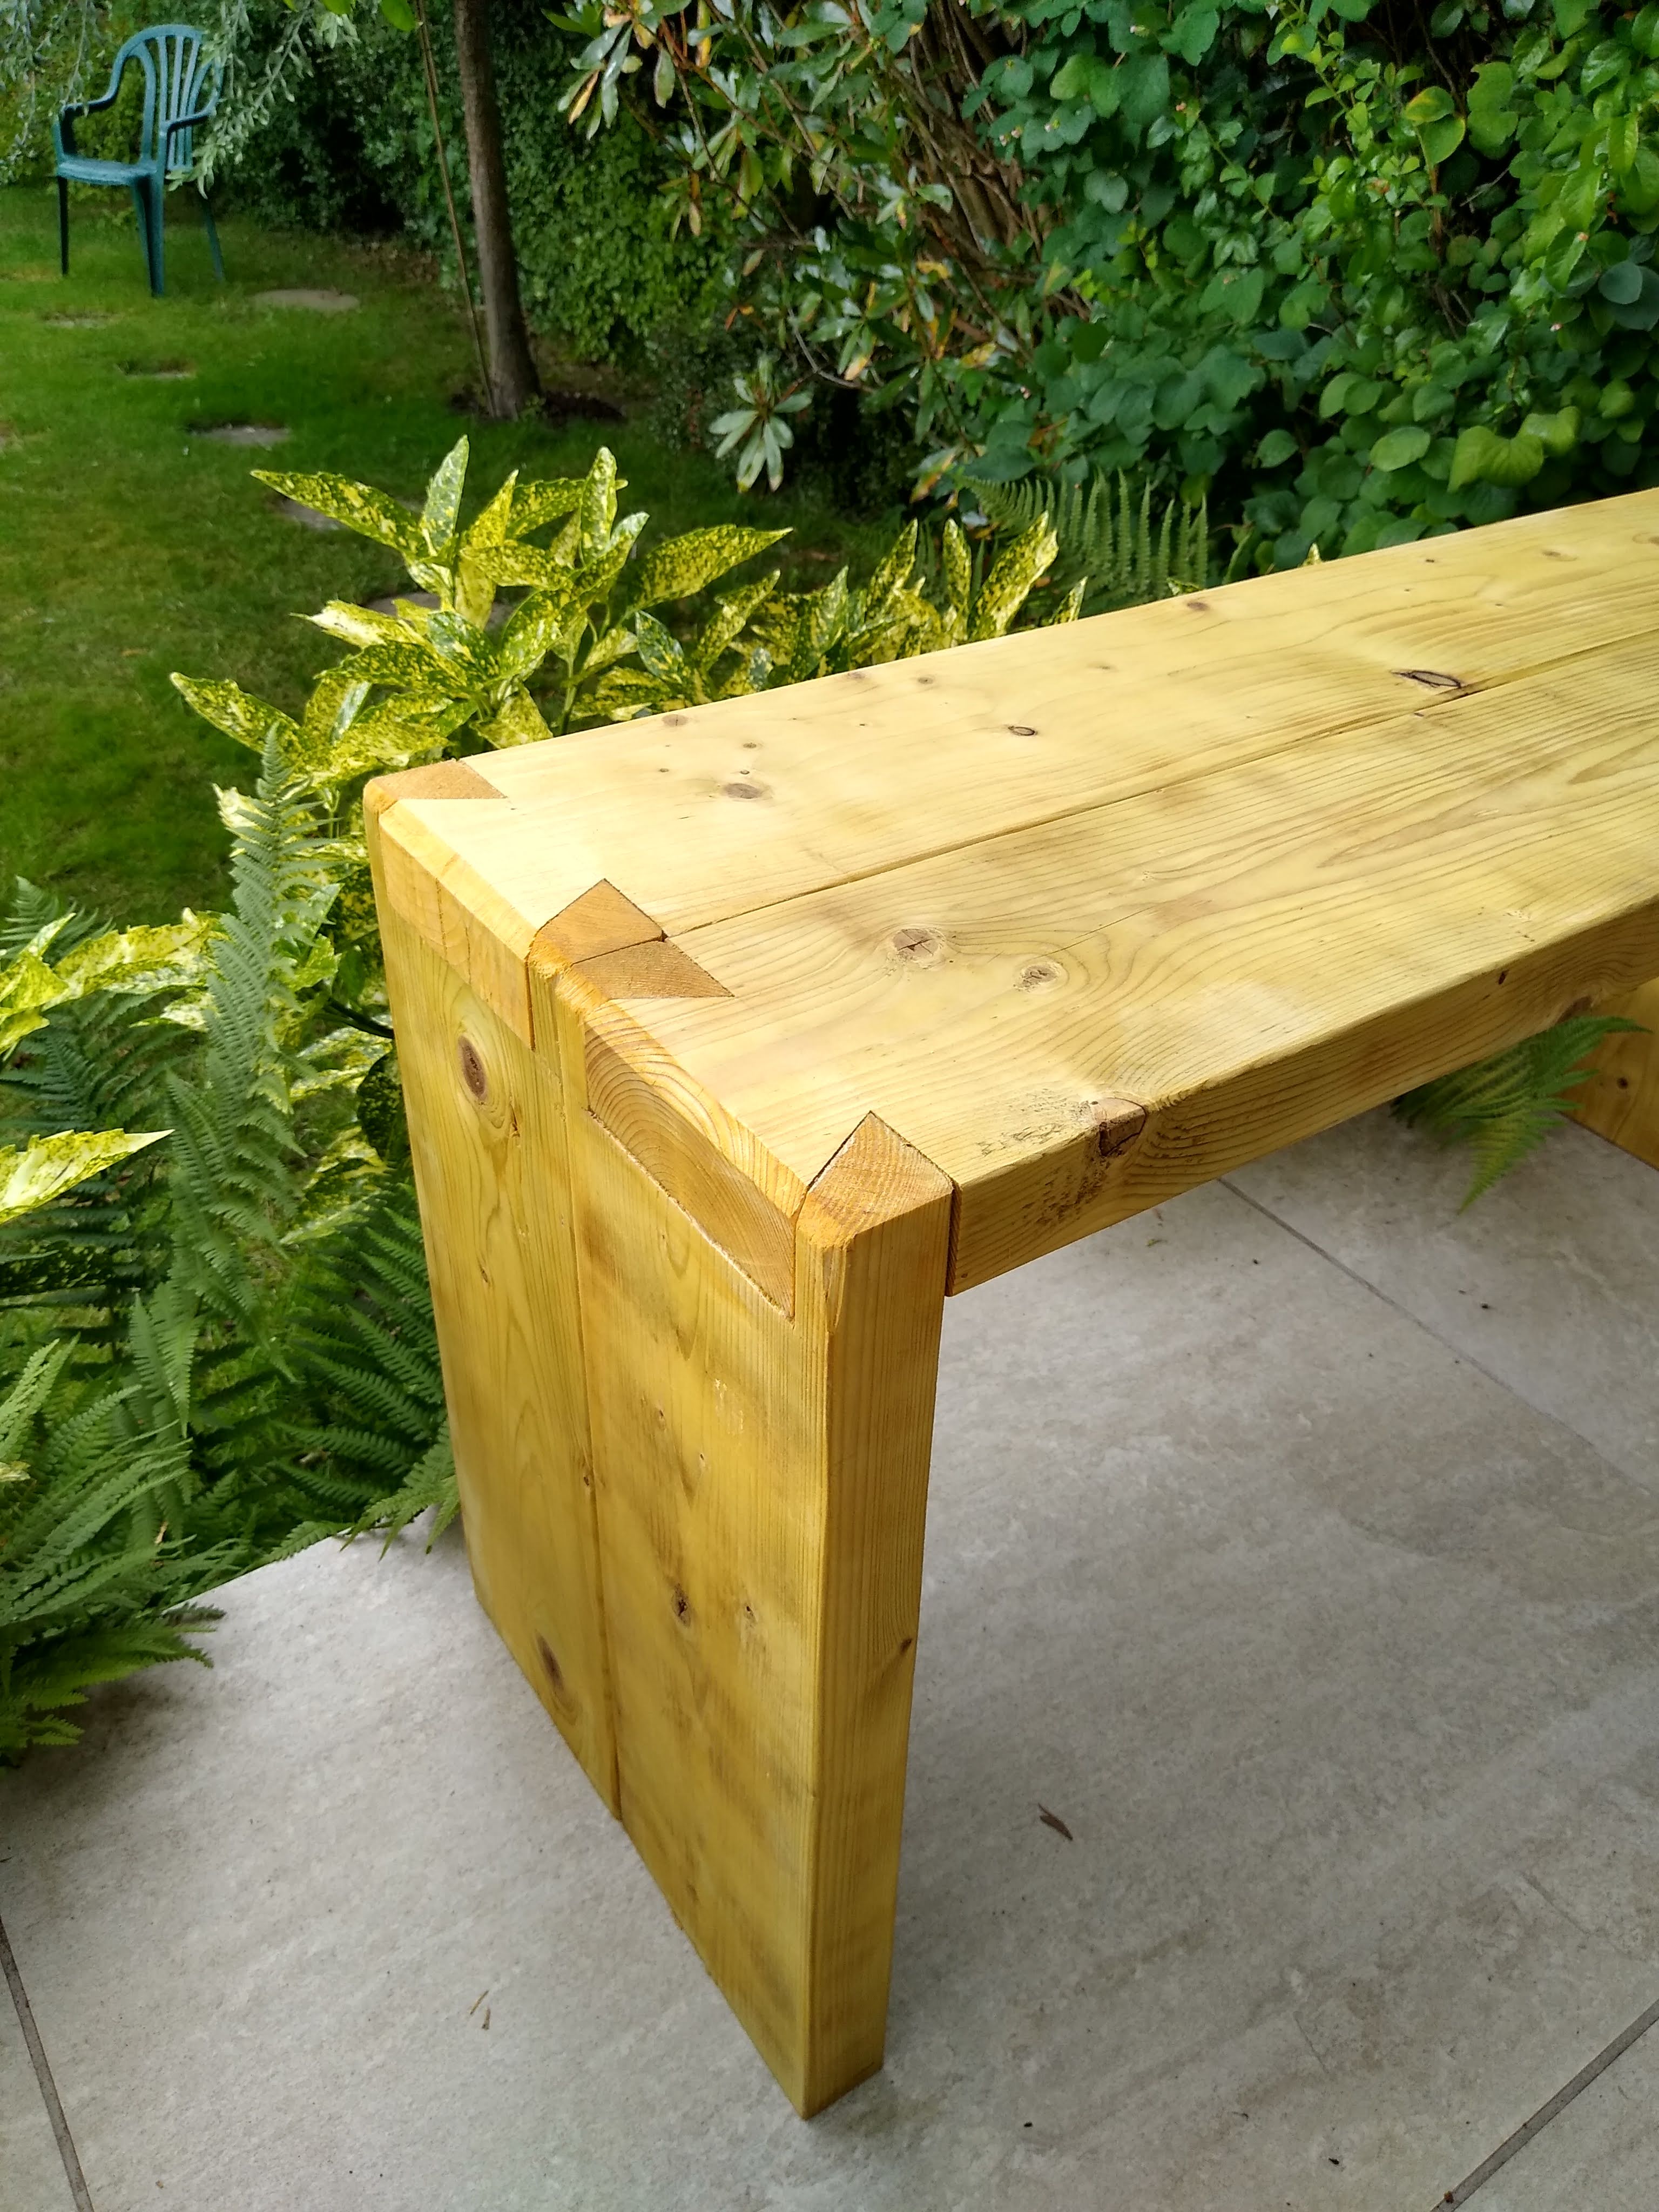
I used pocket holes to attach the two halves and wood glue to join the dovetail joints. Then I took a router to each end and added a chamfered to make it a little more interesting.


Finished with a bit of teak oil, it looks more orange than it really is!

#pocketholes #woodworking #woodworker #reclaimedwood #palletwood #dovetails #bandsaw #outdoorfurniture #bench #furnituremaker #diy #recycledwood -
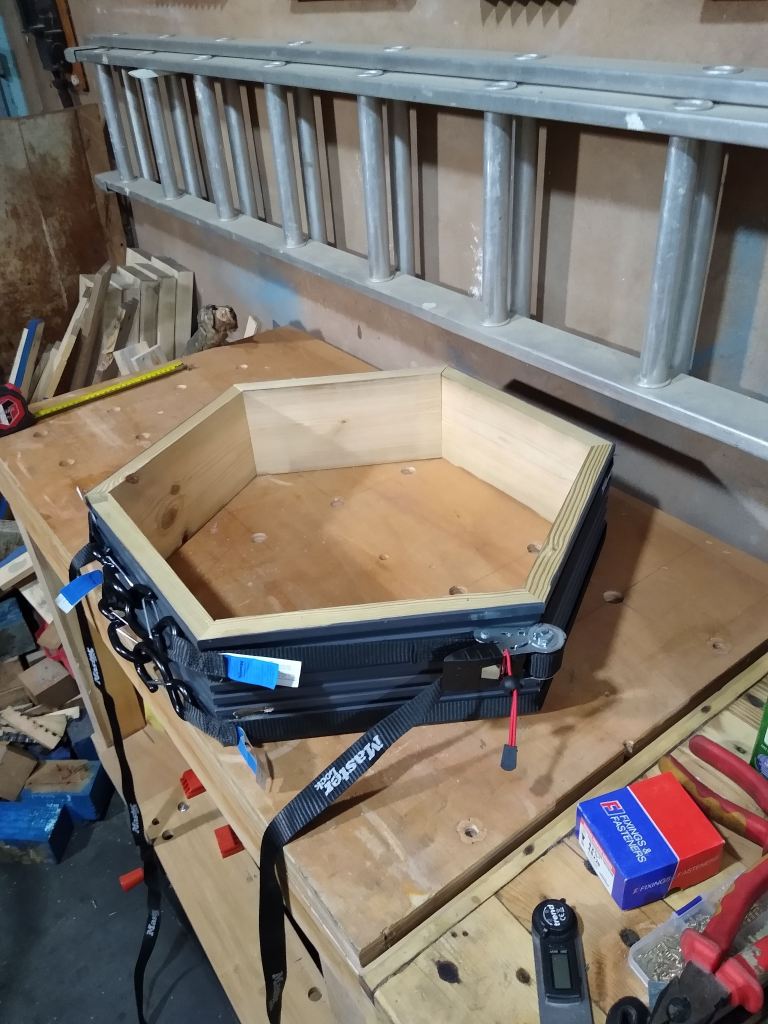
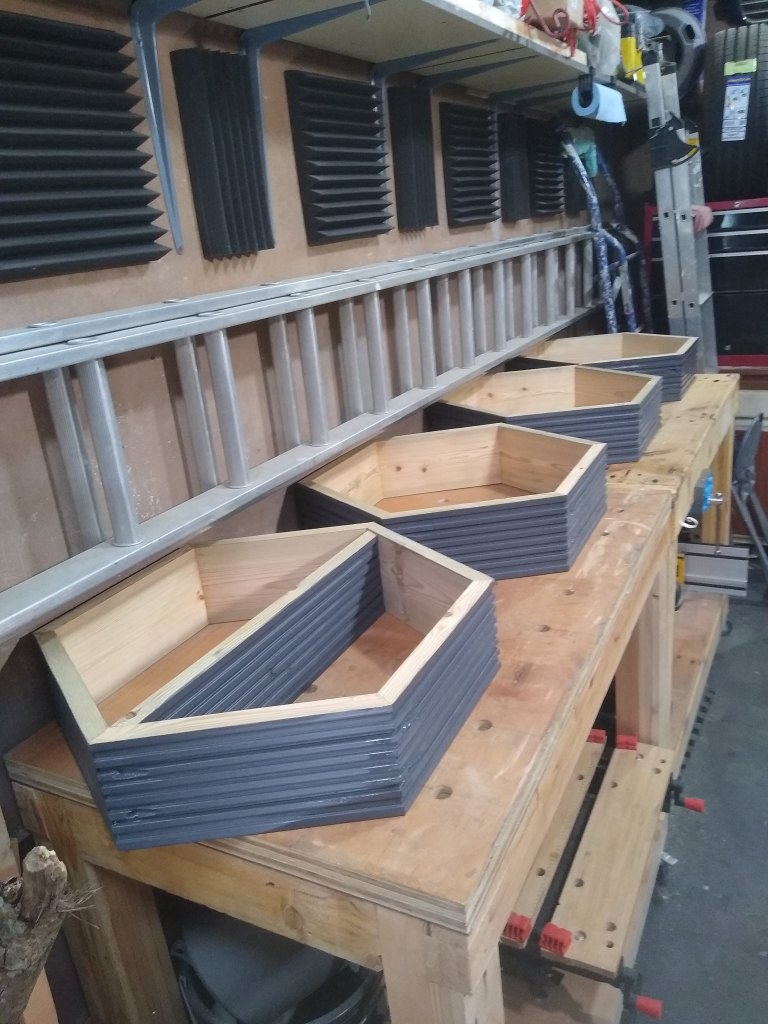
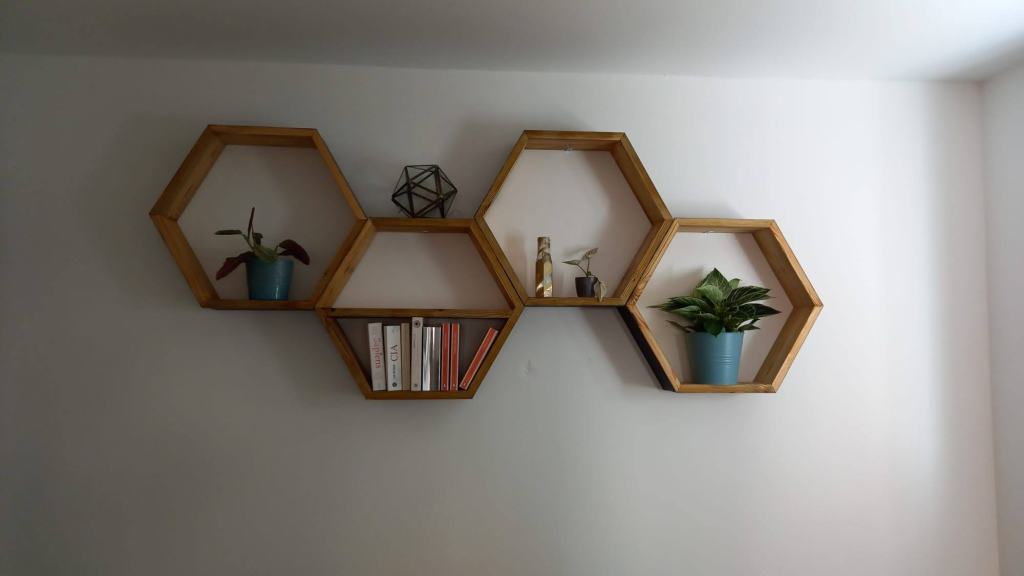
Hexagonal Shelves!
Just a quick post. I got a commission to make some hexagon shelves out of some old decking which seemed simple enough..at first!
I gave the wood a light planing and good scrub to begin with as it needed some TLC. I seem to have lost the before pictures and time-lapse of the sanding/planning 😦
I discovered that my mitre saw was missing the angle gauge sticker so had to get hold of one from evolution. Took a little while to get the perfect 30 degree set on then after having a few angle issues with a misaligned mitre-saw gauge I eventually got the correct angle. The end result was 4 piles of symmetrical boards:

I made a test shelve and assembled it with just glue but wasn’t happy with it’s strength so I ended up going a bit pocket hole mad! The combination of glue and pocket holes made them pretty solid. I used a ratchet strap to hold them together whilst putting the screws in:
I gave the out side a few fresh coats of paint then finished the inside with a few coats of linseed oil, which suited the grey paint. They ended up looking great and had a happy customer who already commissioned me to make a desk.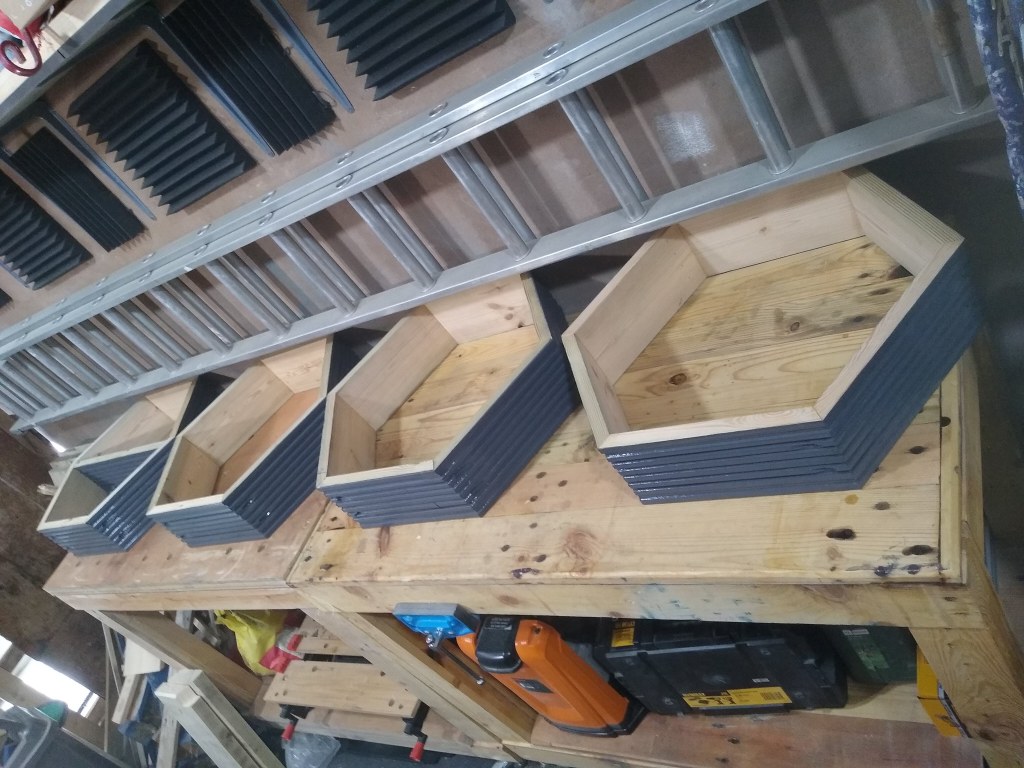
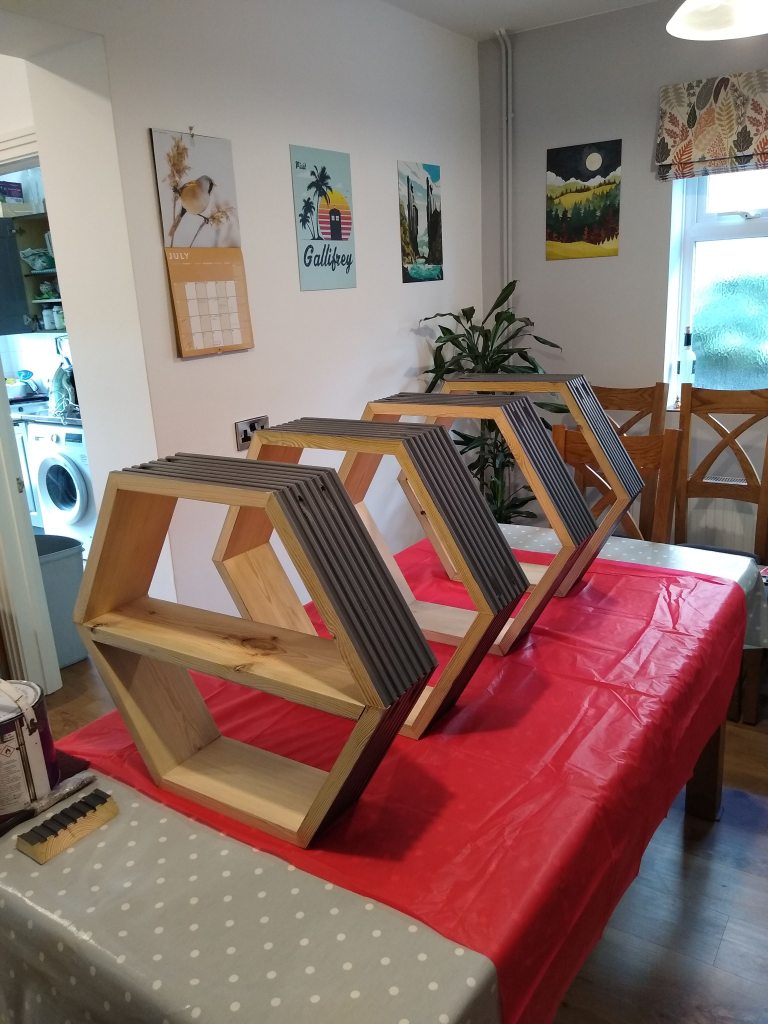
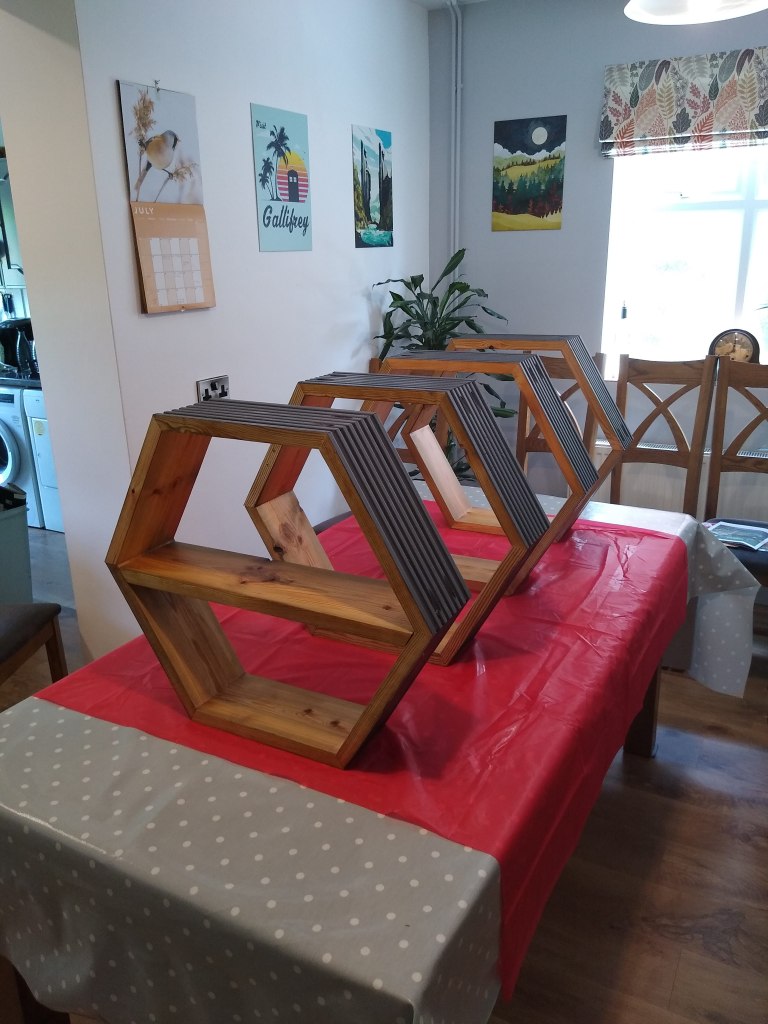
Ta- Da!
-
Raised Beds!
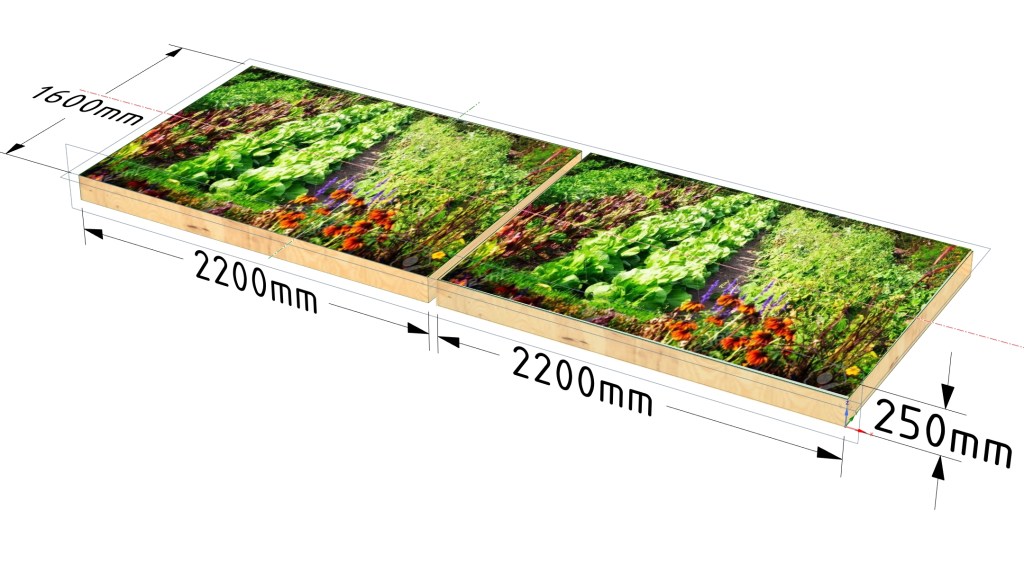
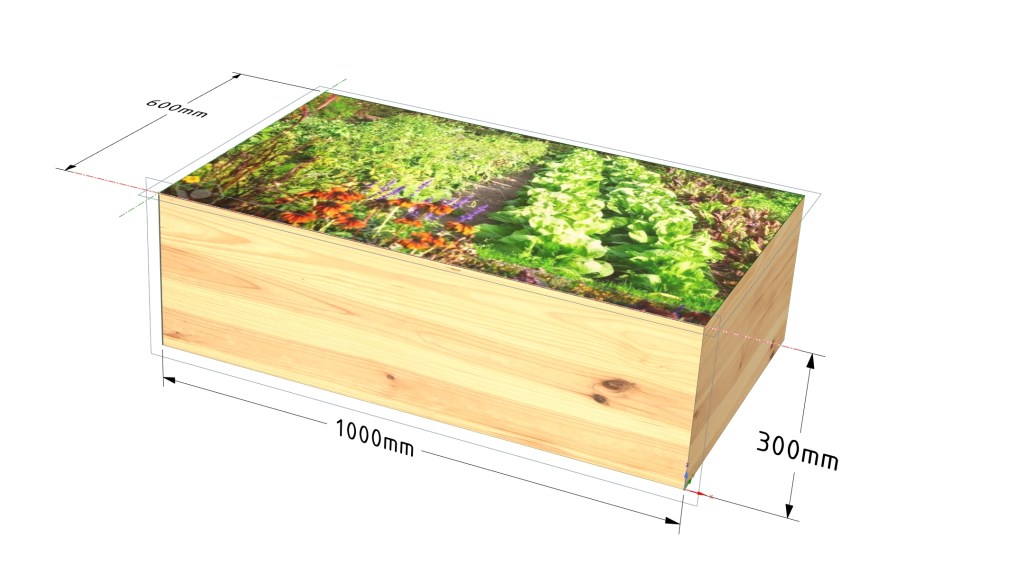
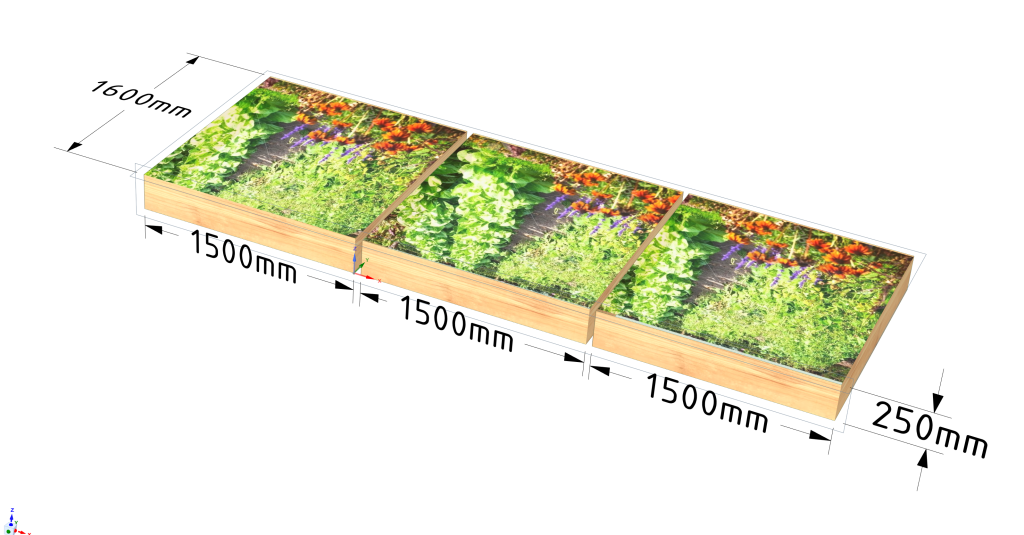
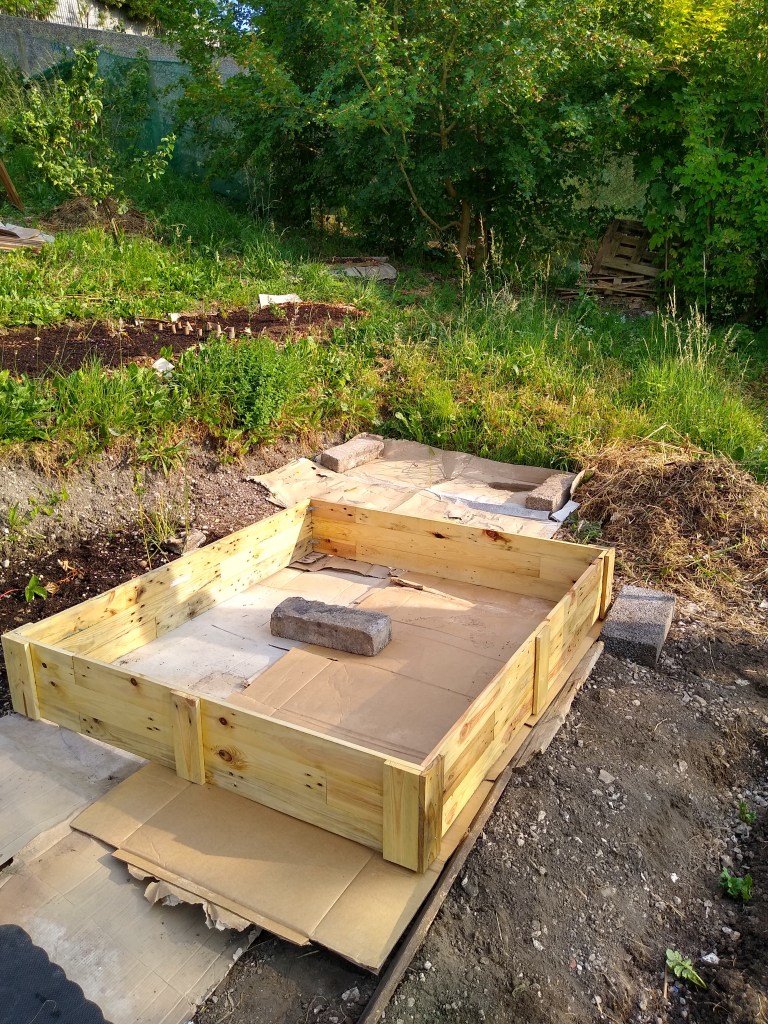
Raised beds! I’ve had a few requests to make some raised beds so I have put a couple together over the last few weeks. These have been made all out of pallet wood as it lends it’s self to this quite well. I was making a smaller bed 1000mm/600mm and a bigger bed about double the size. Here is a rough guide on how I went about making the beds.
Step zero. Measure the area!
Work out what size you want the bed to be and sketch it out if it helps to visualize it. With a simple project like this it may not be necessary but I find it helps If I can see what the end product should look like. I’ve been using Design Spark recently so I made a sketch in that. I used to use Fusion360 when it was free but now even the cheap subscription is too much. I’ve found design-spark (explorer) has a very good free version.
Designspark’s page: https://www.rs-online.com/designspark/subscriptions-pricing-page
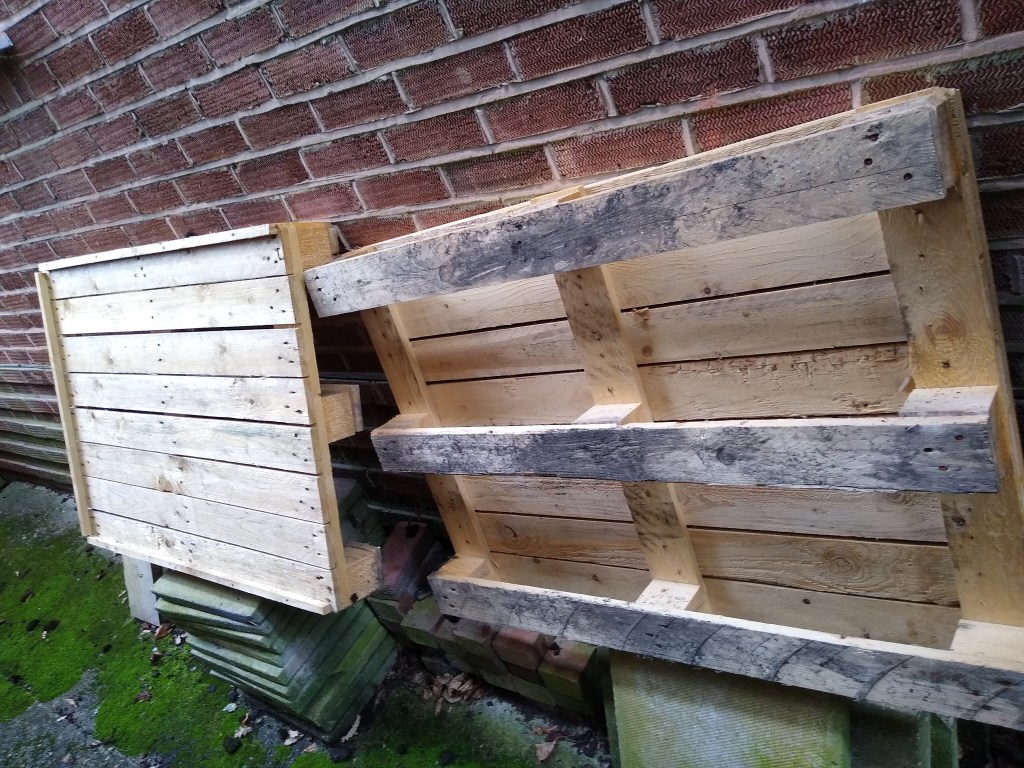
First step! Get some pallets.
Yup.
Second step. De-palletify the pallets.
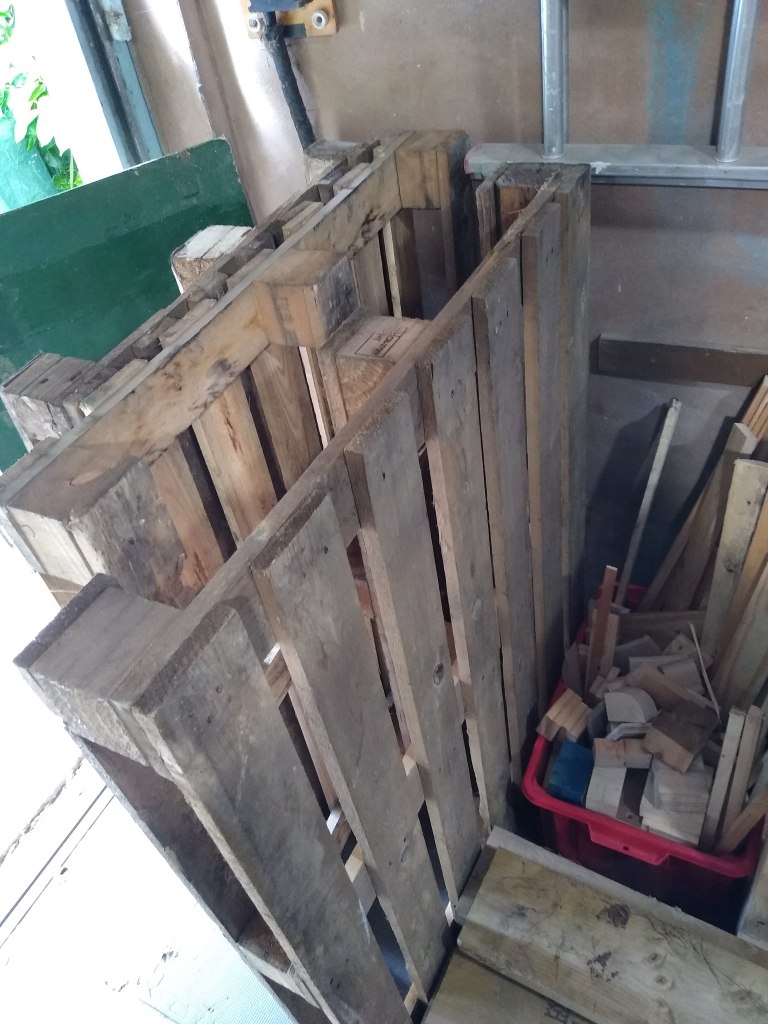
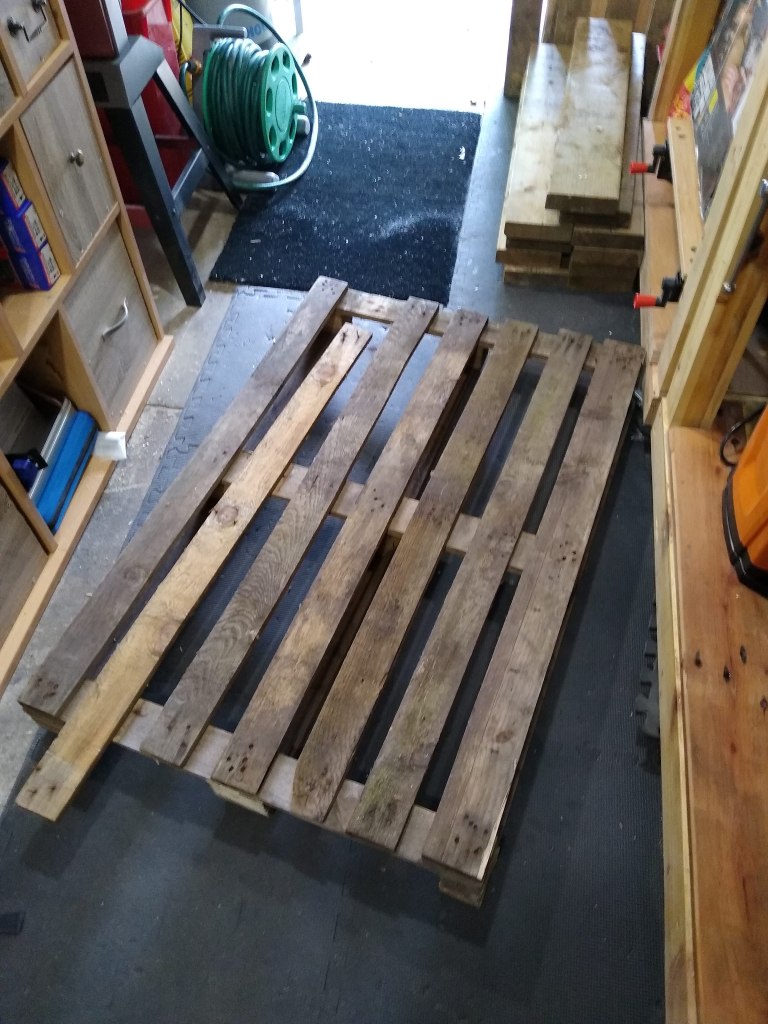
As normal this is combination of using the pallet buster and jigsawing out any stubborn boards. Followed by hammering out the nails. One day I’ll get a compressor and a denailer tool. (https://woodenduck.co.uk/2022/10/18/pallet-buster/).

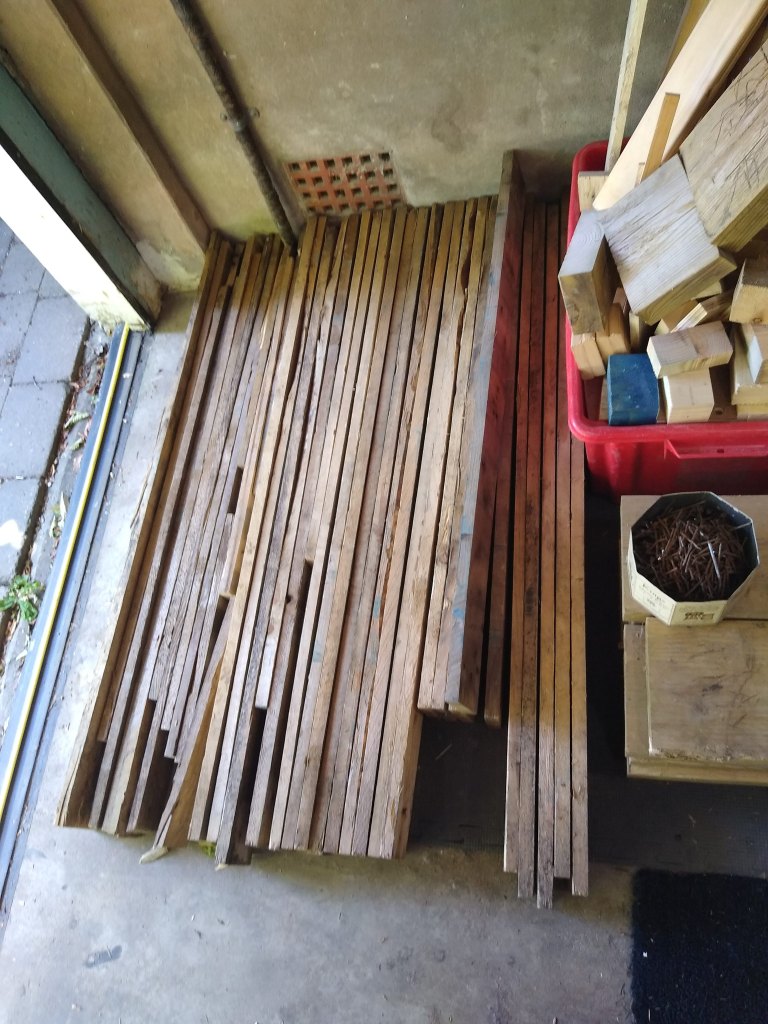
The tetanus tin of terror Third step. Prep the wood.
Firstly I had to repair a couple of split boards, I’ve found that gluing clean splits back together renders a perfectly serviceable board. Then it was a case of planing each face and the sides to leave a nice clean board to work with. The first pass I took was way too deep and I could hear the motor on the planer bog down (on the below clip), light passes are deffo good for the motors long term health!
Fourth step. Cut everything to length.
With your shiny new mitre saw cut everything to length and cut off any scrappy ends. Buying one these was a game changer for getting consistent square cuts. It’s on an arm with 300 mm of reach, 0 degrees to 45 degrees bevel and has 50 degrees to 50 degrees mitre settings. It’s probably the most used tool I’ve got so far.
Link to the saw: https://amzn.to/3NsAsJL
Fifth step. Start assembling it.
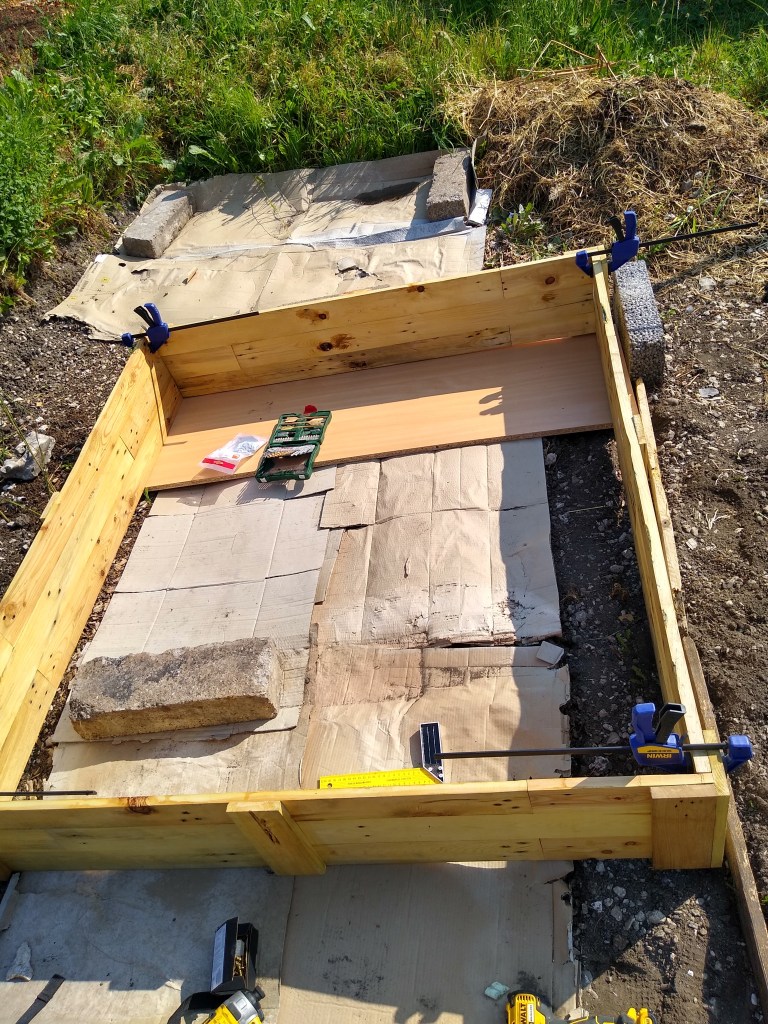
On the smaller bed this just involved making the 4 sides by screwing a vertical section to 3 horizontal boards. The two longer sides had a corner piece added that would then be used to attach to the smaller sides.
For the bigger bed I glued up the sides and added the corner braces but the final assemble would be done on site as my golf was too small to fit an assembled bed of that size! A couple of the boards where a little bowed so I piled a bunch of weighty things on top and clamped it to the bench whilst the glue was curing. Ended up looking like an odd Buckeroo/Jenga game


Sixth step. Protect the wood. I bought a natural teak oil that should help the wood last a long time and doesn’t add that orangey colour to the wood like some outdoor furniture finish does. Half was through the bigger bed I decided to fill a few gaps where knots where coming loose.
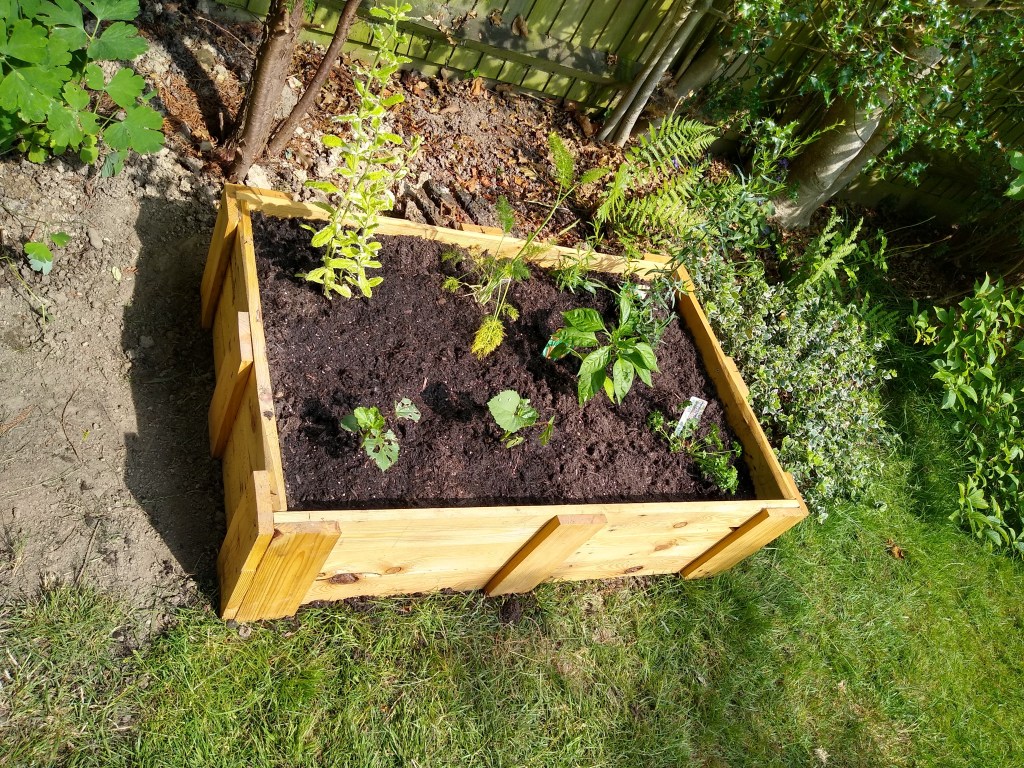
Seventh step. Stick some plants in it!
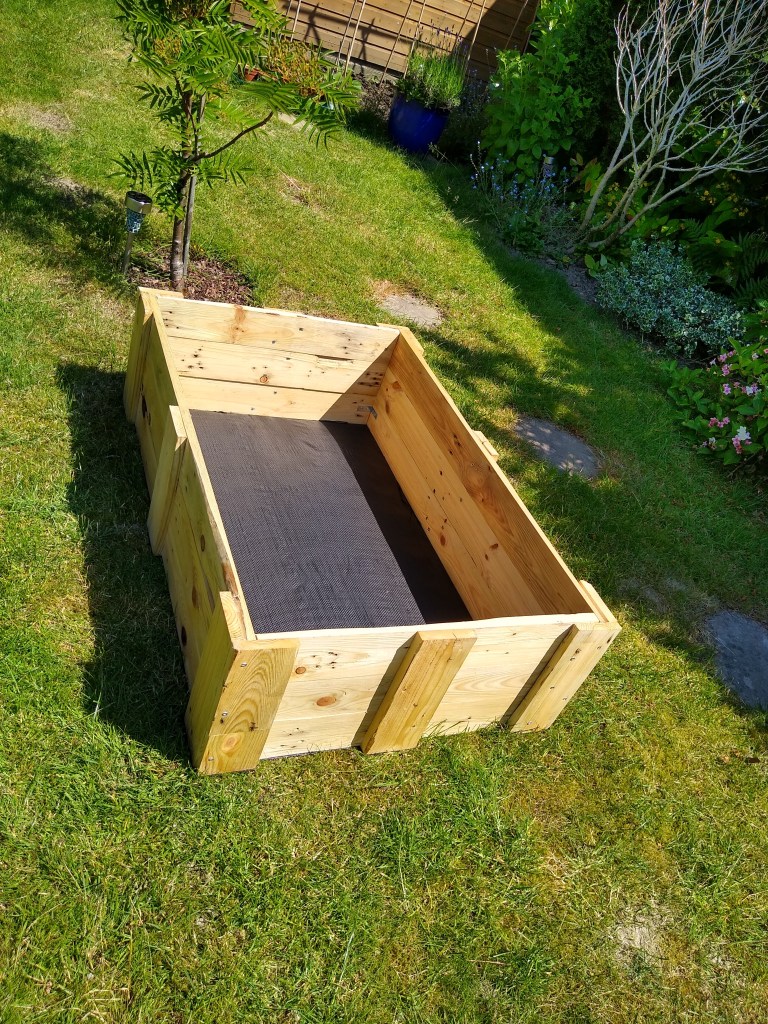
After lining the small bed with some eco friendly and breathable material it was put to use with some decent soil and various herby-planty things. The bigger bed was lined with cardboard, this seems to be the liner of choice as its biodegradable and still keeps weeds and critters out.


A walk around of the beds in situ. -
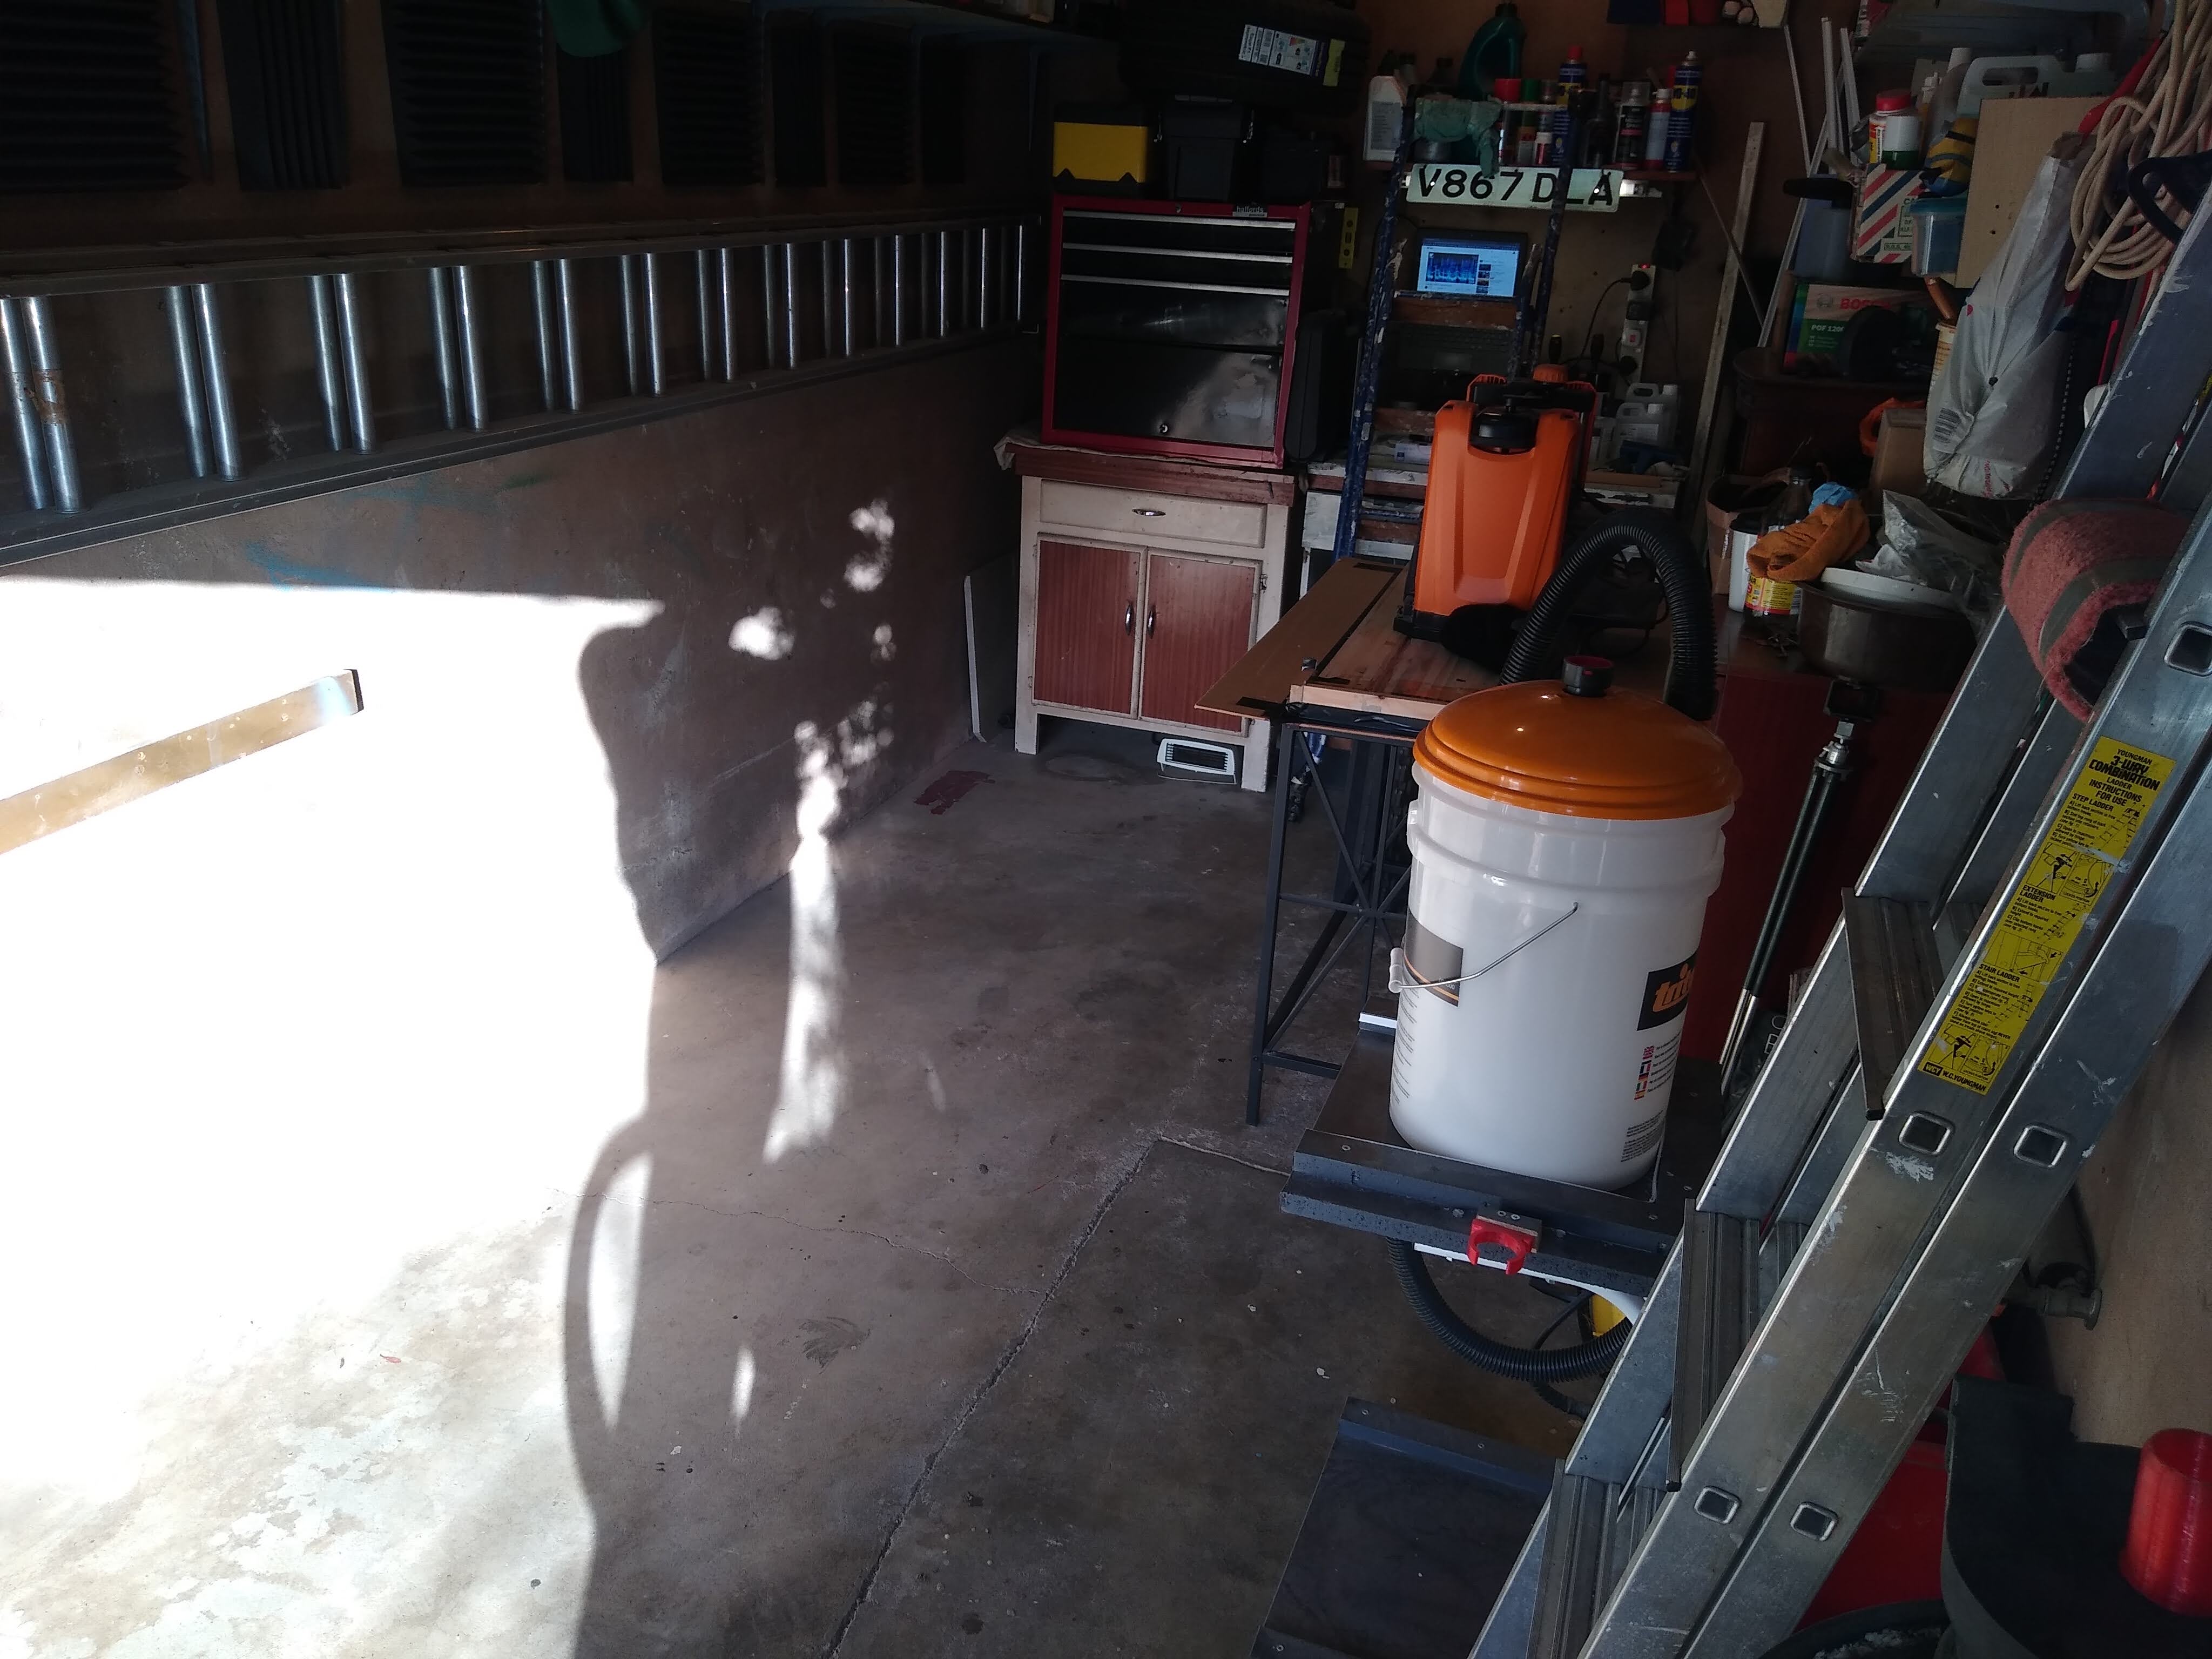
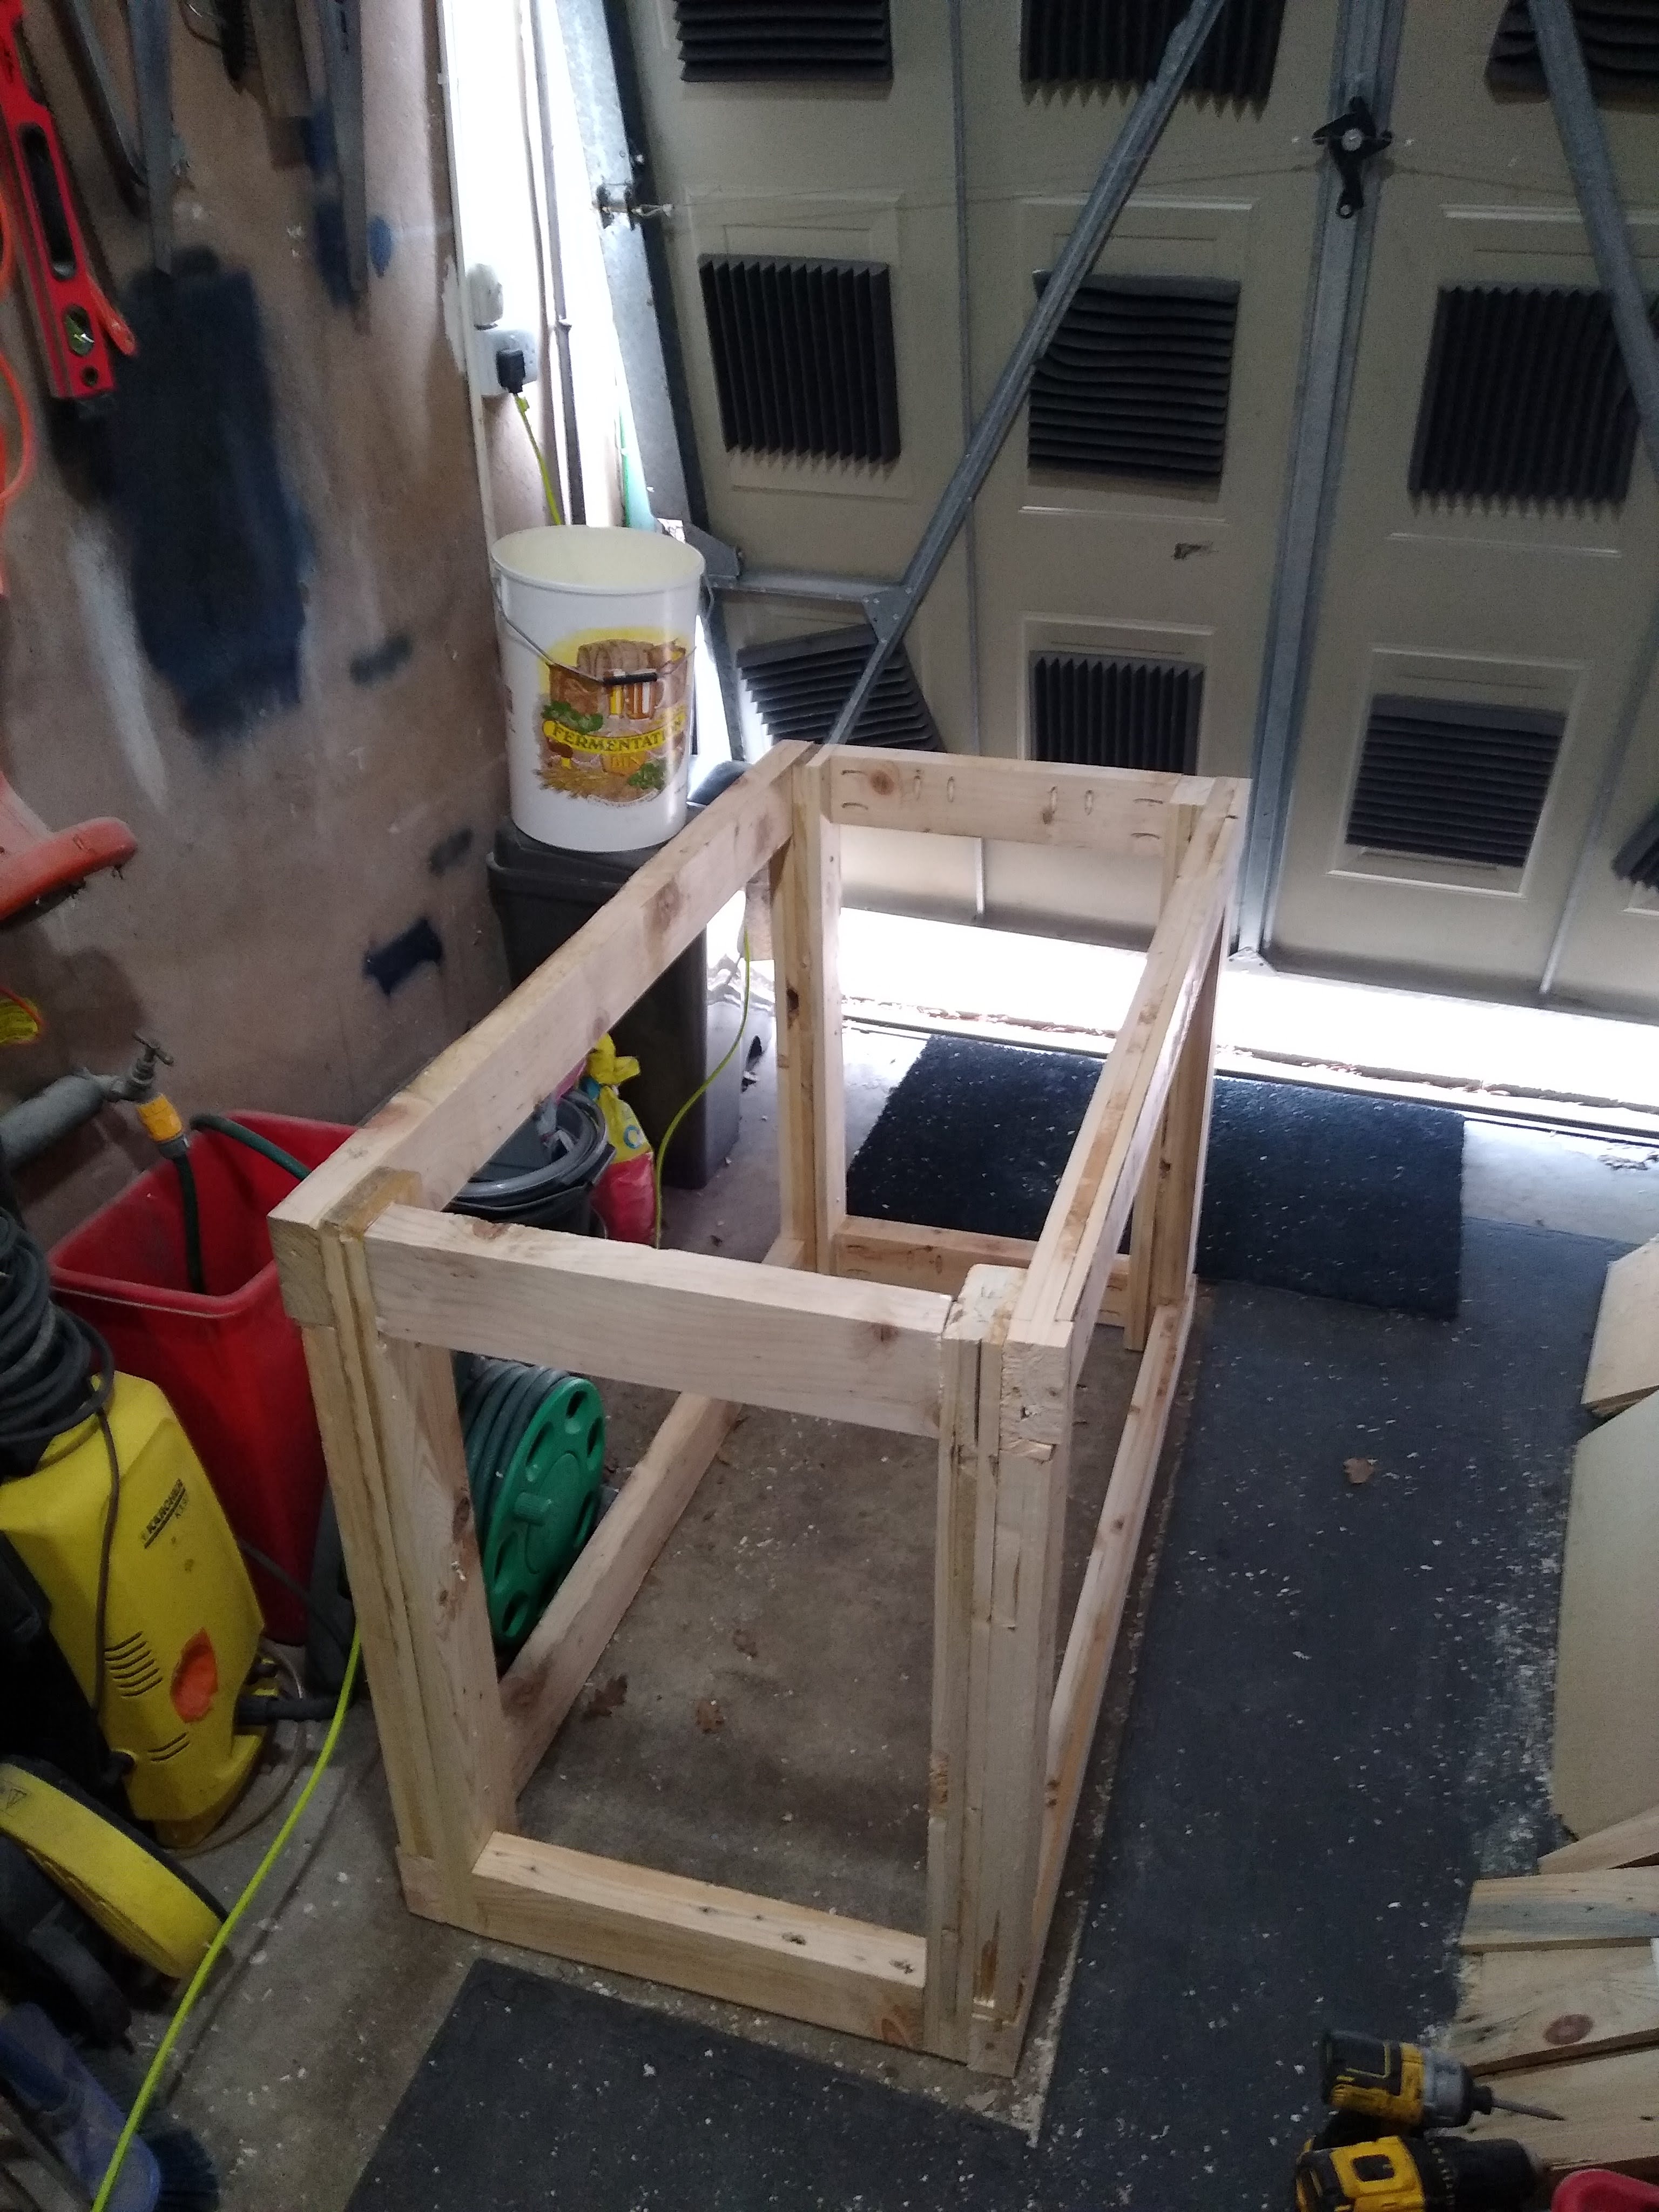
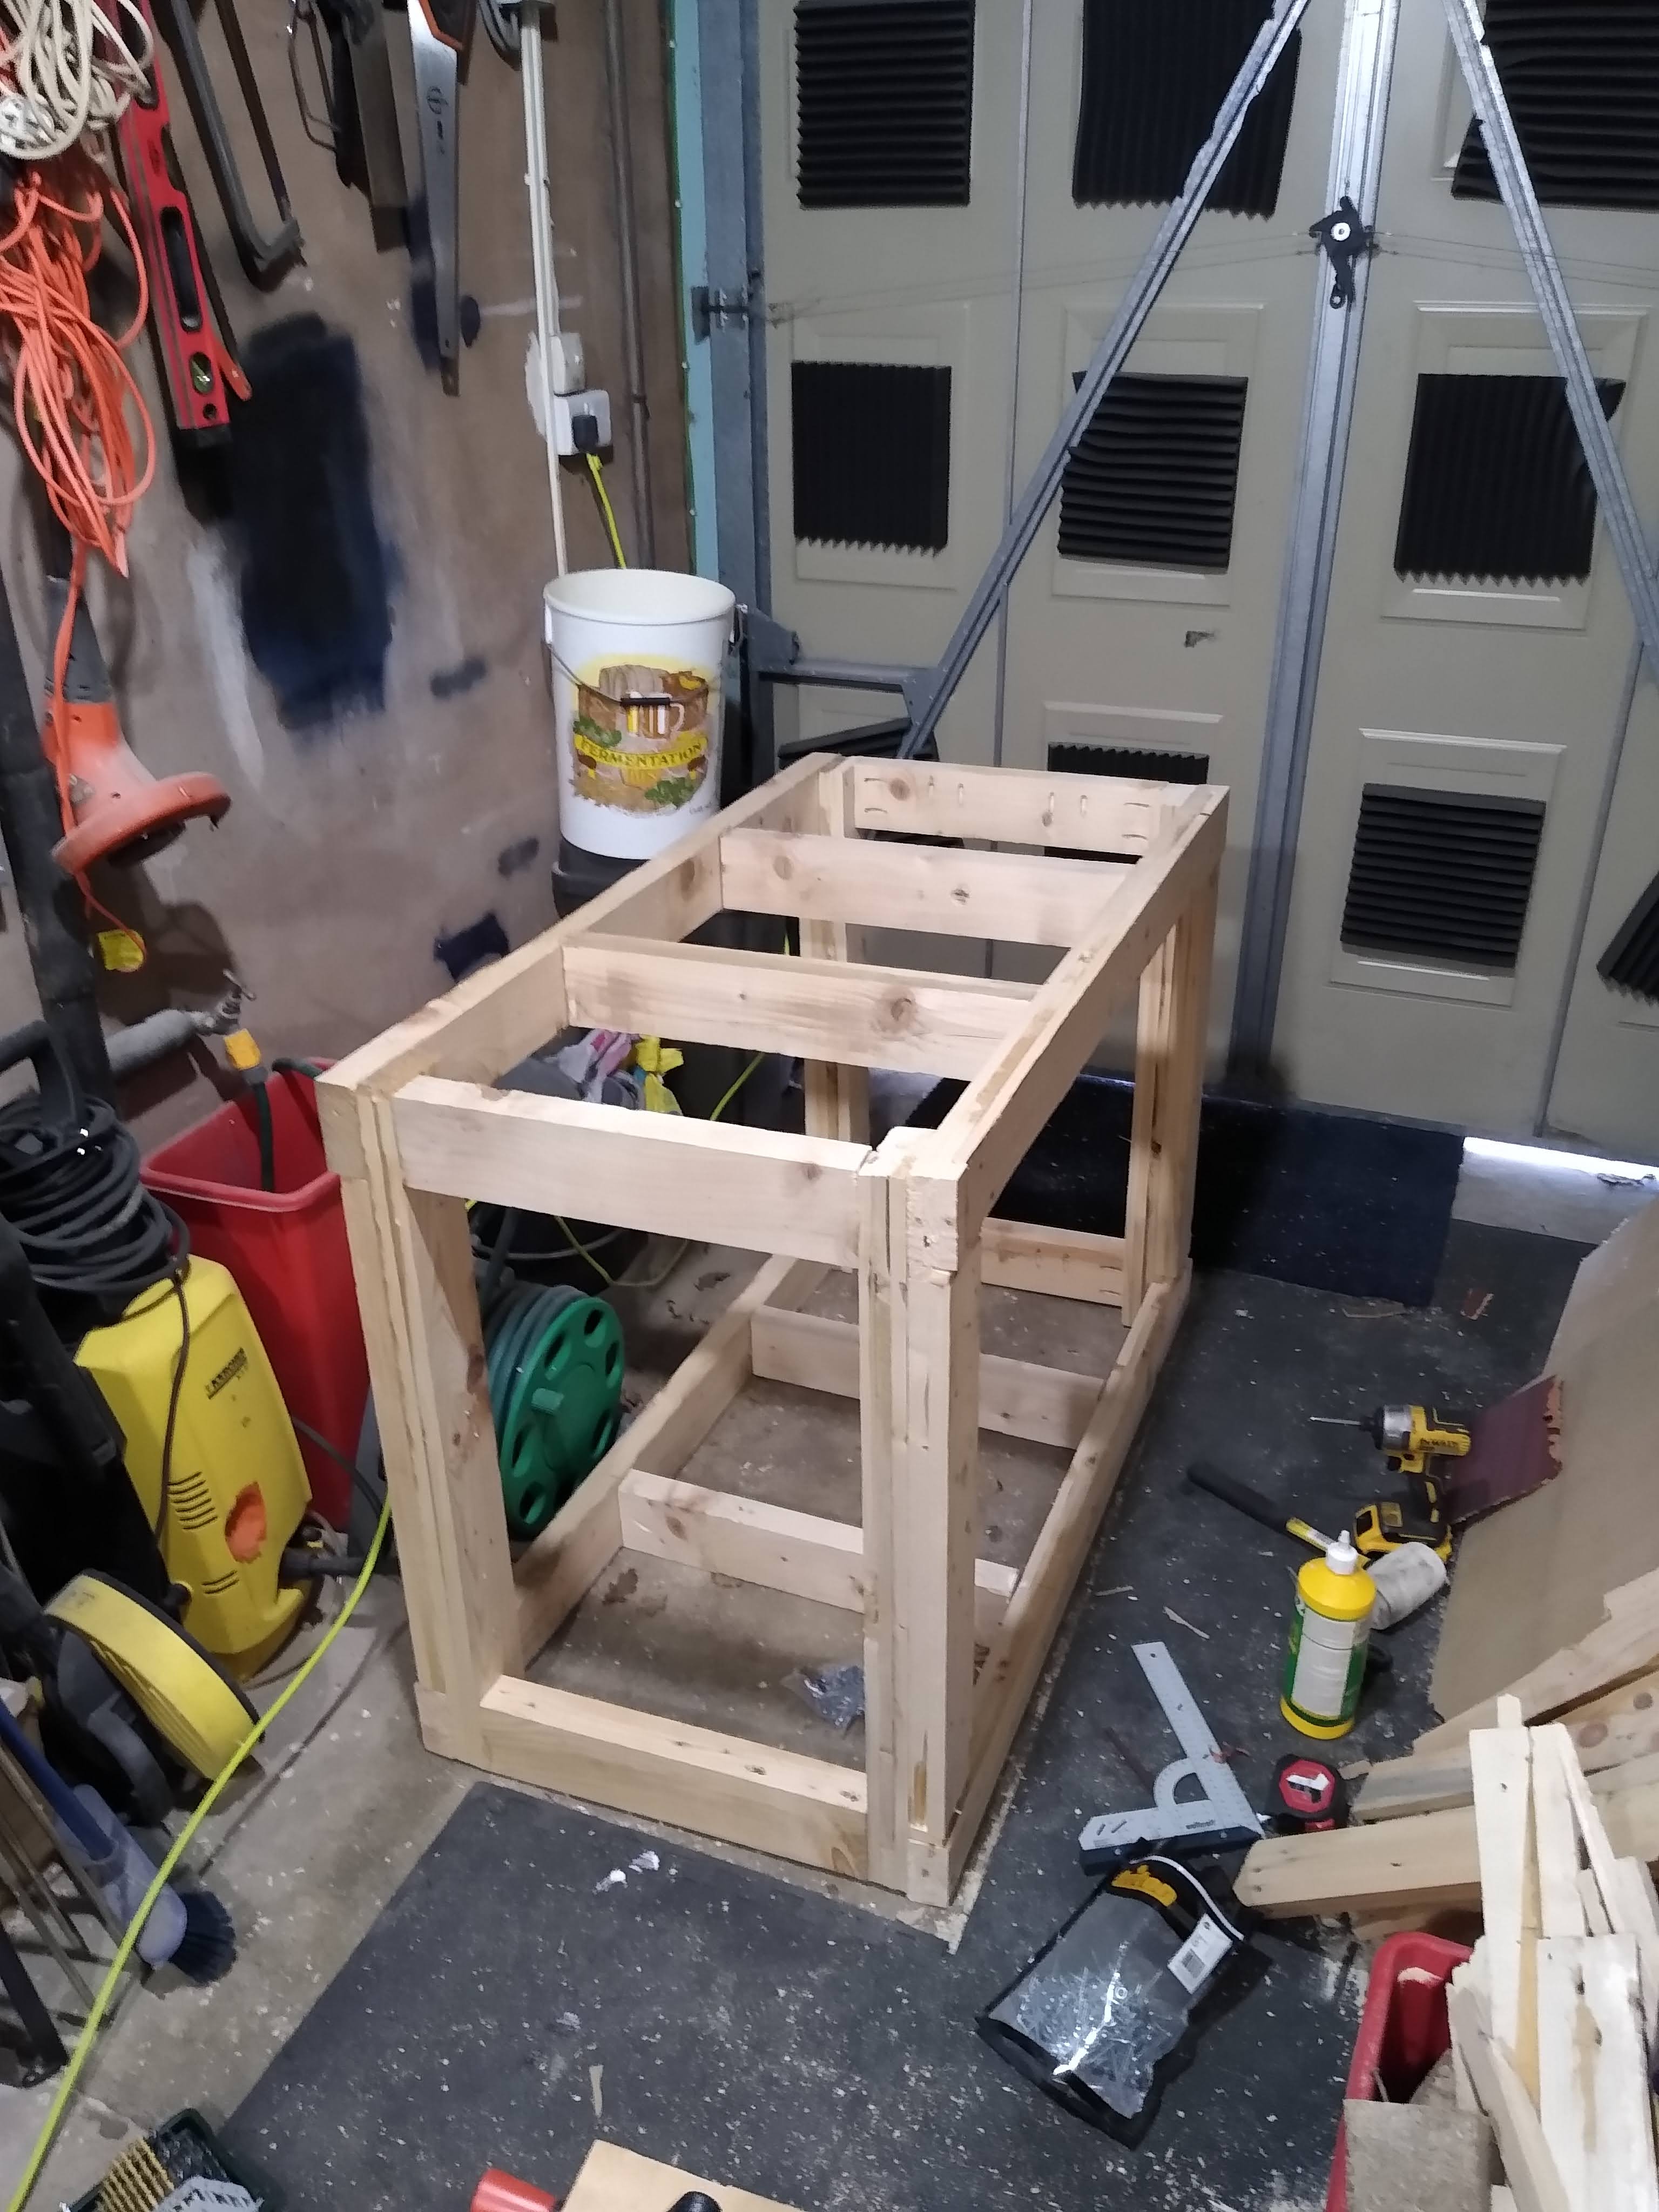
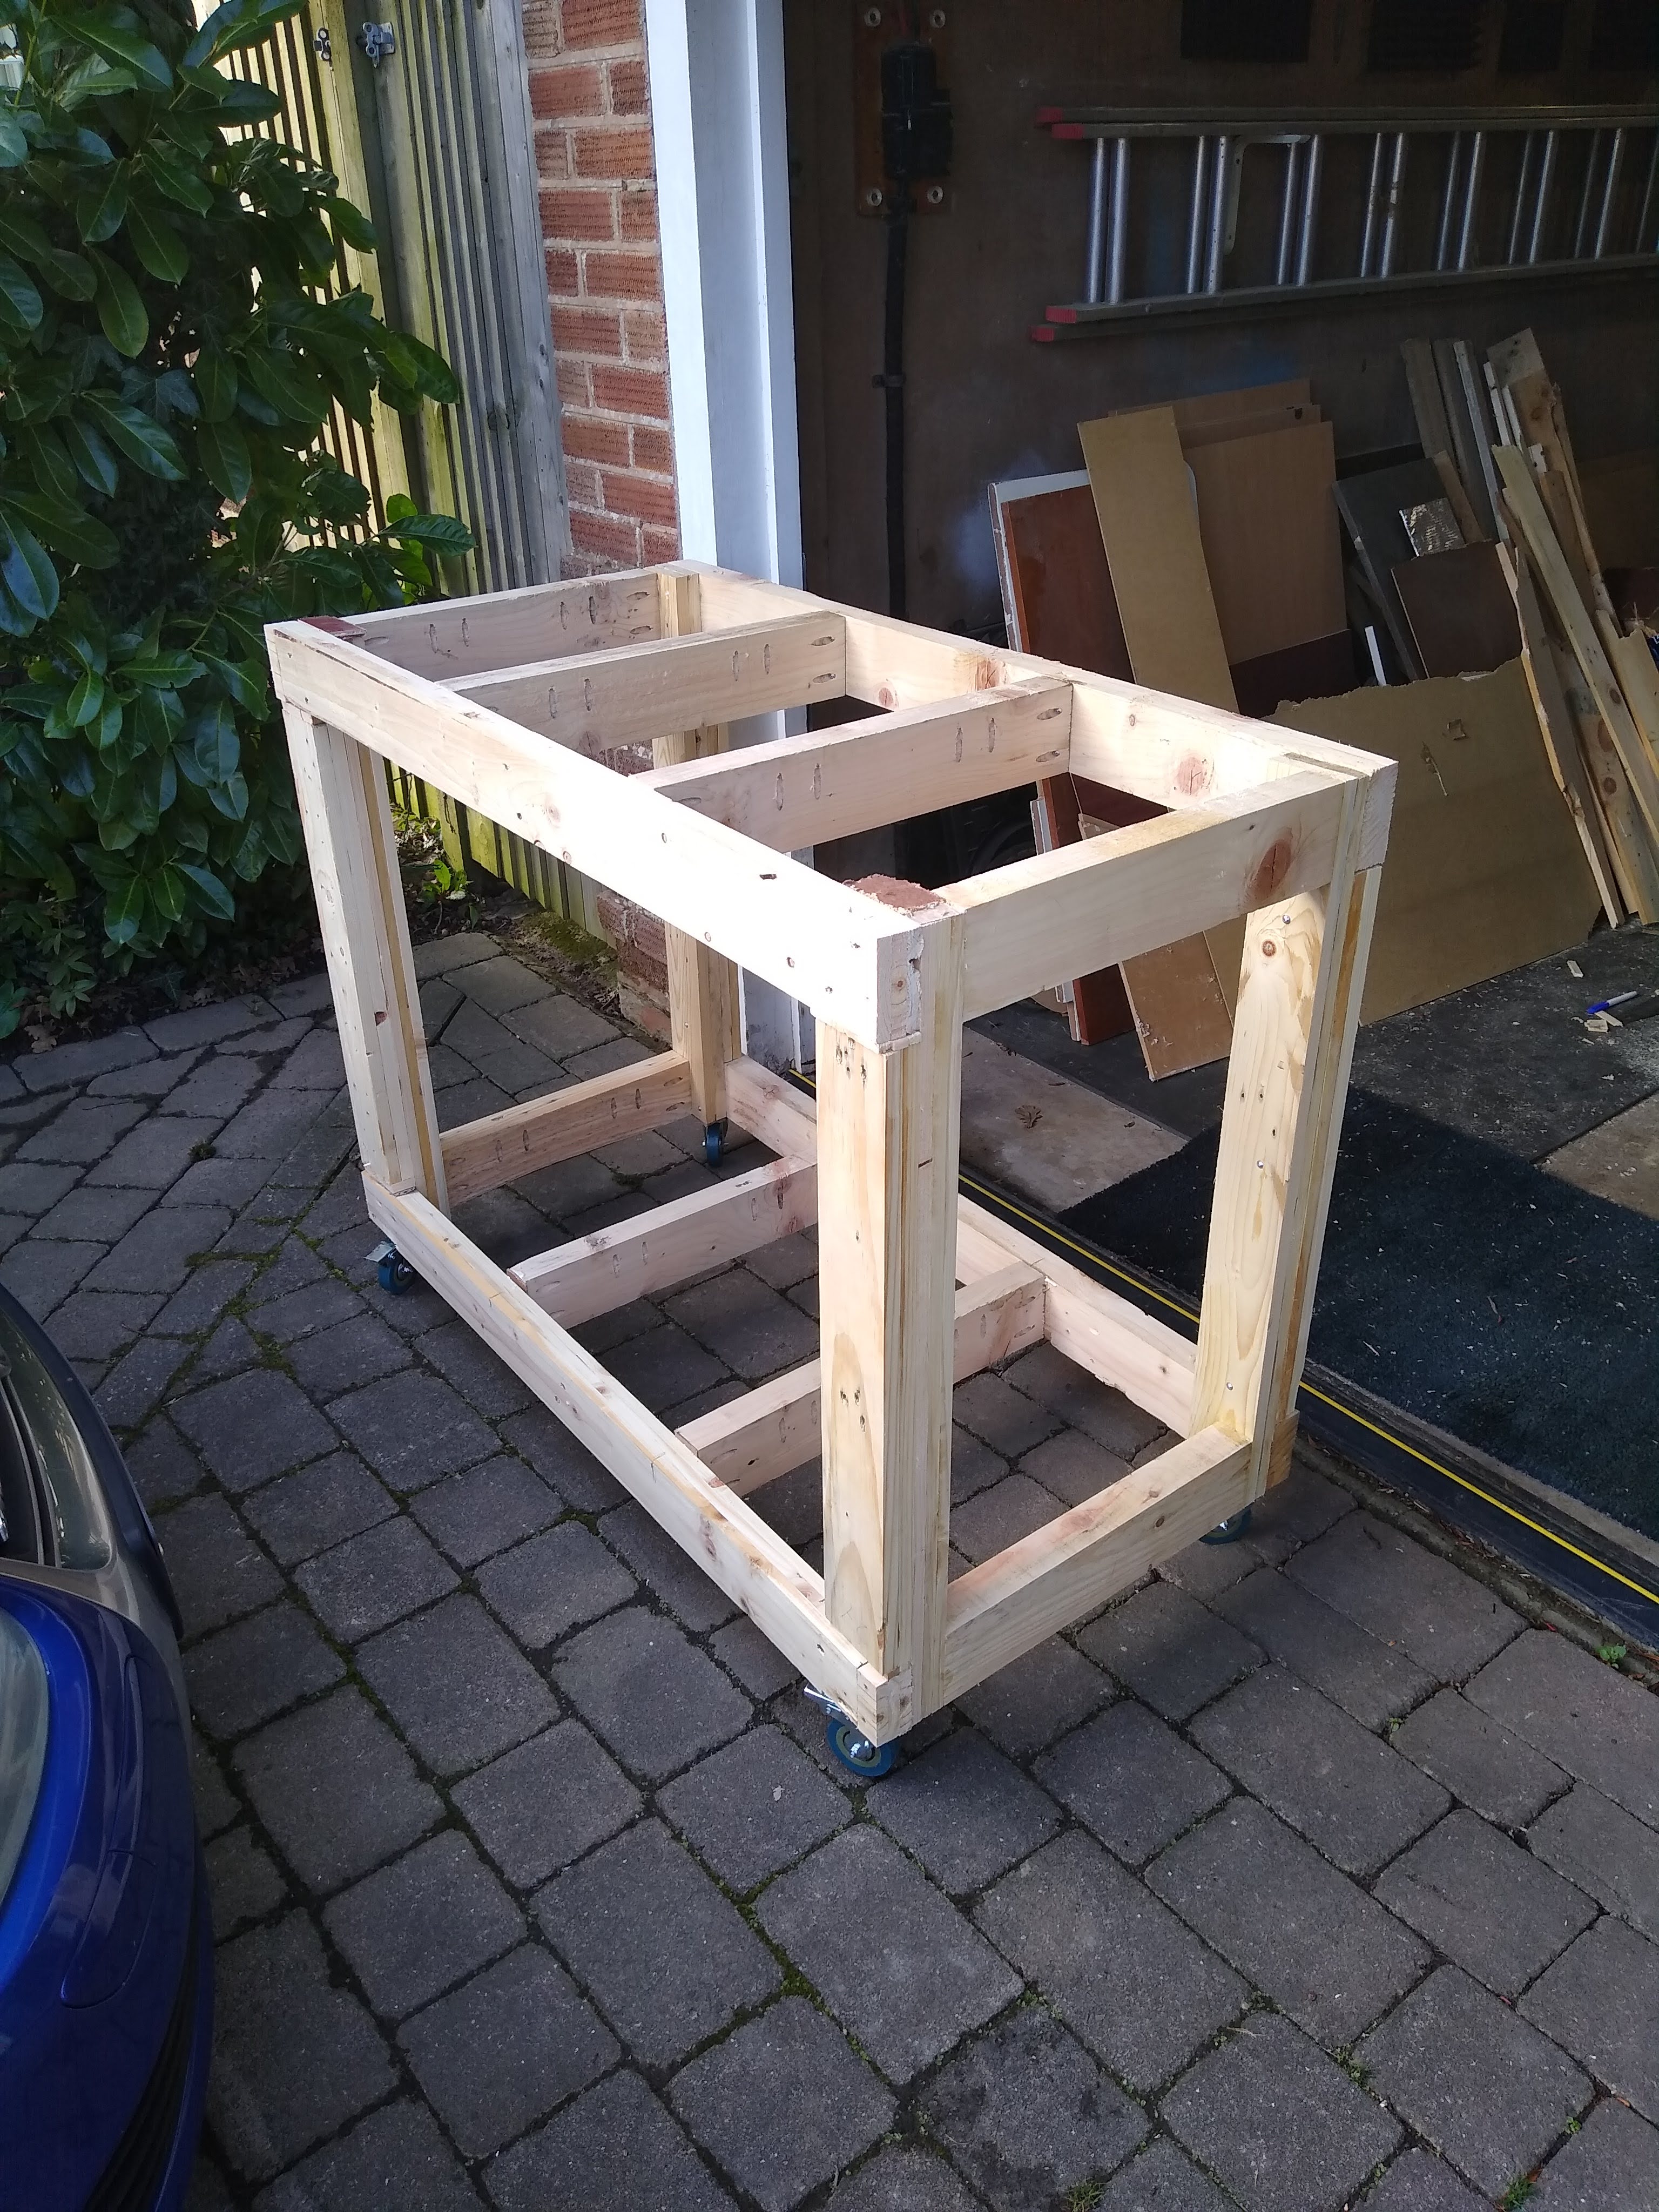
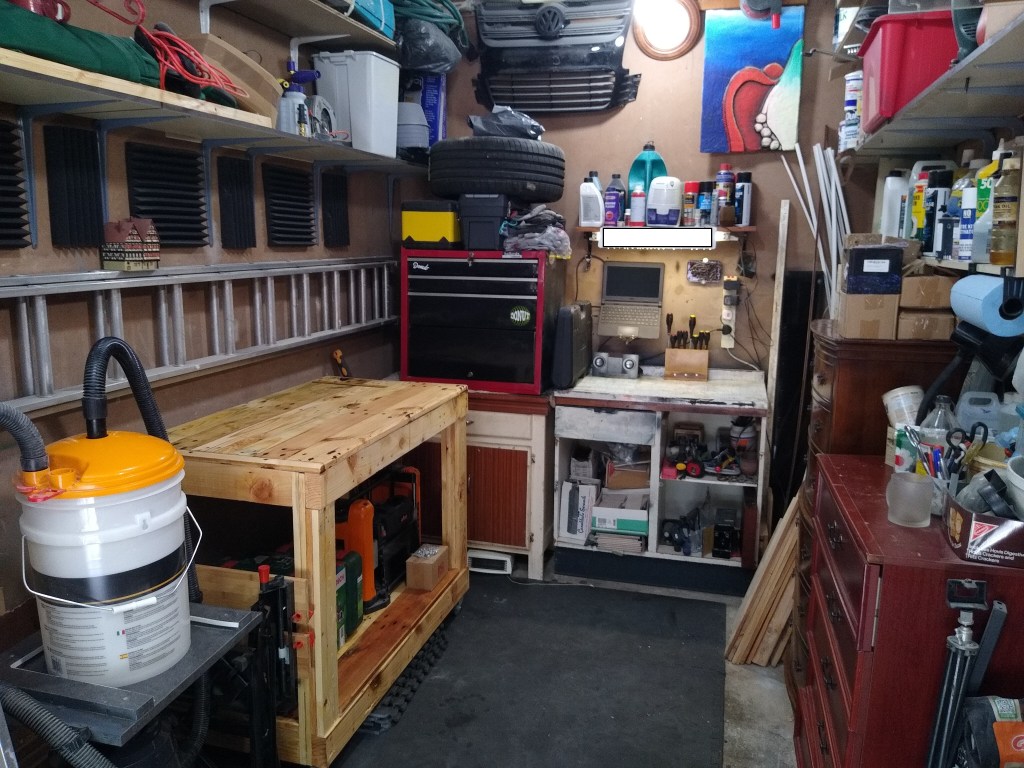
Workshop V1.2
The dumping area of a garage has now become a fairly useful space, with some pretty handy work surfaces, storage and toolage. After making the first workbench I decided that I liked it so much I would make another one, and then make another one. This post is basically a quick rundown on what I’m calling Workshop V1.2.
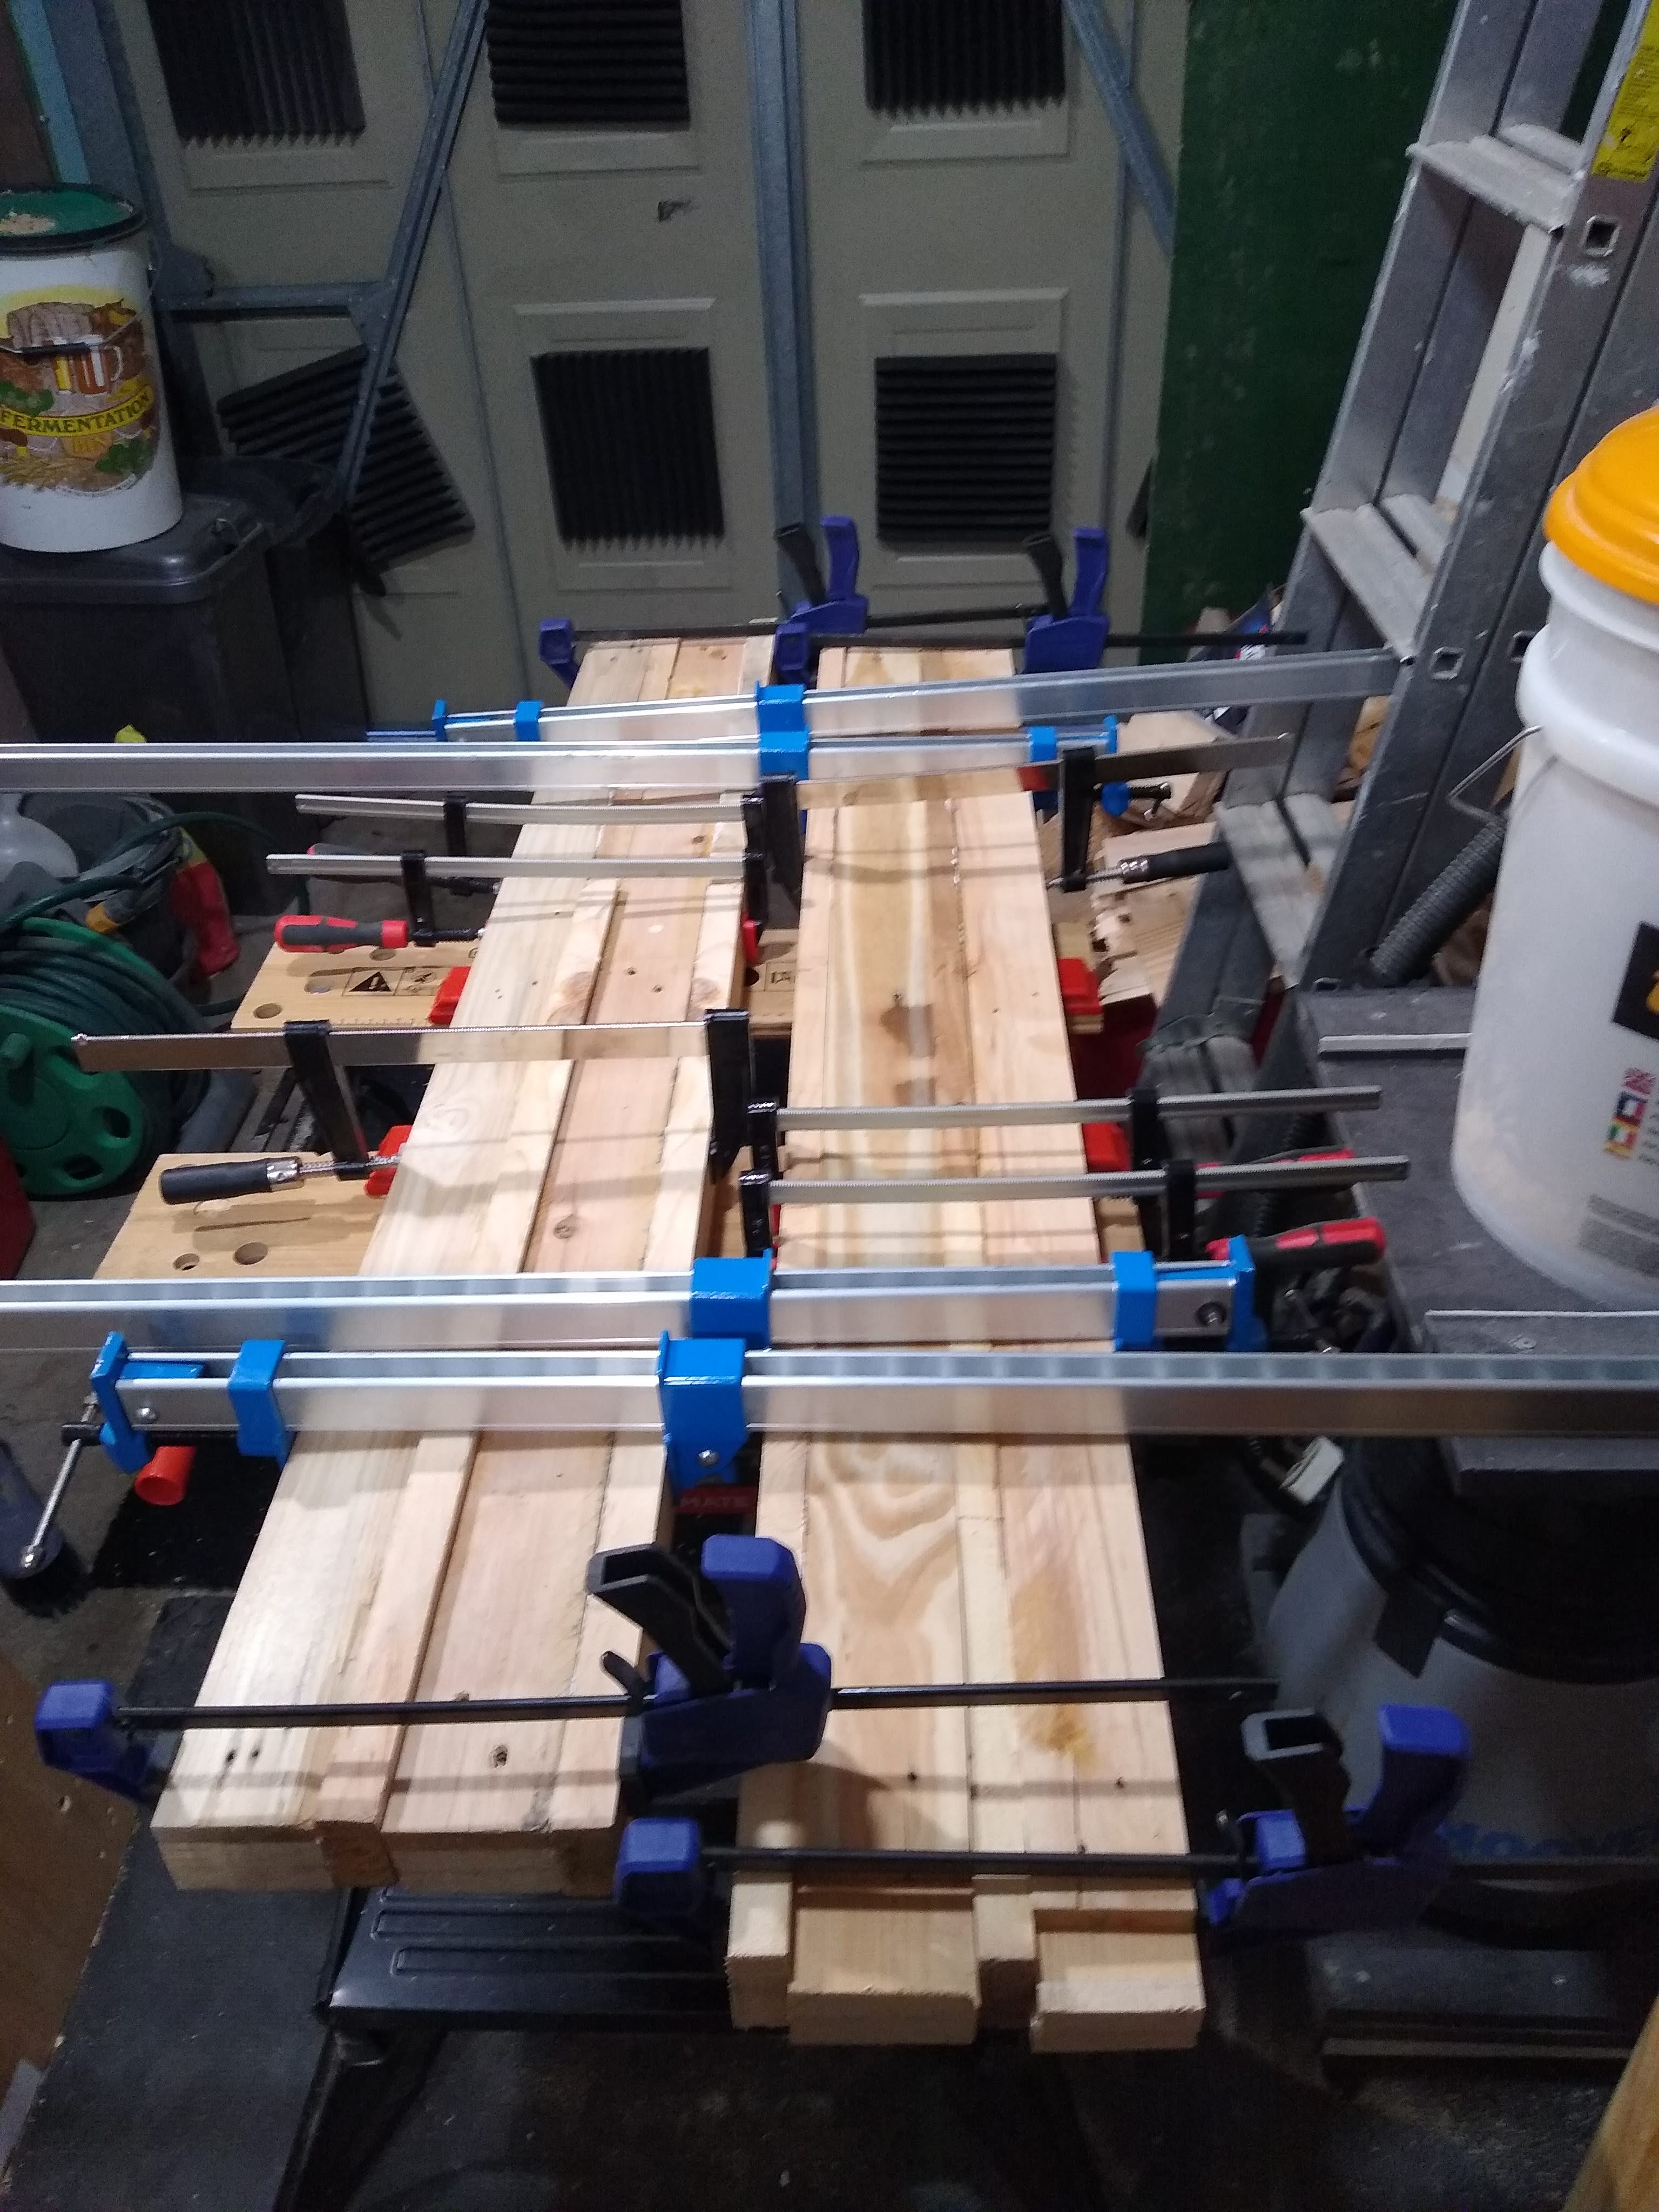
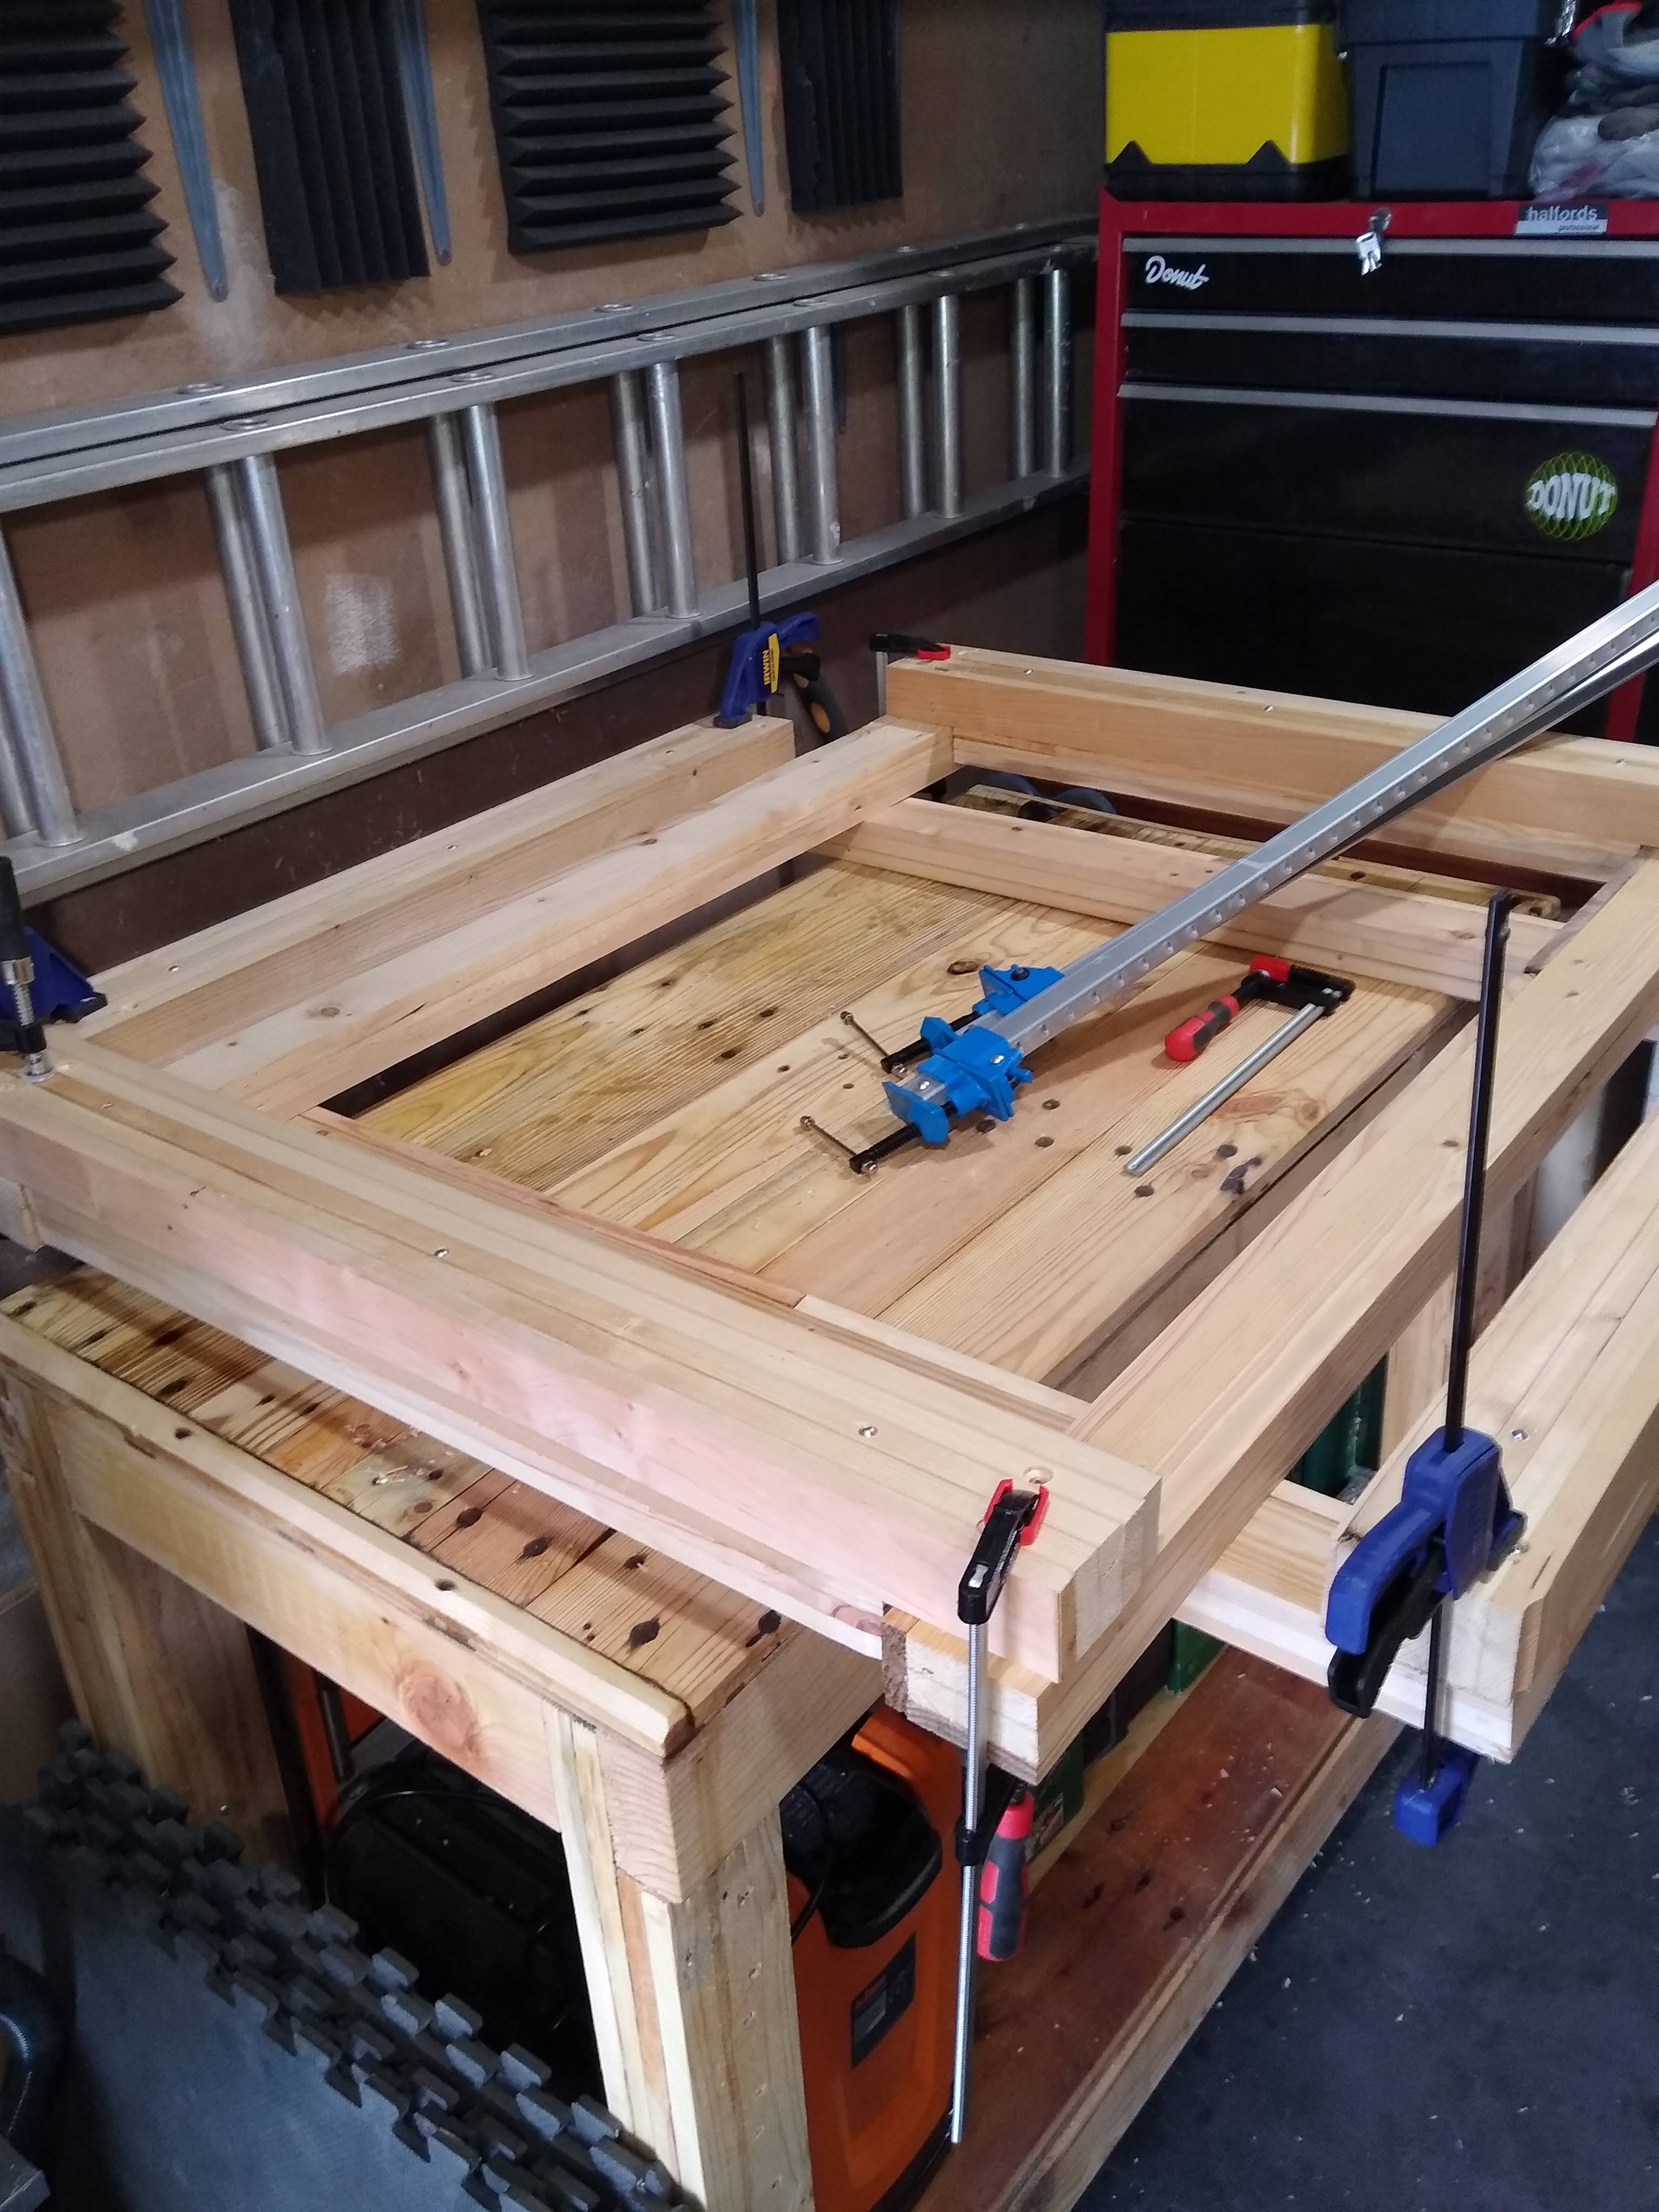
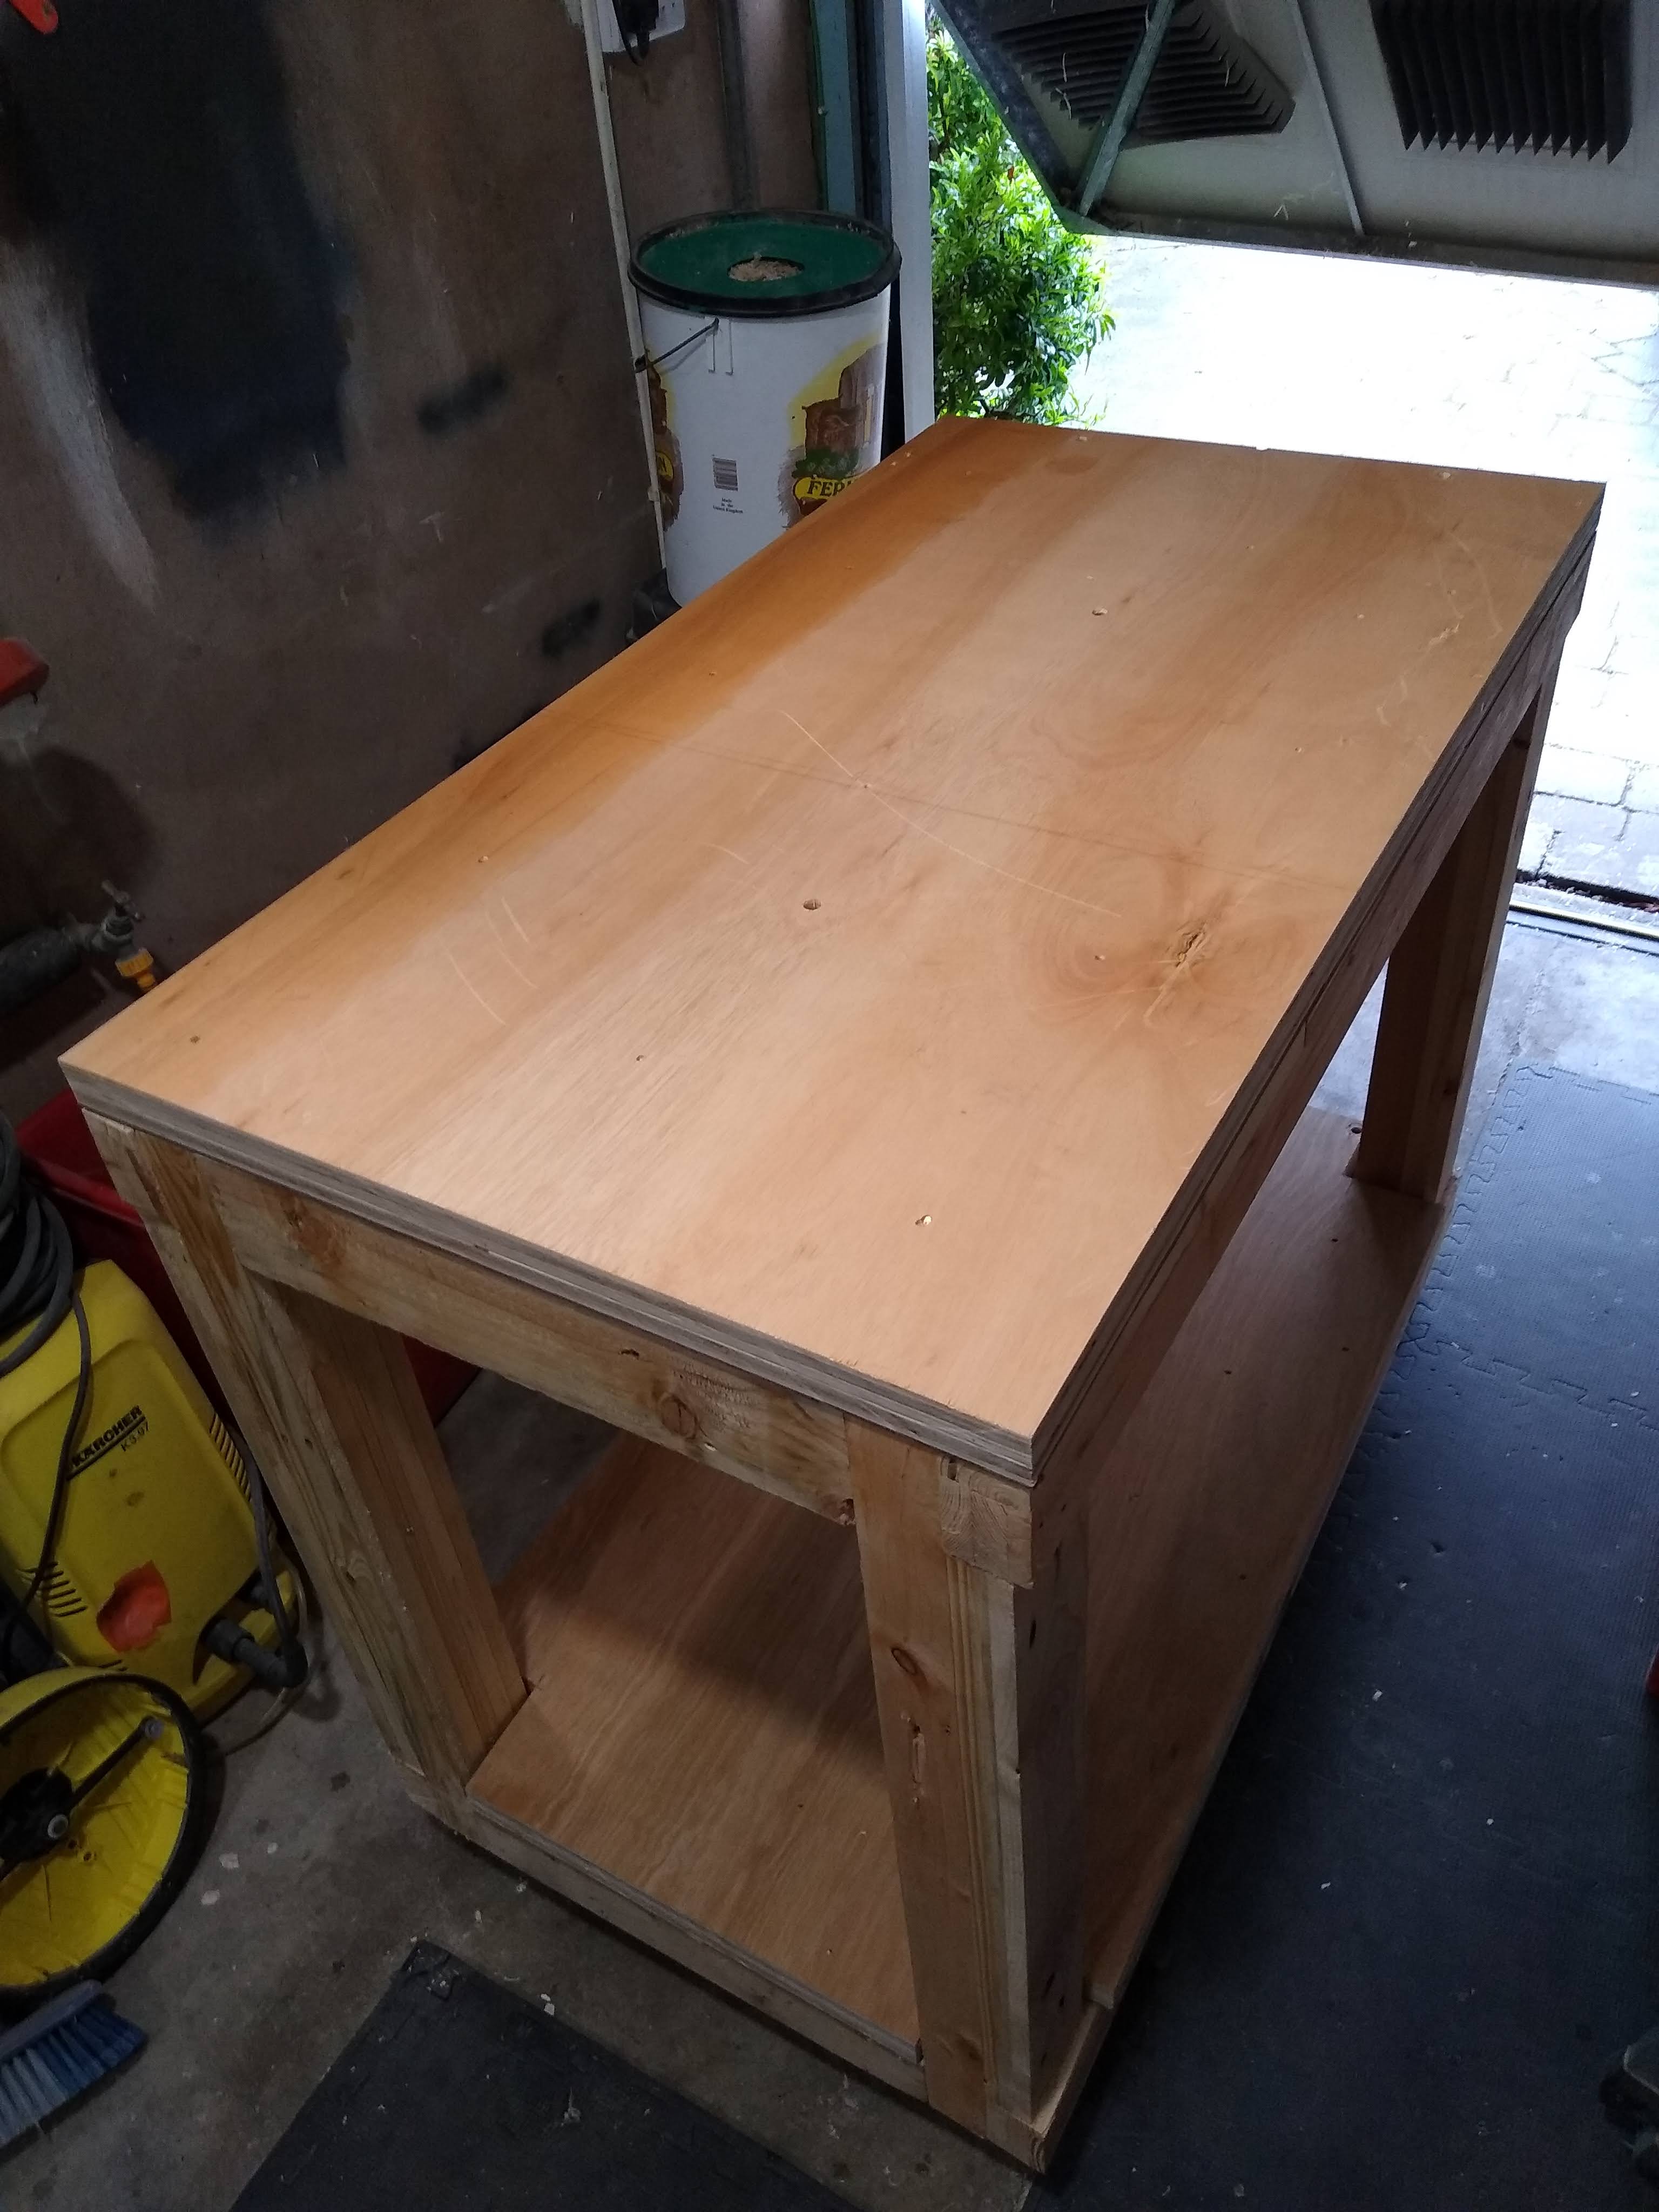
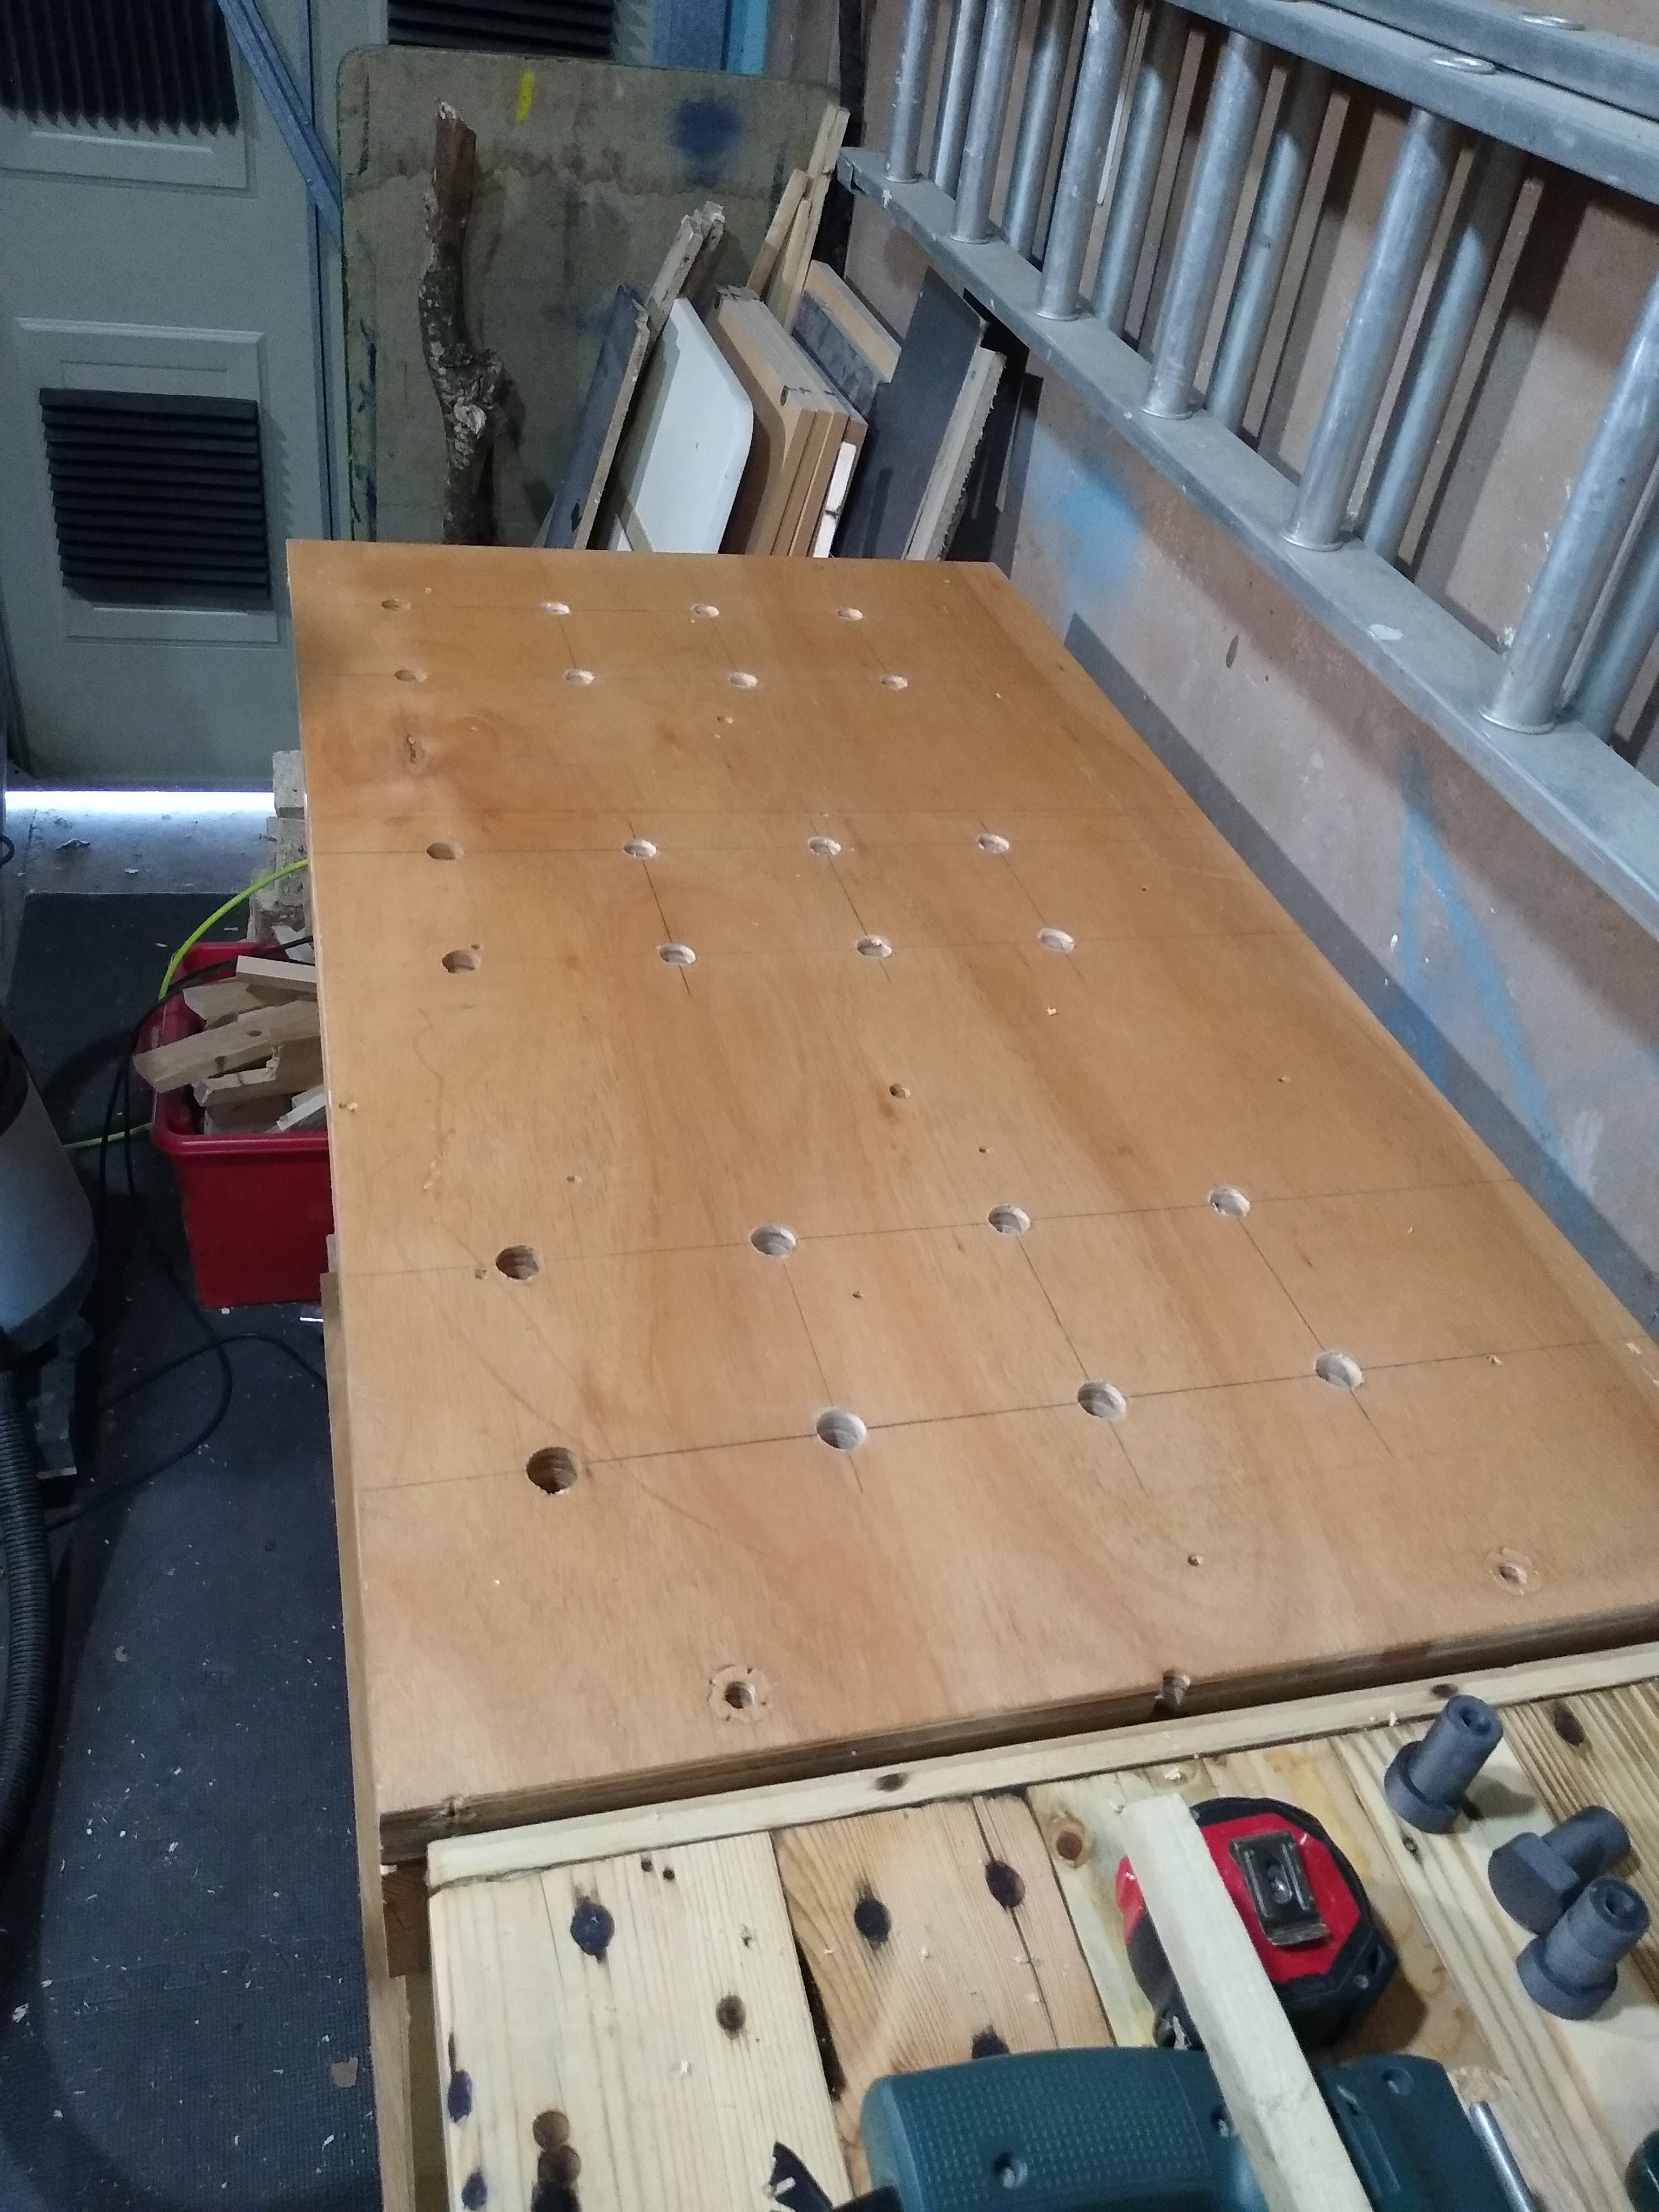
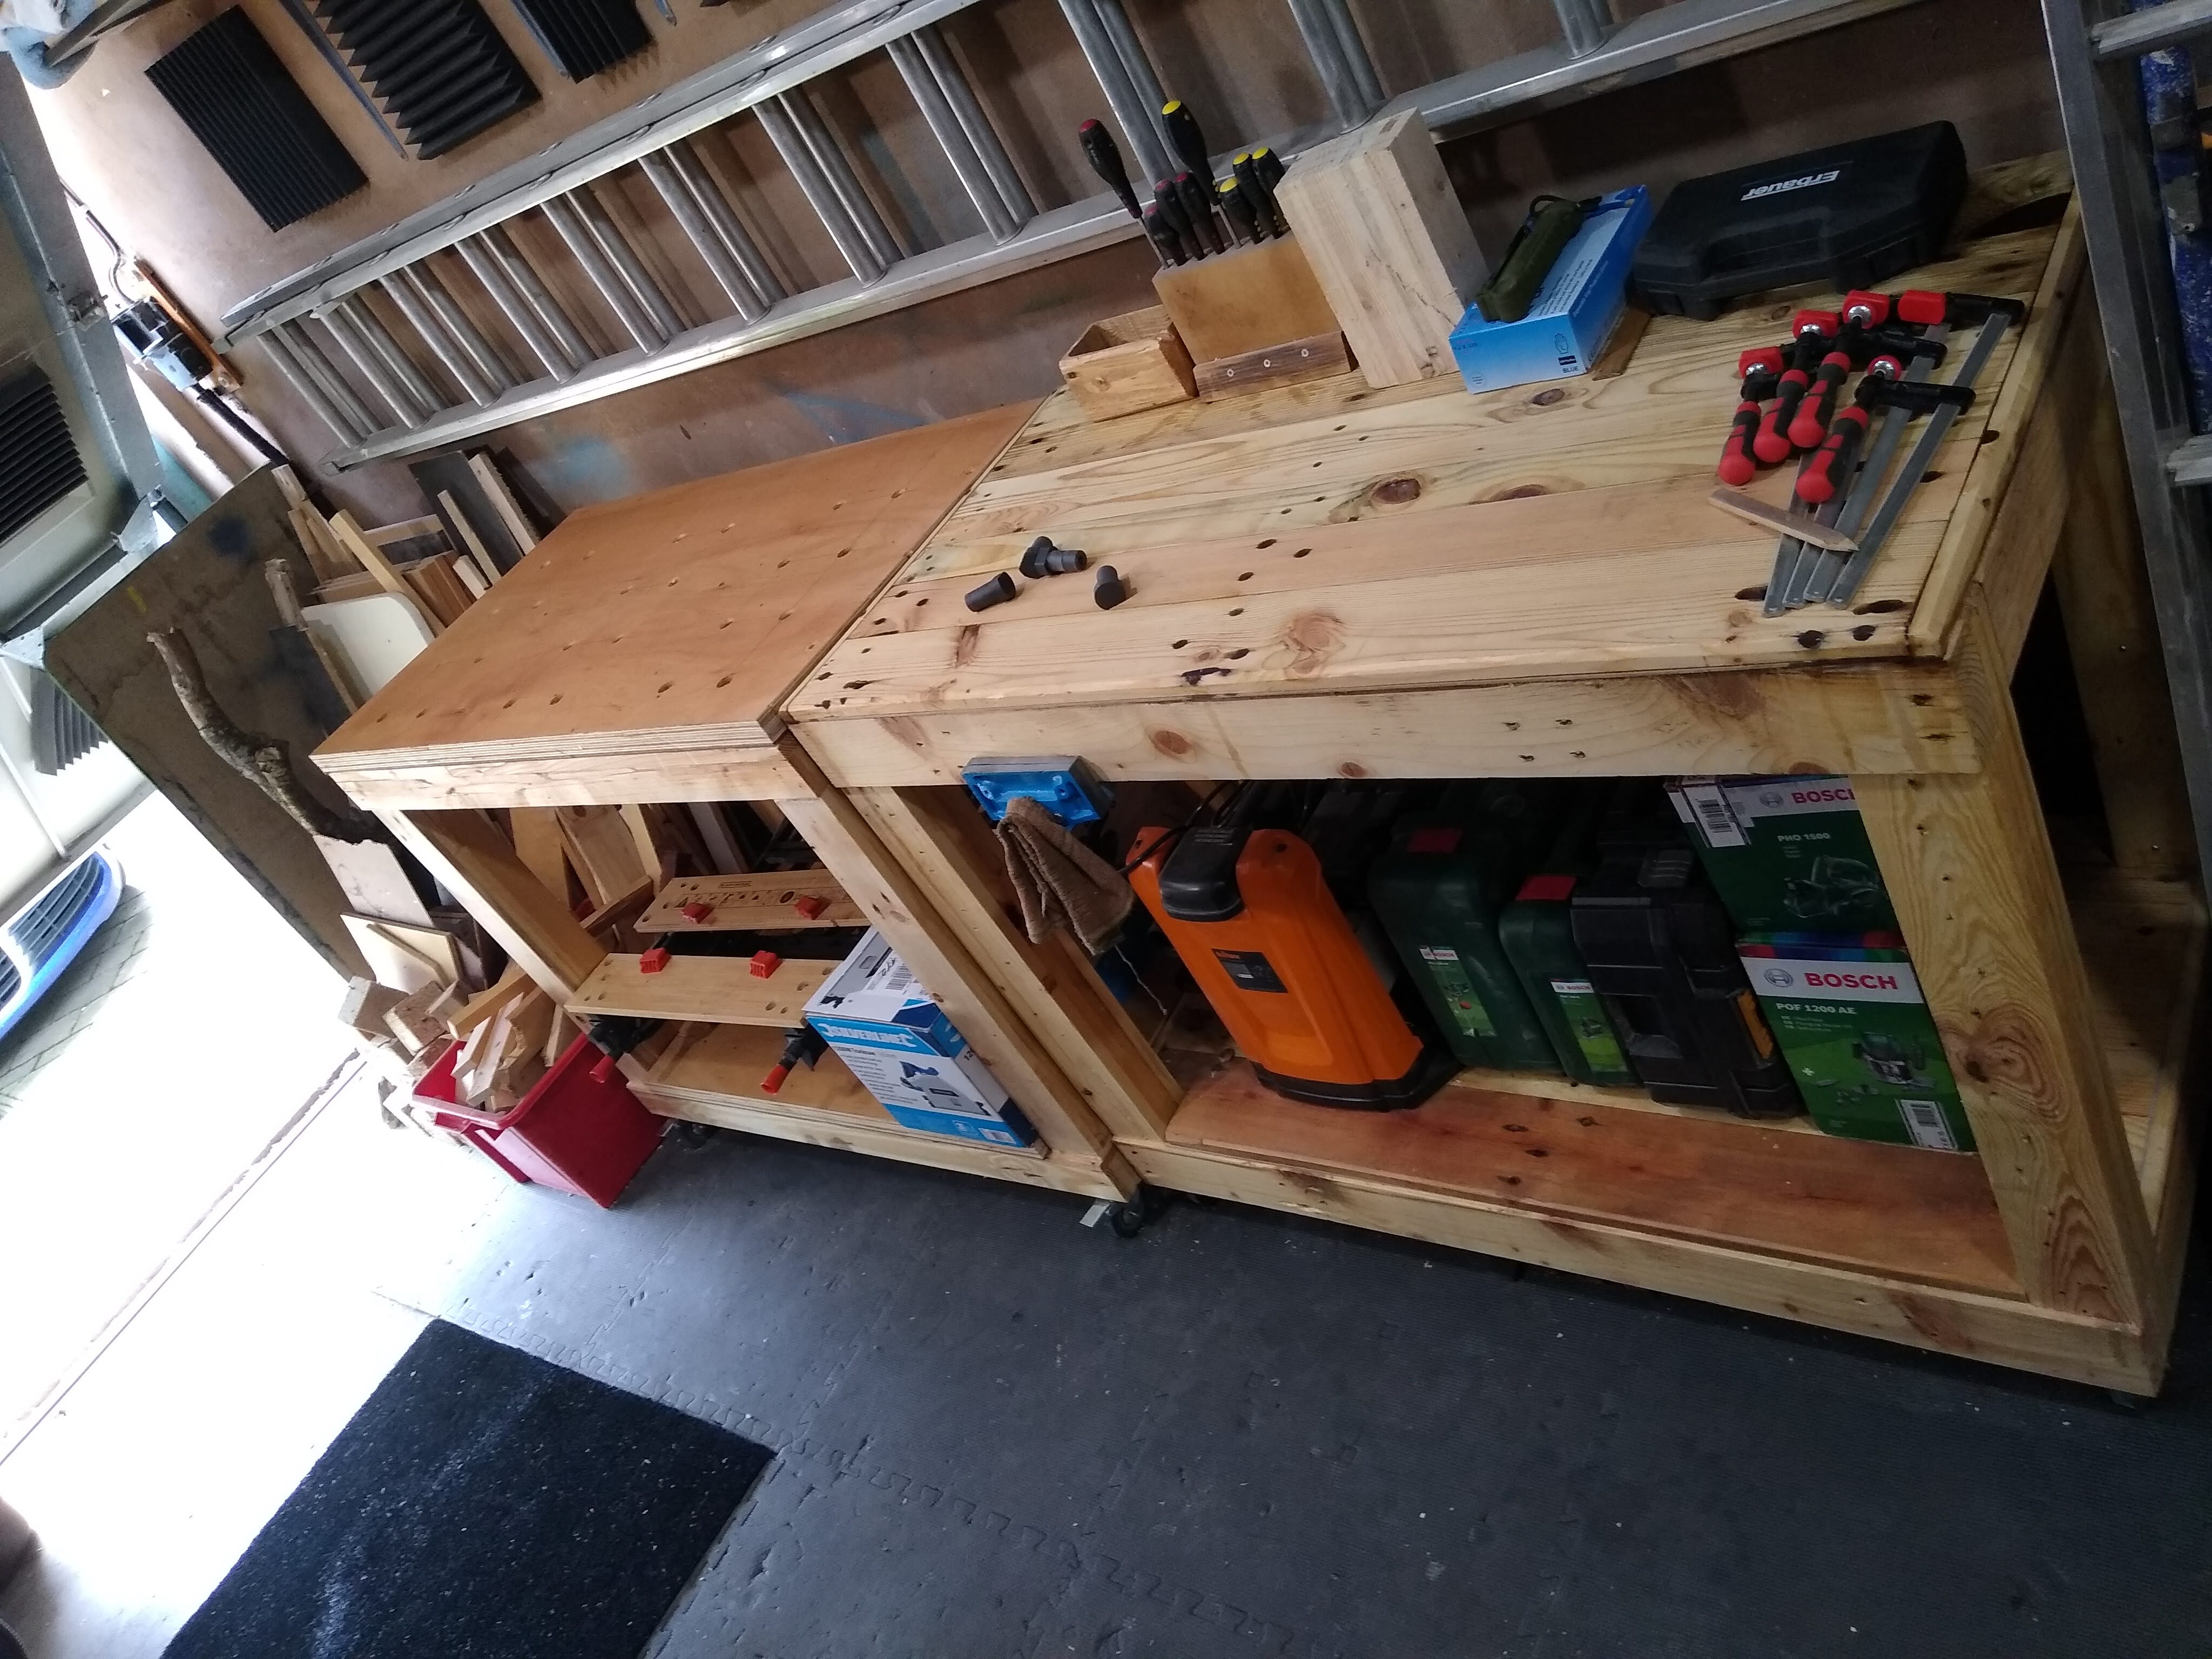
The first addition was another bench, which was an upgraded version of the first version. This bench would feature a proper plywood top and a grid of dogholes. The plywood had been rescued from a beastly pallet by a mate who then donated it to me!
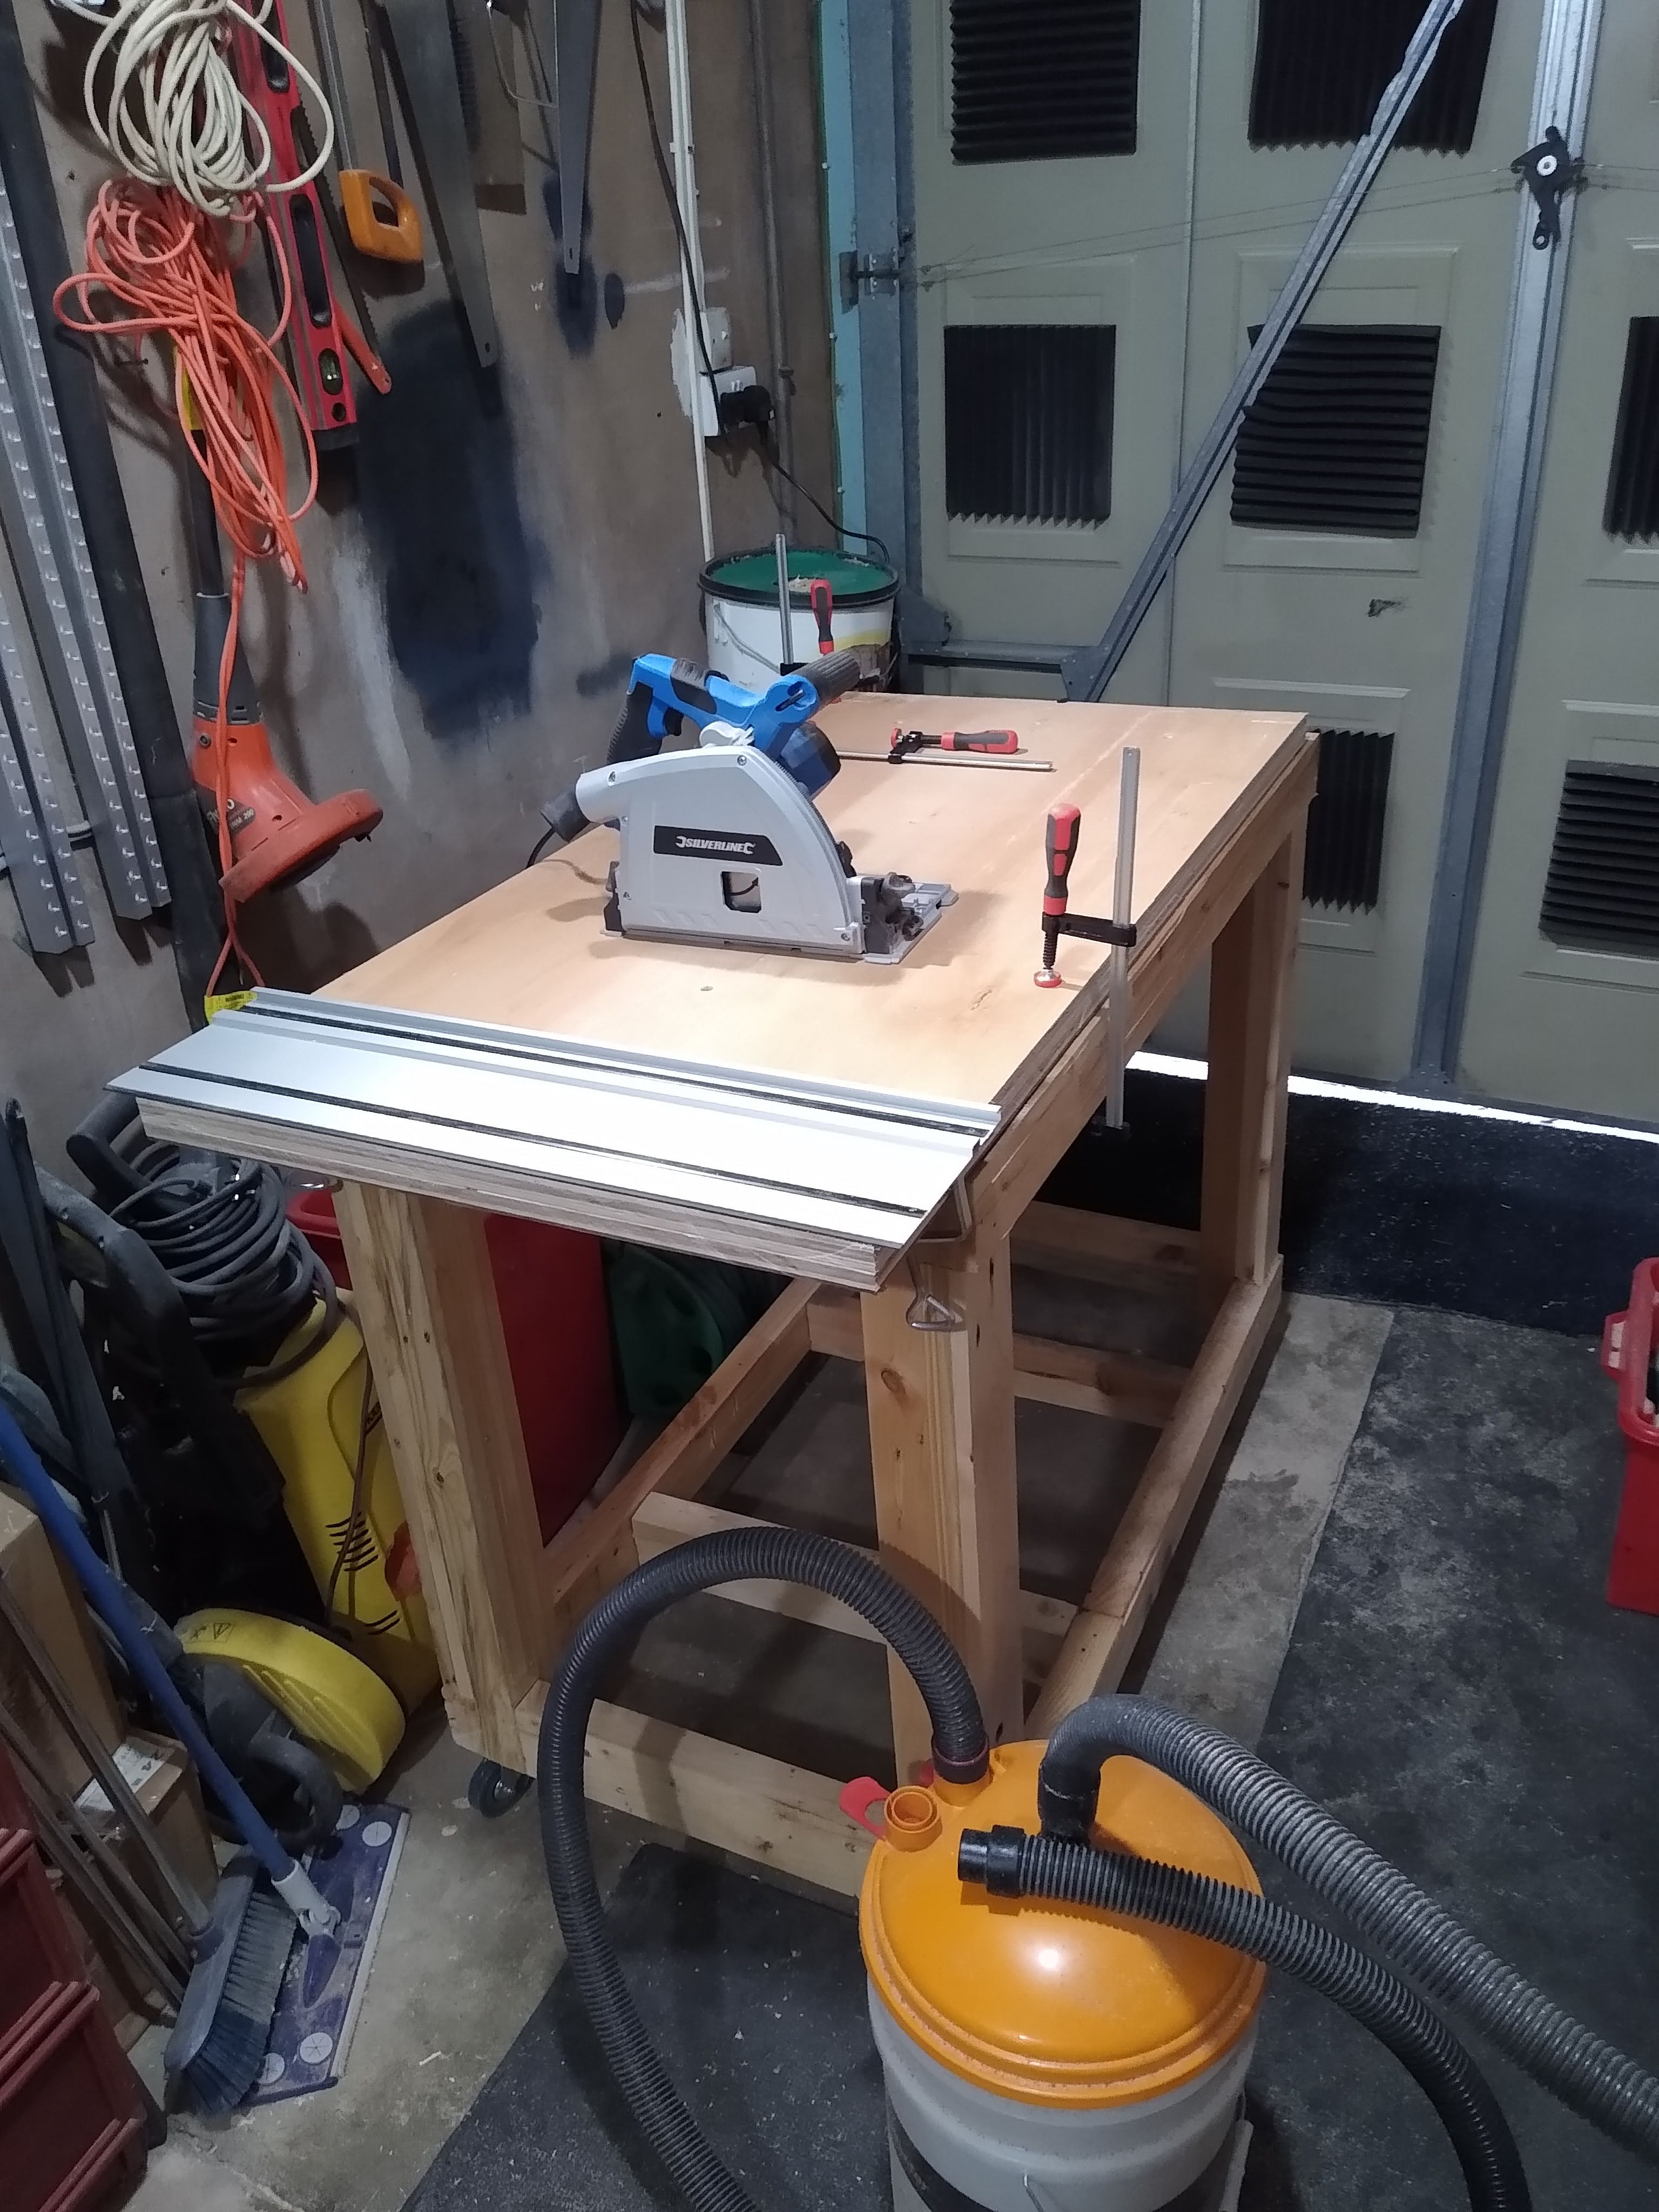
Once again I used pallet wood to create my 2*4-ish lumber which I then cut down and formed a frame. After boshing some casters on it I needed to cut down the plywood for the top and bottom worktop/storage-shelve. The ancient circular saw I had quickly gave up when cutting the chunky ply. In the interest of wallet-preservation I purchased the cheapest tracksaw that I could find. I wasn’t expecting much but the Silverline performed flawlessly when trimming down 14-layer ply wood.
Link to SilverLine tracksaw https://amzn.to/3BX0Ohn
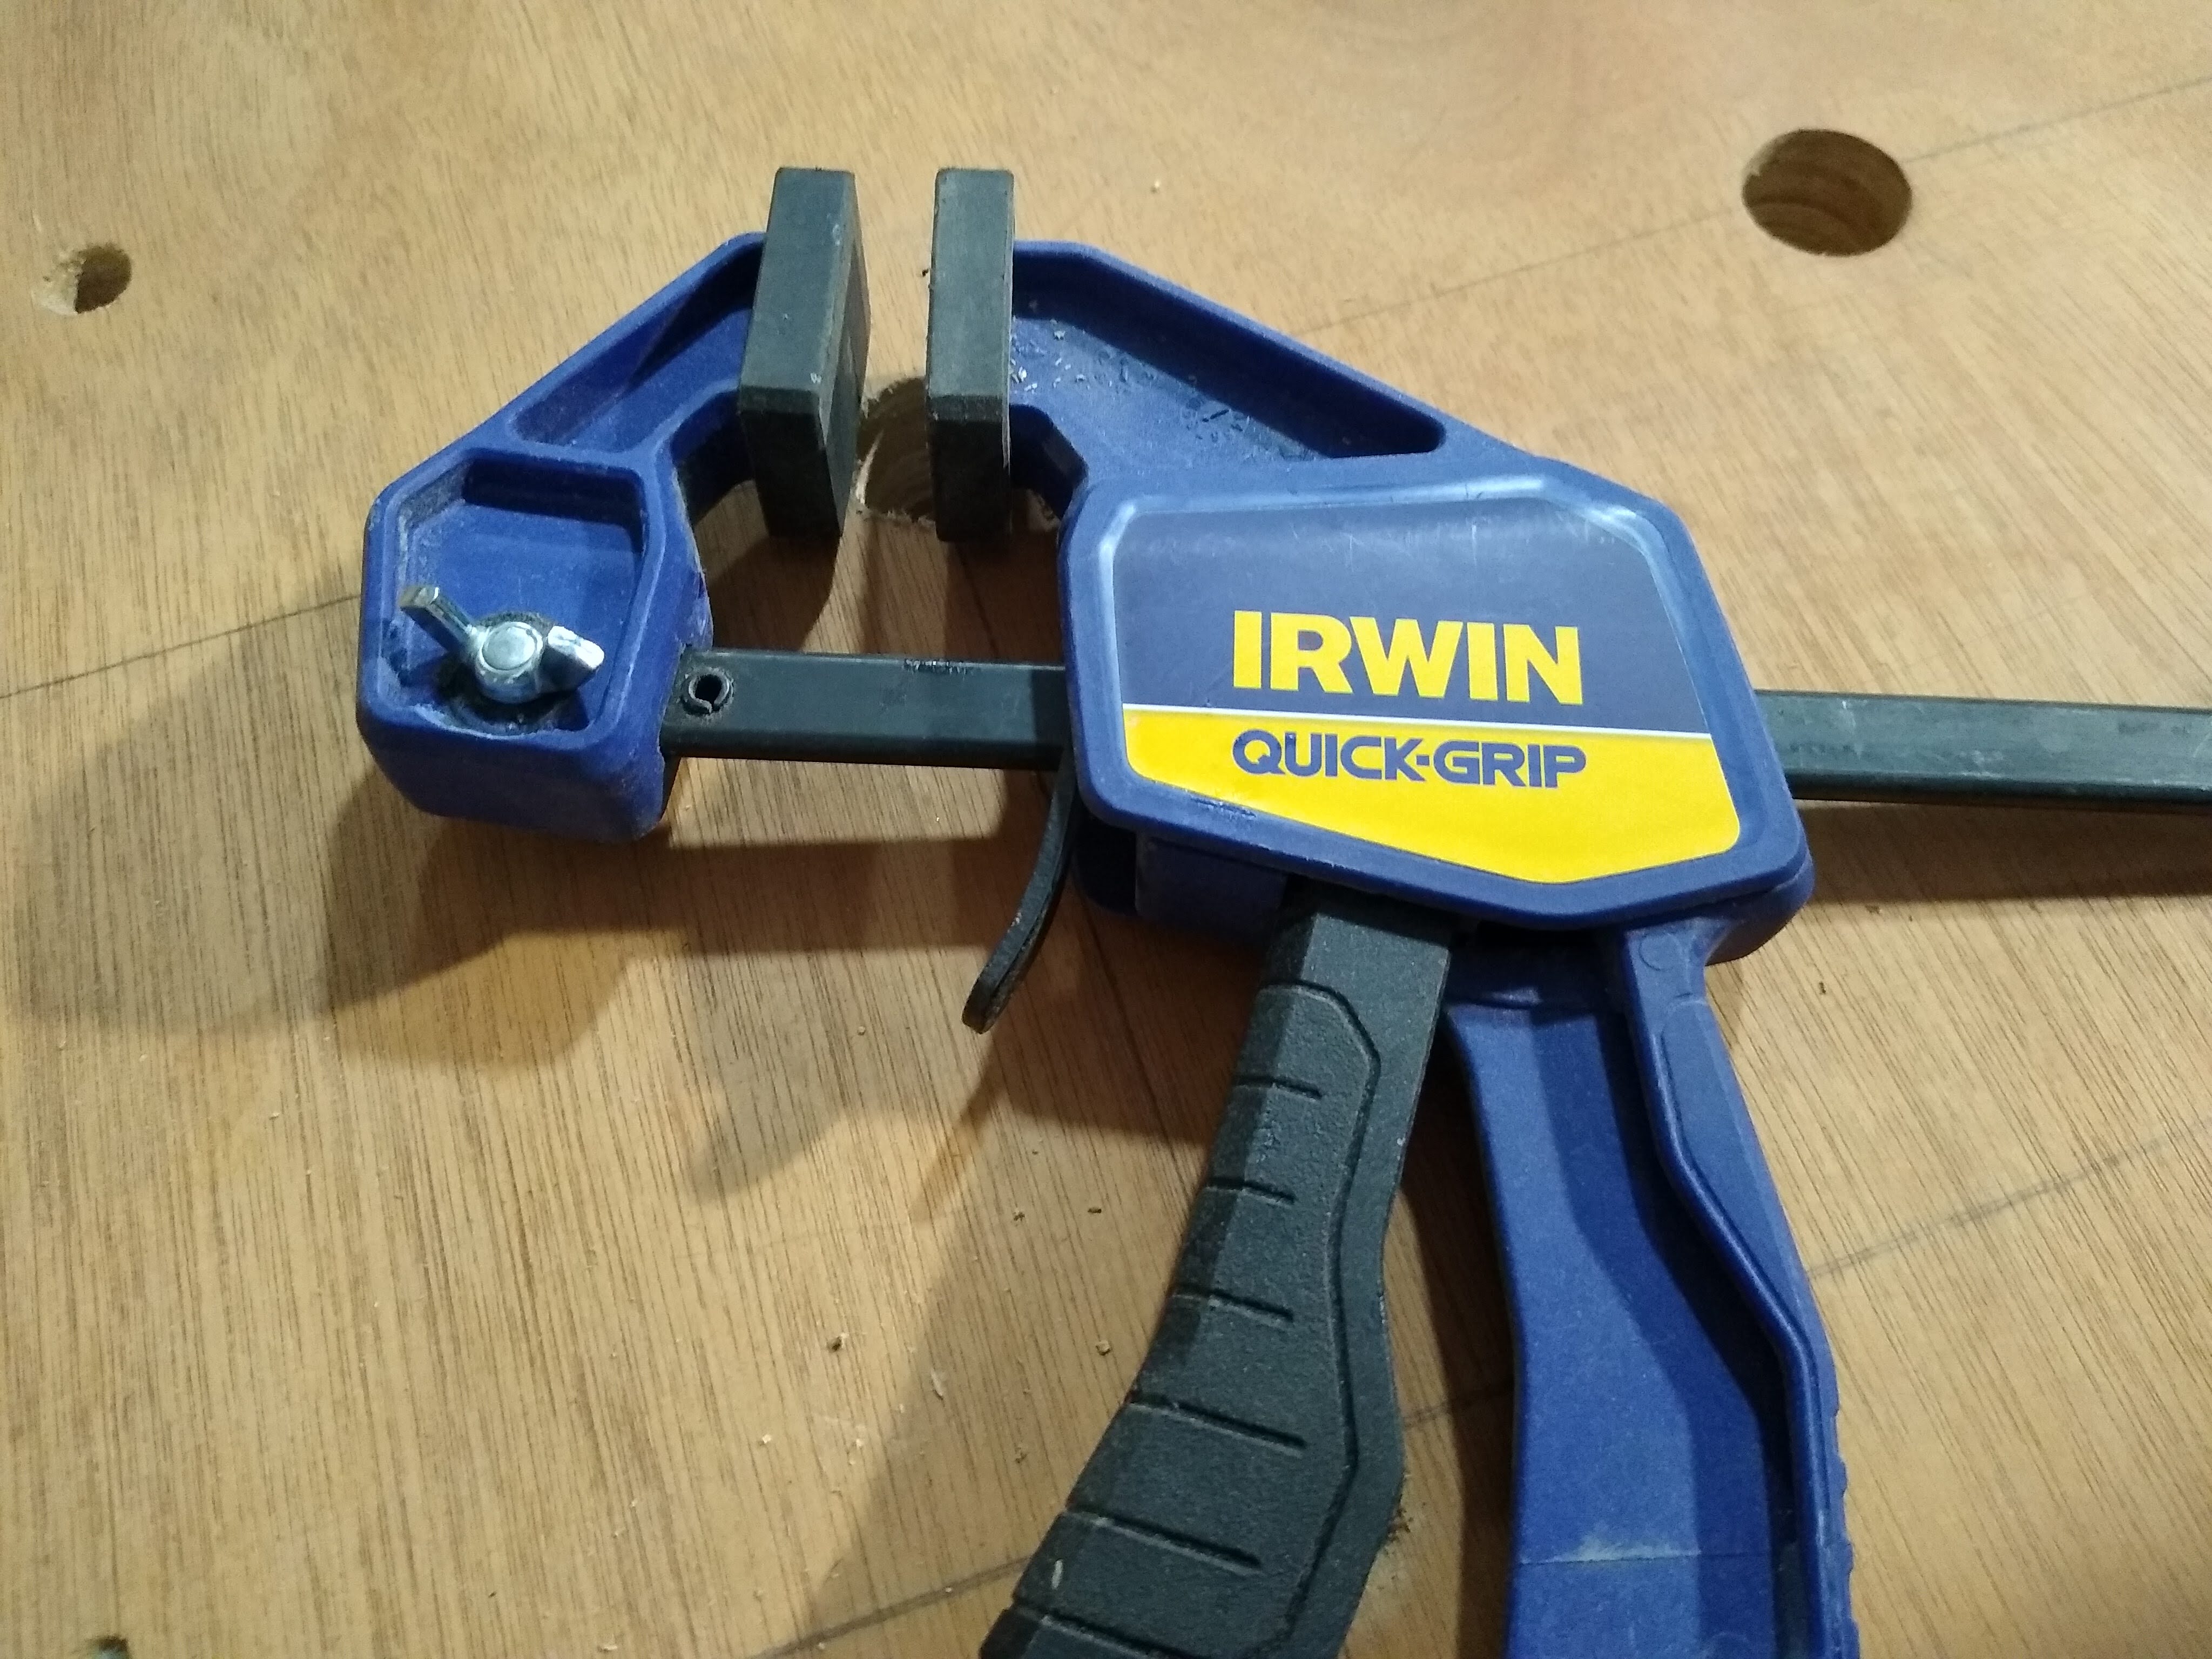
Another wallet saving trick I discovered was modifying Irwin quick clamps for use in dogholes. I’ve seen people cut and bend them so they can be angled through the holes but then you can’t use them as regular clamps. I just replaced the bottom bolt on the clamp with a wing-bolt so you can unscrew it by hand and remove the lower half of the clamp, then drop the clamp through the hole and re-attach the lower half. Takes around 15 seconds to remove and reattach the lower half for use on the bench, so not too bad IMO.


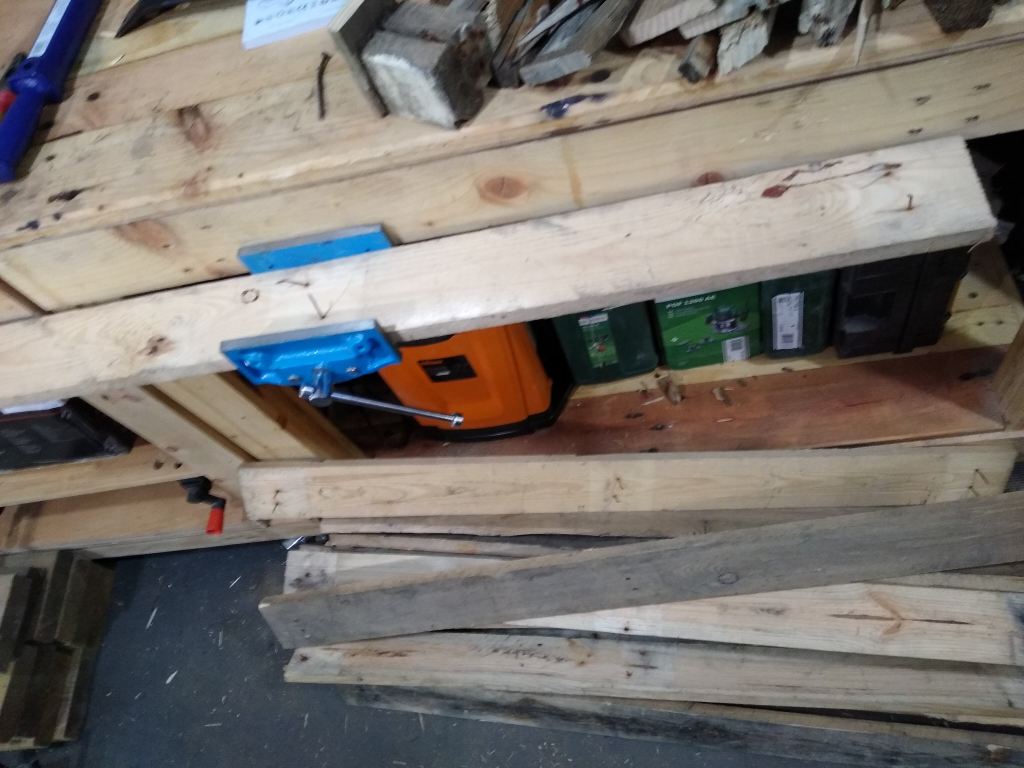
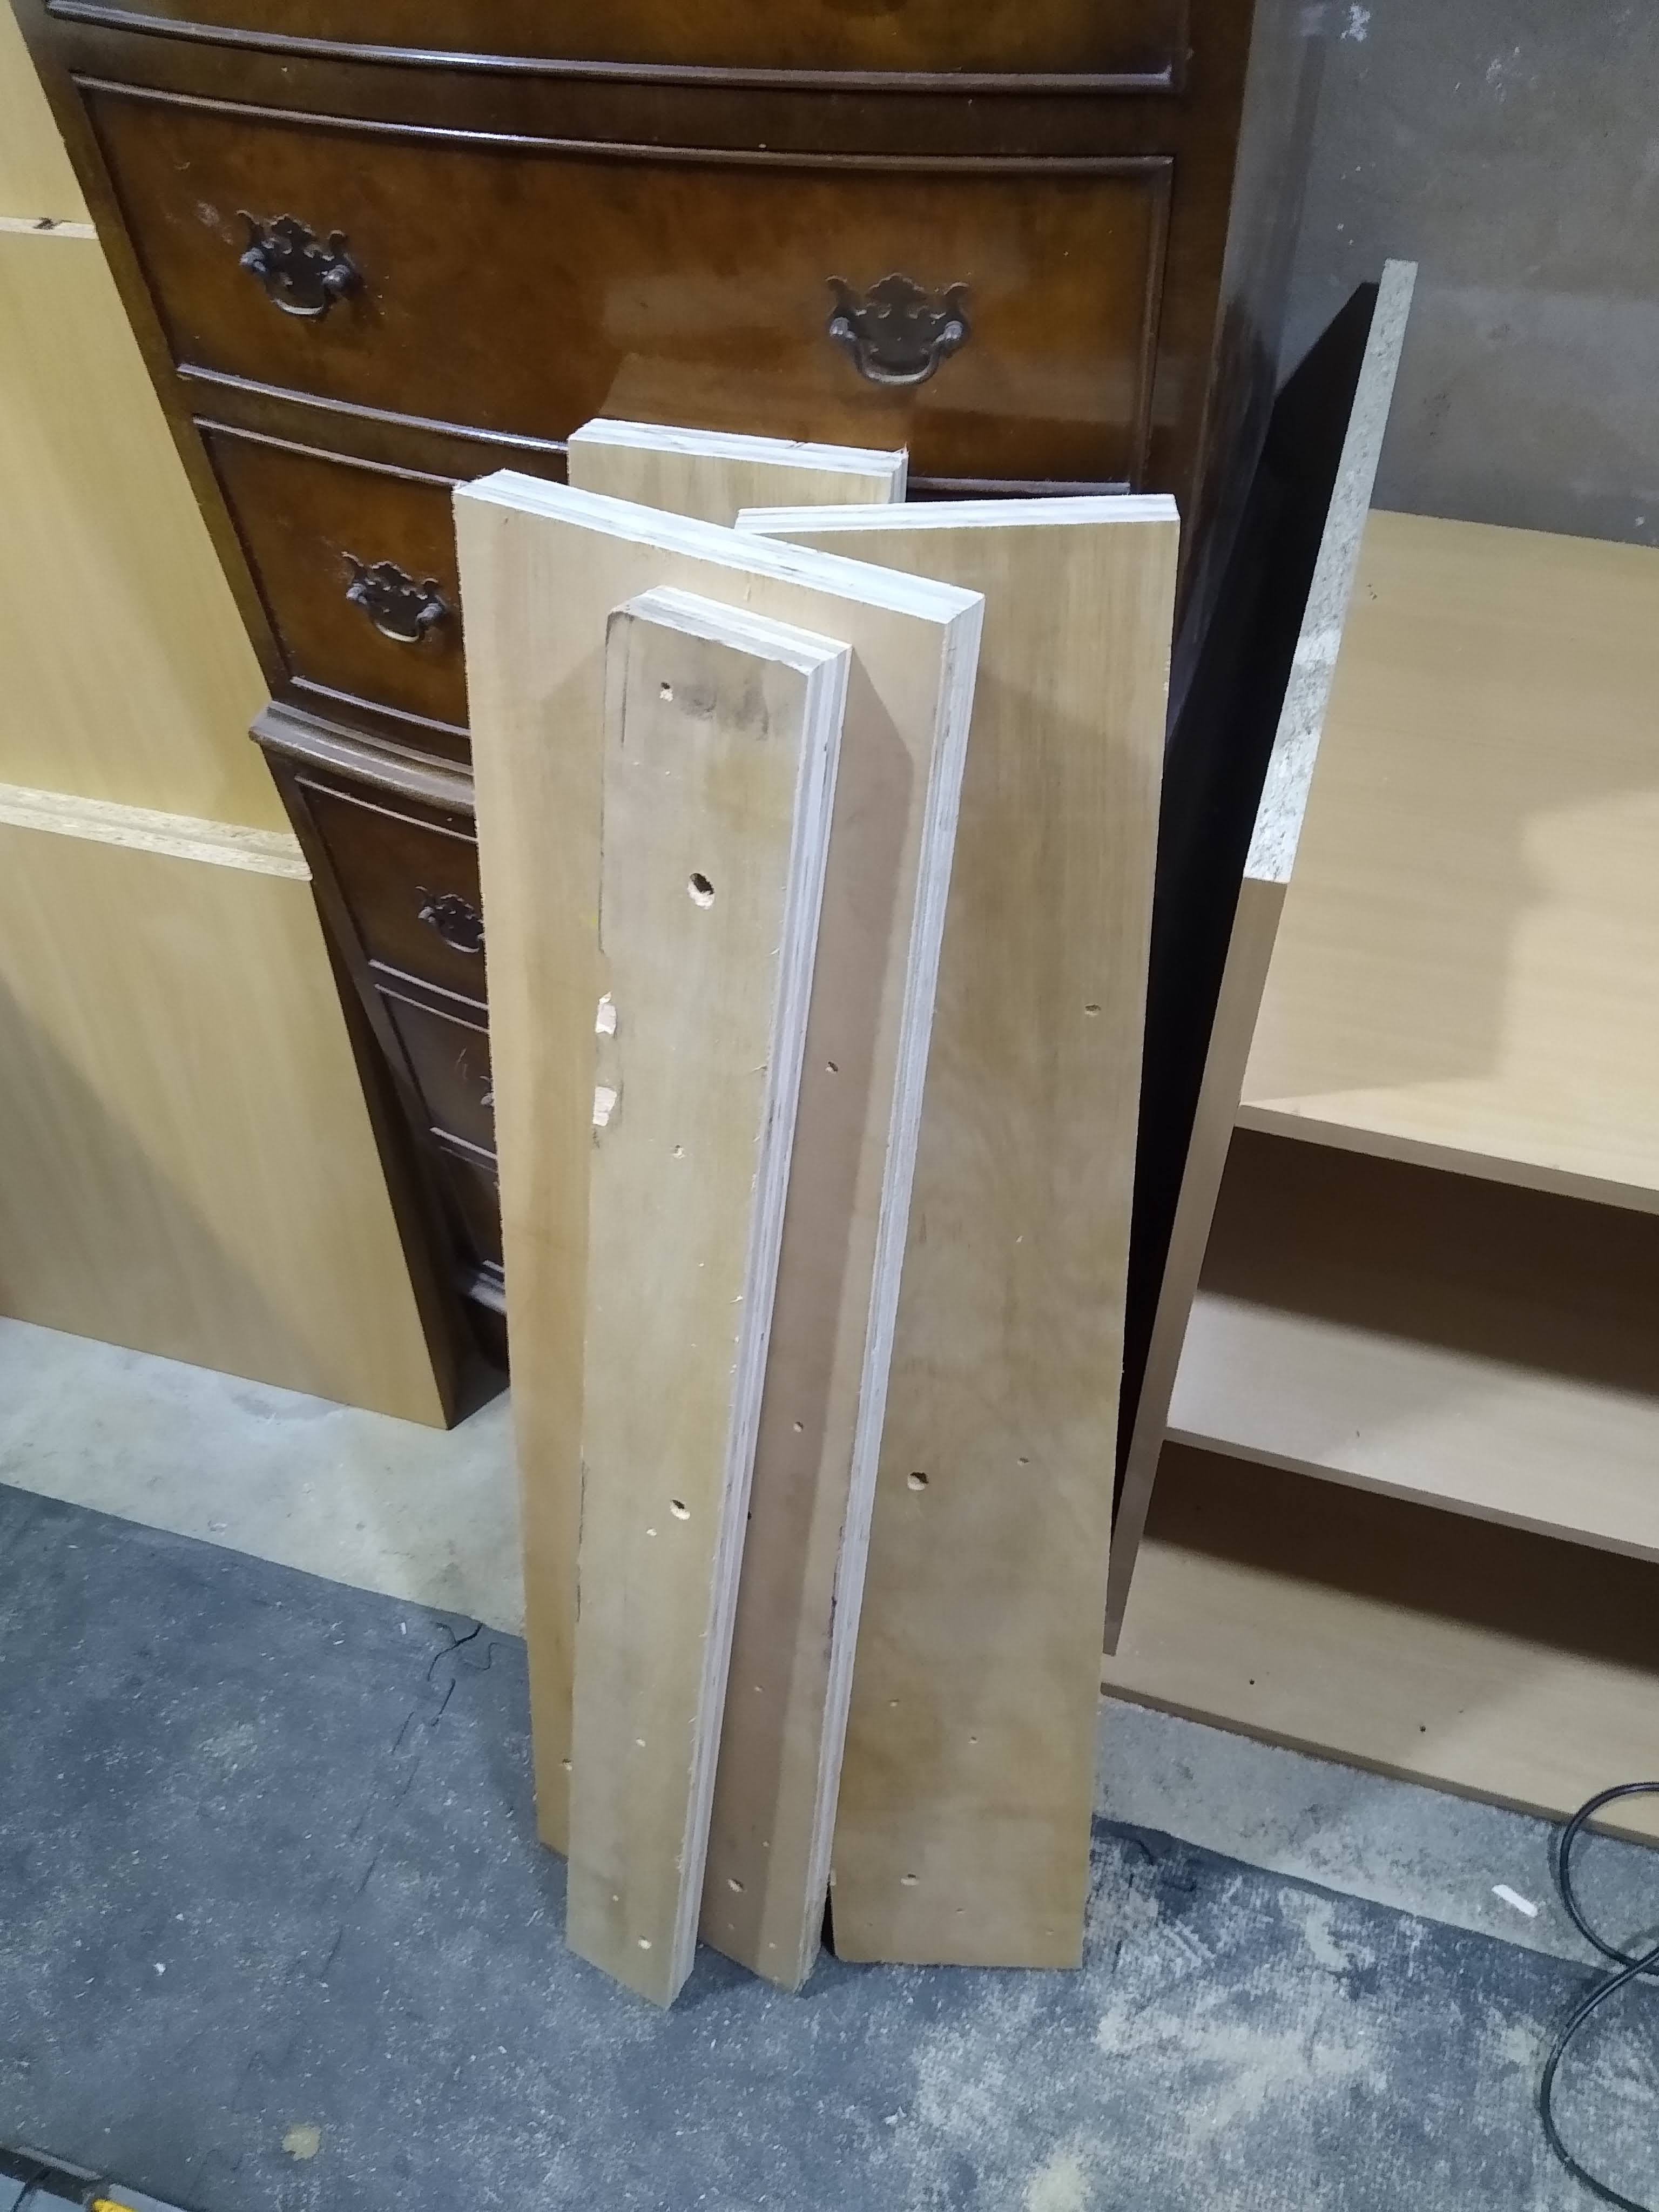
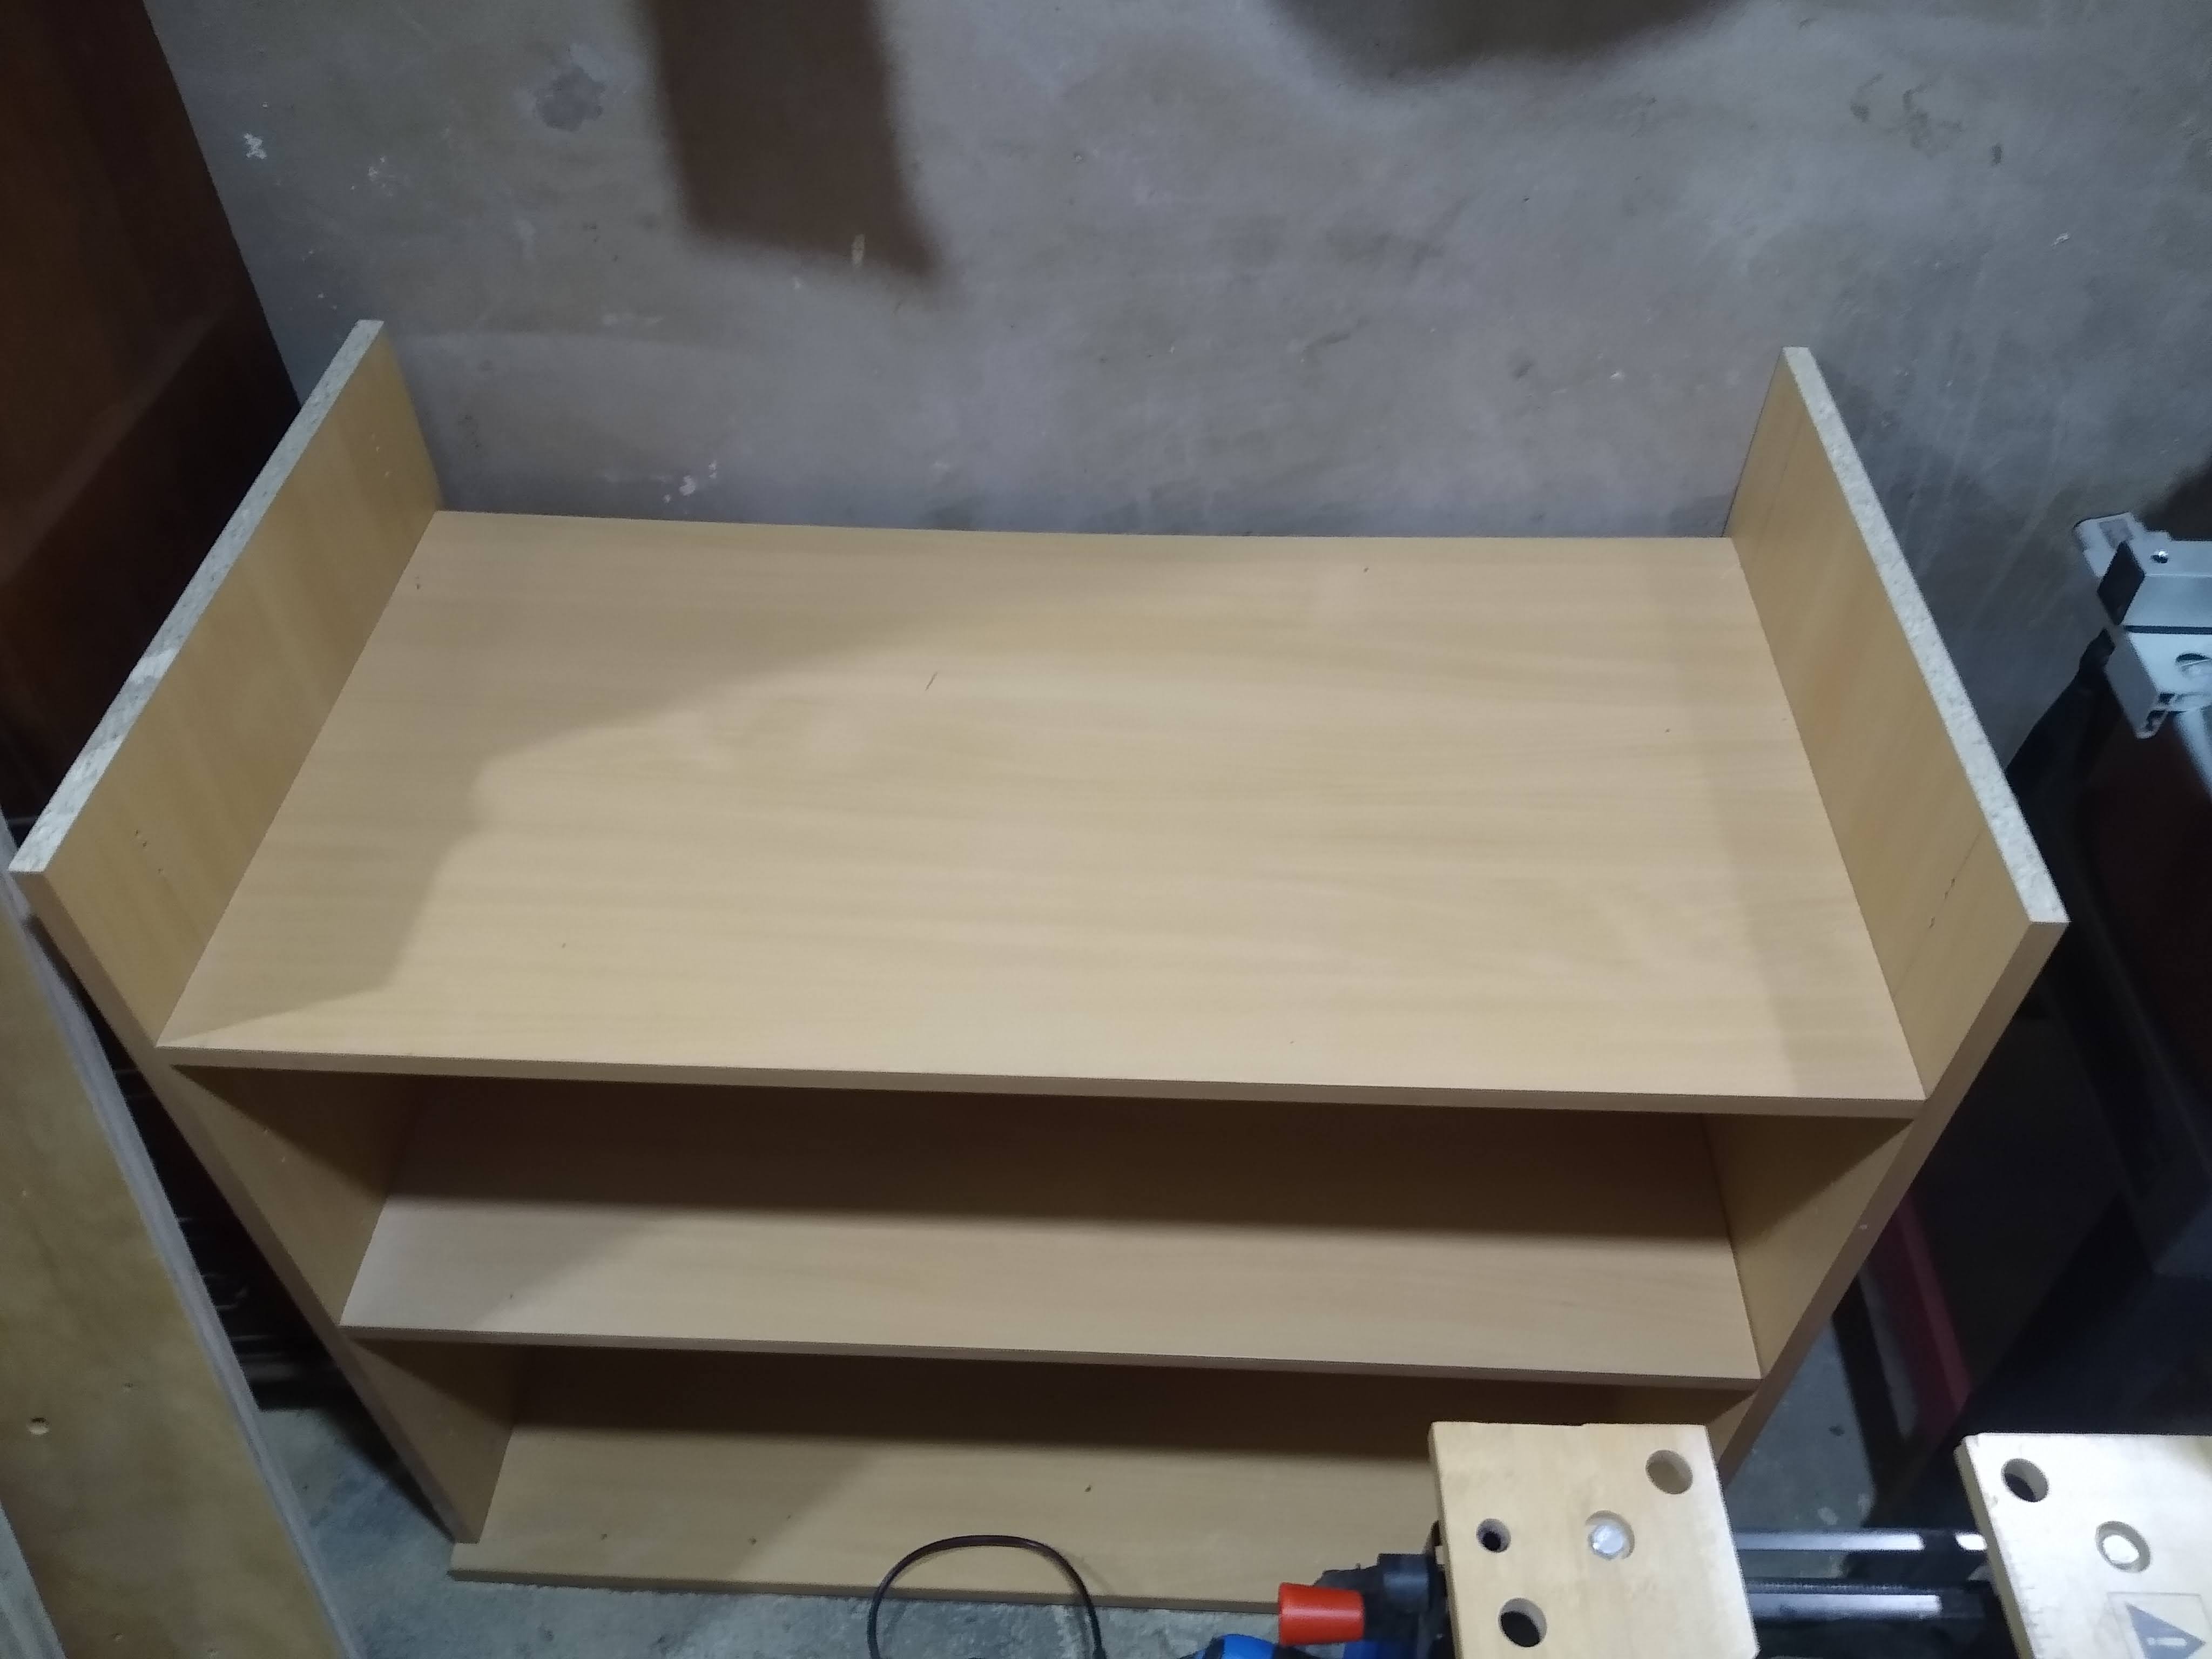
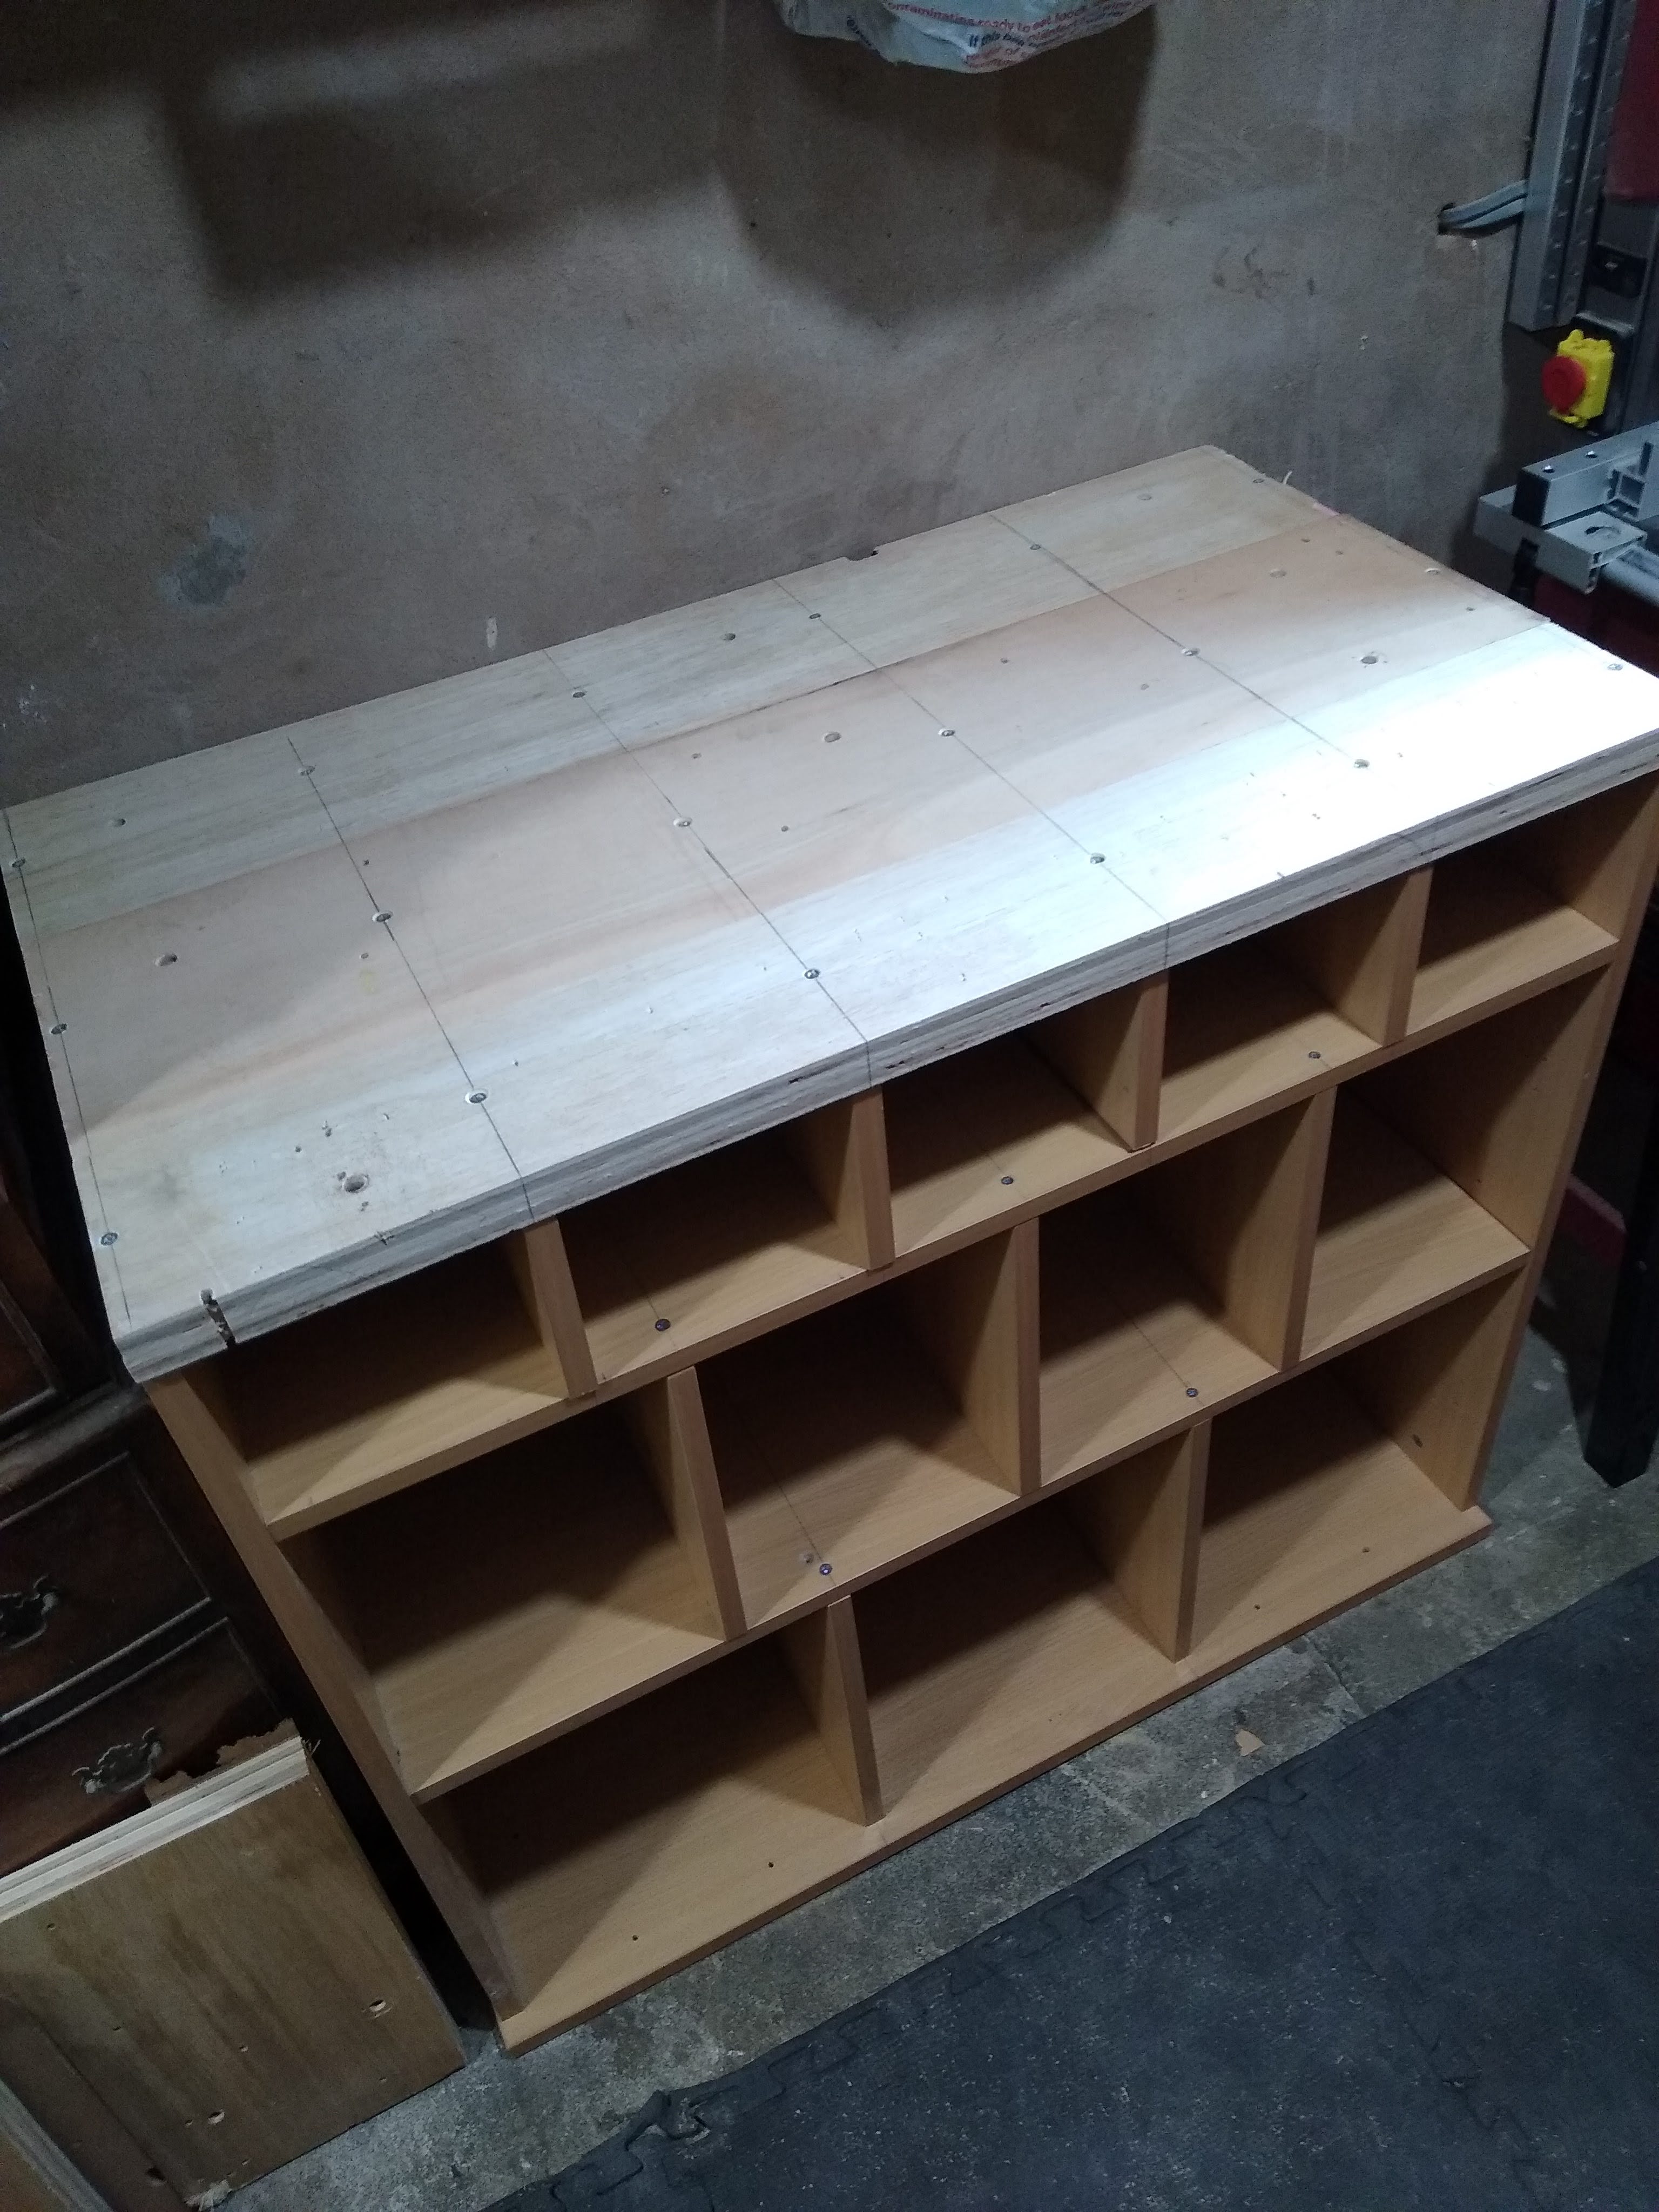
An old neglected chest of drawers had imploded with the weight of 40 years worth of jars filled with”odds N sods”. So it was time to make a new storage solution, with more modularity and using only scrap material that was festering in the garage. It can also double as a band saw feed table which is cool (oh yeah I bought a bandsaw!). I had some scrap plywood left over from the other workbench which made a decent worktop. There’s about 5 different types of MDF from various discarded flatpack furniture and more mismatched screws than you can shake a push stick at. It’s an MDF Mongrel!
The drawers are not on rails so it’s more of a box storage unit but it does exactly what it needs to. The drawer-less bits are for storing bigger things that are easily grabable, the track-saw fits in one of the gaps perfectly (almost as if I planned it), but I may add some more box-drawers at some point.
Going through the many Branston jars and sandwich-bags full of flatpack accessories I found a bunch of mismatched handles which really completes the “cobbled-together-out-of-a-bunch-of-shit” look.


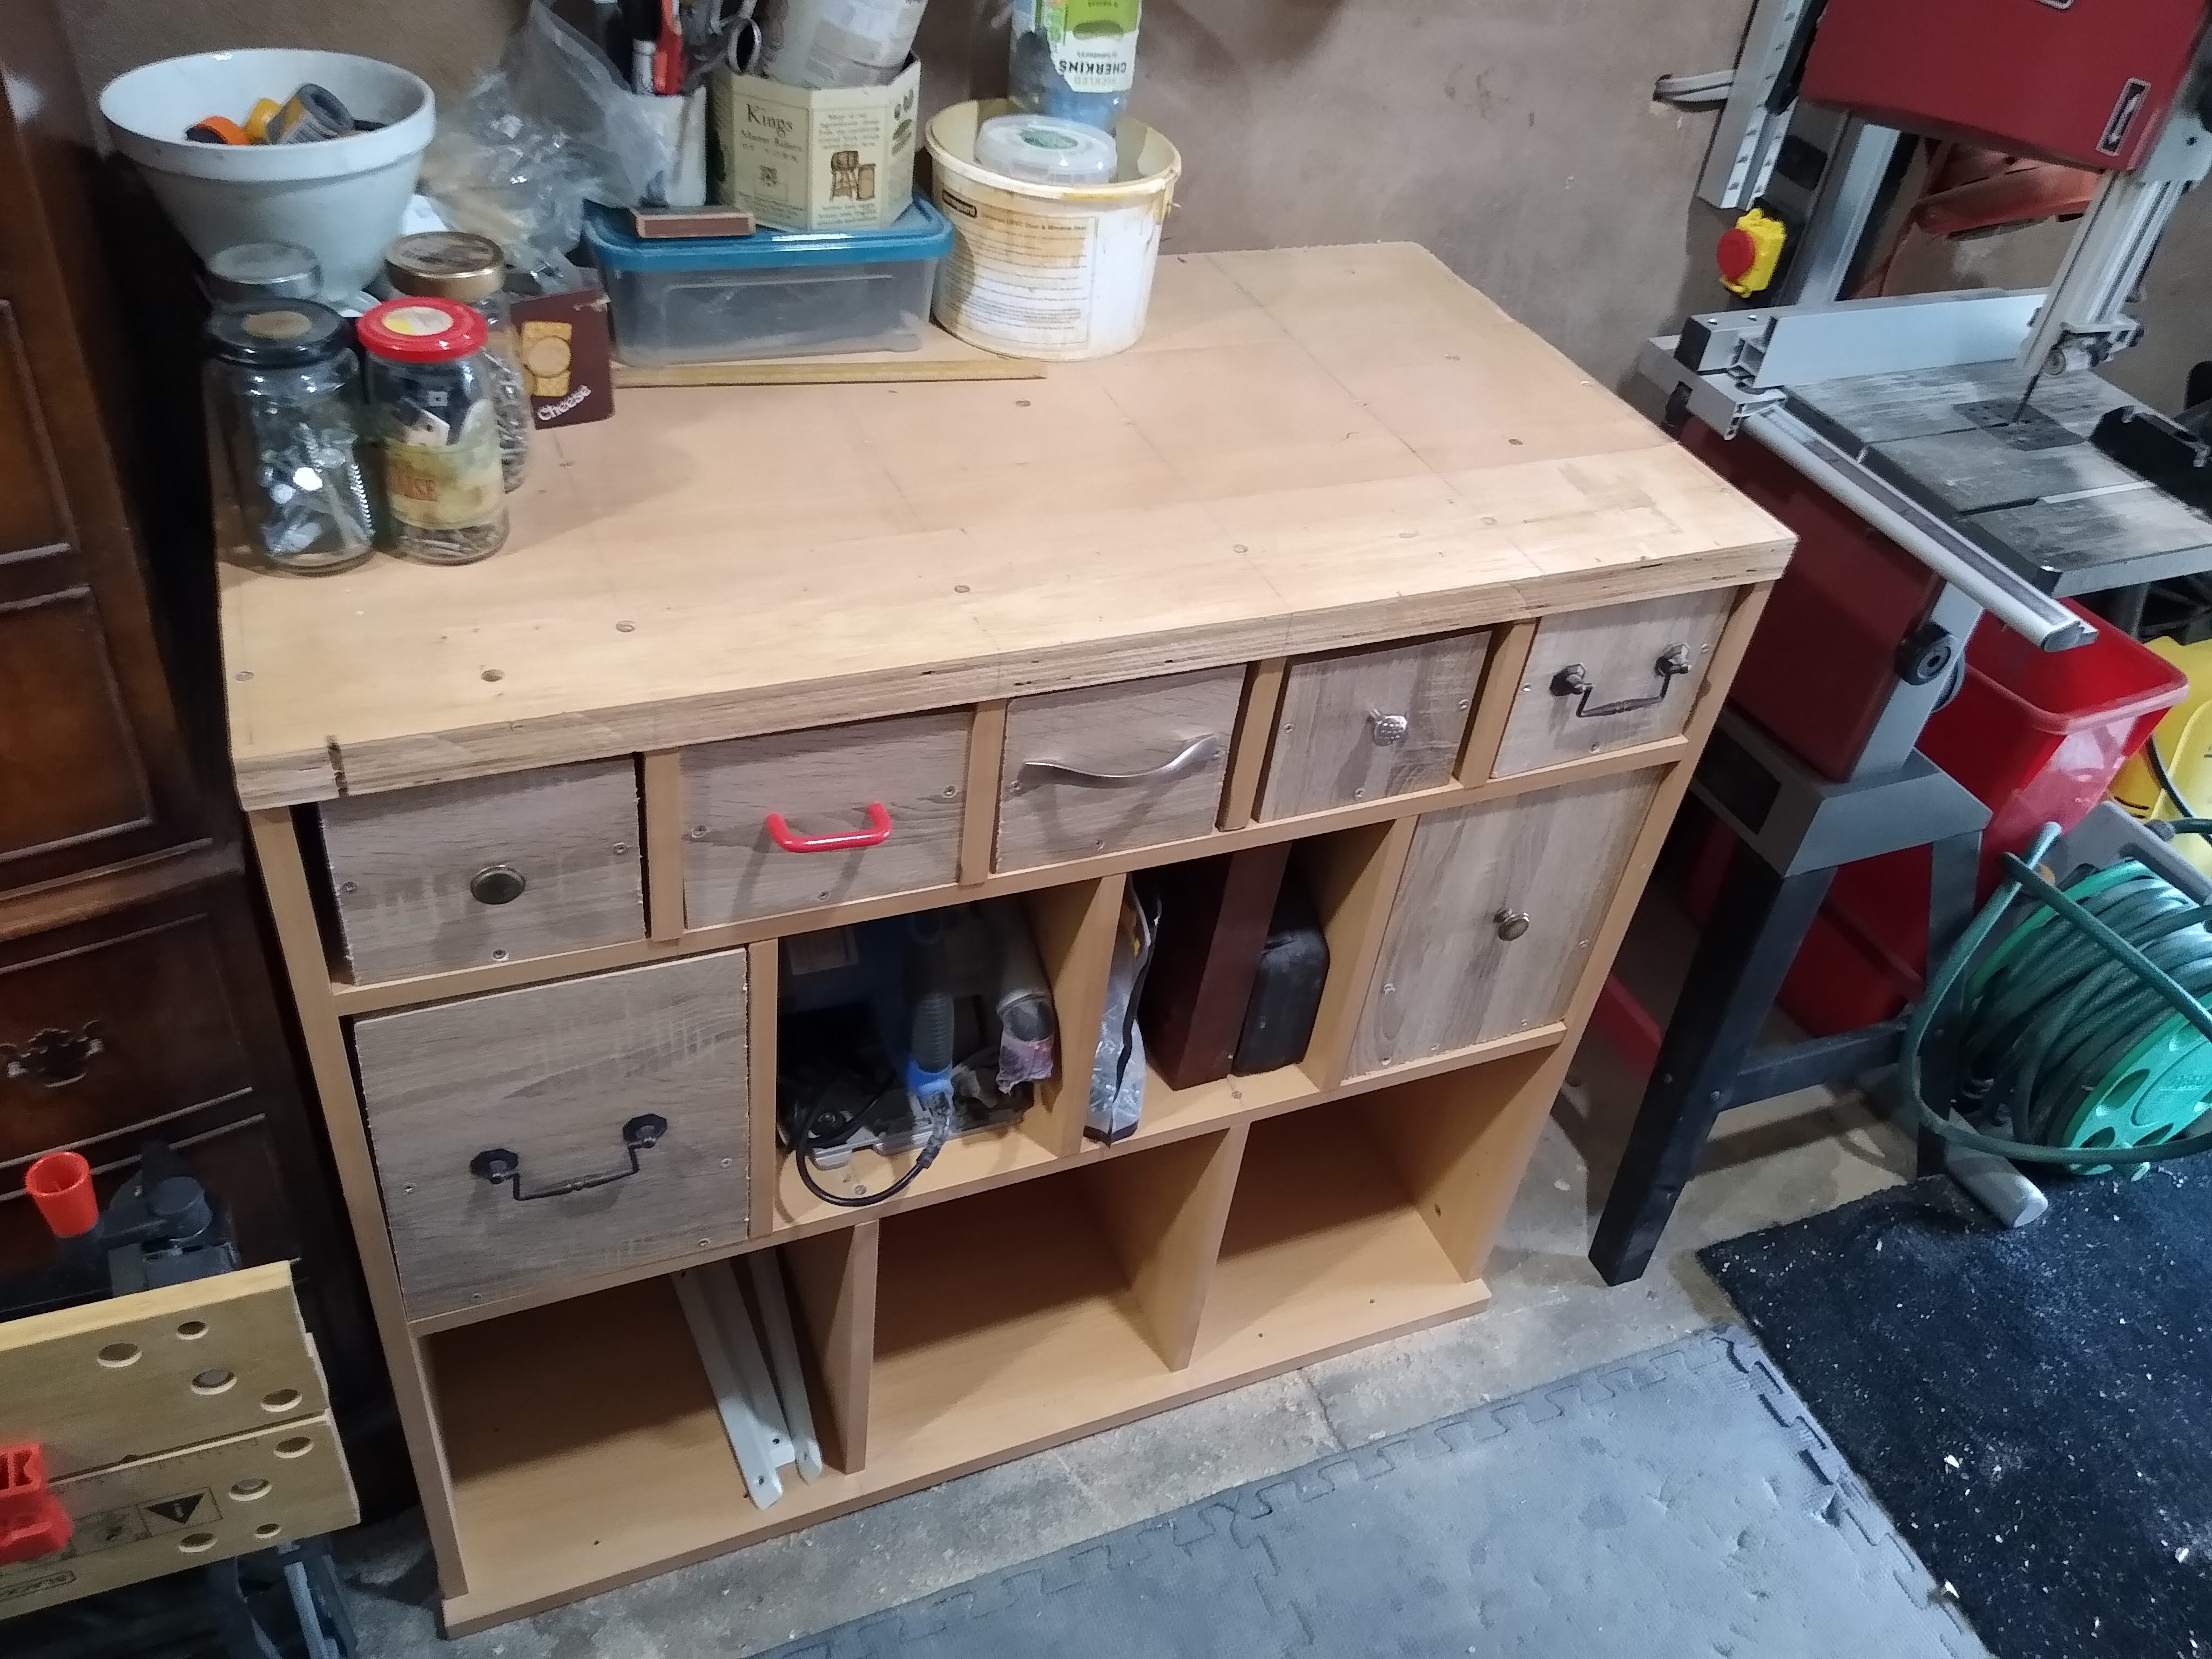

There’s so much scope for improvements and additions to this space but for now I’m very happy with V1.2! It’s also worth noting that everything is made of reclaimed/recycled wood so no dough was spent on materials.
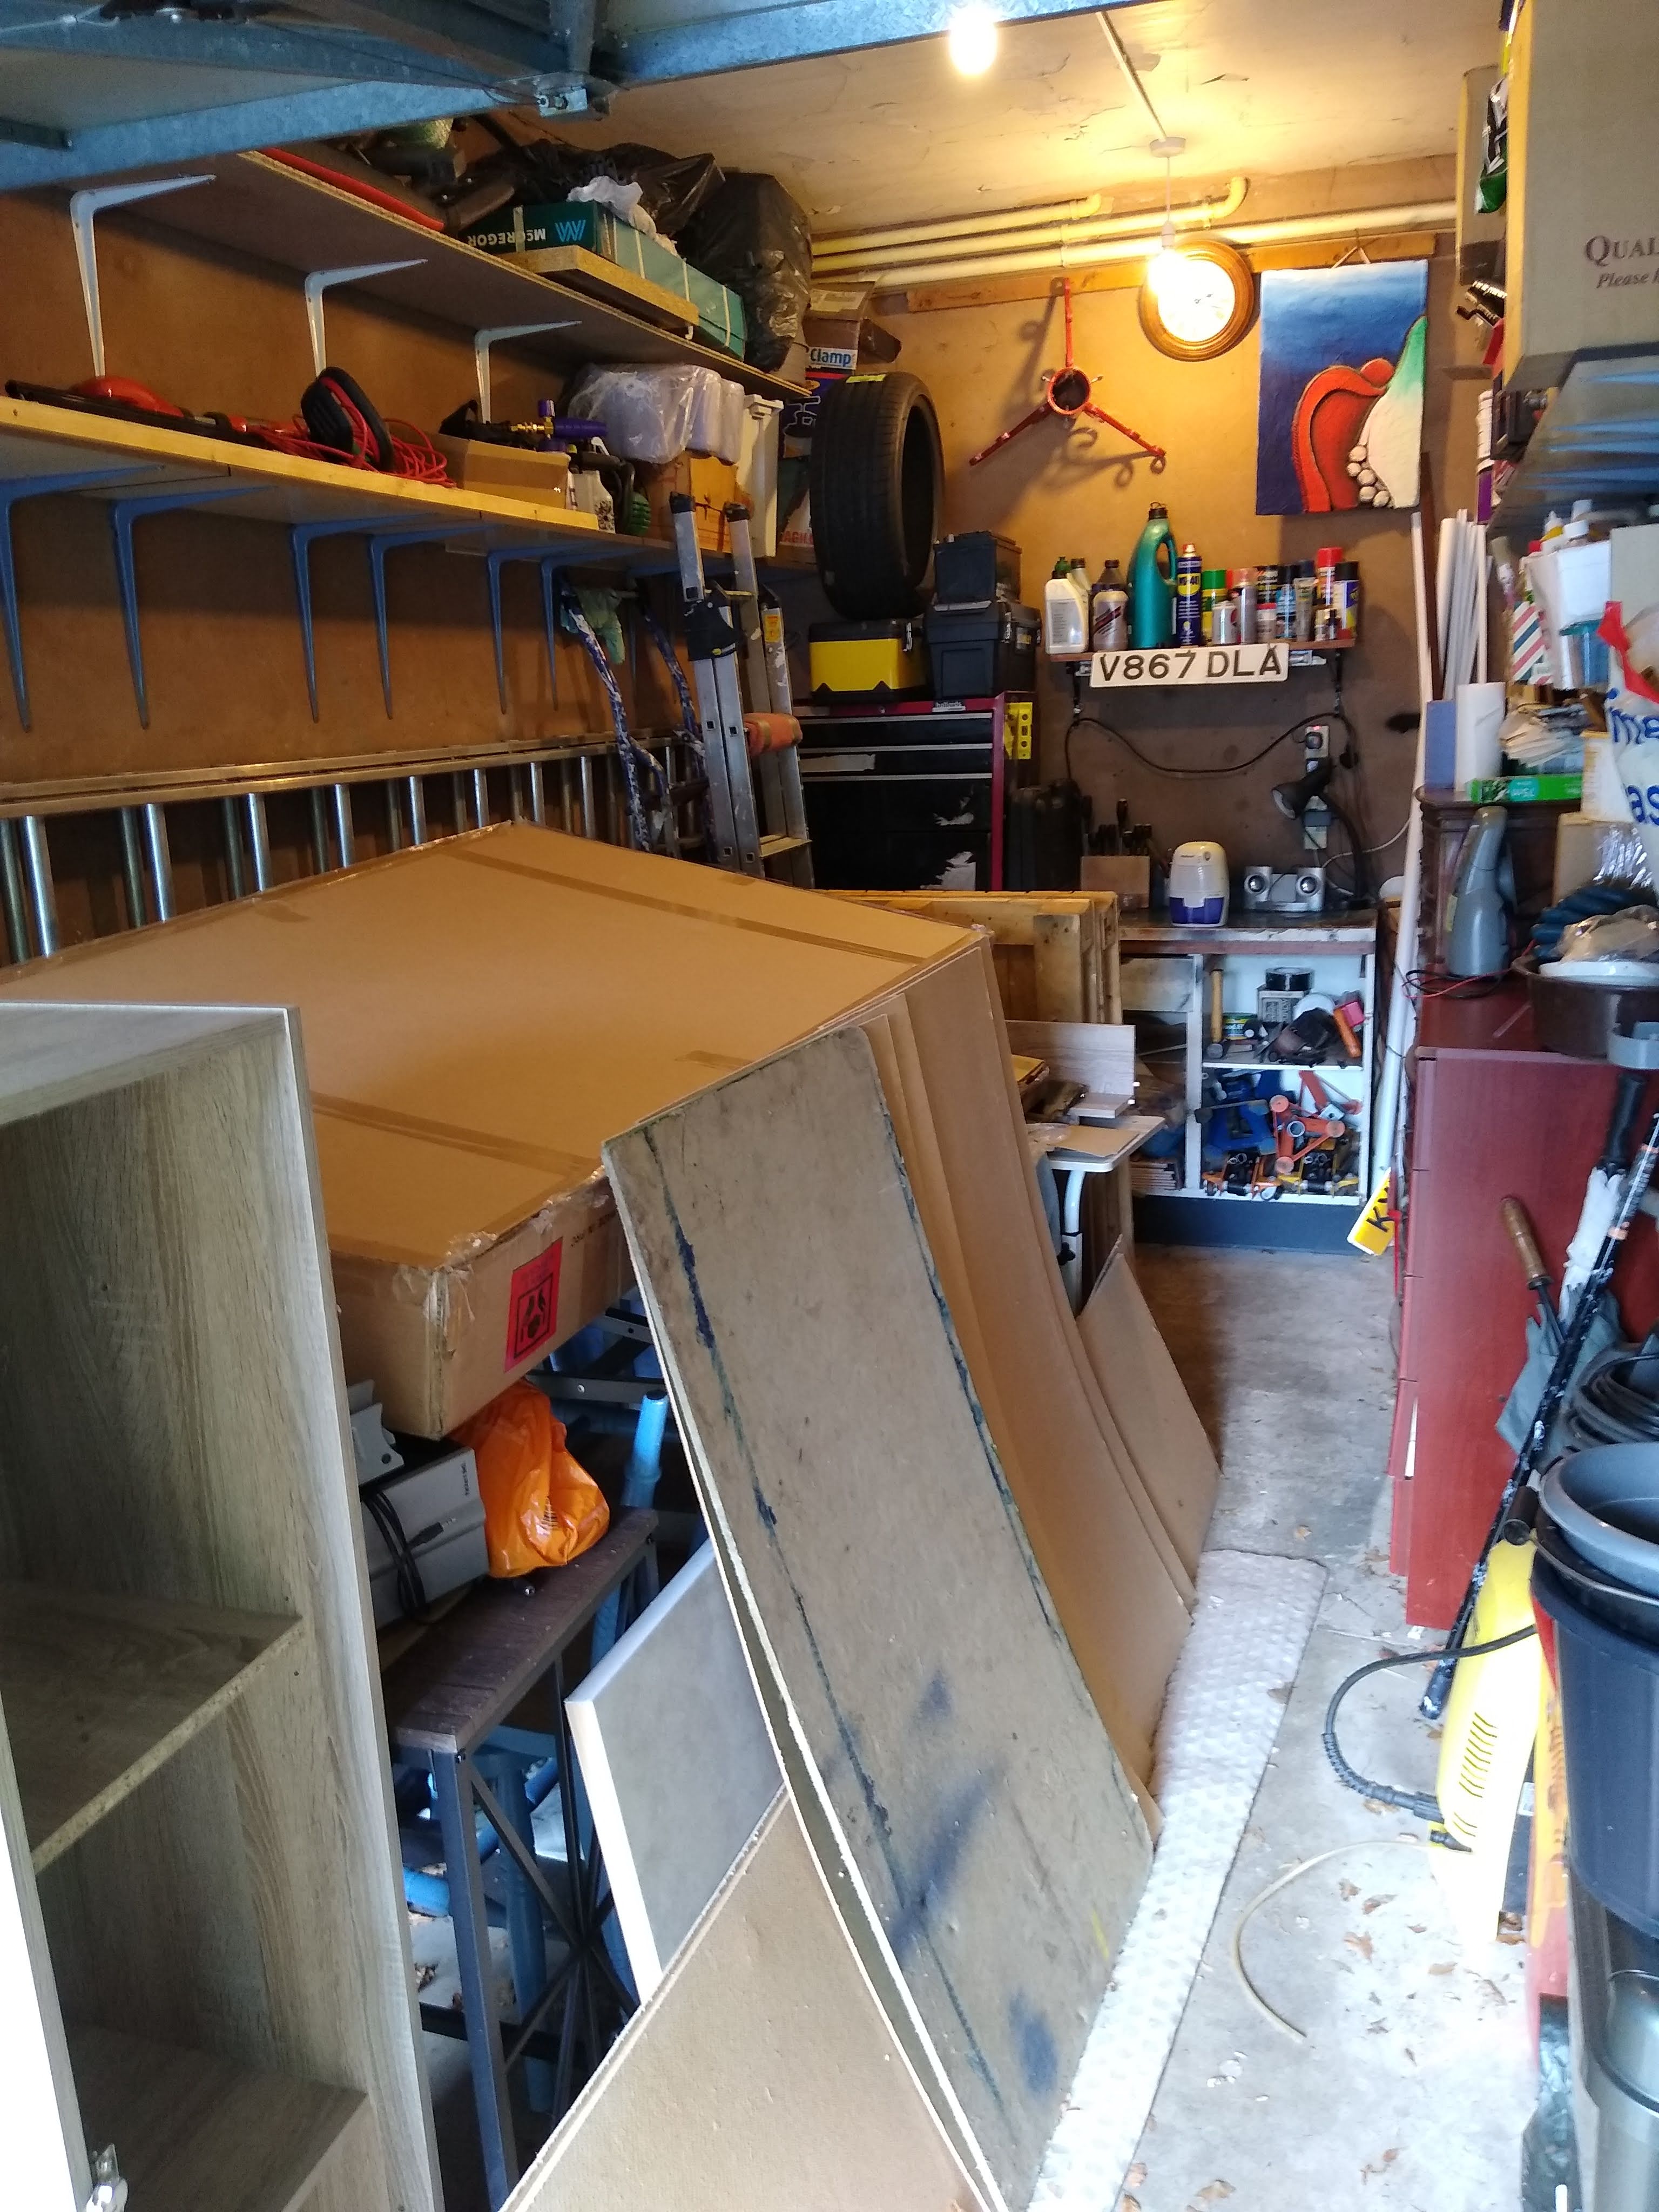
Here’s a few before and after pics for garage-workshop space:


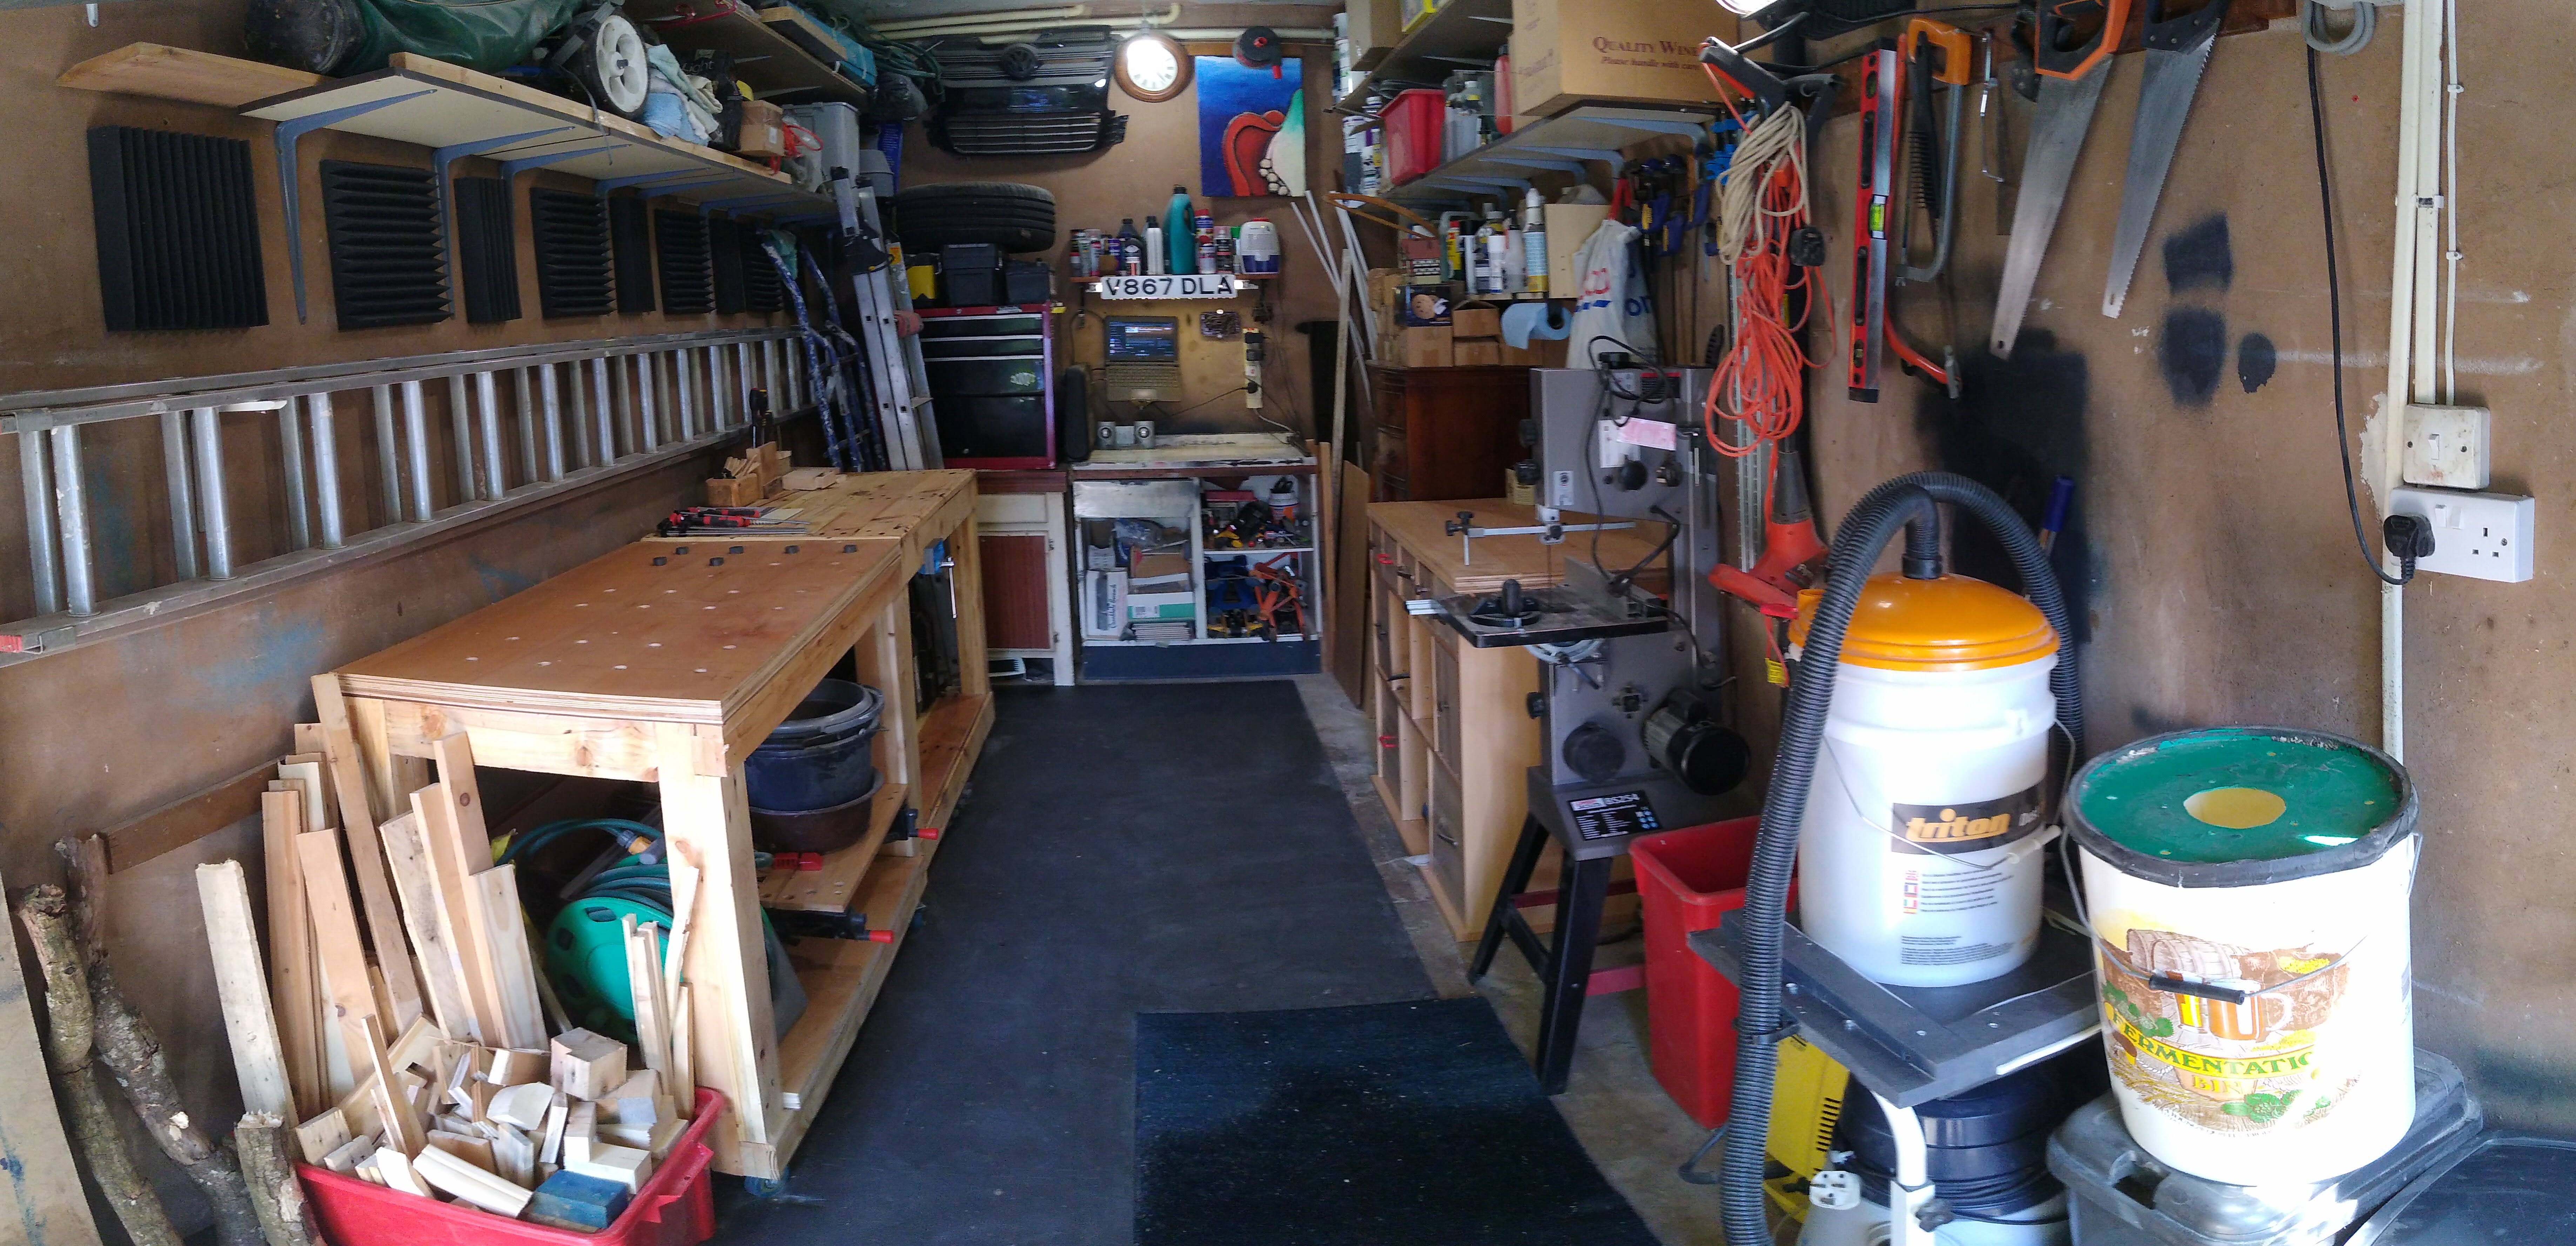
And for no reason at all, here’s poorly edited video of the garage slowly turning into a workshop:
-
Pallet challenge March 2023.
There is a pallet challenge that I found via Mark Dainer’s (aka dainermade) Instagram account, the challenge is to make a thing out of pallets (I do good explaining). I figure now that I’ve finished the “Mistake-table” I’m basically an expert and should enter competitions.
My next logical project has to be a workbench of some kind. Having made do with an old kitchen unit and latterly a workmate (which I wish I bought ages ago!) It had become obvious that I need a work bench.
Ideally one with some storage underneath and some maneuverability to suit a fairly small “workshop”. I figured I would take some existing plans and adapt them to suit my dimensions and needs.
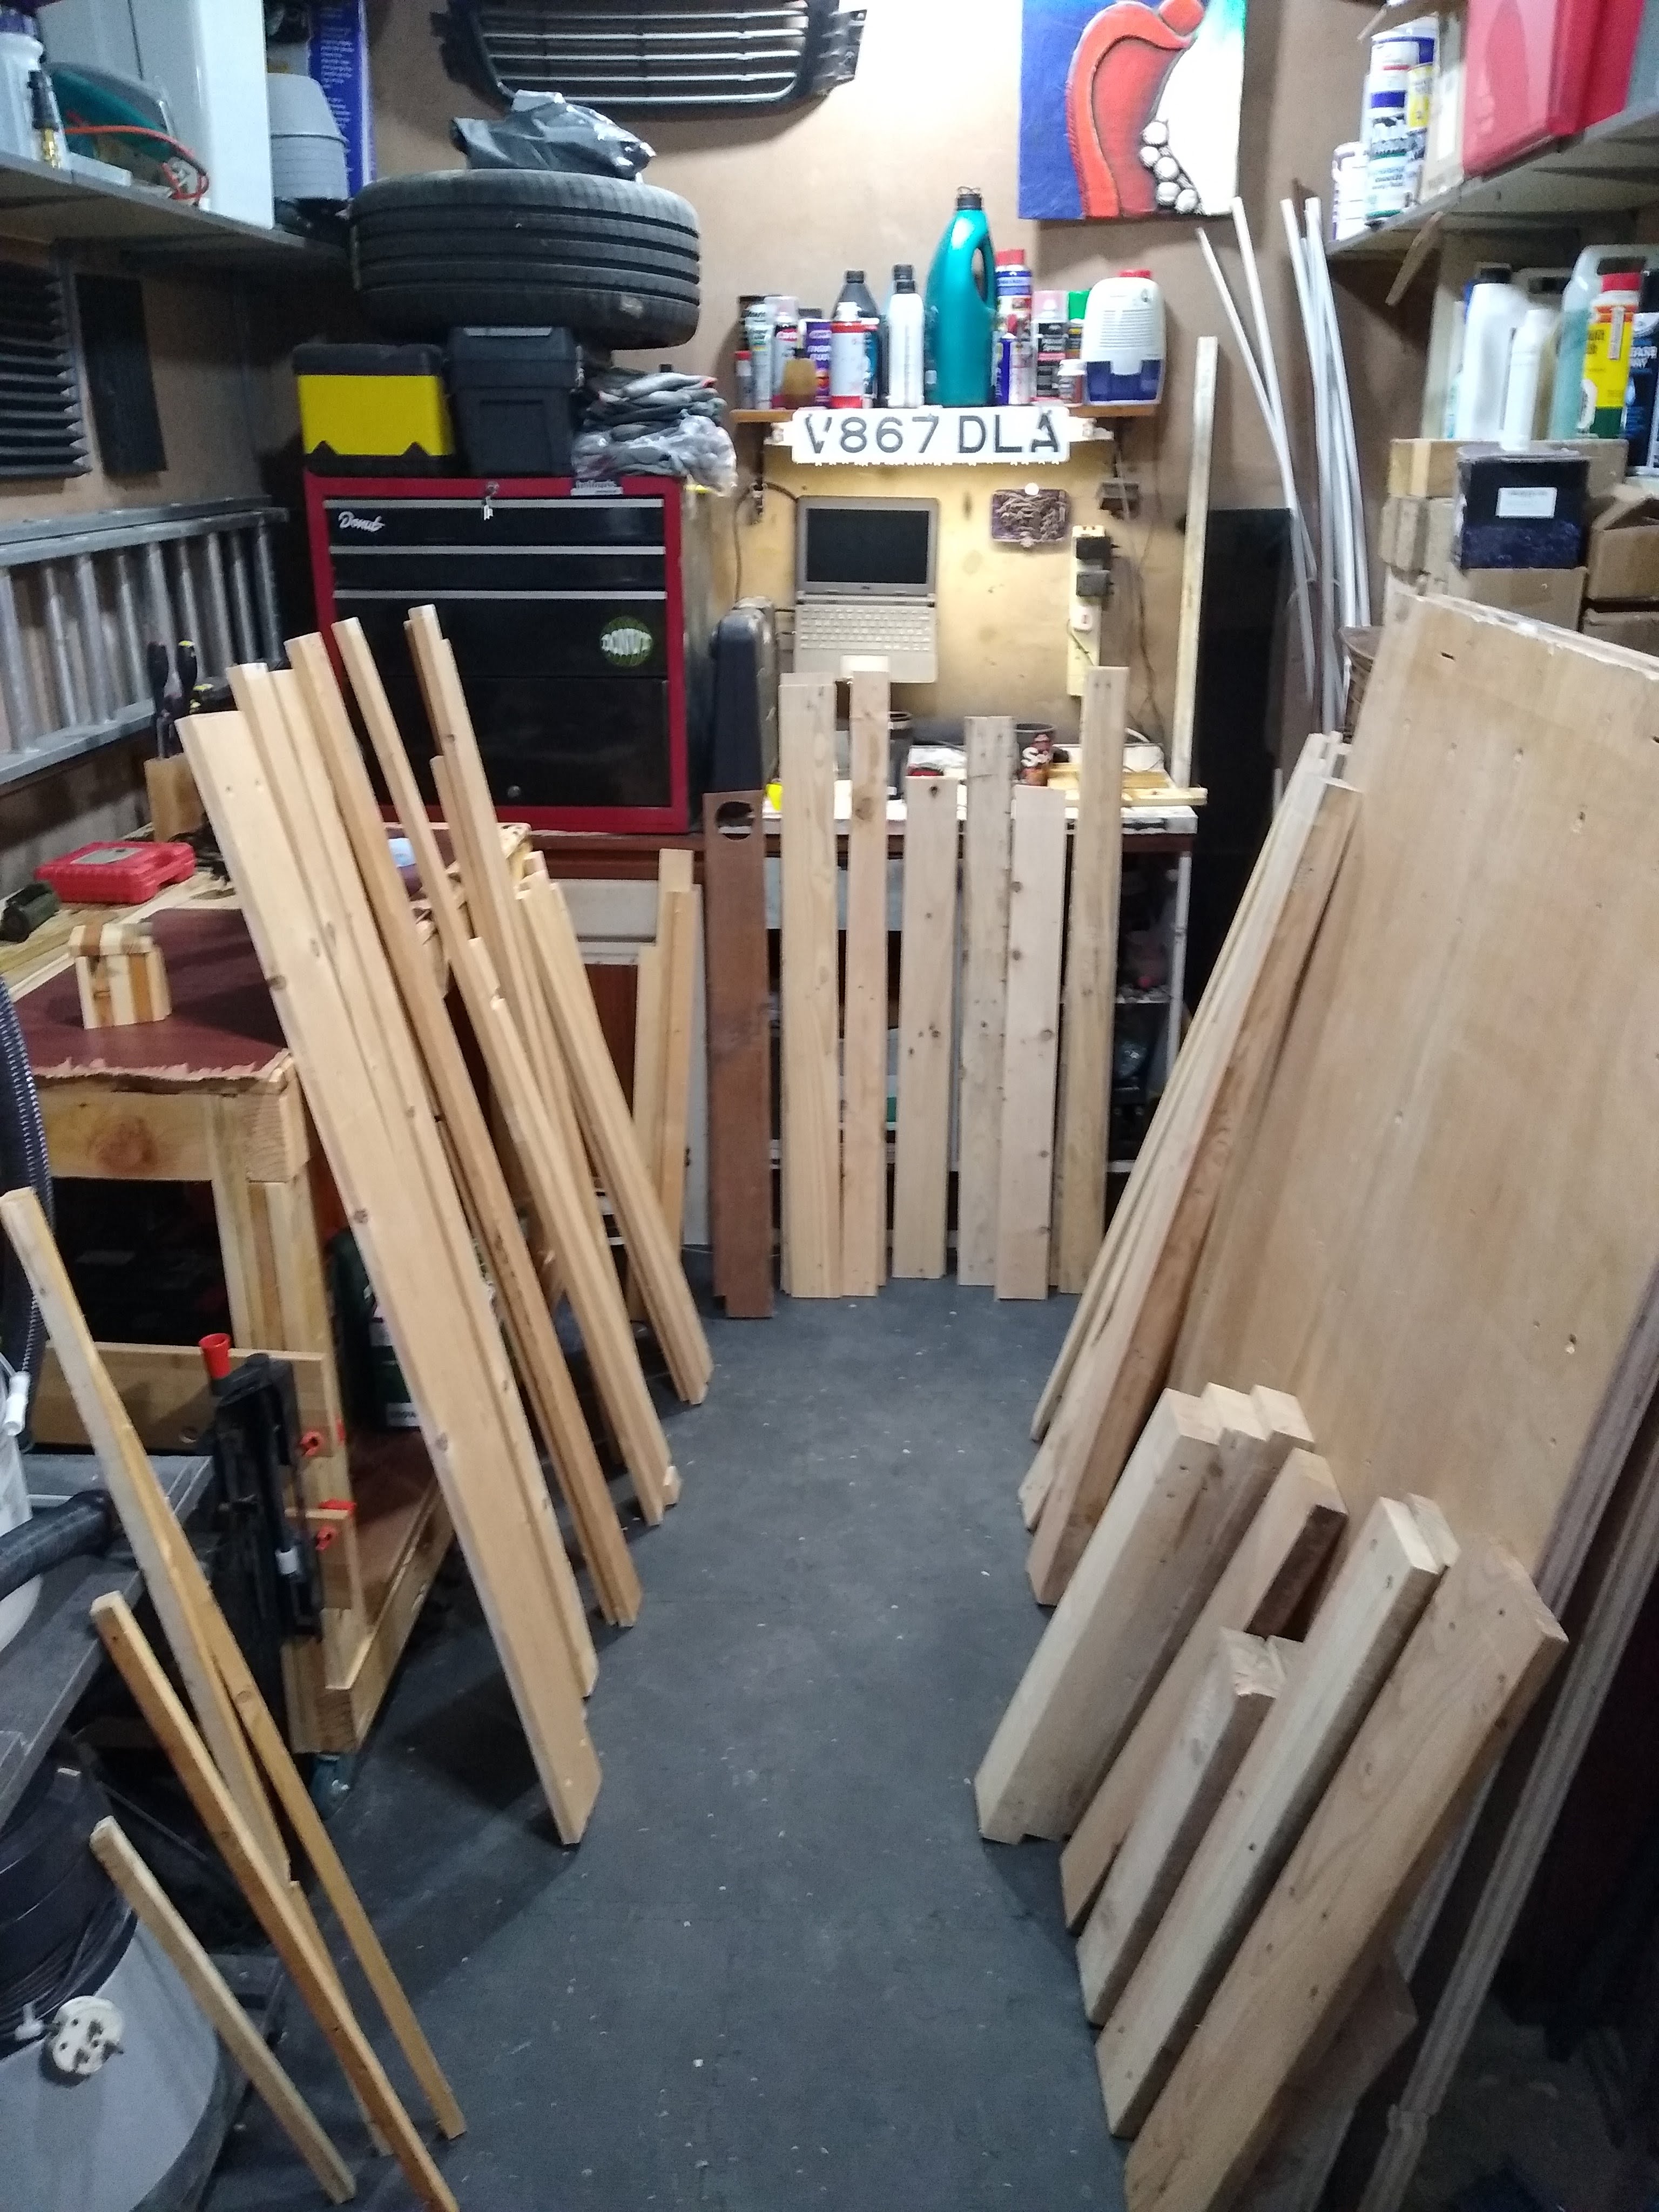
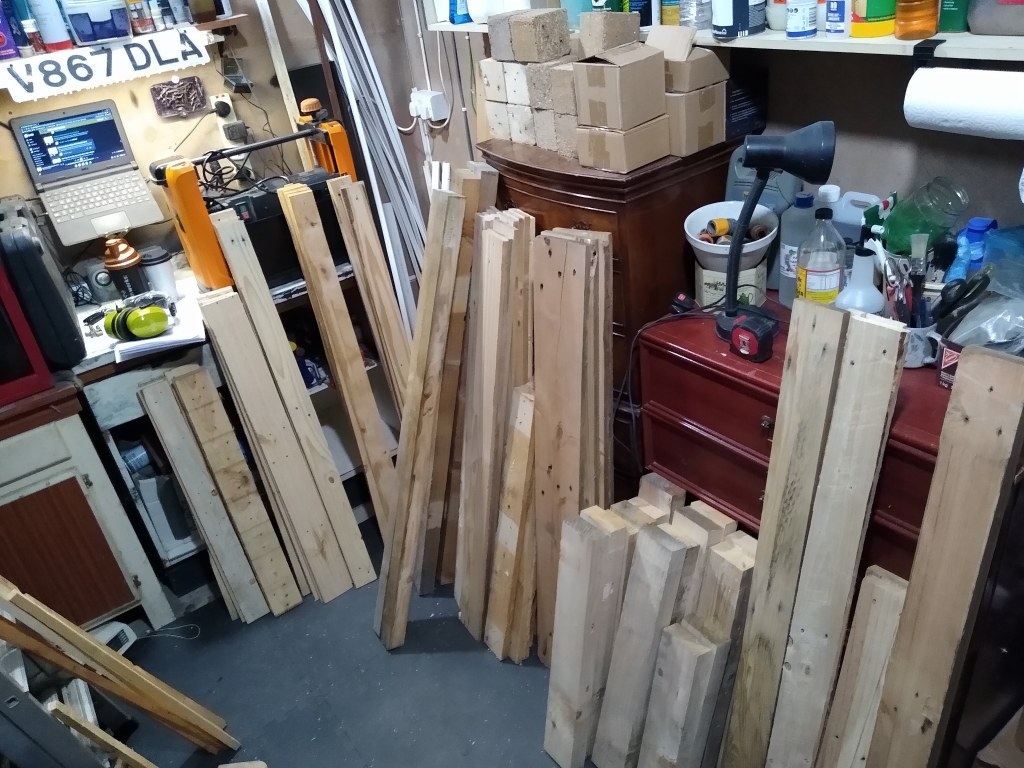
I’ve probably collected, dismantled and planed around 6 or 7 pallets at this point so I started off by selecting the wood from my current “stock”. Most of the wood had been in a dry garage for a few months with a little dehumidifier running close by. I have invested in a moisture meter as I wanted to check that the wood was within moisture parameters before sticking it together. (This is something it did not do on the mistake table!).
The chosen ones. I spent a little time looking at joints and having a go at connecting some wood lengthwise but with little success. I was using a jigsaw free hand for this and could not get the joins to sit flush with each other. Without a workbench or vice it was tricky to attempt proper joinery, so I decided basic lap joints would be the easiest and quickest for this project and then I can practice joinery to my hearts content afterward. It was chicken and egg situation, I needed a workbench to work on whilst I made a workbench.

Almost looks like a joint! 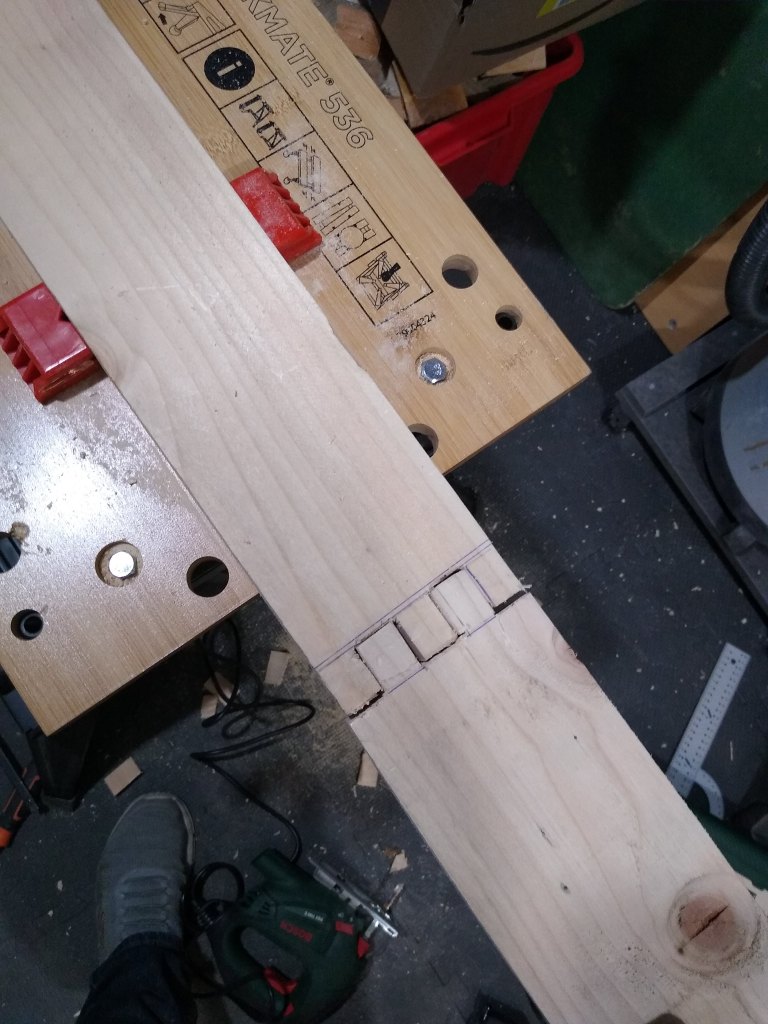
Big ol’ gaps… After watching a few work bench videos I landed on a bench from
Bear Mountain Builds youtube channel. It was based 2*4’s so I attempted to make them out of my pallet wood. Some of the chunkier pallets had some wood that was pretty close to 2*4, but not enough for the whole project. I figured if I glued a few slats together then cut it down to the required lengths that should be fine? I cracked on making the the first side and it ended up looking fairly neat and pretty square (if you squinted a little bit).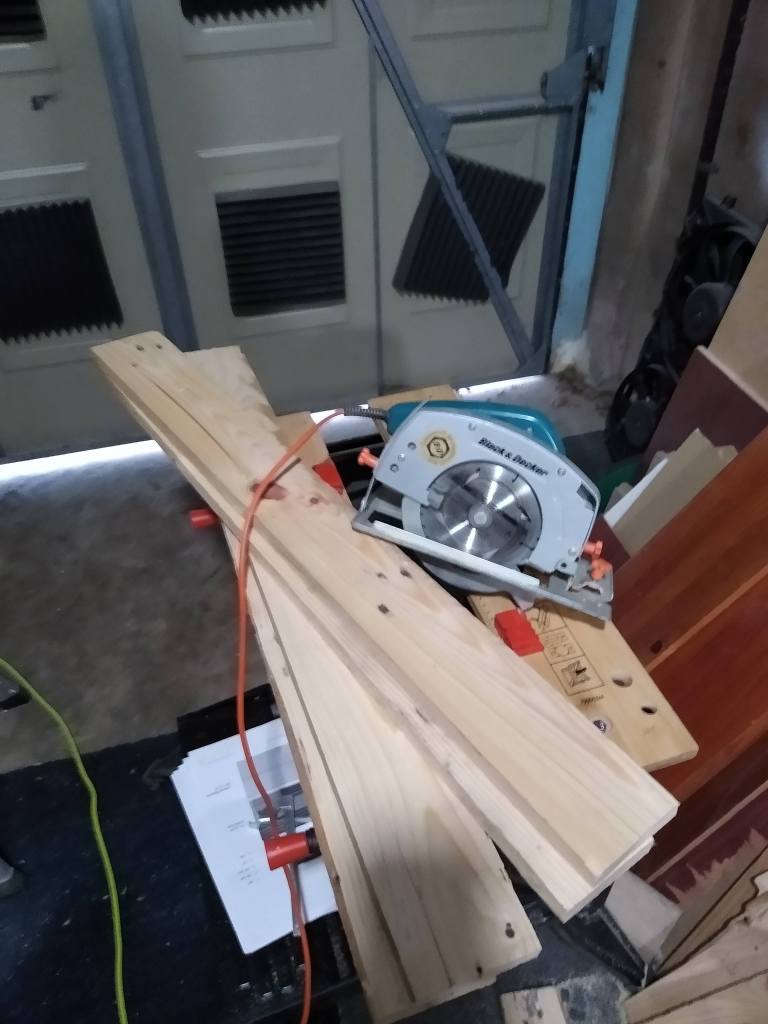
Chop’in 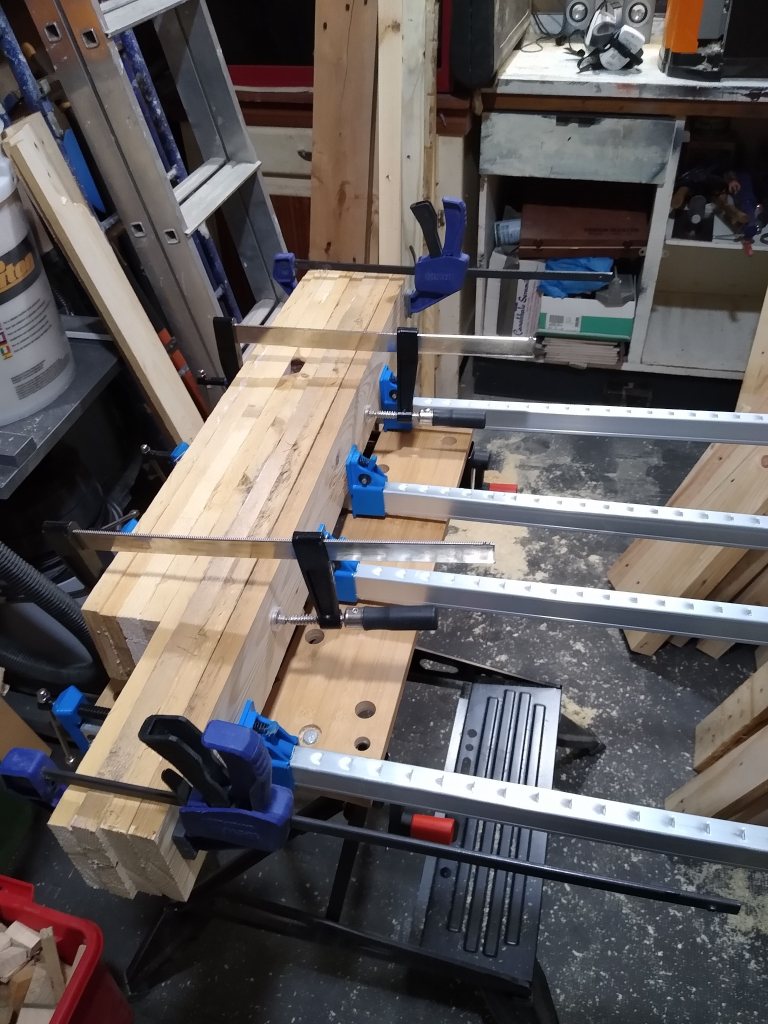
Glue’in 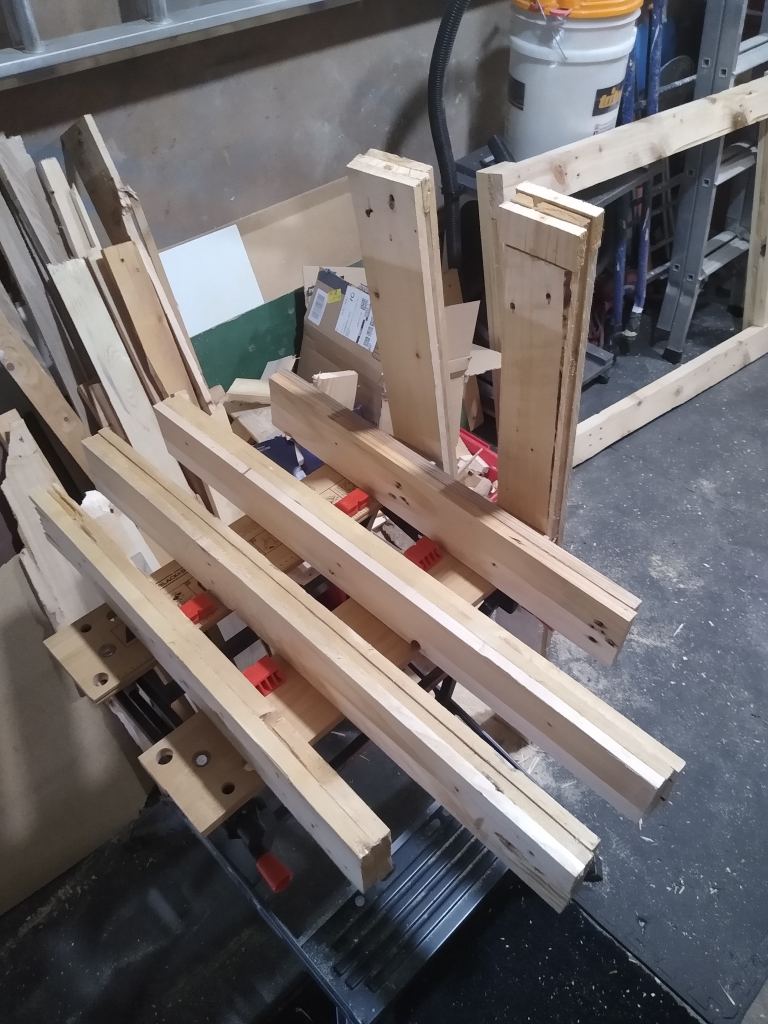
Premium Lumber 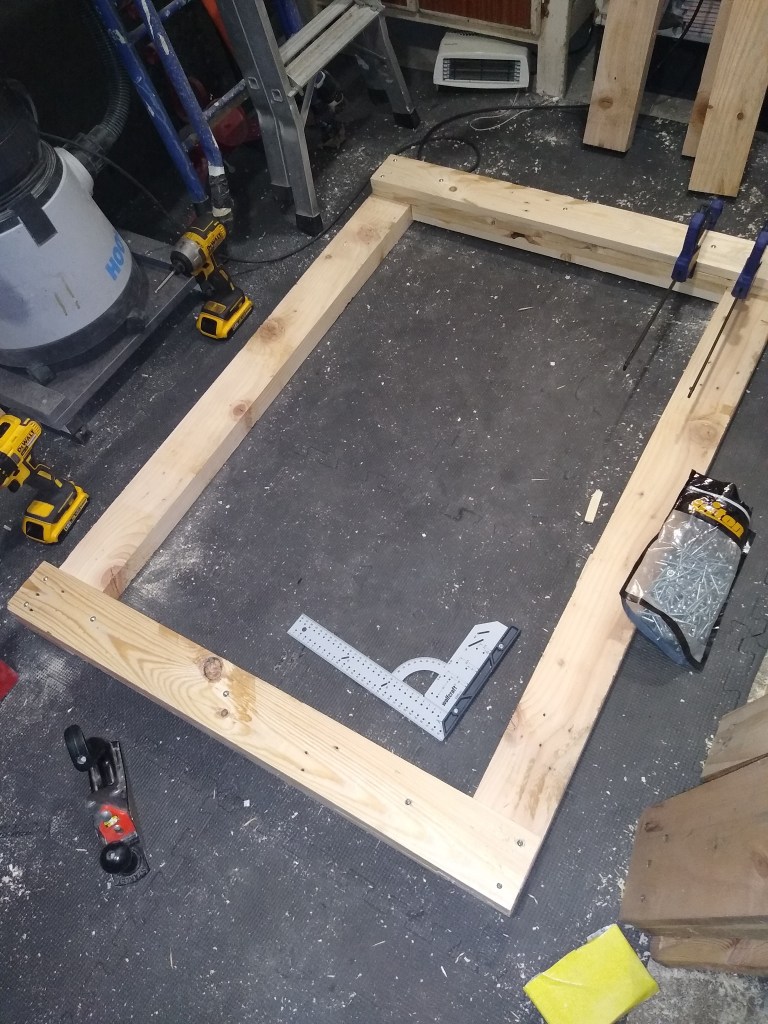
Screw’in 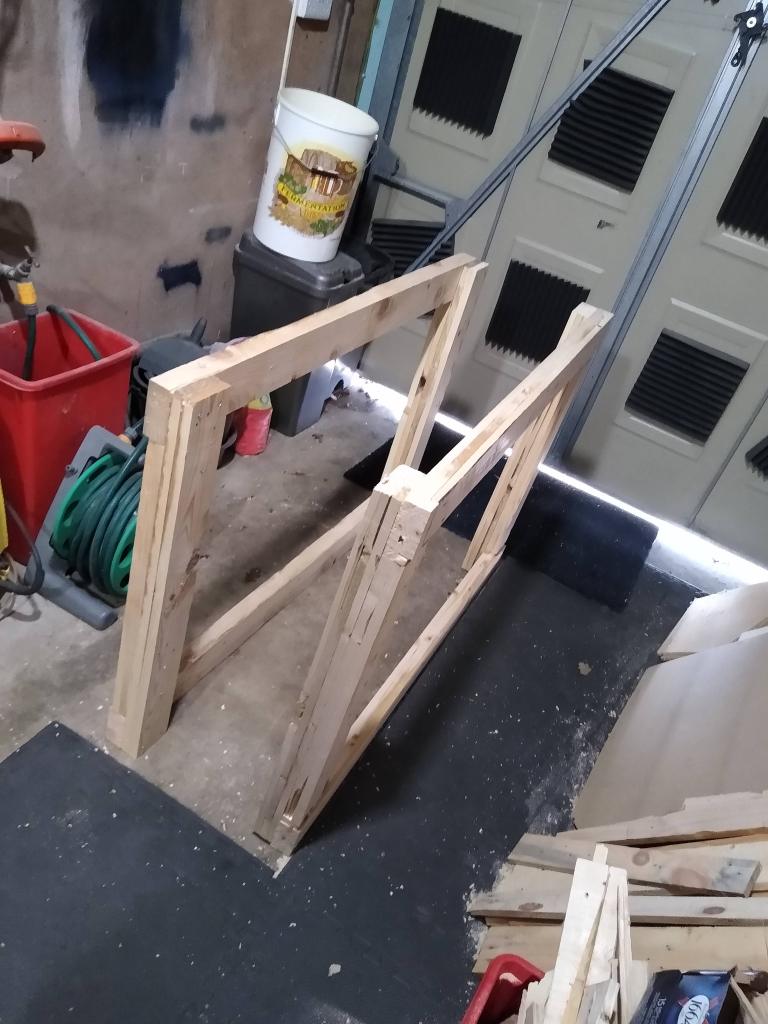
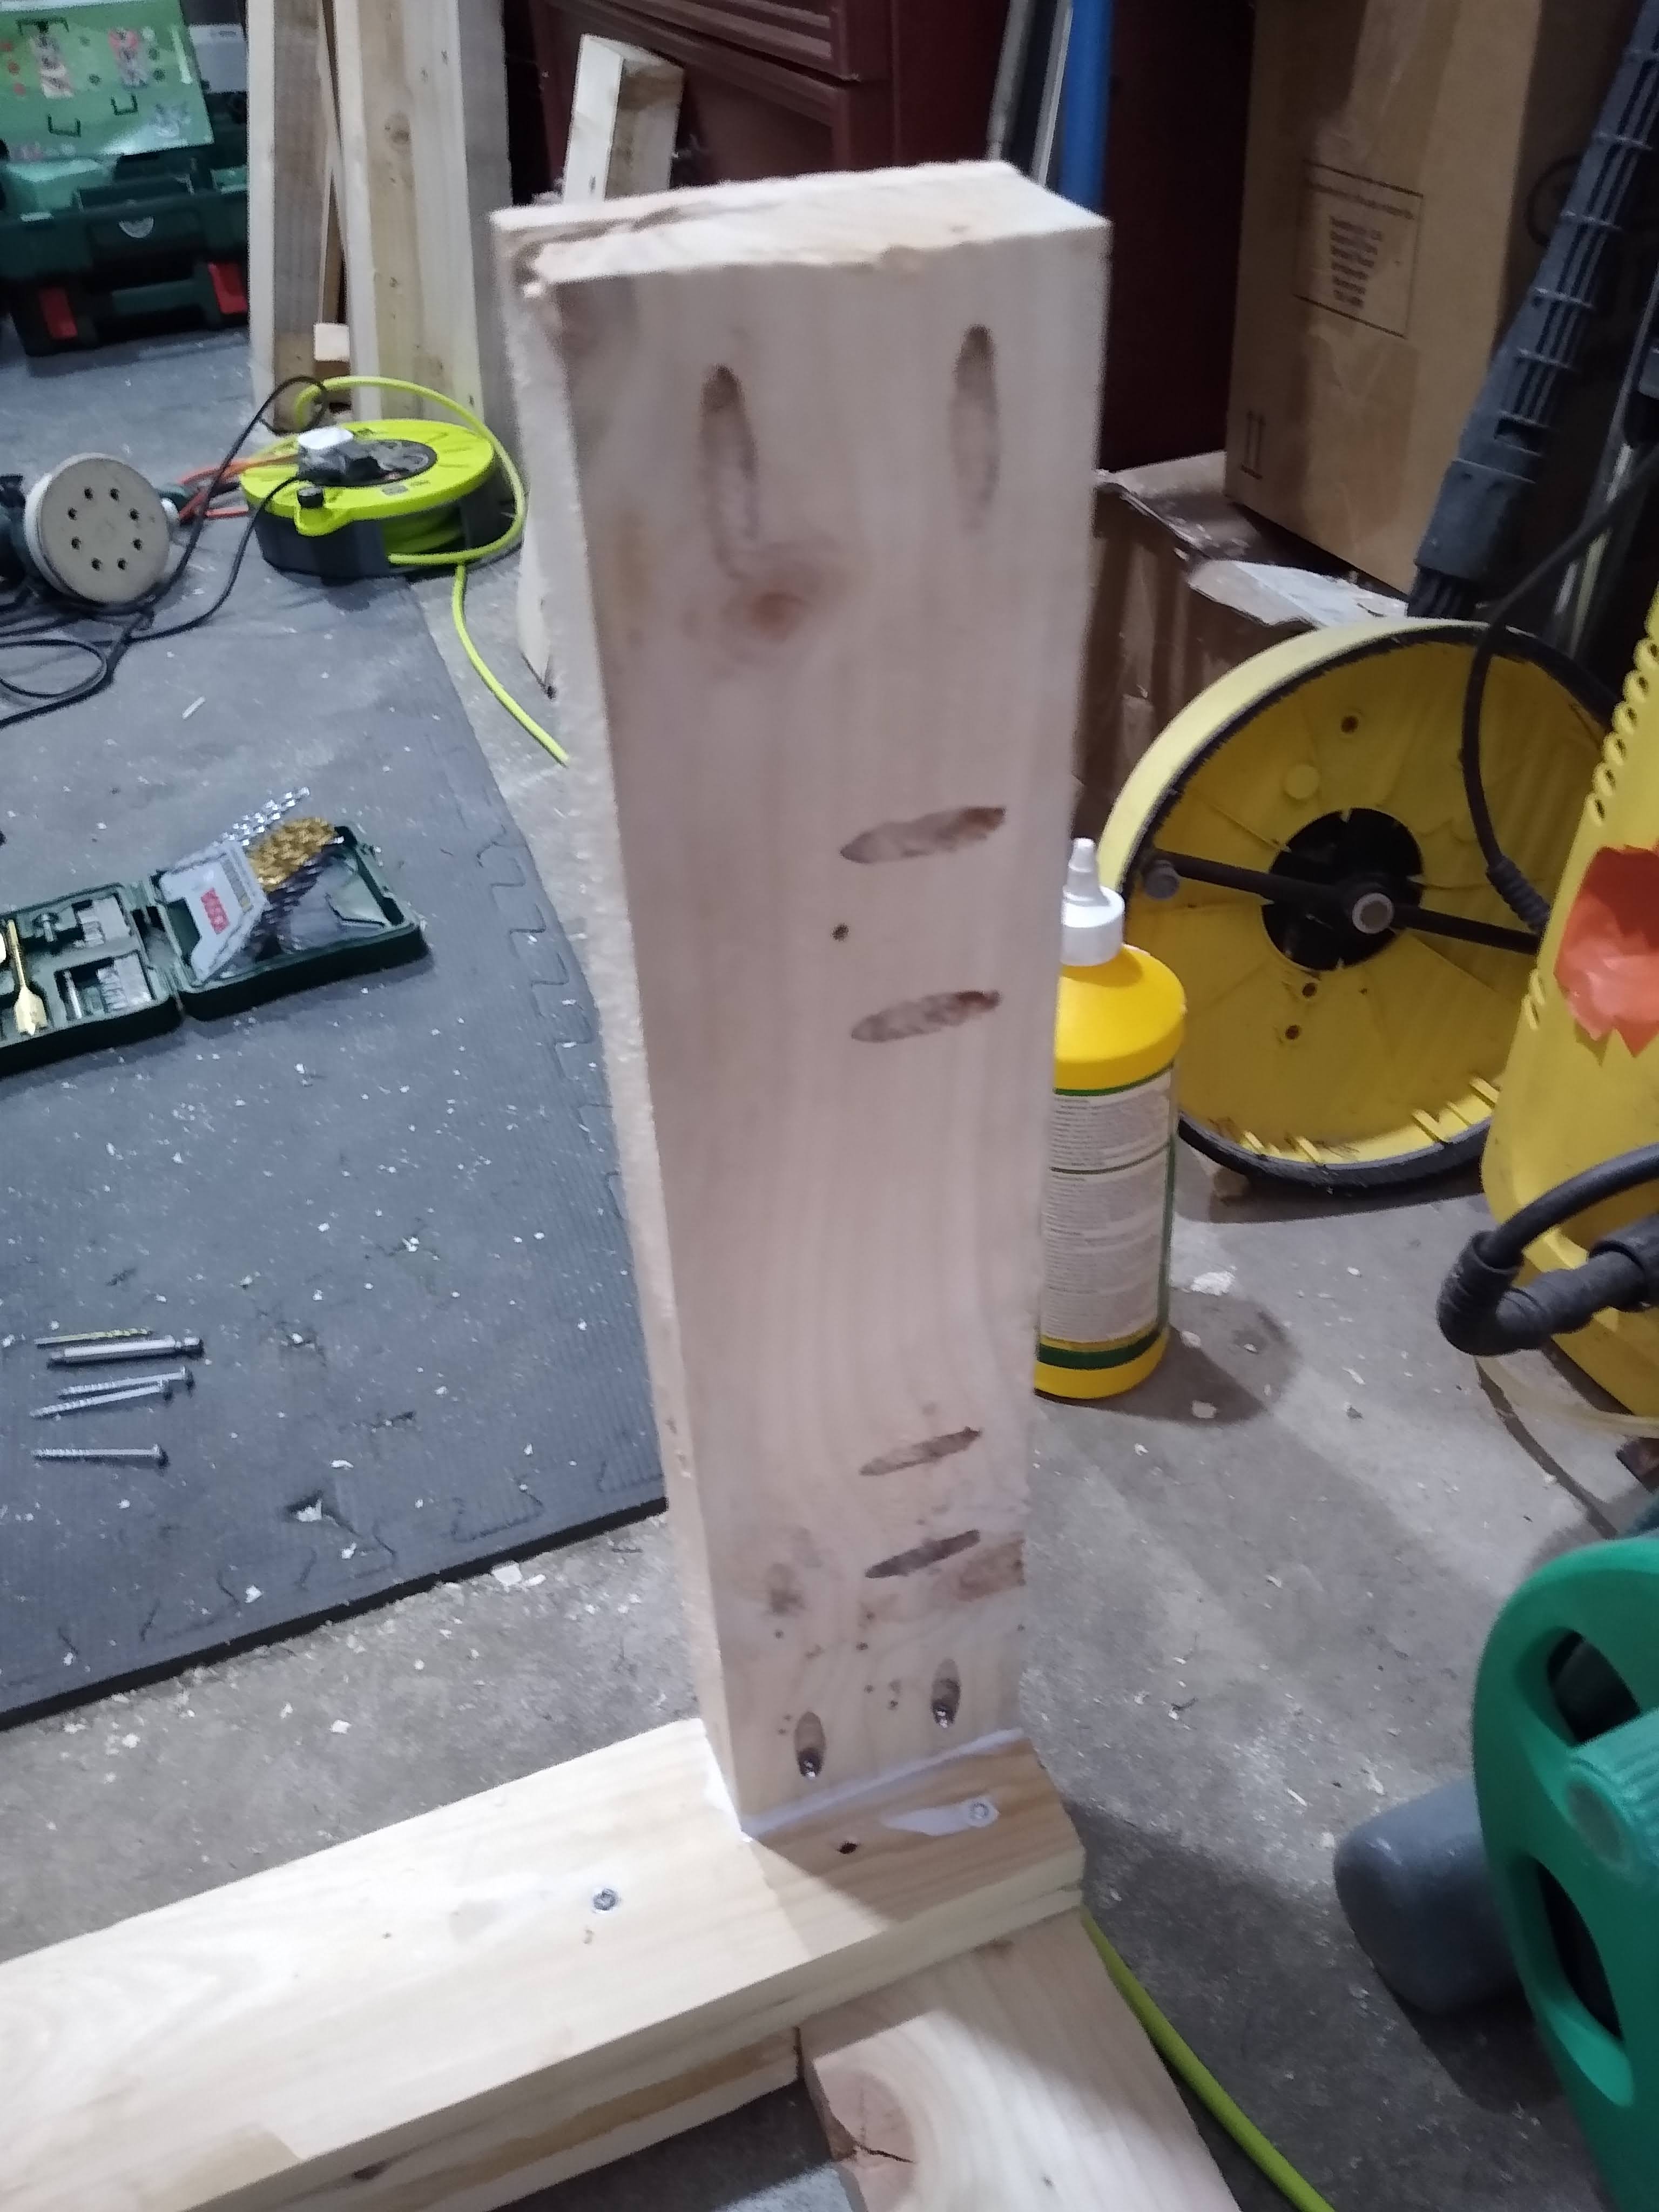
And another one The next stage was to attach the two side together to form the frame. Using pocket holes were suggested so I got myself a Trend pocket hole jig, it was a wicked little tool that made the assembly a breeze. I probably went a little OTT on the pocket holes but I figured, the more the merrier. I also got some sturdy caster wheels to make the bench mobile (The ones I had were too big).


Link to jig: https://amzn.to/3YSyztt
Link to casters: https://amzn.to/3yOAy7i
As every piece of wood was cut free hand whilst being clamped to a work-mate it wasn’t the squarest frame in the world. I took a rachet strap and pulled the corners in which helped to bring the frame into square. However, I had missed that some of the braces that joined the two sides together were not flush on the top so I had to level it out with some scrap hardboard.
I had some chunkier boards (3/4 inch) from the chunkier pallets so decided I would use them as the work bench top. I glued them down on the hardboard and together. After clamping it all I piled some weight on top to make it as flat as possible.

Rachet strapped 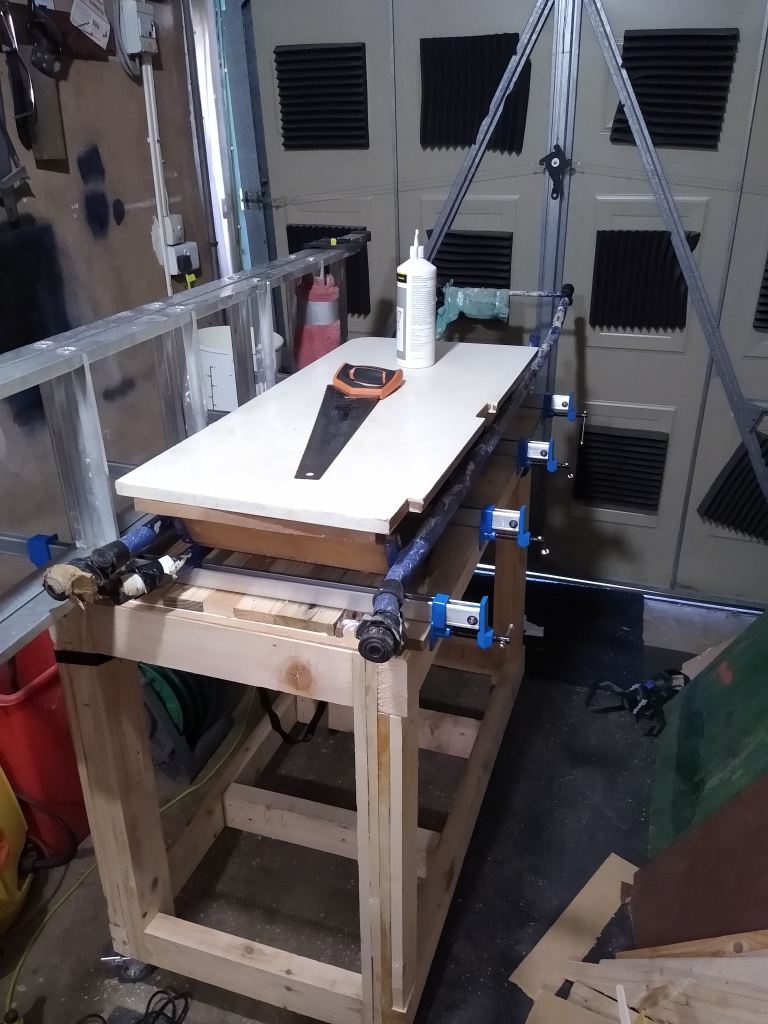
Top Clamped 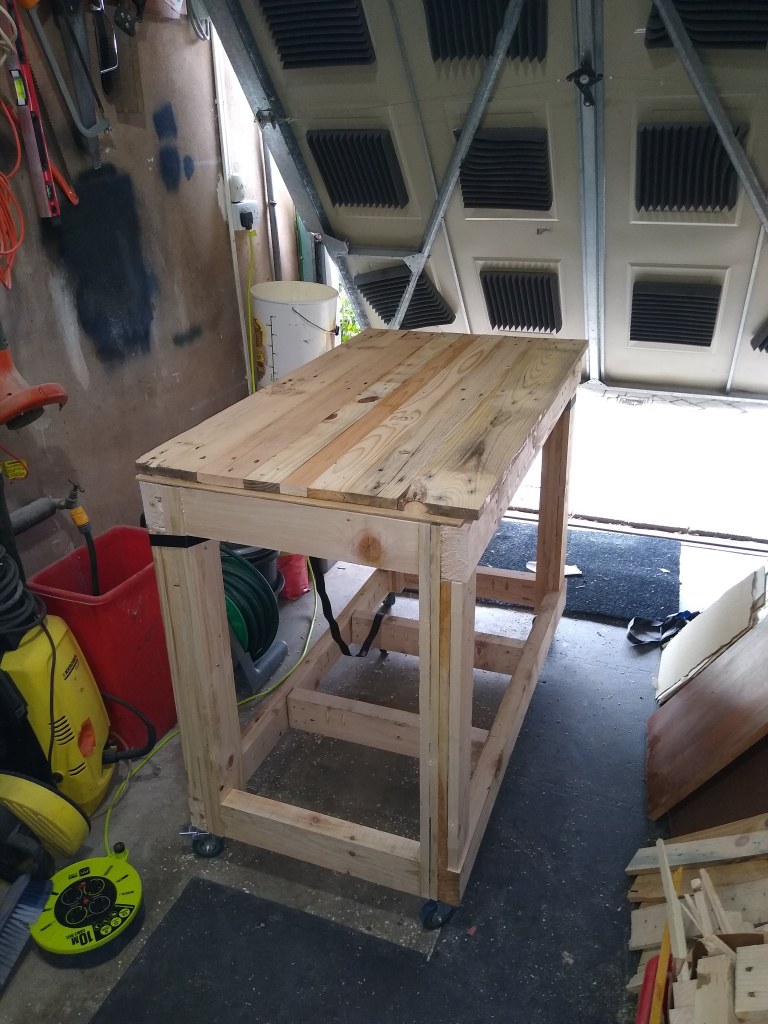
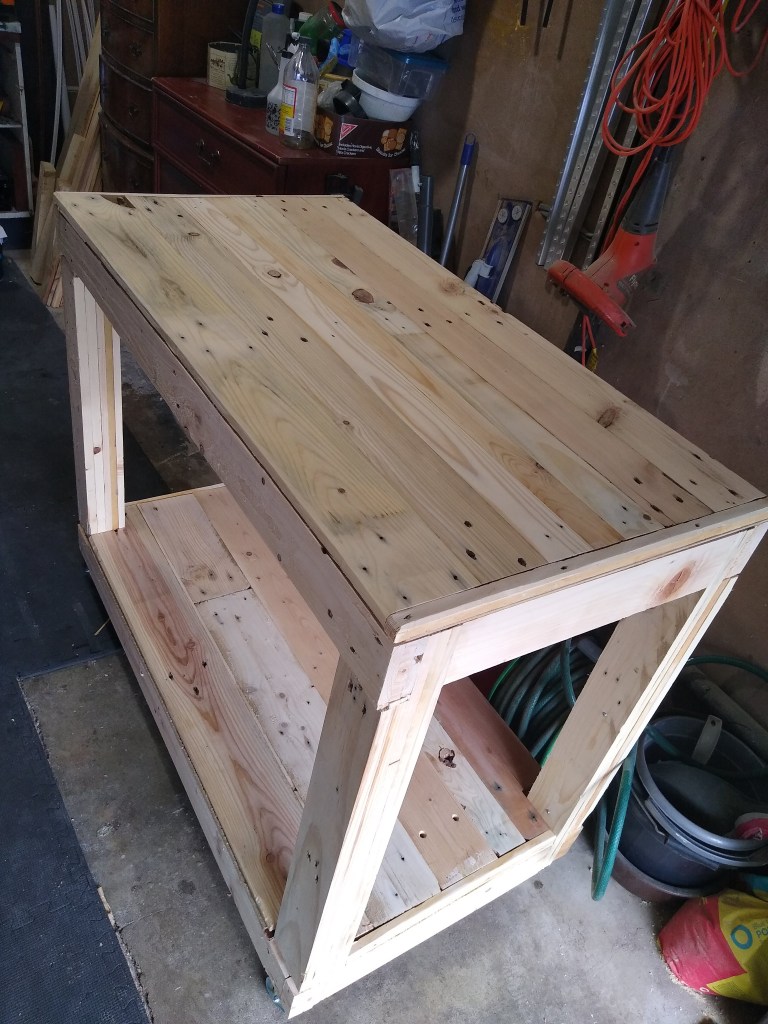
Kinda looks like a bench! 
End strip added 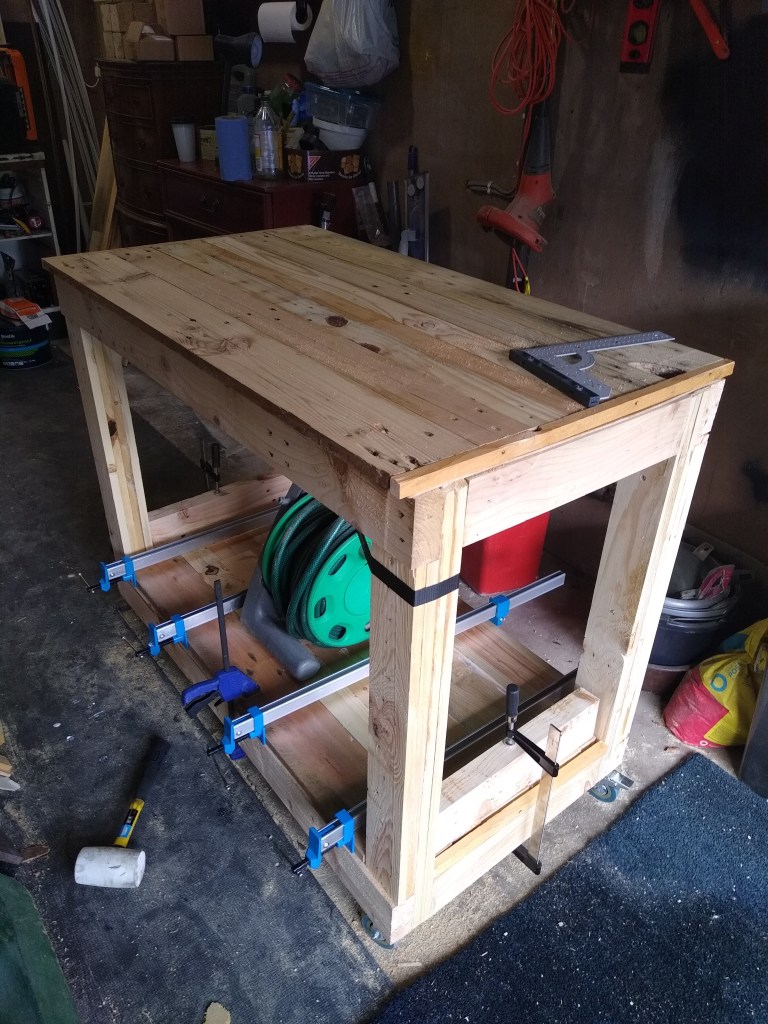
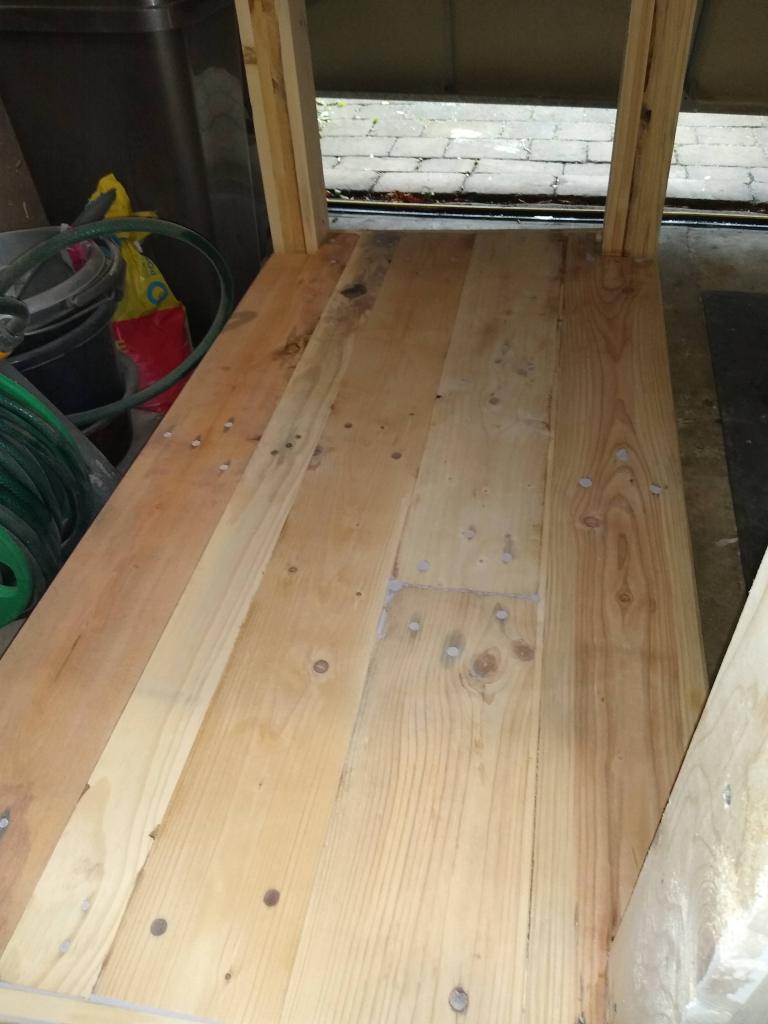
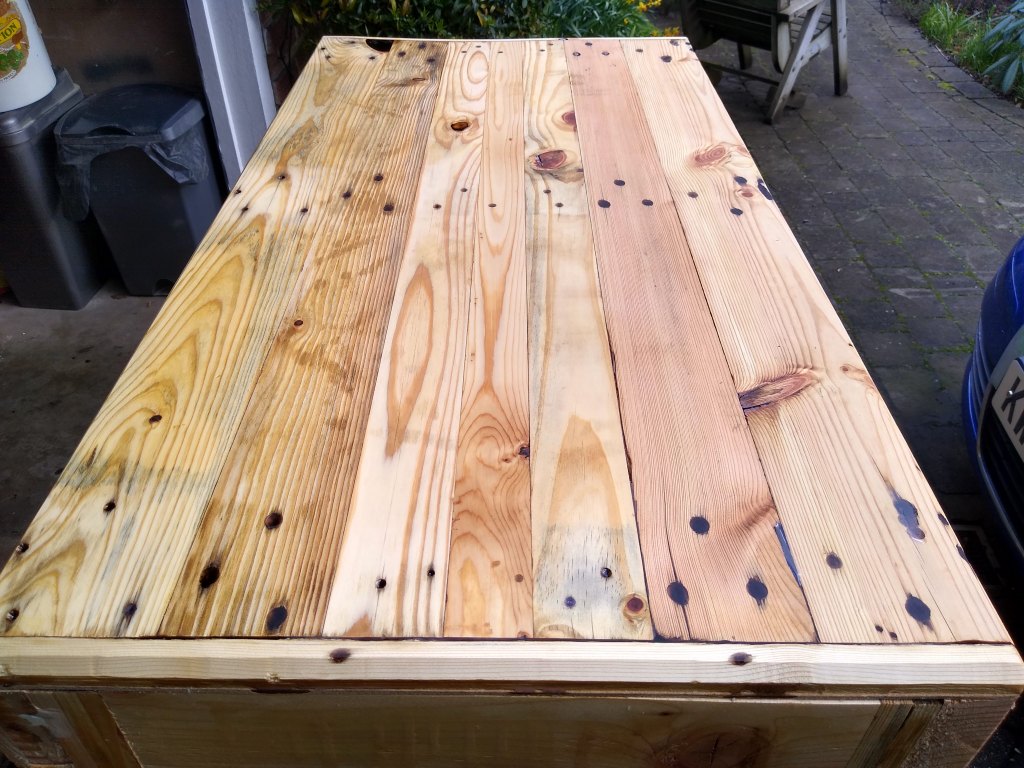
Bottom clamped There was a overhang on the top on each side of the bench that I trimmed down with a jigsaw and then chamfered with a router. Now the bench was assembled and looking half decent I needed to sand all the surfaces, fill all the gaps and varnish it all. I used my sander with an 80 grit then 120 grit, this smoothed most of the lines that were left from the planer. I then took a counter sink drill bit to clean up the nail holes left from separating the pallets. This left a cleaner hole for the filler (epoxy in this case) to bind to.
Edges chamfered 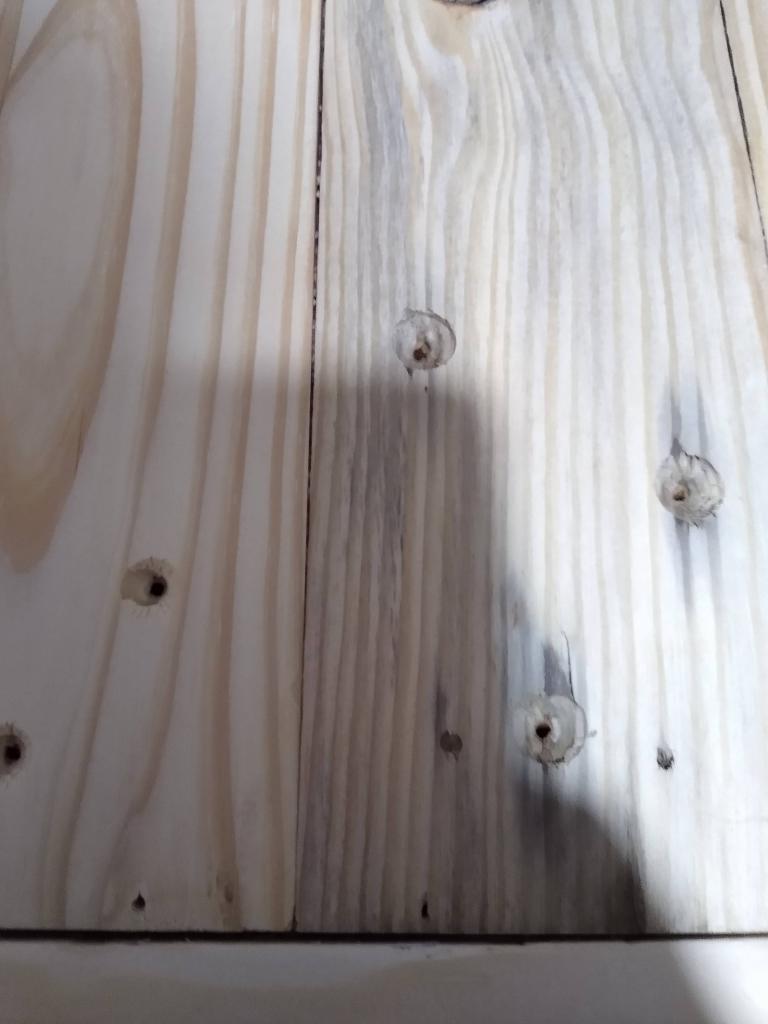
Nail holes tidied 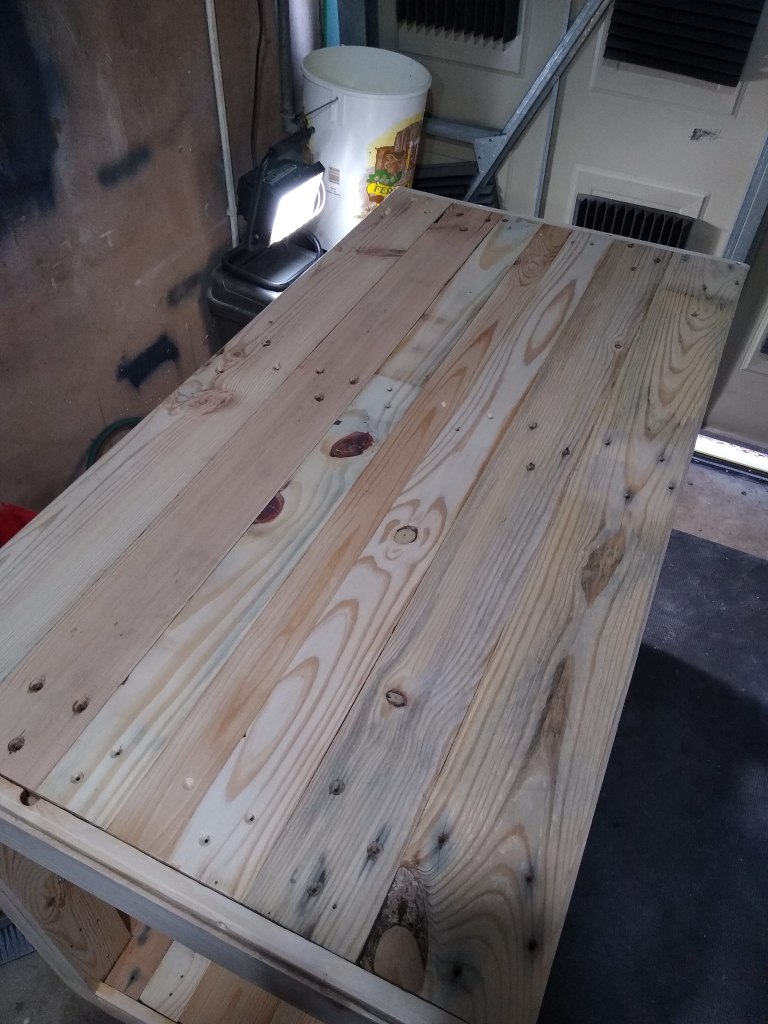
Old shaker was handy for pouring epoxy! 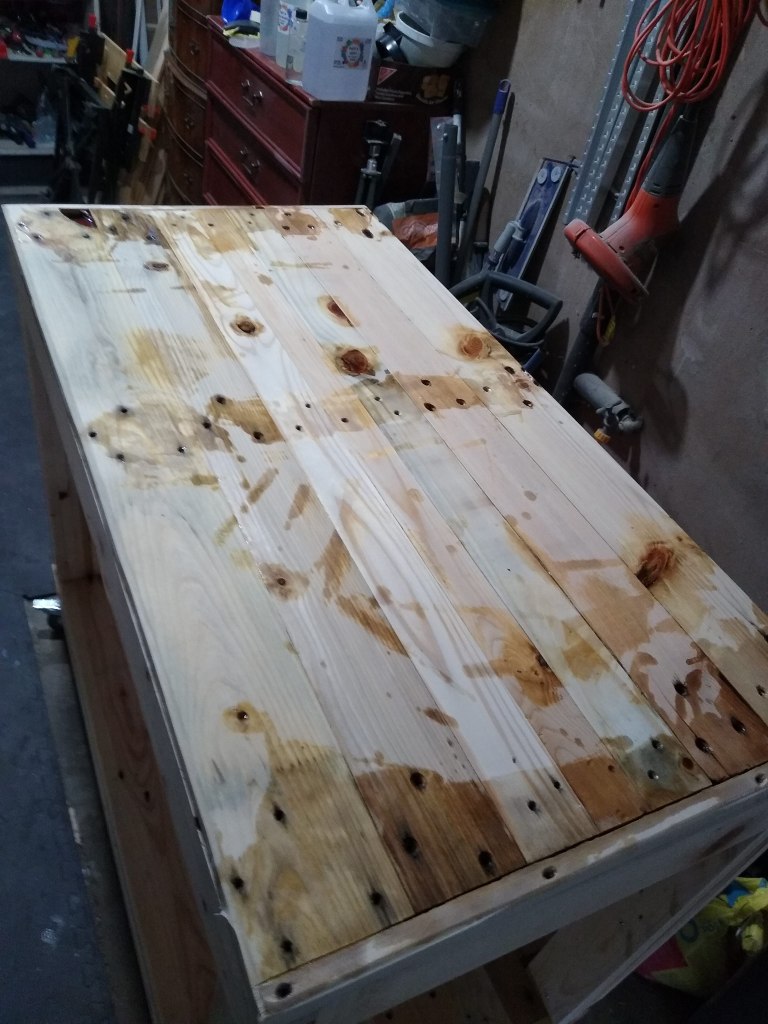
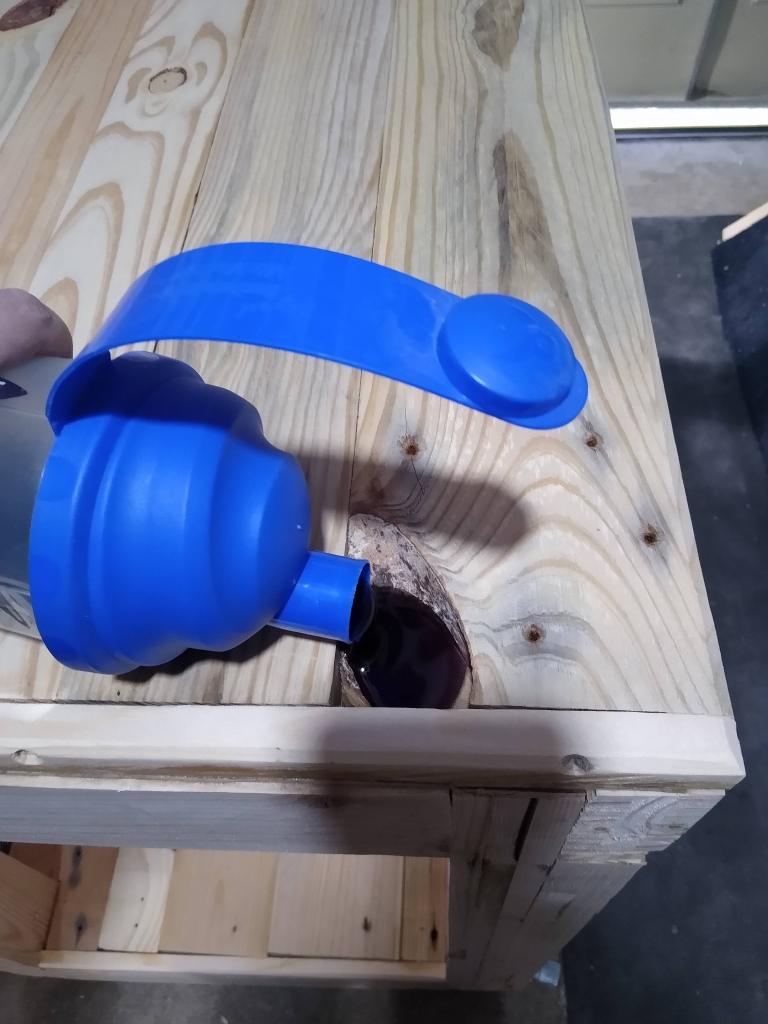
First layer It be came apparent that using epoxy to fill old nail holes was not ideal as it just got absorbed into the wood and fill every nook and cranny before reaching the top of the nail hole. After 3 rounds of topping up the nail holes 90% of them were looking good, including the main knot hole.
Once again I sanded everything back to remove the over-spill of epoxy, thinking about it, I didn’t need to sand it before, but who doesn’t love a bit of unnecessary sanding.
On the bottom shelf I originally used normal wood filler with a drop of dye, however it looked inconsistent. I ended up drilling them all out and persevering with epoxy on the bottom shelf’s nail holes. This time I used a syringe to fill the holes which meant no over spill and a very precise epoxy application.
The last step was to finish the wood, I decided a simple teak oil would do the trick, mainly as it happened to be laying around for decades looking rather unloved. It’s called Hiltons teak oil, and I don’t think it exists anywhere anymore.
Before teak oil 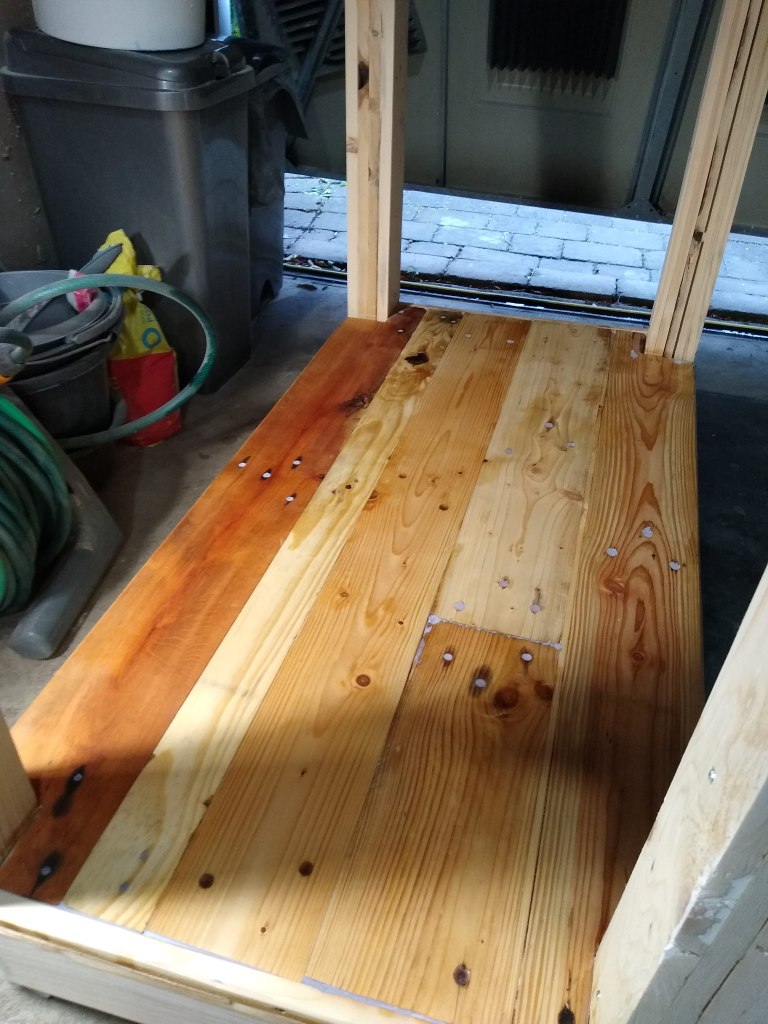
After teak oil 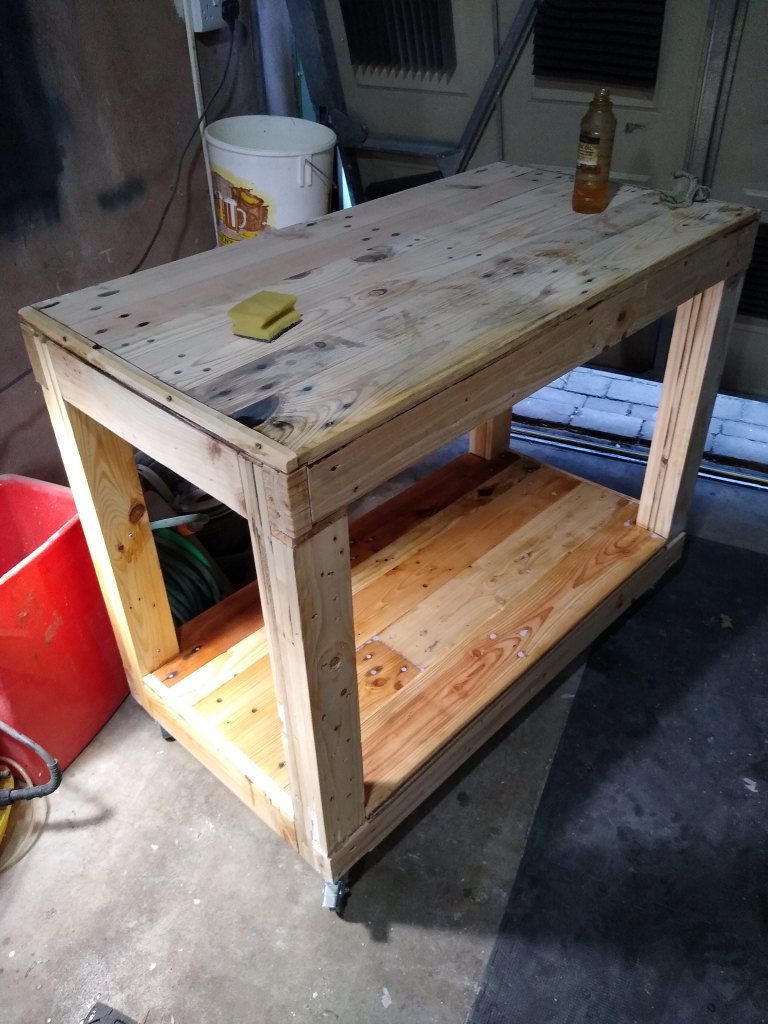
Before teak oil 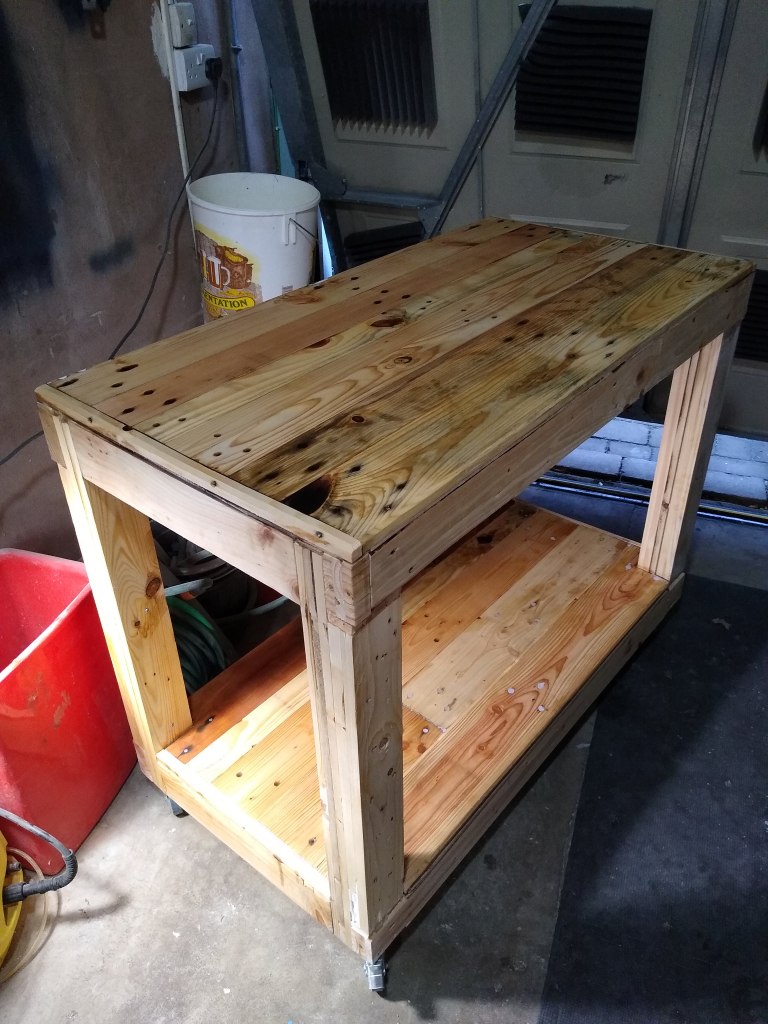
After teak oil 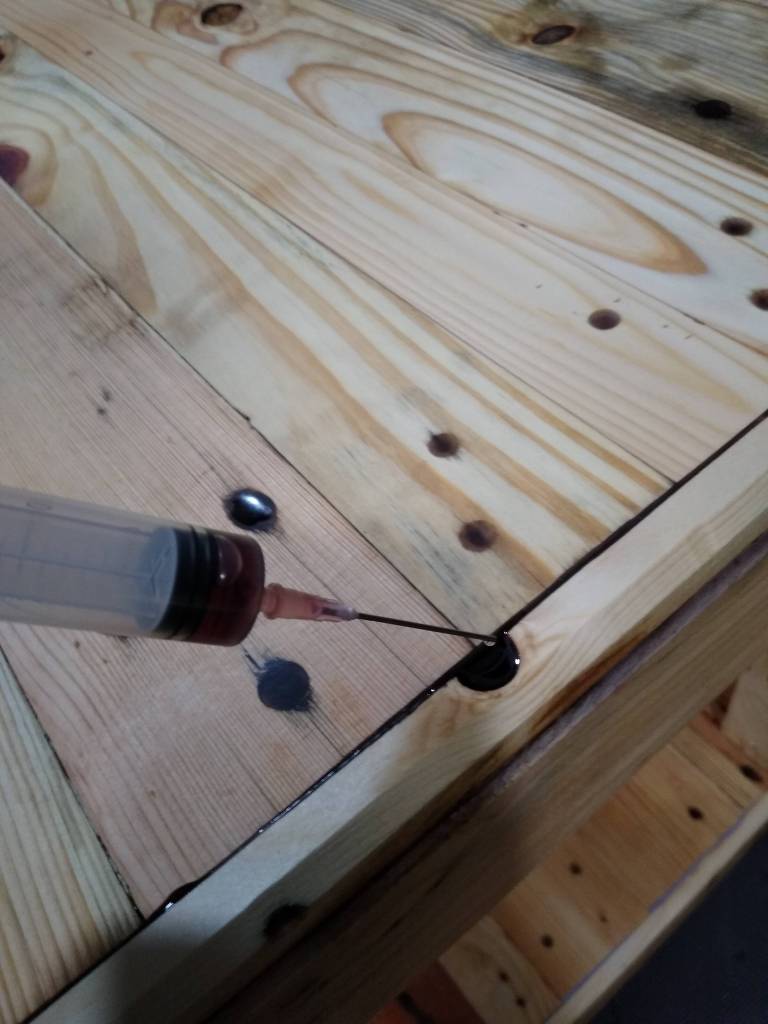
Just what the doctor ordered 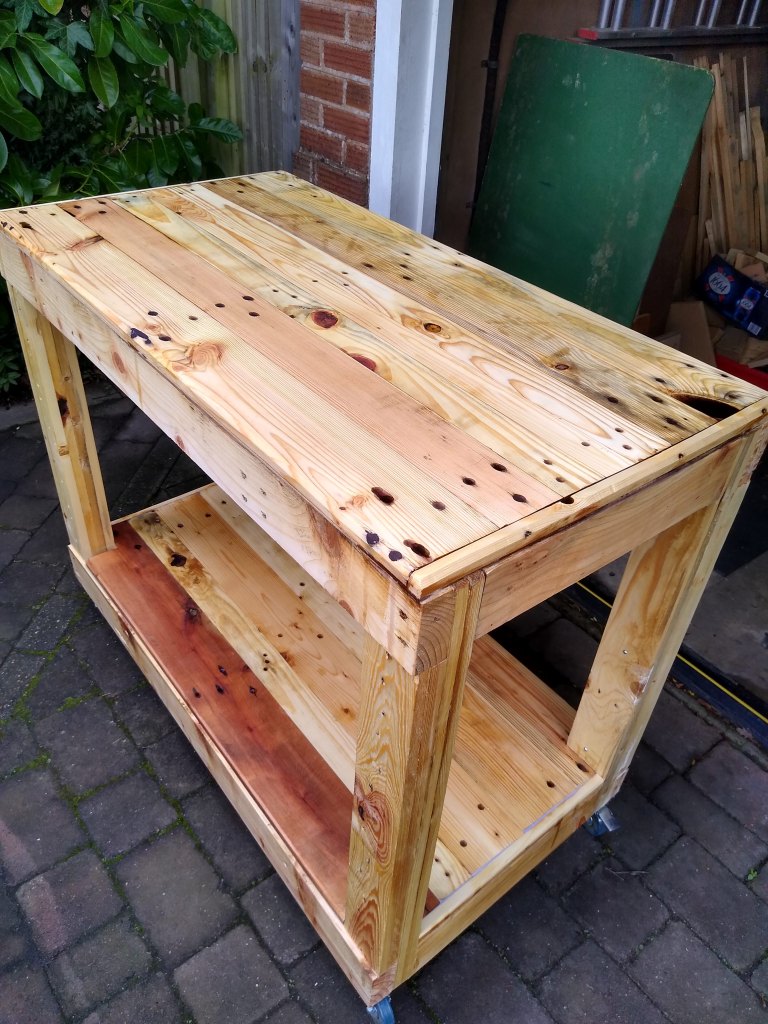

After replacing filler with epoxy 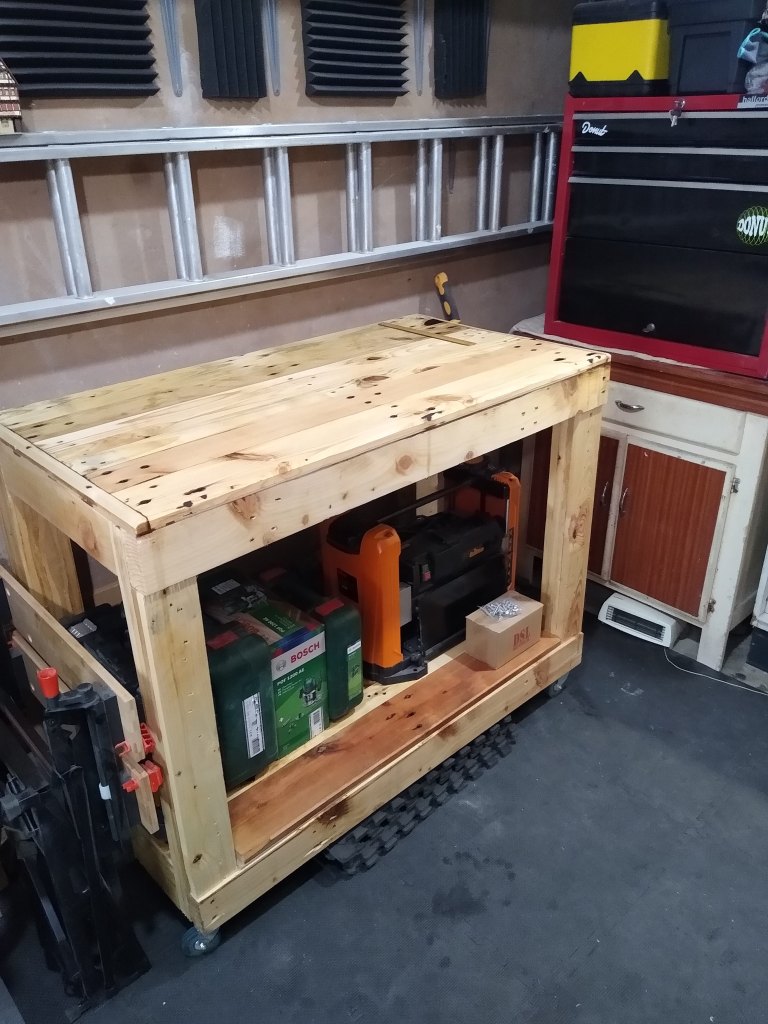
It’s done! This was certainly a challenge and it has taught me a lot about working with pallet wood. It’s also very clear that there is a lot to learn and I’ve barely scratched the surface of what you can do with abandoned pallets.
What to make next?
-
Mistake table, Mistable, Les Misértables. Part 3 (Final!)
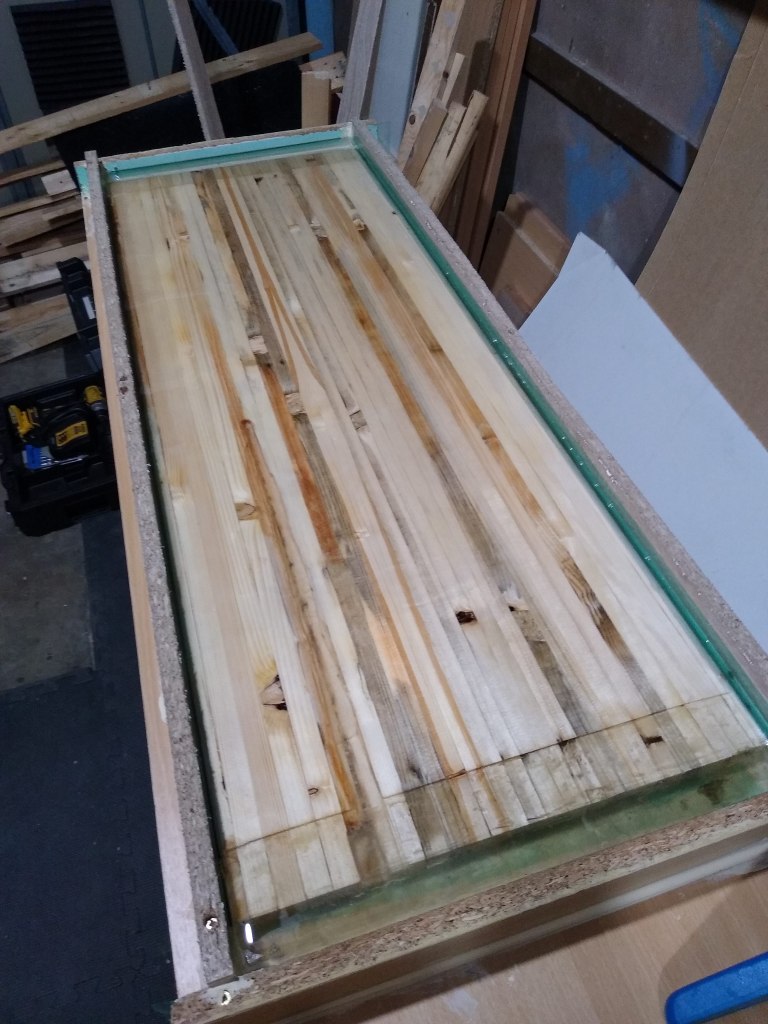
Step 15: Make a proper form this time. An old MDF wardrobe generously donated it’s body parts for the greater good. I traced a line around the table ontop of the MDF panel and then trimmed another panel down with a jigsaw to make the box. Next it was just a case of screwing the box together and calking the bottom before screwing it to the base. I caulked all along the out side and the inside of the box before adding release tape to every surface. No more scraping leaked epoxy for this guy. Probably.
Then I plonked the table top back inside the form and to my amazement, it fitted perfectly, with a slight gap on each side to allow the resin to encase it. I thoroughly mixed the resin then poured it in the form and once again crossed my fingers.
Caulked around the inside 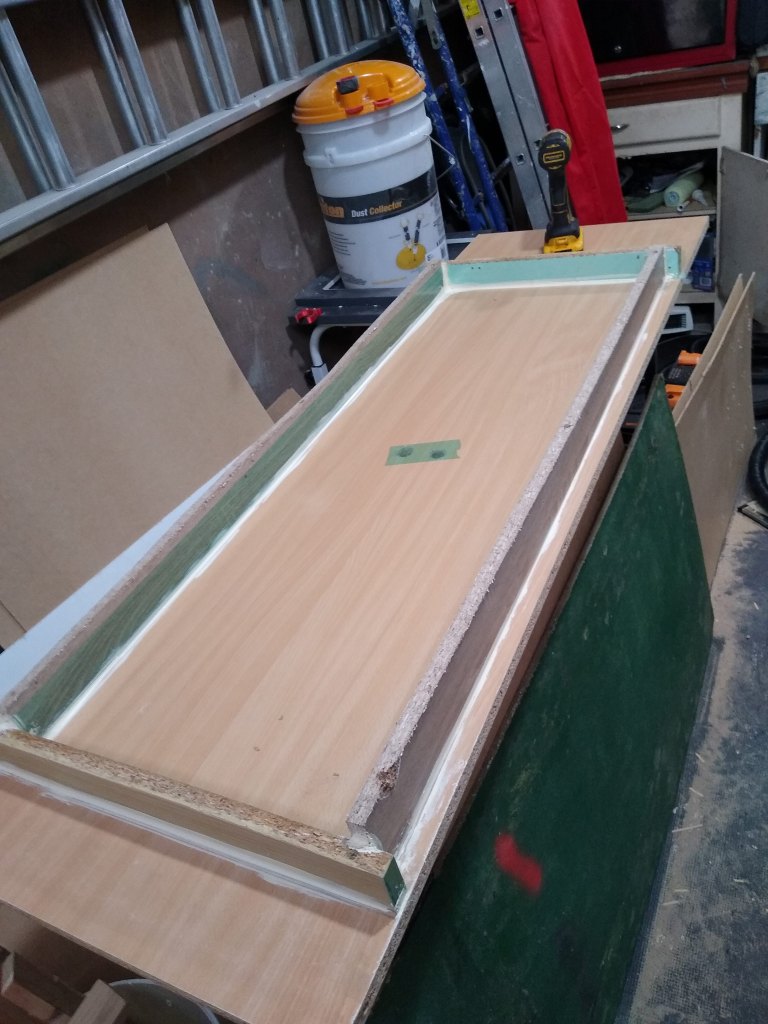
Caulked around the outside 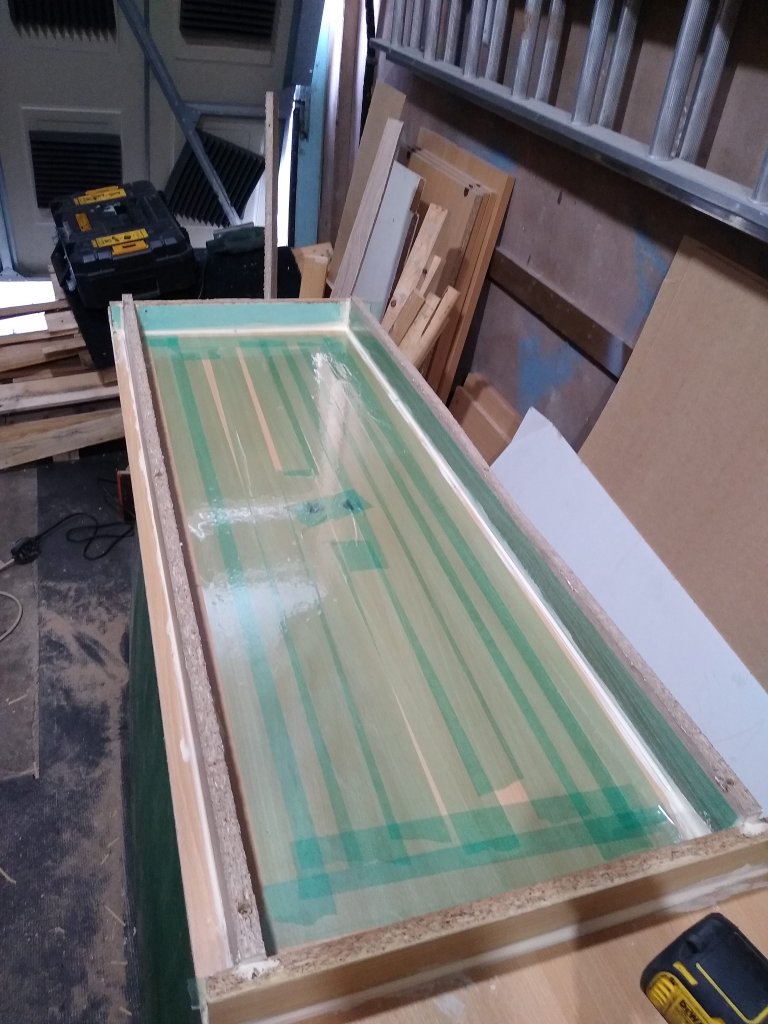
Release tape everywhere! 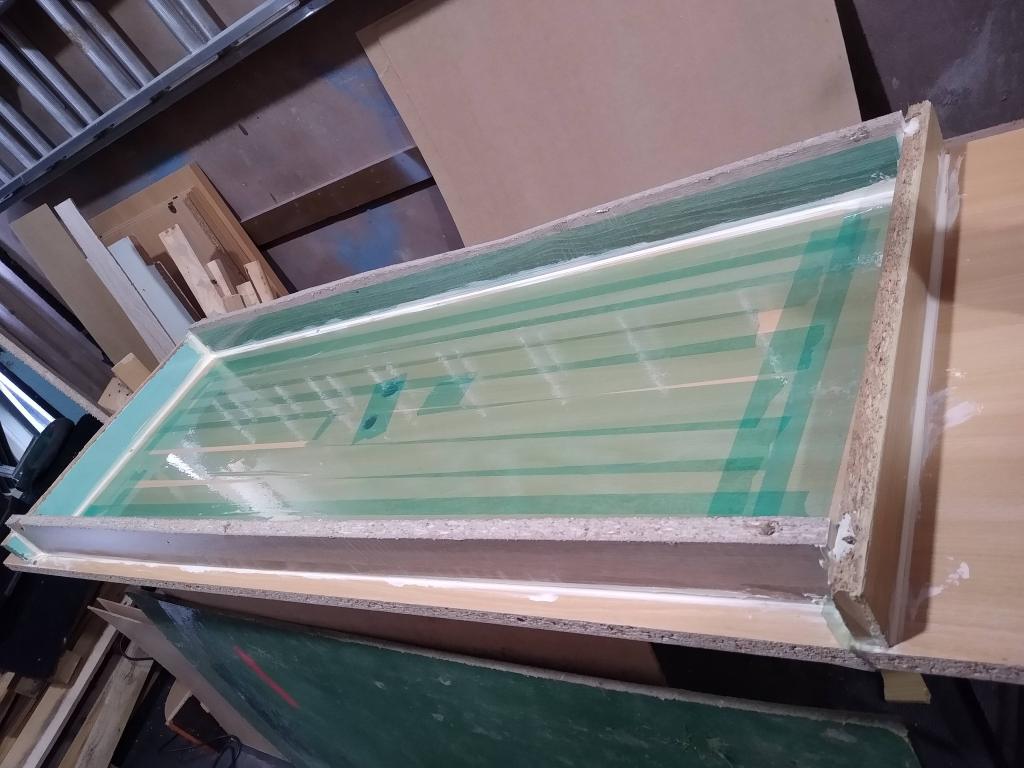
Like a glove! 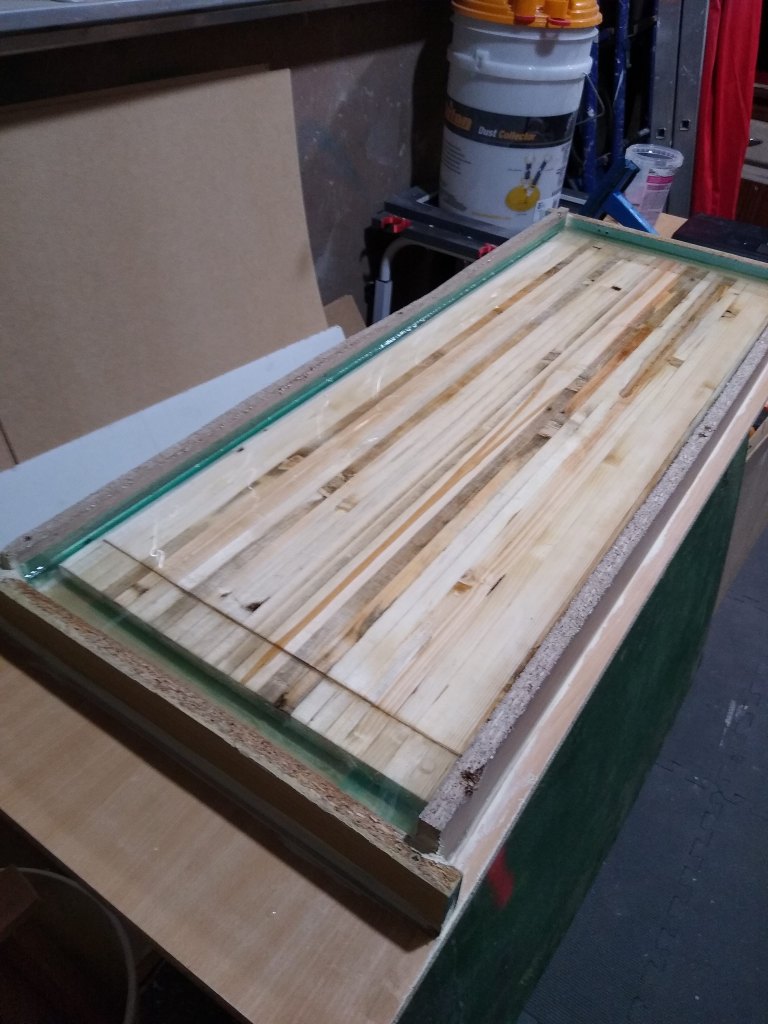
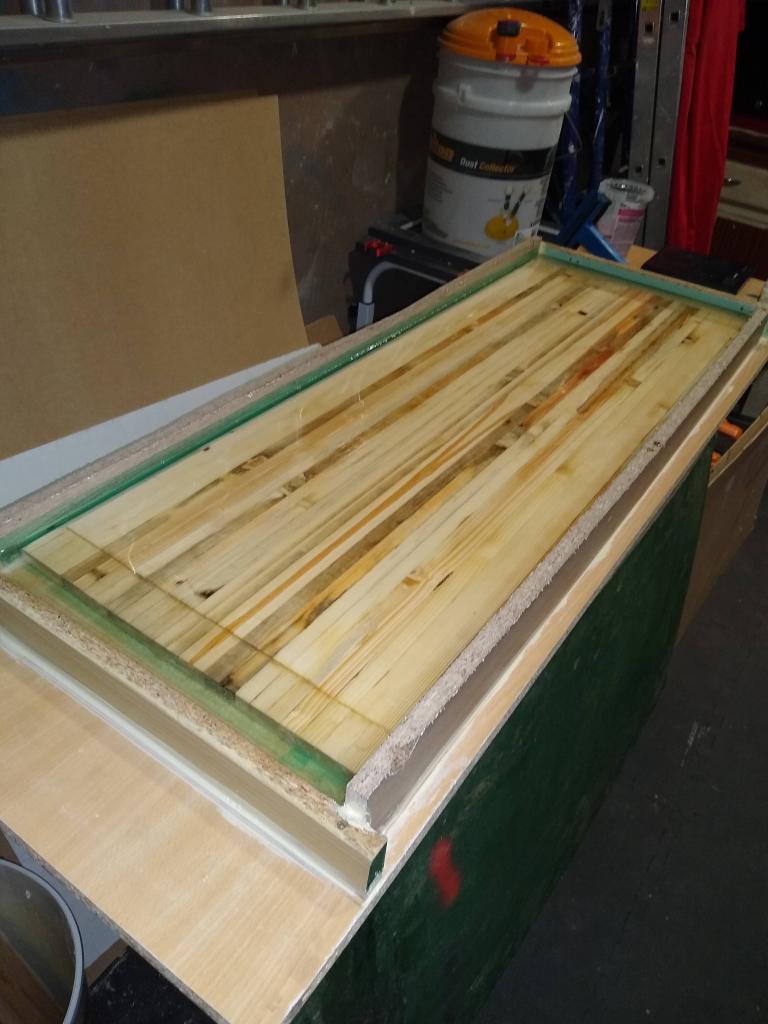
Now we wait. Step 16: Discover a new issue. There was a milky haze in the epoxy. I’m not sure if this was the temperature or some other curing issue, as it was completely clear when it was poured. It was unexpected as I made sure to mix it exactly to spec and poured it within the temperature guidelines. As I mentioned before this was a different epoxy to the first type so maybe it was not as good quality?
Step 17: Remove the form, inspect the Cure and hope this boy doesn’t cry (any more). When I flipped the table over I saw it had almost uniformly set on the bottom, so it must have been floating on epoxy in the form. There were a handful of empty pockets that would need filling and some imprints of the MDF pattern that would need sanding out. Talking of sanding, I got some 3M Xtract sanding discs (after Cam from Blacktail studios mentioned them) and they are actually much more resistant to clogging.
Link: https://amzn.to/3xsGouL
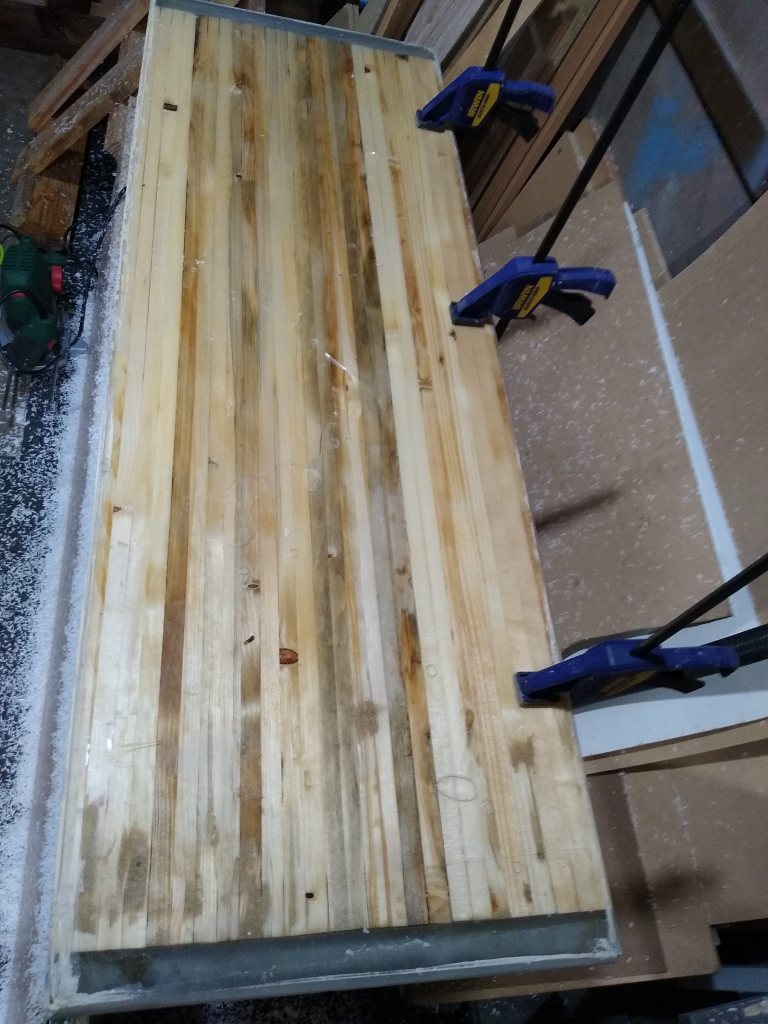
I also found that the caulk had pretty much set into the epoxy on every side, this wasn’t a huge deal as I was going to route every edge again. The routing went far smoother than last time, apart from a slip on the underside it turned out pretty uniform. I also, also noticed that some tiny bubbles had escaped being popped. I may have to invest in a blow torch as my ancient heat gun is a bit too asthmatic for popping epoxy bubbles.
Round epoxy-less pockets 
Pattern from the MDF form. 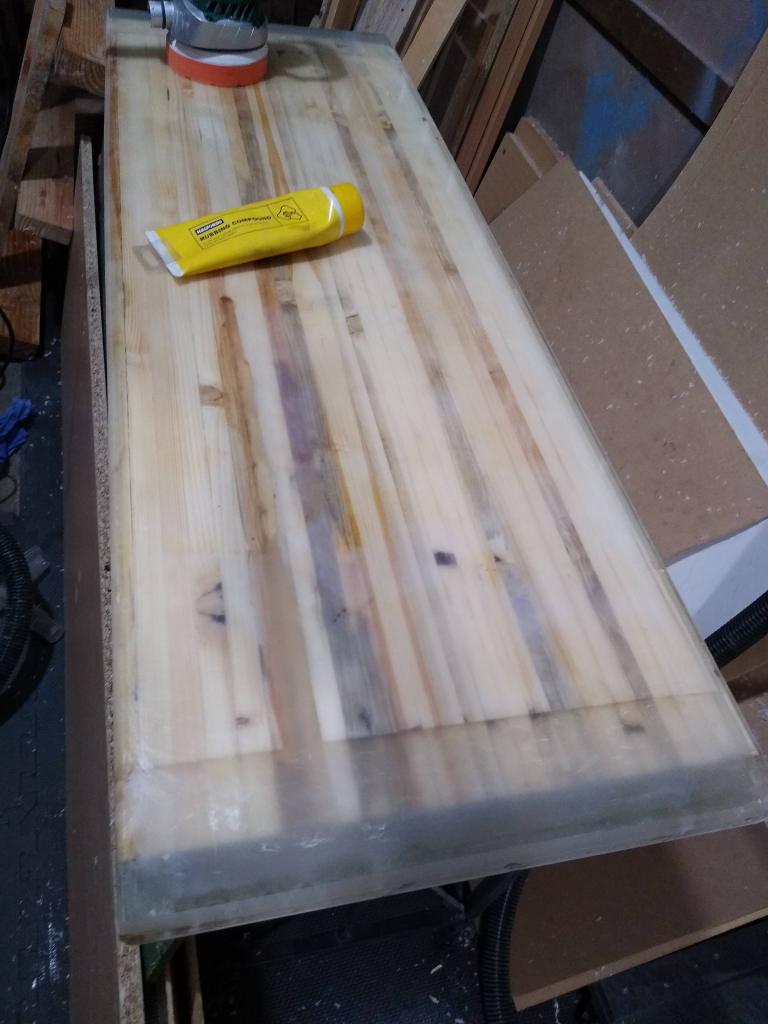
Milky haze 
The frame! 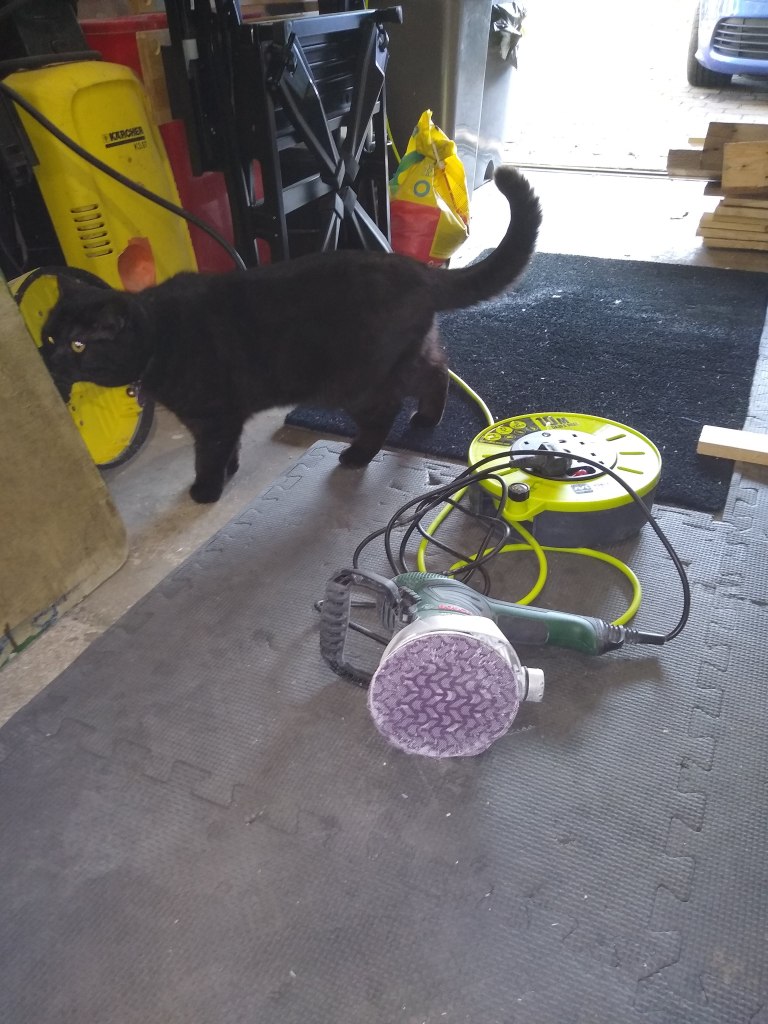
Neighbour’s cat popped in to offer sanding advice. Step 18: After some sanding advice from a cat, I landed on a frosty finish on the epoxy to mask the bubbles, milky haze, embedded caulk & other unwelcomed bits. Originally this was going to be a glassy clear top but experimenting with sanding grits, polished and waxes proved to be enlightening.
I used the sander and went through grits 80, 120, 180 and 320 , this left a uniform and frosted look. Then I attempted to buff it with an automotive cutting compound that I found in the back of a cupboard. This actually seemed to work and gave a smooth and slightly clearer finish. After little to no research I decided to use a B&Q basic mat furniture wax to finish the table. It looks like Rubio mono-coat is often used but that stuff is too expensive for this experiment.
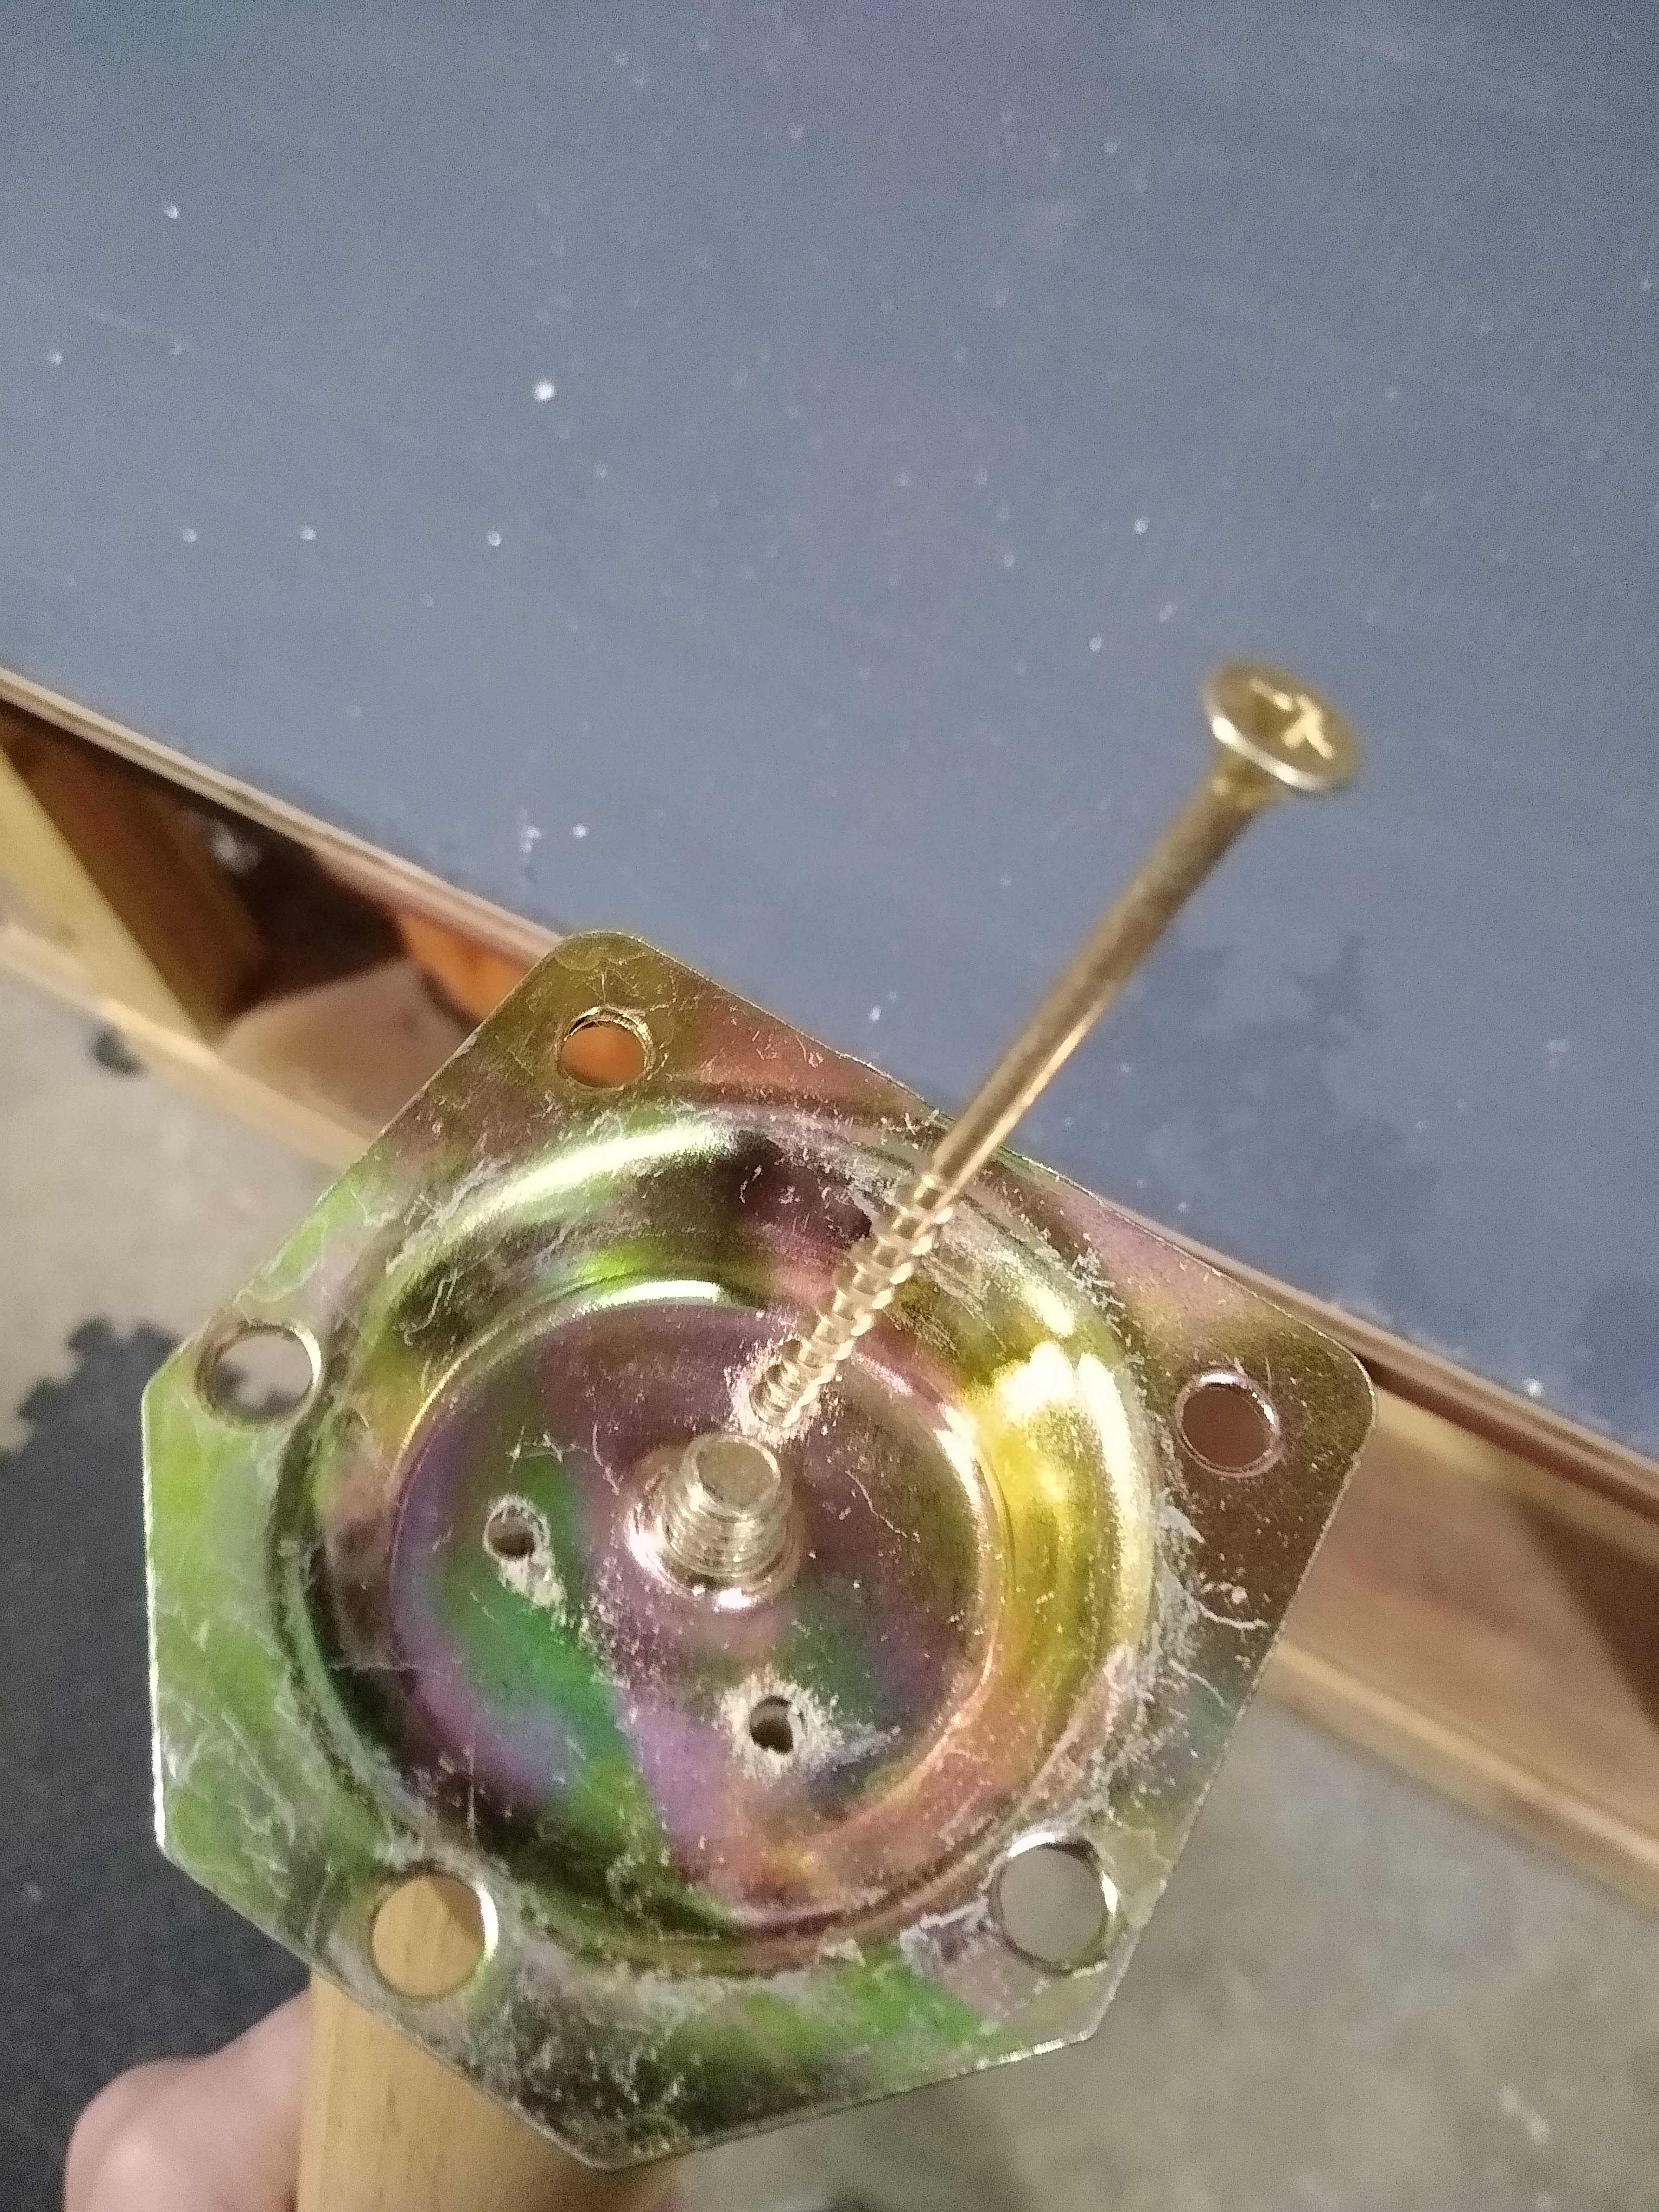
I decided some simple threaded inserts would be the best way of attaching the legs to the table. They were good value, easy to install and looked pretty neat!

Finished underside 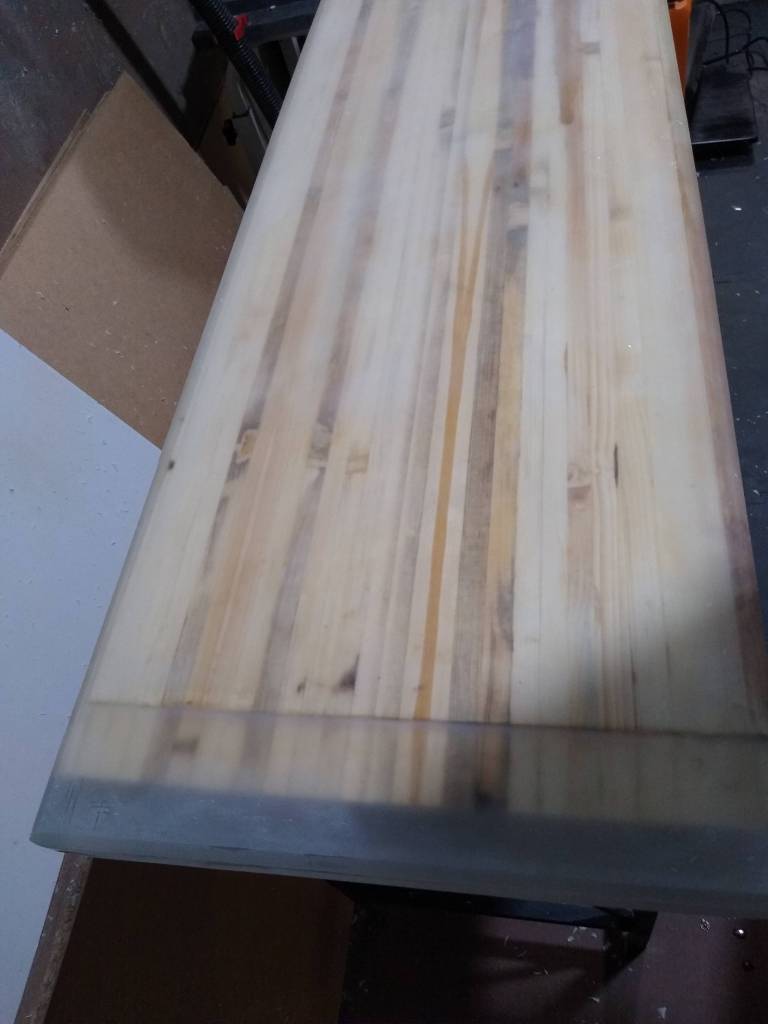
Finished top 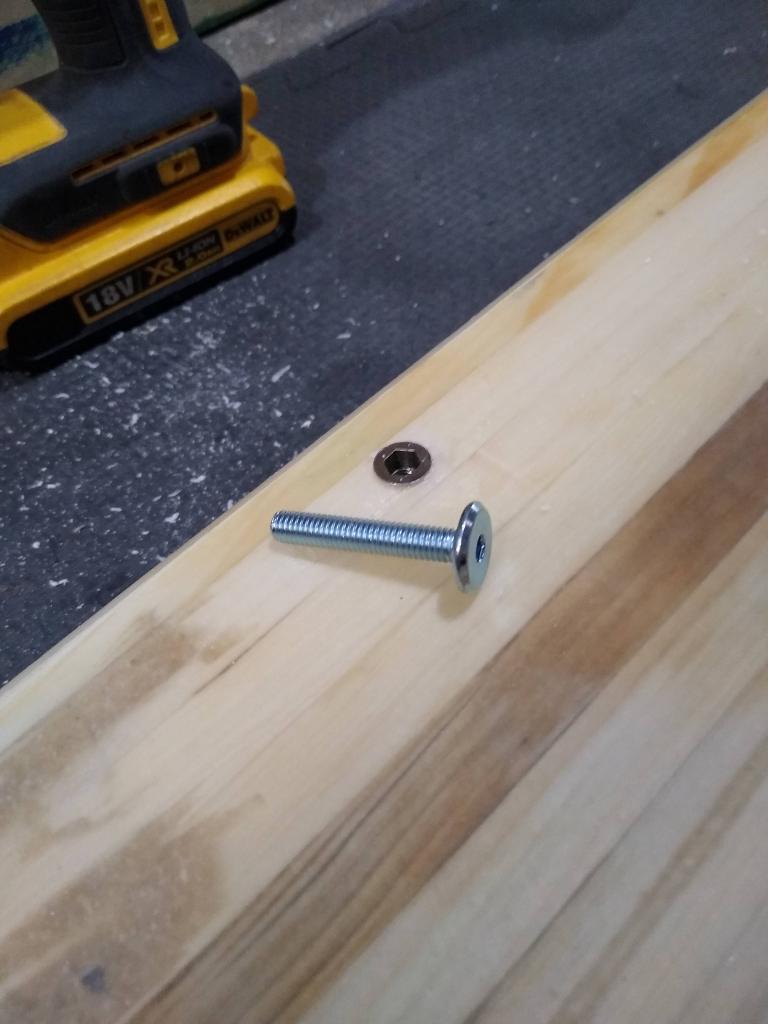
Threaded inserts added to the underside 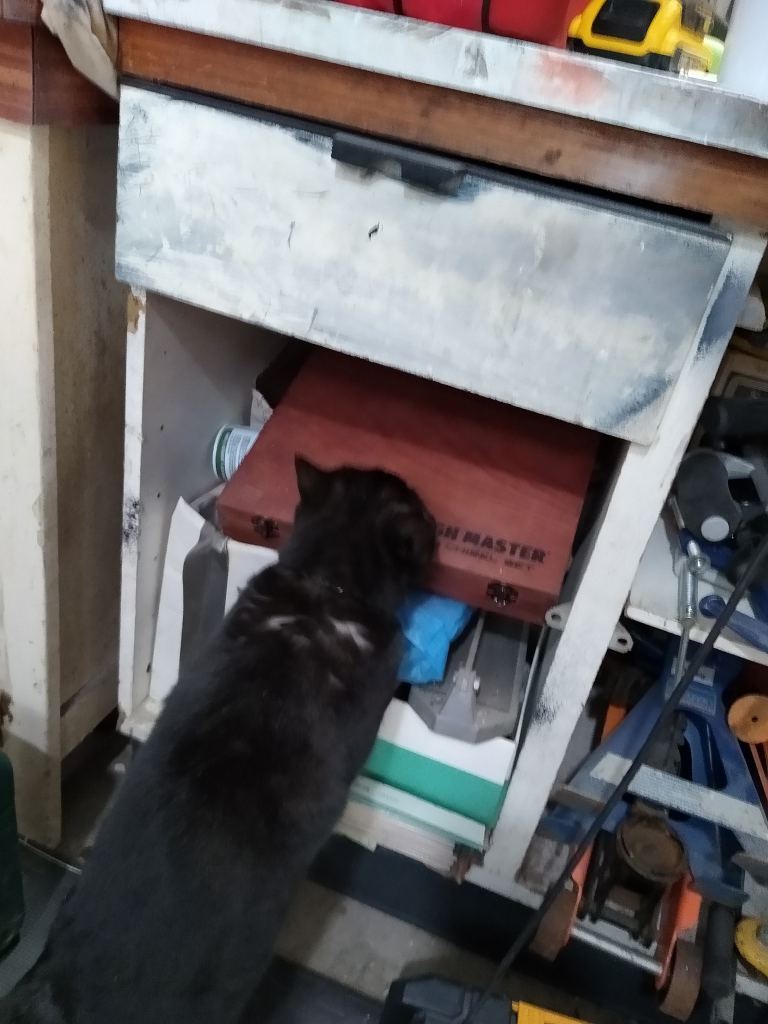
The cat trying to steal my chisel set. 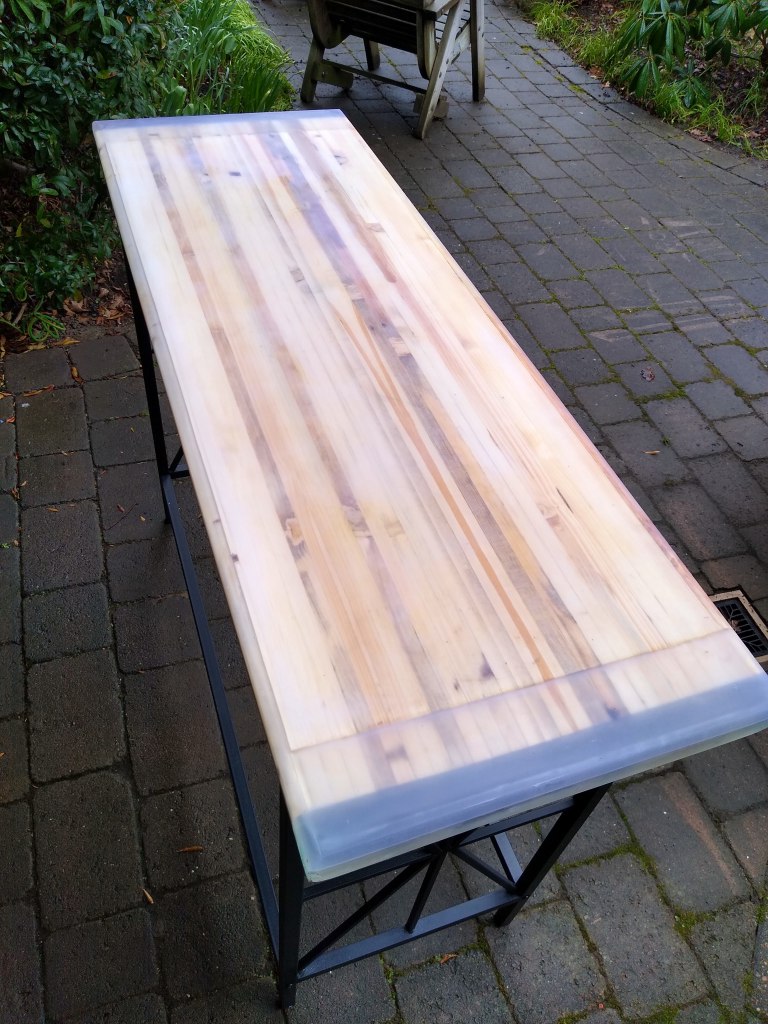
First time taking it outside 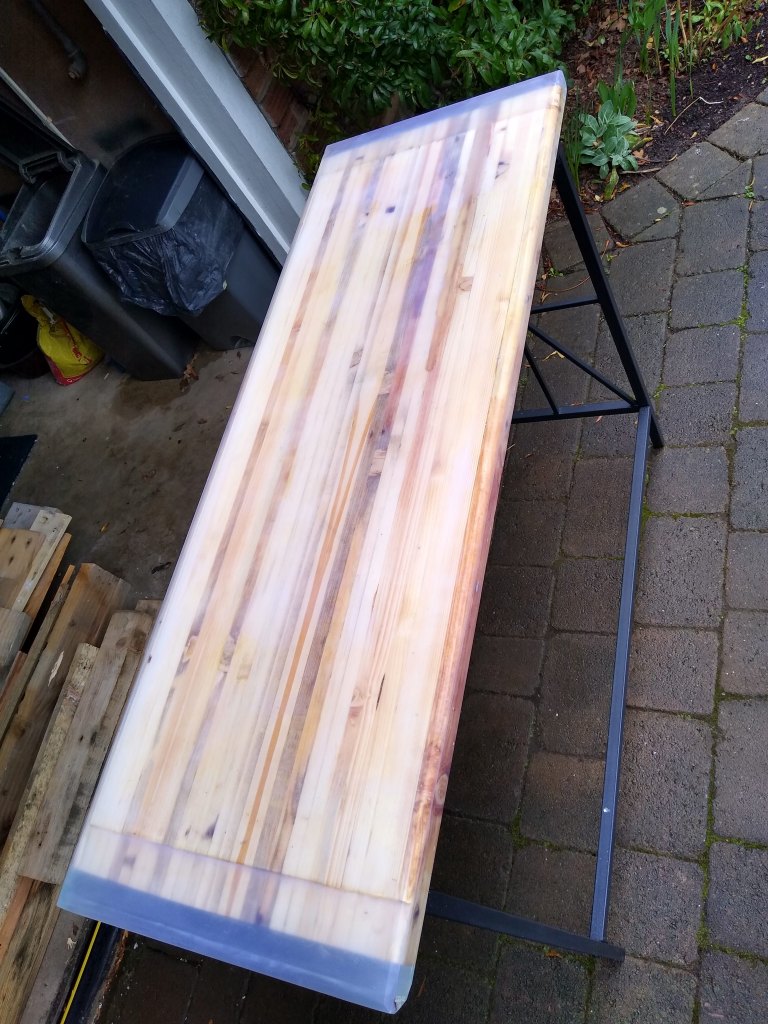
The UV glows slightly outside 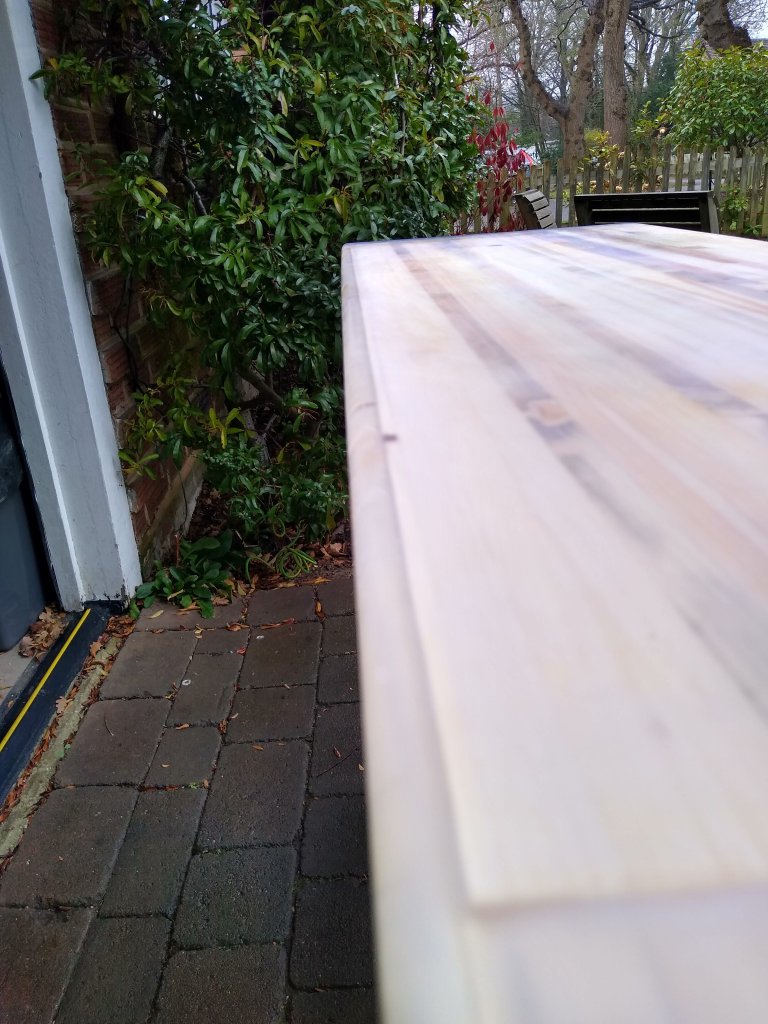
Half decent routing? 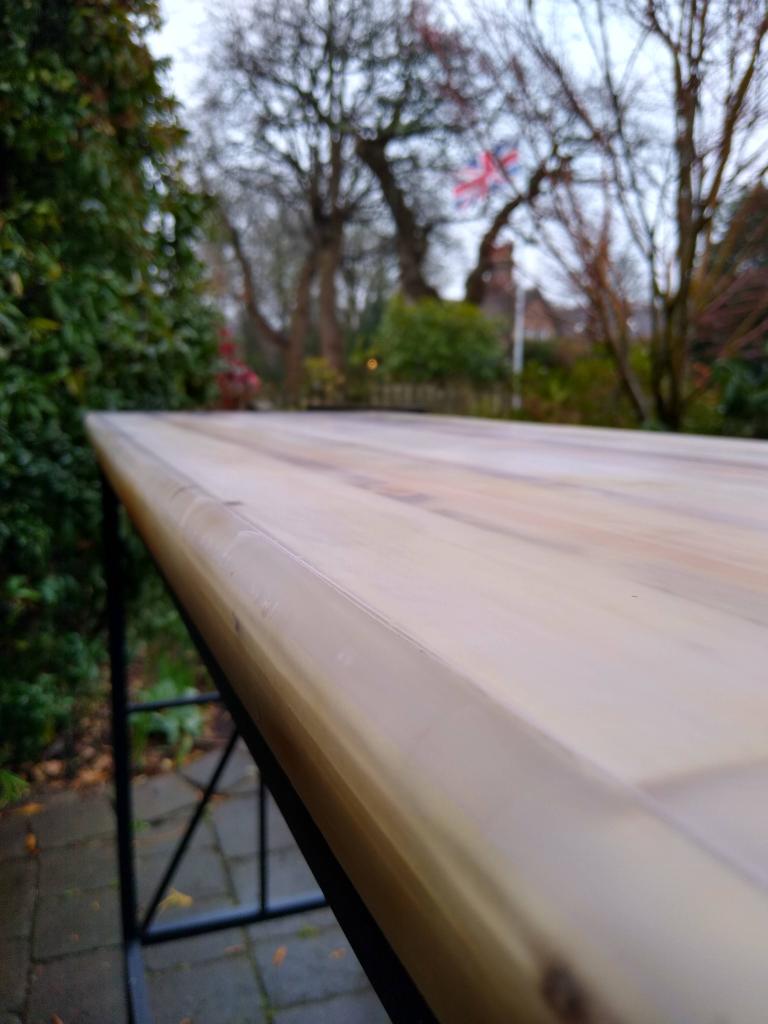
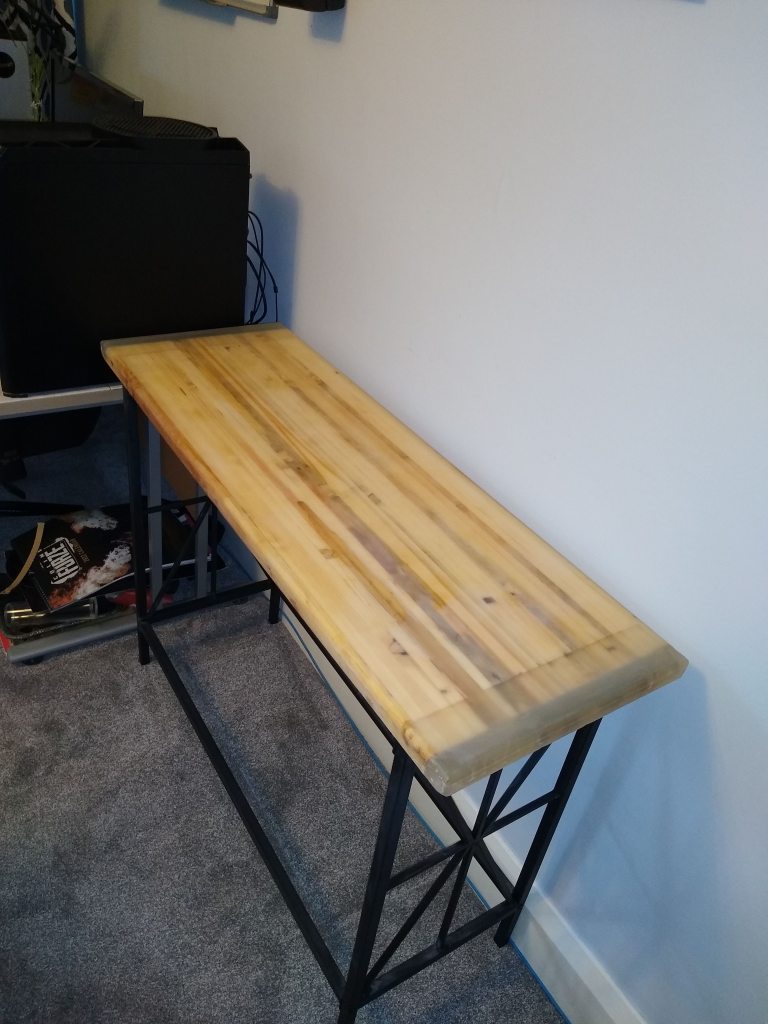
House trained Step 19: The final part of this weird table project was to find a way to make it glow with that UV goodness. Turns out that UV strip lighting is readily available and pretty cheap. I wanted the UV light source to be out of sight and shine up though the ends of the table. To get the best light coverage, the LEDs needed to be angled upwards so I printed some 45-degree angled brackets. These could be installed under the table and the black filament matched the table frame so it’s barely noticeable unless you’re looking for it. The UV light strip is powered by USB, so plugging it into my PC means it powers up and down with the PC.
UV Light strip: https://amzn.to/3XJURwT
Here’s another poorly edited clip for your viewing pleasure!
This whole process has been a bit of a roller-coaster of balls ups, aka a fluid learning experience. I started out with a simple goal of gluing up some wood and sticking some legs on it, but when epoxy got involved it seemed like a great opportunity to let out some pent up creativity. Even if the result was a bit tacky or tasteless, it ultimately was incredible fun to make from start to finish and have learnt way more that I anticipated.
Before 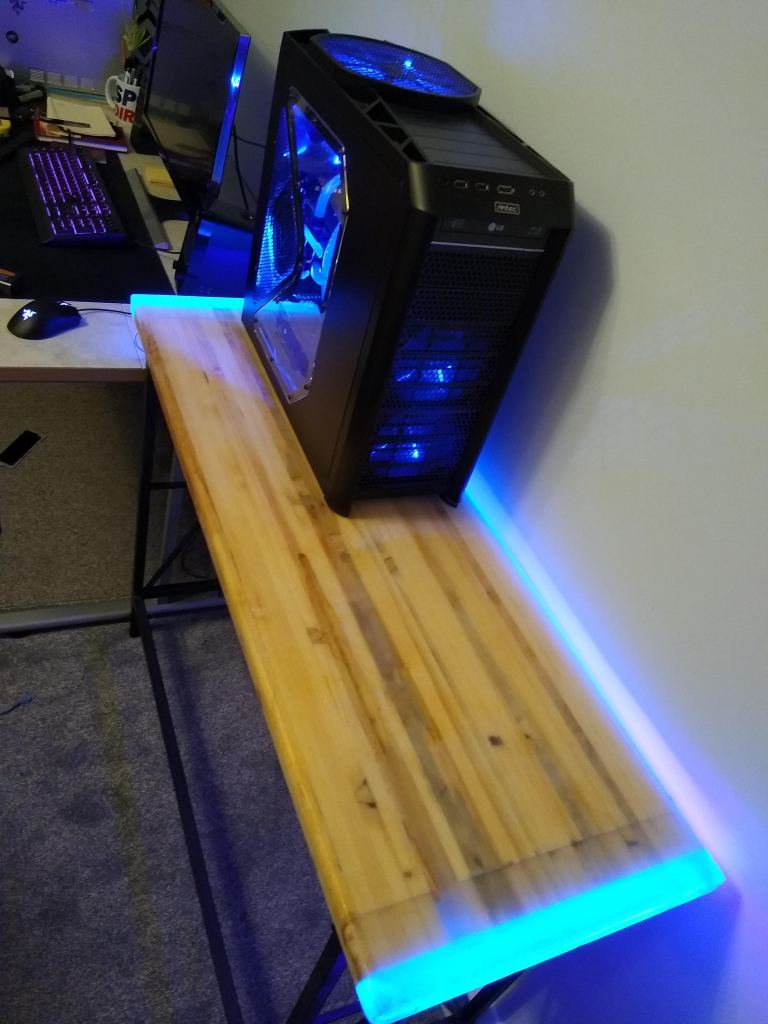
After
The Wooden Duck
Proudly powered by WordPress
