
-
Pair o’ Stools
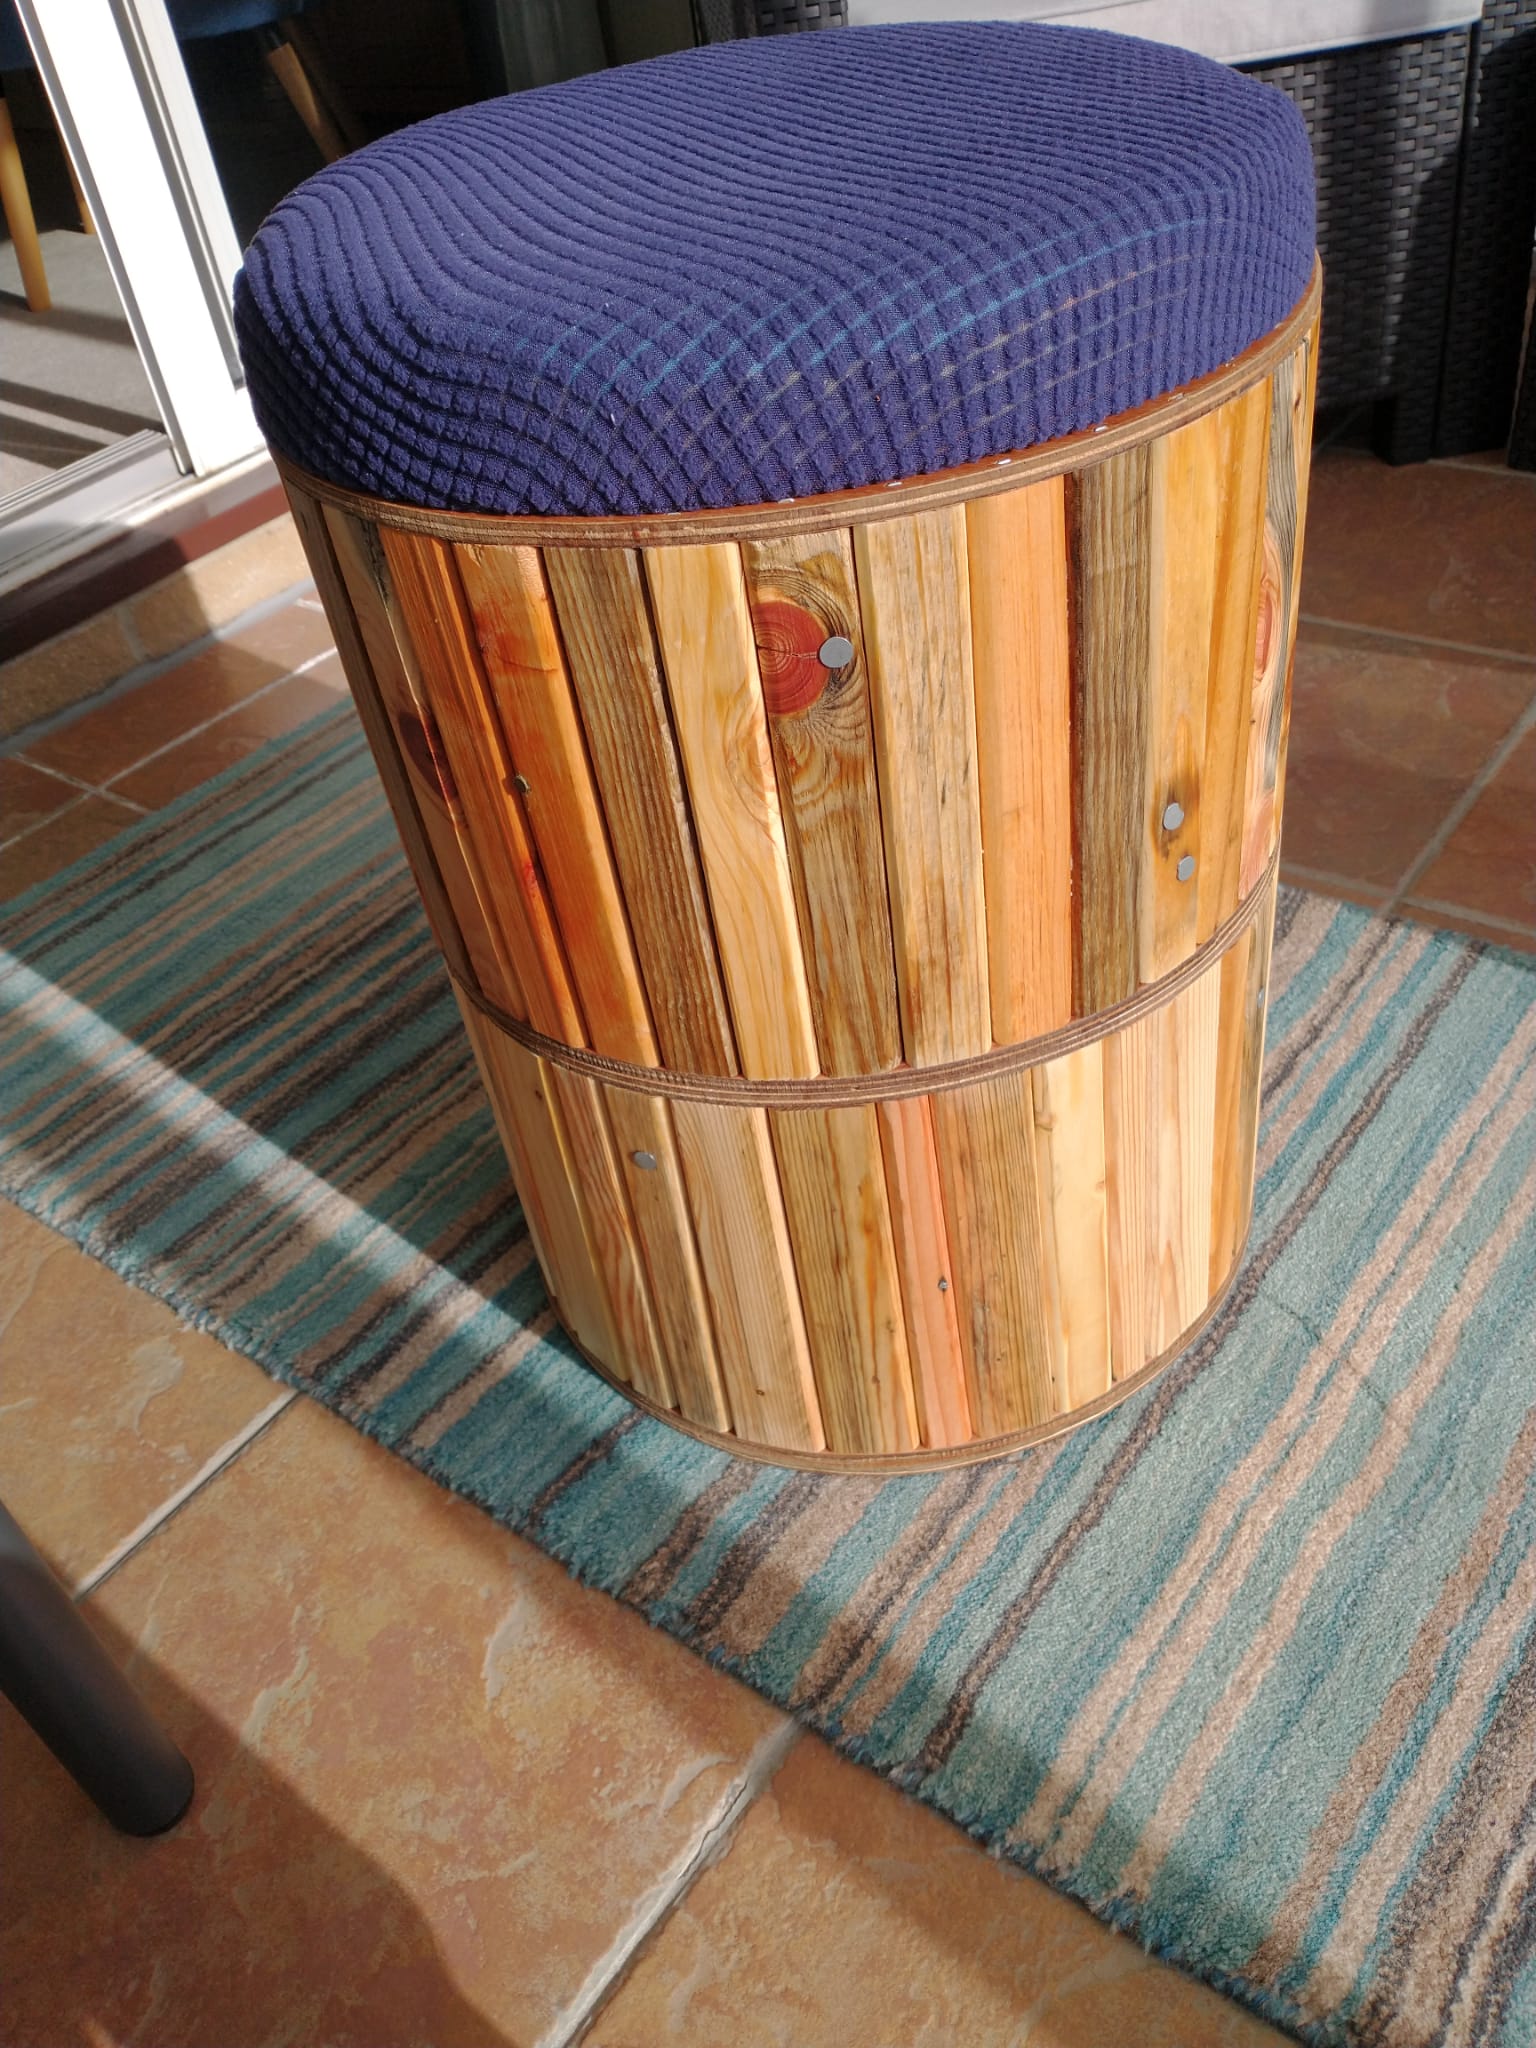
Another little commission! This project is for a couple of stools to sit near a front door for shoe taking off and putting on activities.
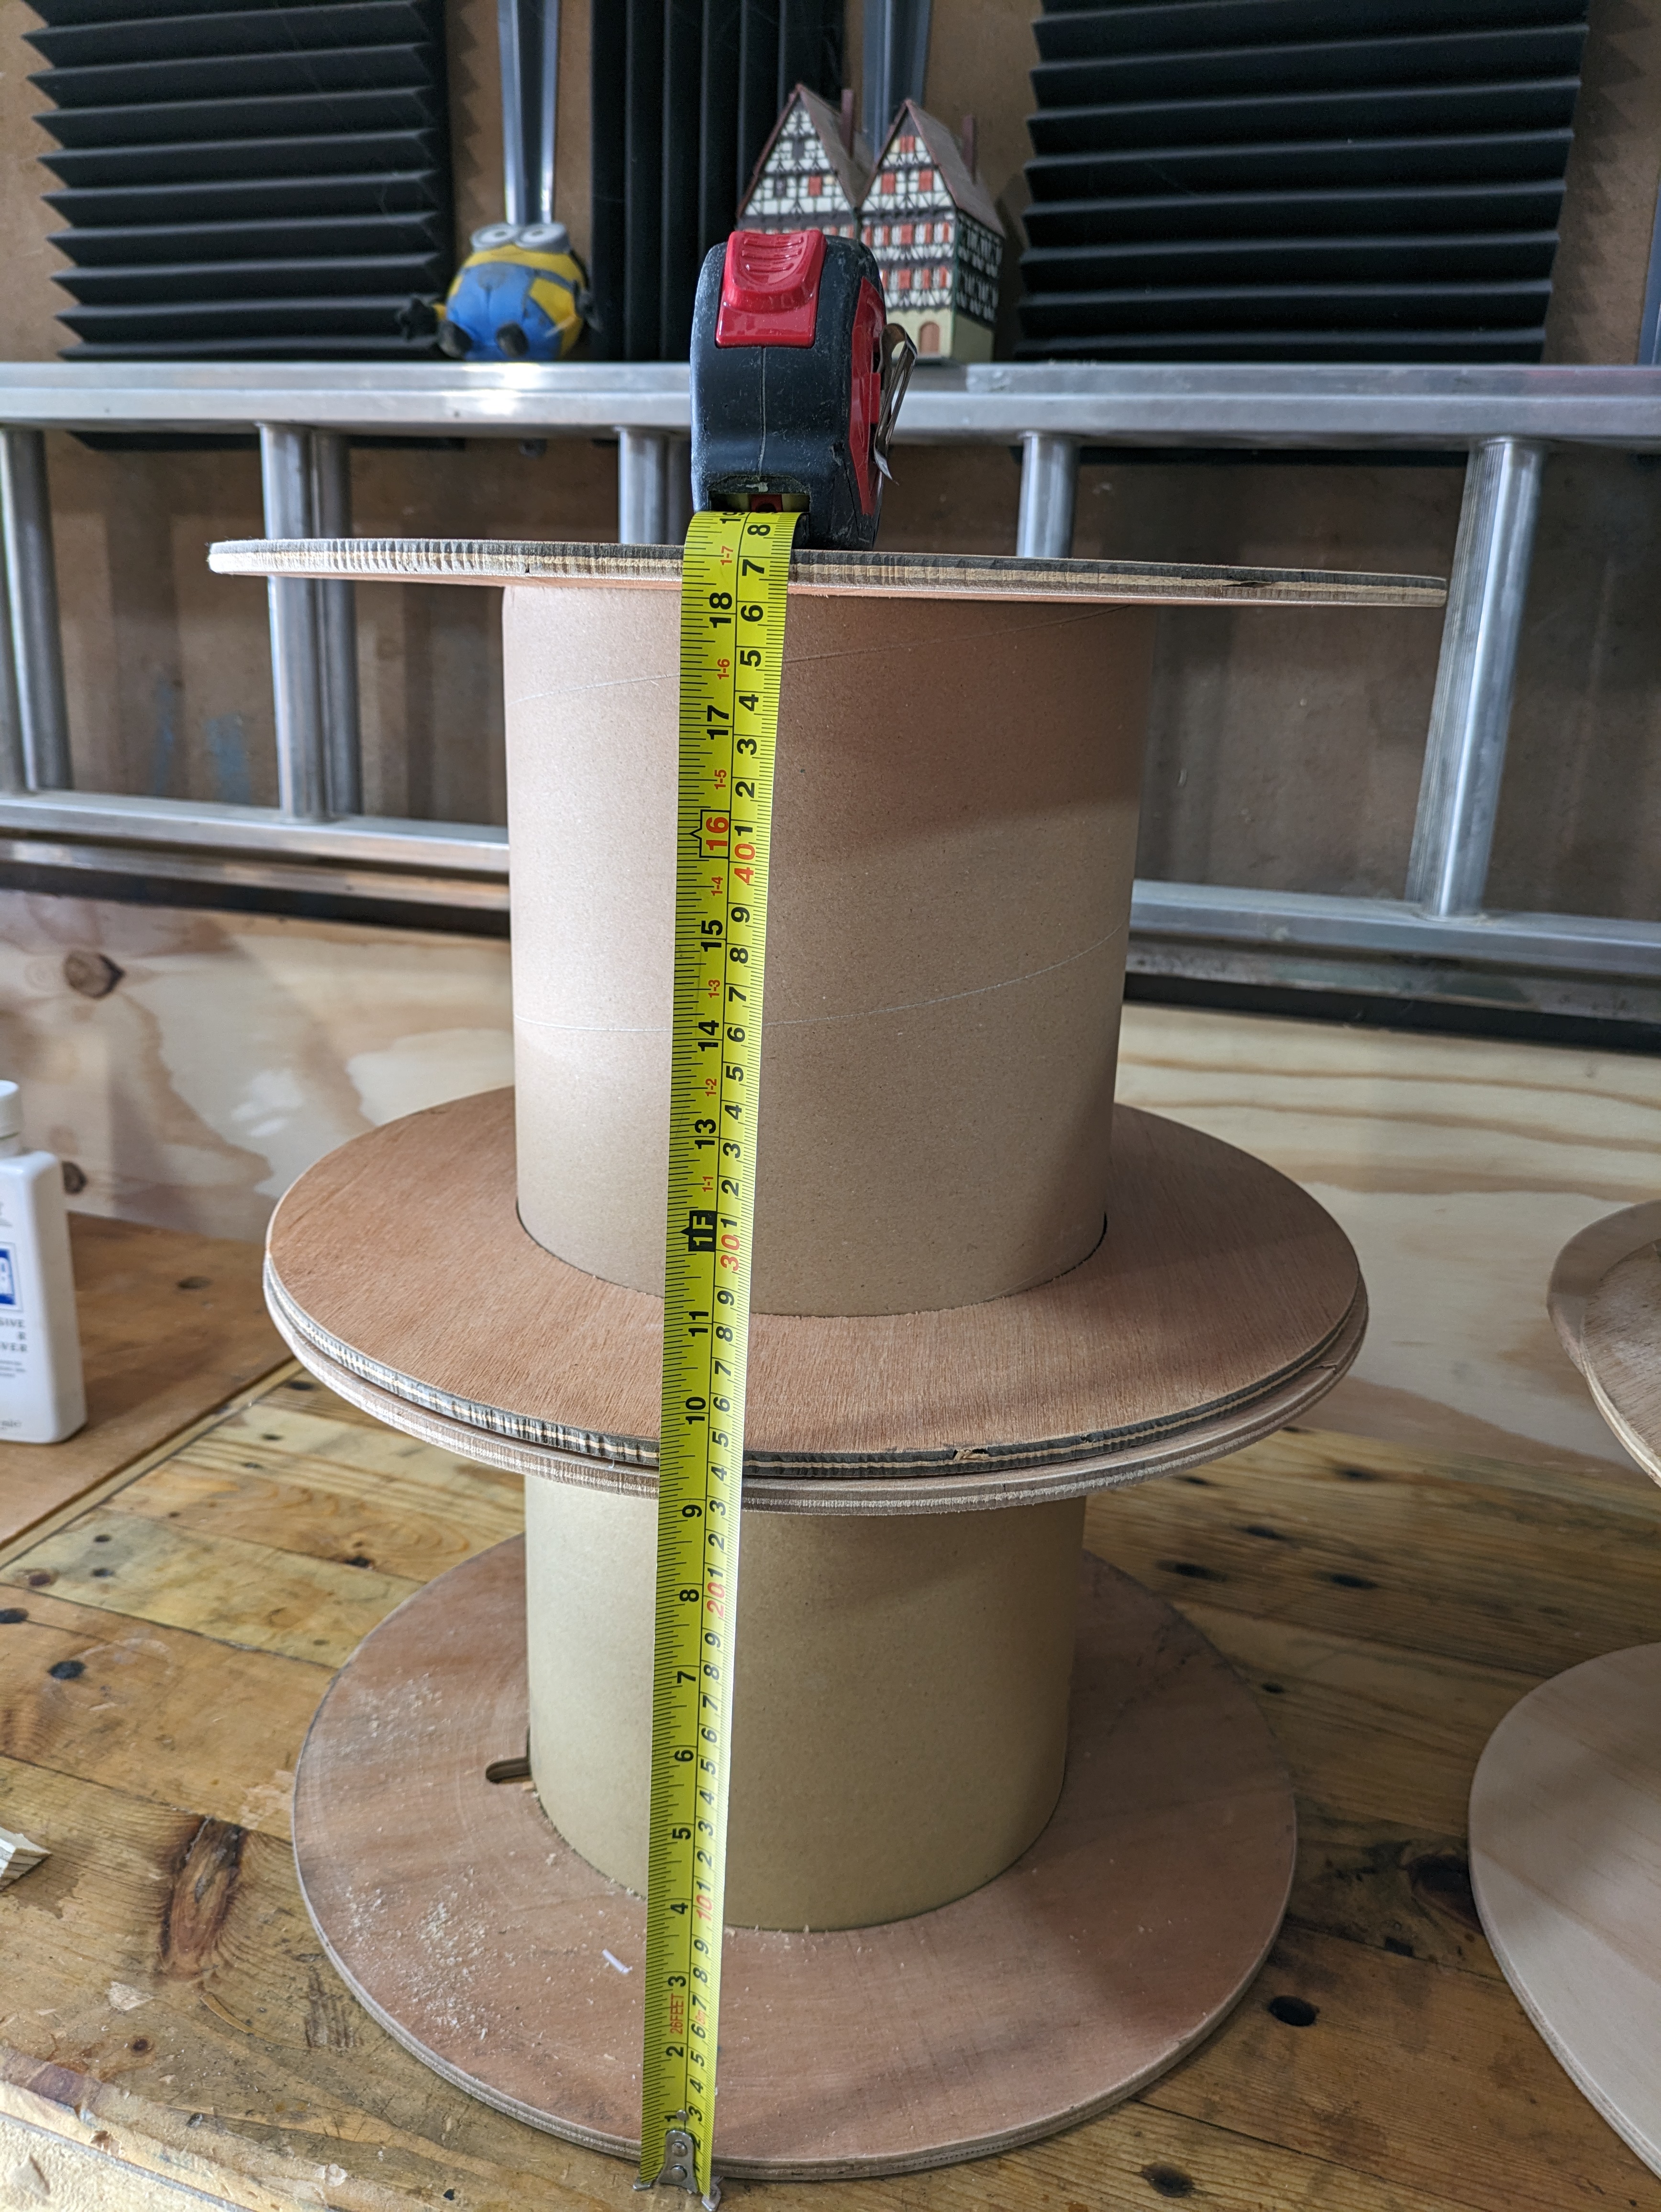
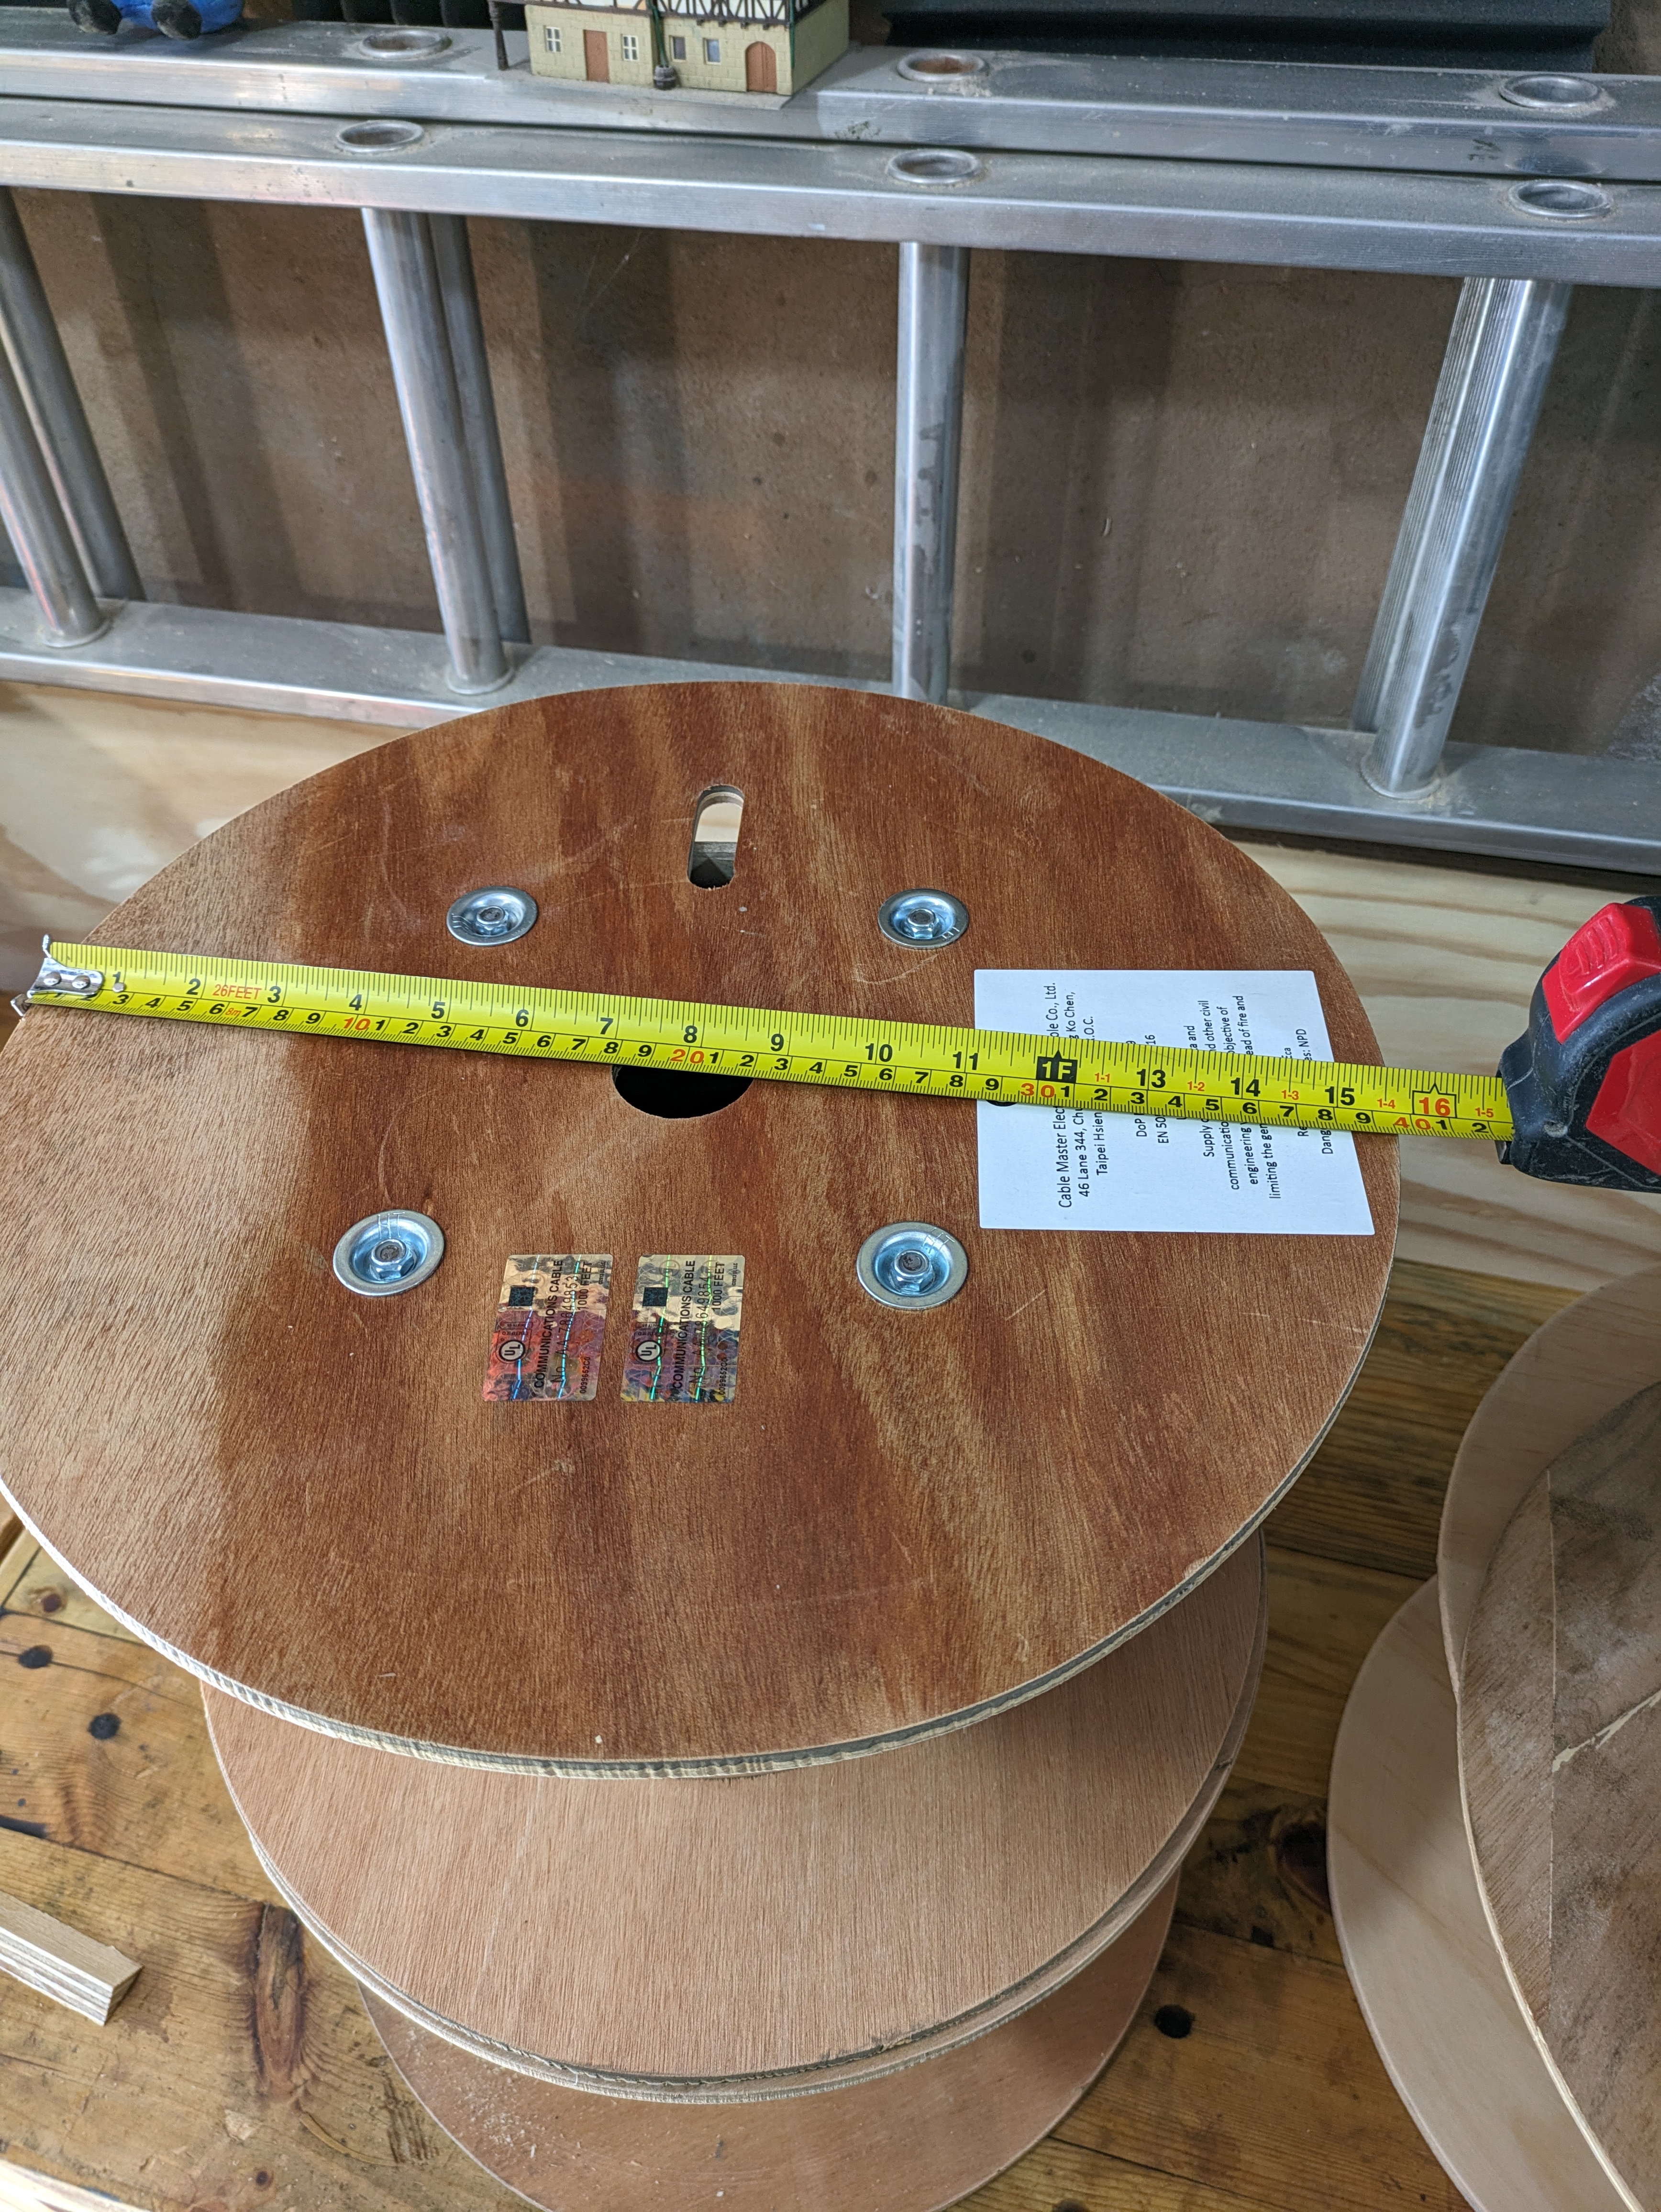
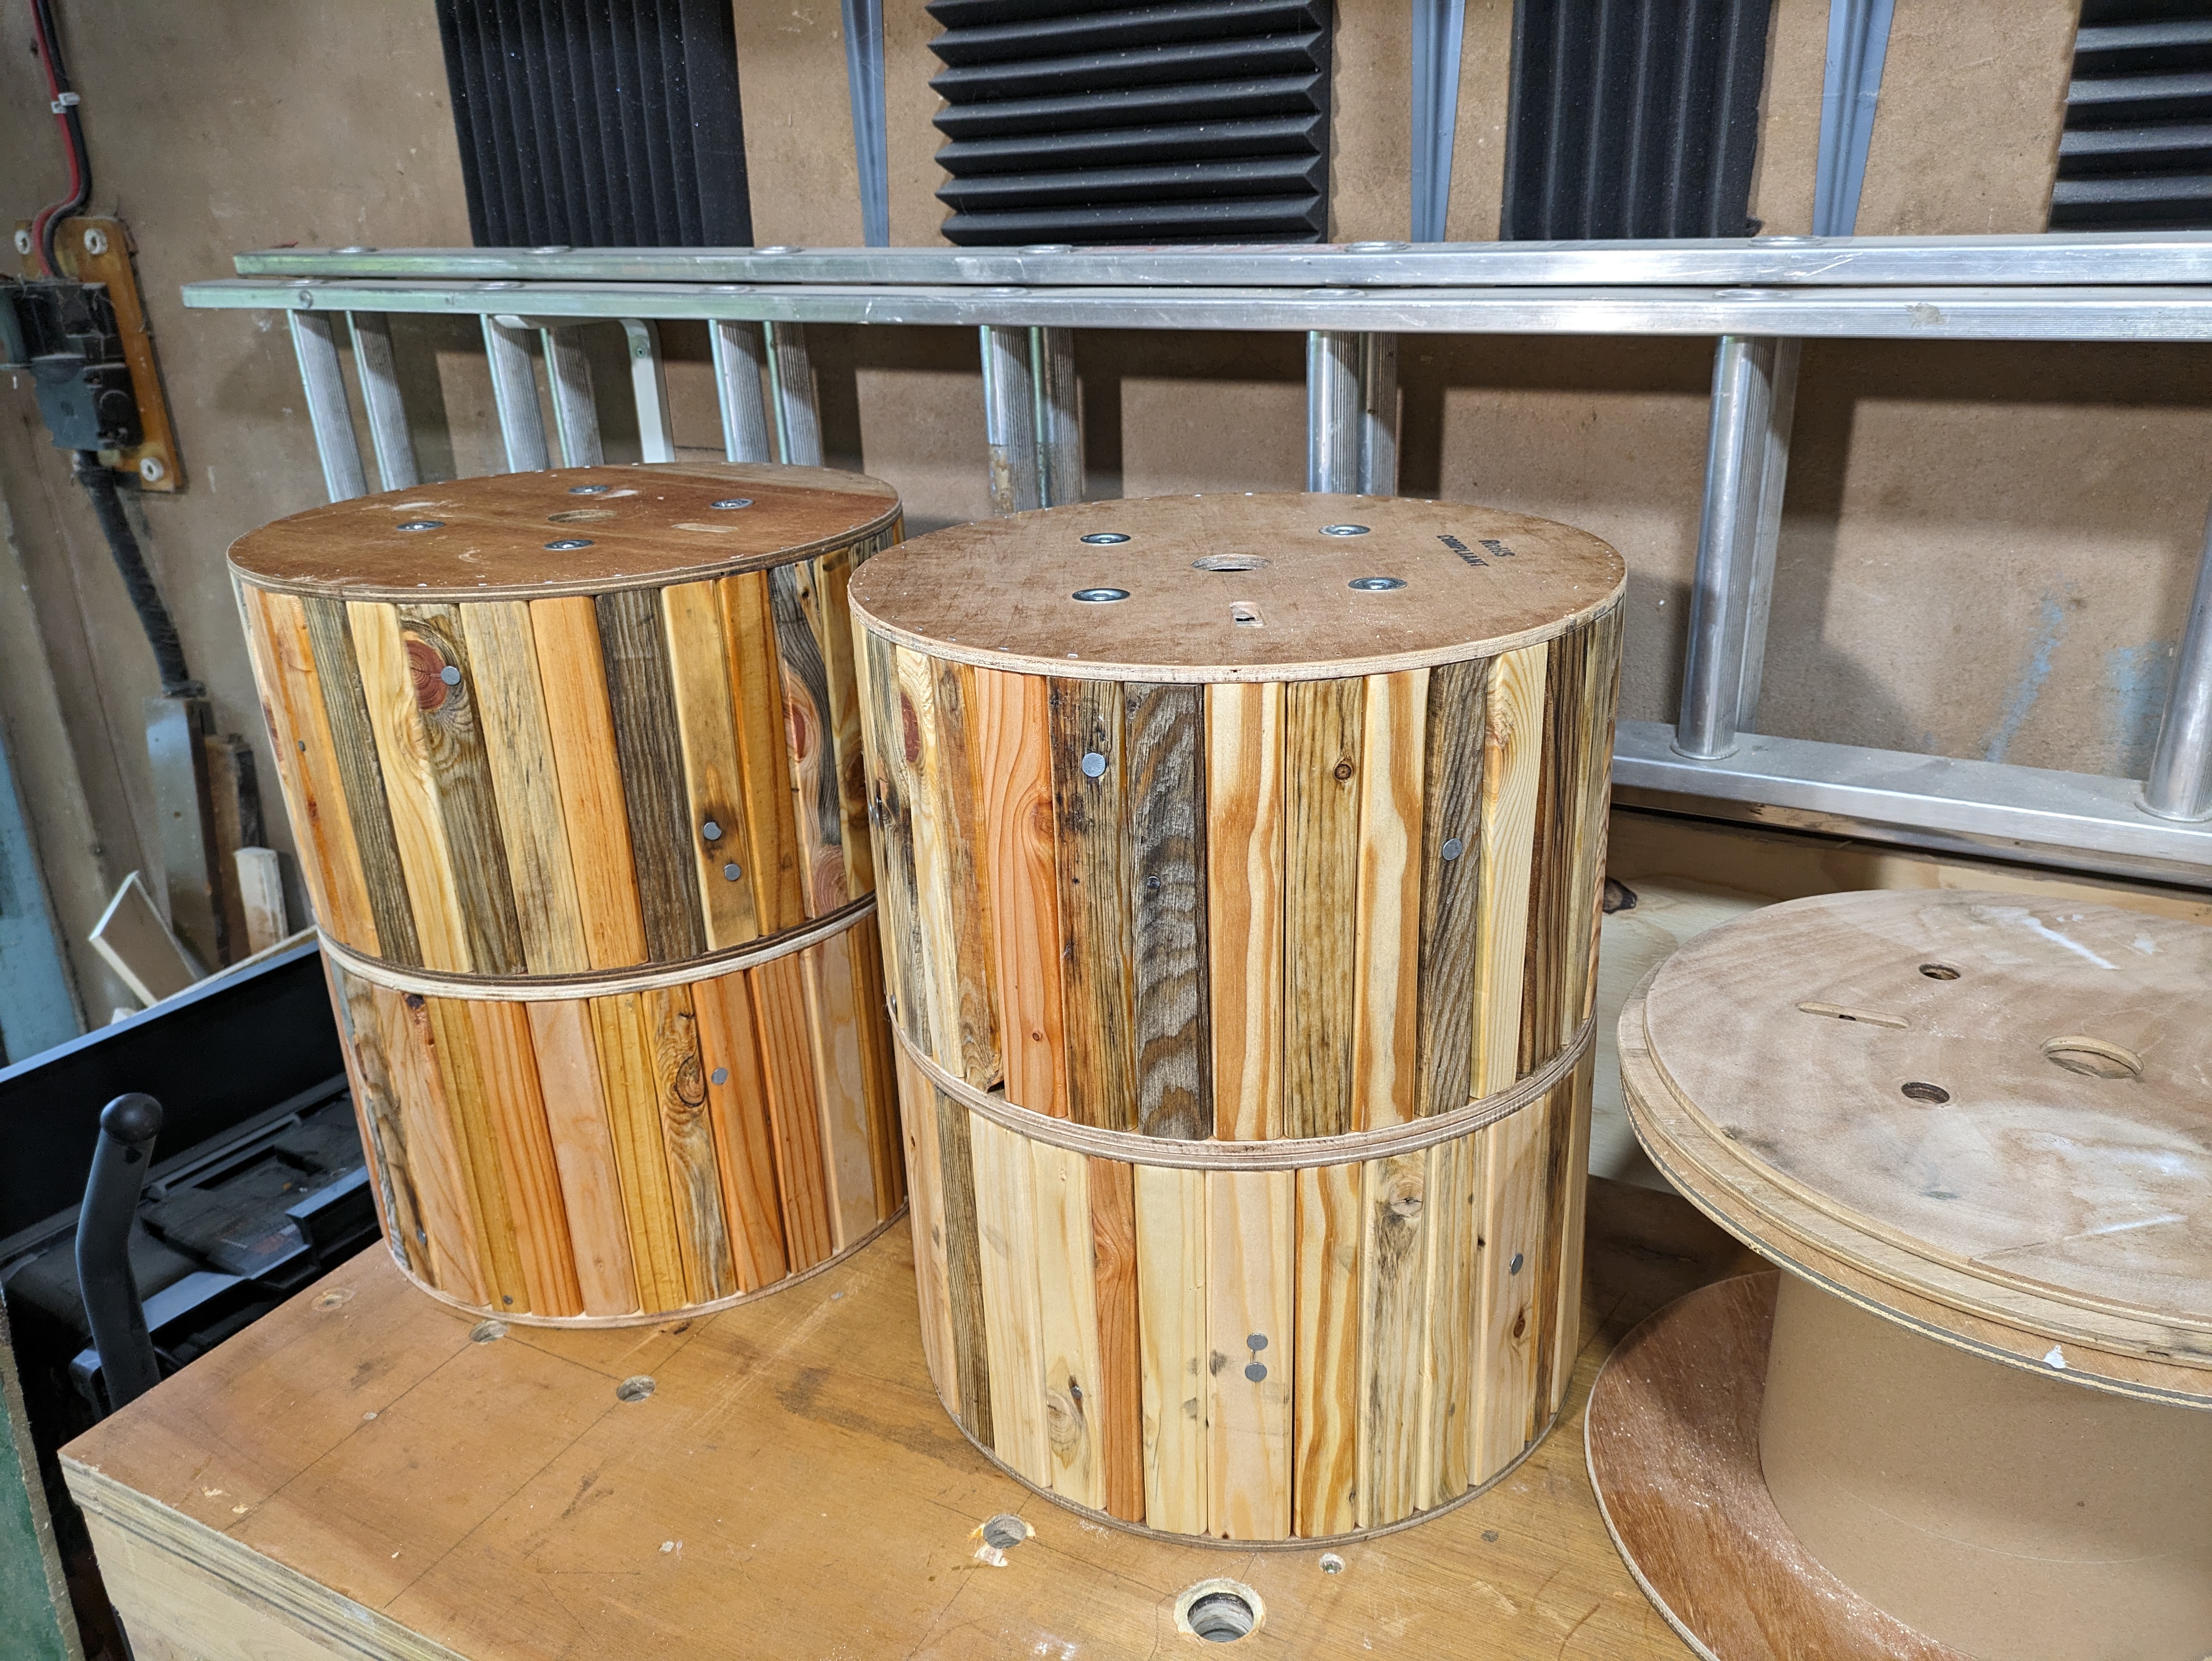
I got my hands on a few empty Cat6 ethernet cable drums from work which would be a perfect size to base the stool on. As a rough plan of attack I thought I would prepare a bunch of my pallet stock into rounded over batons and attach them to the inside of the drum. All my current pallett stock is from different types of pallet so it would not be a uniform colour or grain pattern but I figured that “added to the character?”.
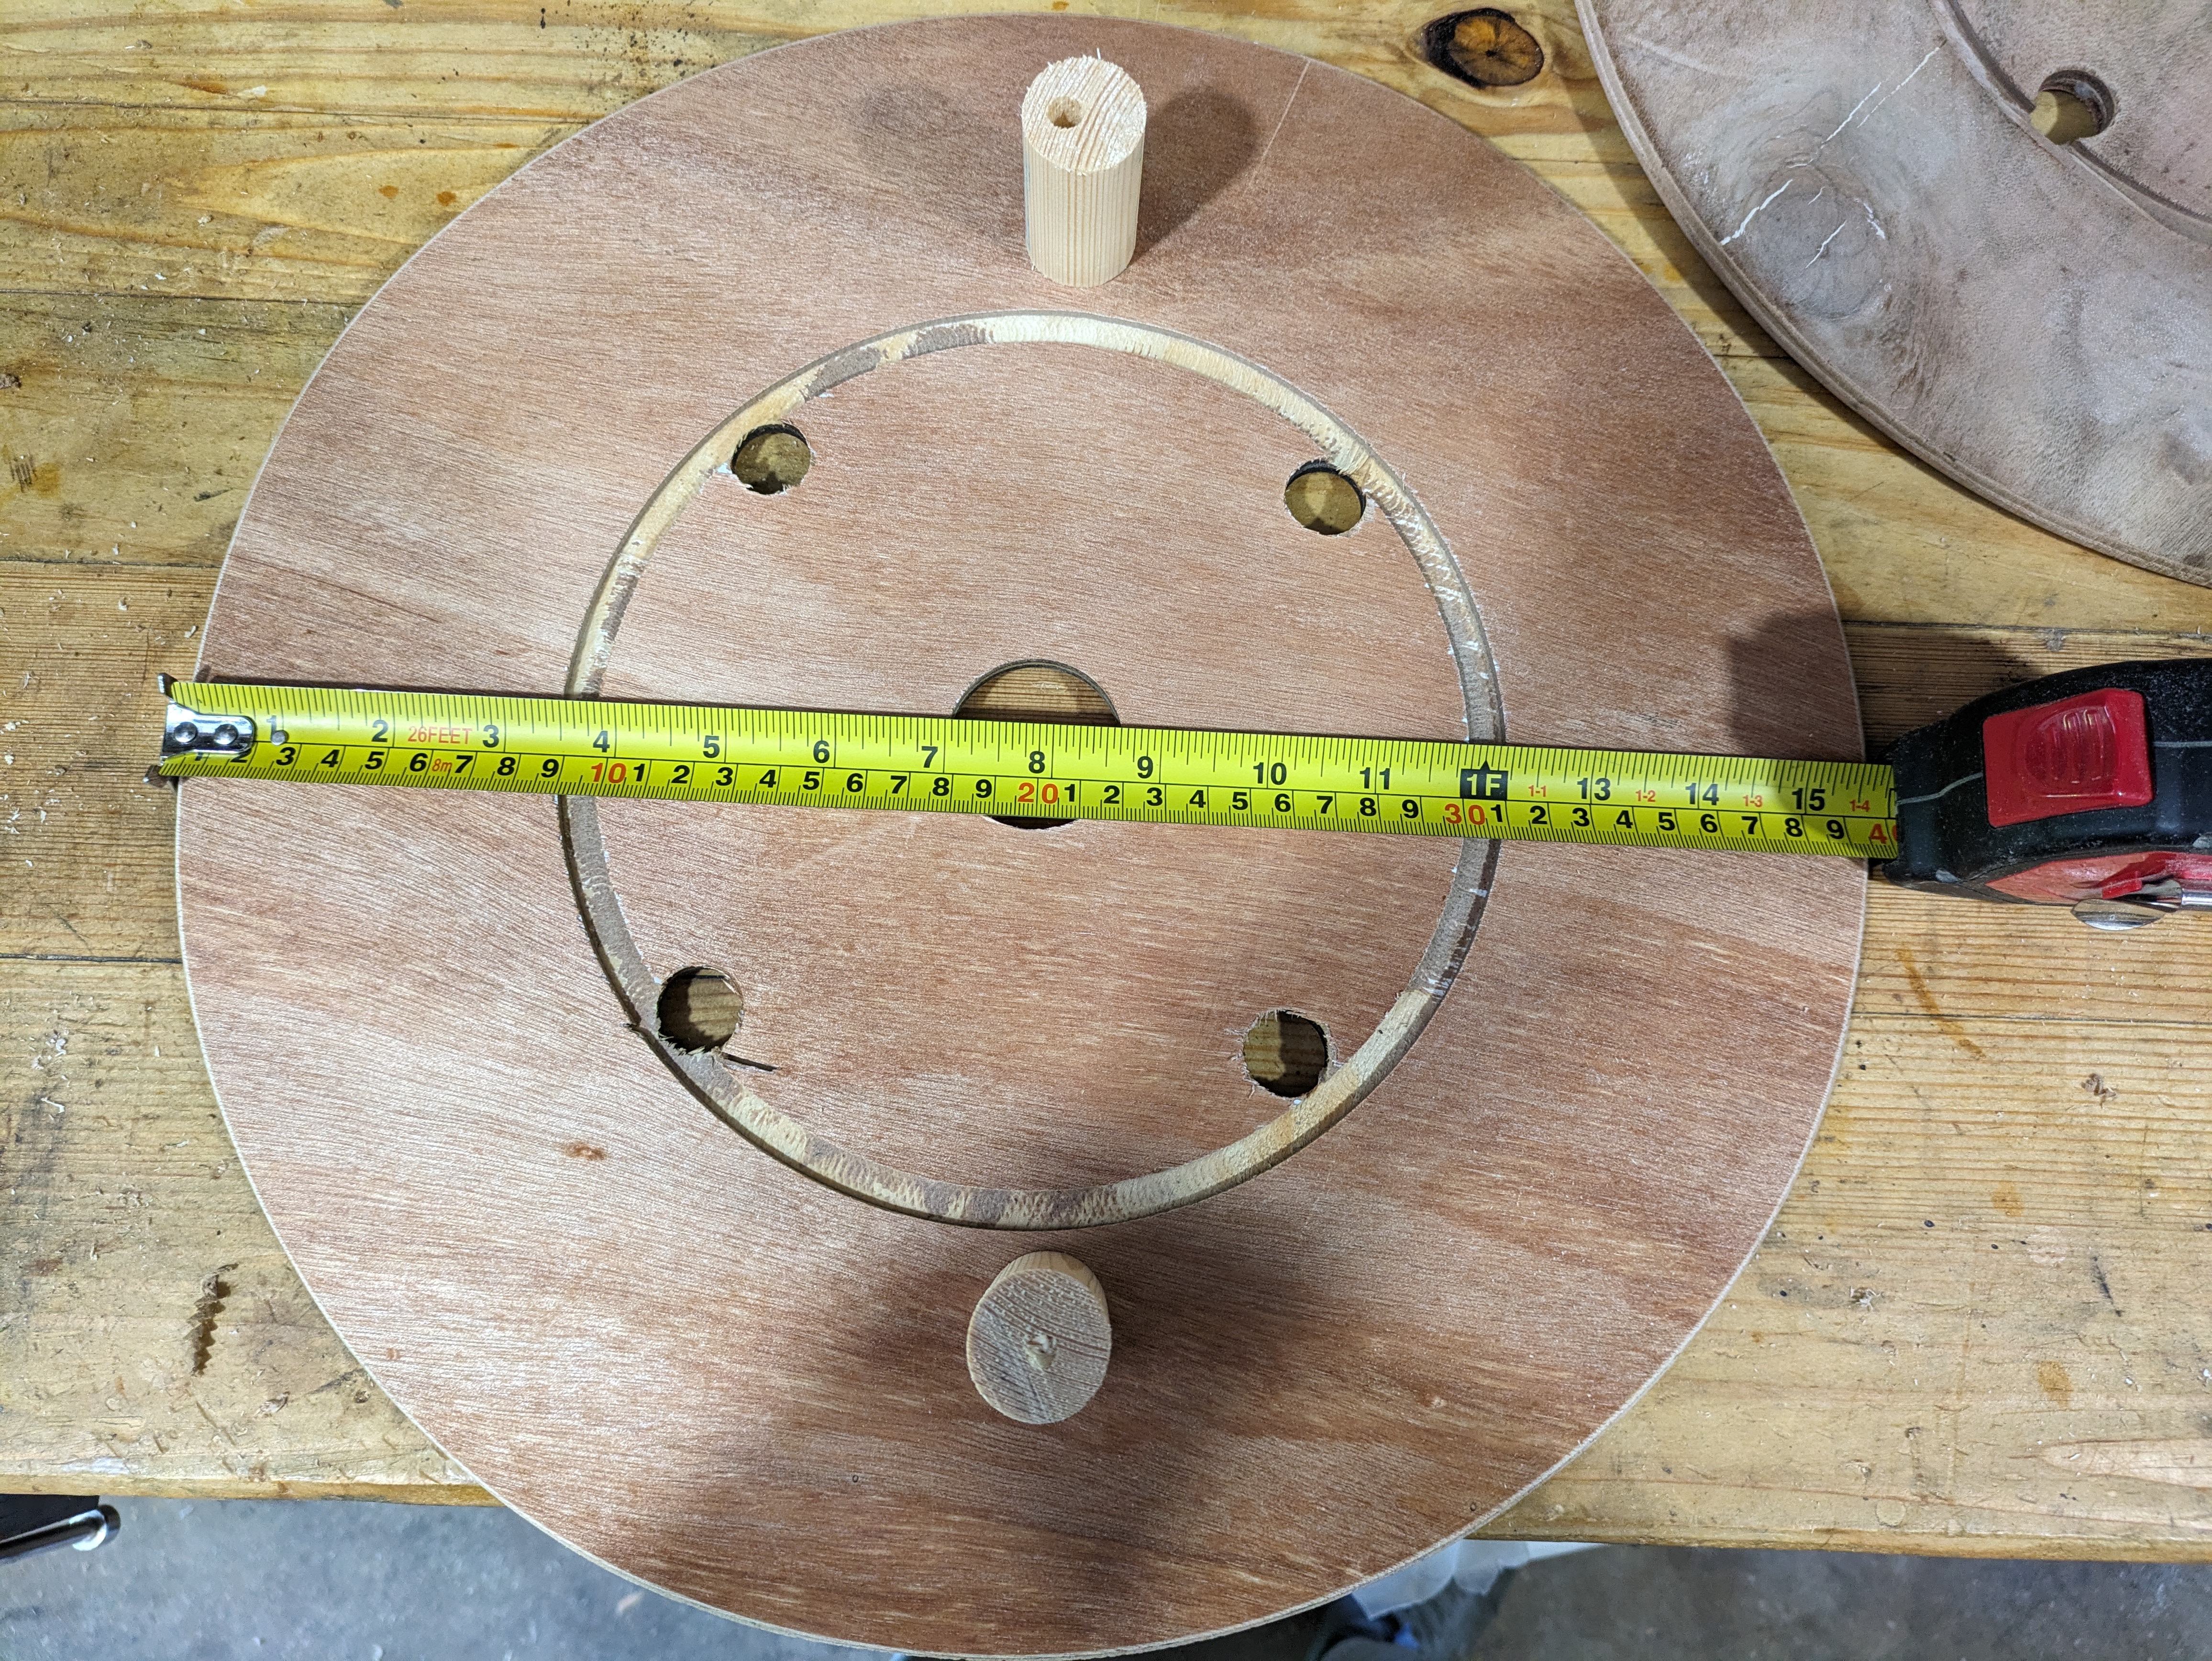
Let us begin. I measured up the drums and found that two stacked on top of each other would be a good seat height.
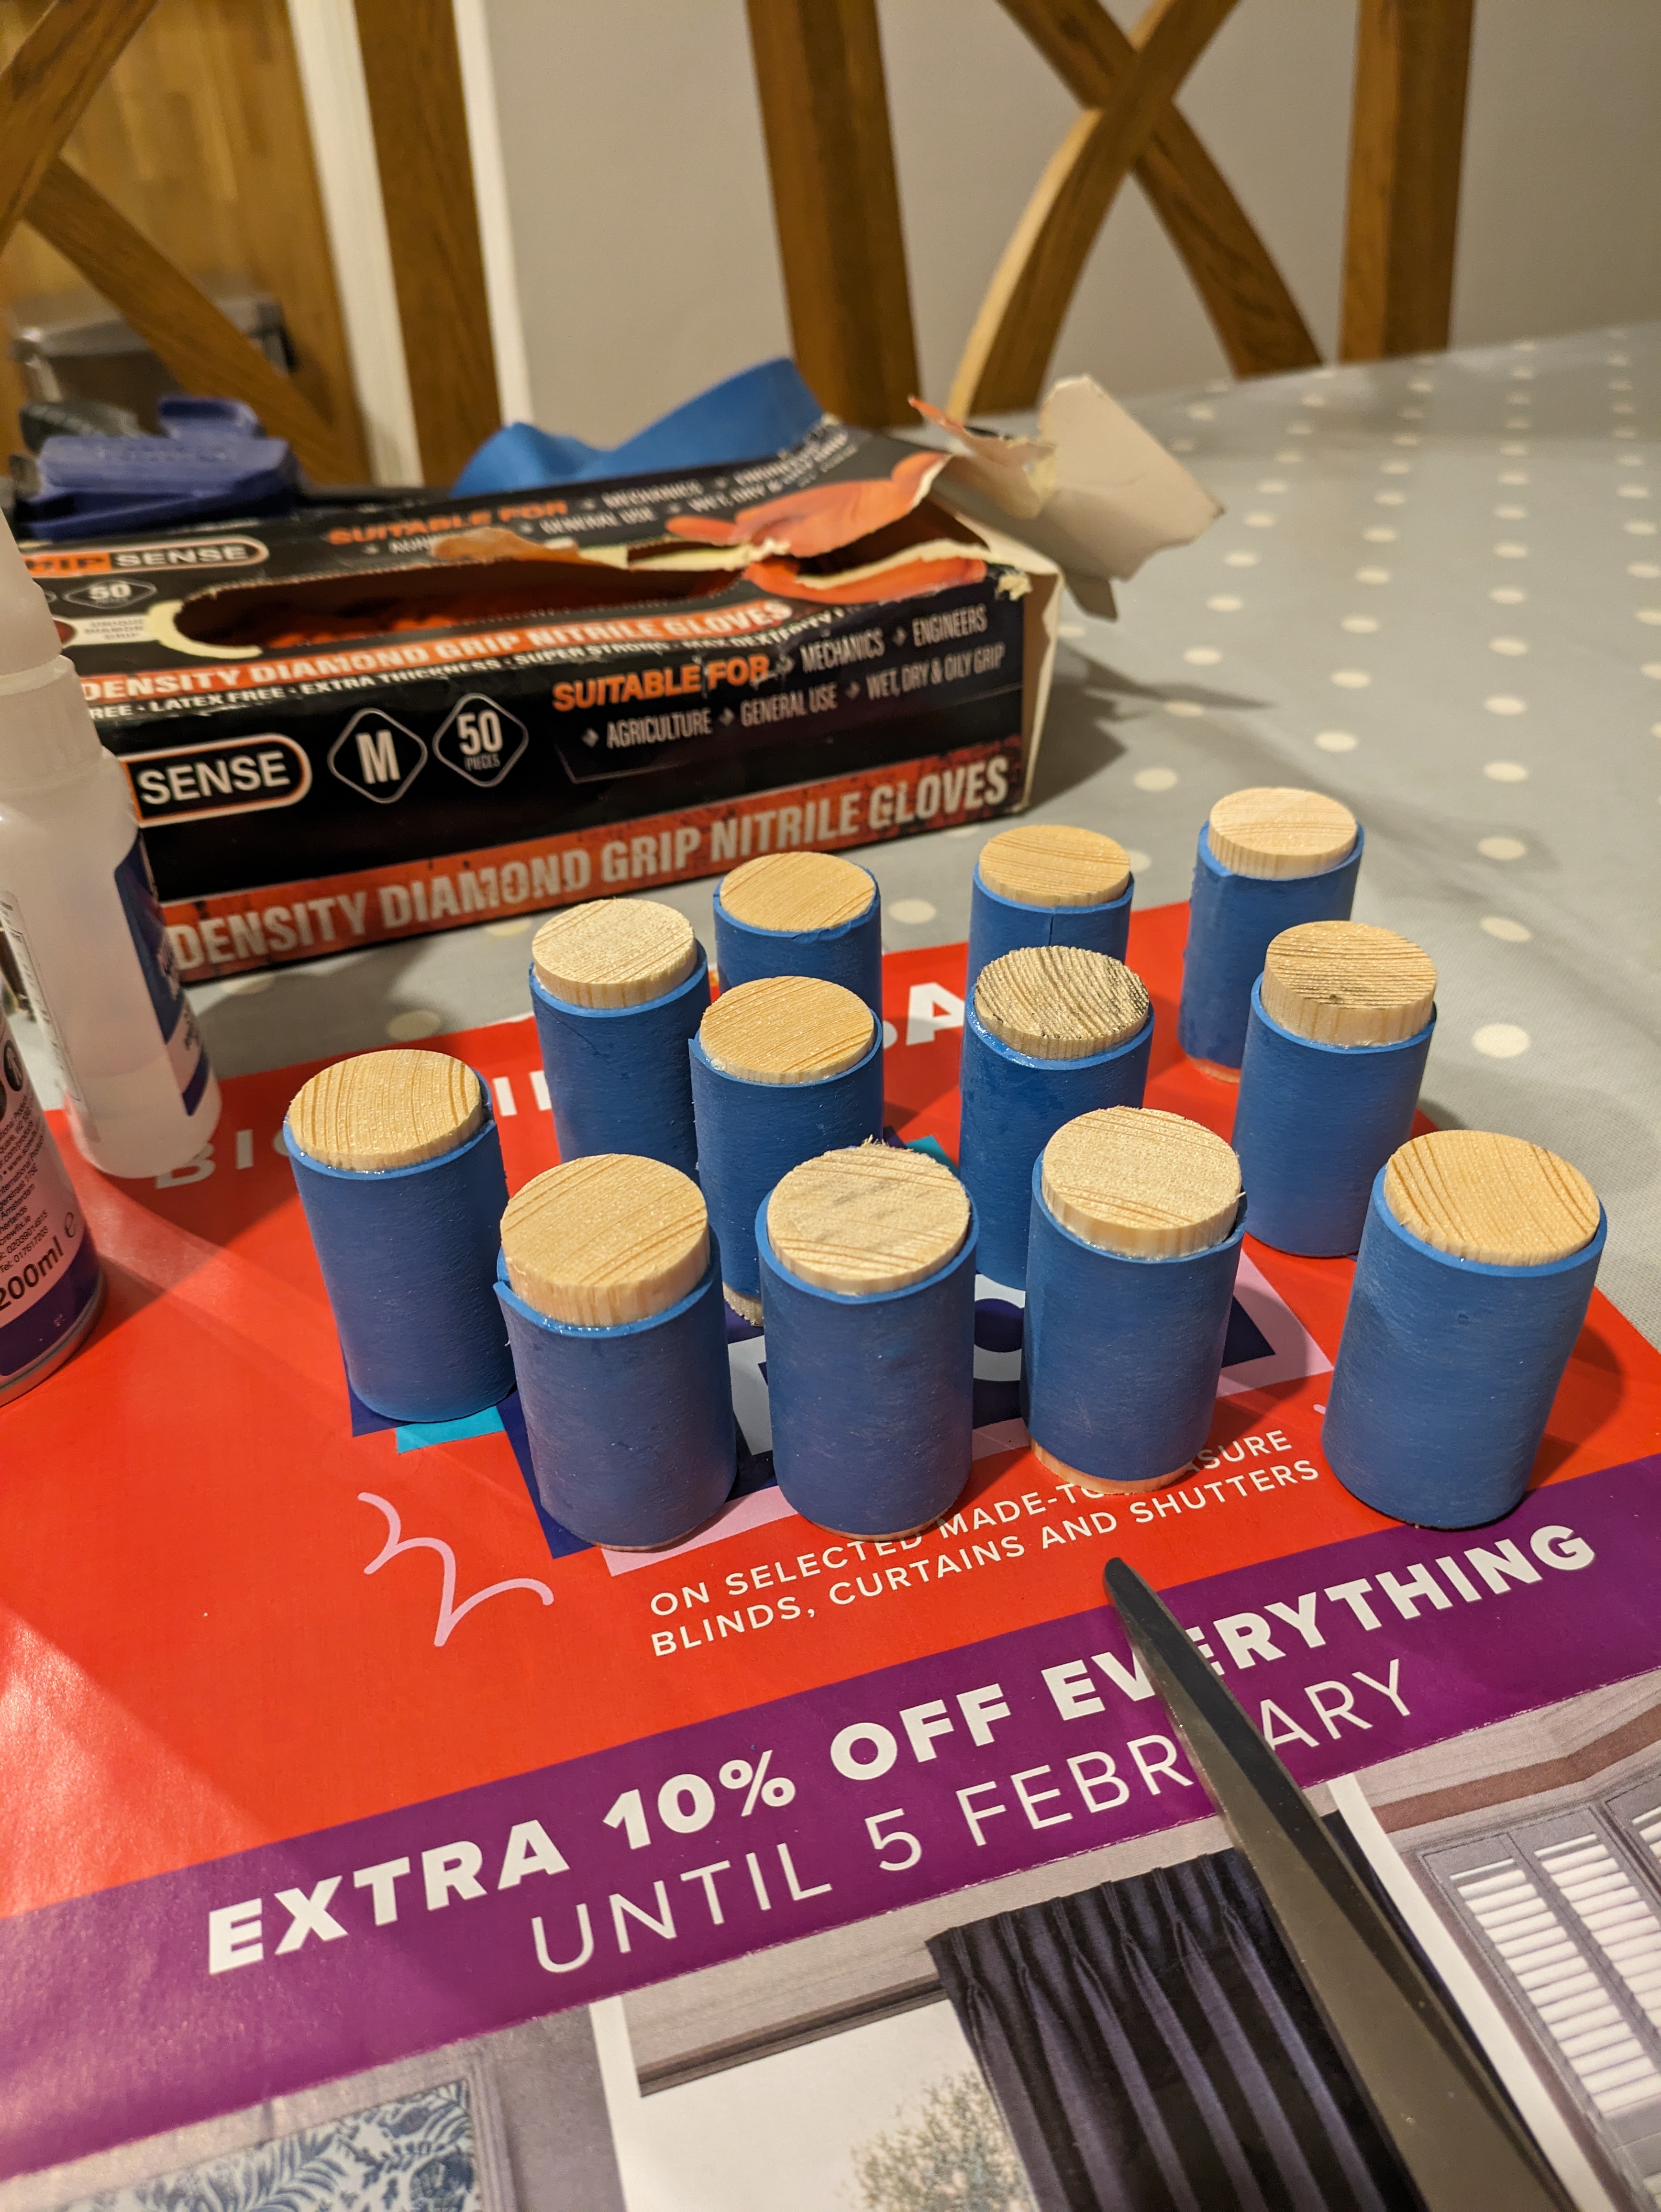
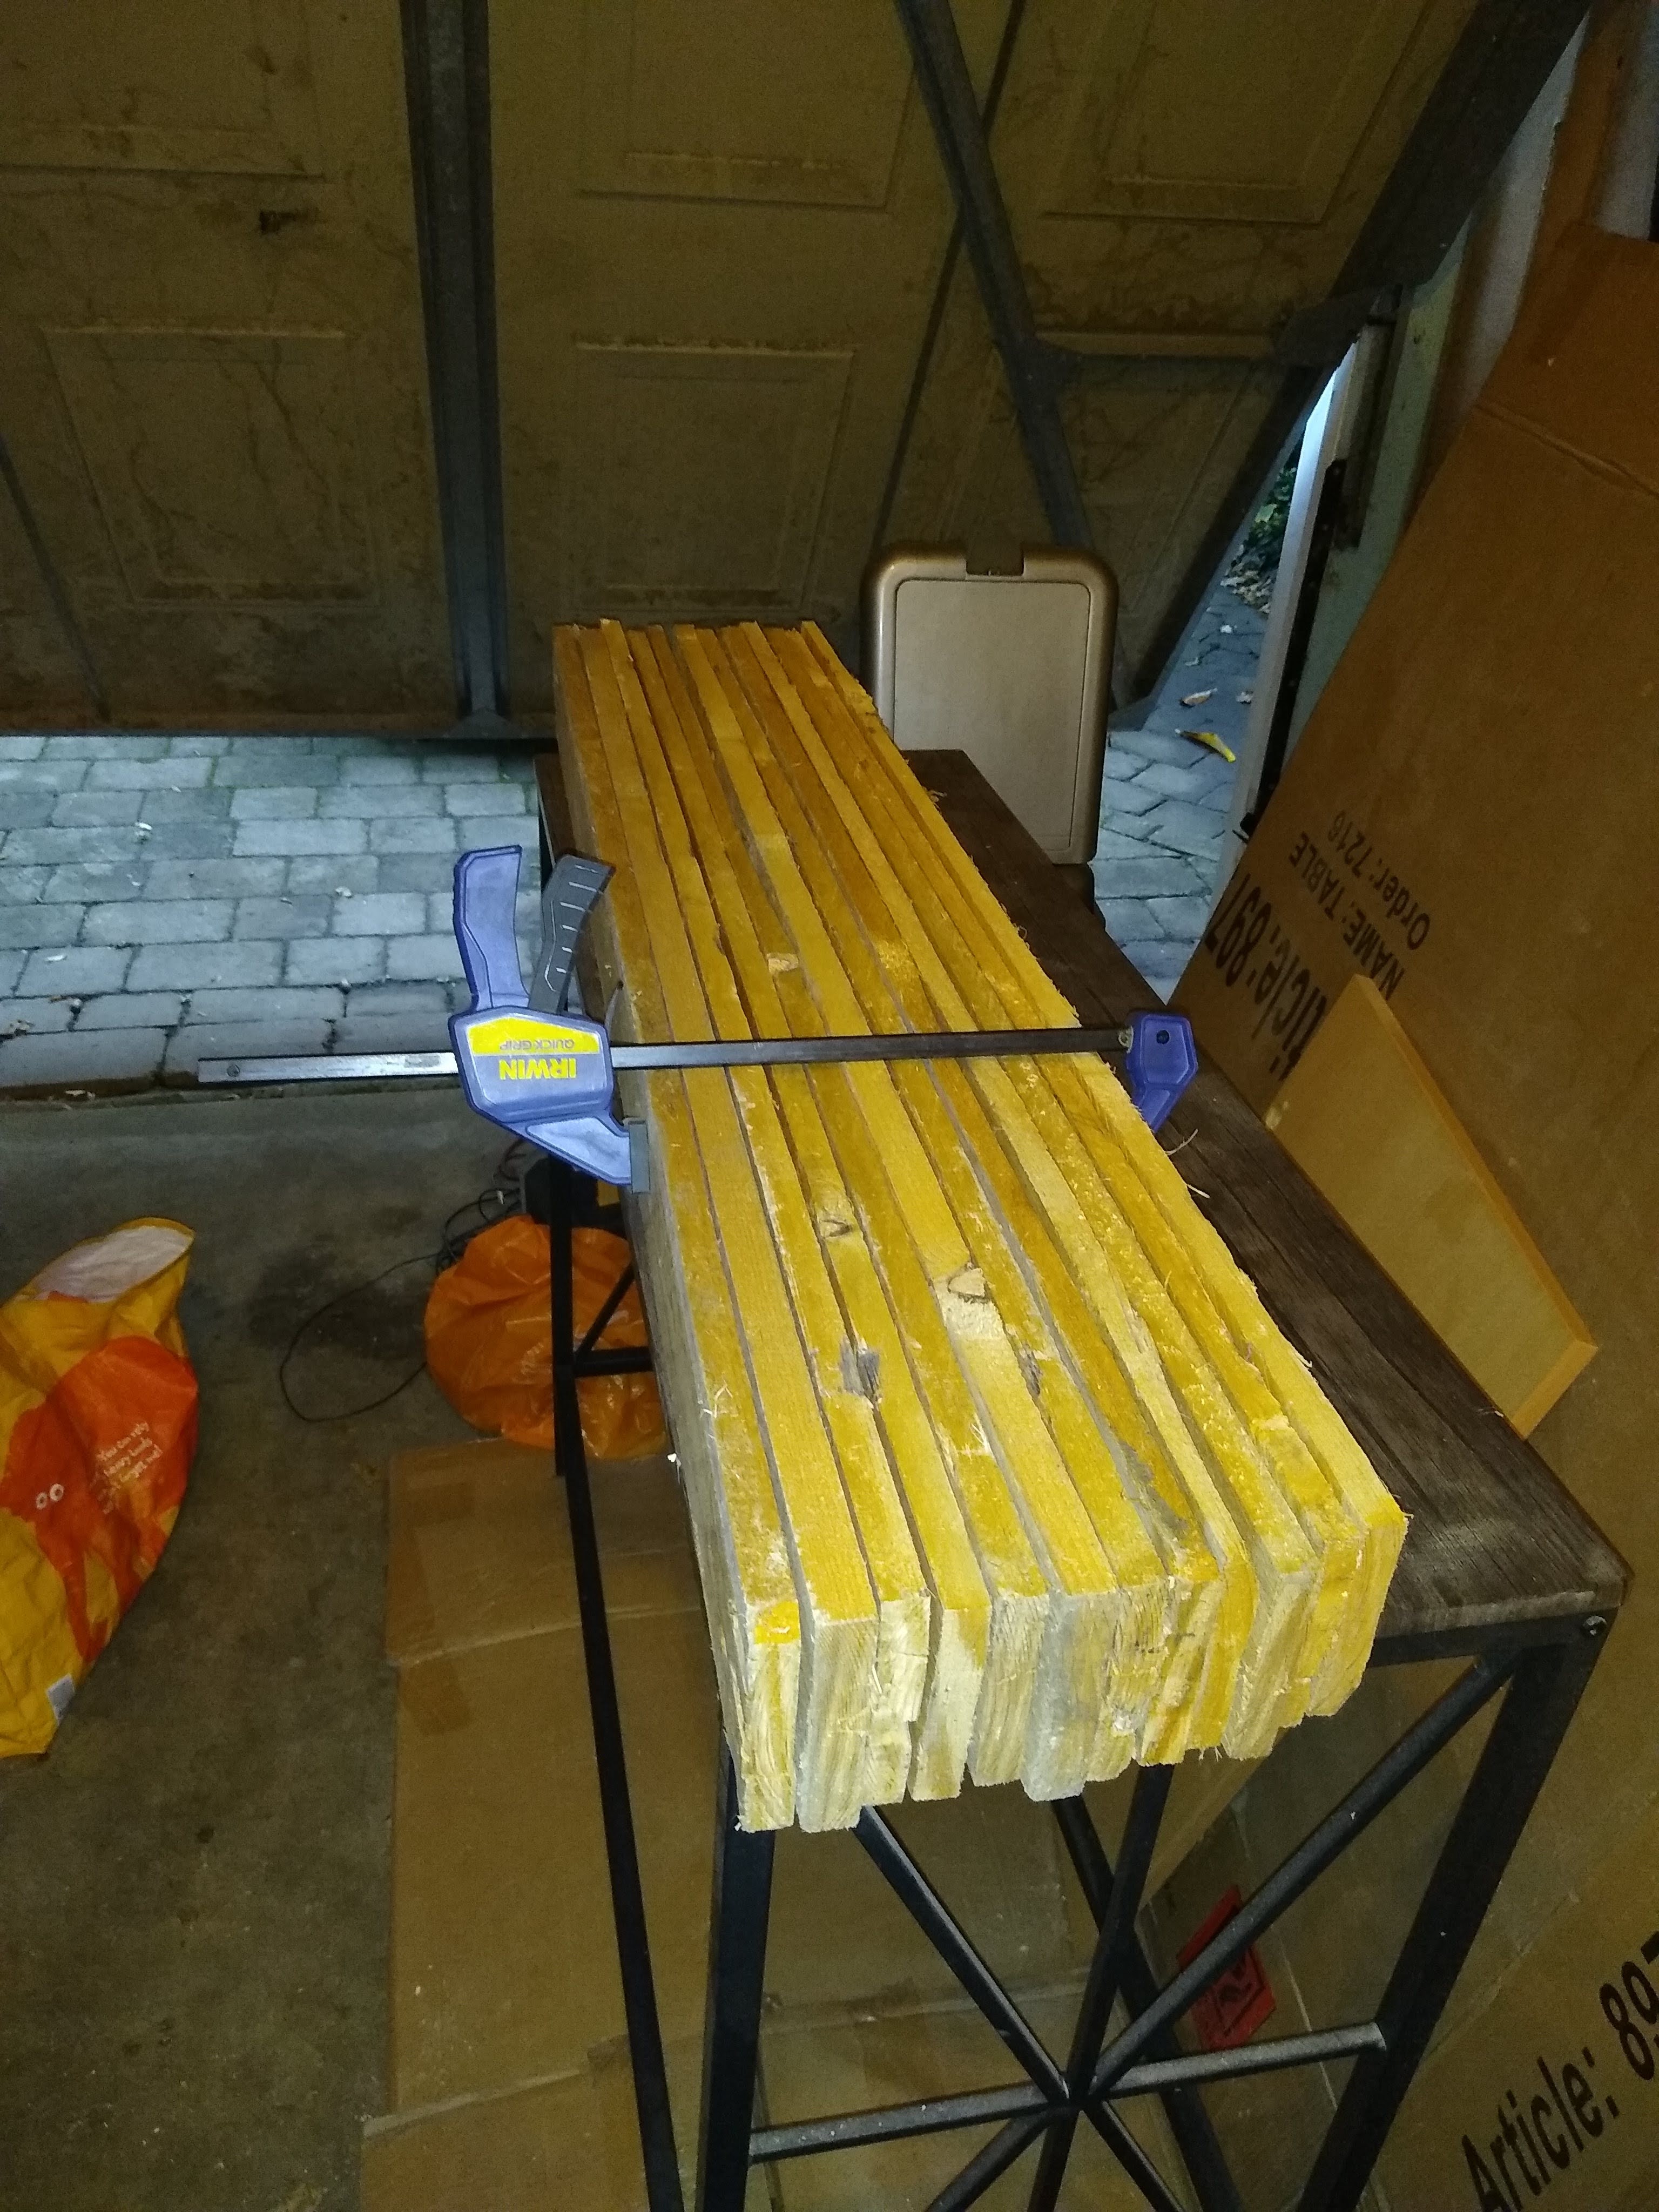
The first step was to start preparing the pallet slats into uniform lengths and similar widths. Trimming them down length-wise cleaned up the edges nicely. Then I wanted to round over each side to give it some more depth and make it visually more interesting. Lastly I was going to sand all the battons to 120 grit. I didn’t have a router table or bench sander so I had to Macgyver some static tools!
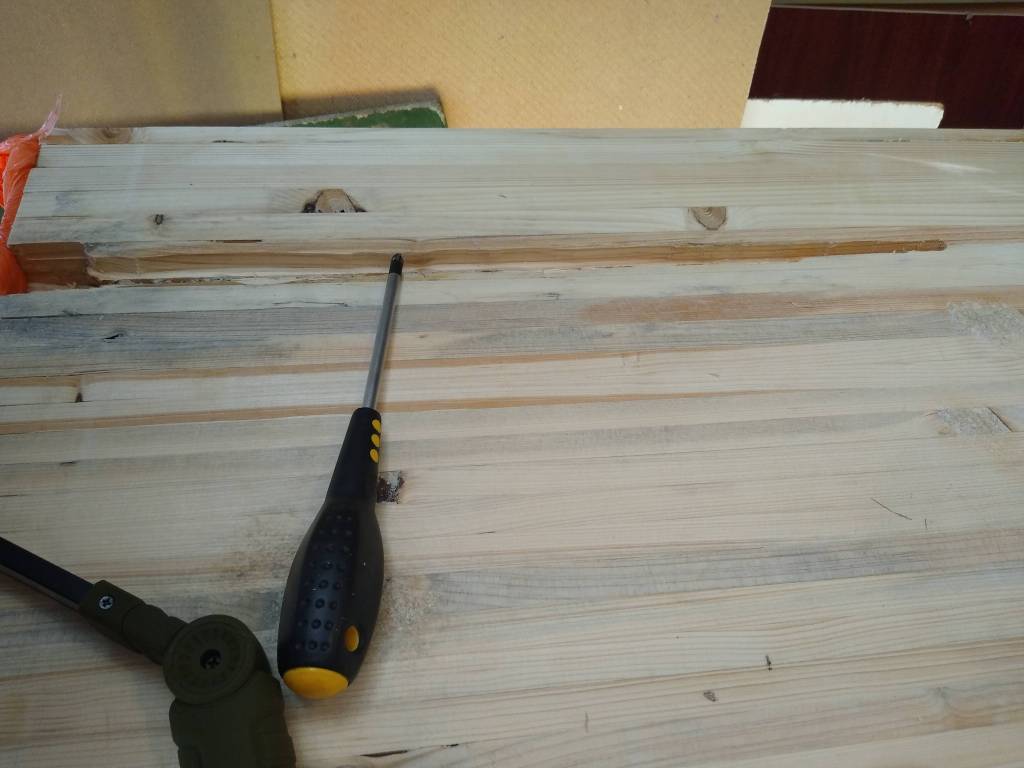
Next on the rosta was to fill the nail holes with some new shiney new nails, either a really dumb idea is potentially genius? I just cleaned up the holes with a drill, cut some nails to length then hammered them in. Simples.
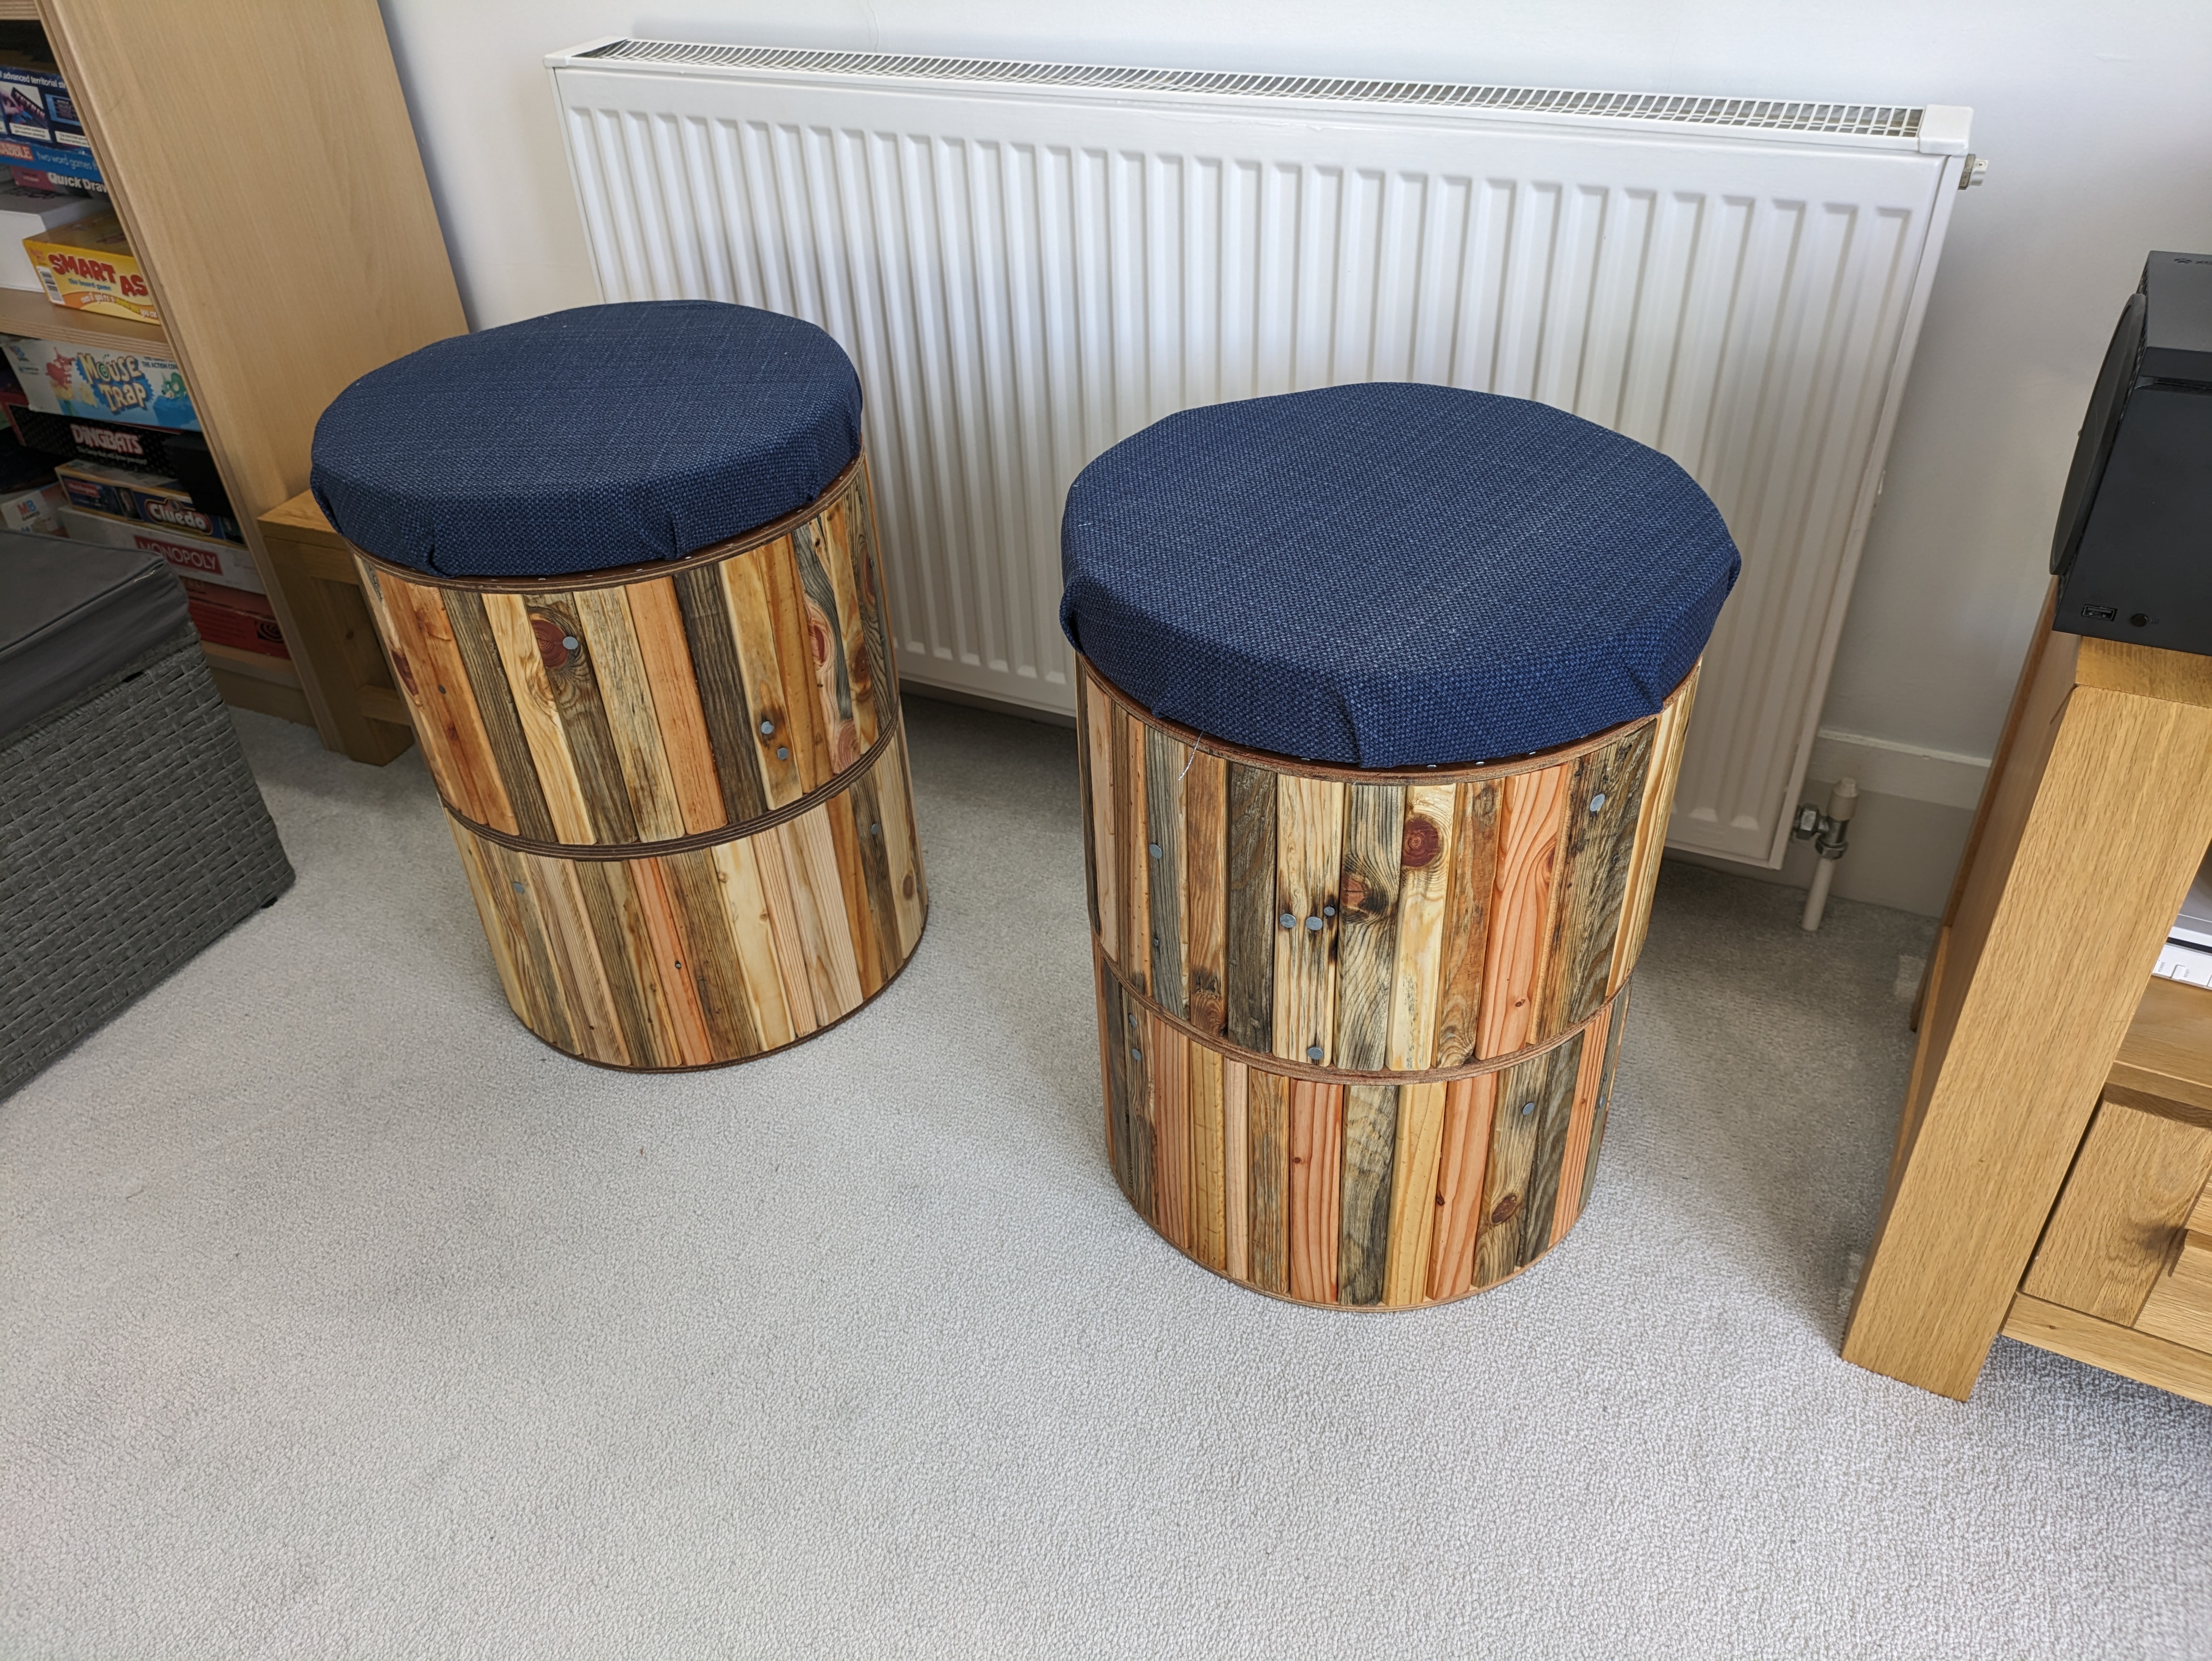
Then it was time to use some trusty ol’ linseed oil on all the battons and start to attach them to the empty drums. I used a nail gun to drive the nail/staple through the top of the ply into the ends of the batons. I didn’t use glue as I didnt think it was necessary due to only be subjected to downward force (and just incase I needed to make adjustments during assembly).
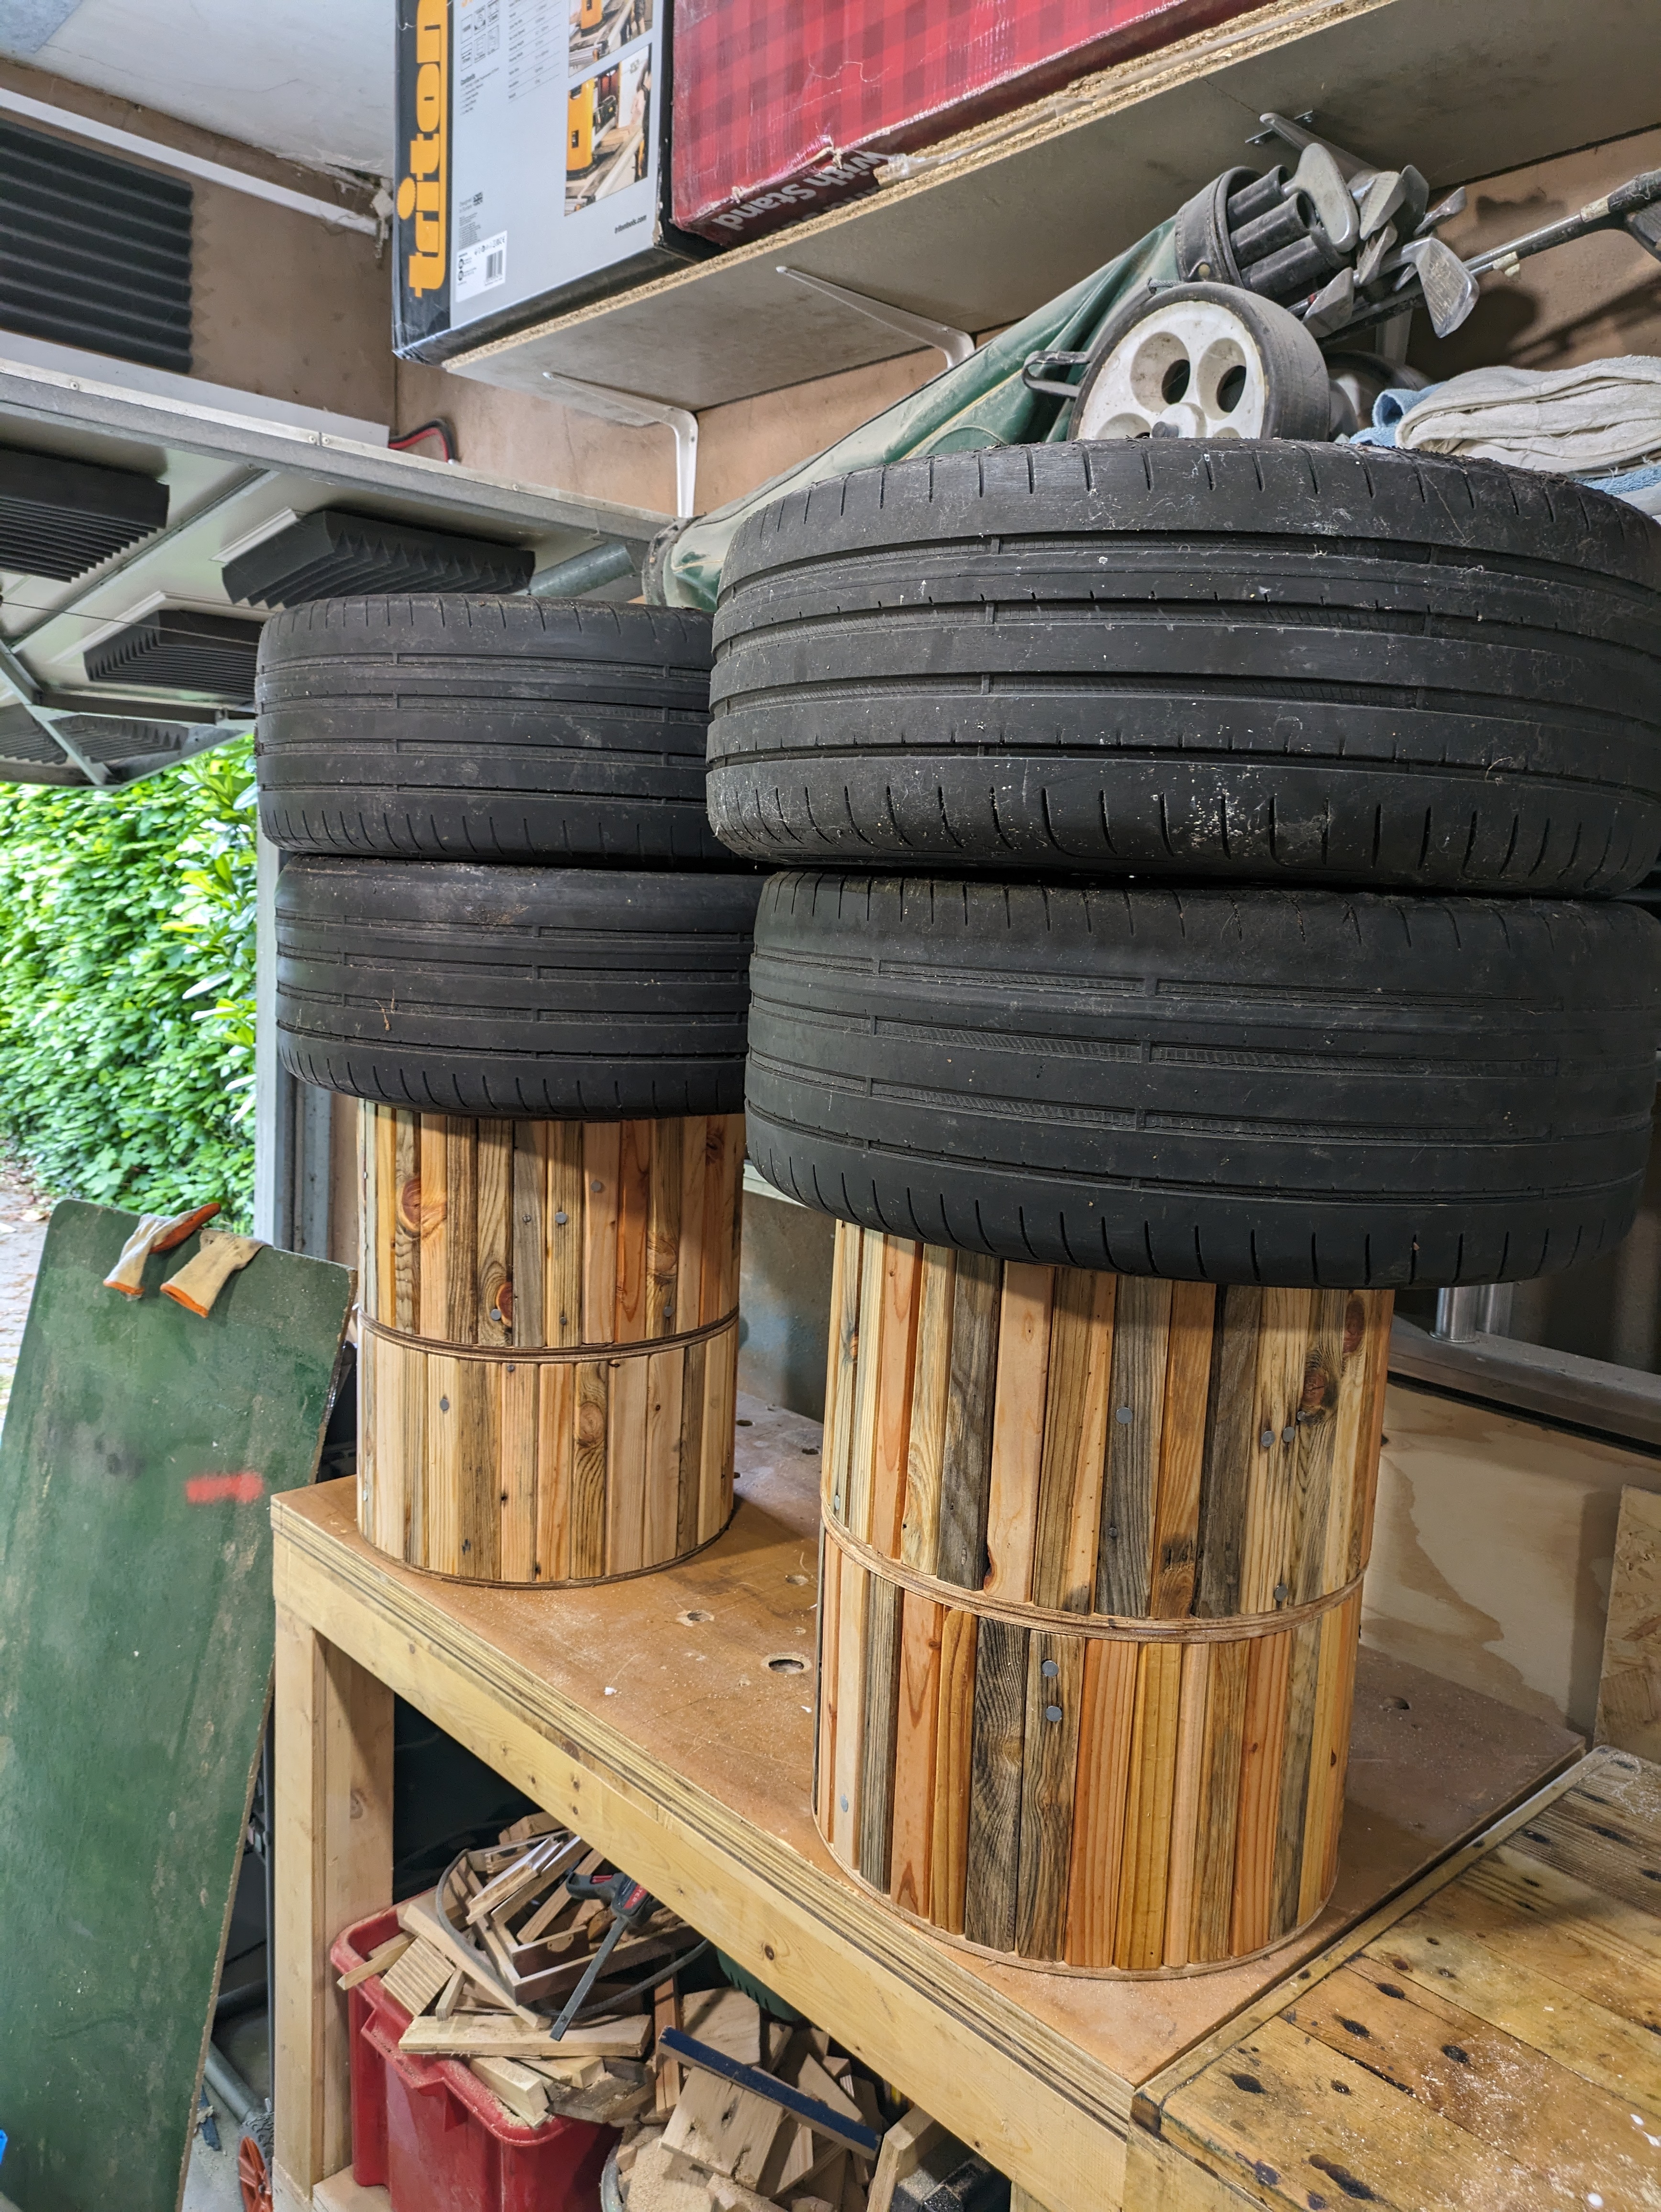
After finishing all 4 drums I needed to attach them in pairs to make 2 seats. I simply used wood glue and stacked some old wheels on top to apply pressure whilst the glue cured.
Finally I need to make a removable cushion which meant trying my hand at upholstering some foam. Before upholstering I added some chunky dowels to an end plate of another cable drum and then drilled a hole in top of the stool in the same place which meant they slotted in nicely, but could be removed if needed.
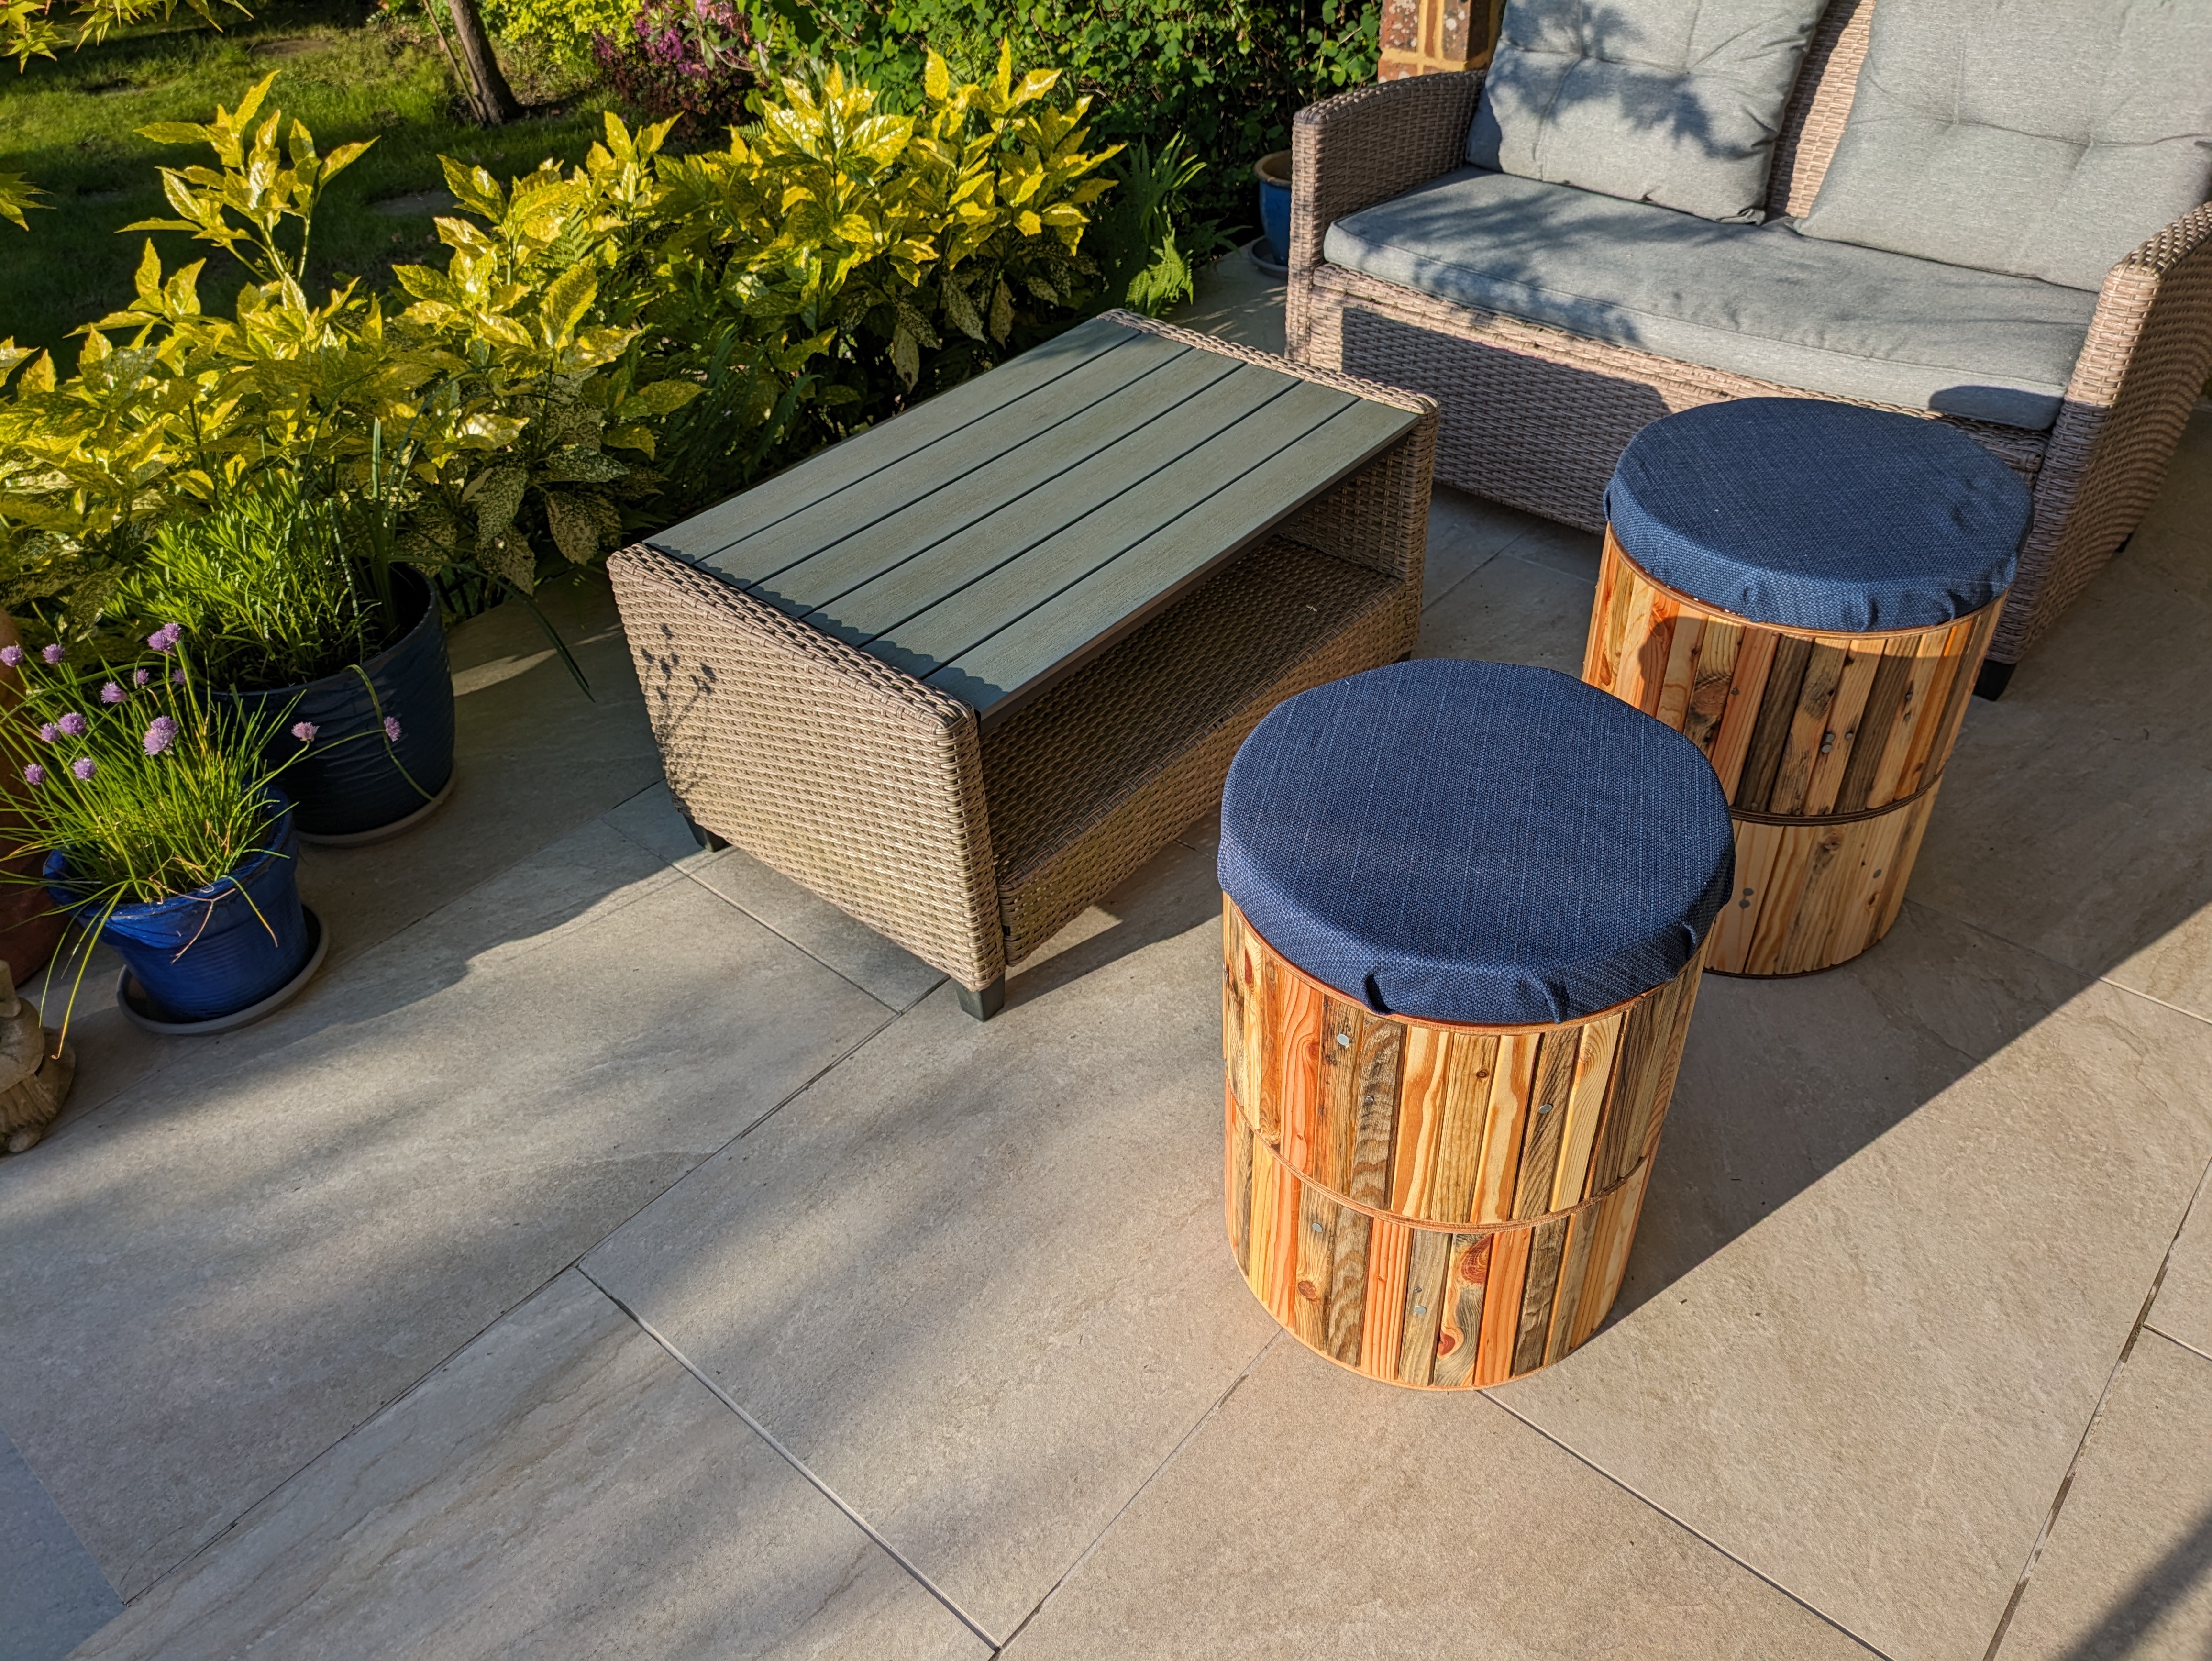
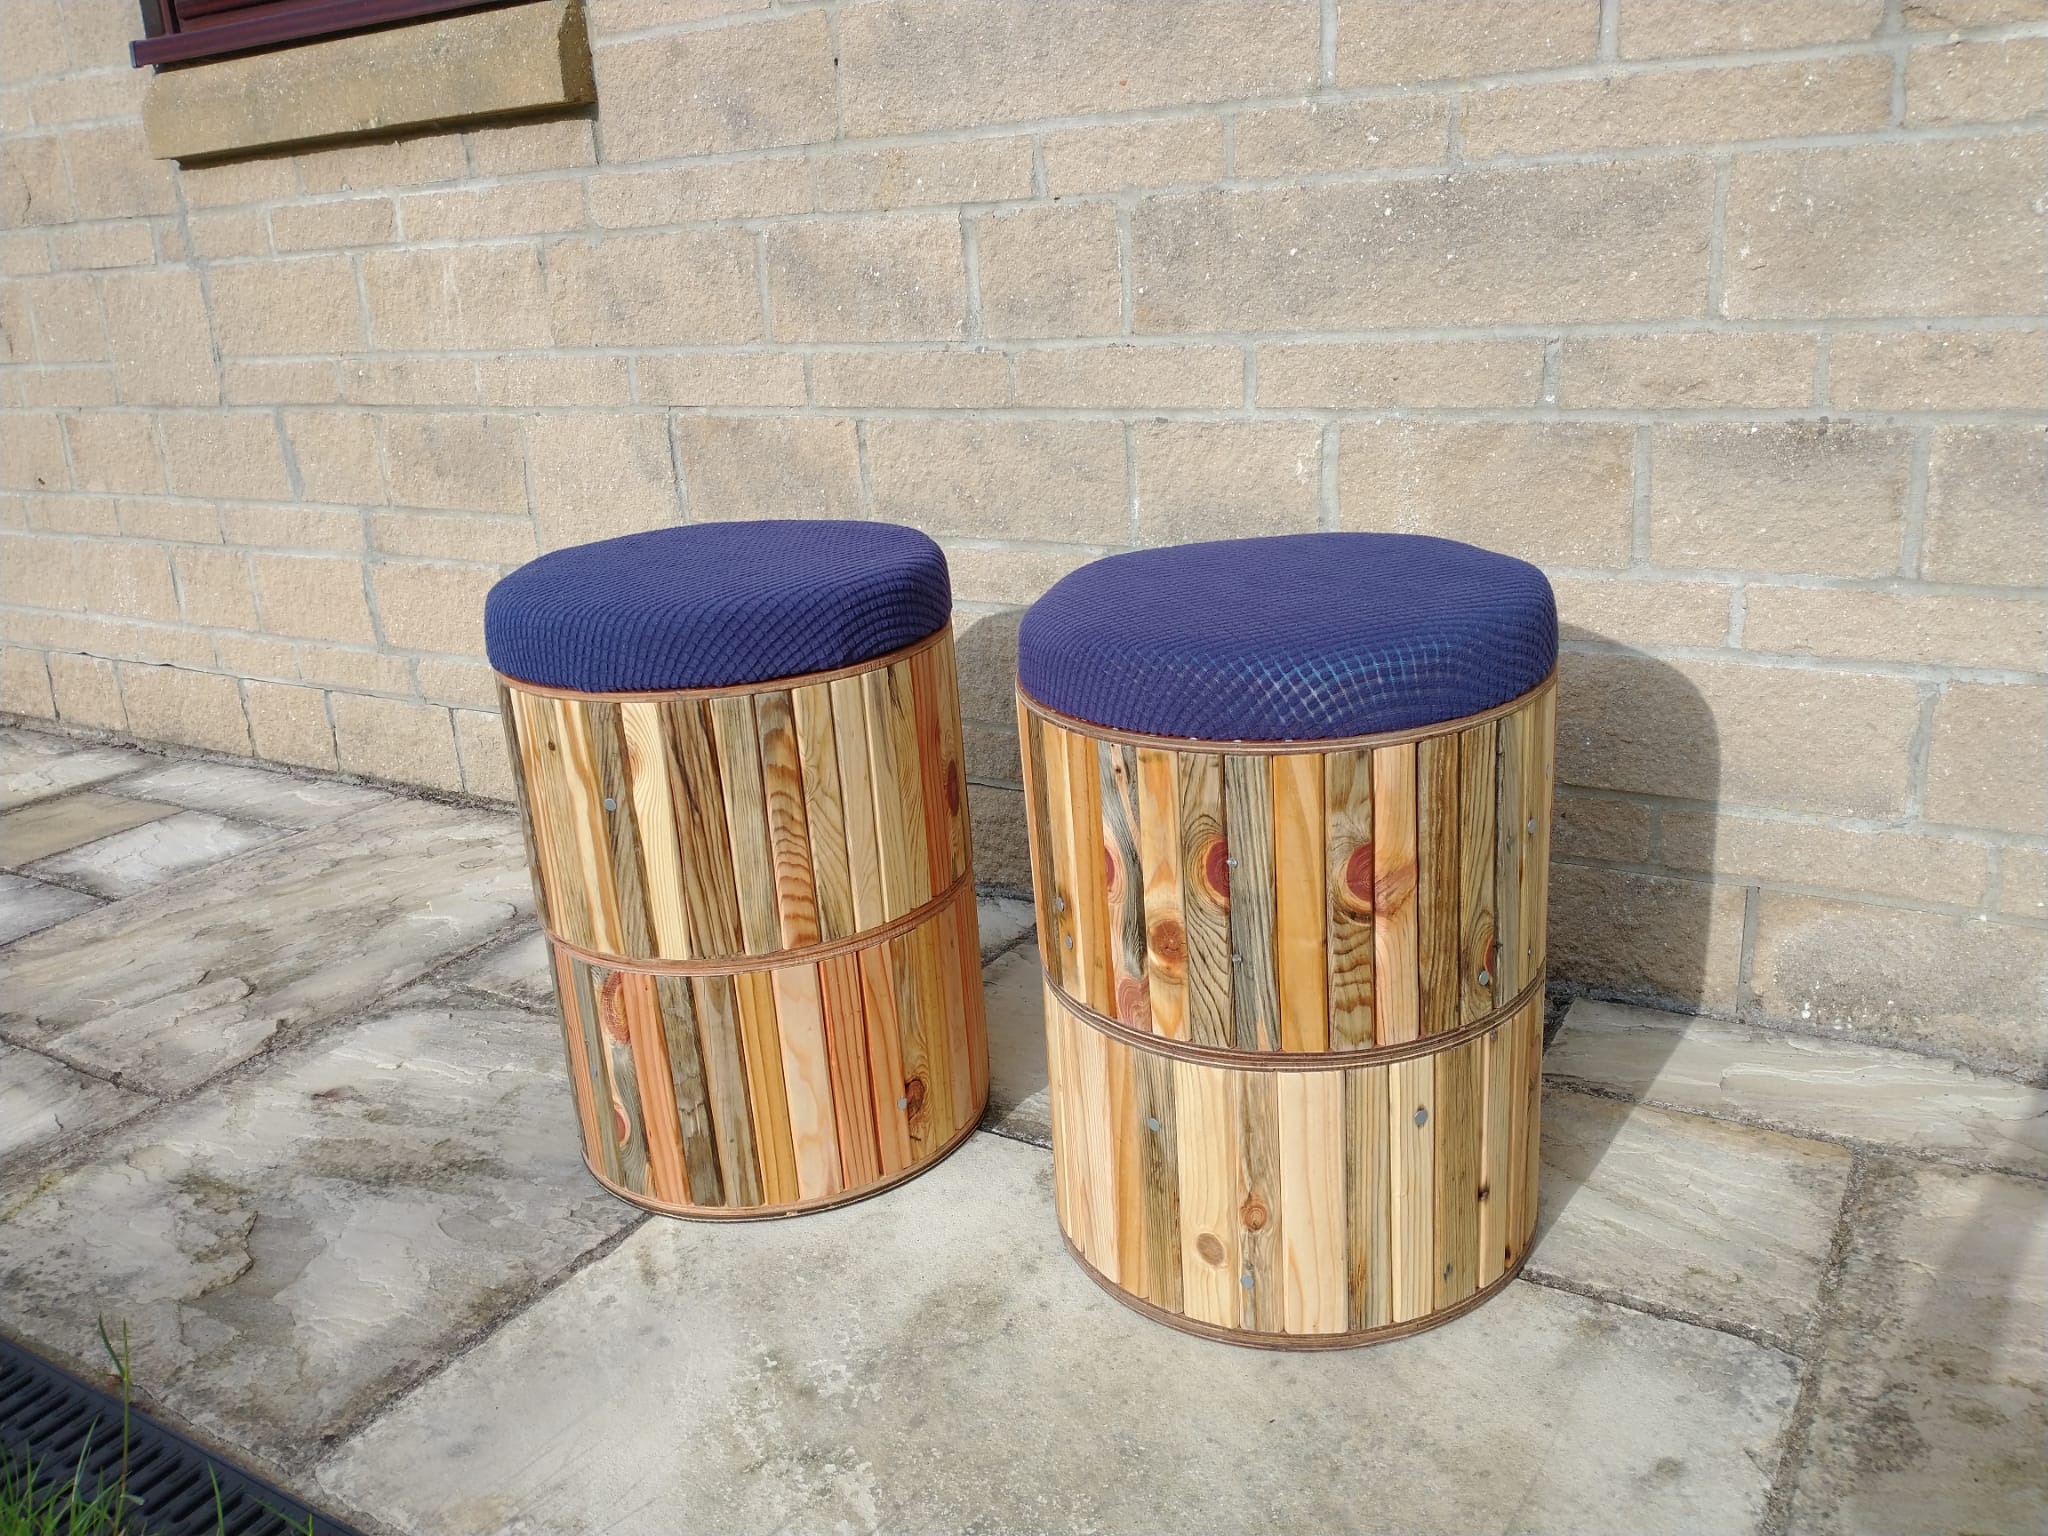
I had some old fairly thick curtains that looked to fit the bill for foam covering purposes. However I wasn’t a huge fan of all the folds that were visible from the side so I opted for some elastic bar stool covers, which gave a slicker look. The last two pics have the other seat covers on

-
Workshop V2.0
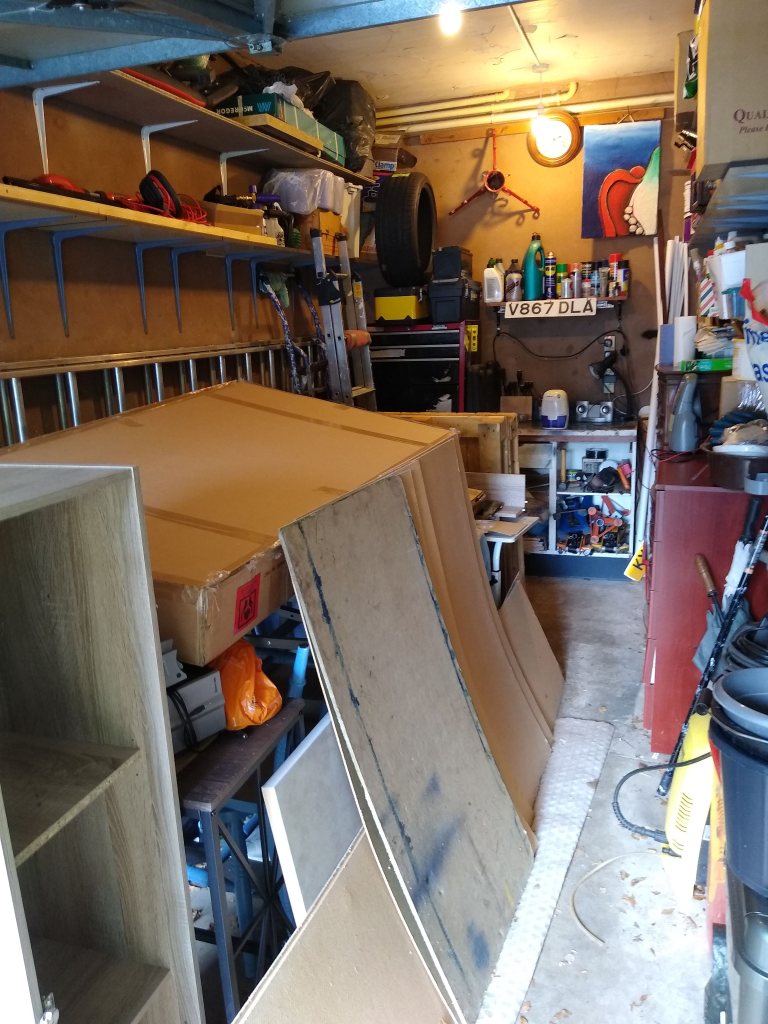
As I’ve made more things over the last year or so I’ve chipped away at improving the efficiency and flow of my little workshop space. Tool storage was on the top of the list now. I wanted some kind of racking to enable quickly grabbing a commonly used tool. I have buckets of offcuts so put alot of them to good use in this project.
First thing was to decide where this racking would actually fit in the single garage. I took a picture and some measurements and whipped up a quick sketch in designspark to help visualize it.


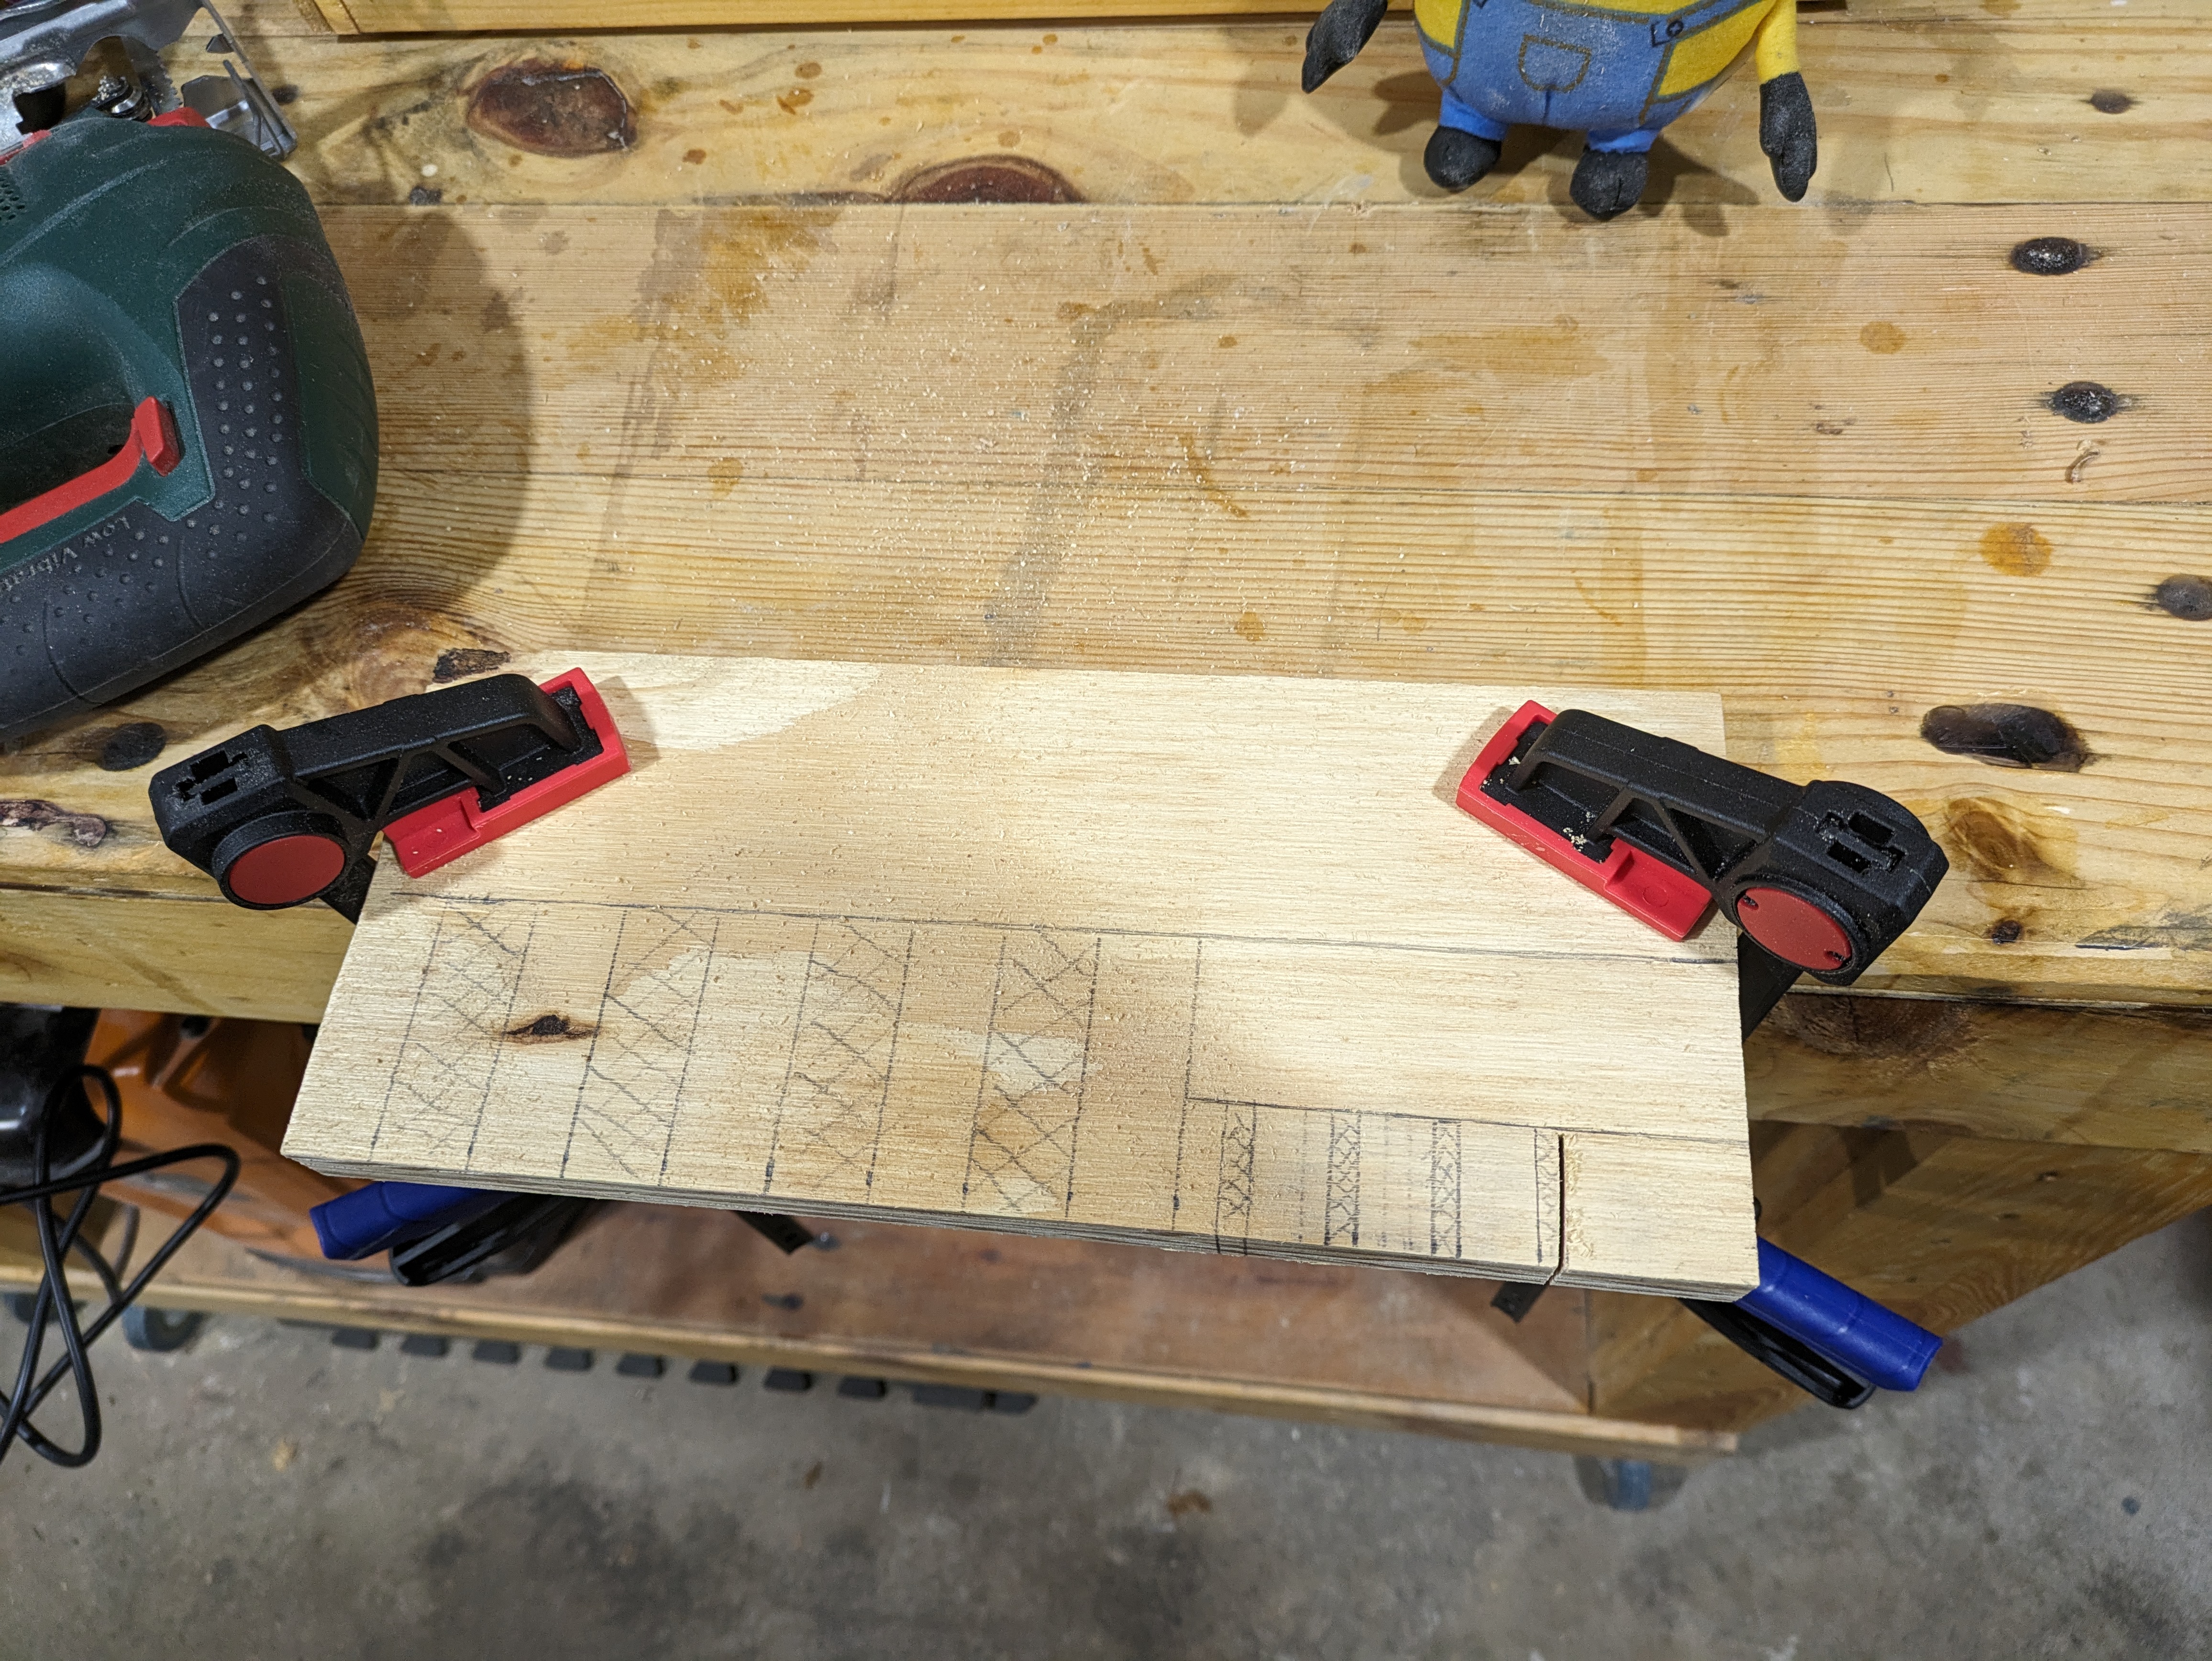
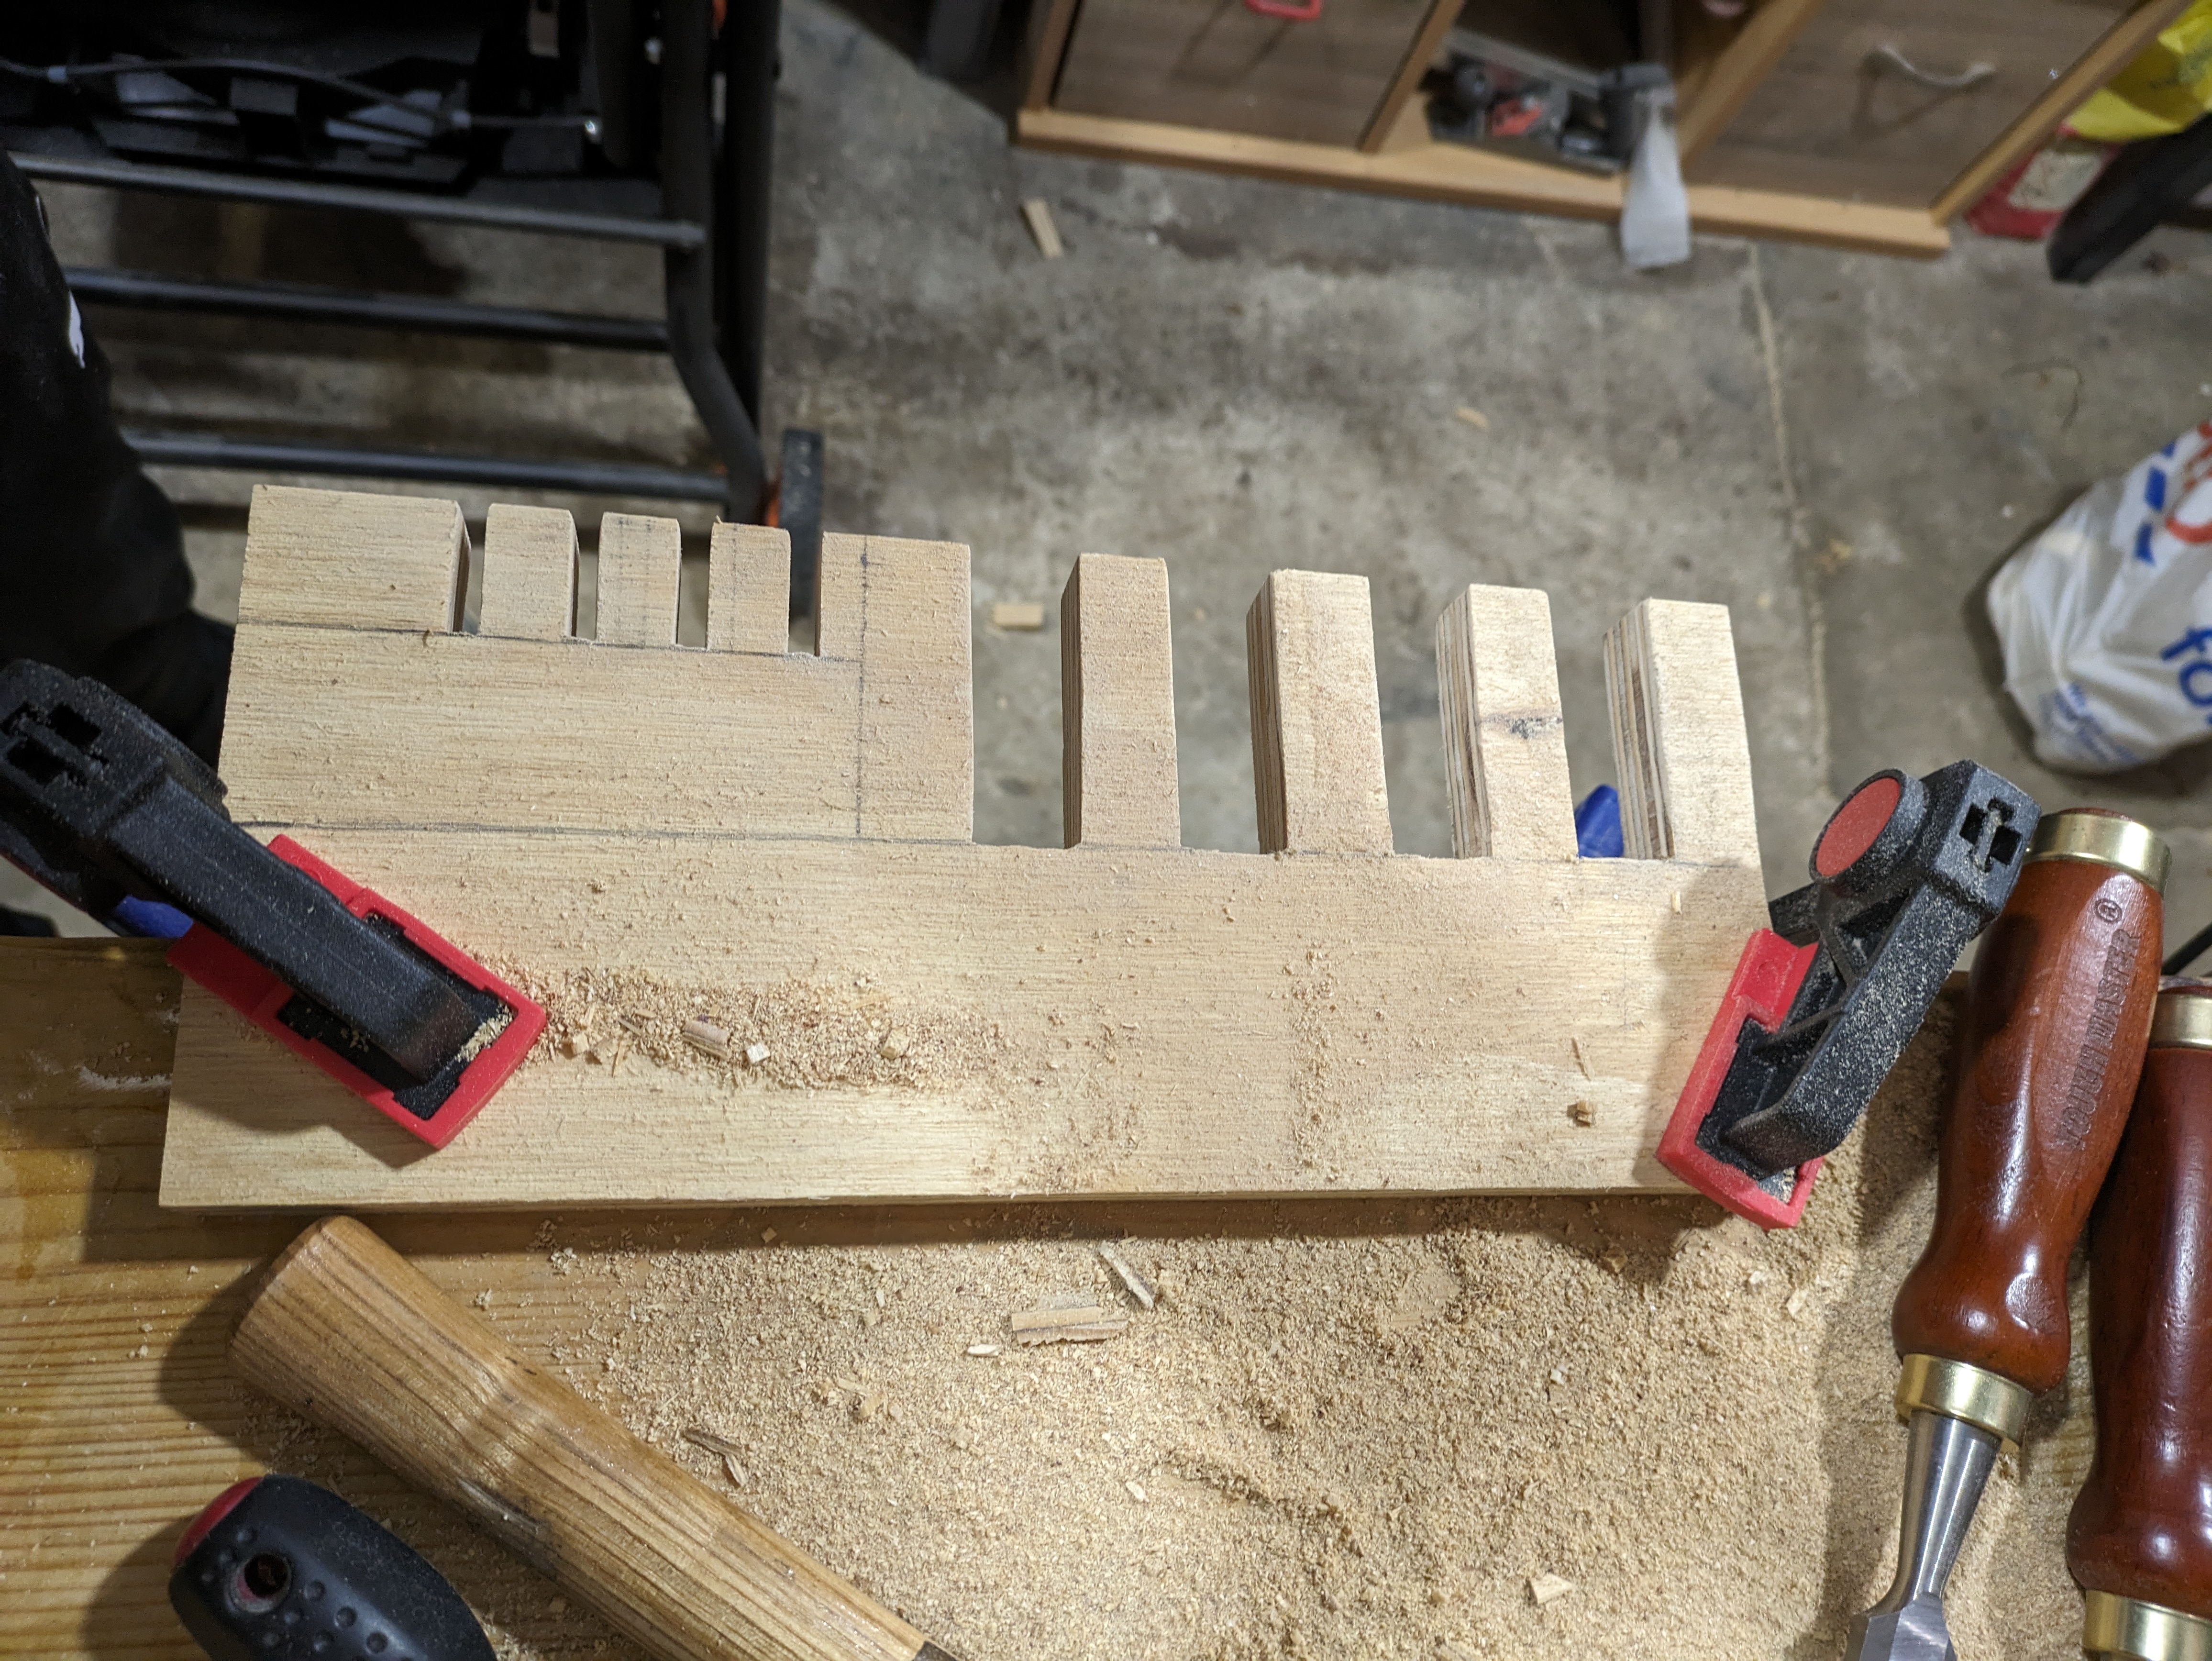
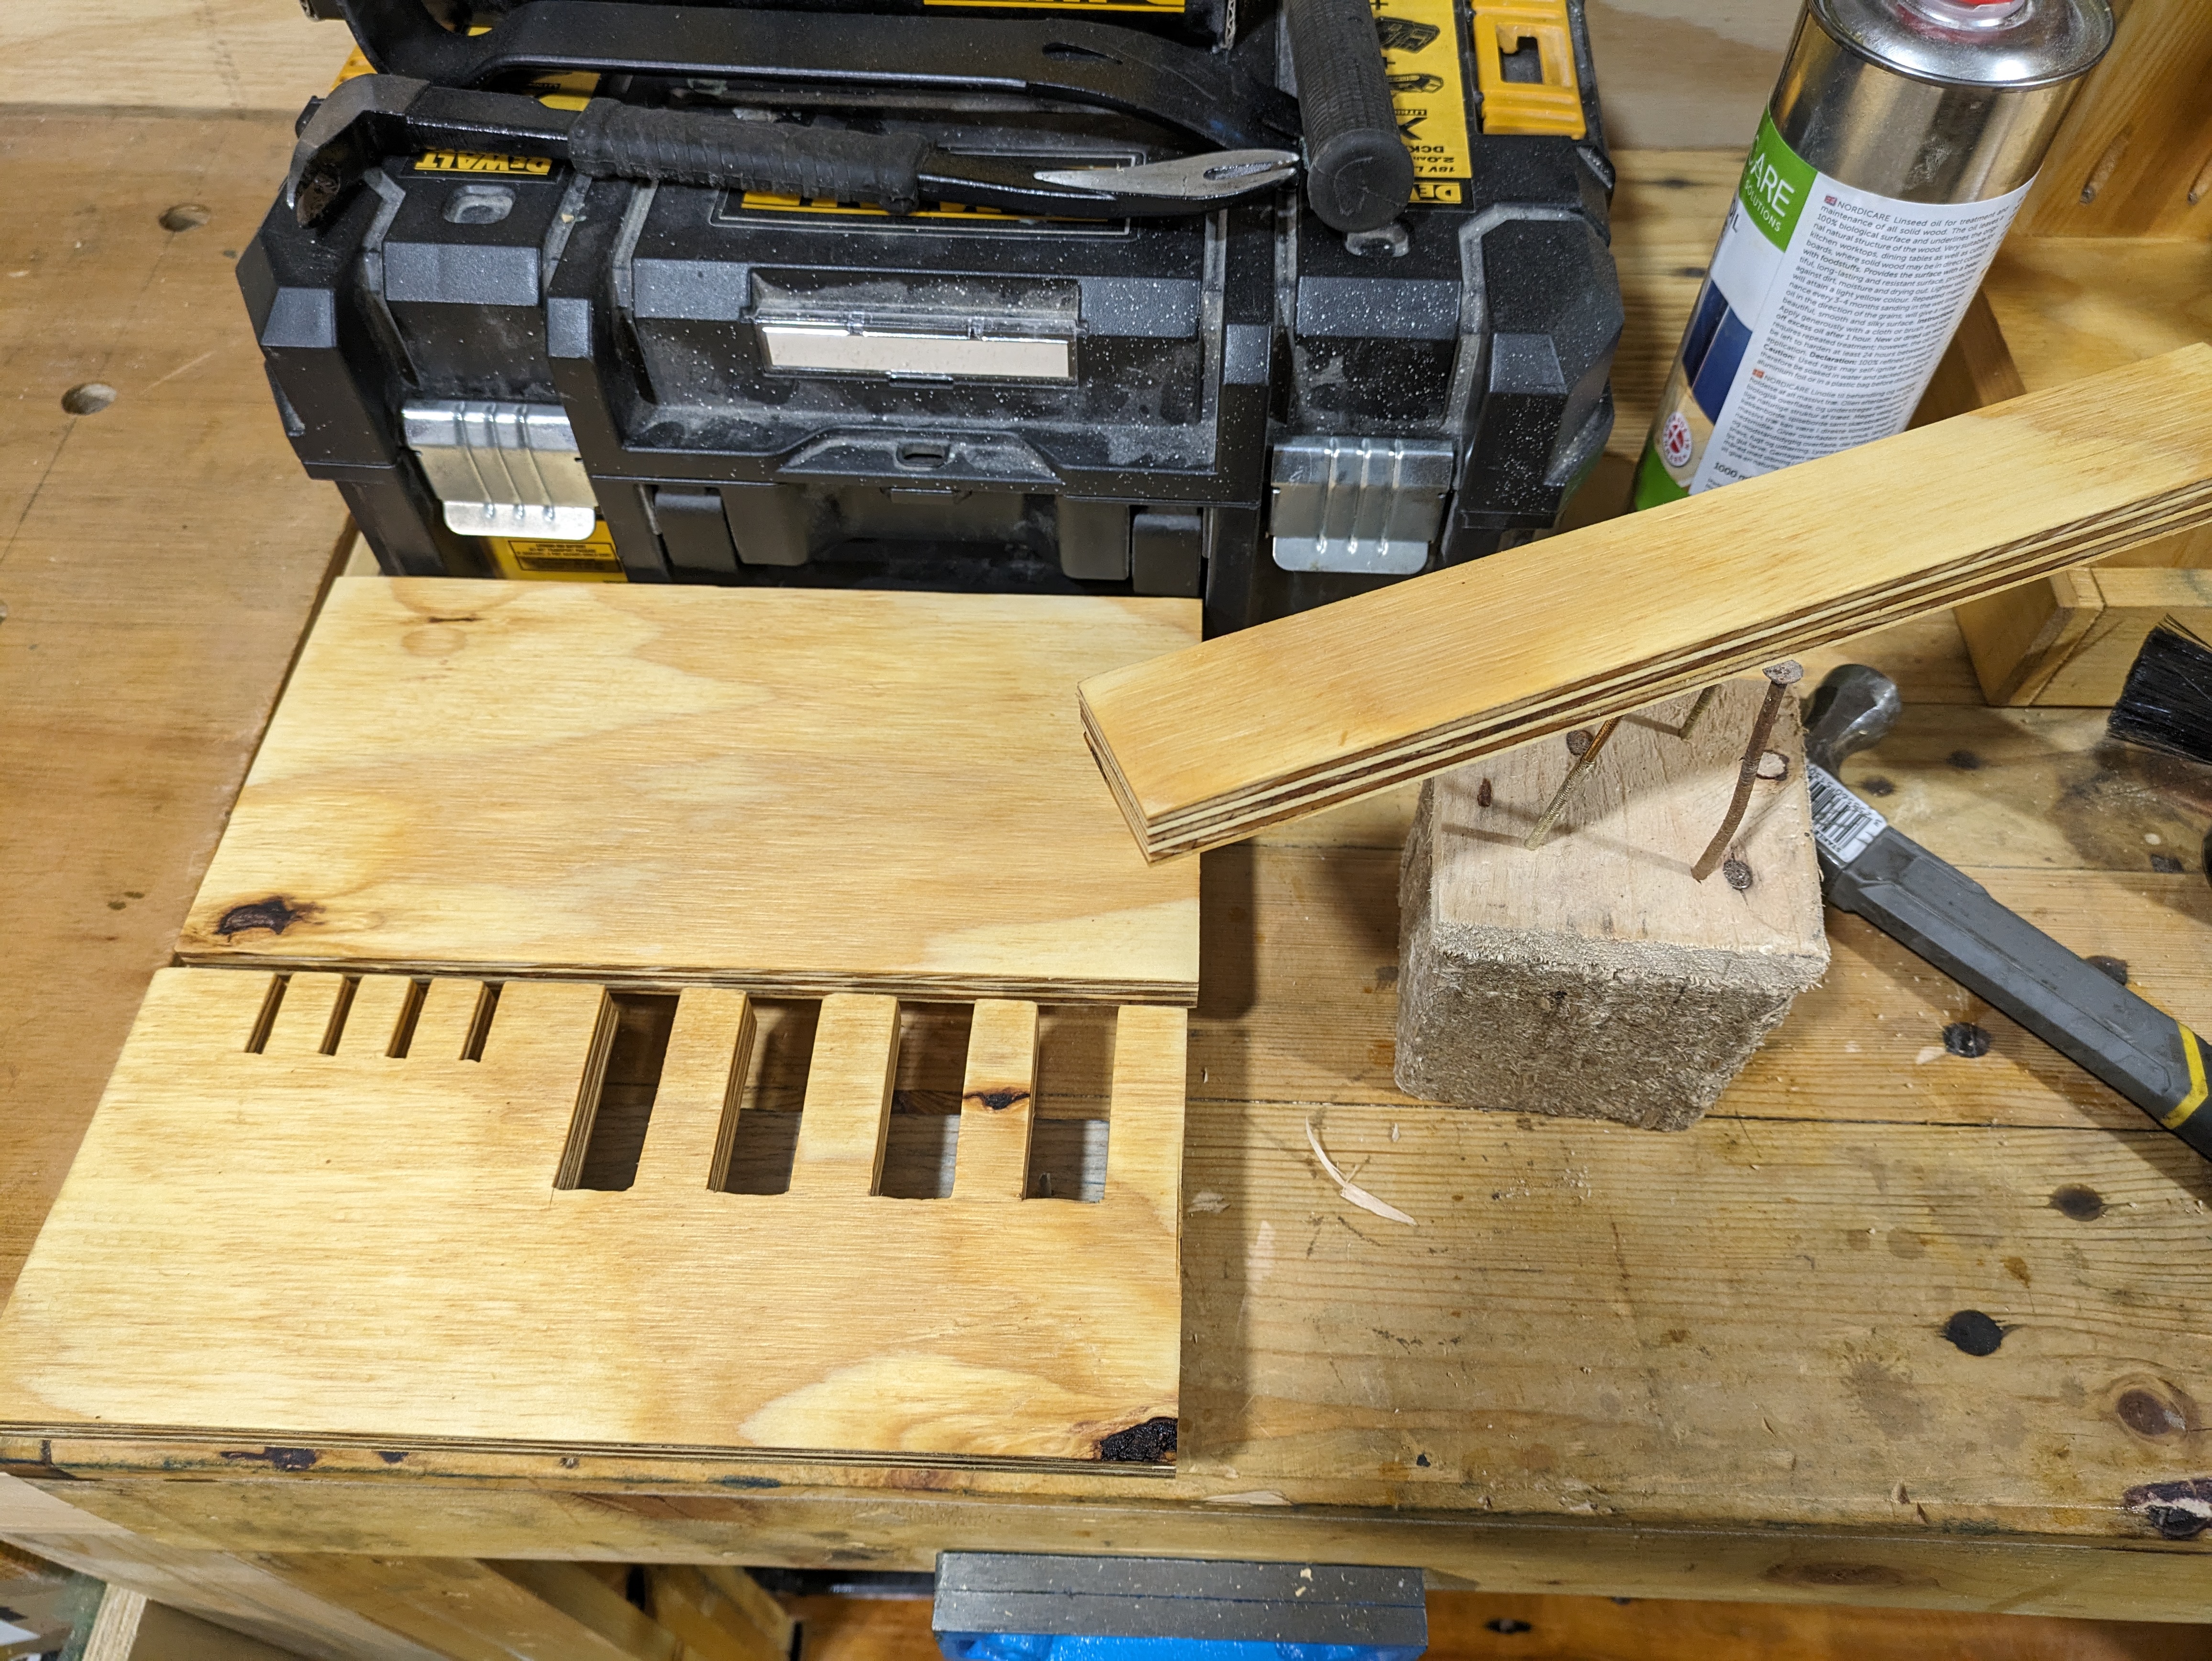
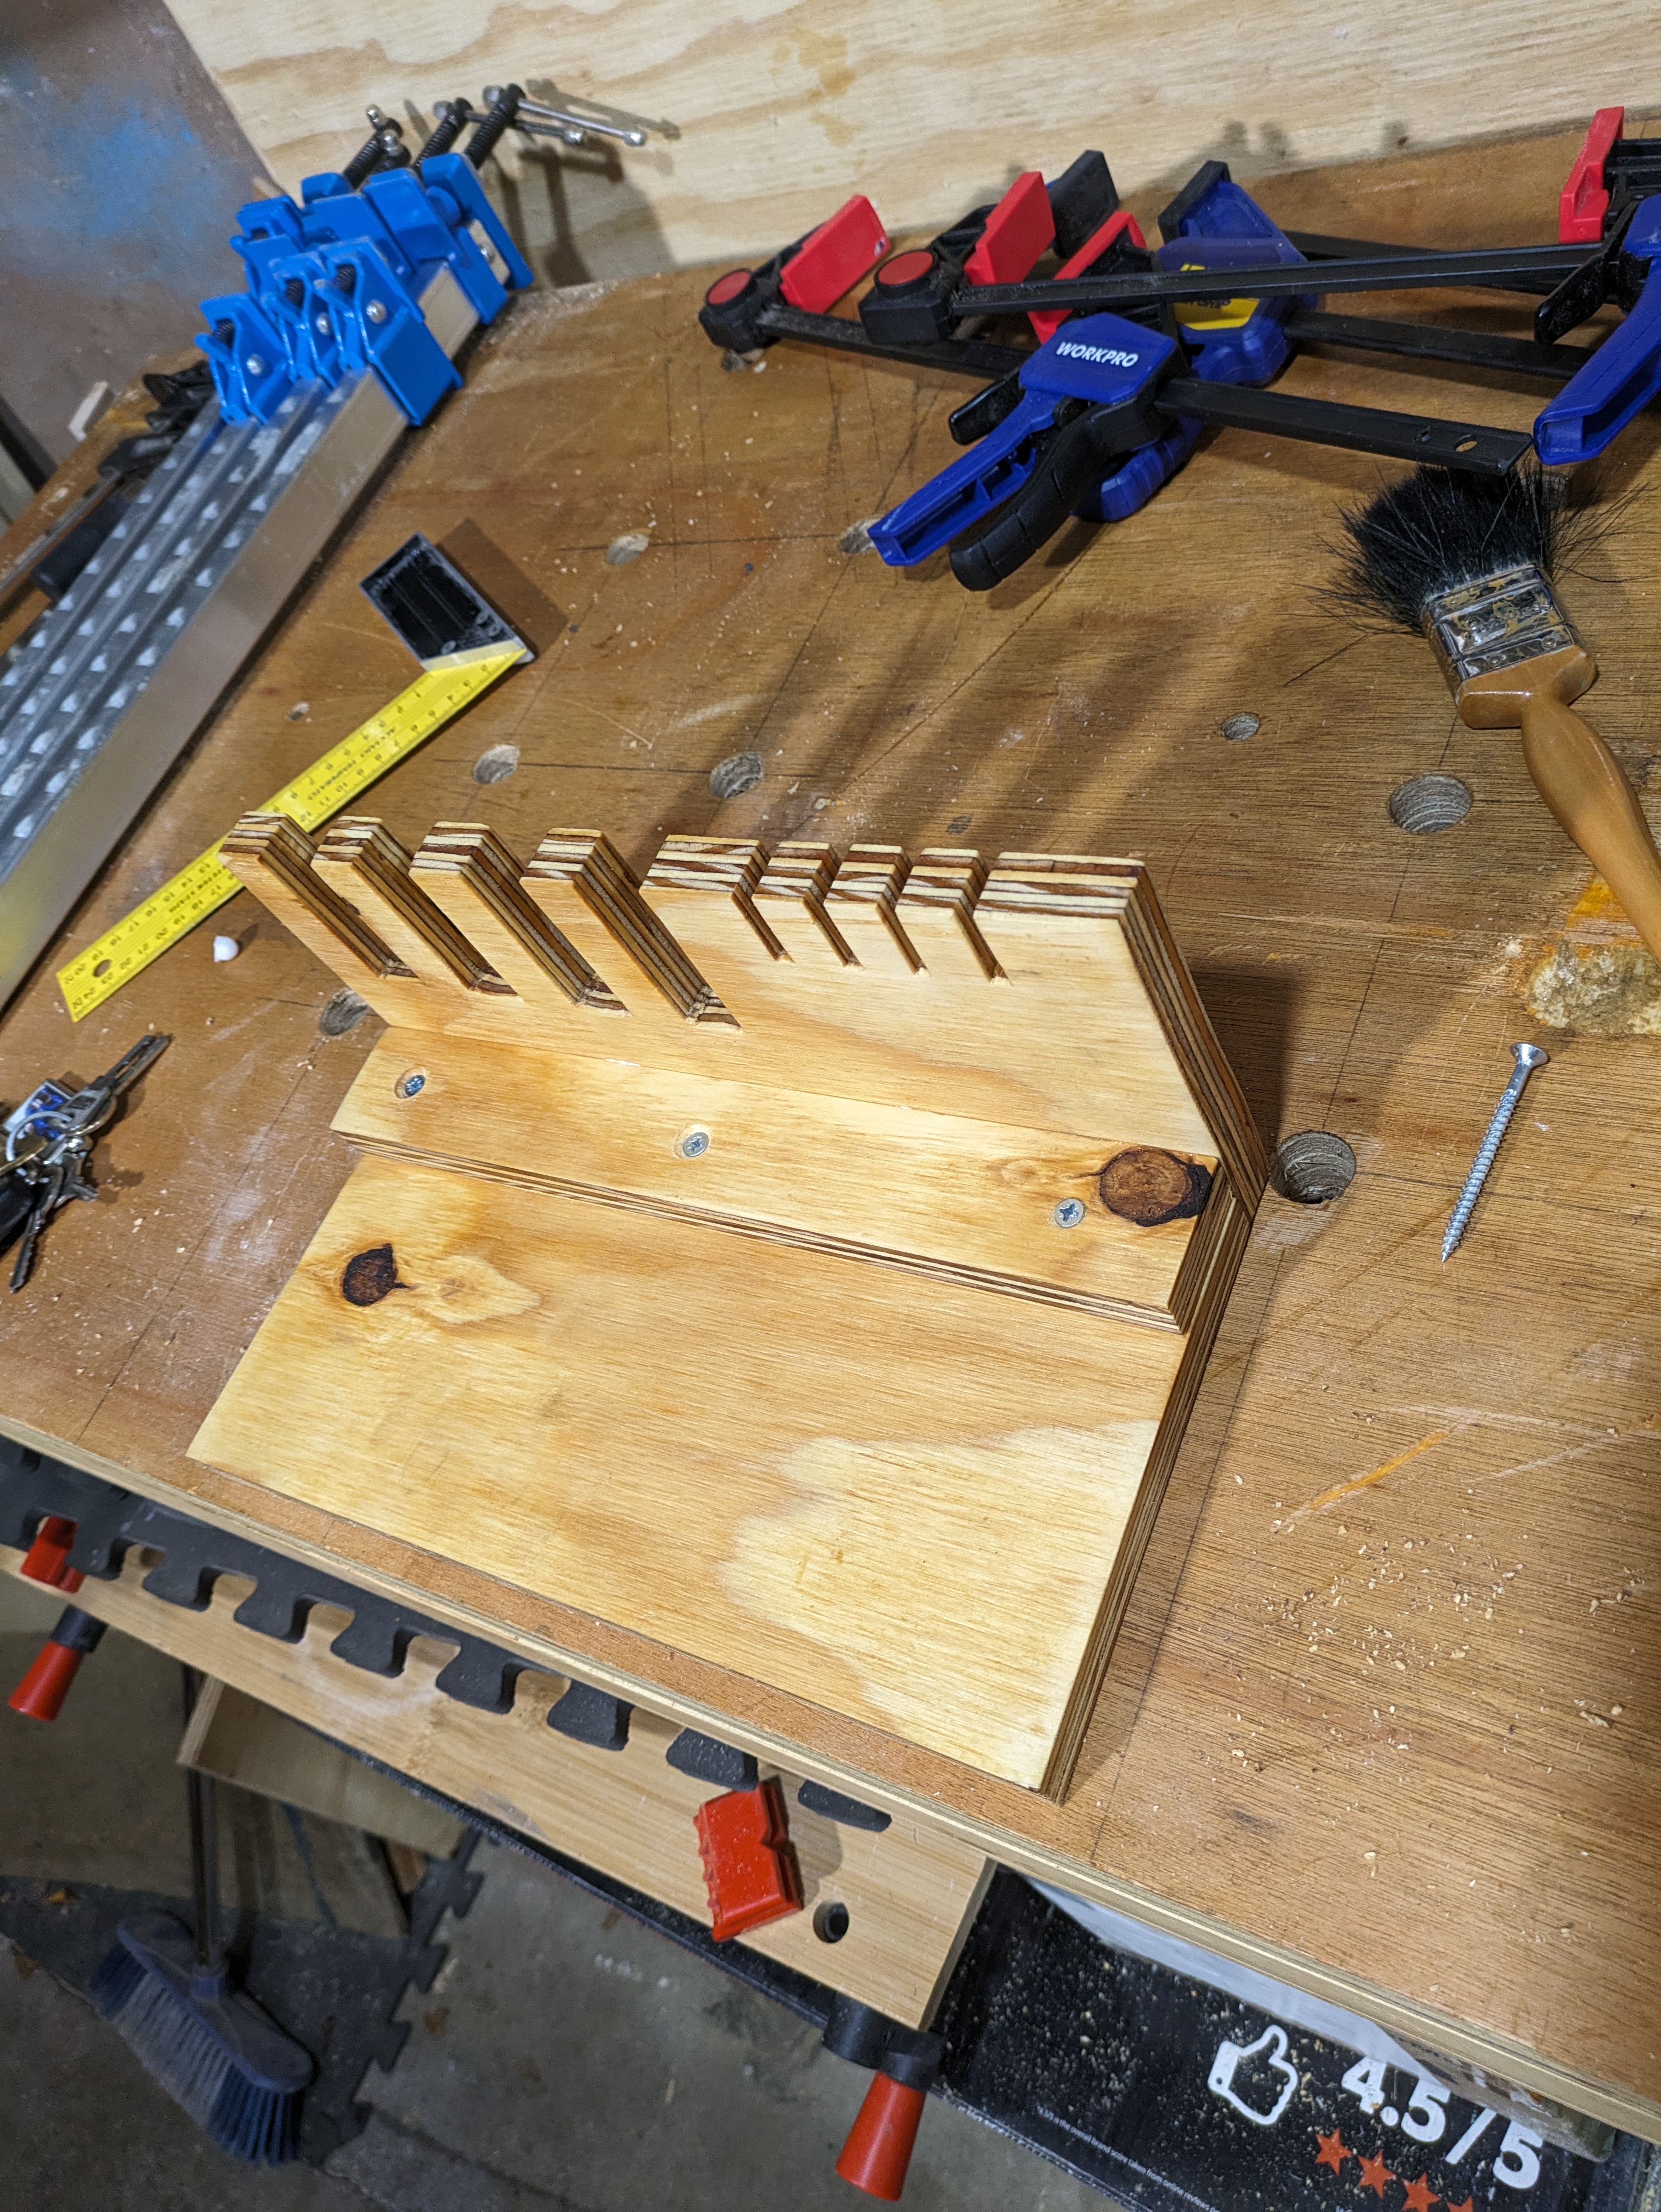
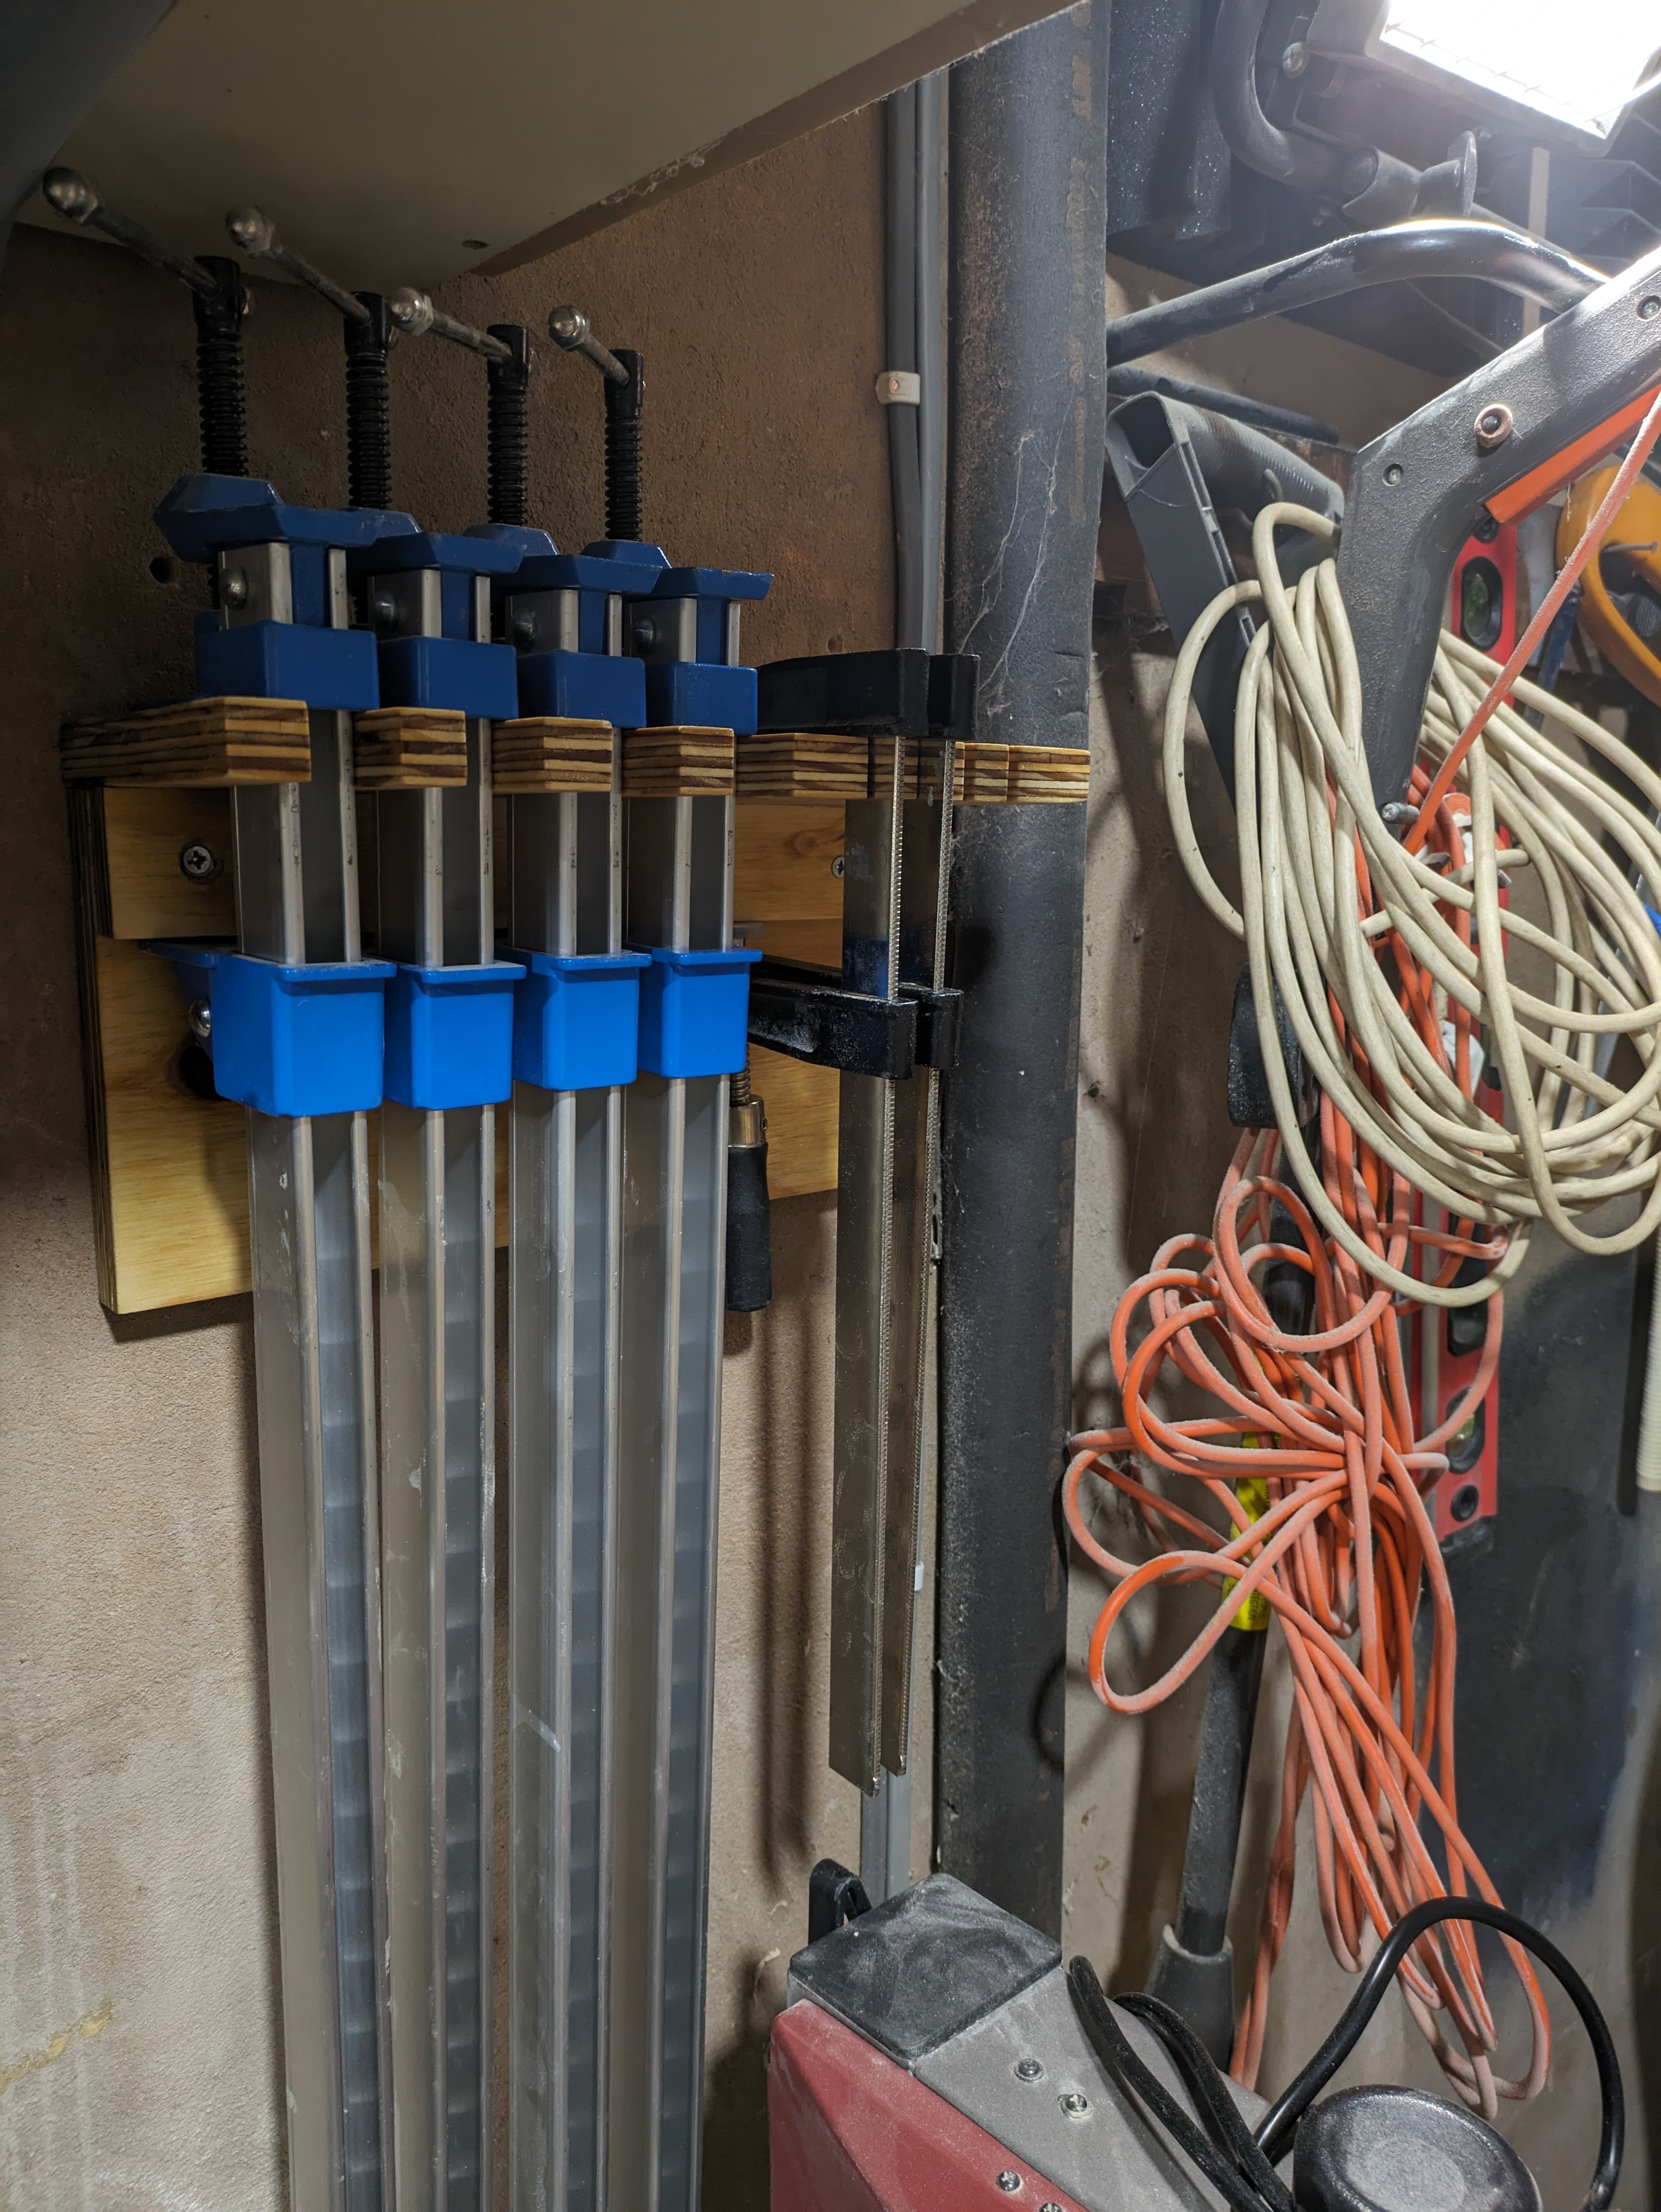
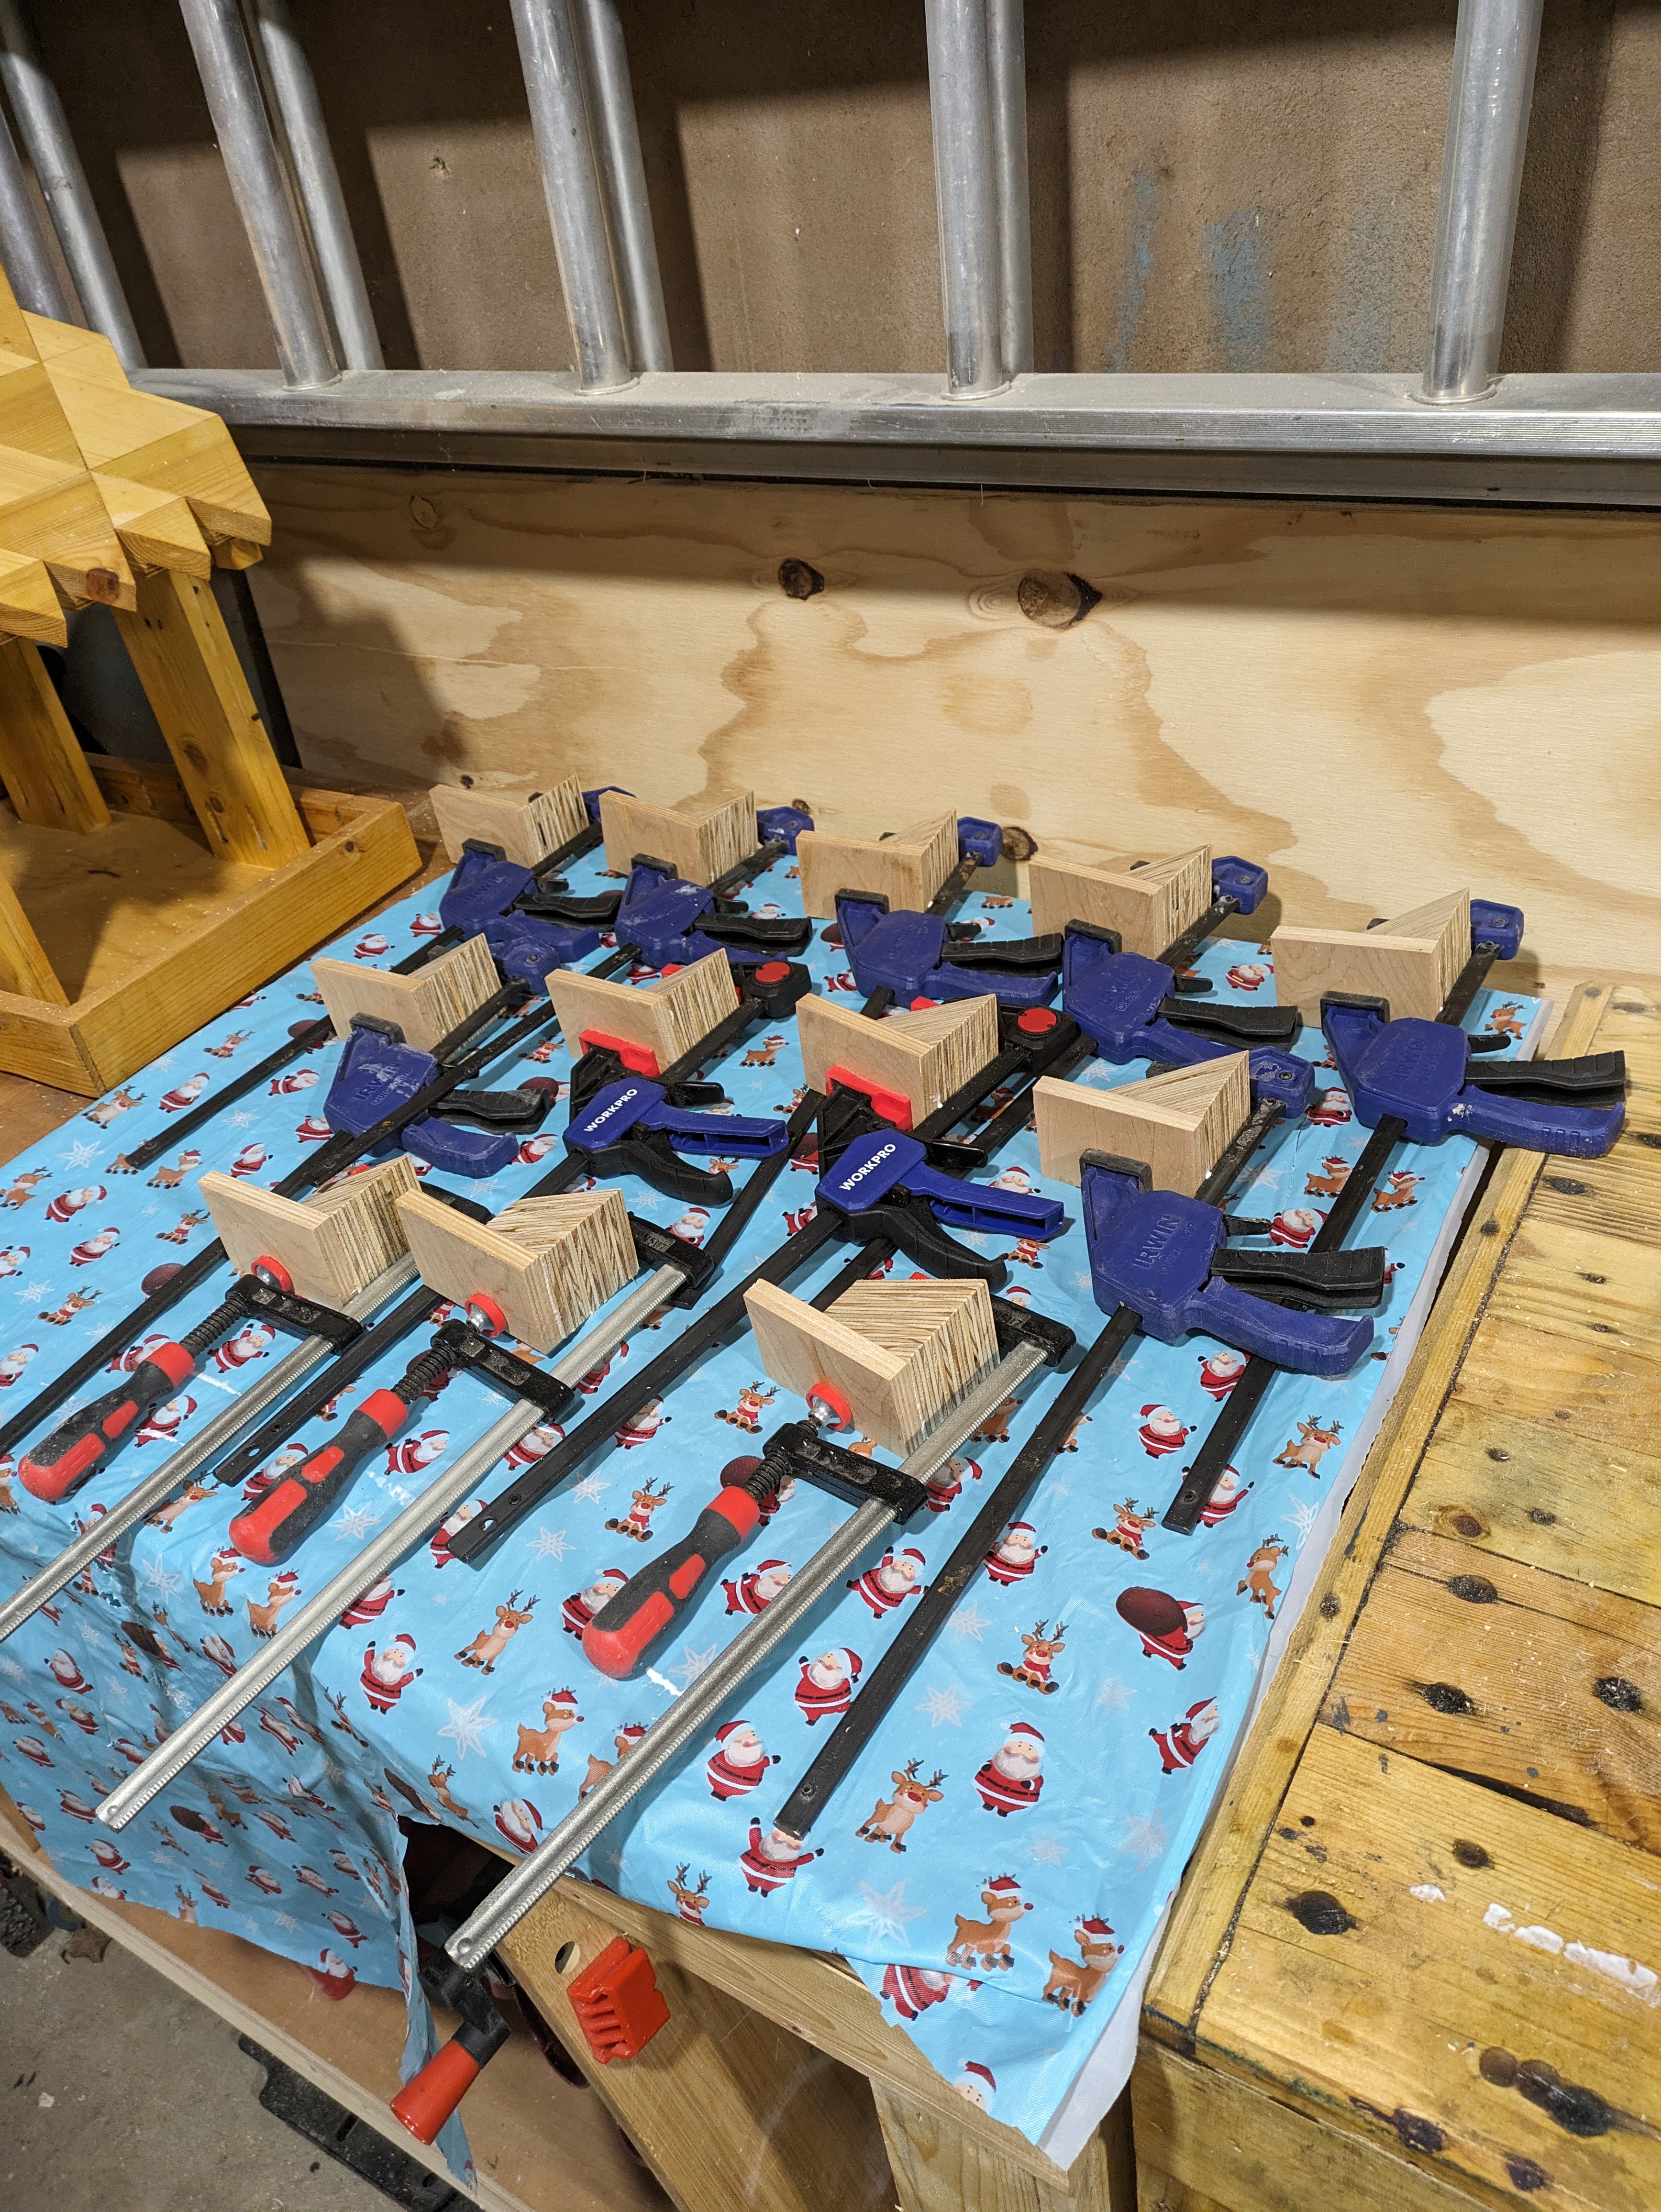
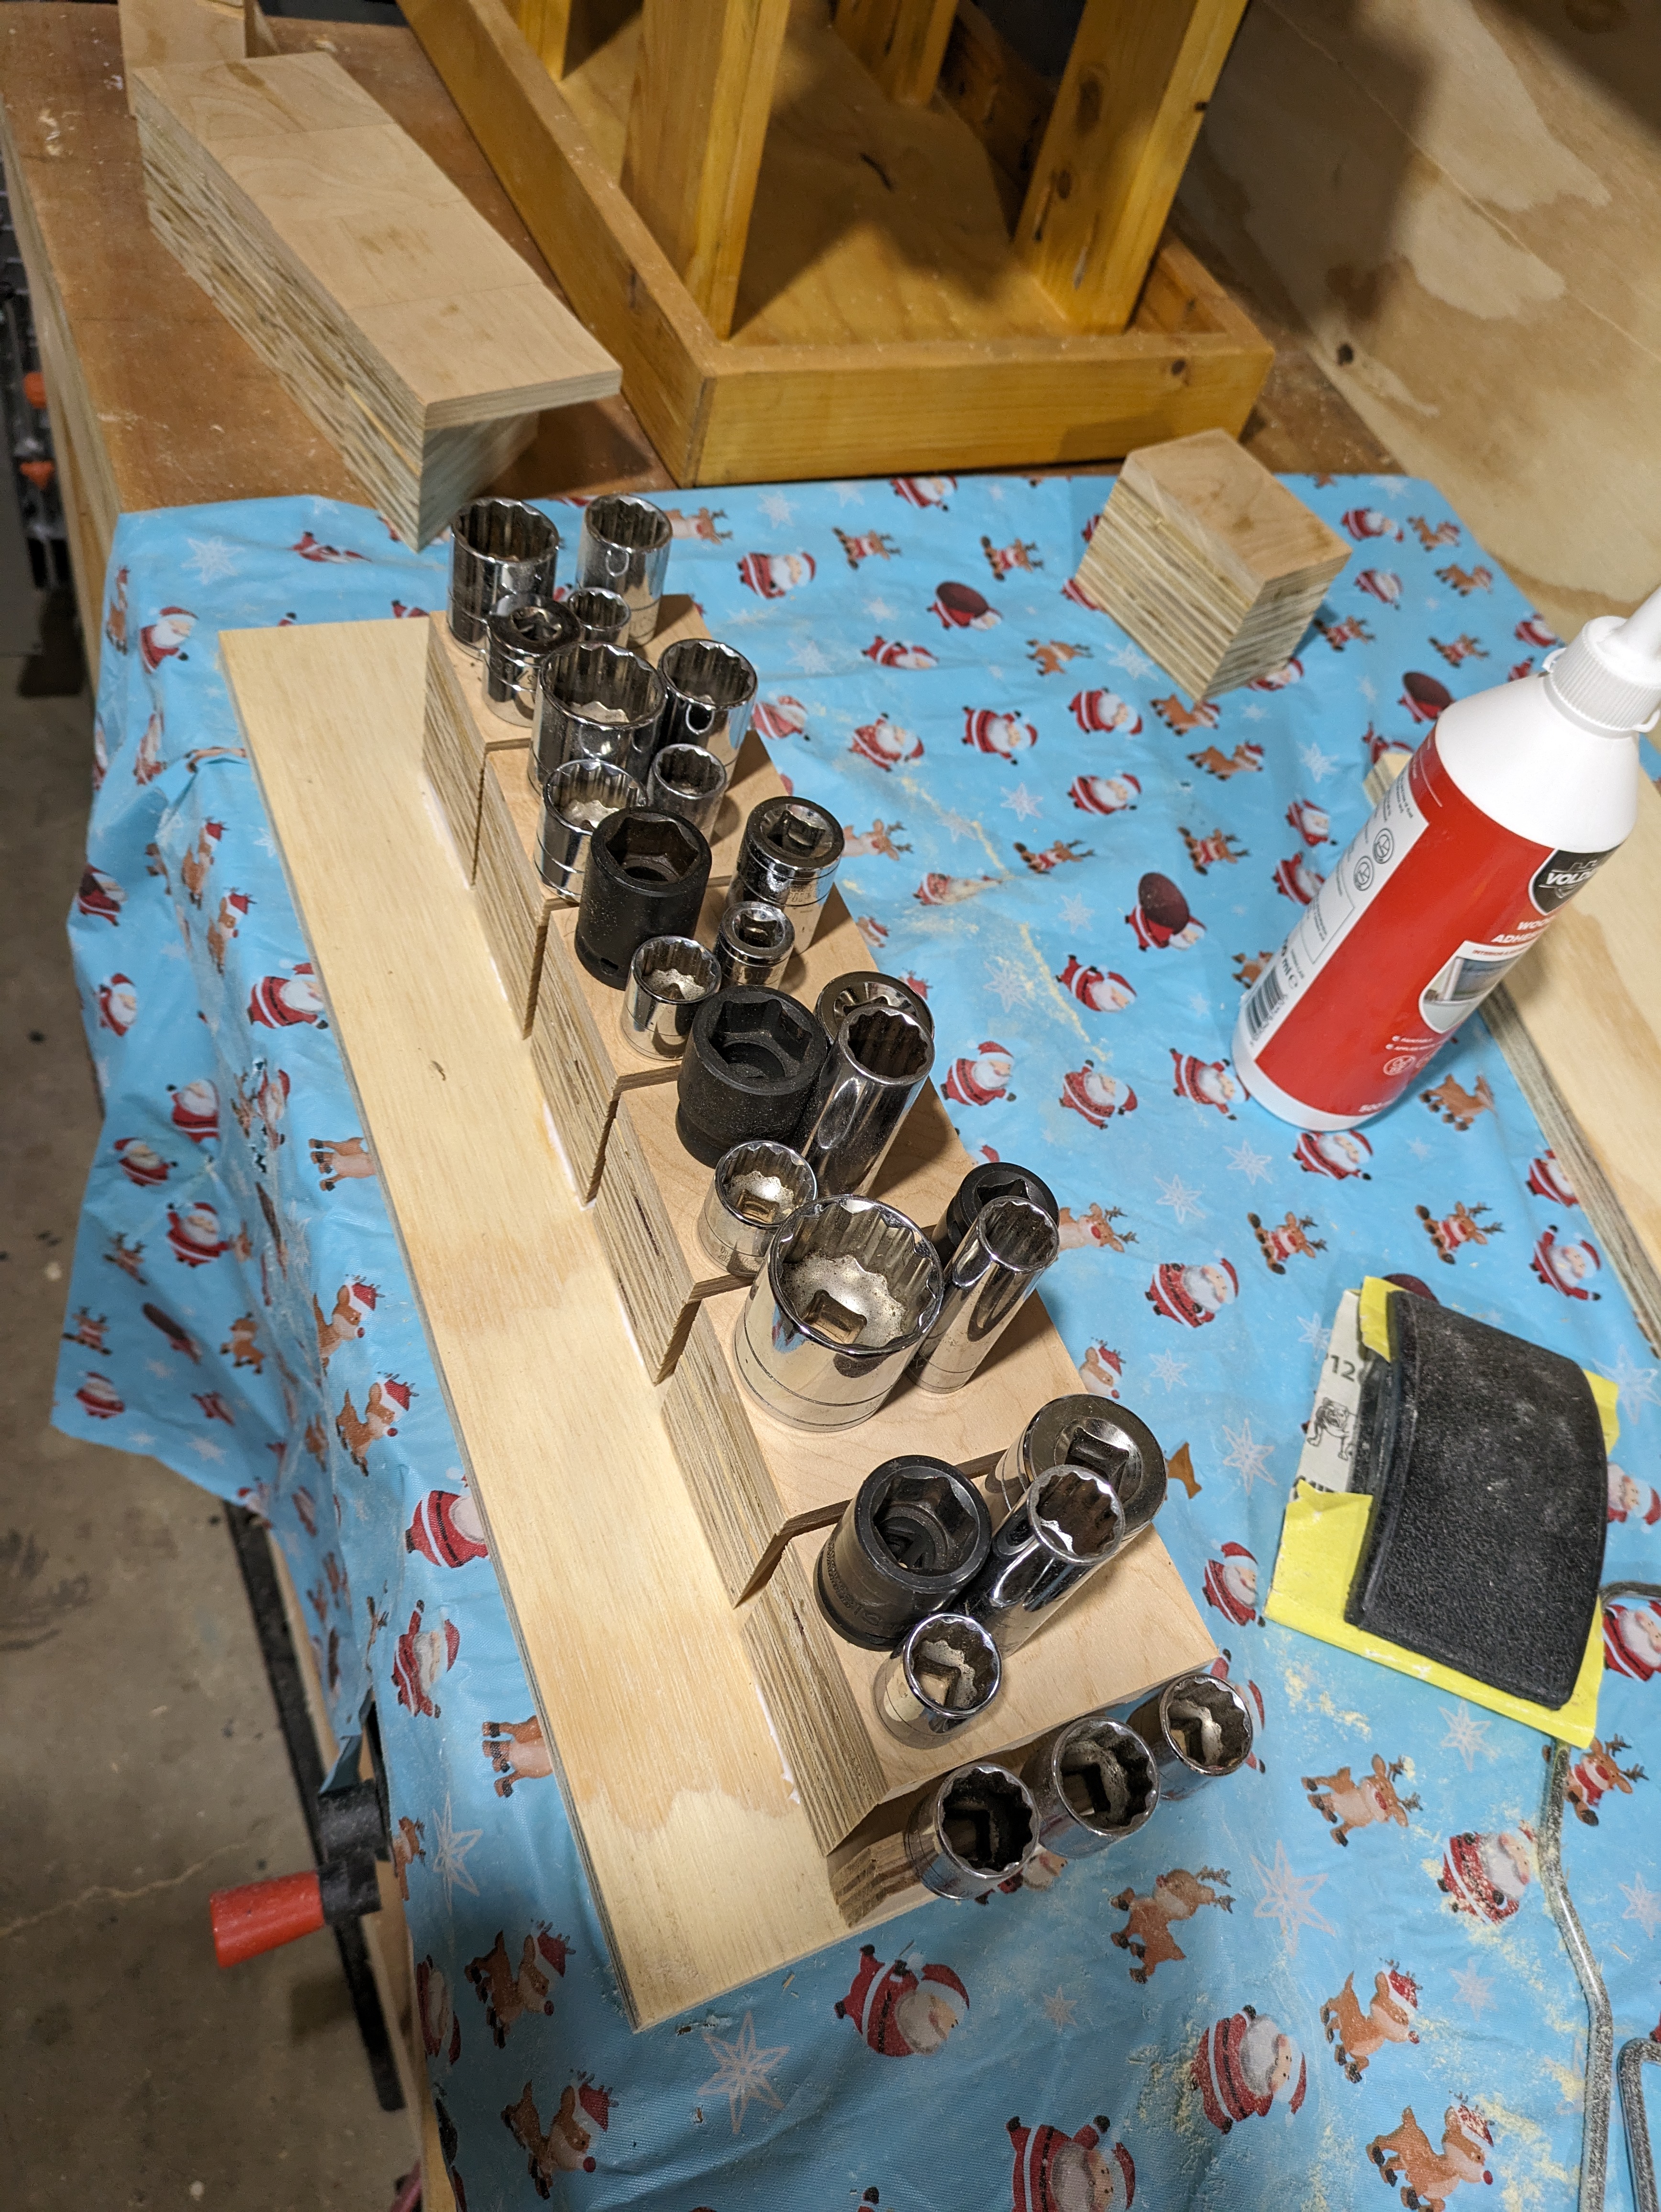
The most annoying thing to store are the various clamps as they all get tangled in cupboard were I was keeping most of them. I decided to have two racks for the different types of clamps. Firstly I layed out the clamps to get an idea of size then cut some to ply to size and started notching out the ends with a saw and chisel. I managed to get 14 clamps neatly stored and easily accessible, so marked that up as a win!
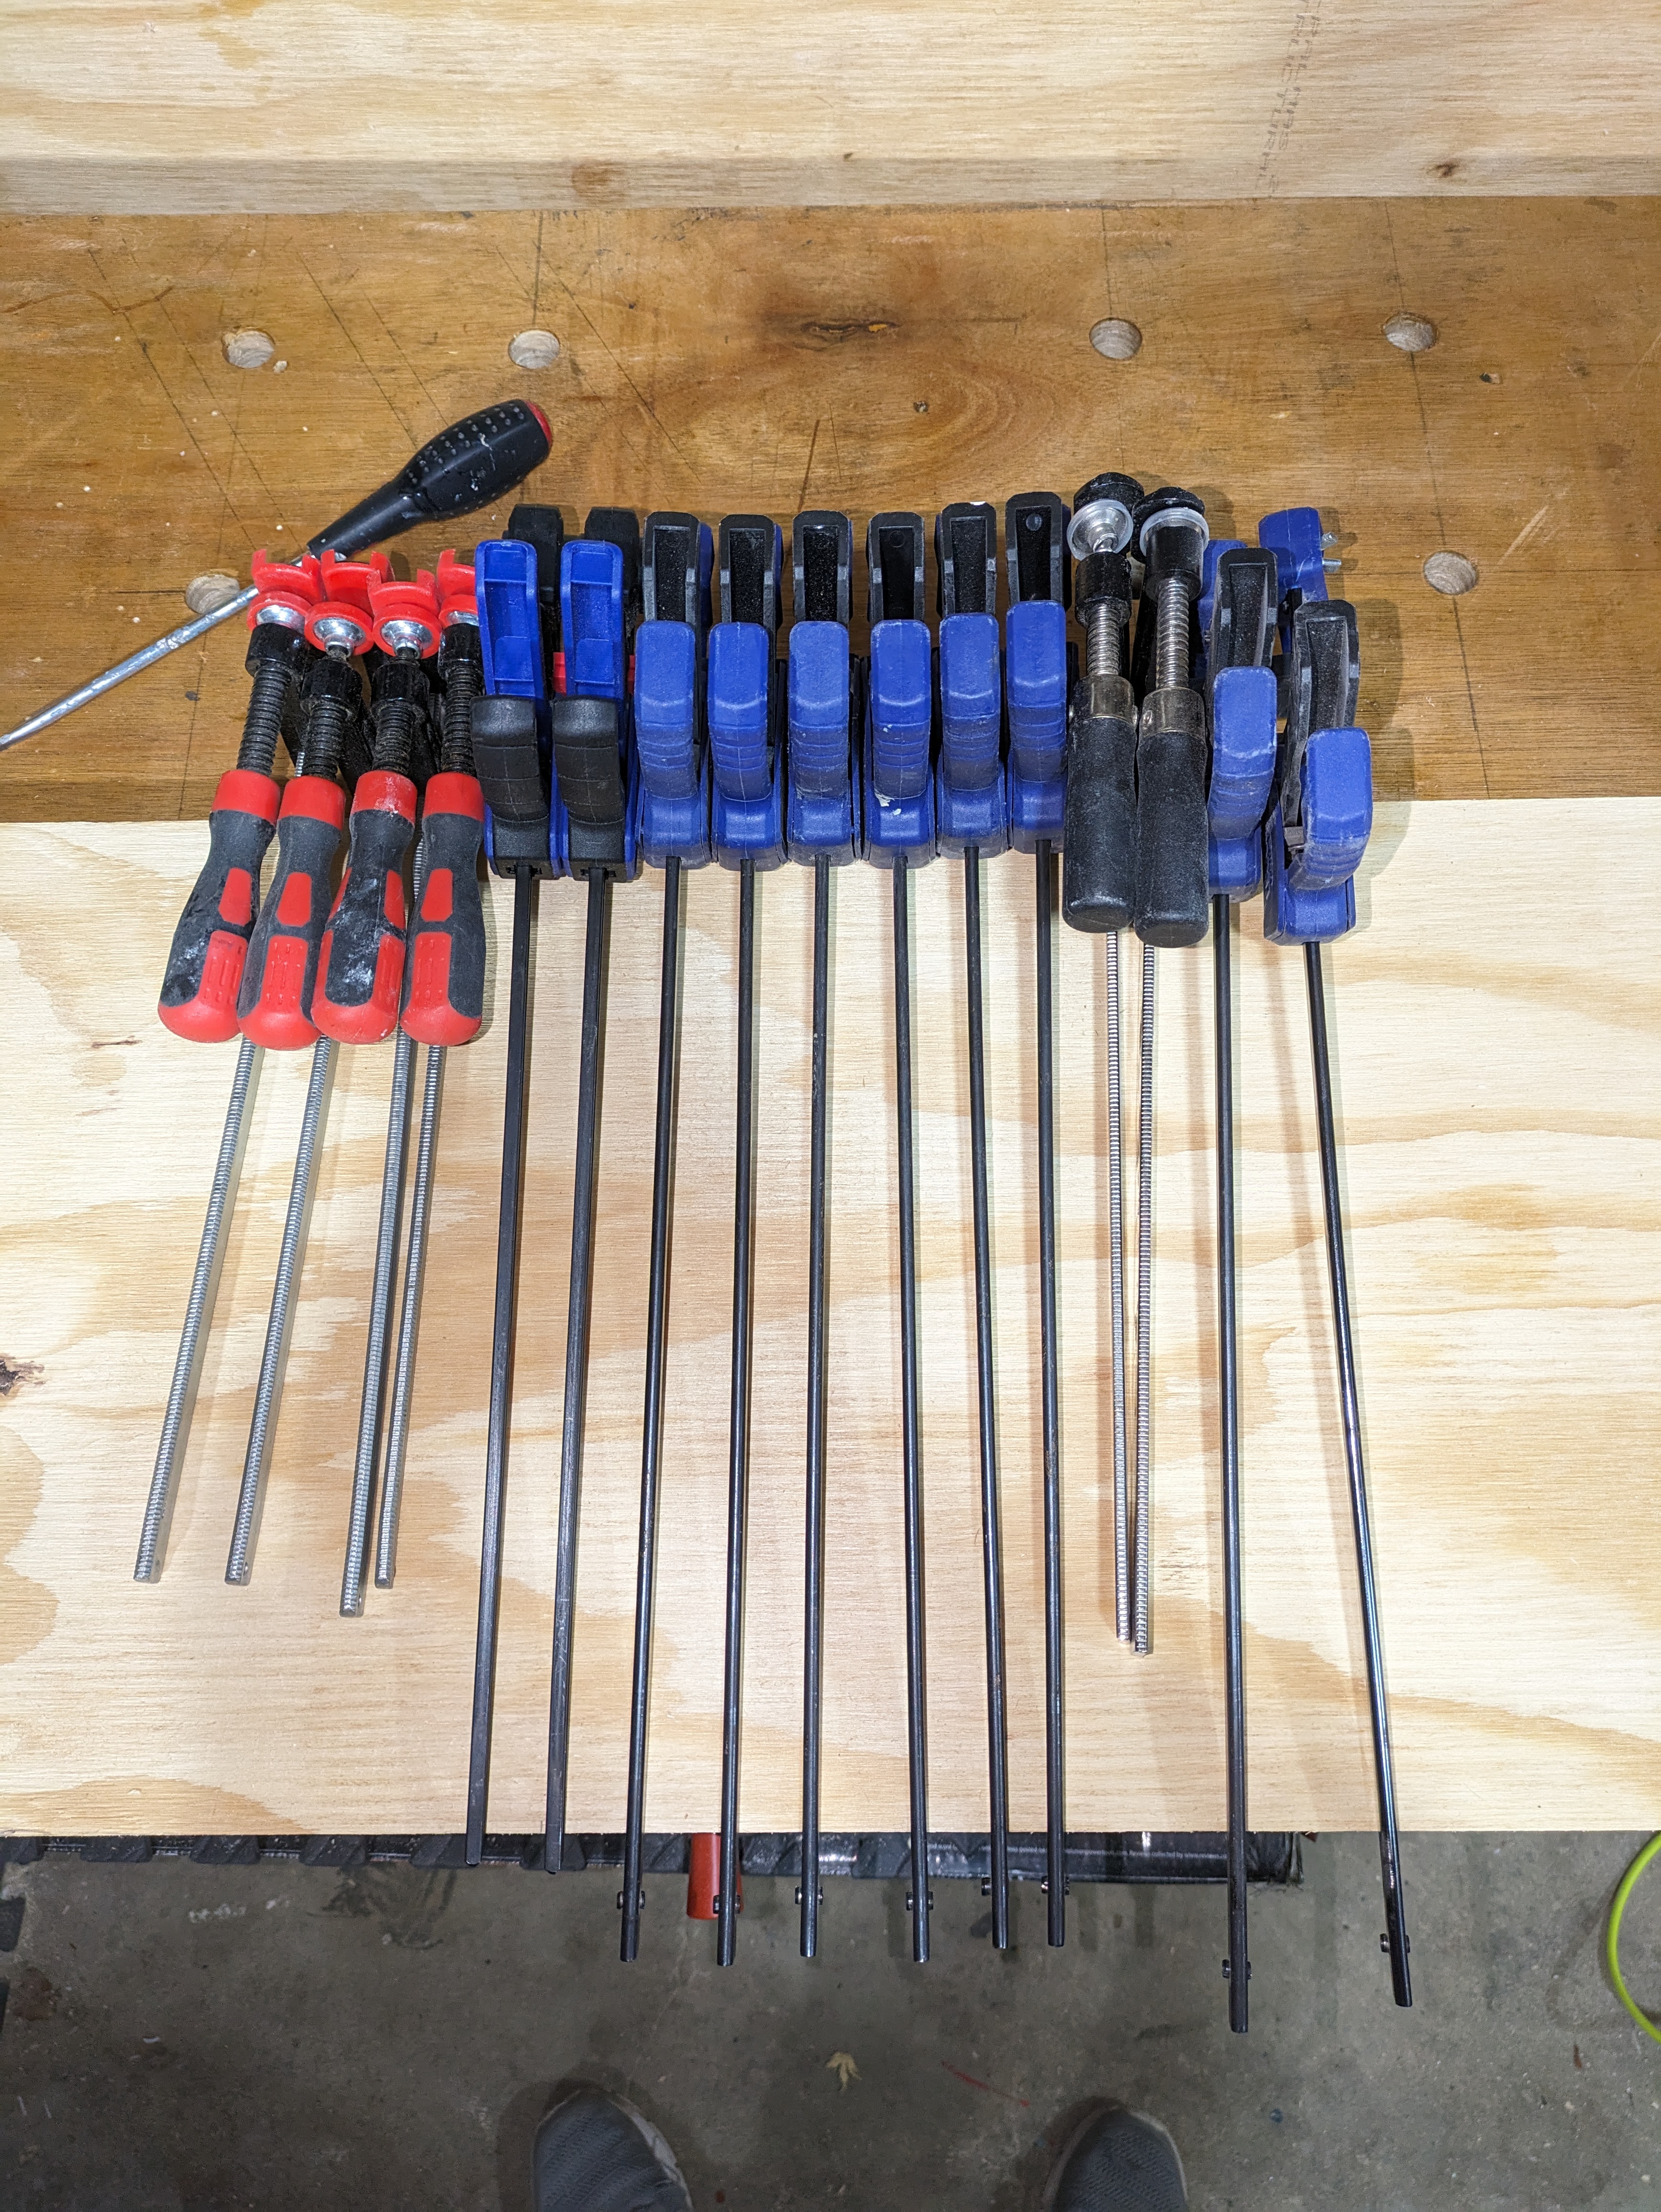
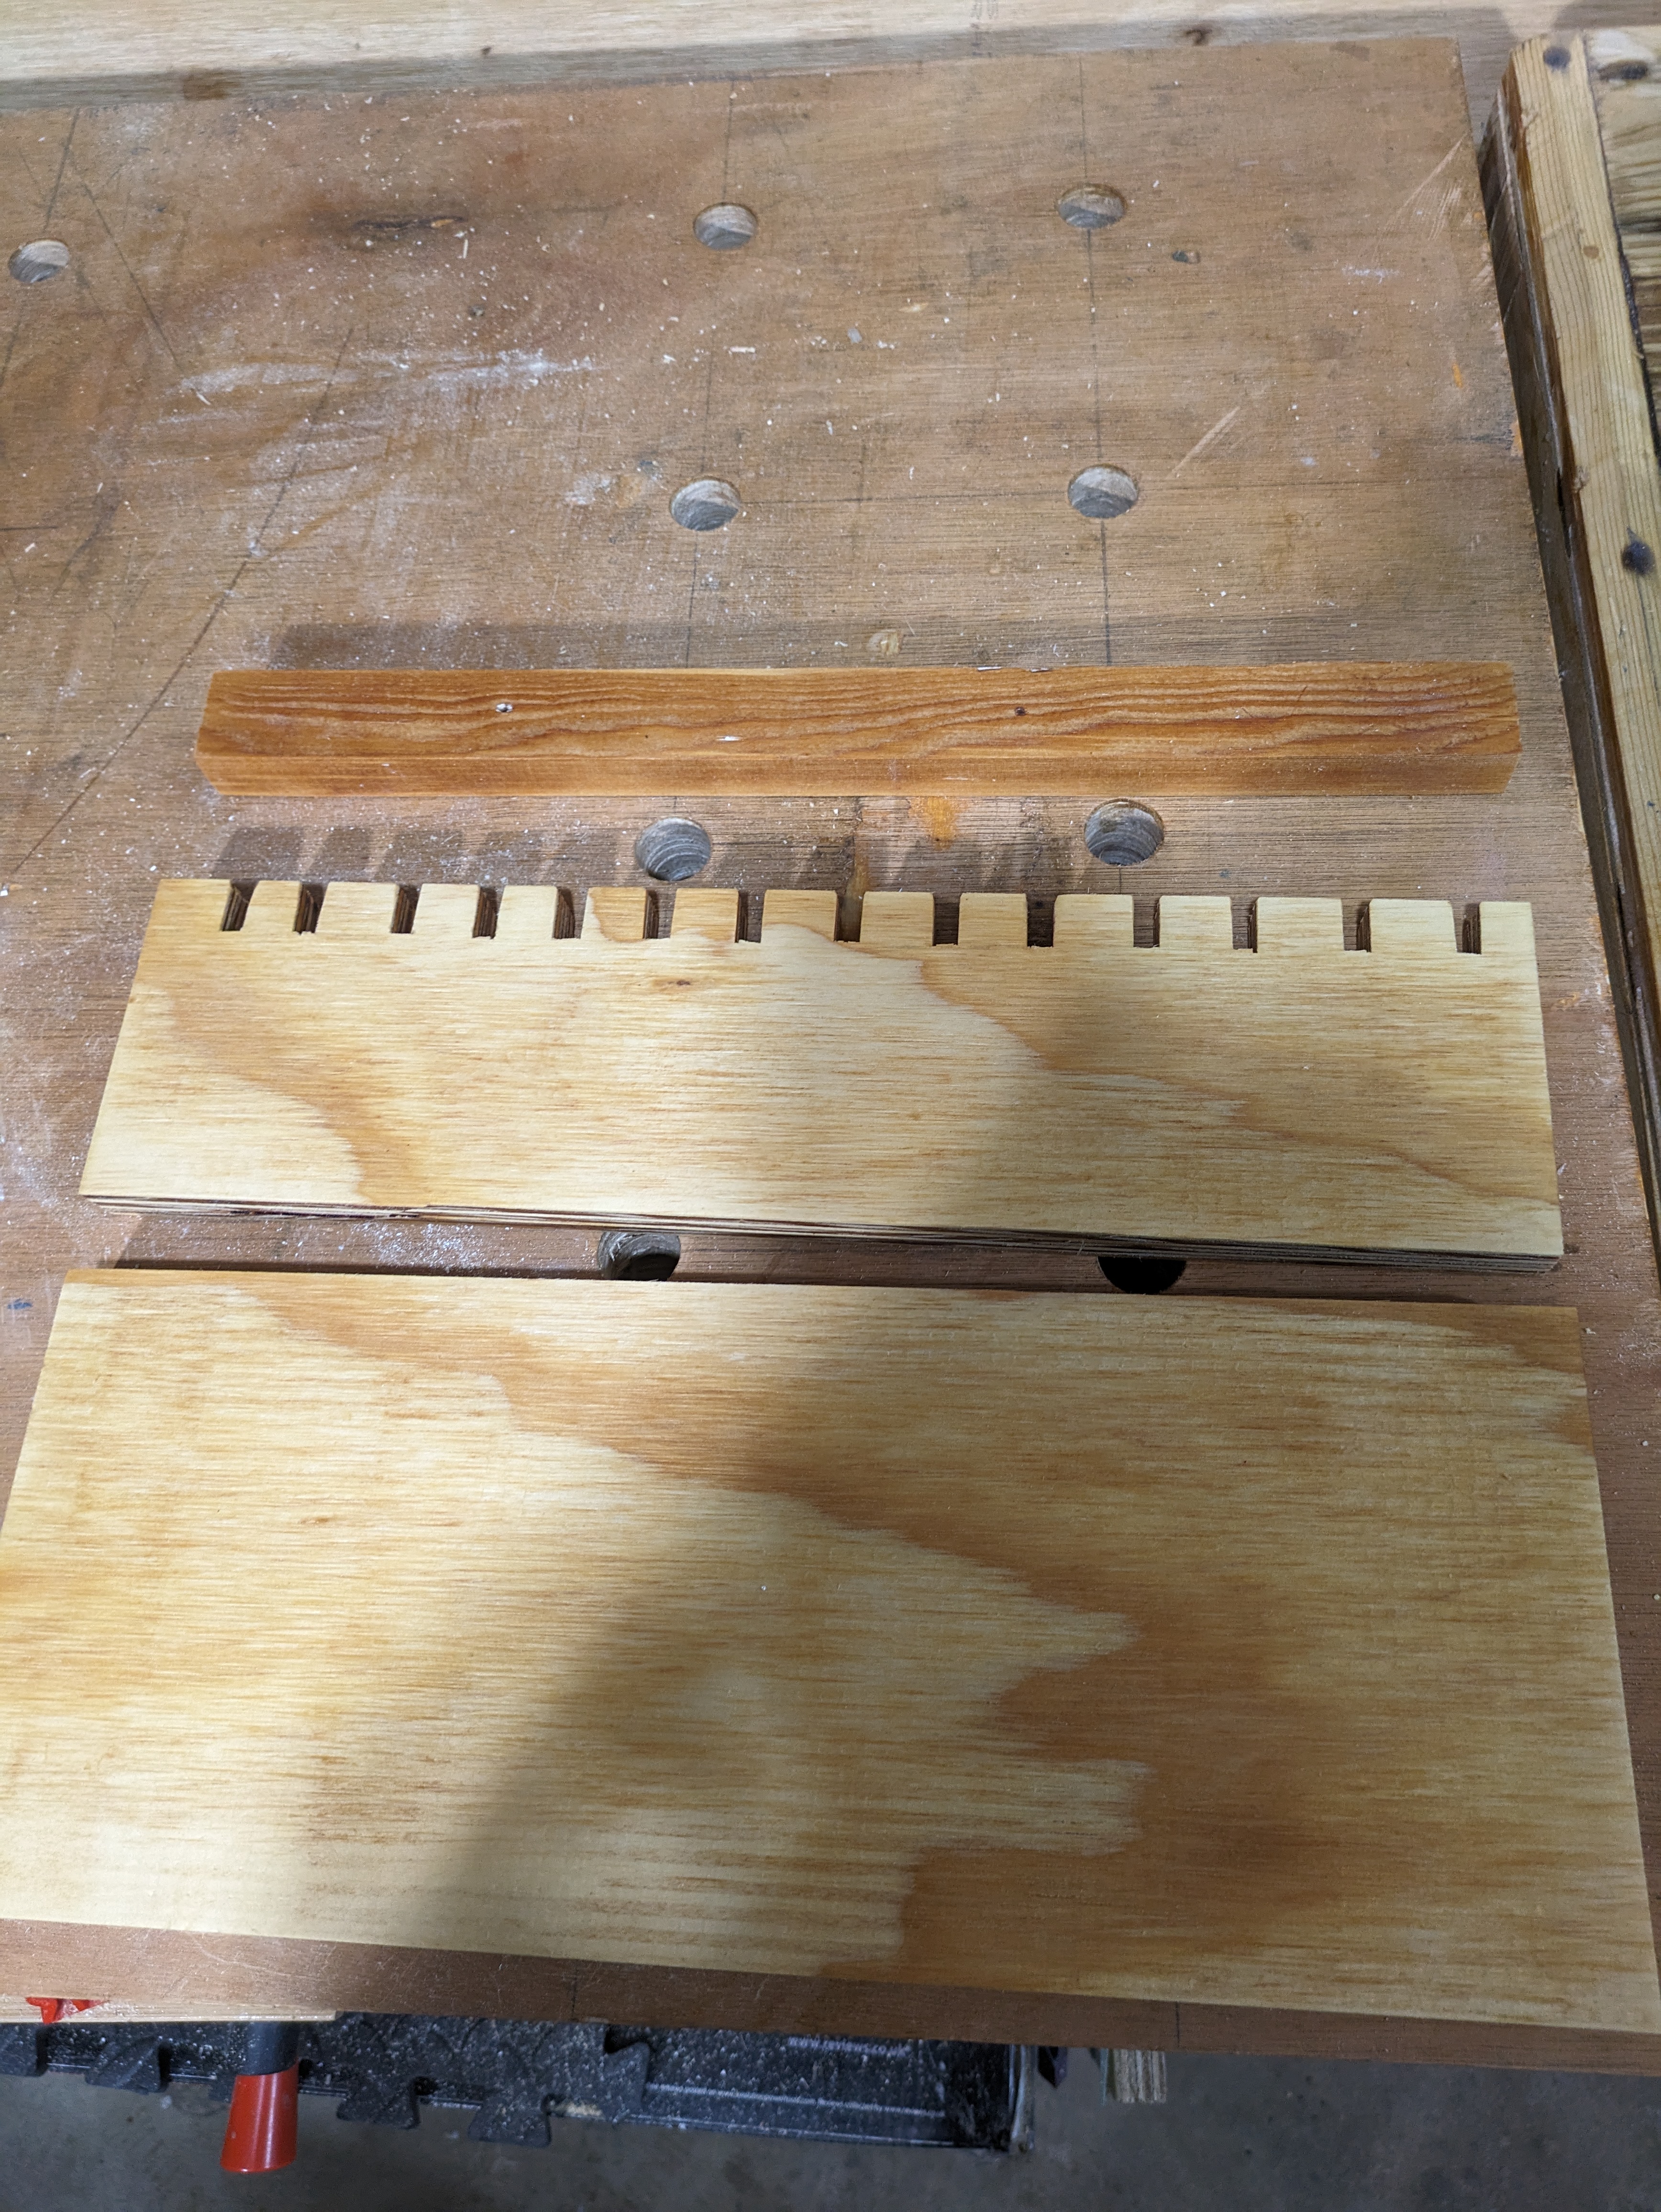
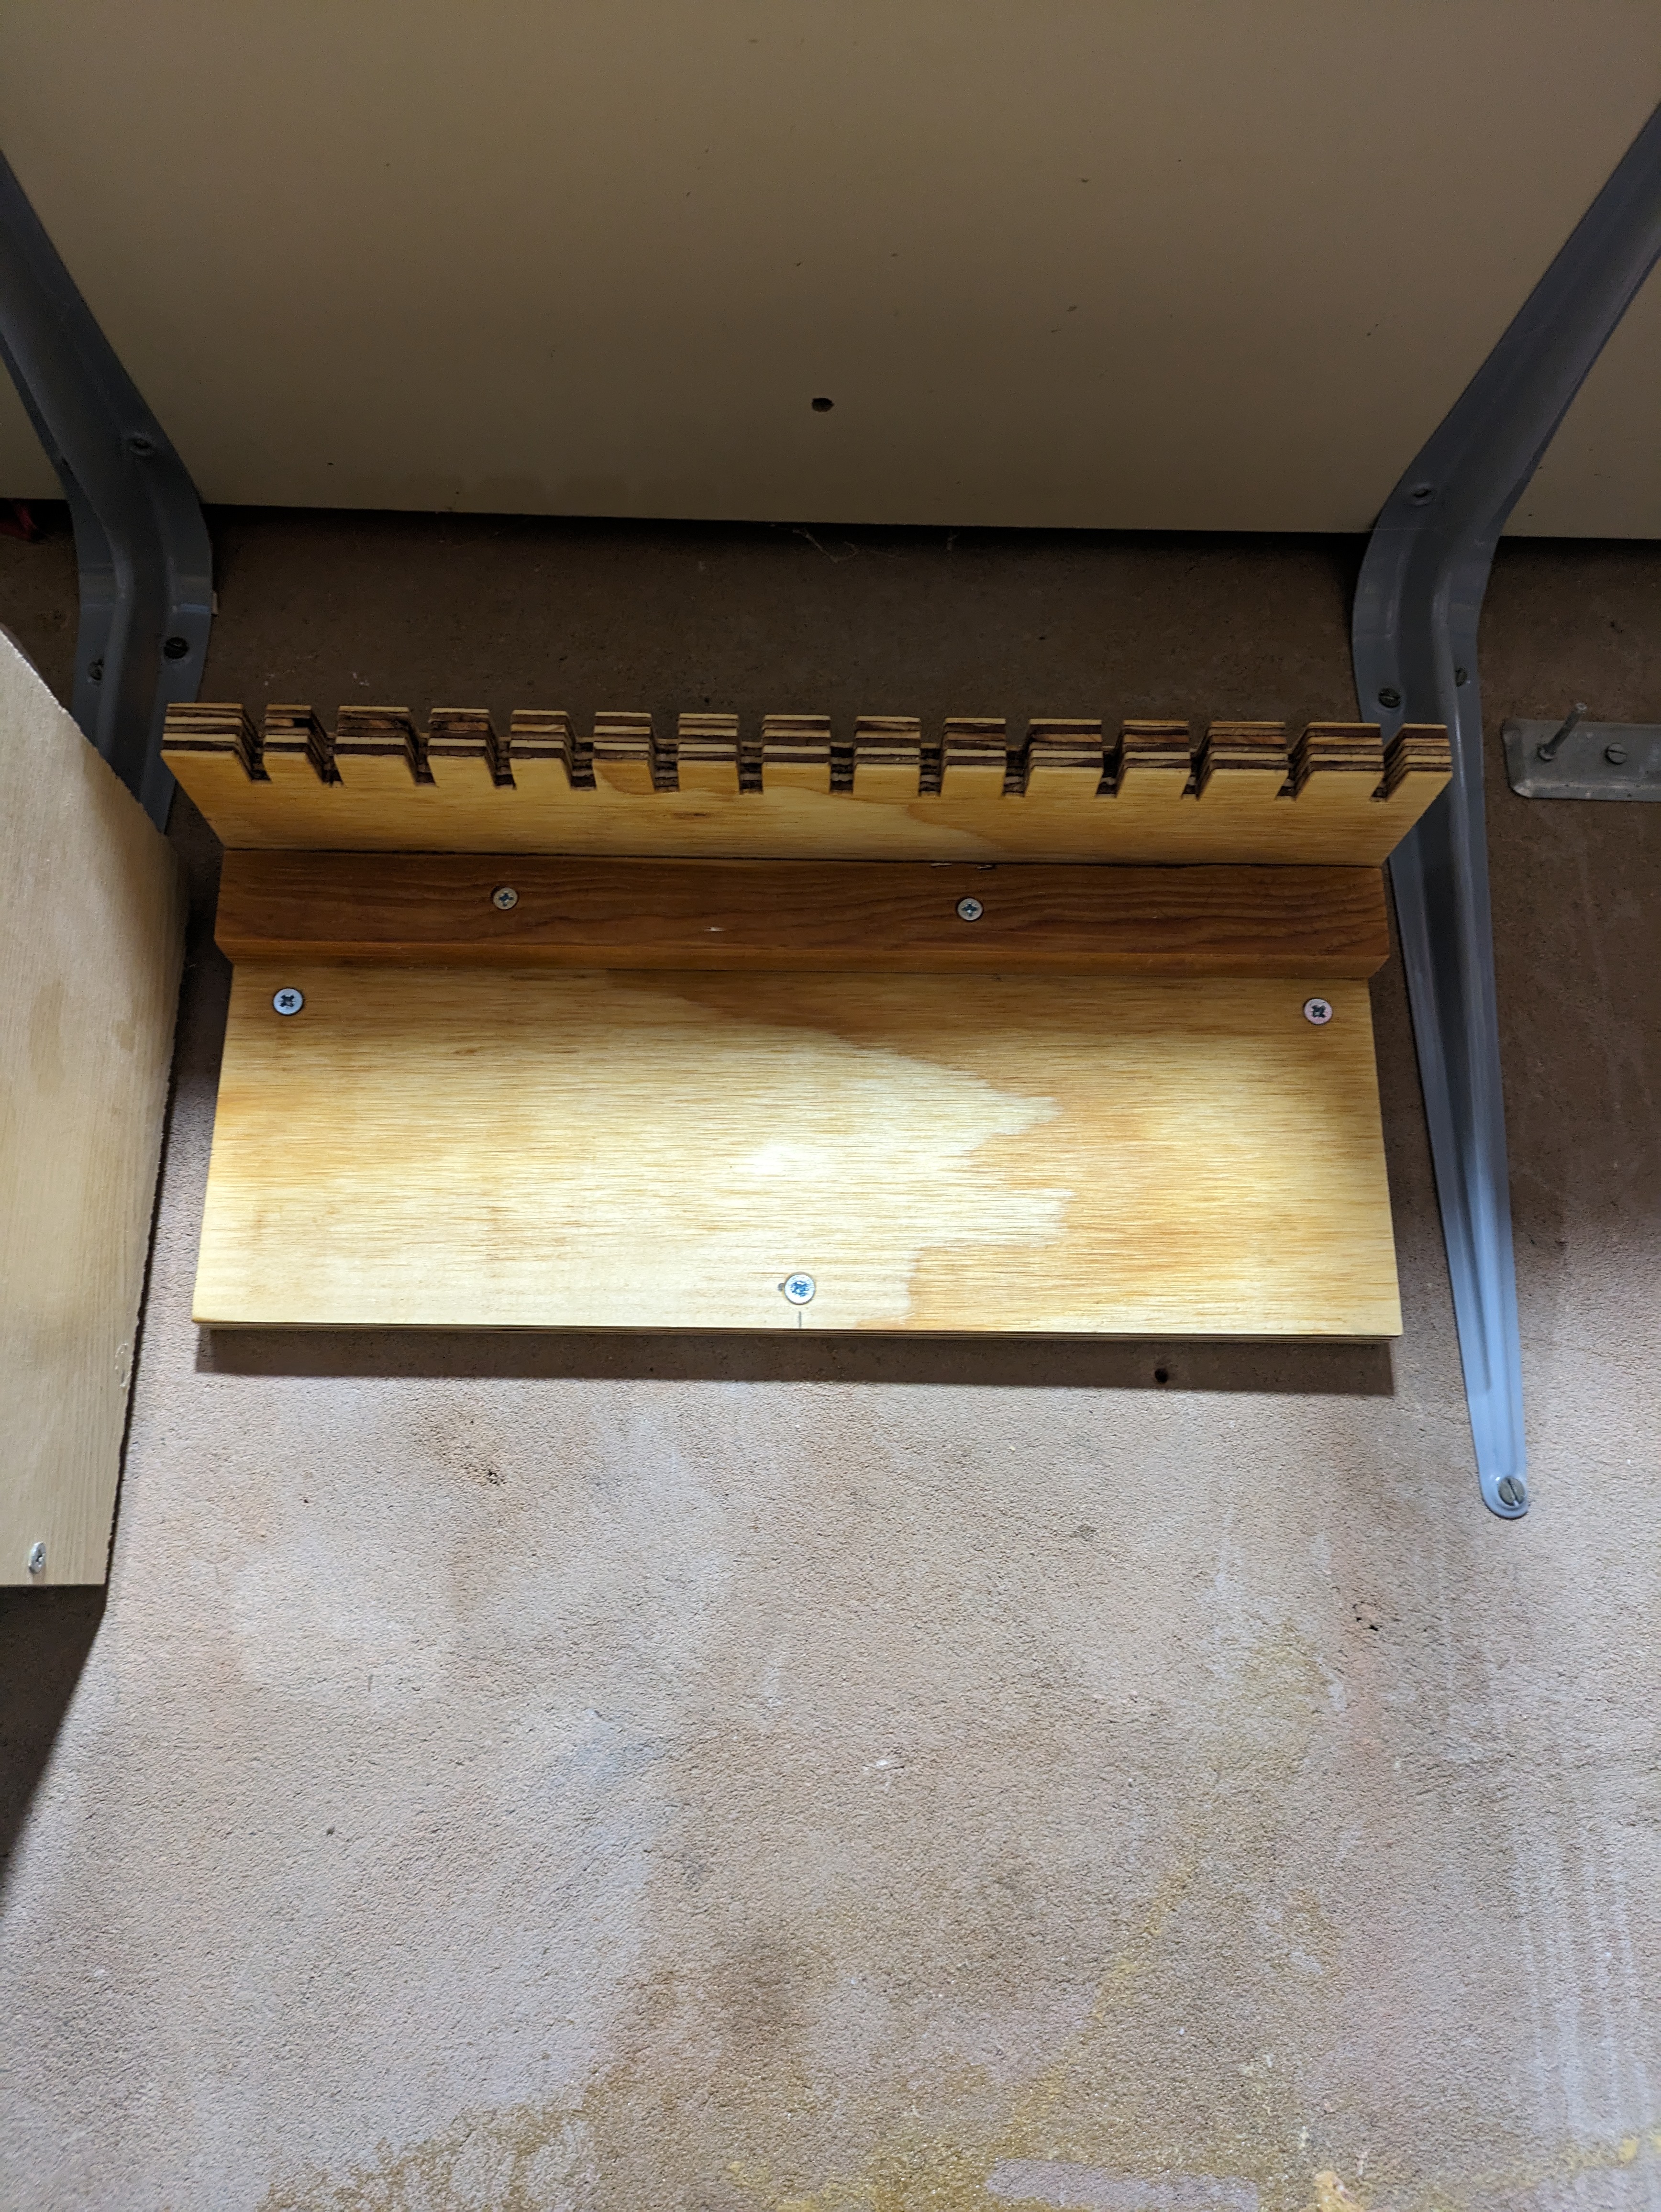
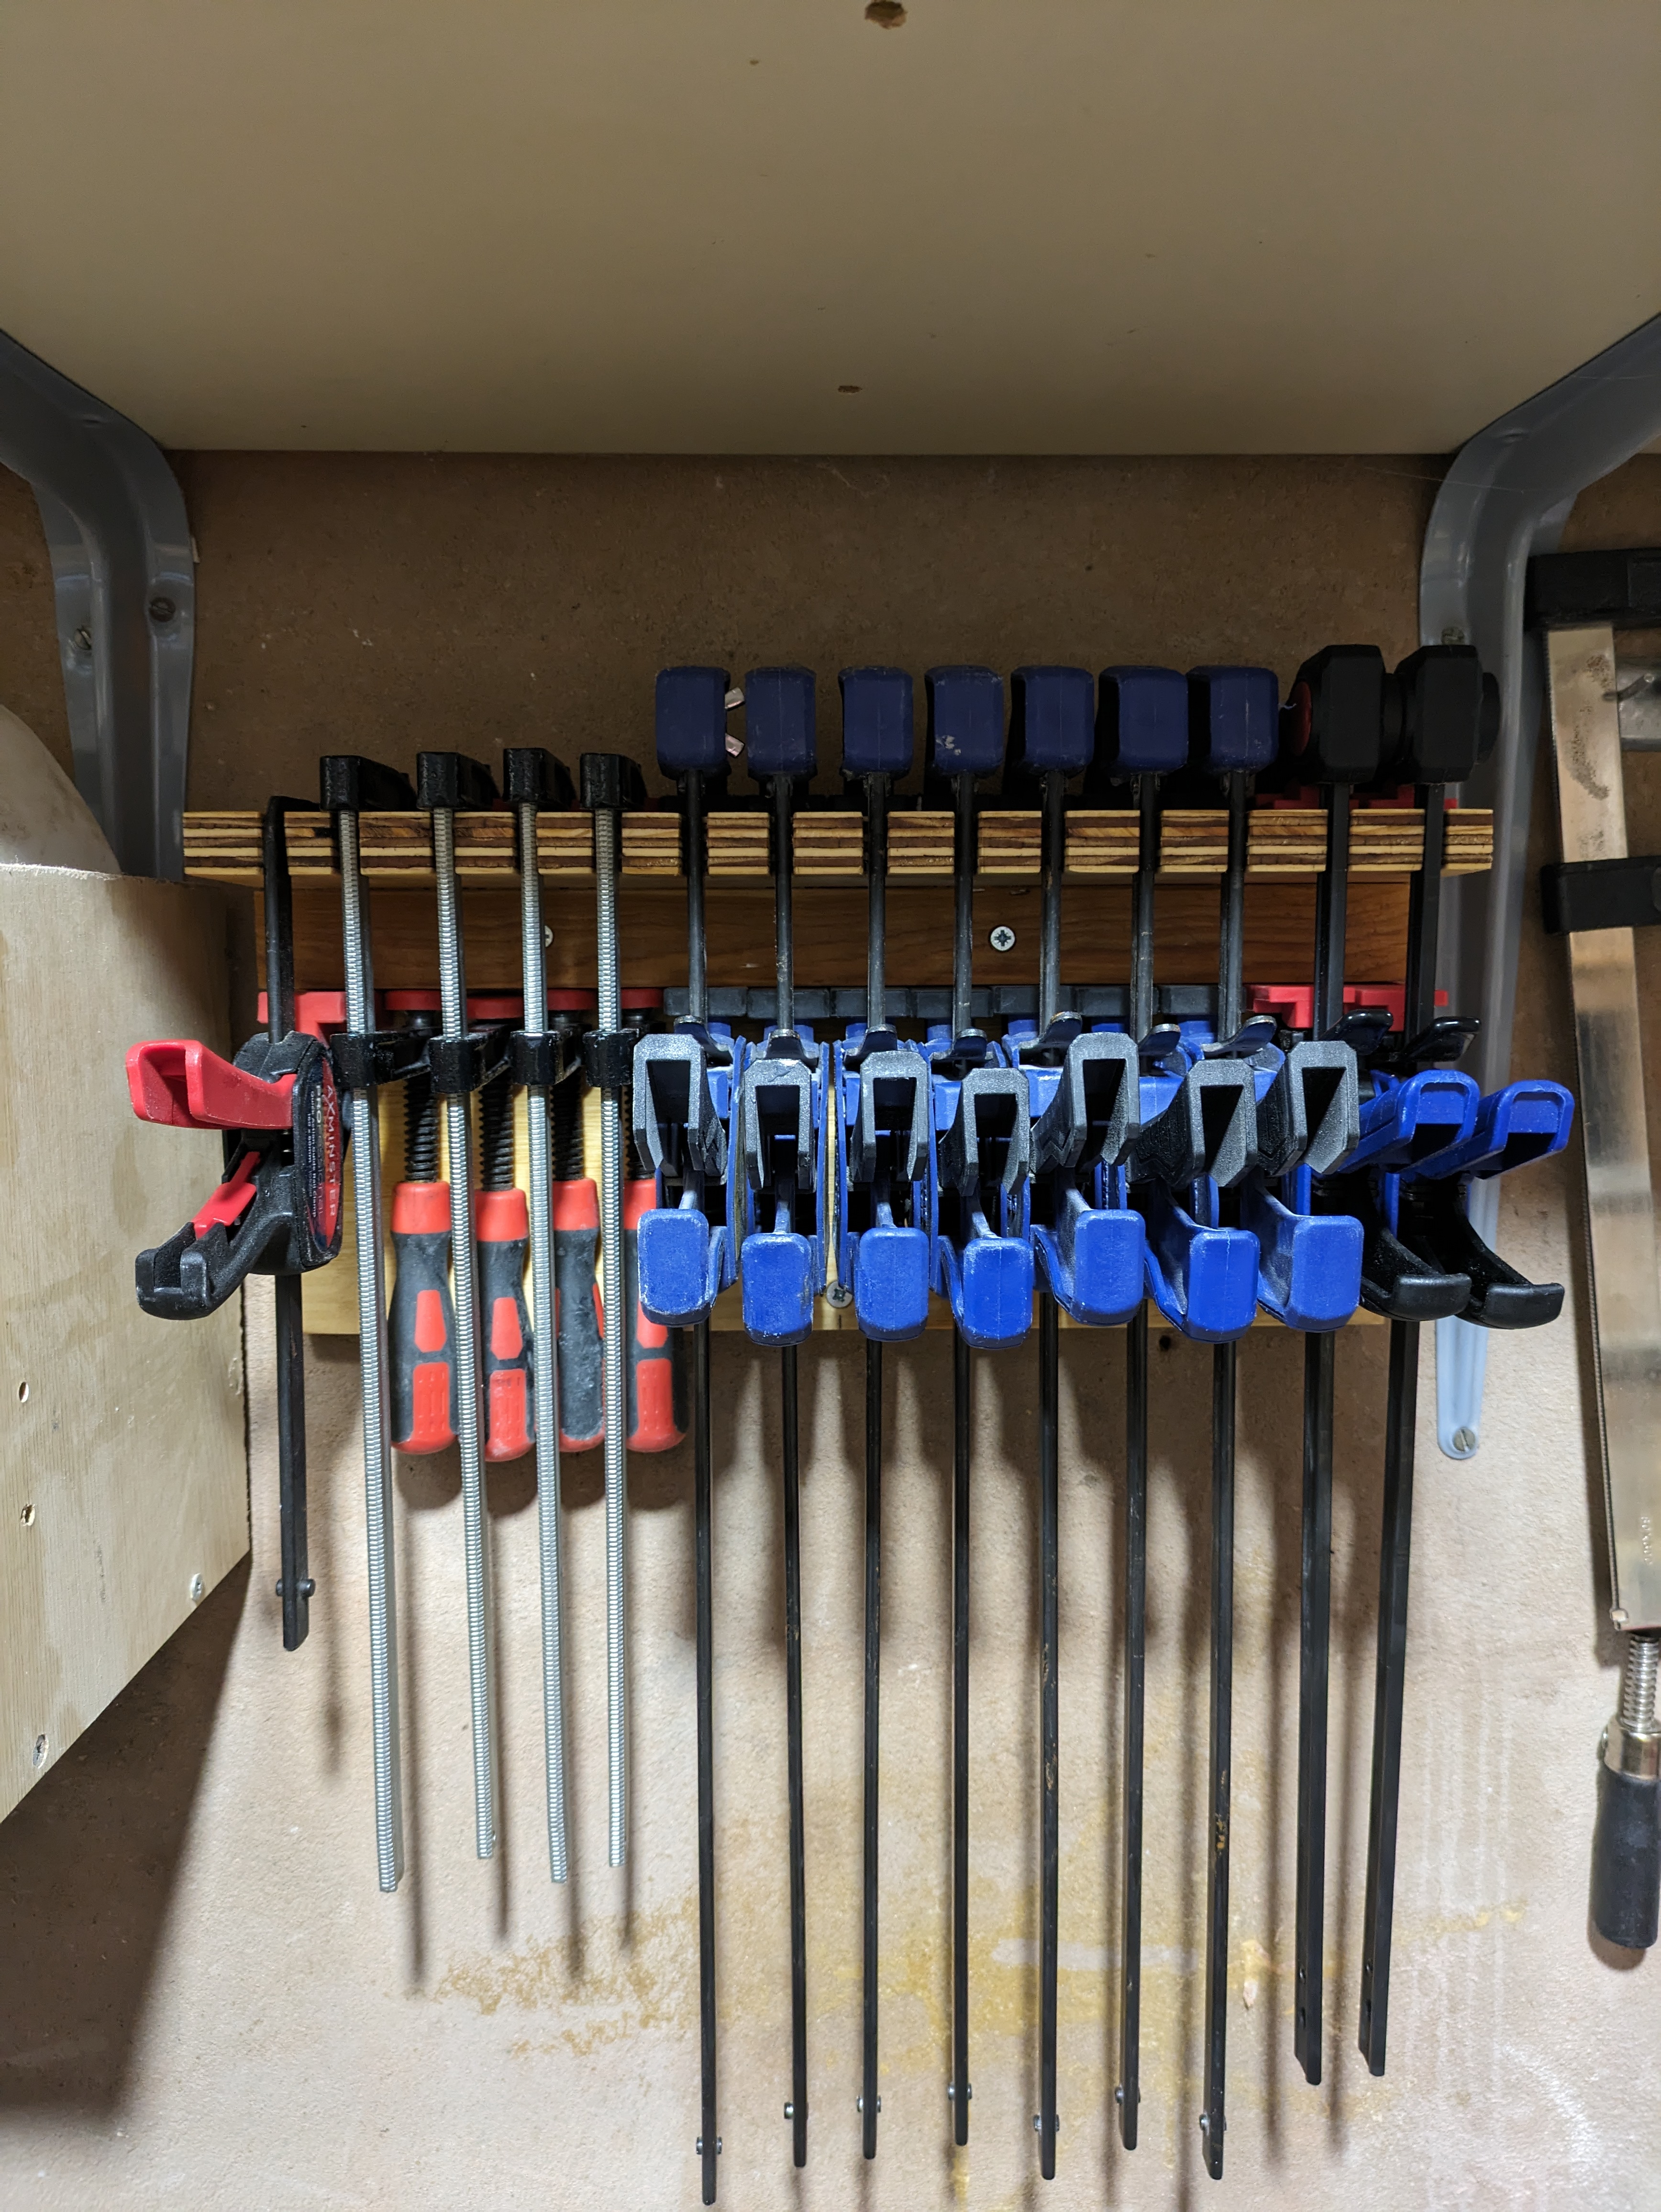

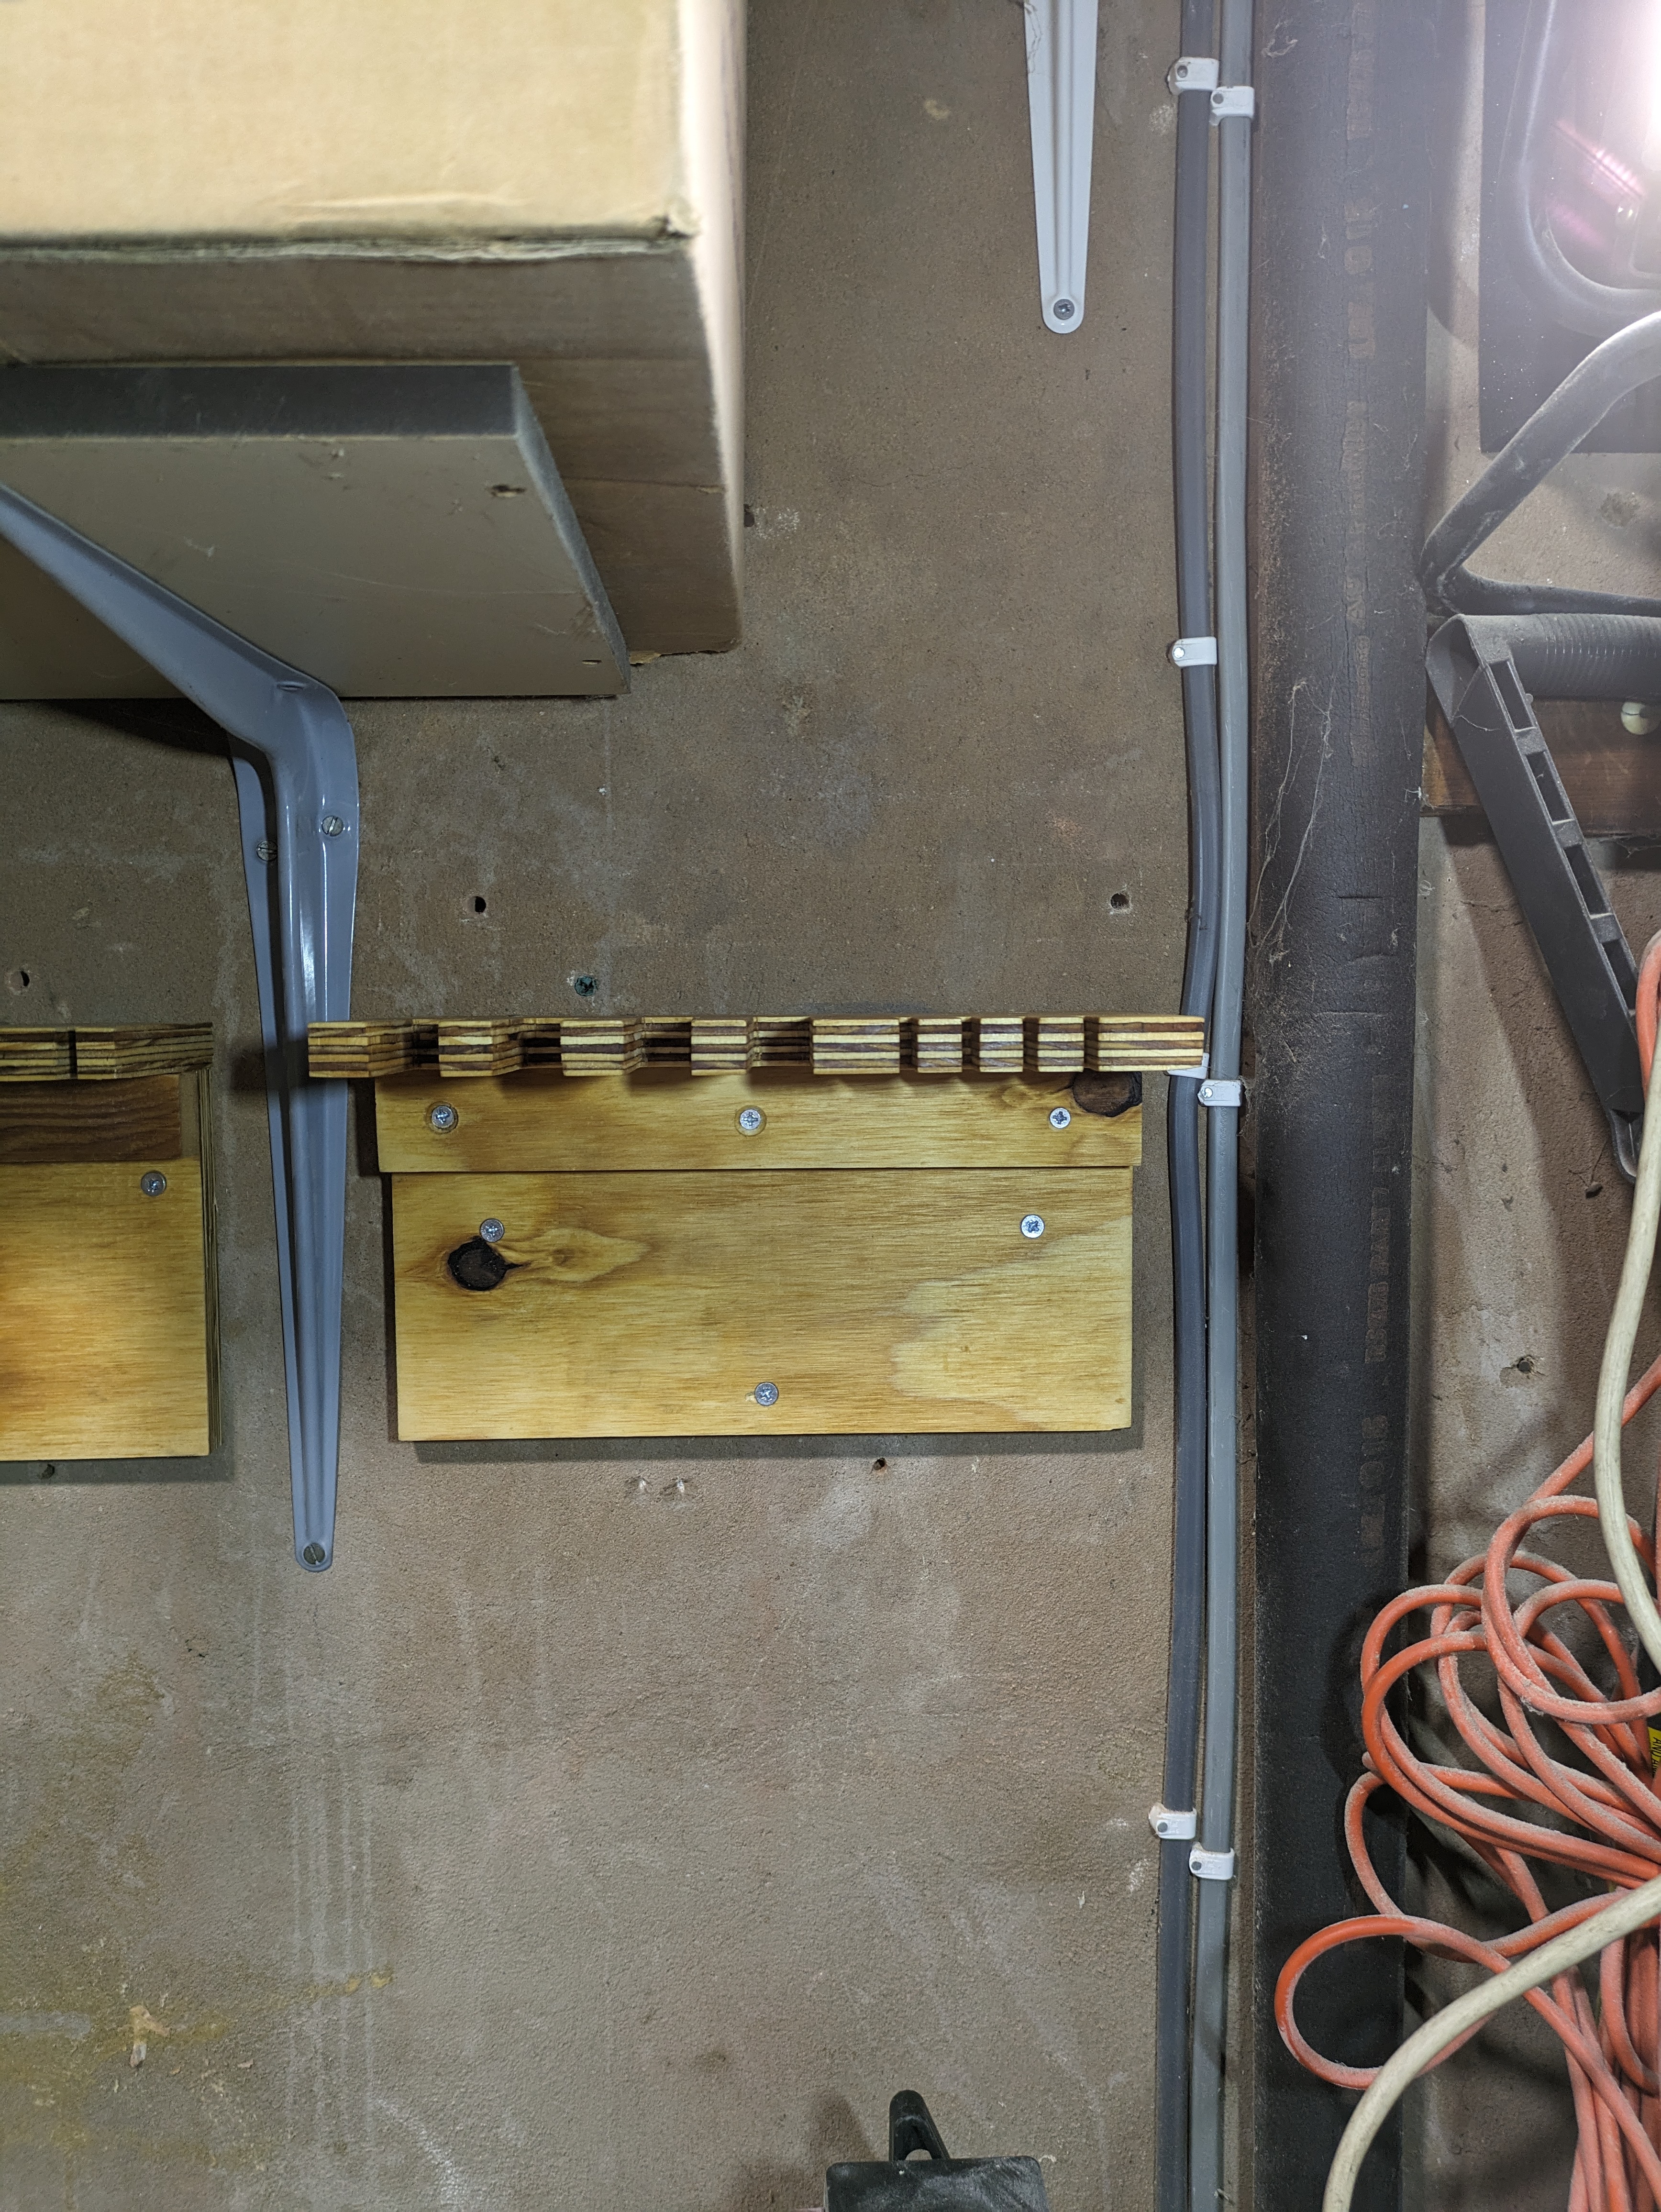
Next was to make some storage for the bigger clamps. Previously they had been precariously dangling off an old coat hook. In a similar way to the other rack, I cut some slots in the ply, added a backing piece and a drop of linseed oil then attached it to the wall. Simples. Nothing fancy but it works
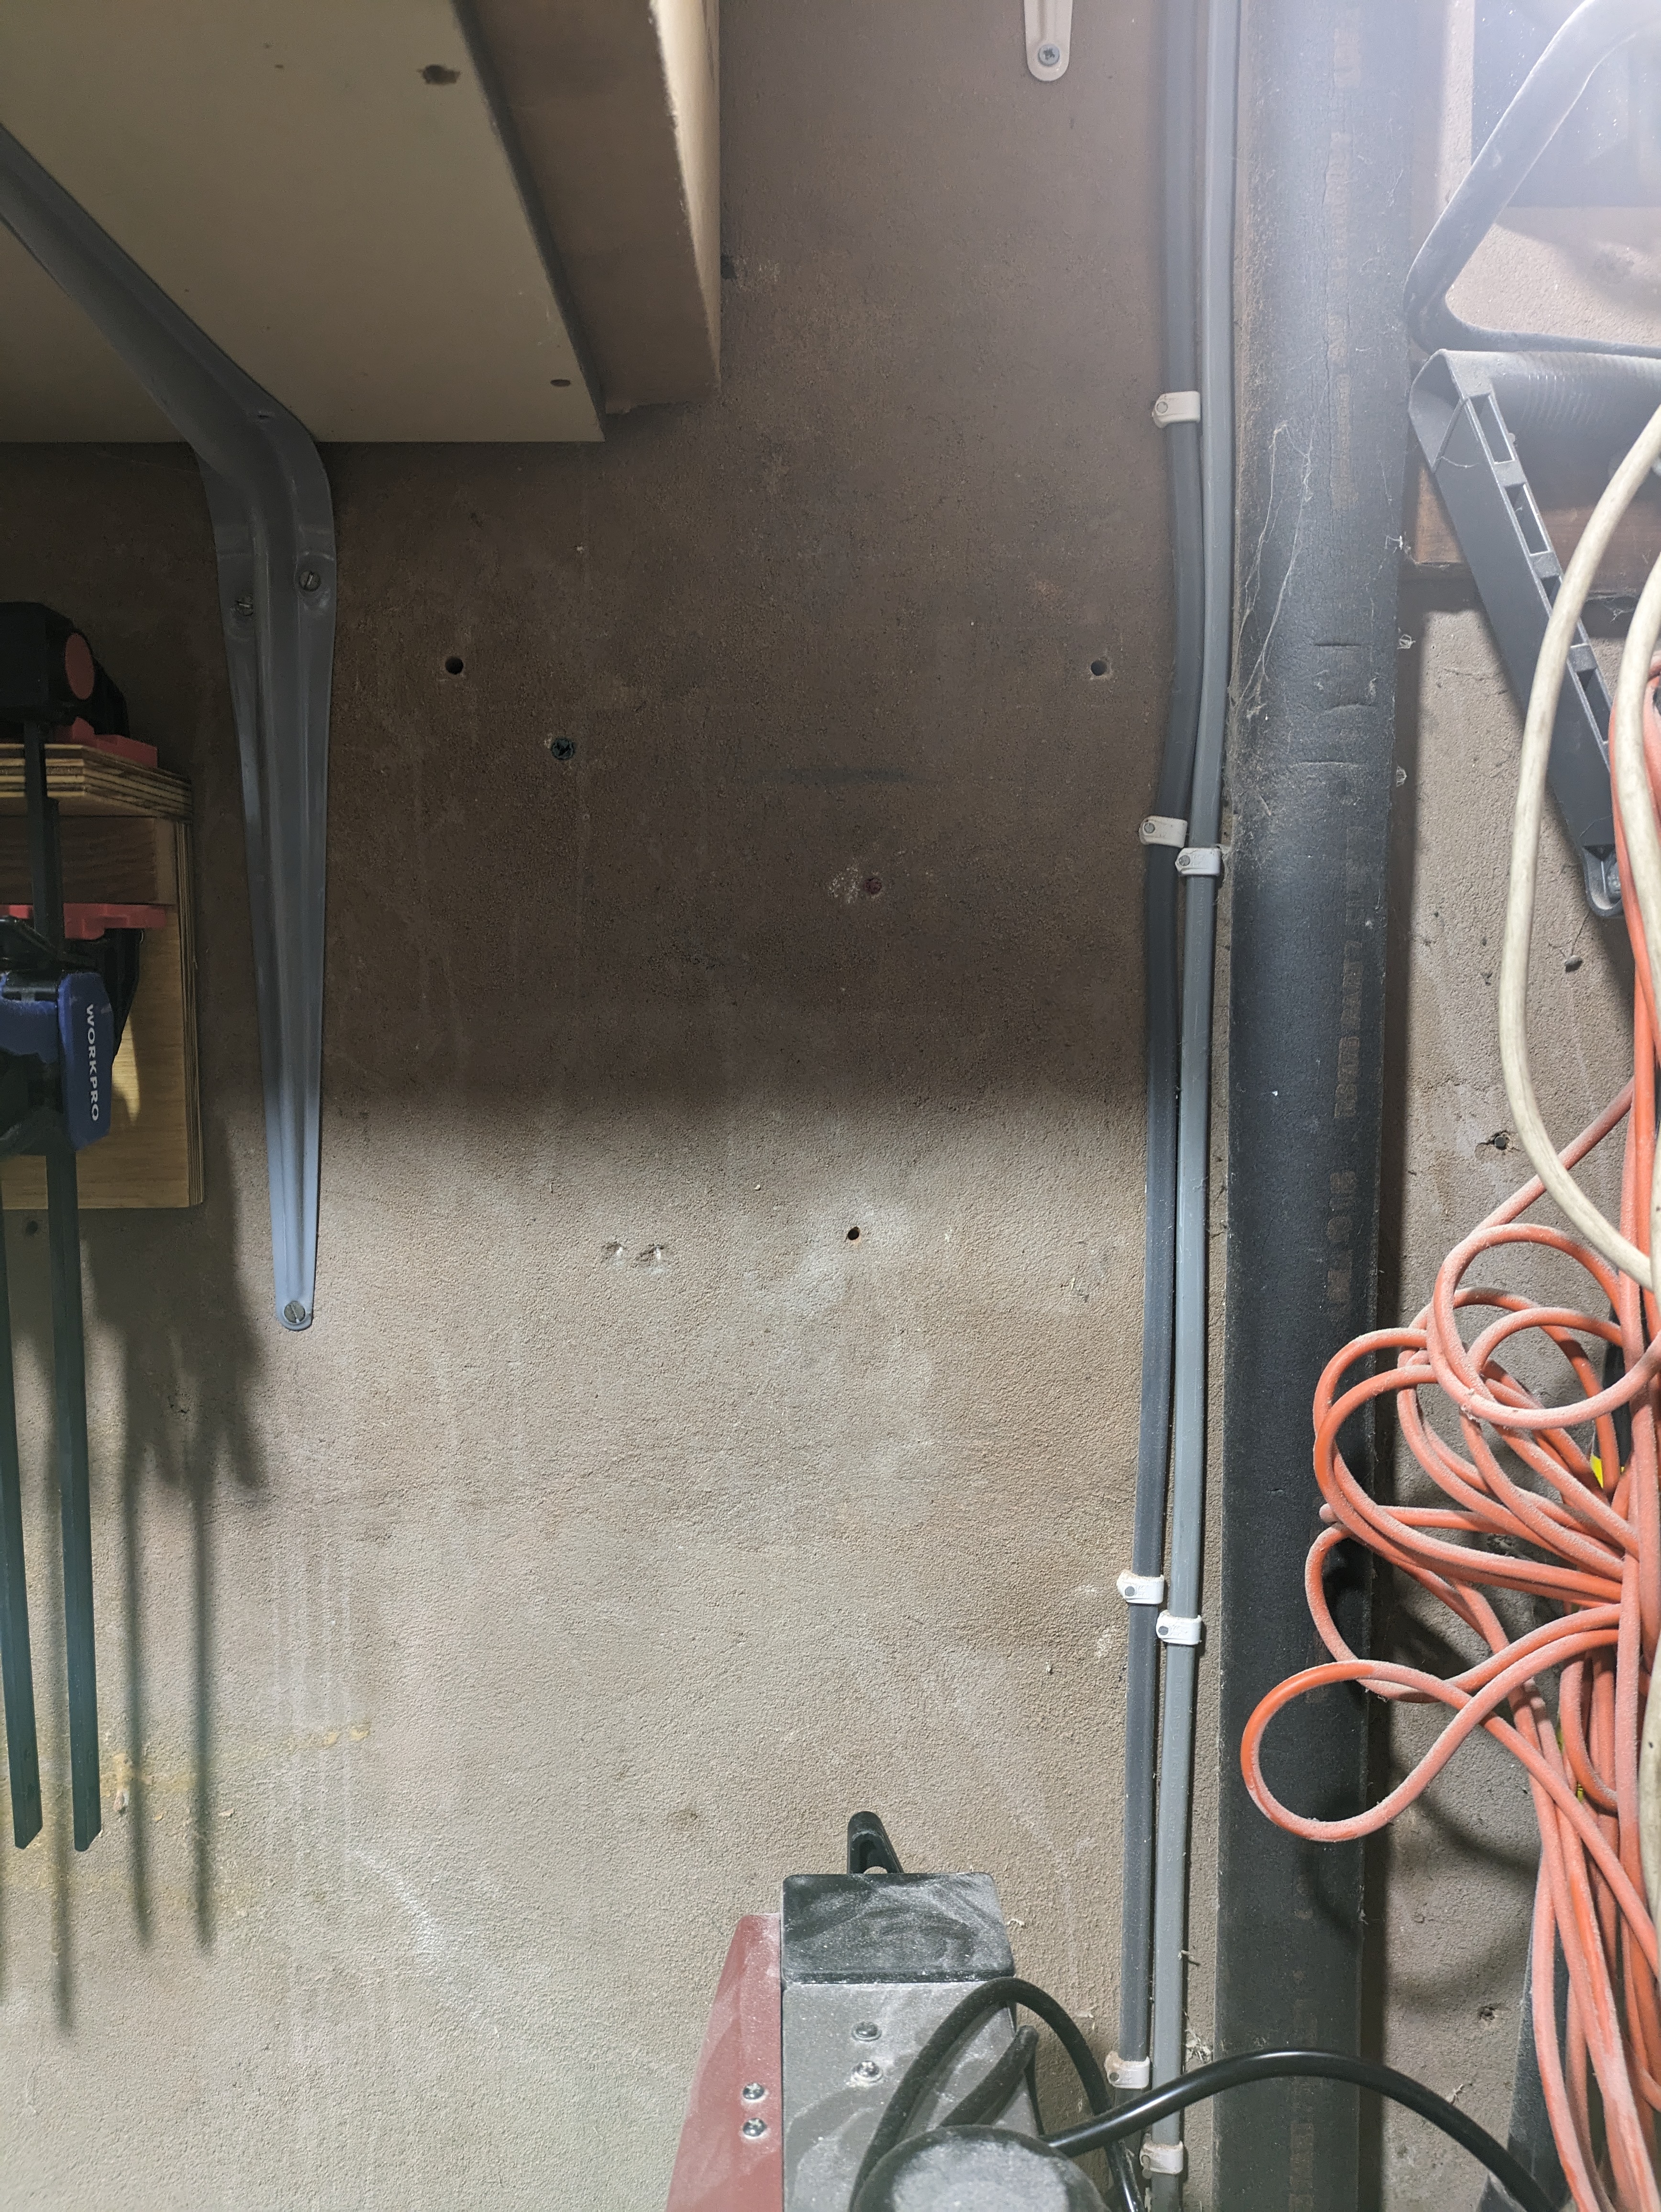

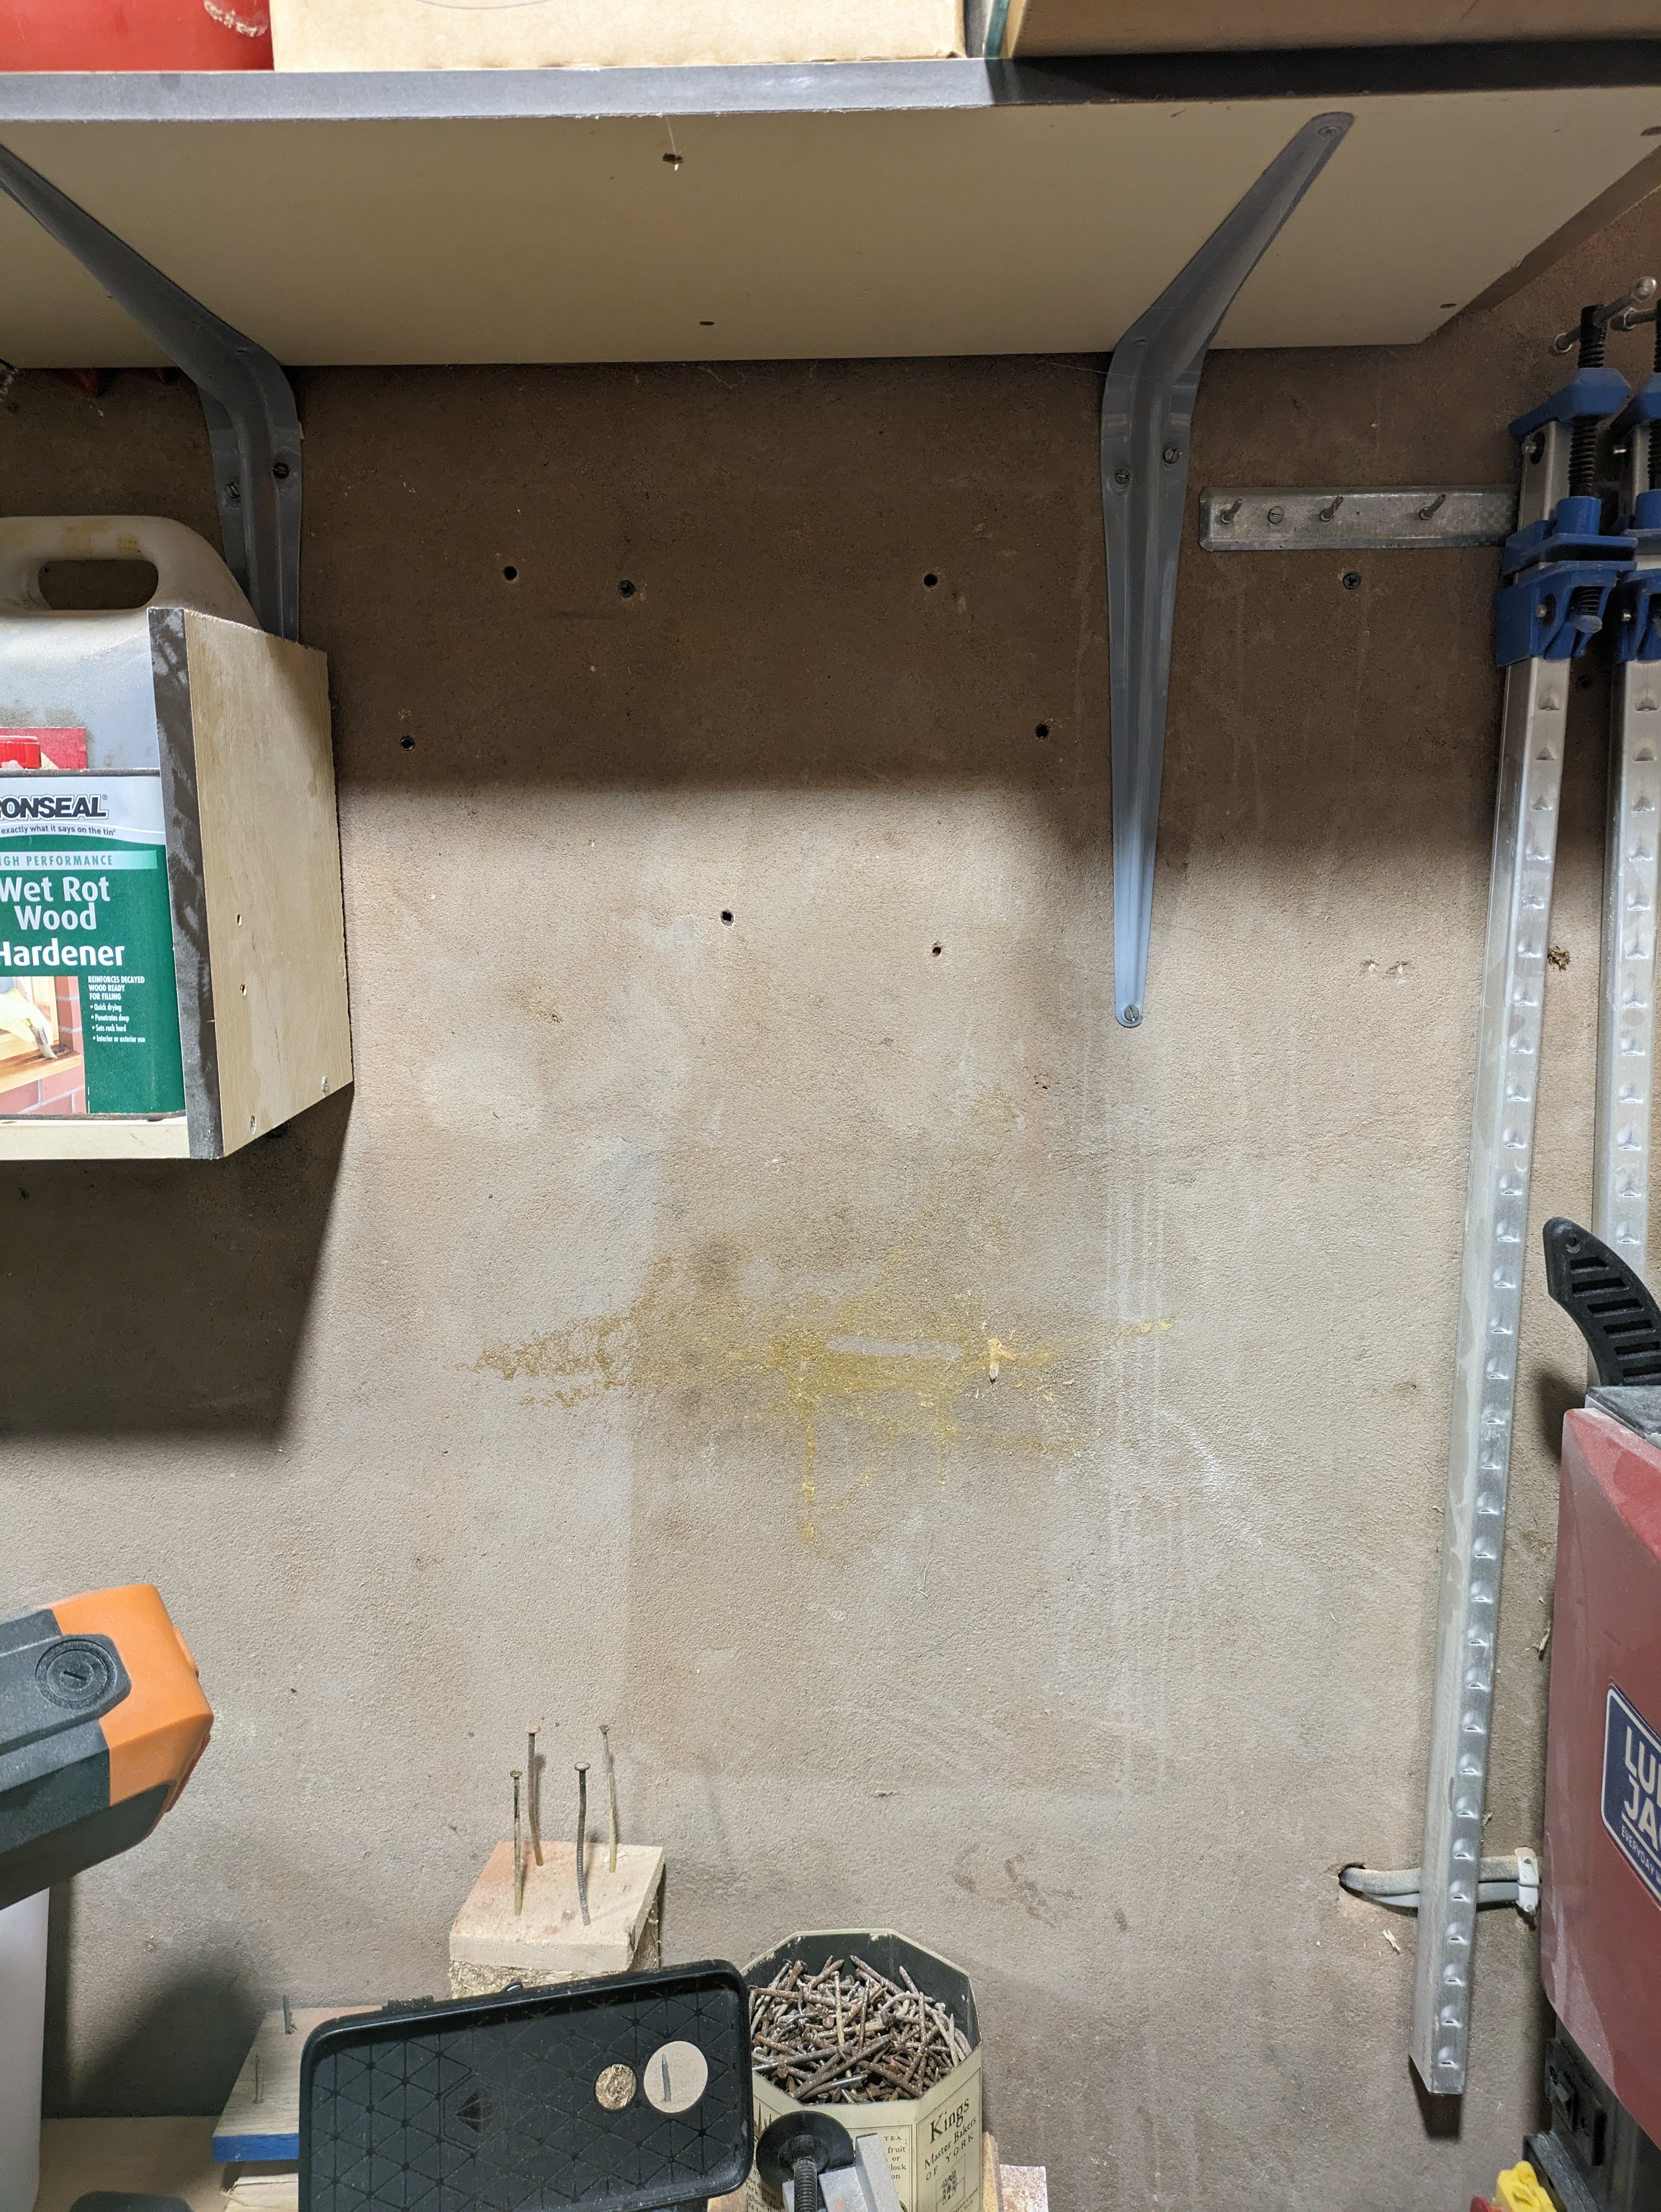
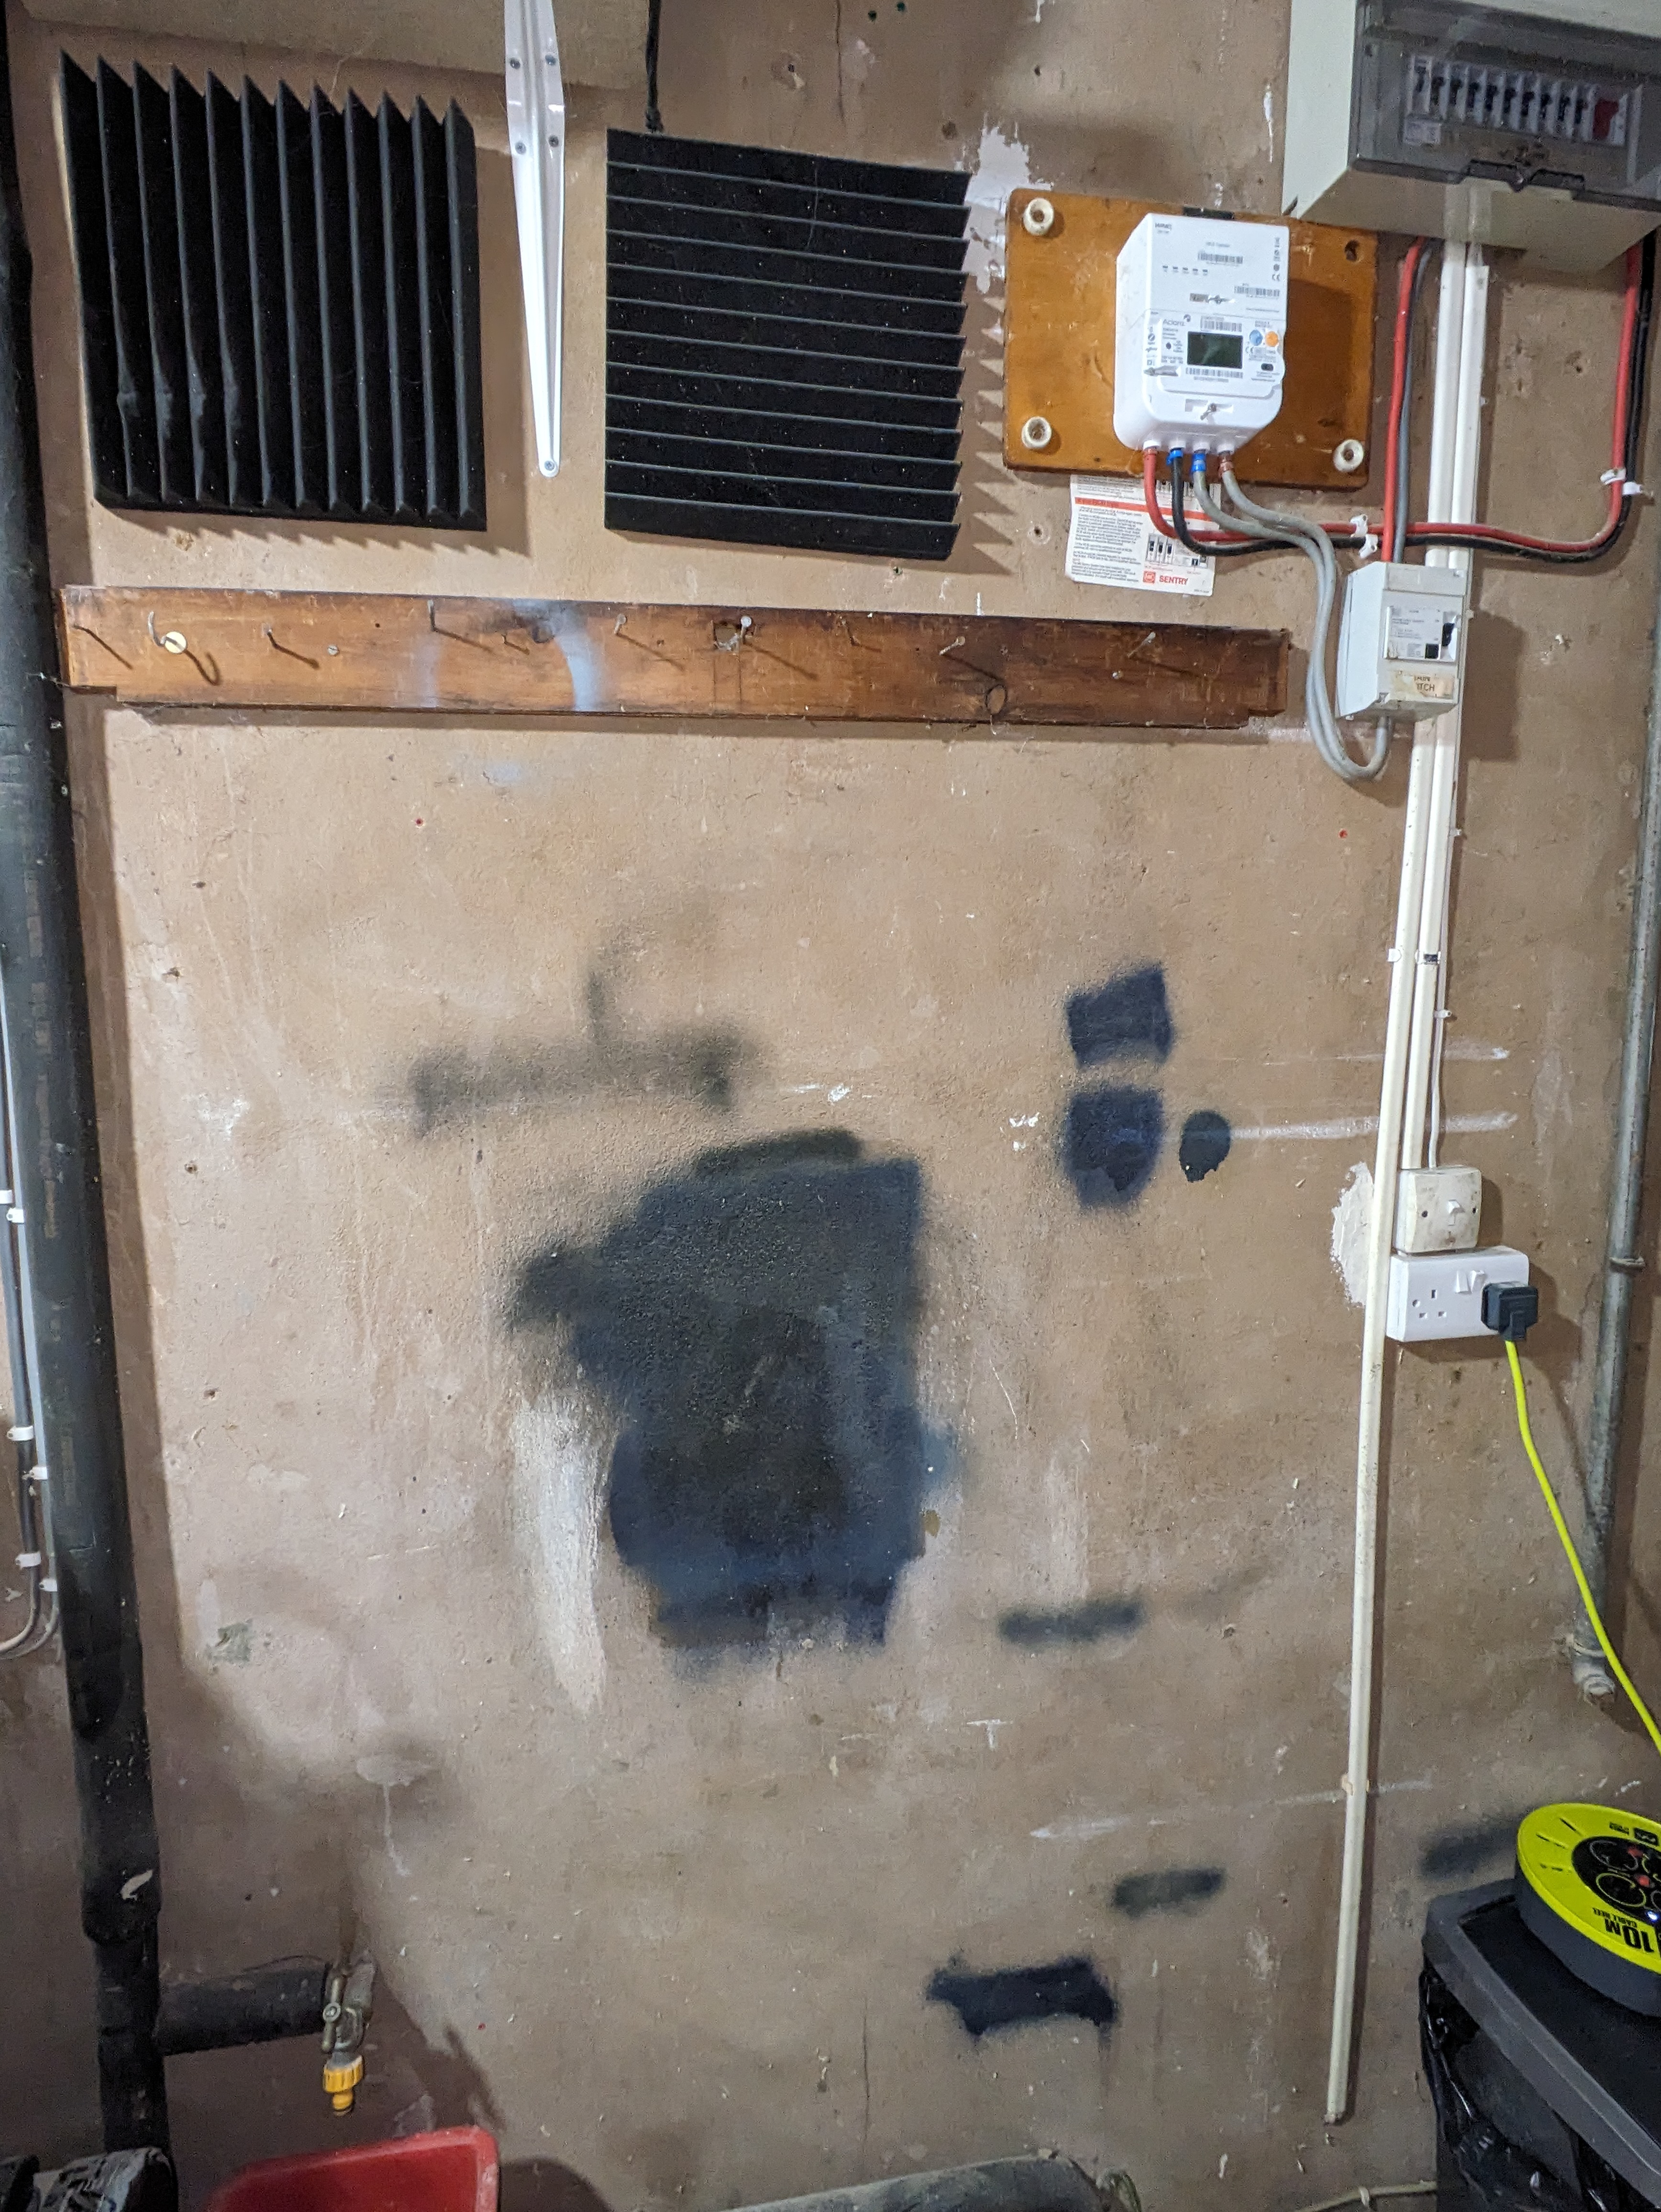
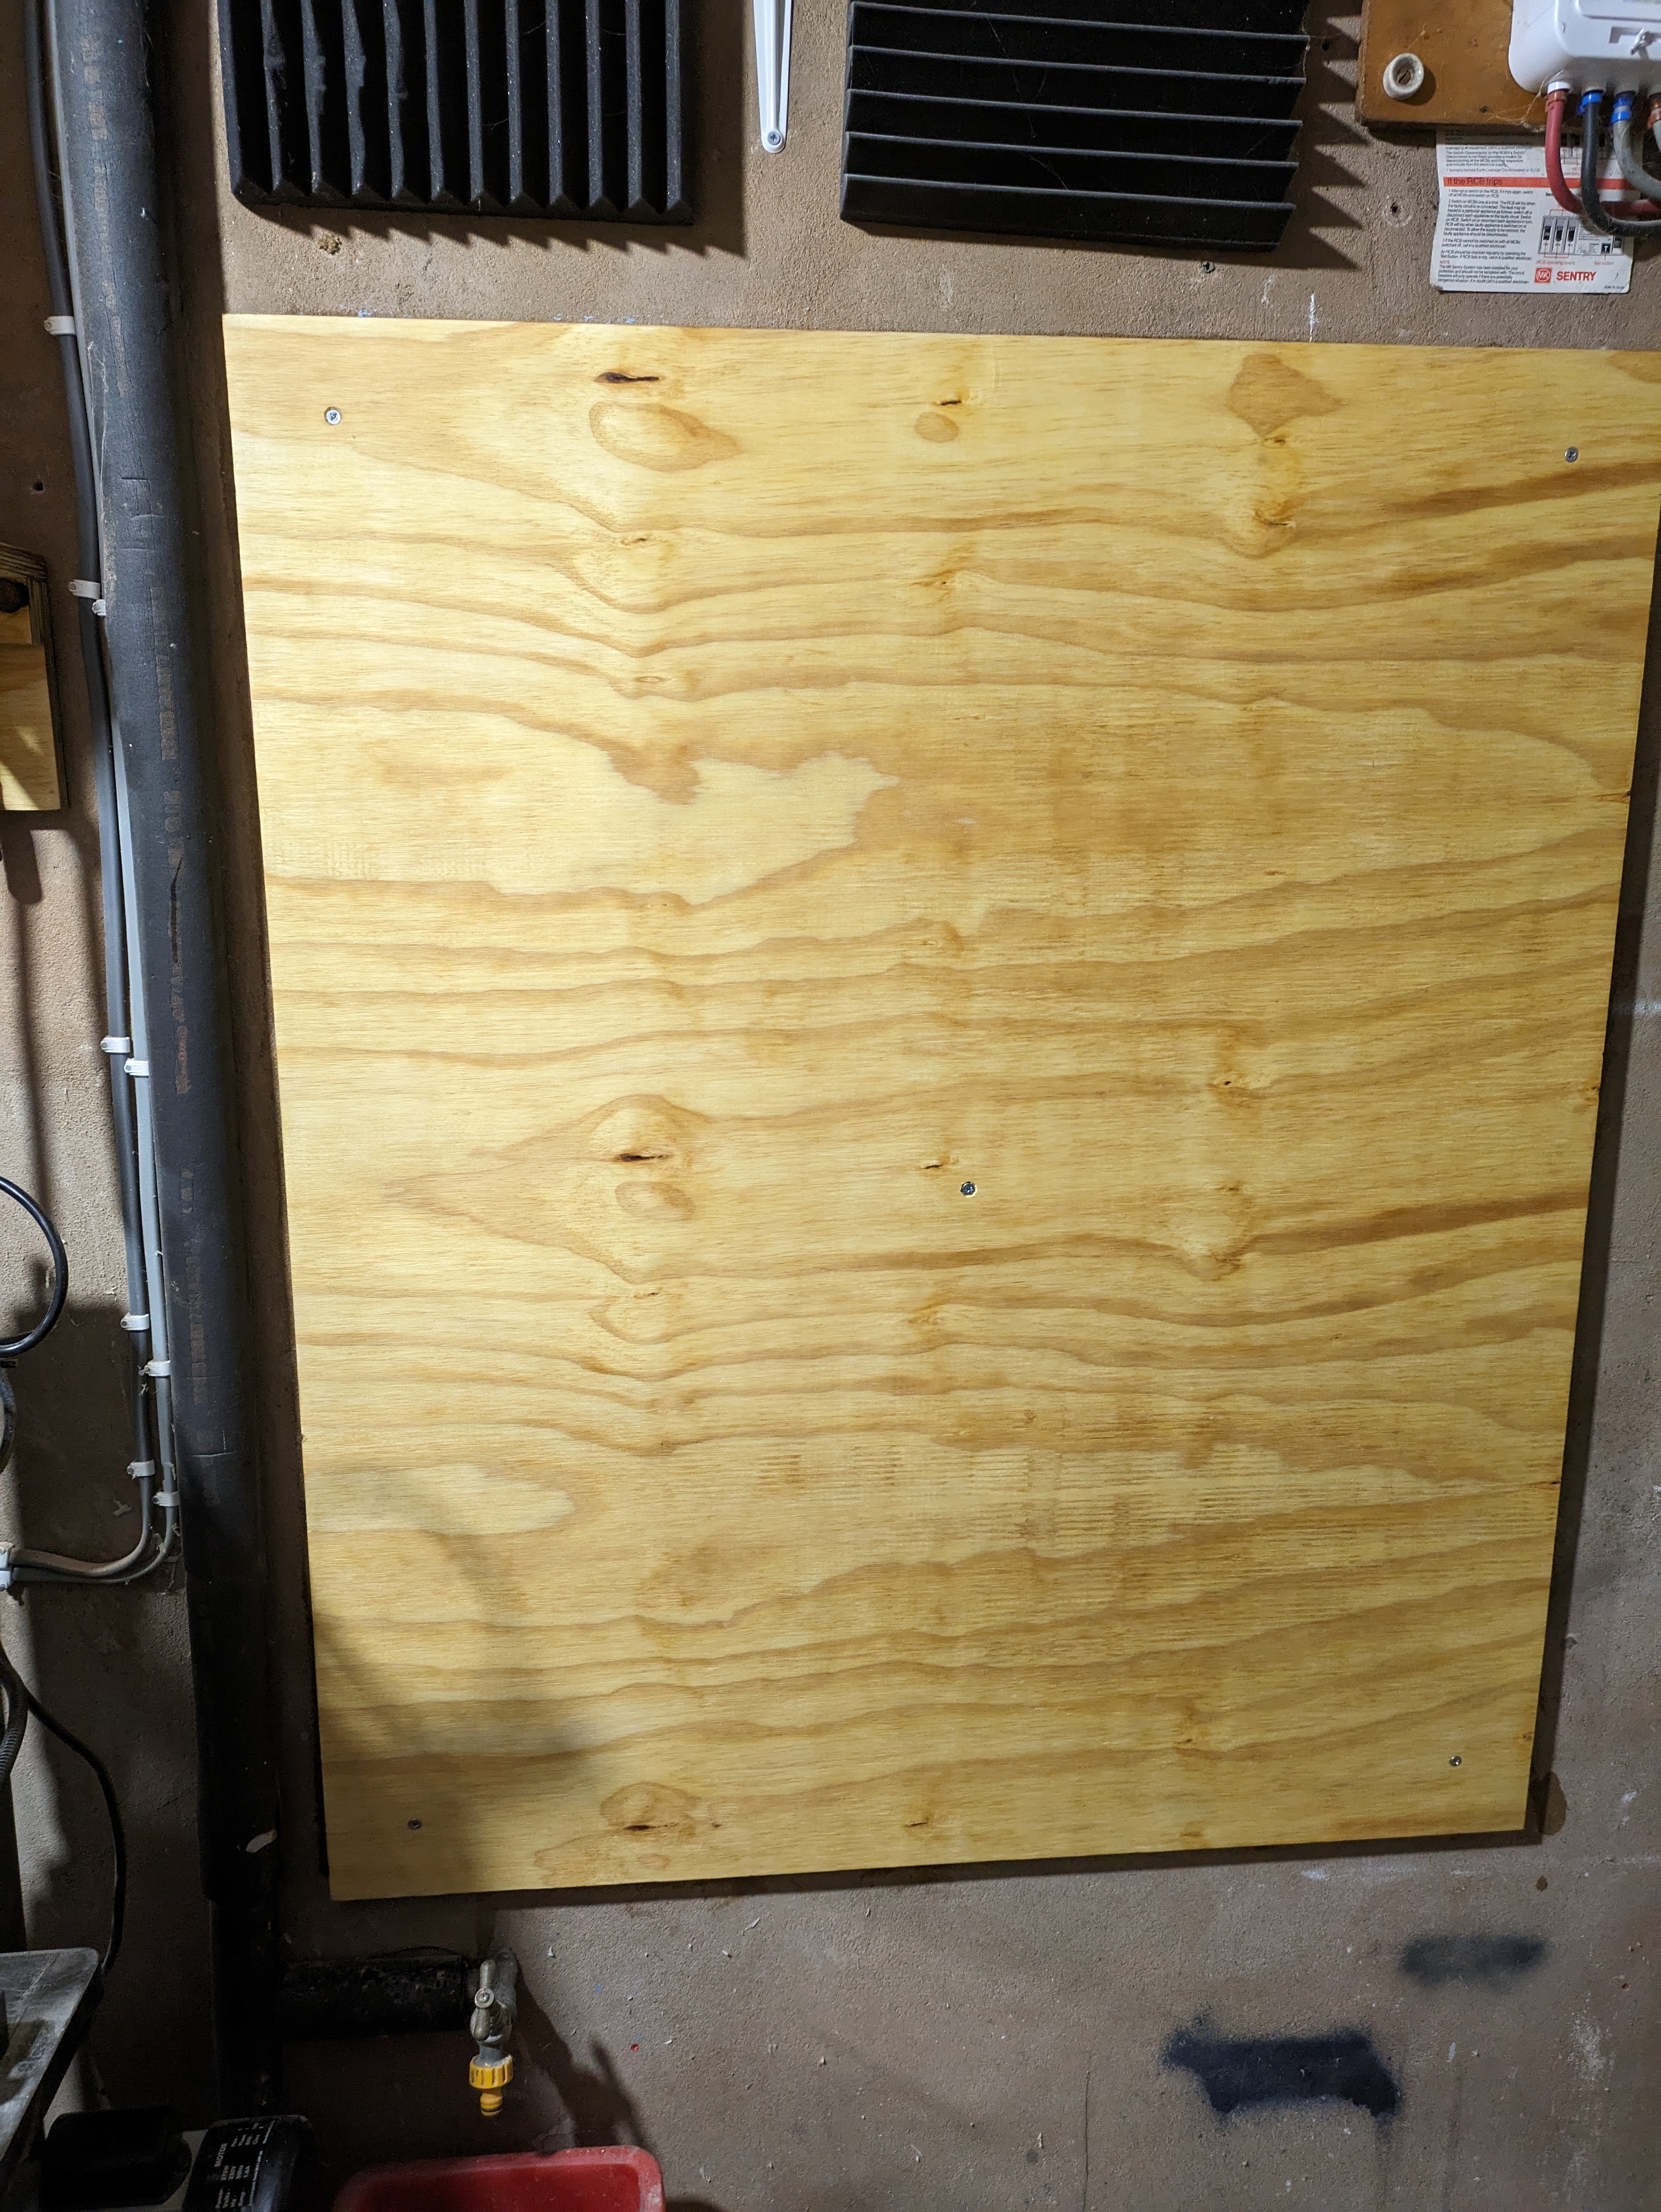
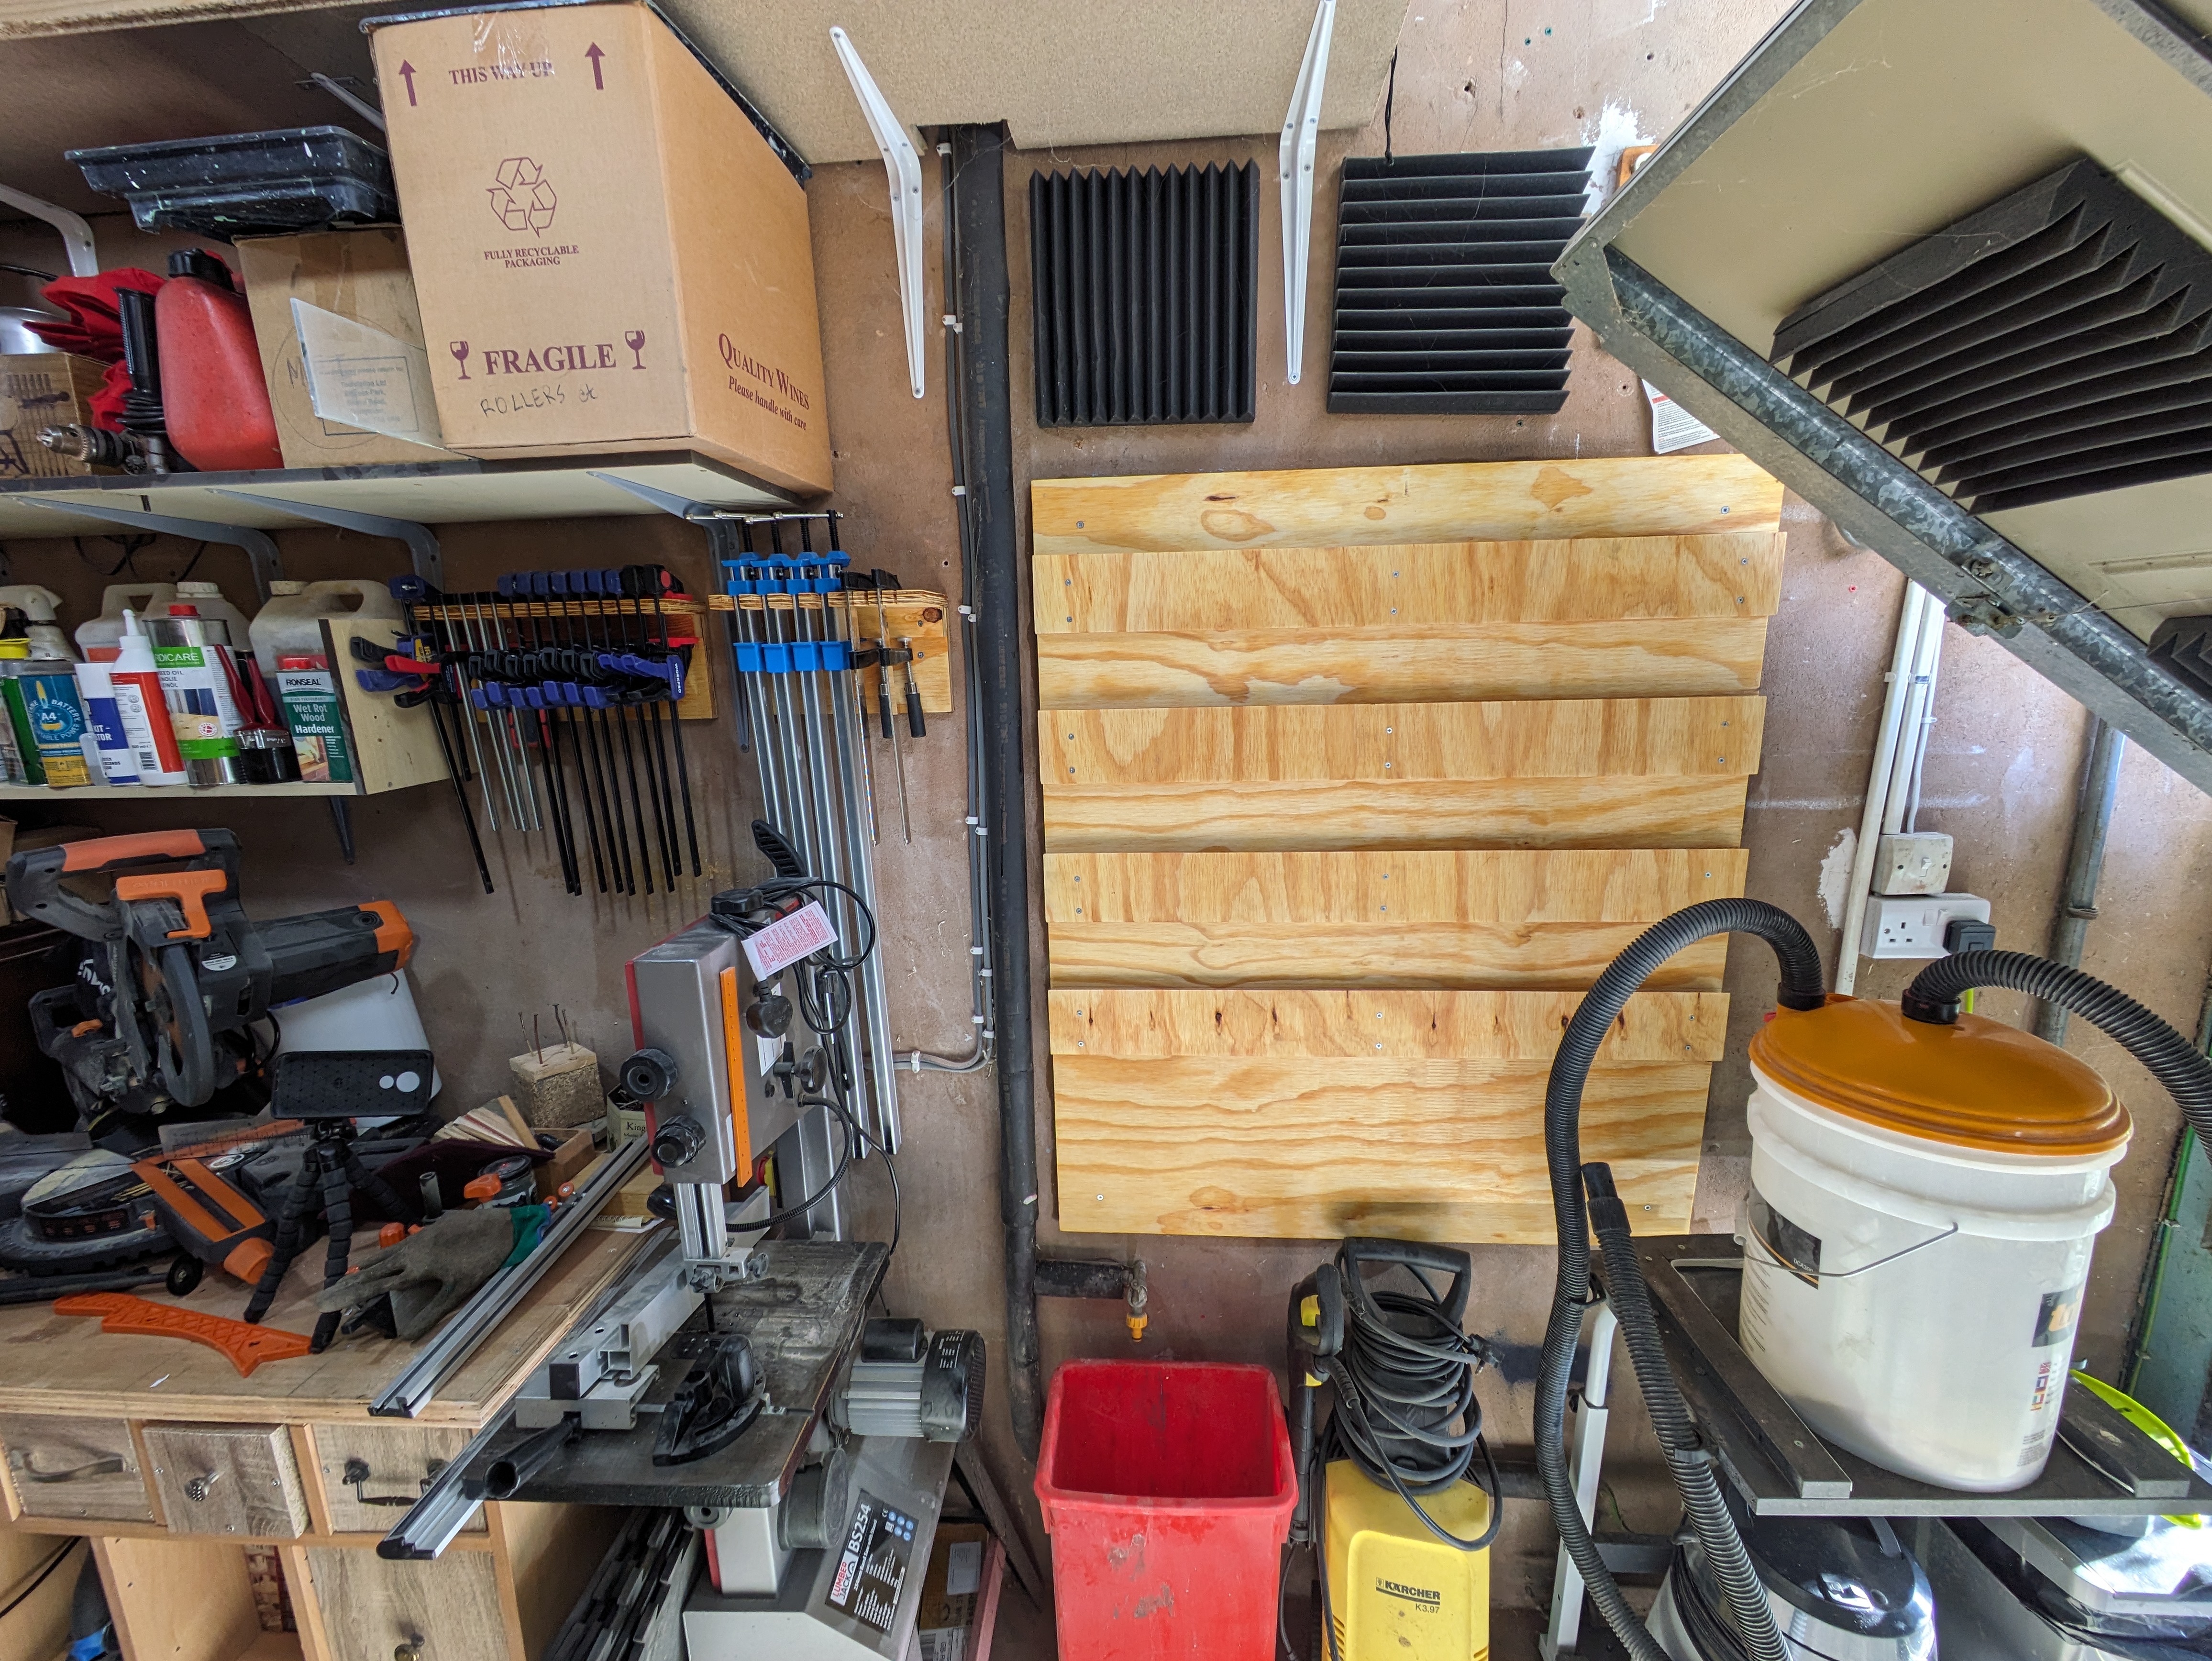
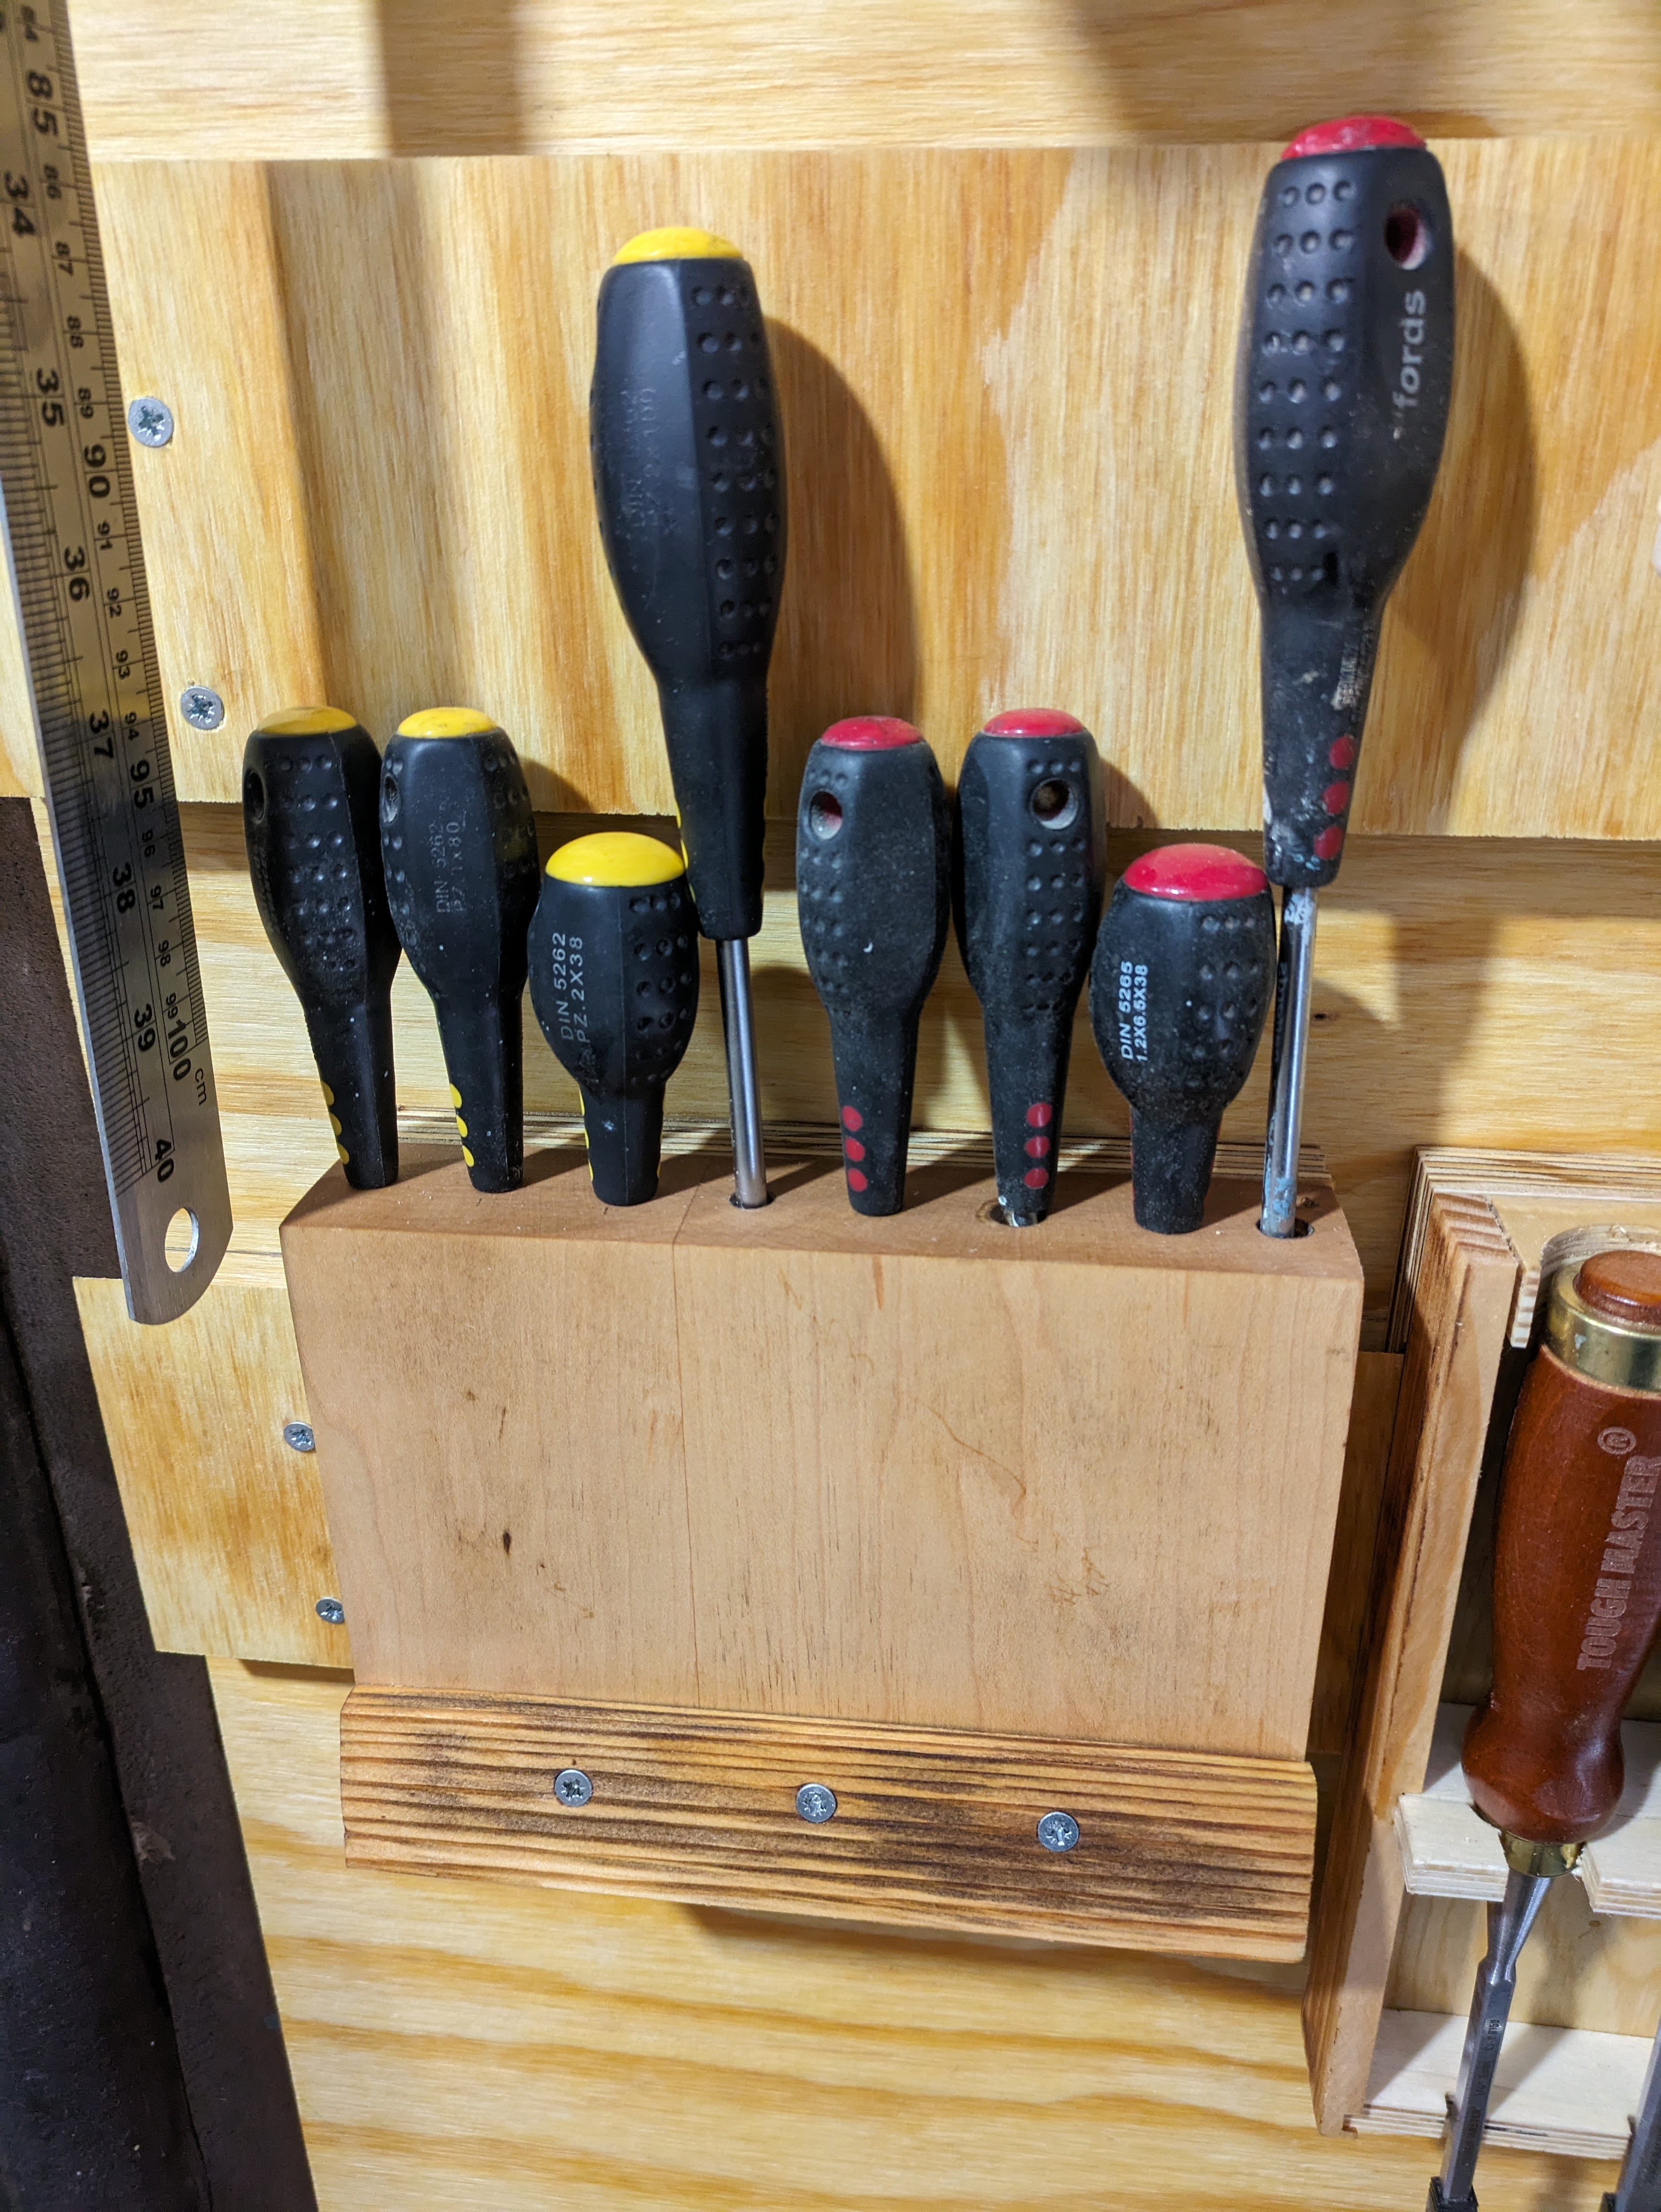
Now onto the tool wall! Using a french cleat wall seemed to be pretty popular for it’s flexibility and modular tool holding capabilities. I figured 4 rails would be enough to get me started and let me get most of the common tools out of the draws and onto the wall. First step was to take down the old storage system (bit of wood with a few nails sticking out!).
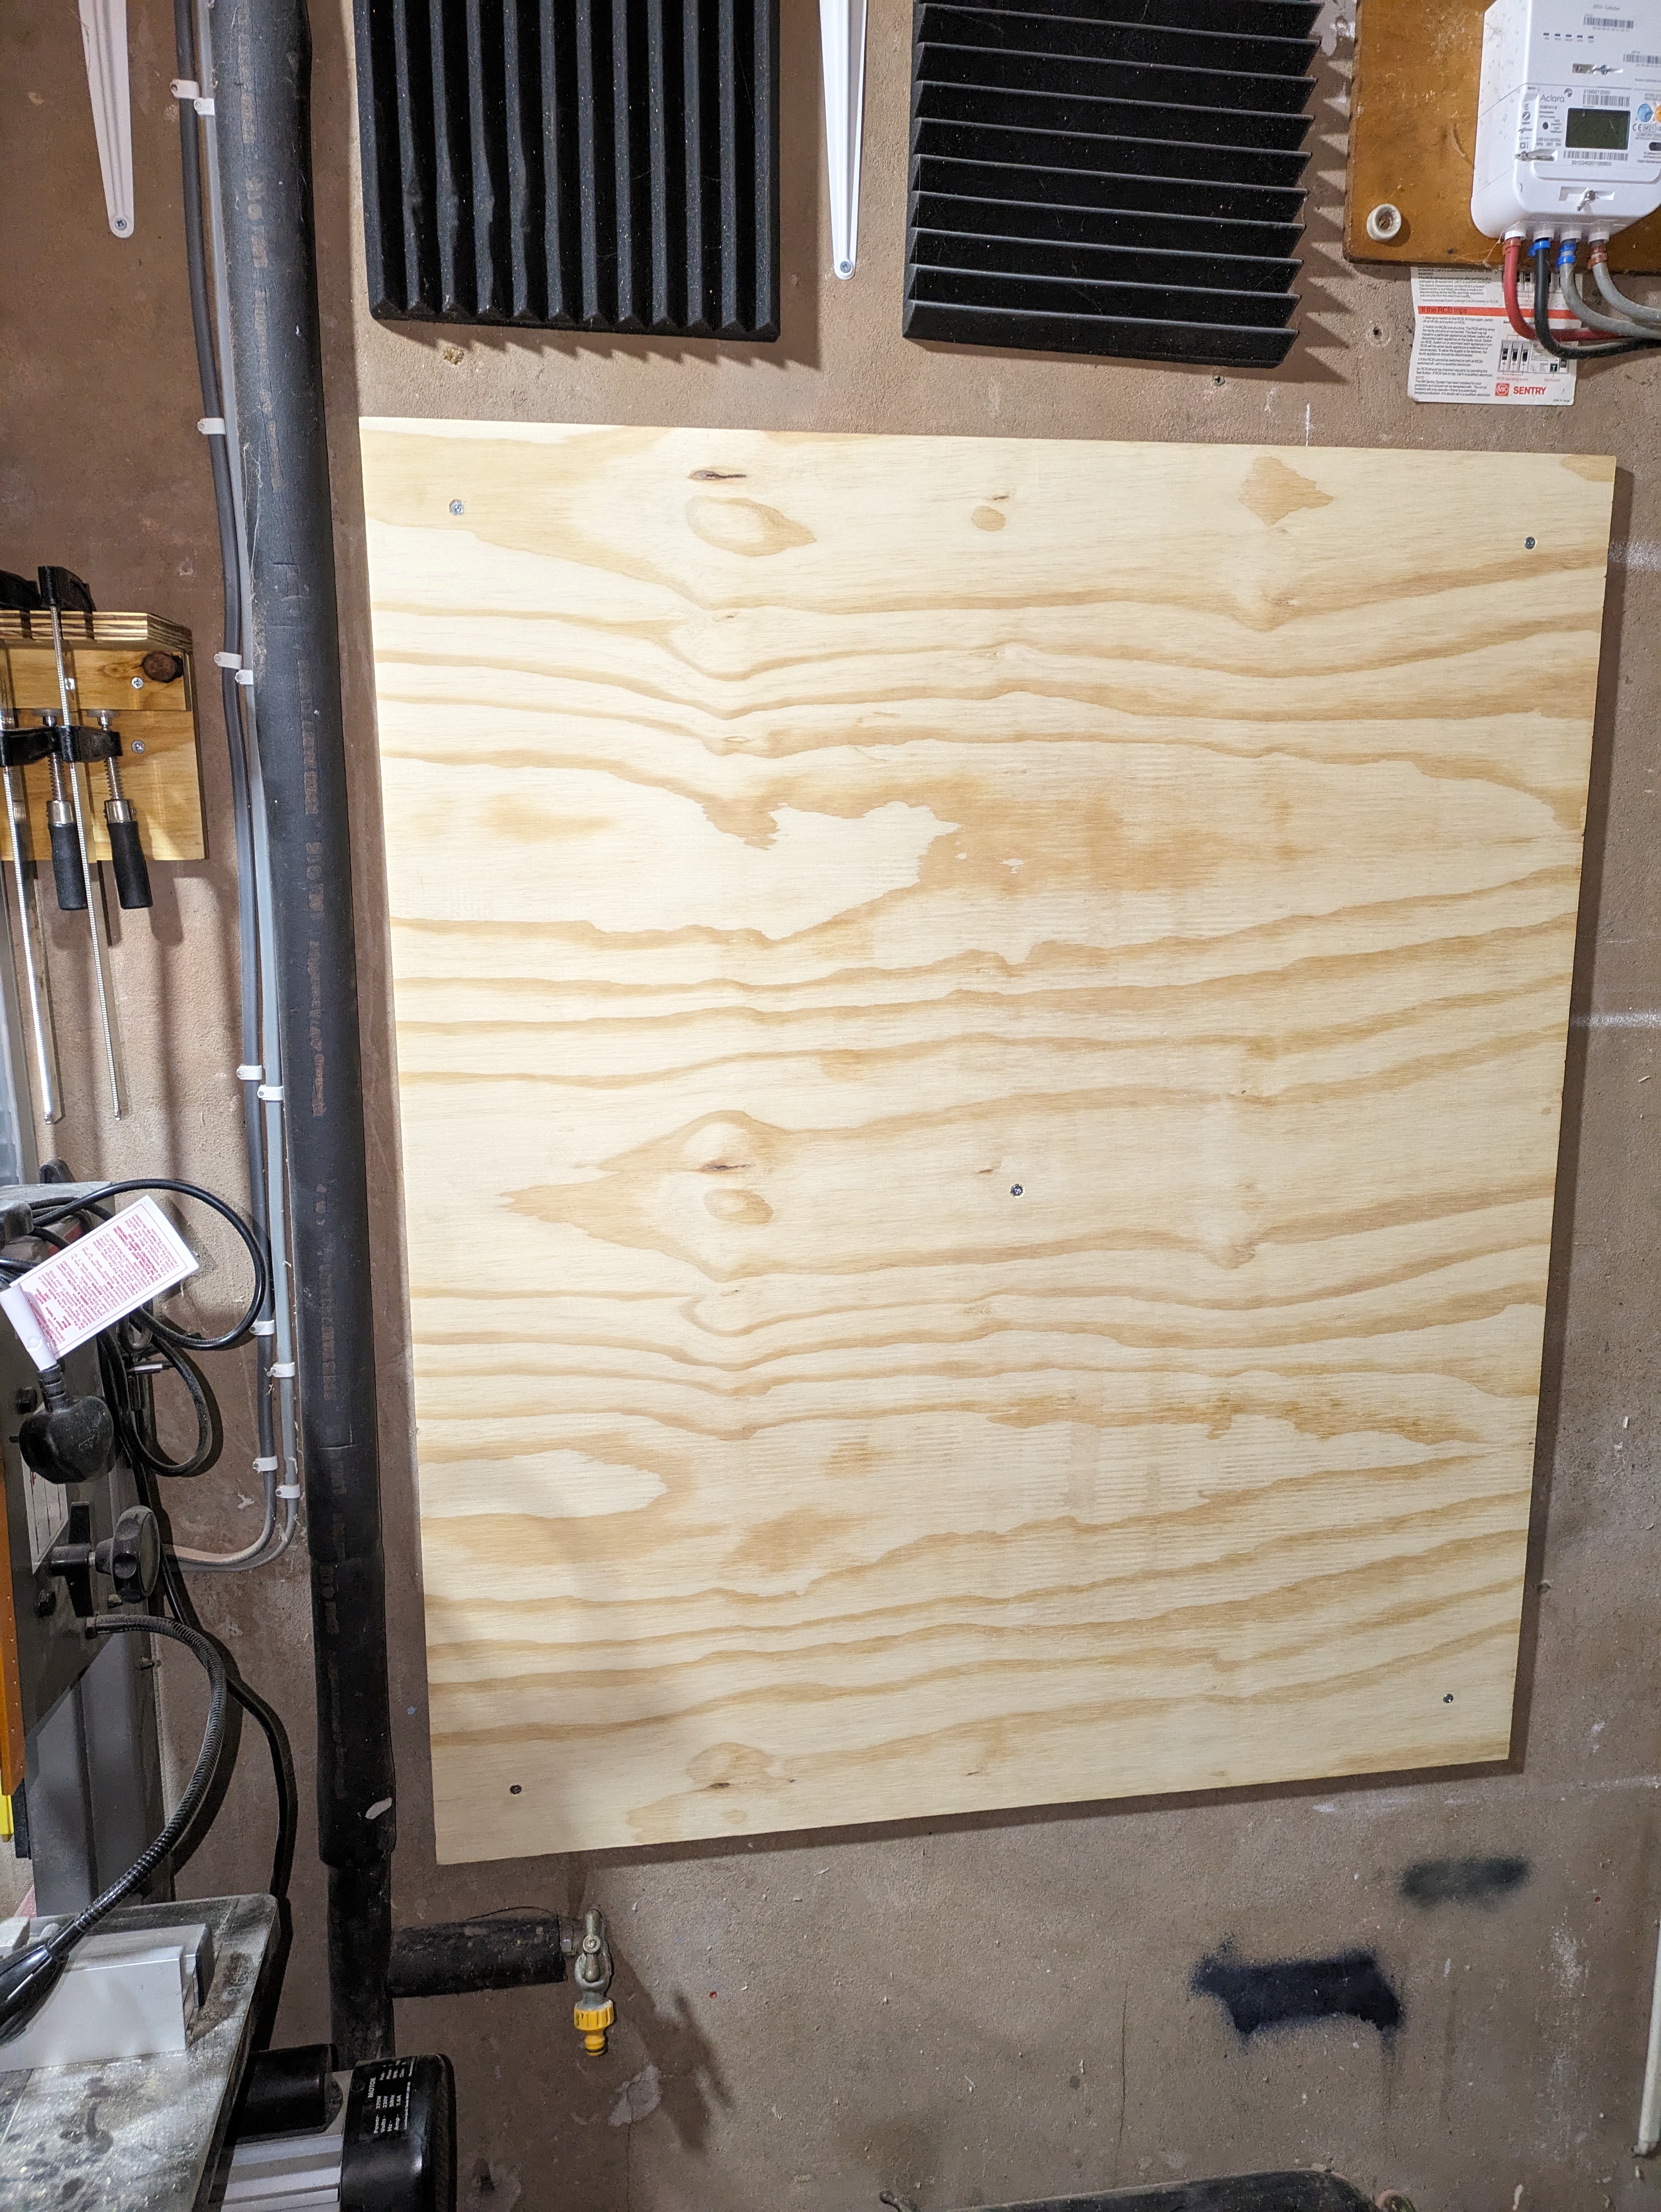
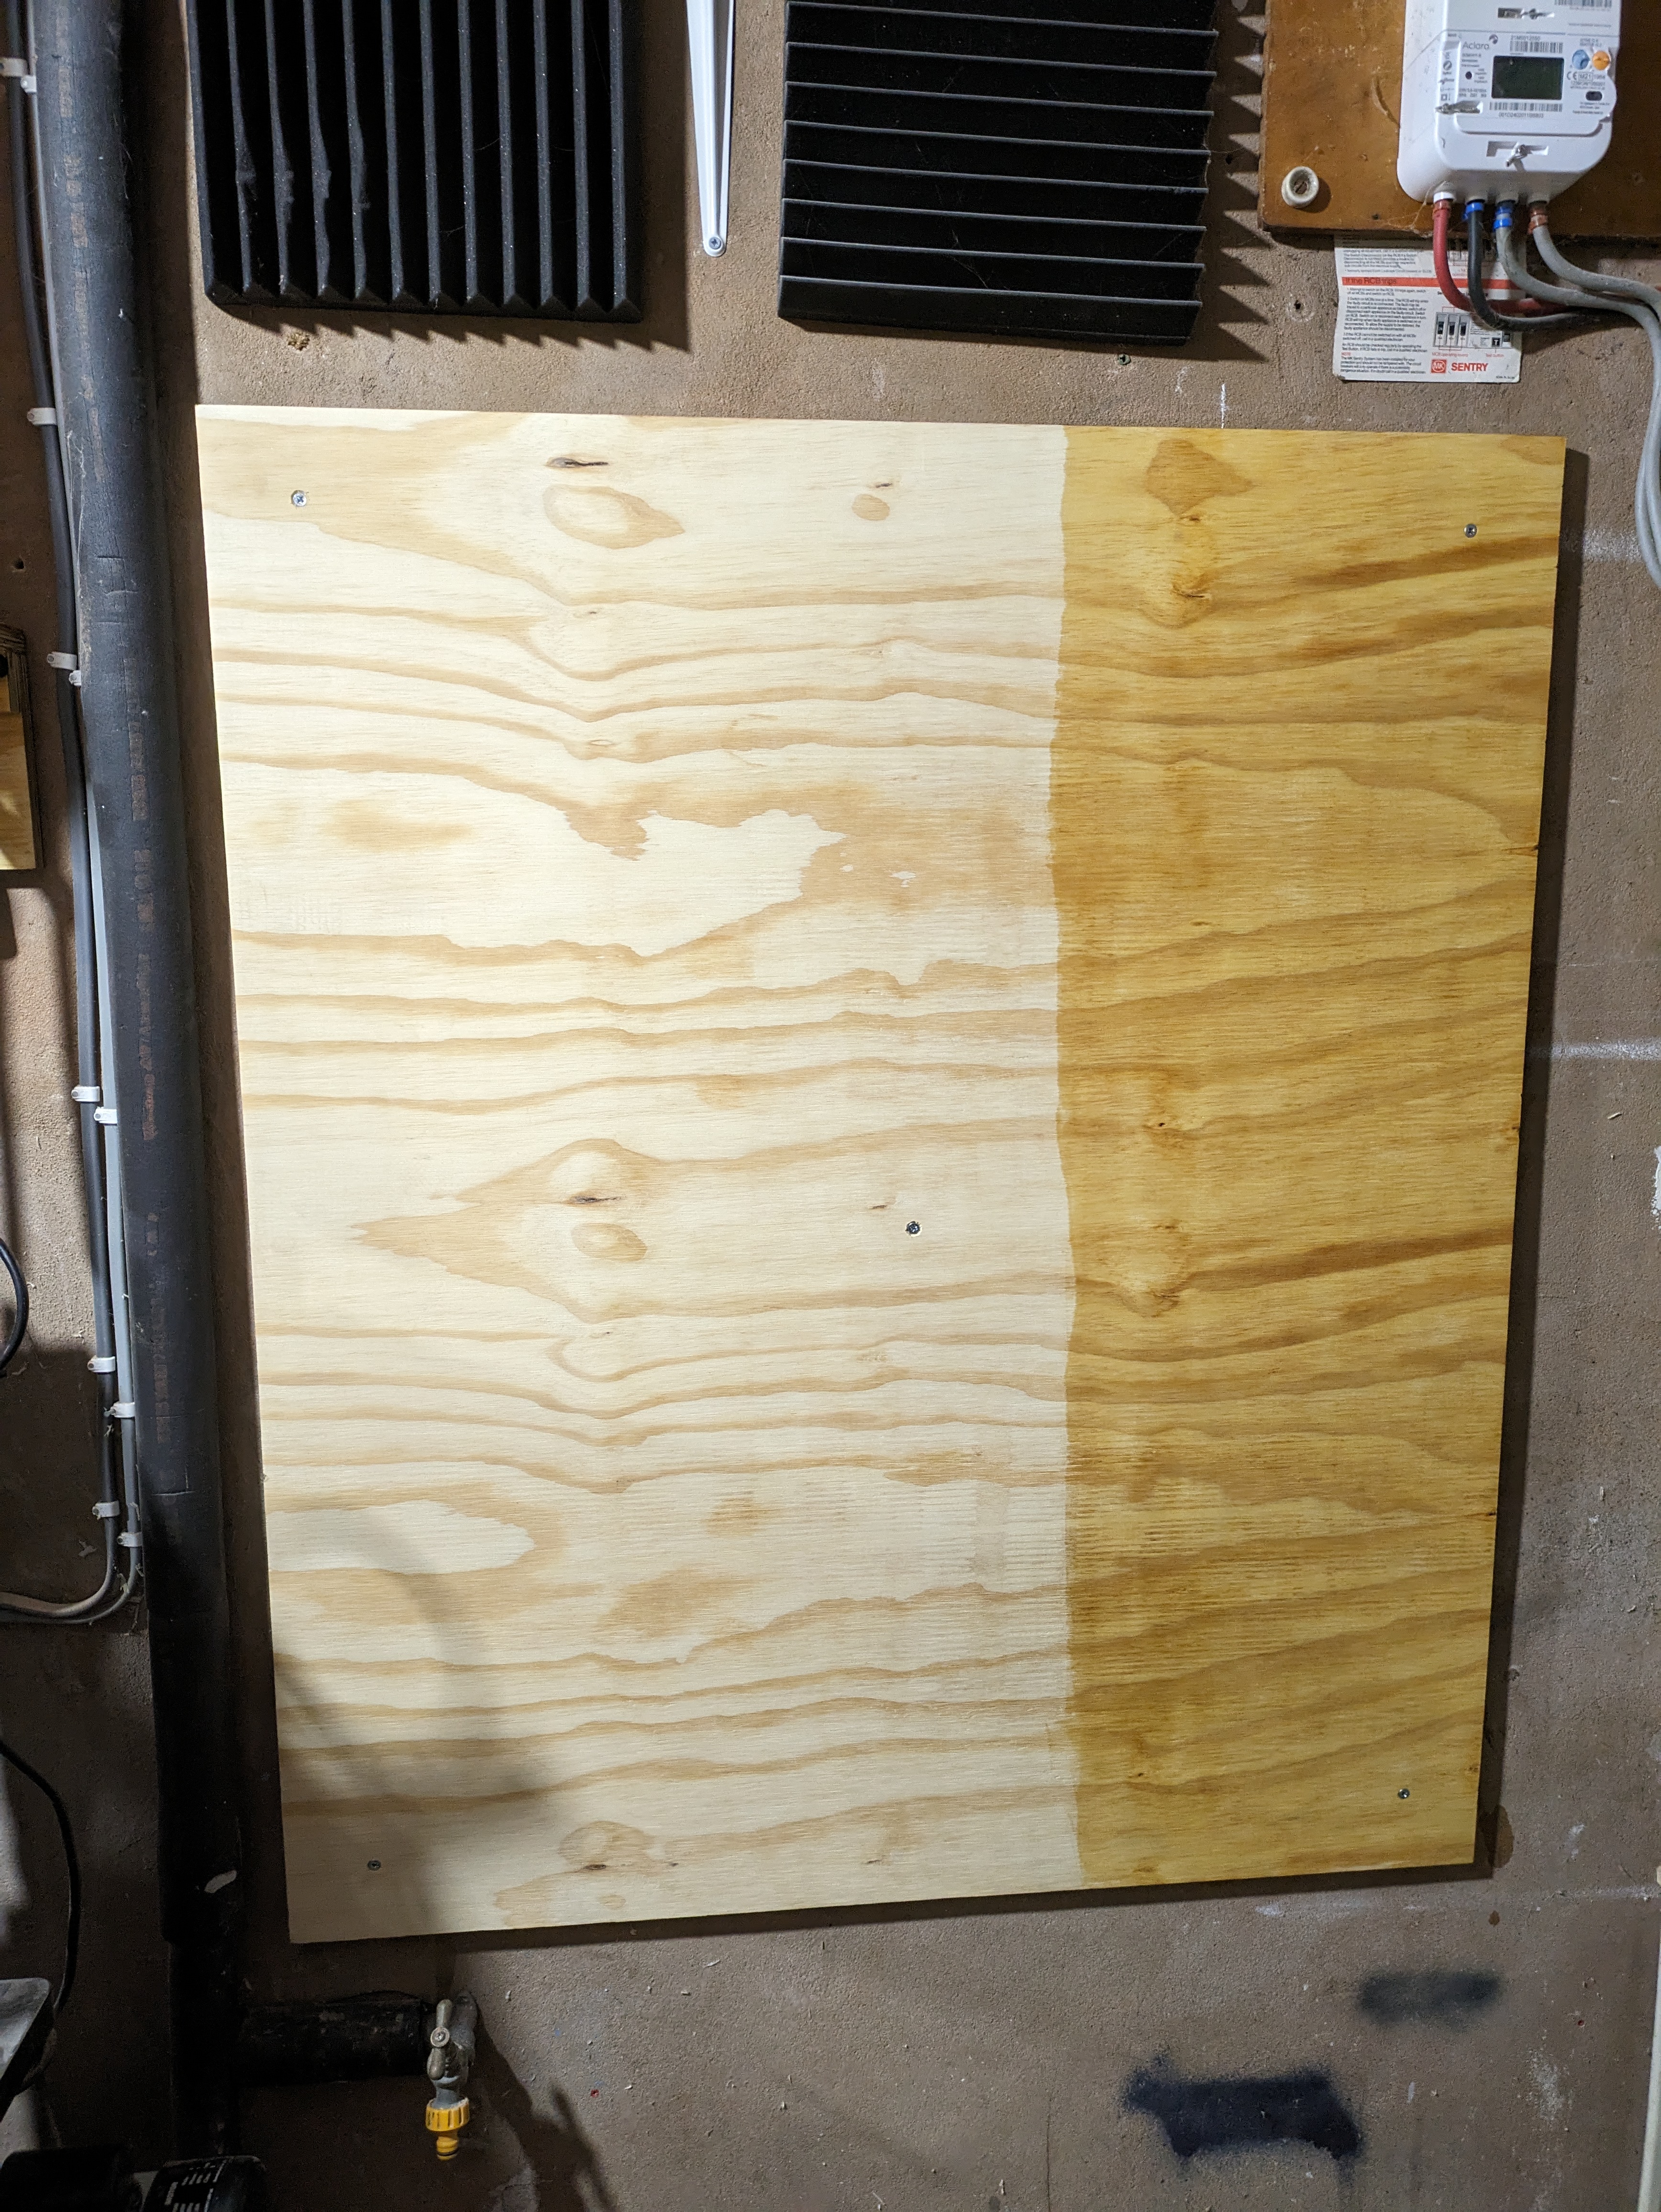
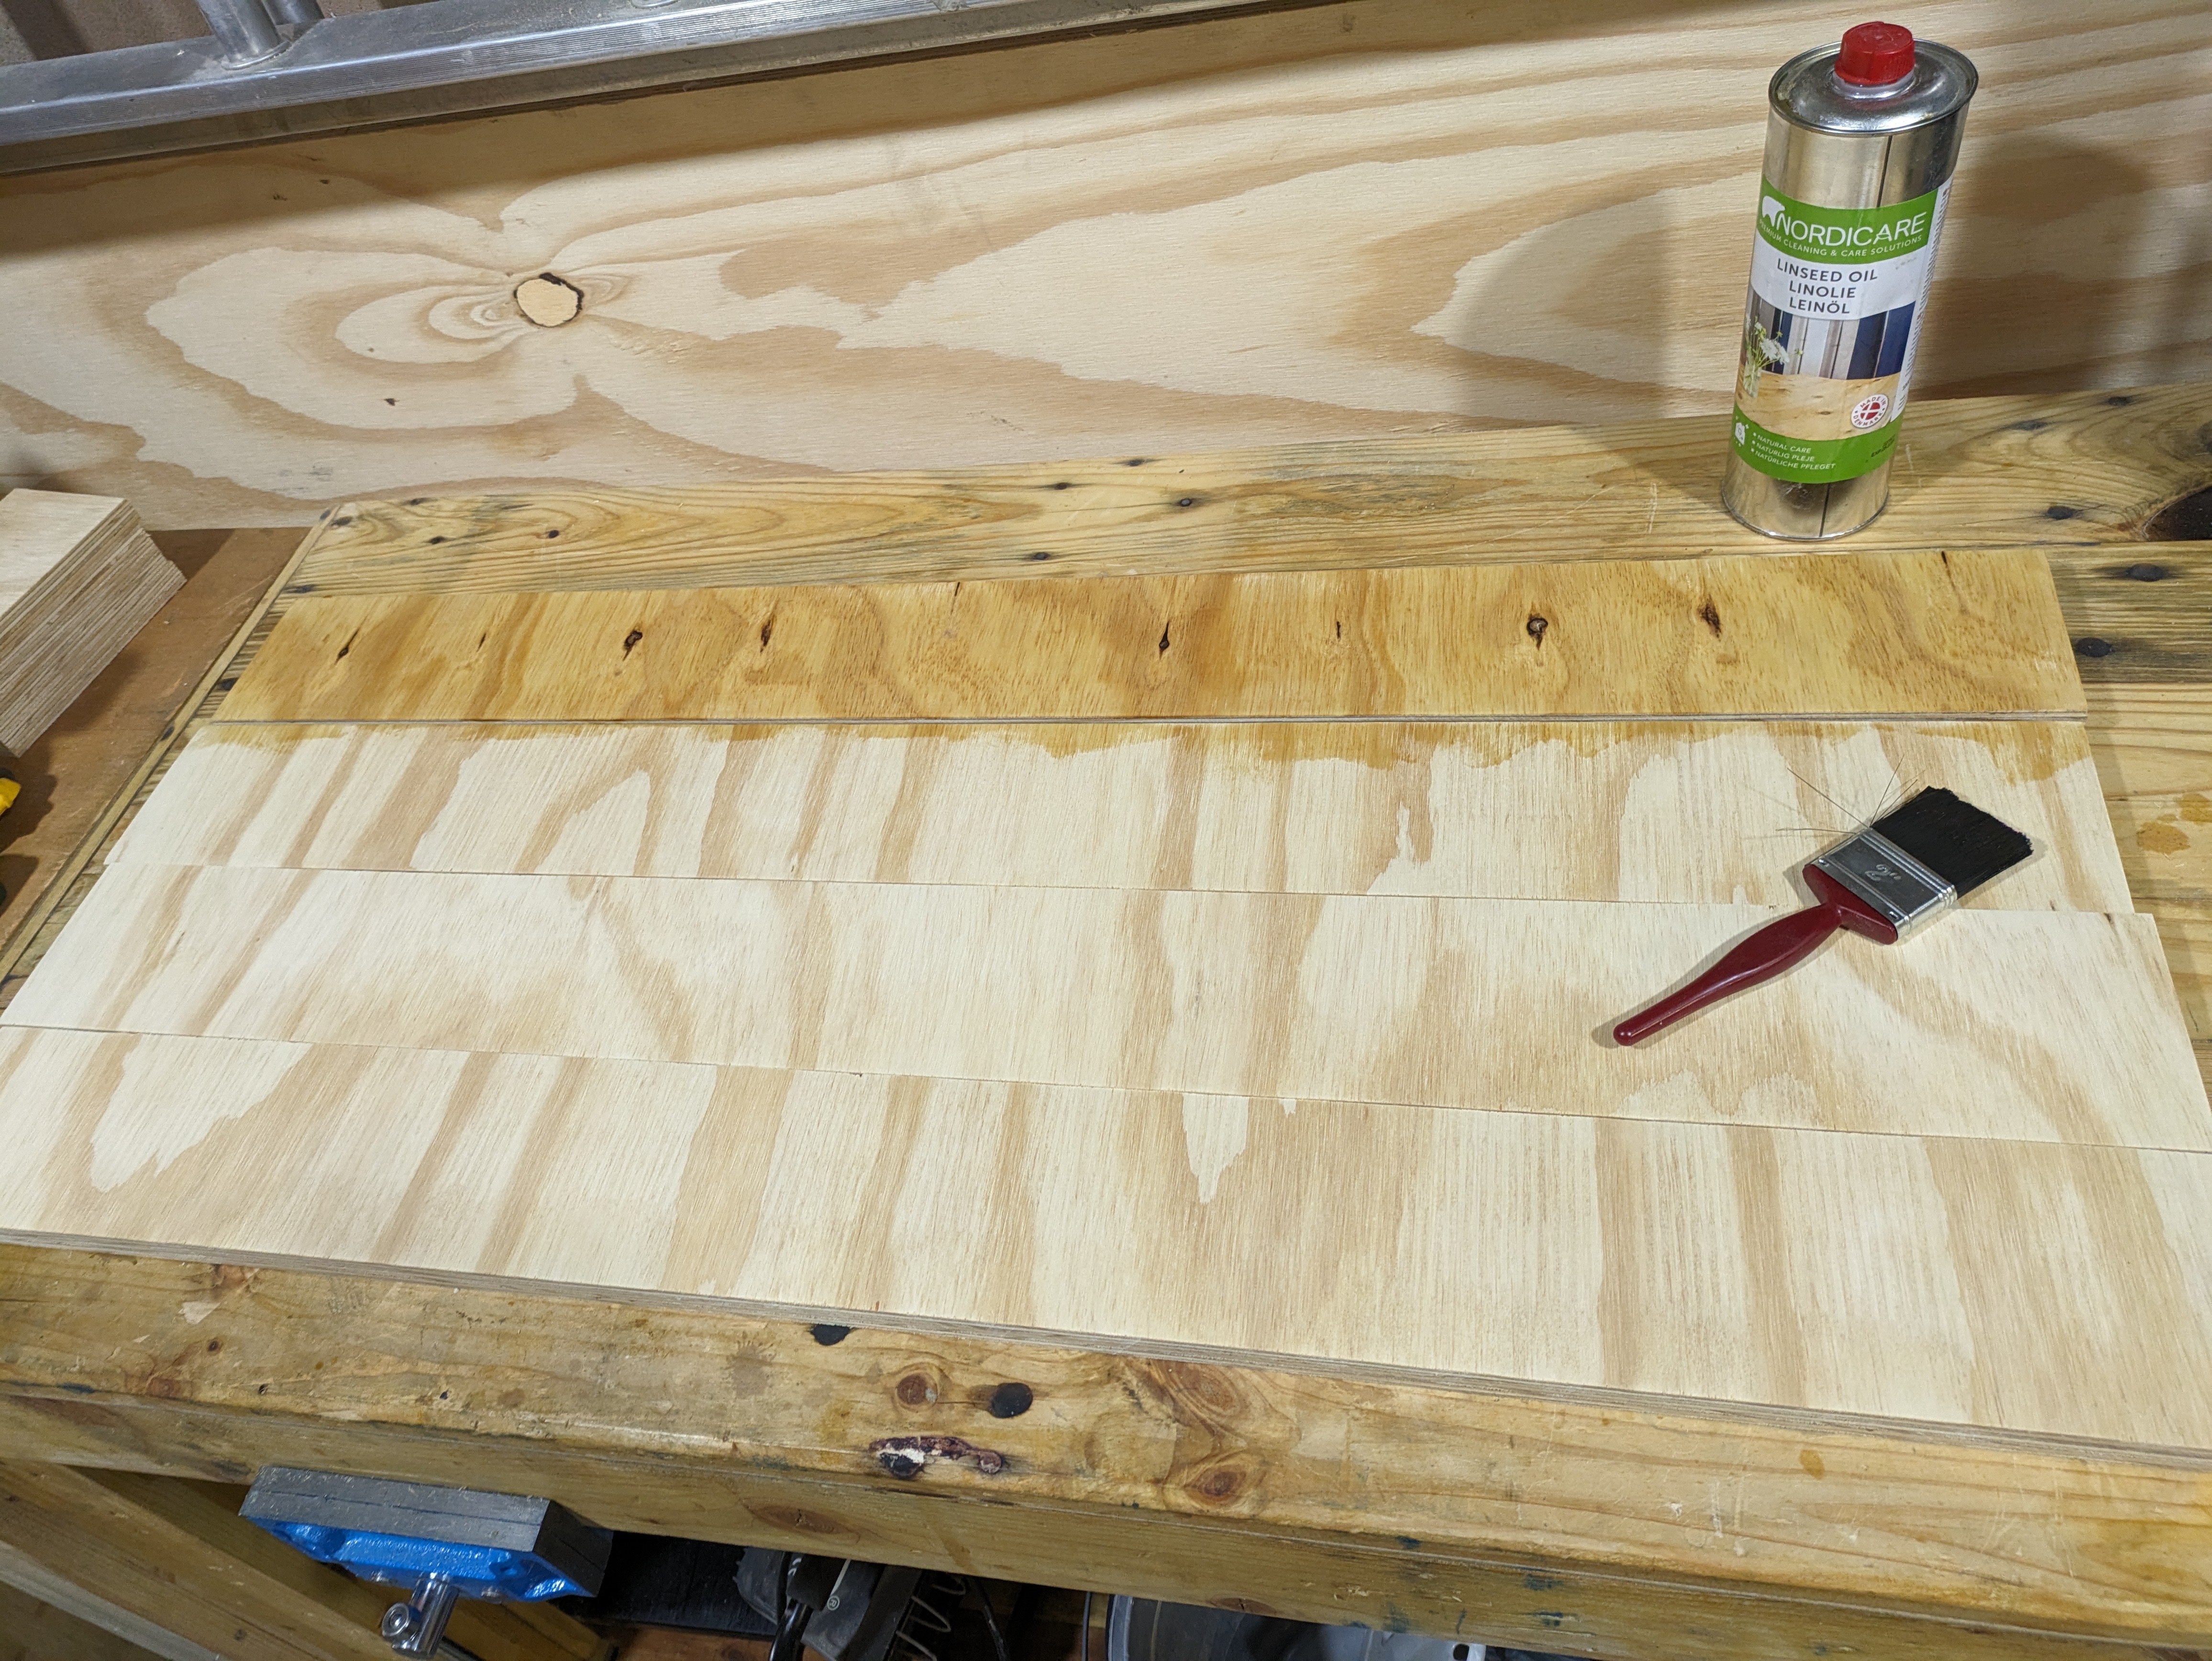
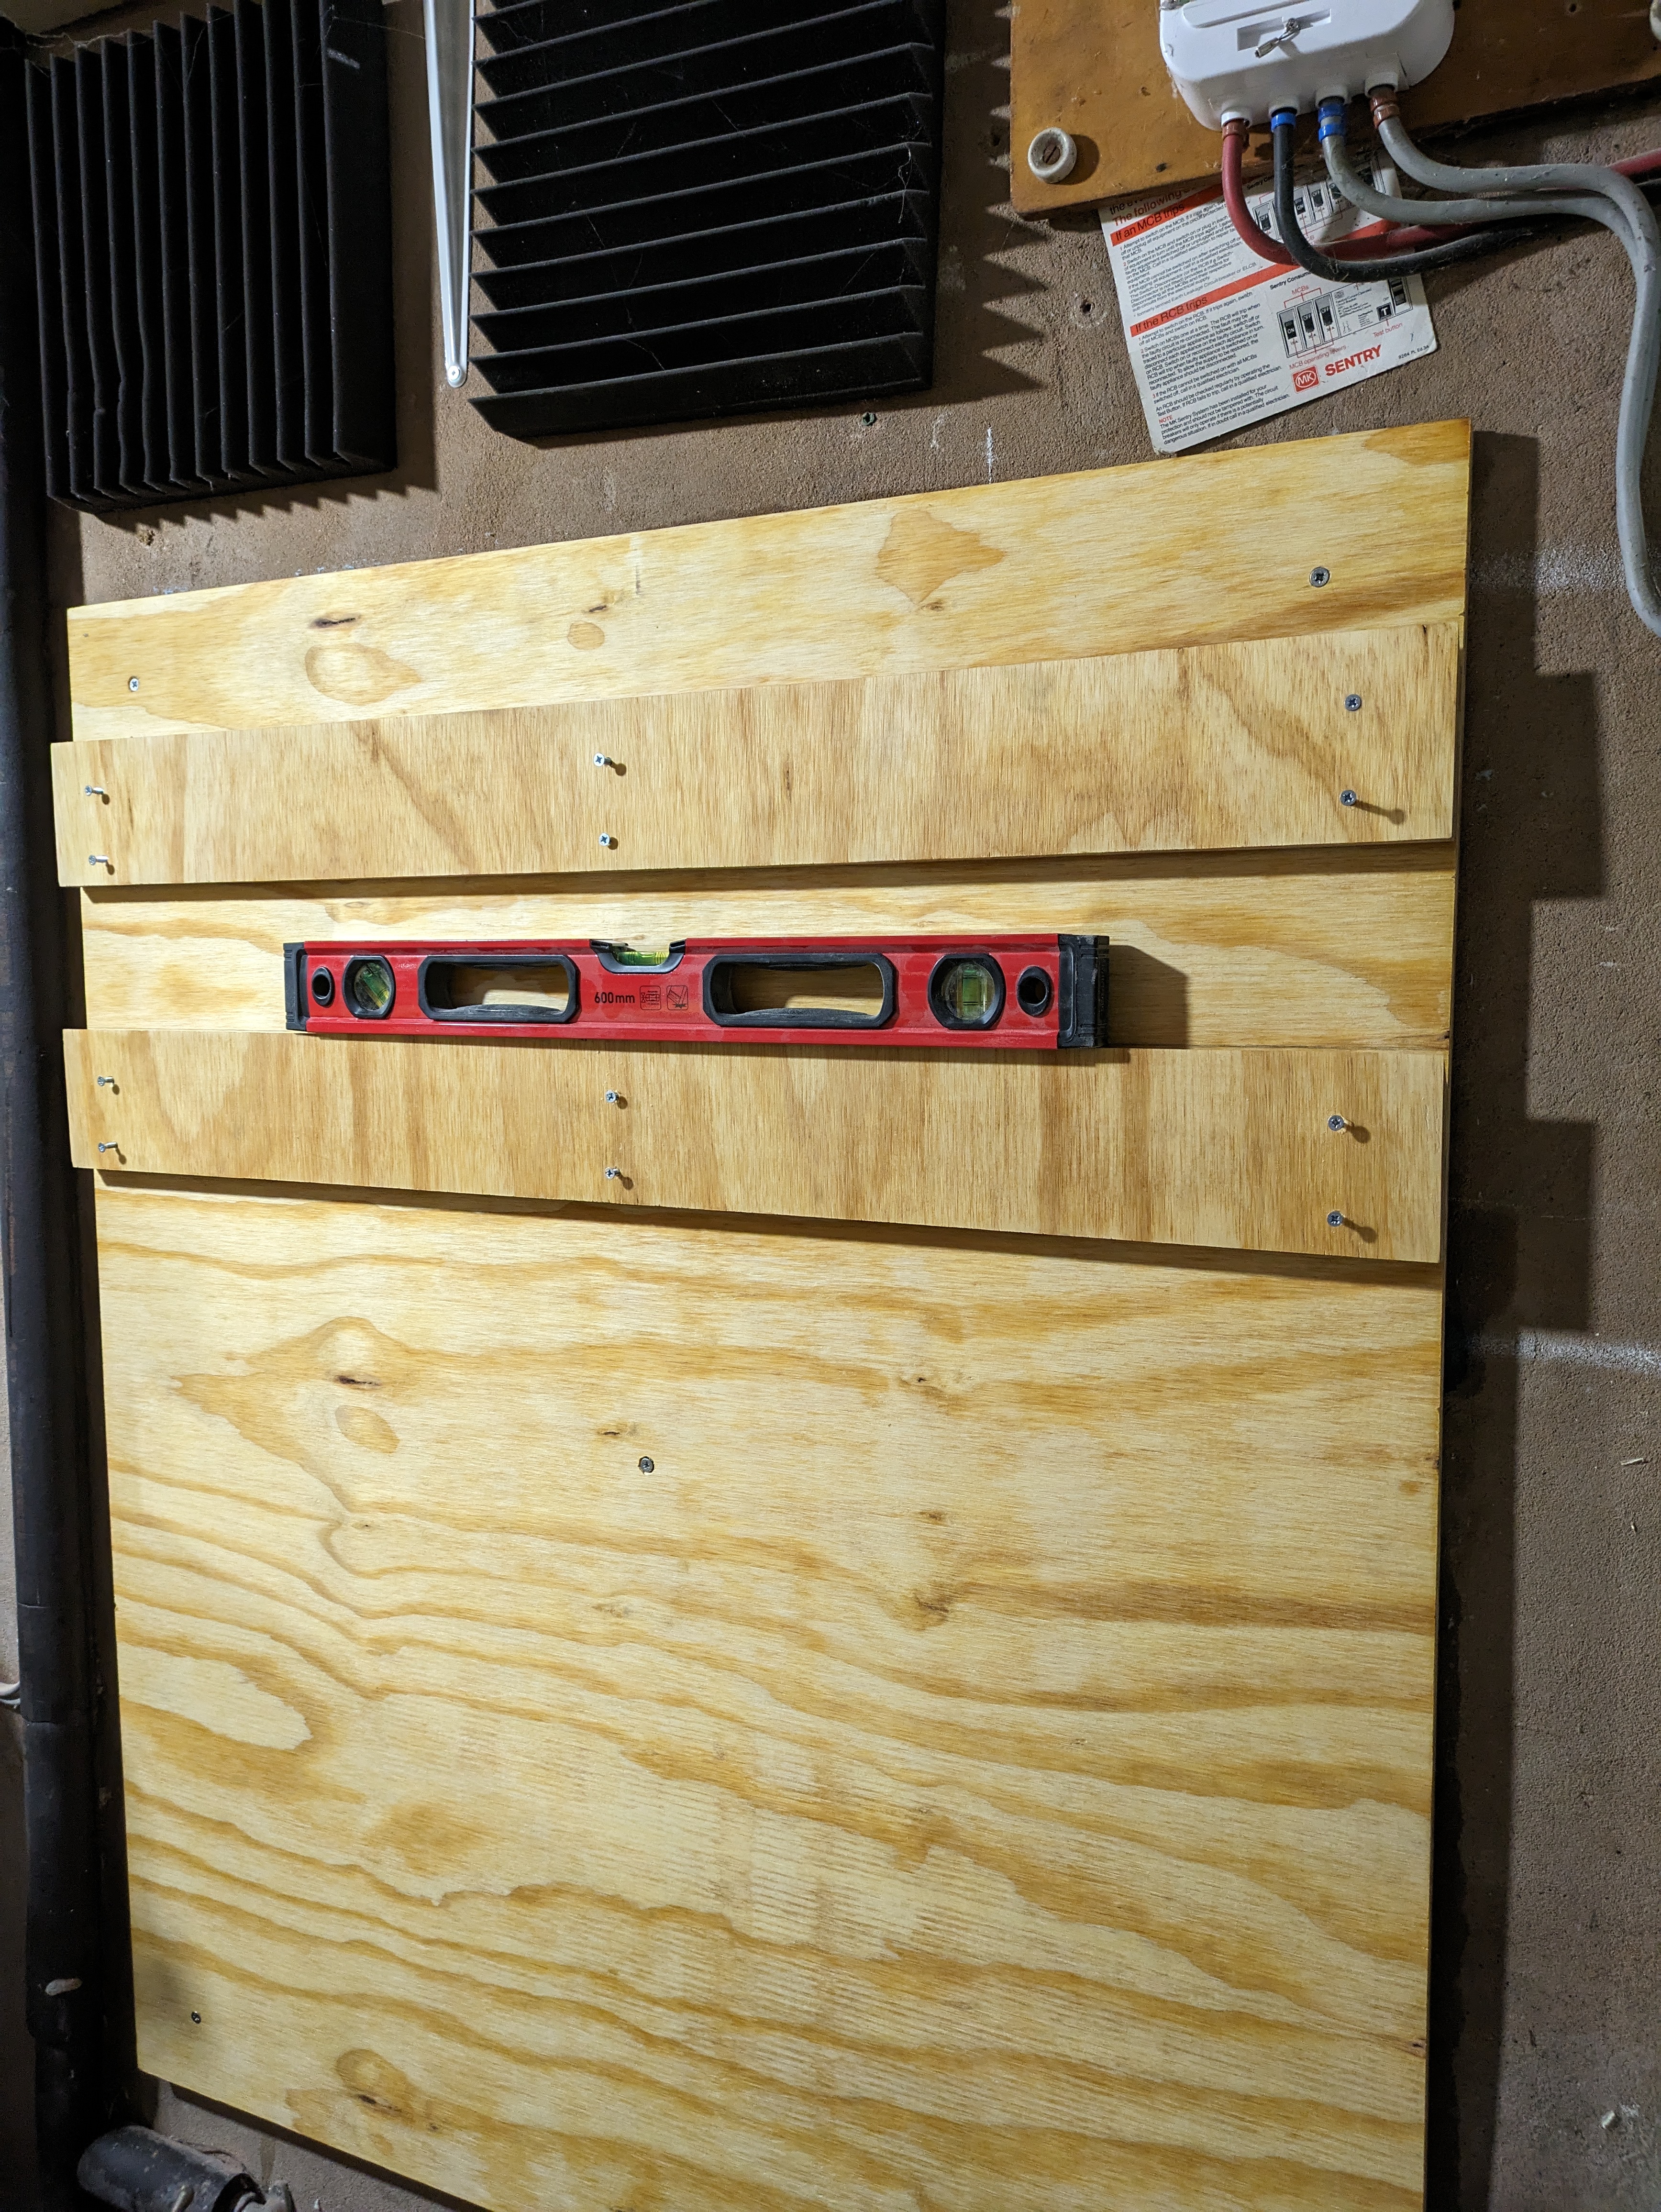
Then I measure my ply to fit the size from my sketch and trimmed it to size, screwed it to the wall and brushed on some linseed (probably not really needed but it looked nice on the clamp racks). I cut 4 rails and added a 45 degree angle on one side as this is what would hold the future tool holders. The rails were levelled and screwed to the backing ply and ready for some tool holders to be built.


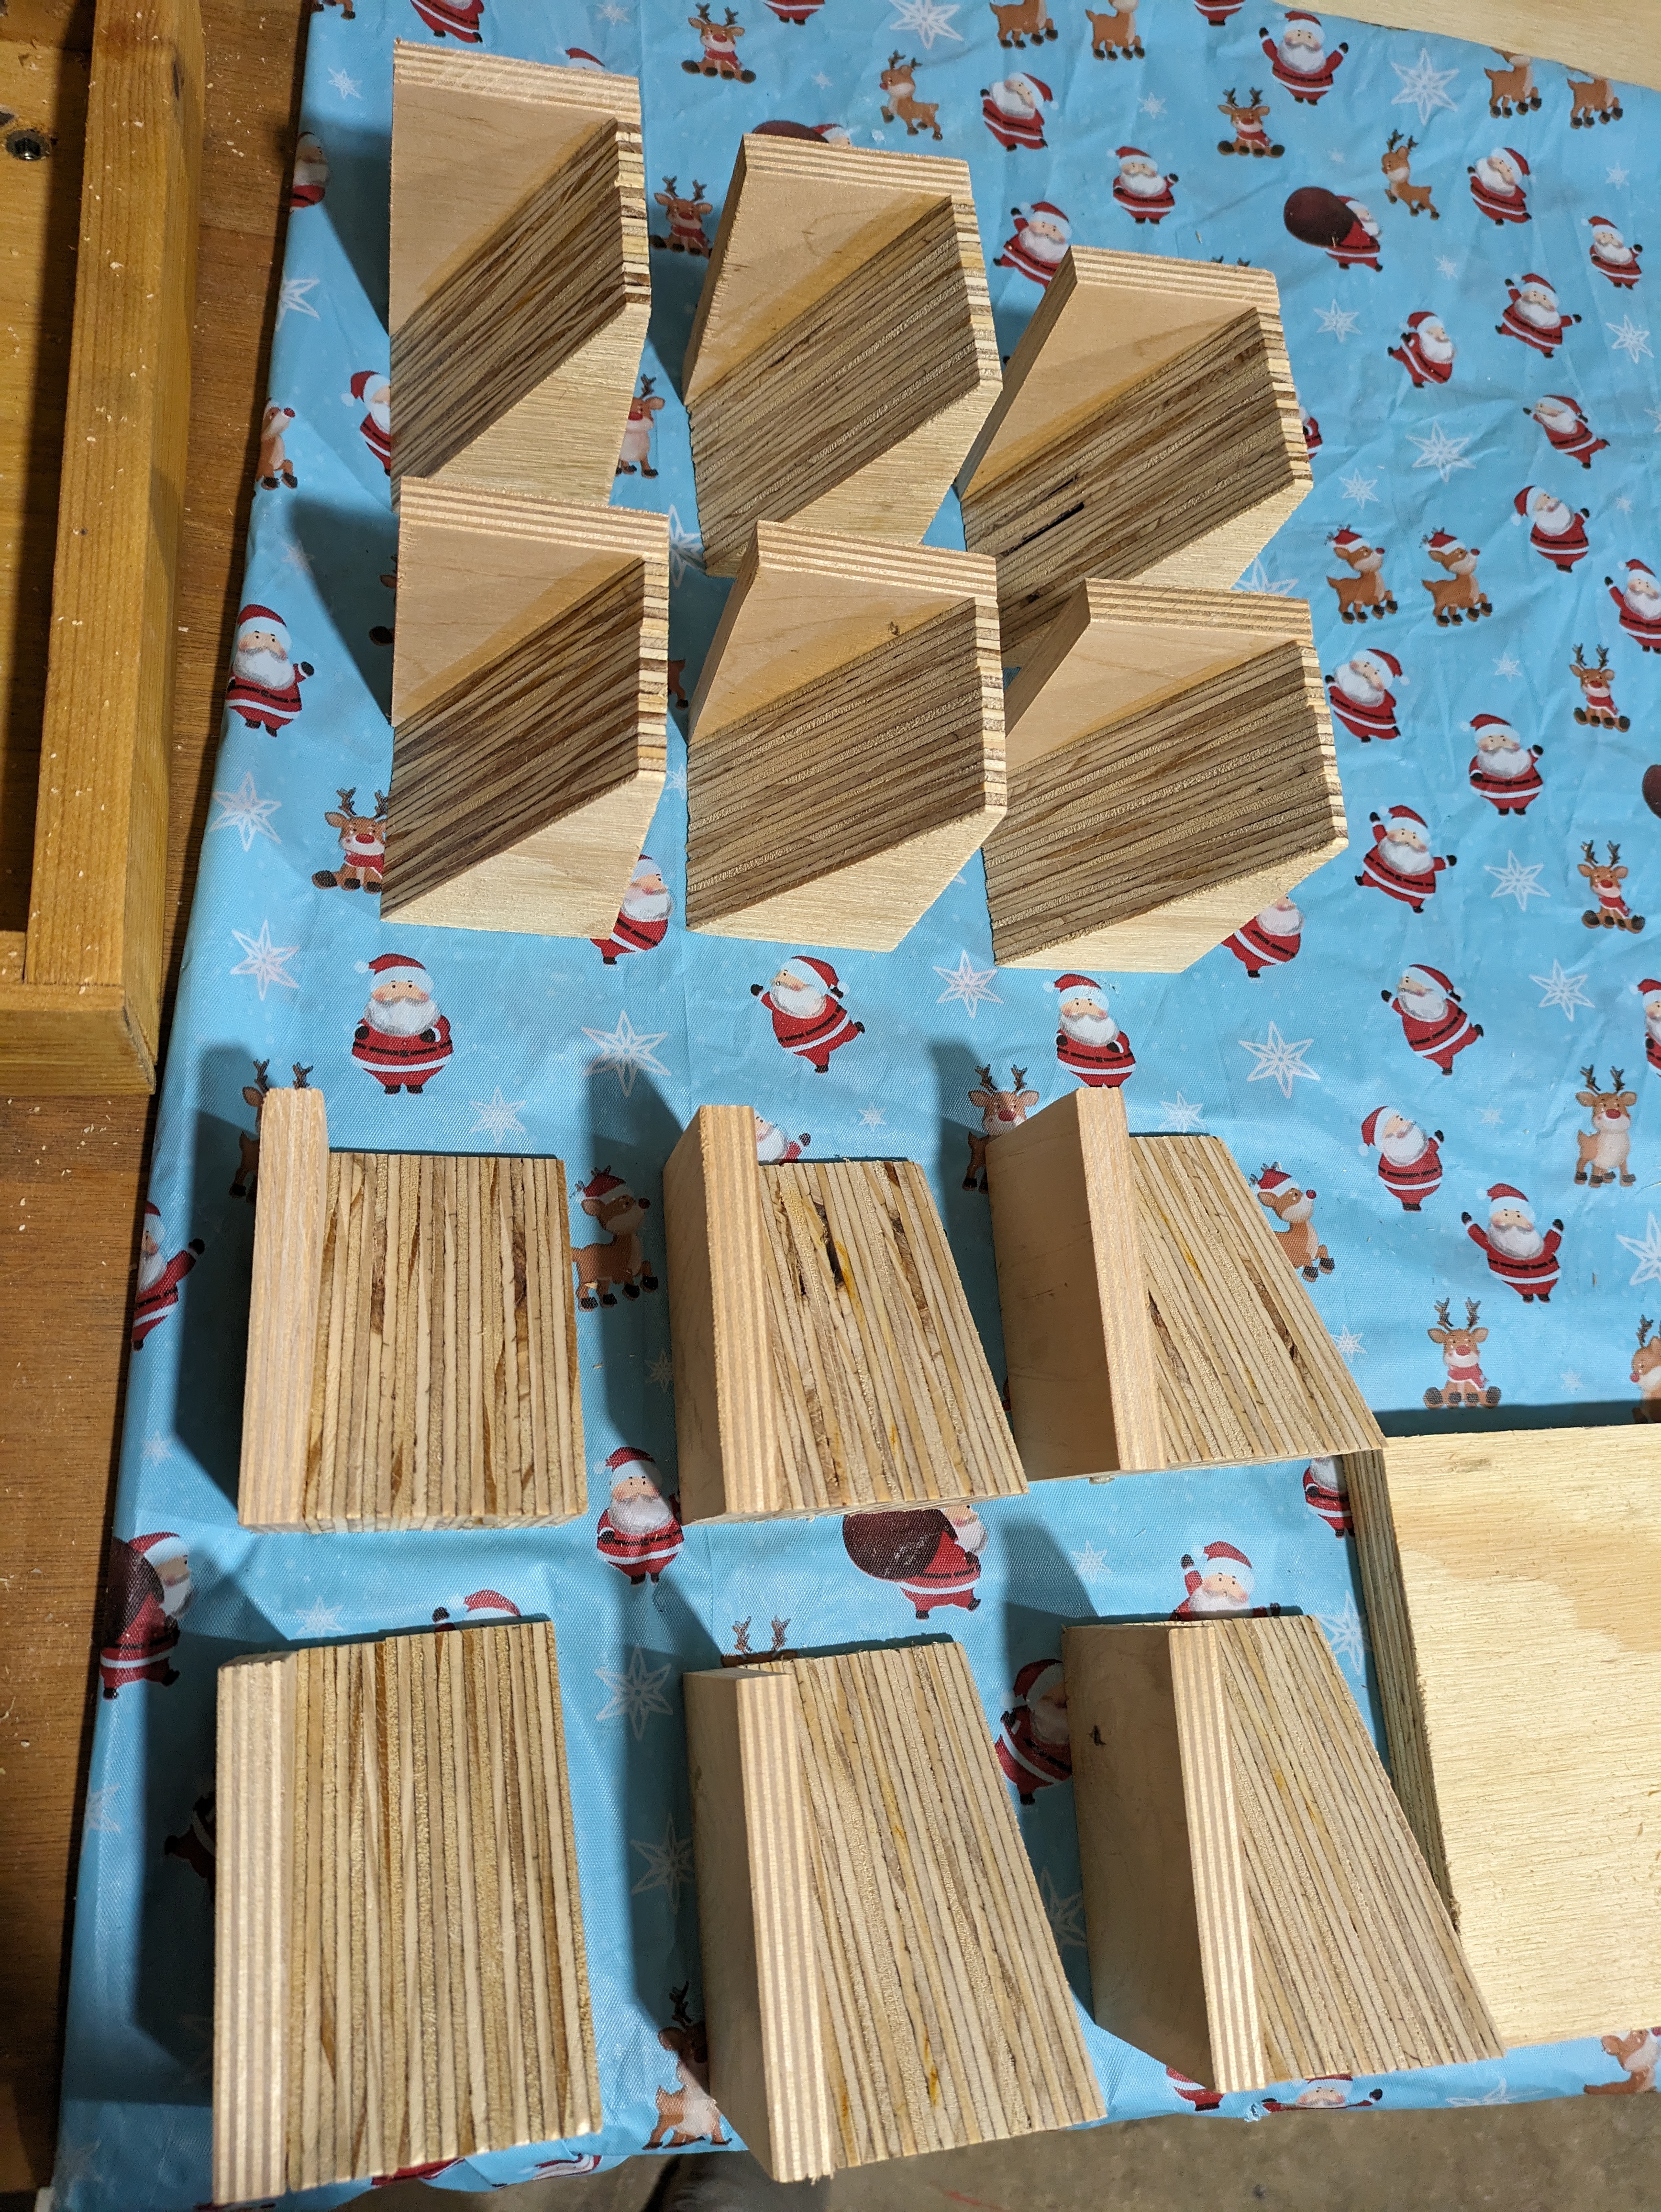
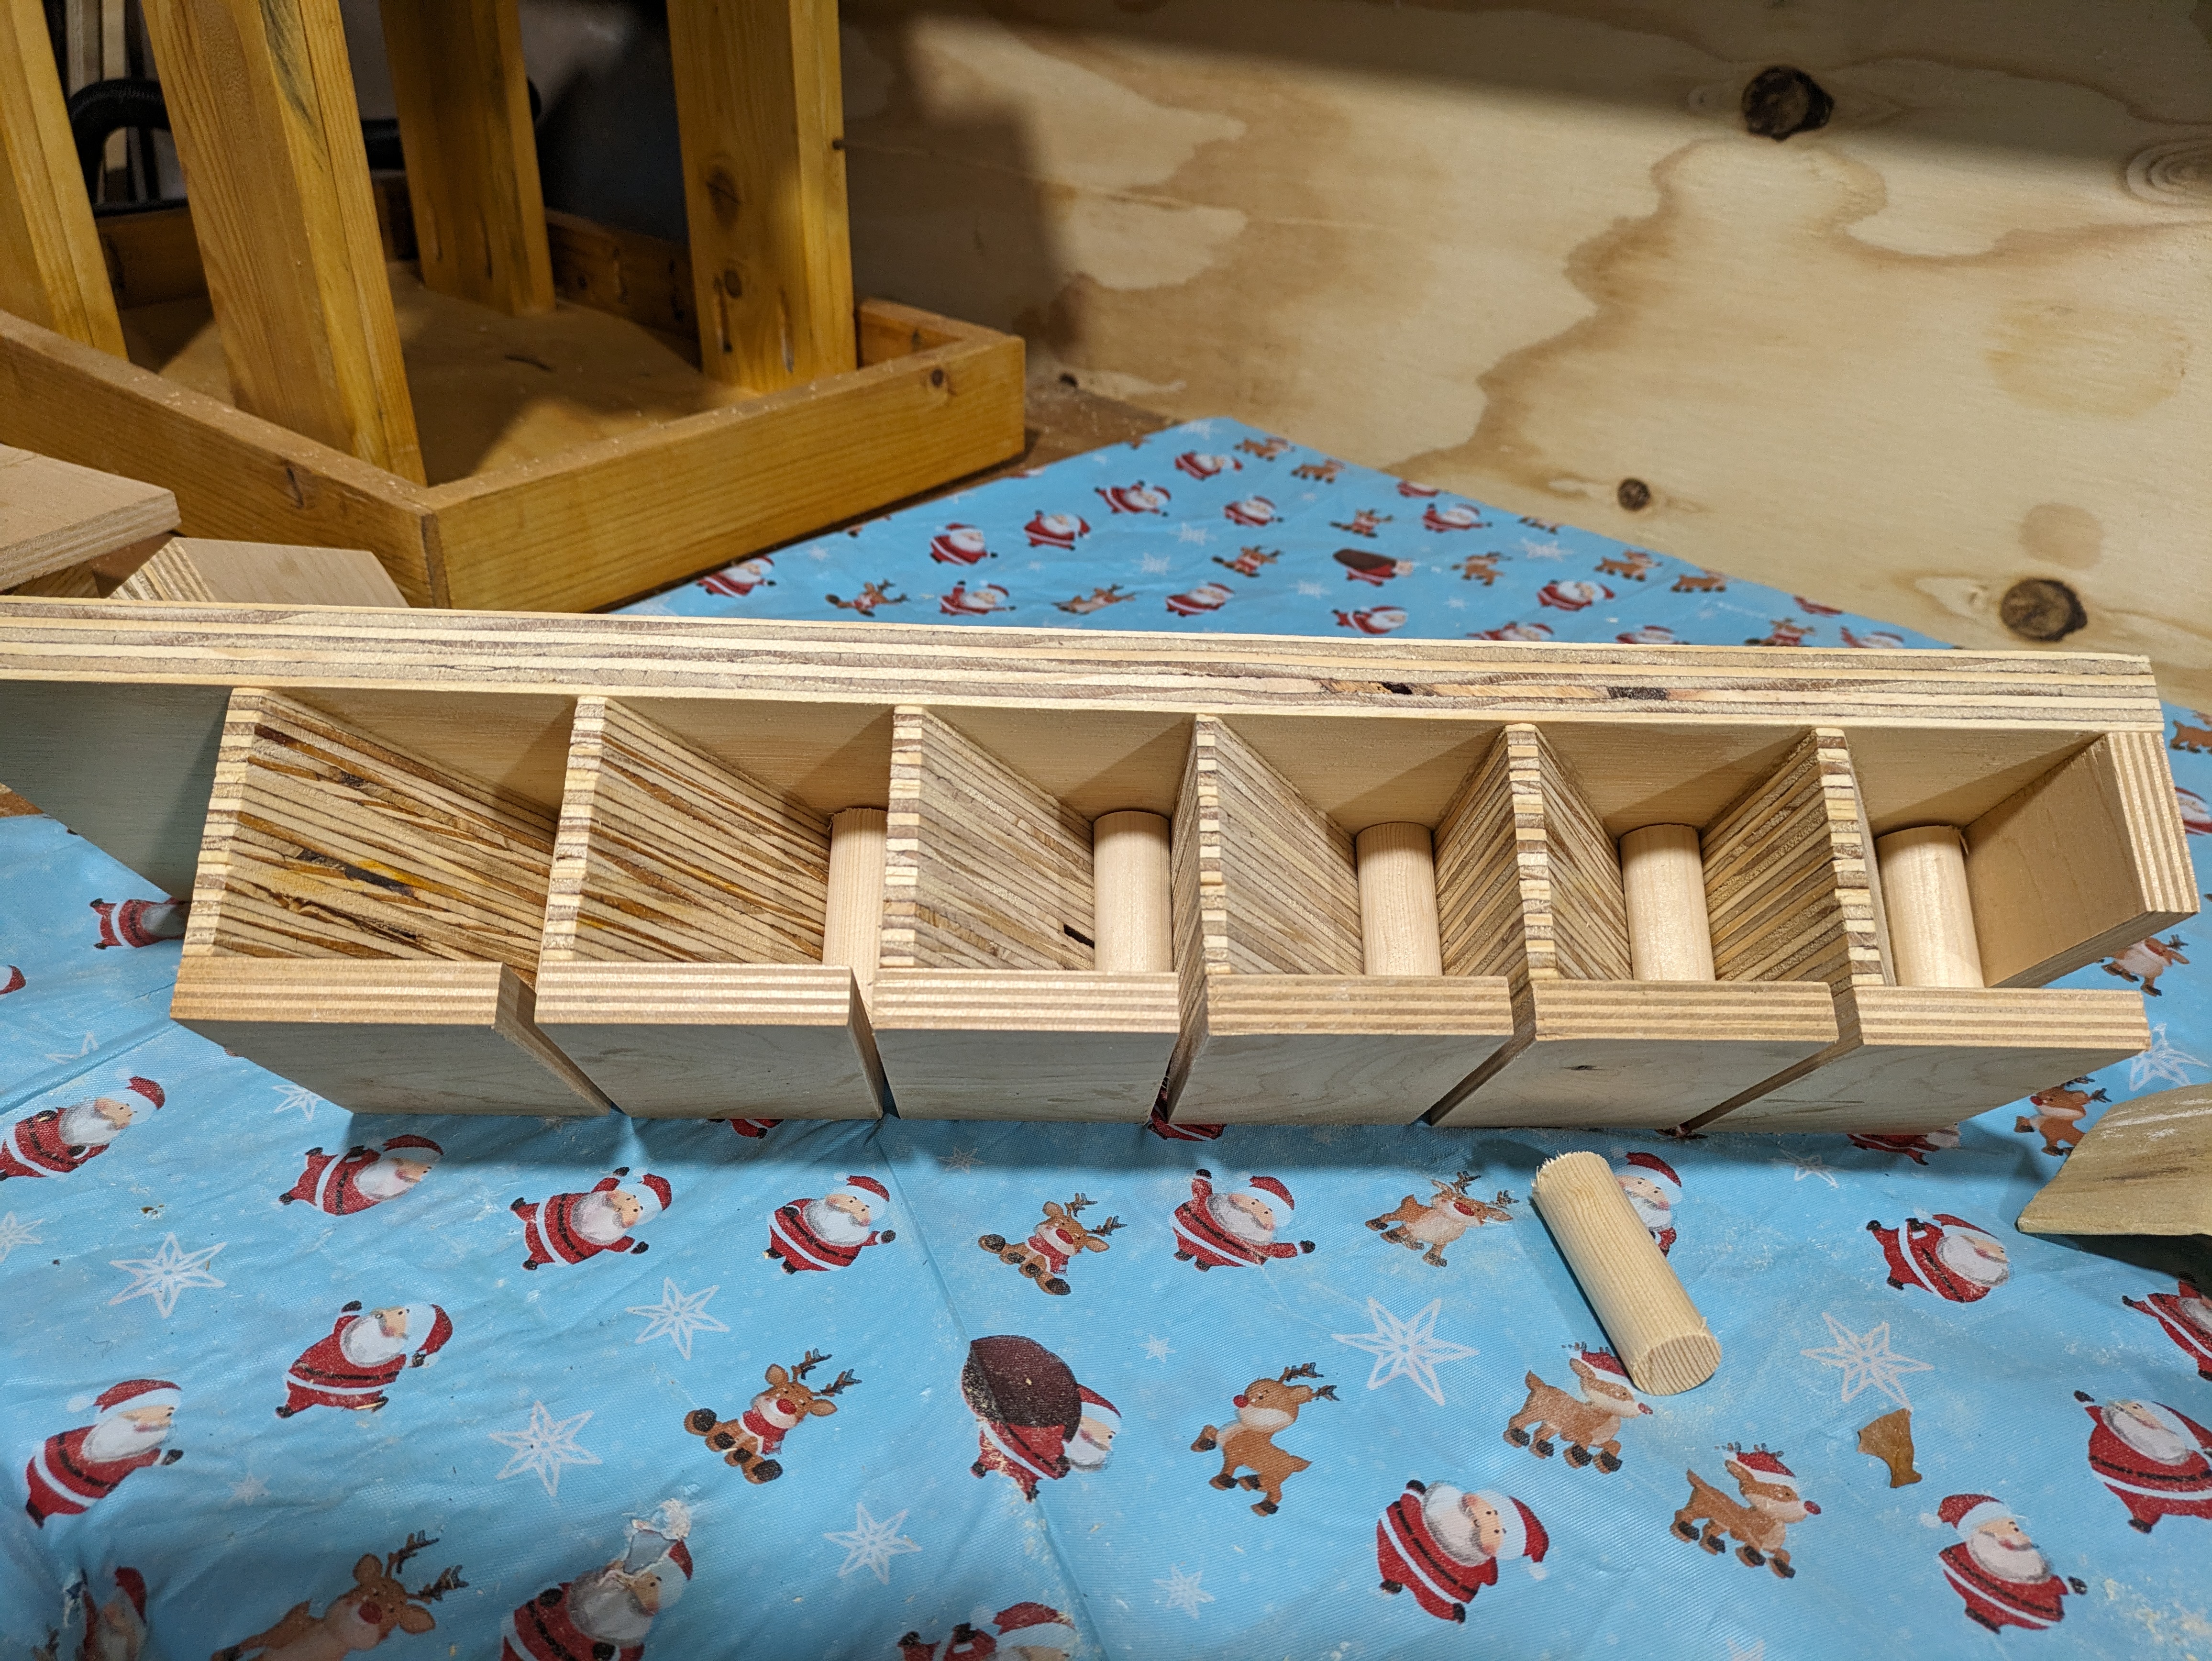
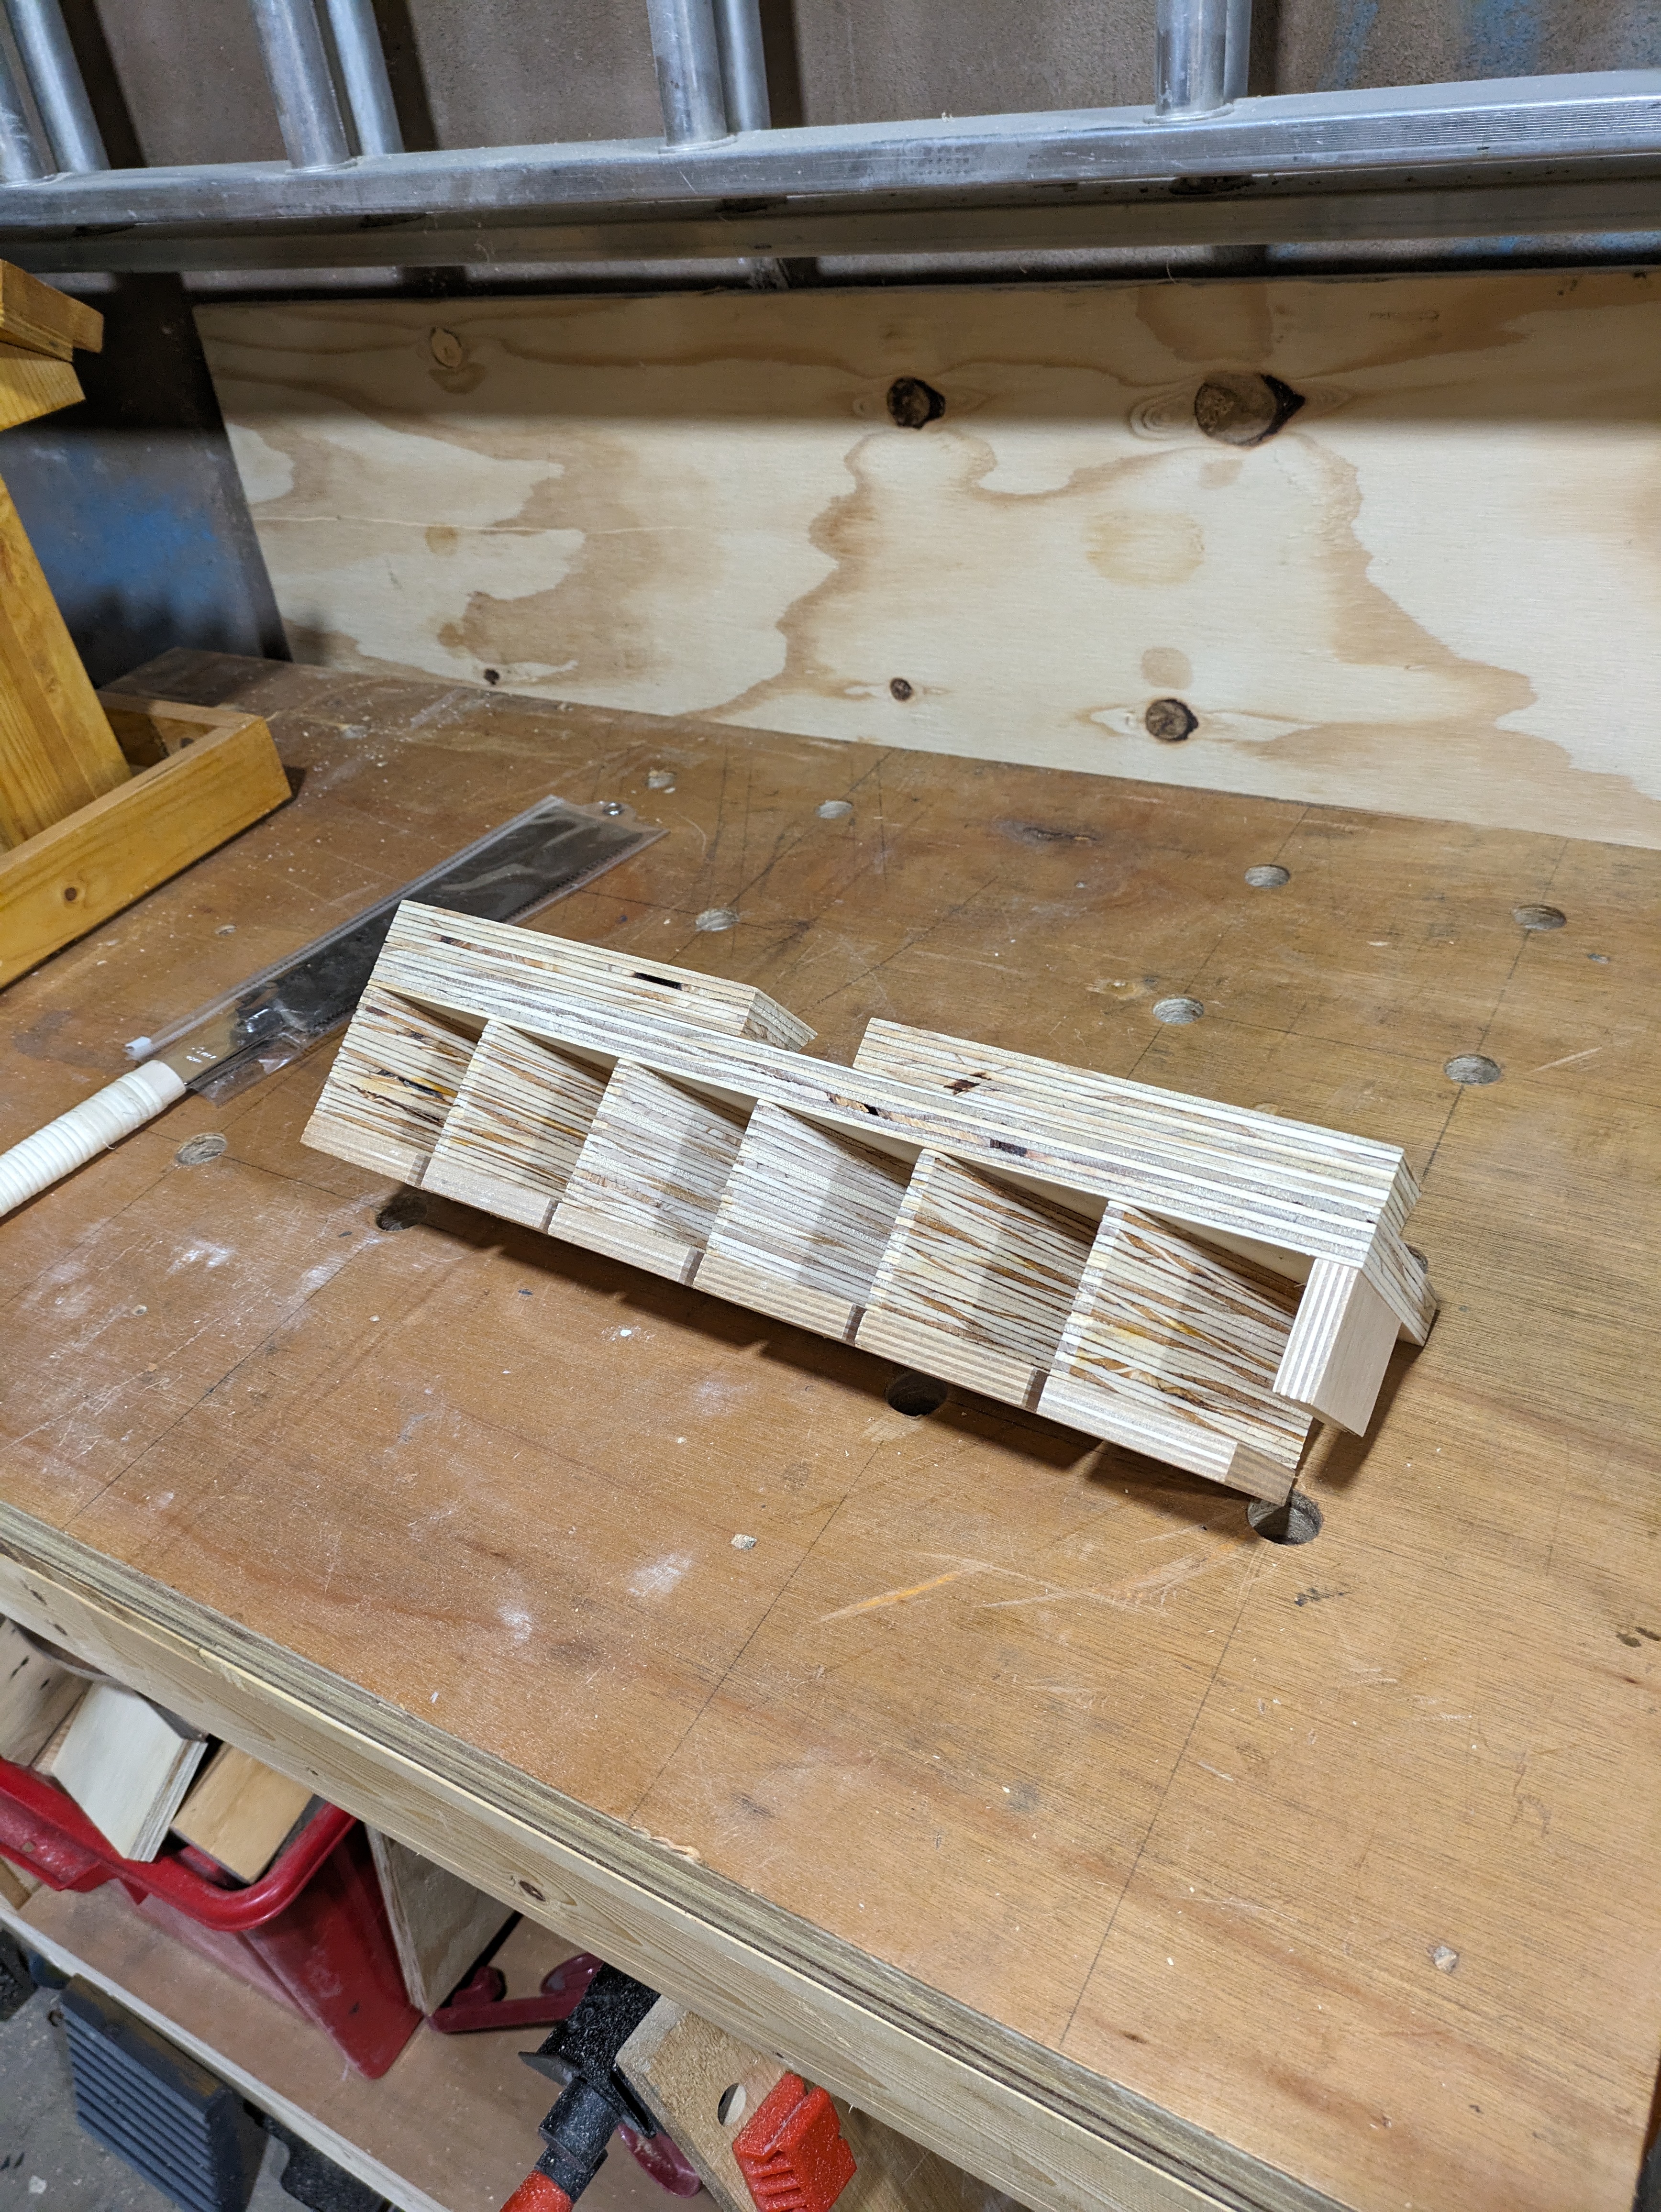
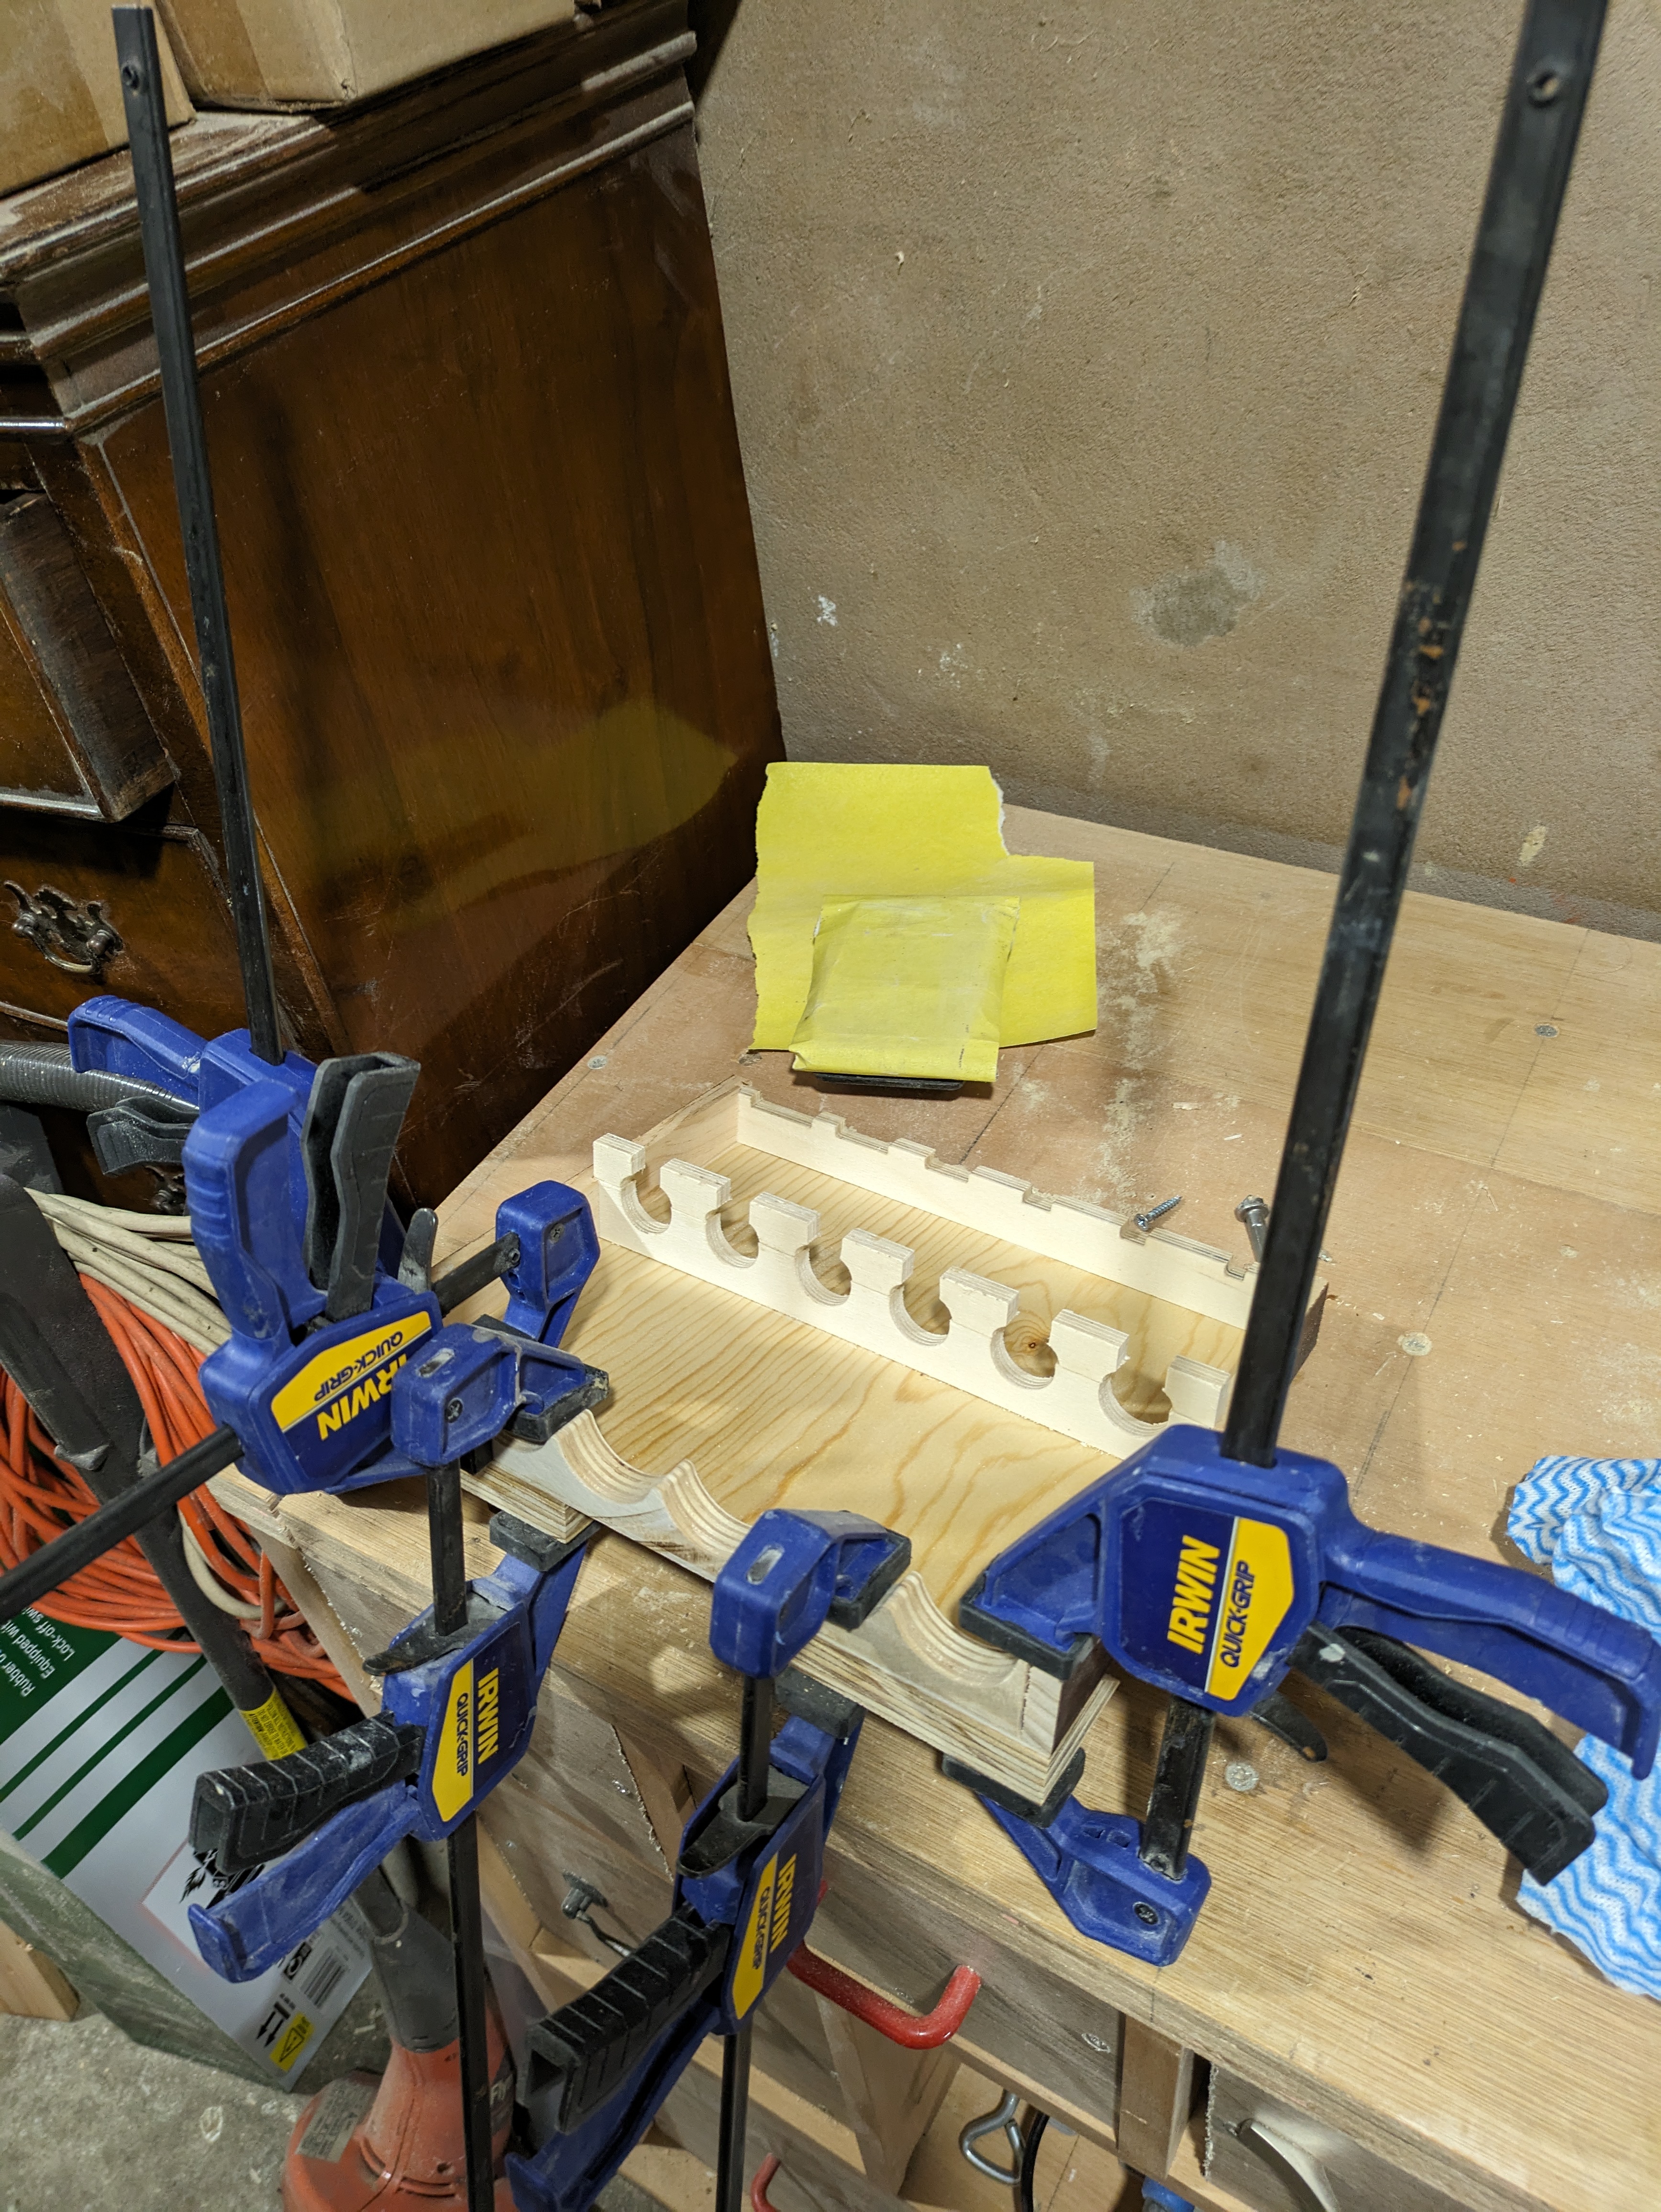
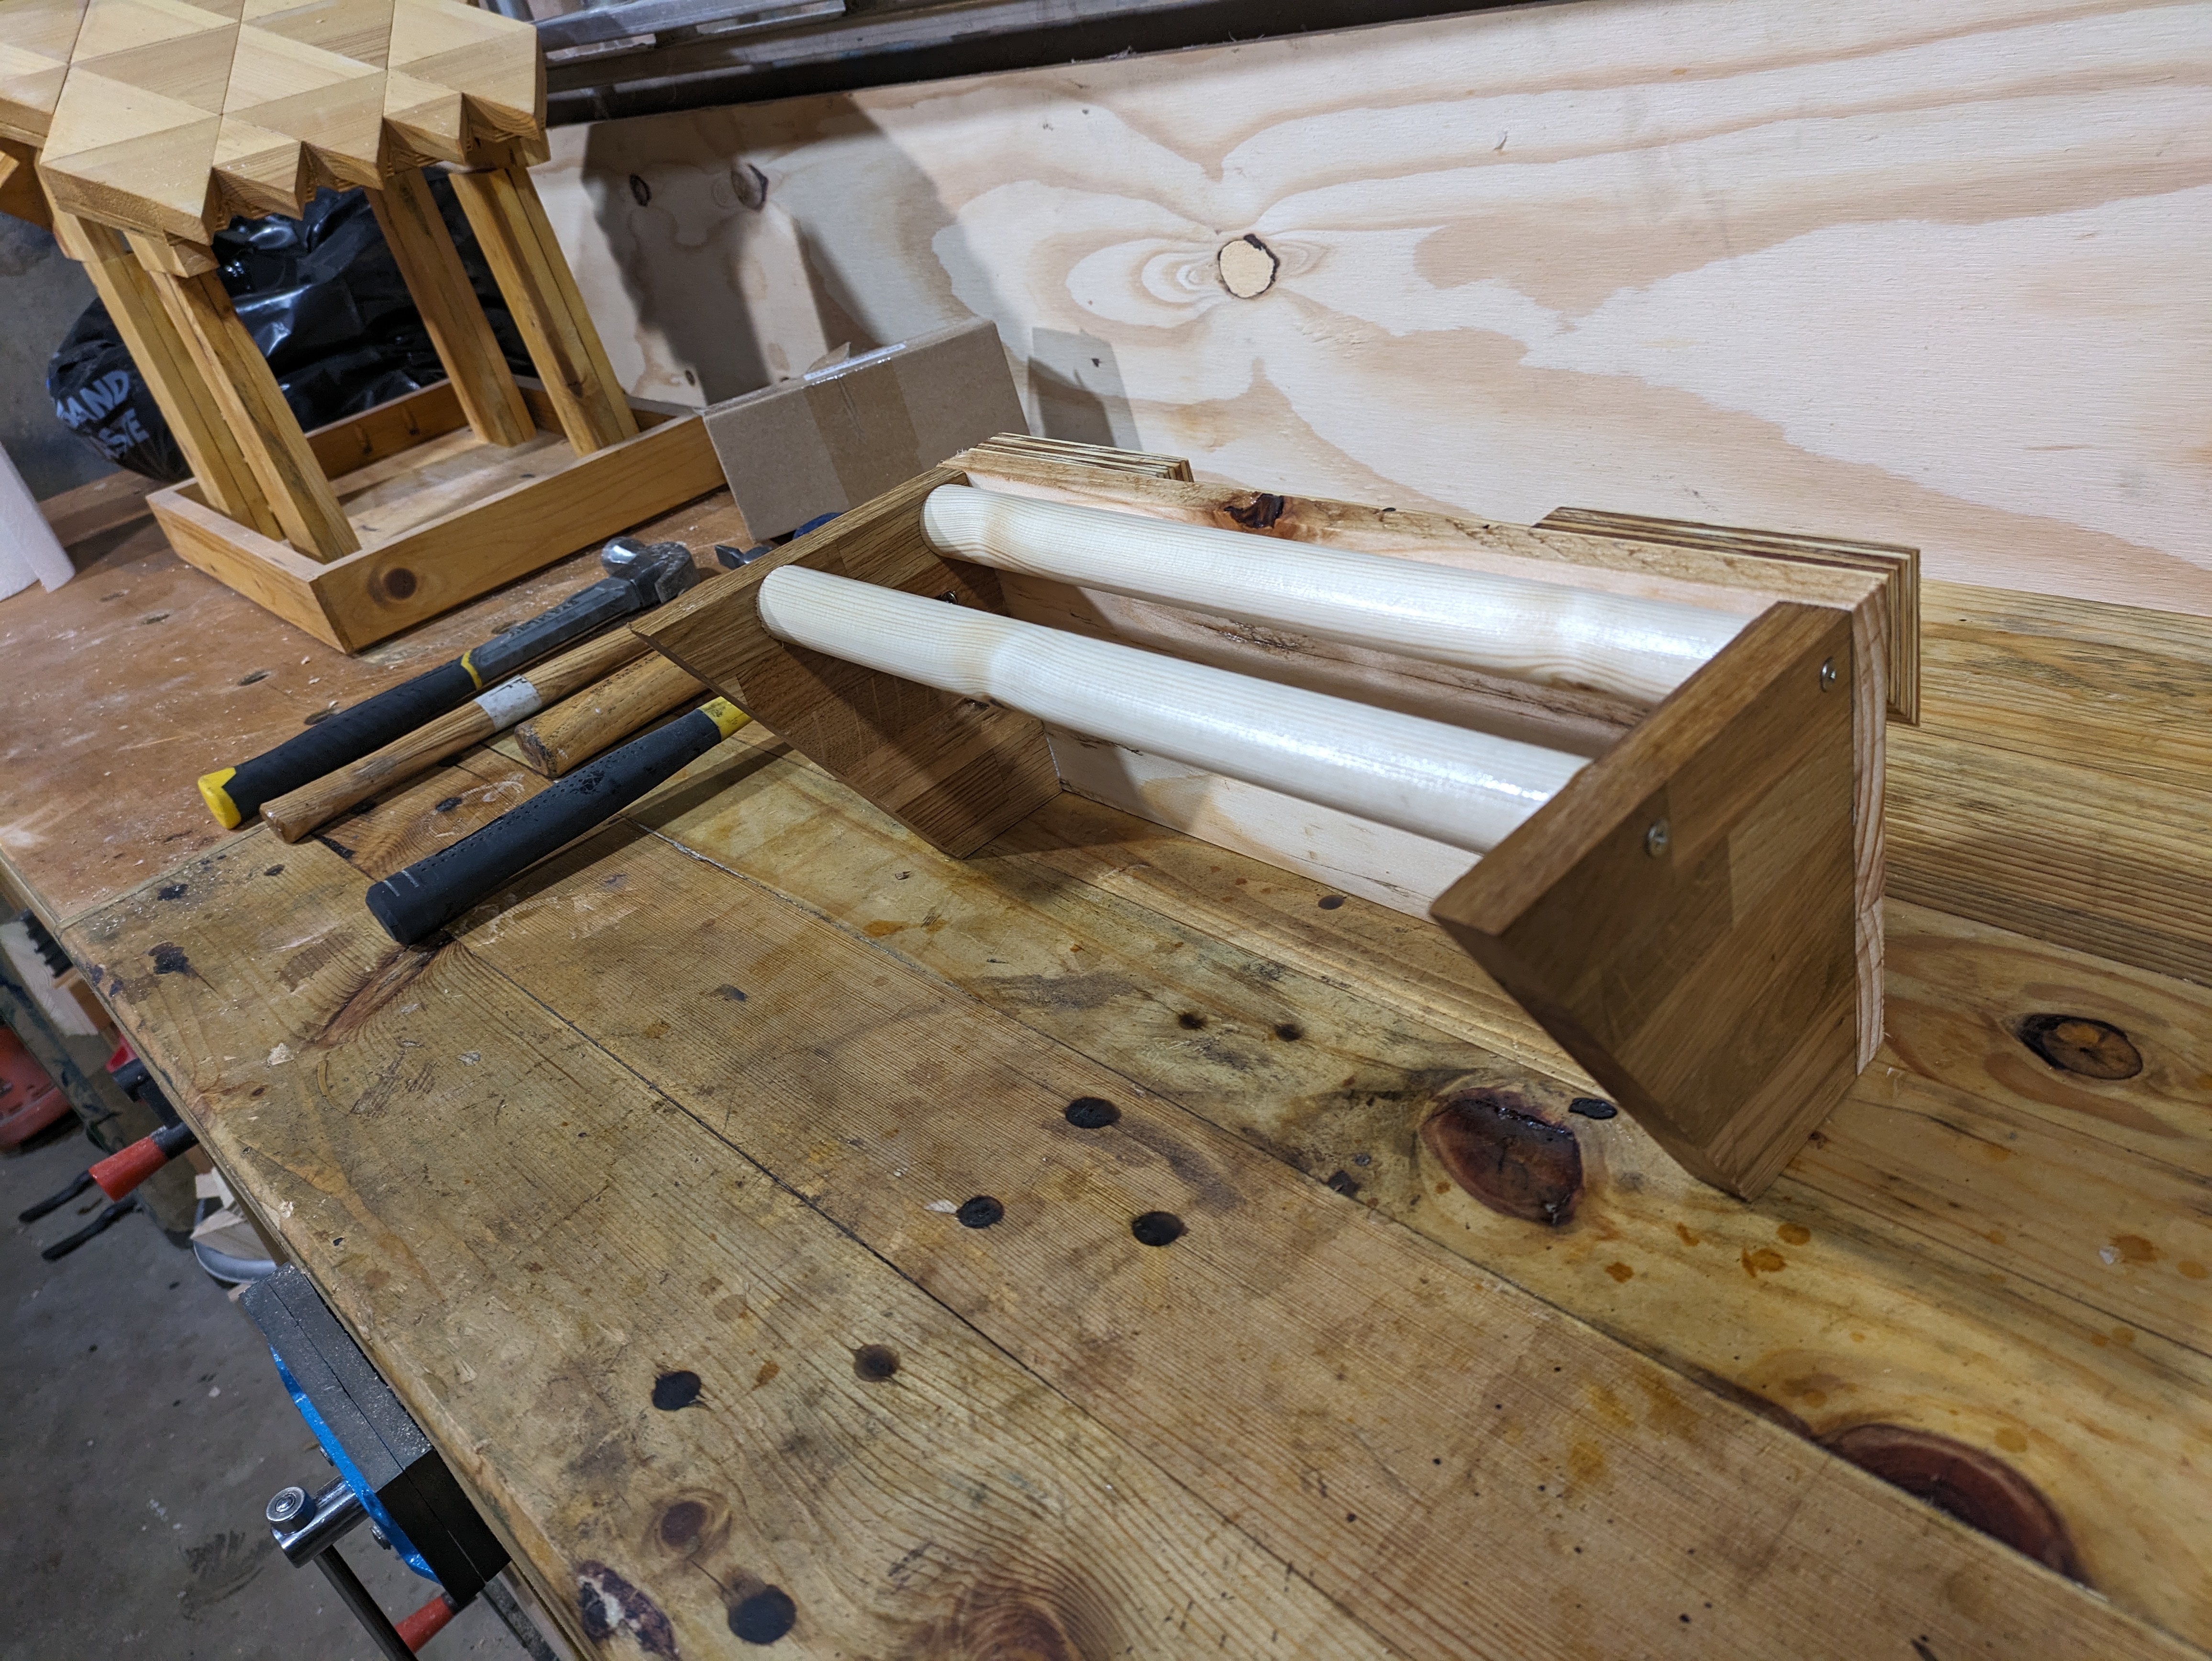
Now onto the tool holders! I really didn’t know how I would go about making the holders so I just typed “french cleat *insert tool* holder” into google and attempted to replicate a design. The first tool holder was for the saws, I kept seeing a floating saw holder which looked pretty awesome and could also be used for holding squares. This turned out to be quite involved but was worth the effort for the end result.
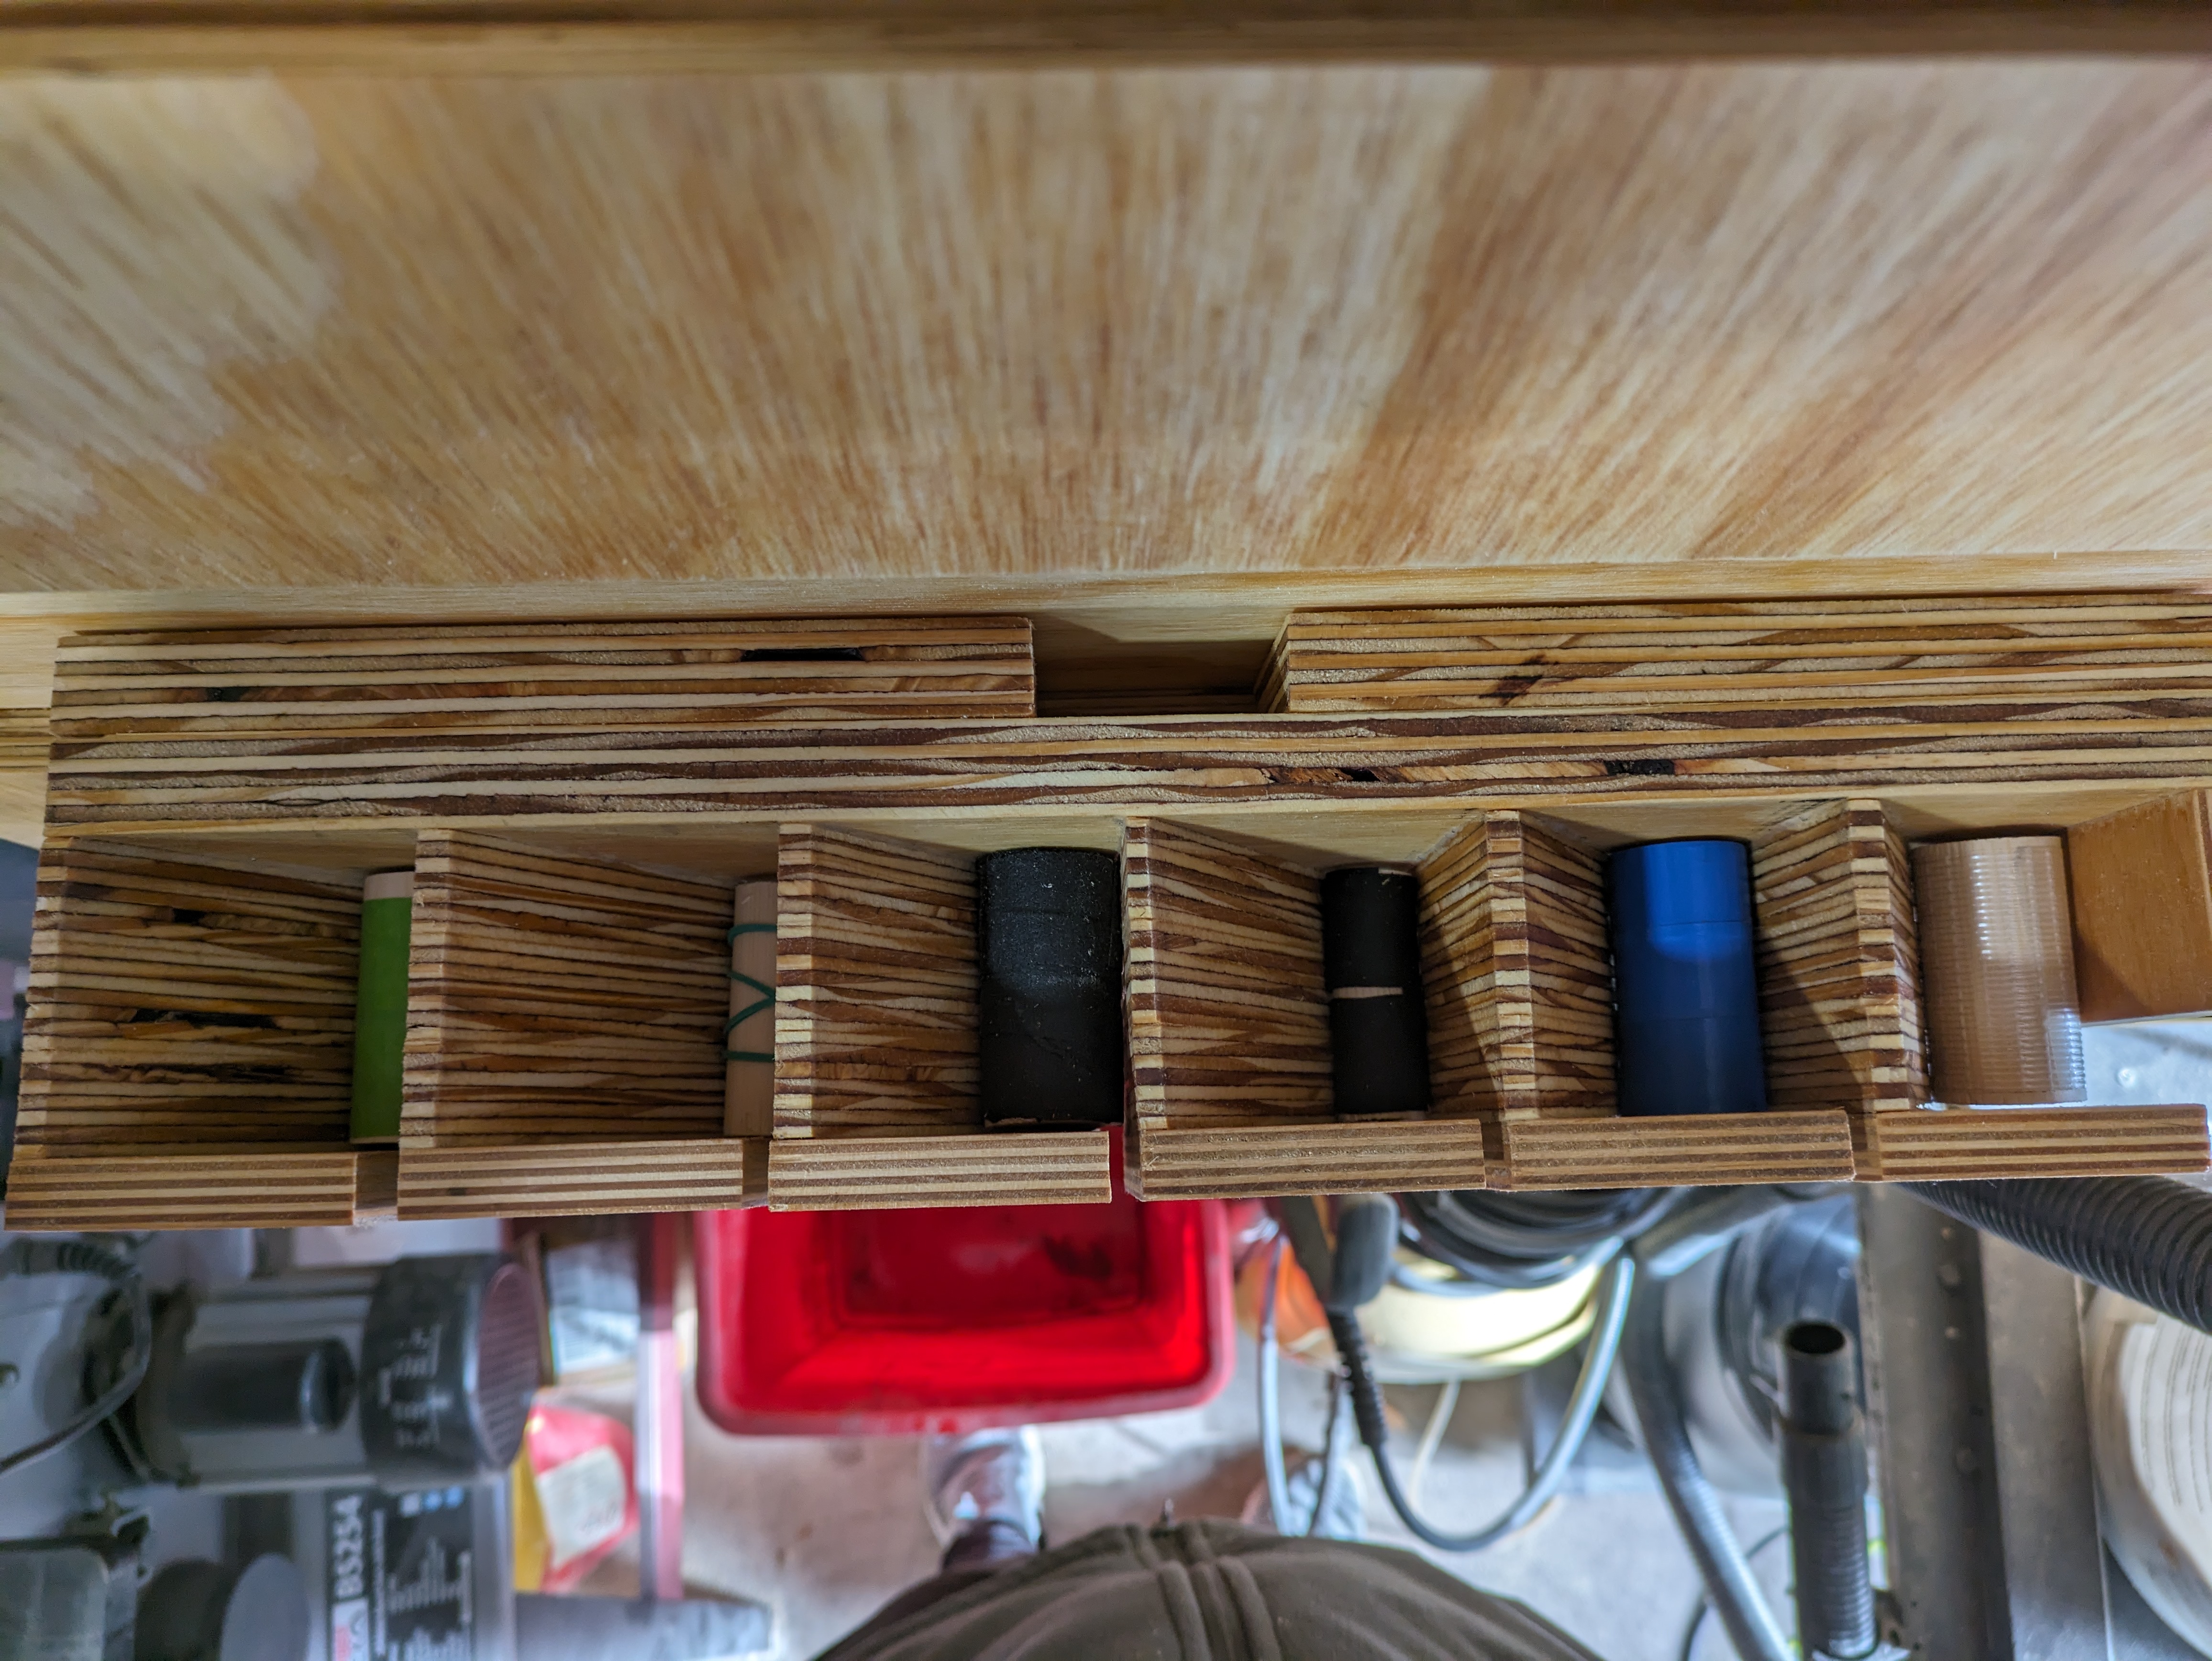
The floating saw holder basically used a bit of dowle in an angled box that locks the saw in place with gravity and friction of the dowle. In theory.
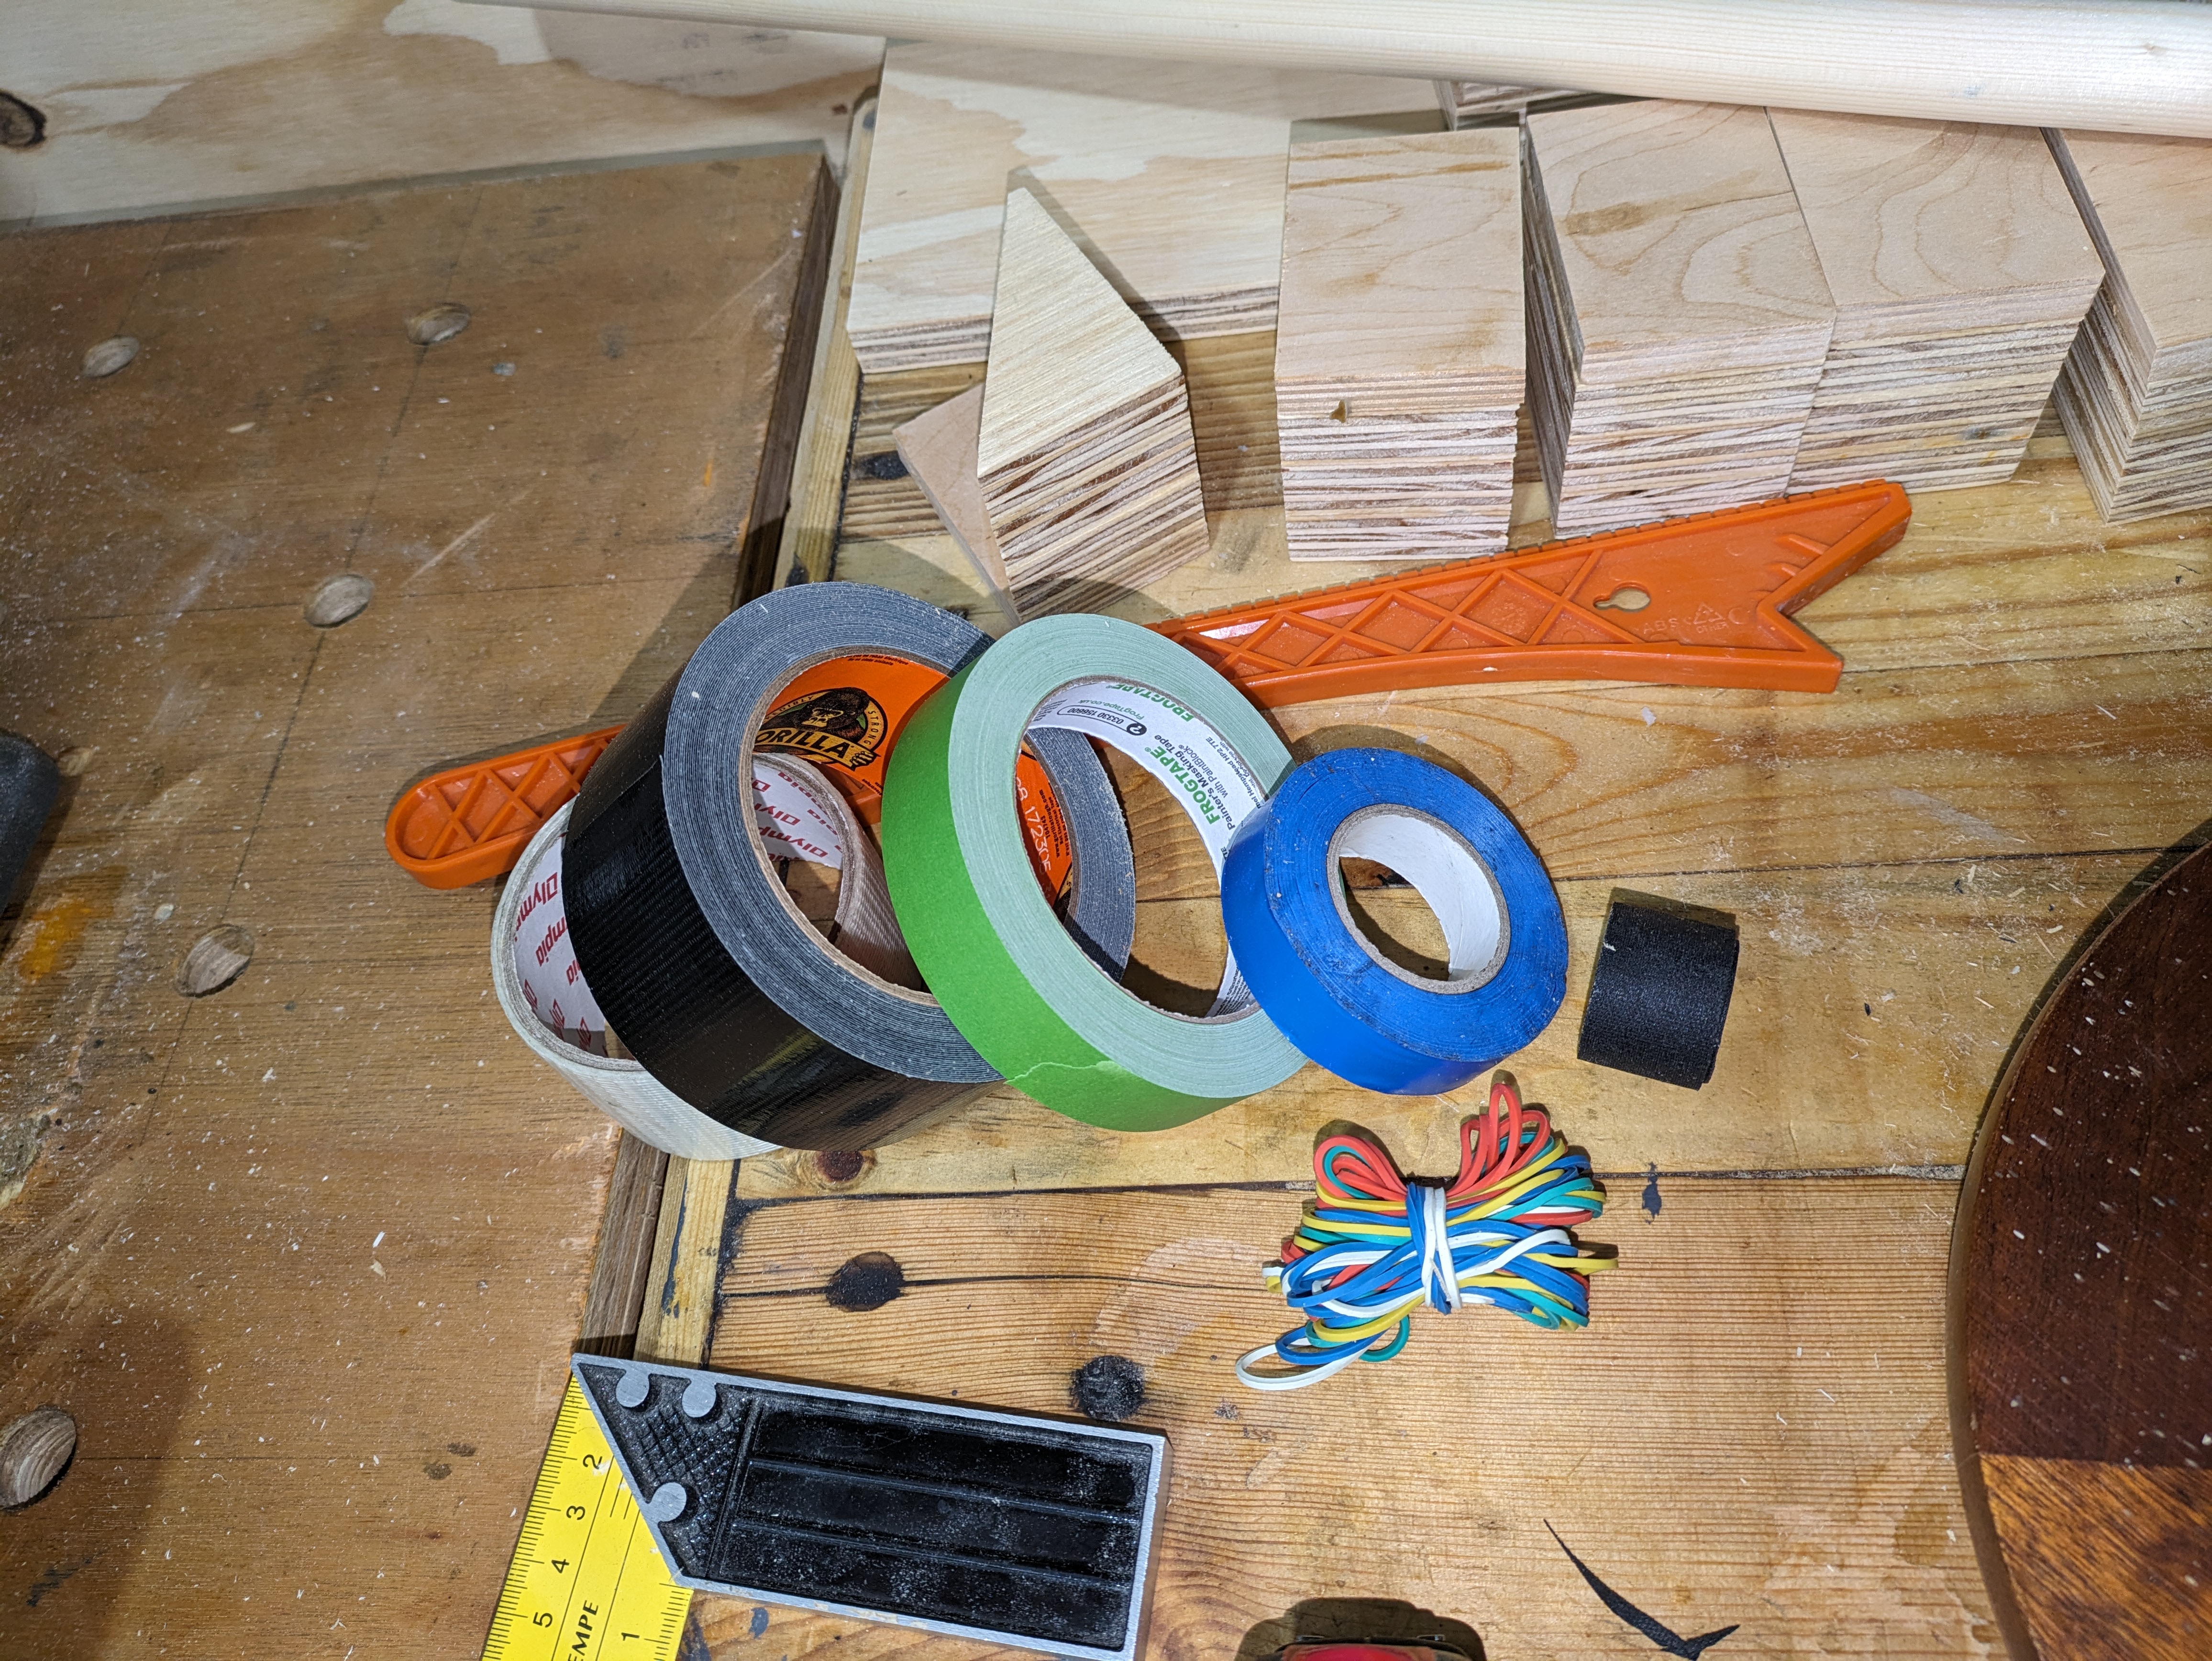
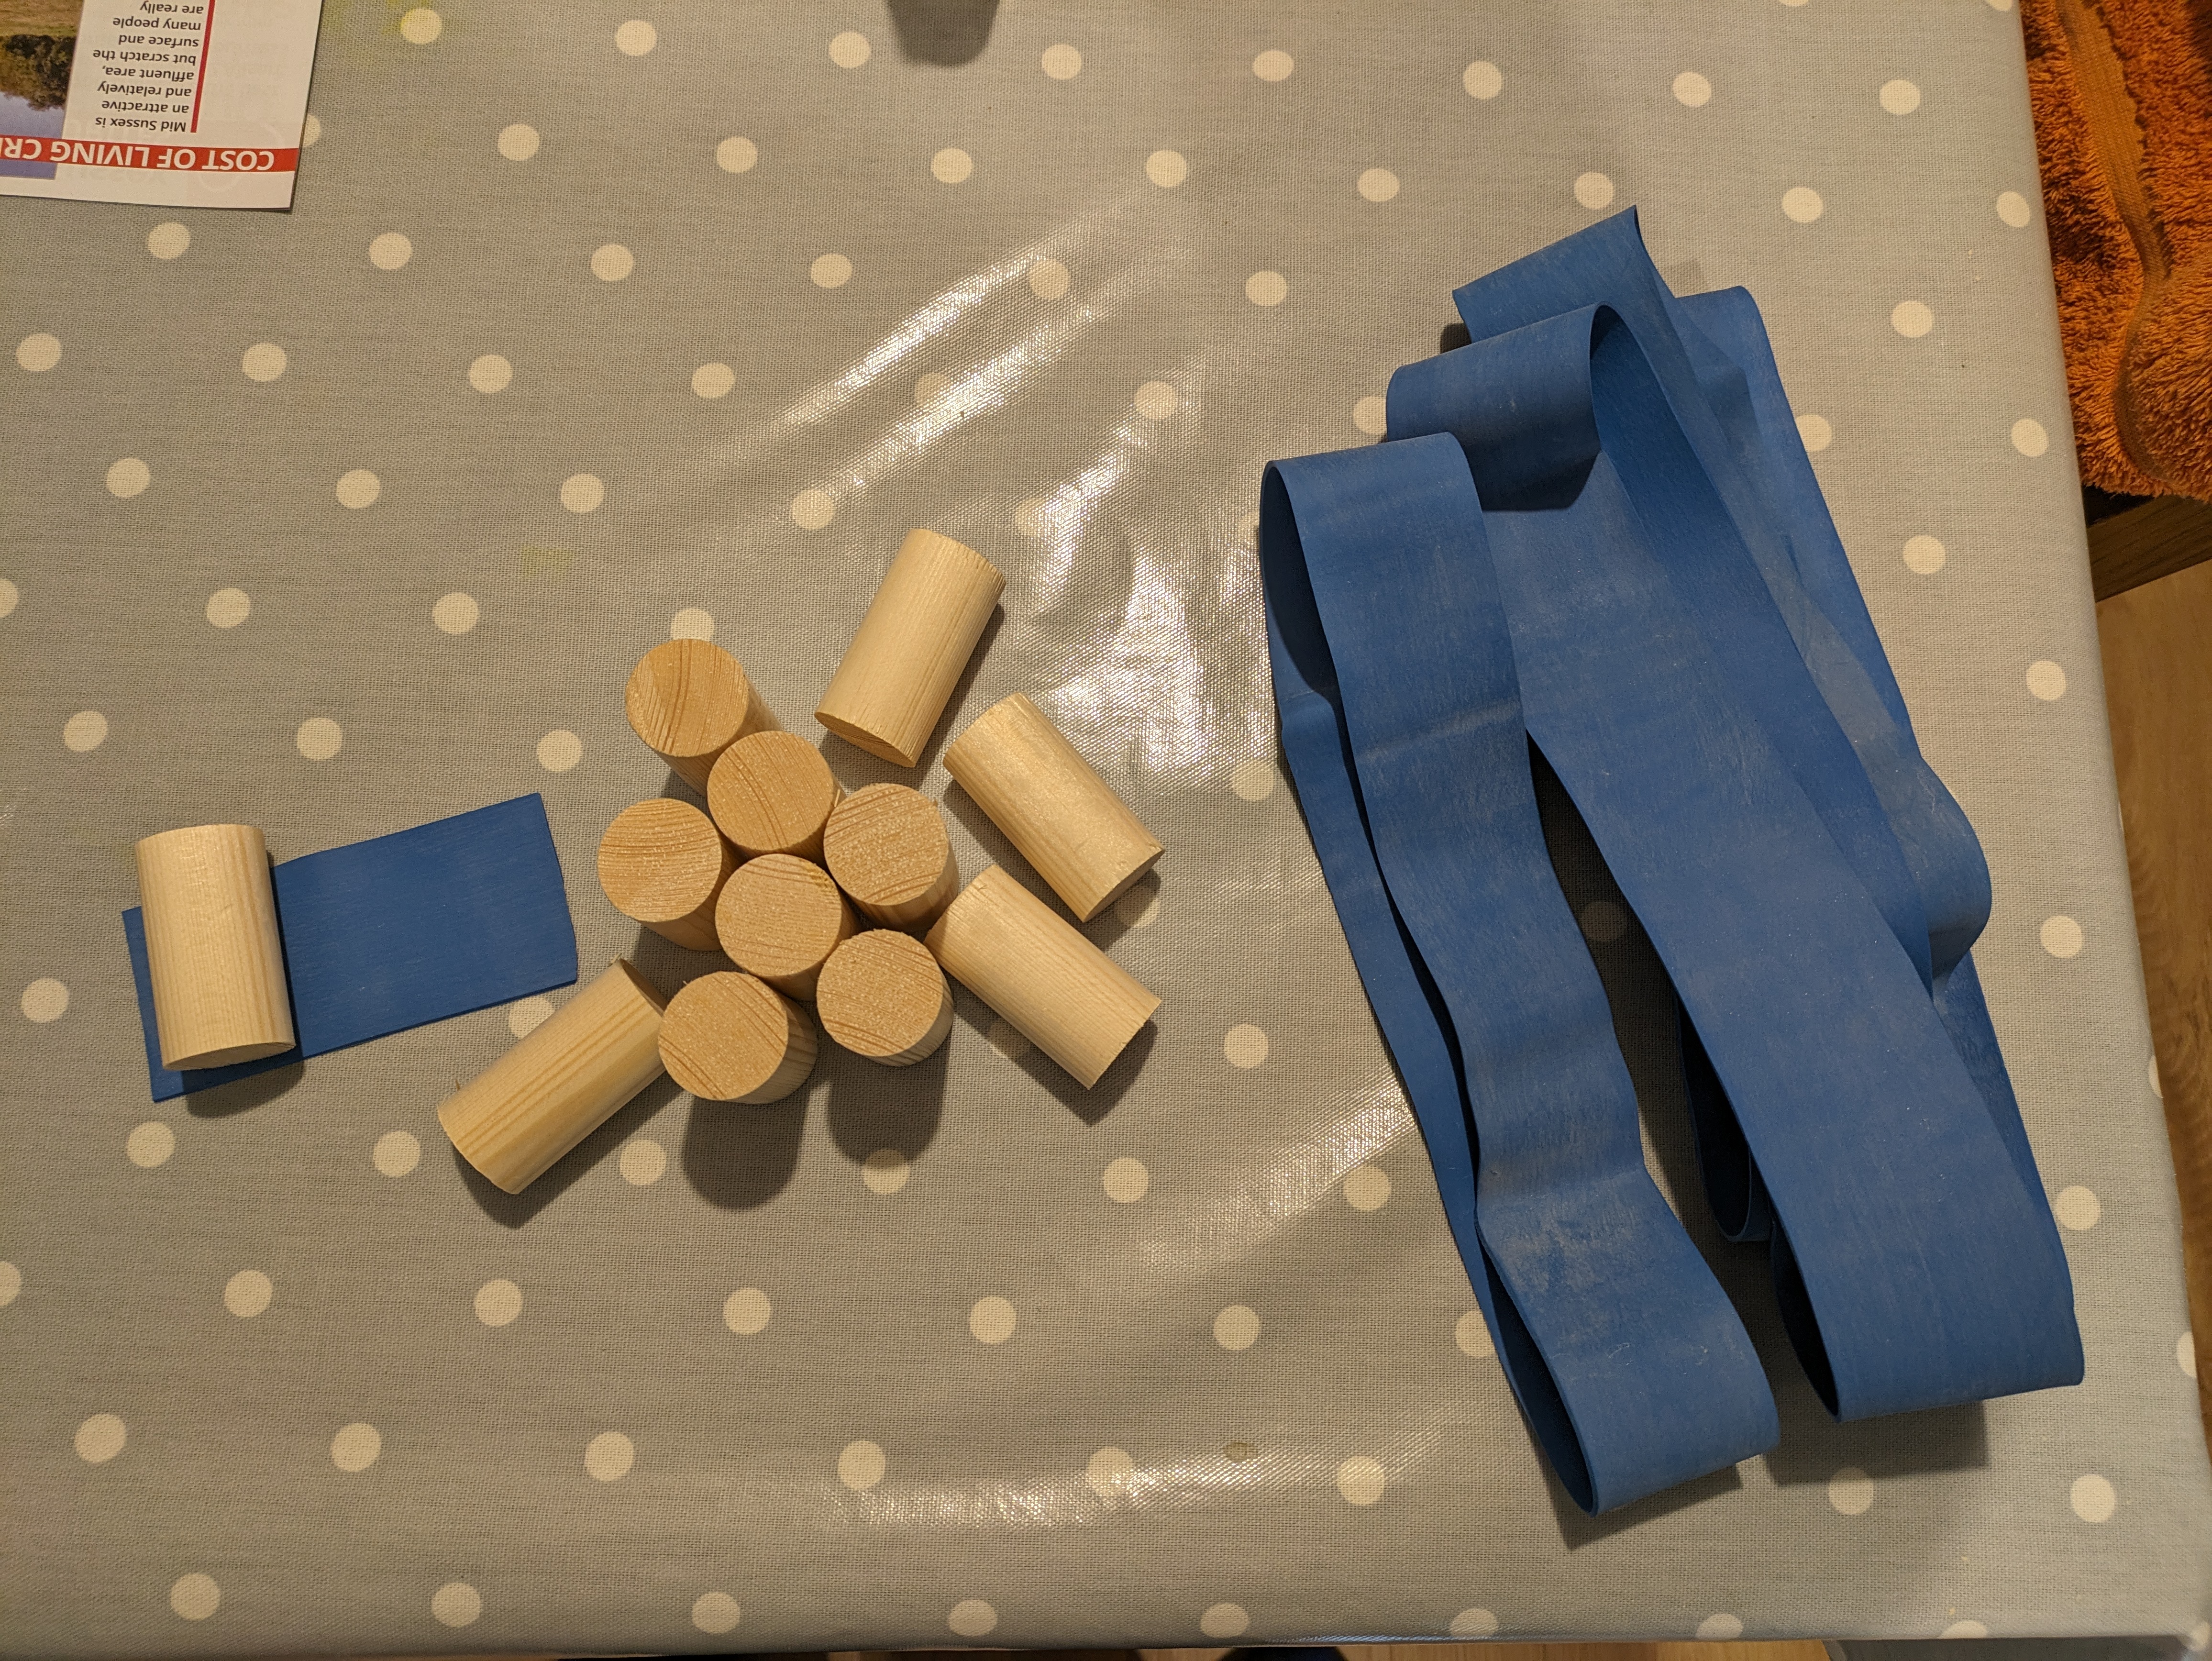
I set about making the boxes and glueing them to a backing board and dropping a dowle the same width of the box into it. This was partially successful, but I found that there was not enough friction on the dowles so I tried adding a bunch of different tapes to the dowels to create more friction. In the end I bought a larger diameter dowel and a massive elastic band and cut it to size to wrap around the dowel. This probably makes no sense but the pictures really explain it better that I could!

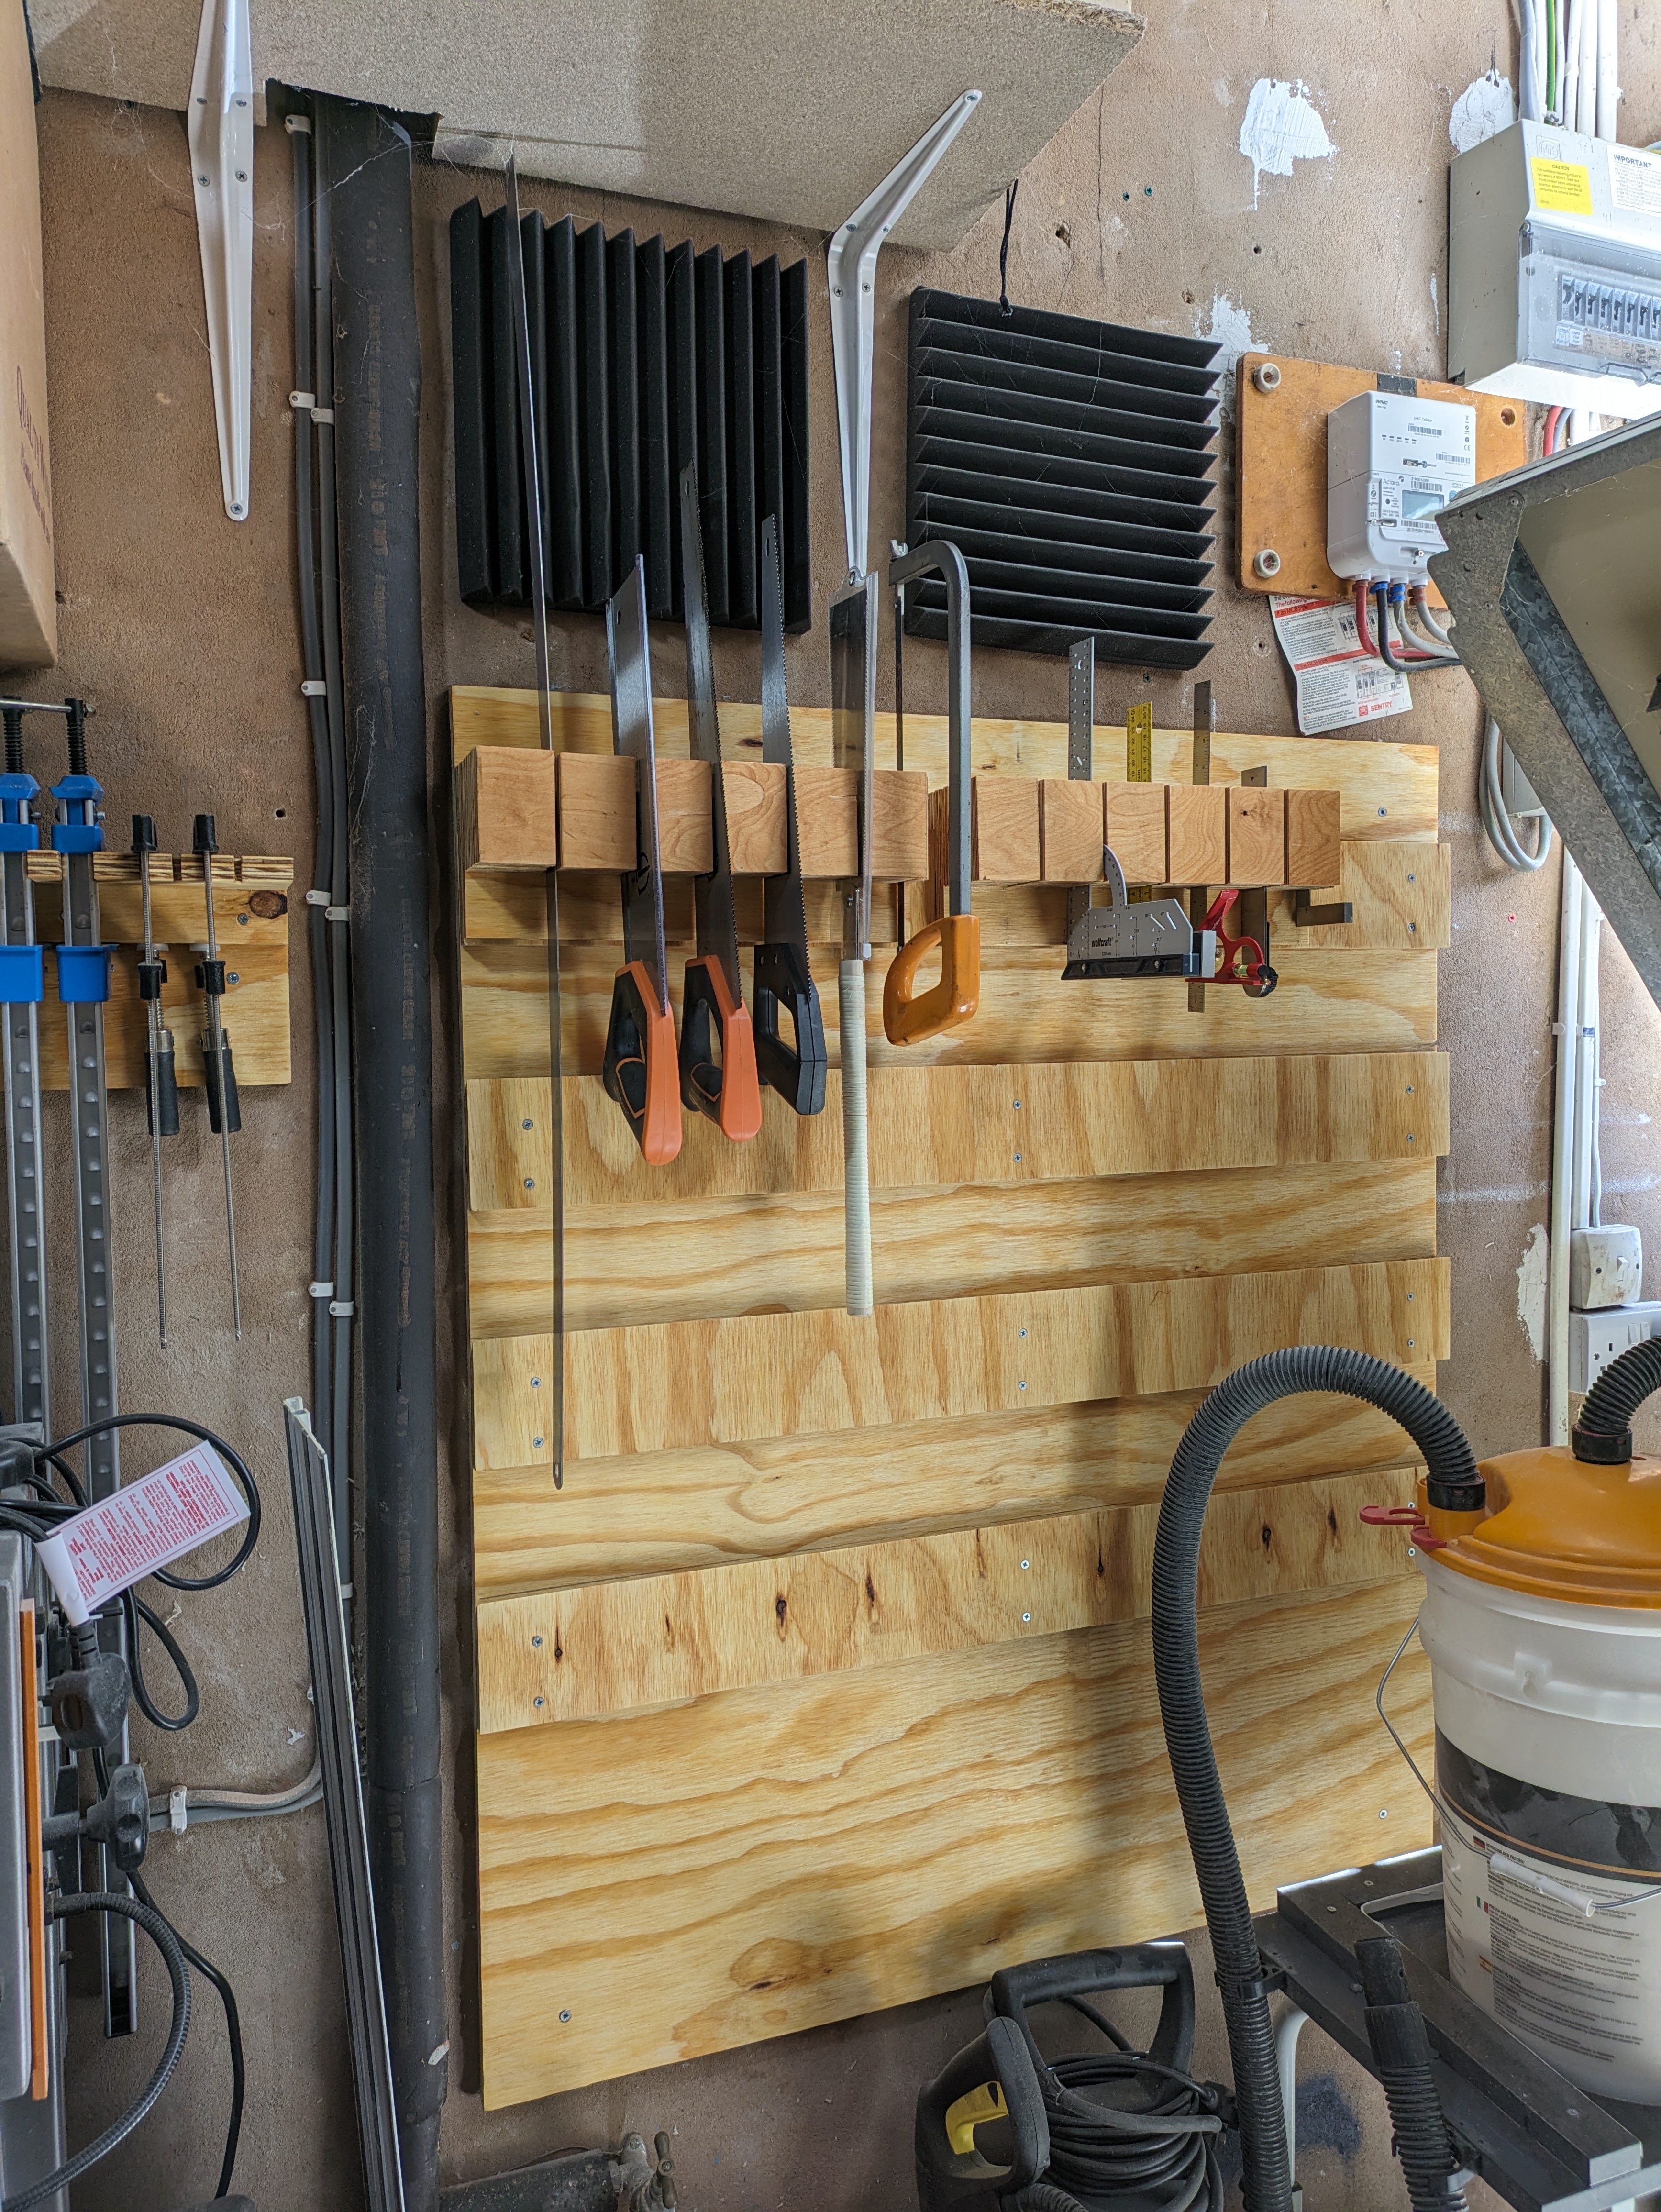

The next tool holders were made in fairly quick succession. I already had a screwdriver holder on the workbench so I slapped a 45 degree rail on the back and stuck it straight on the wall.
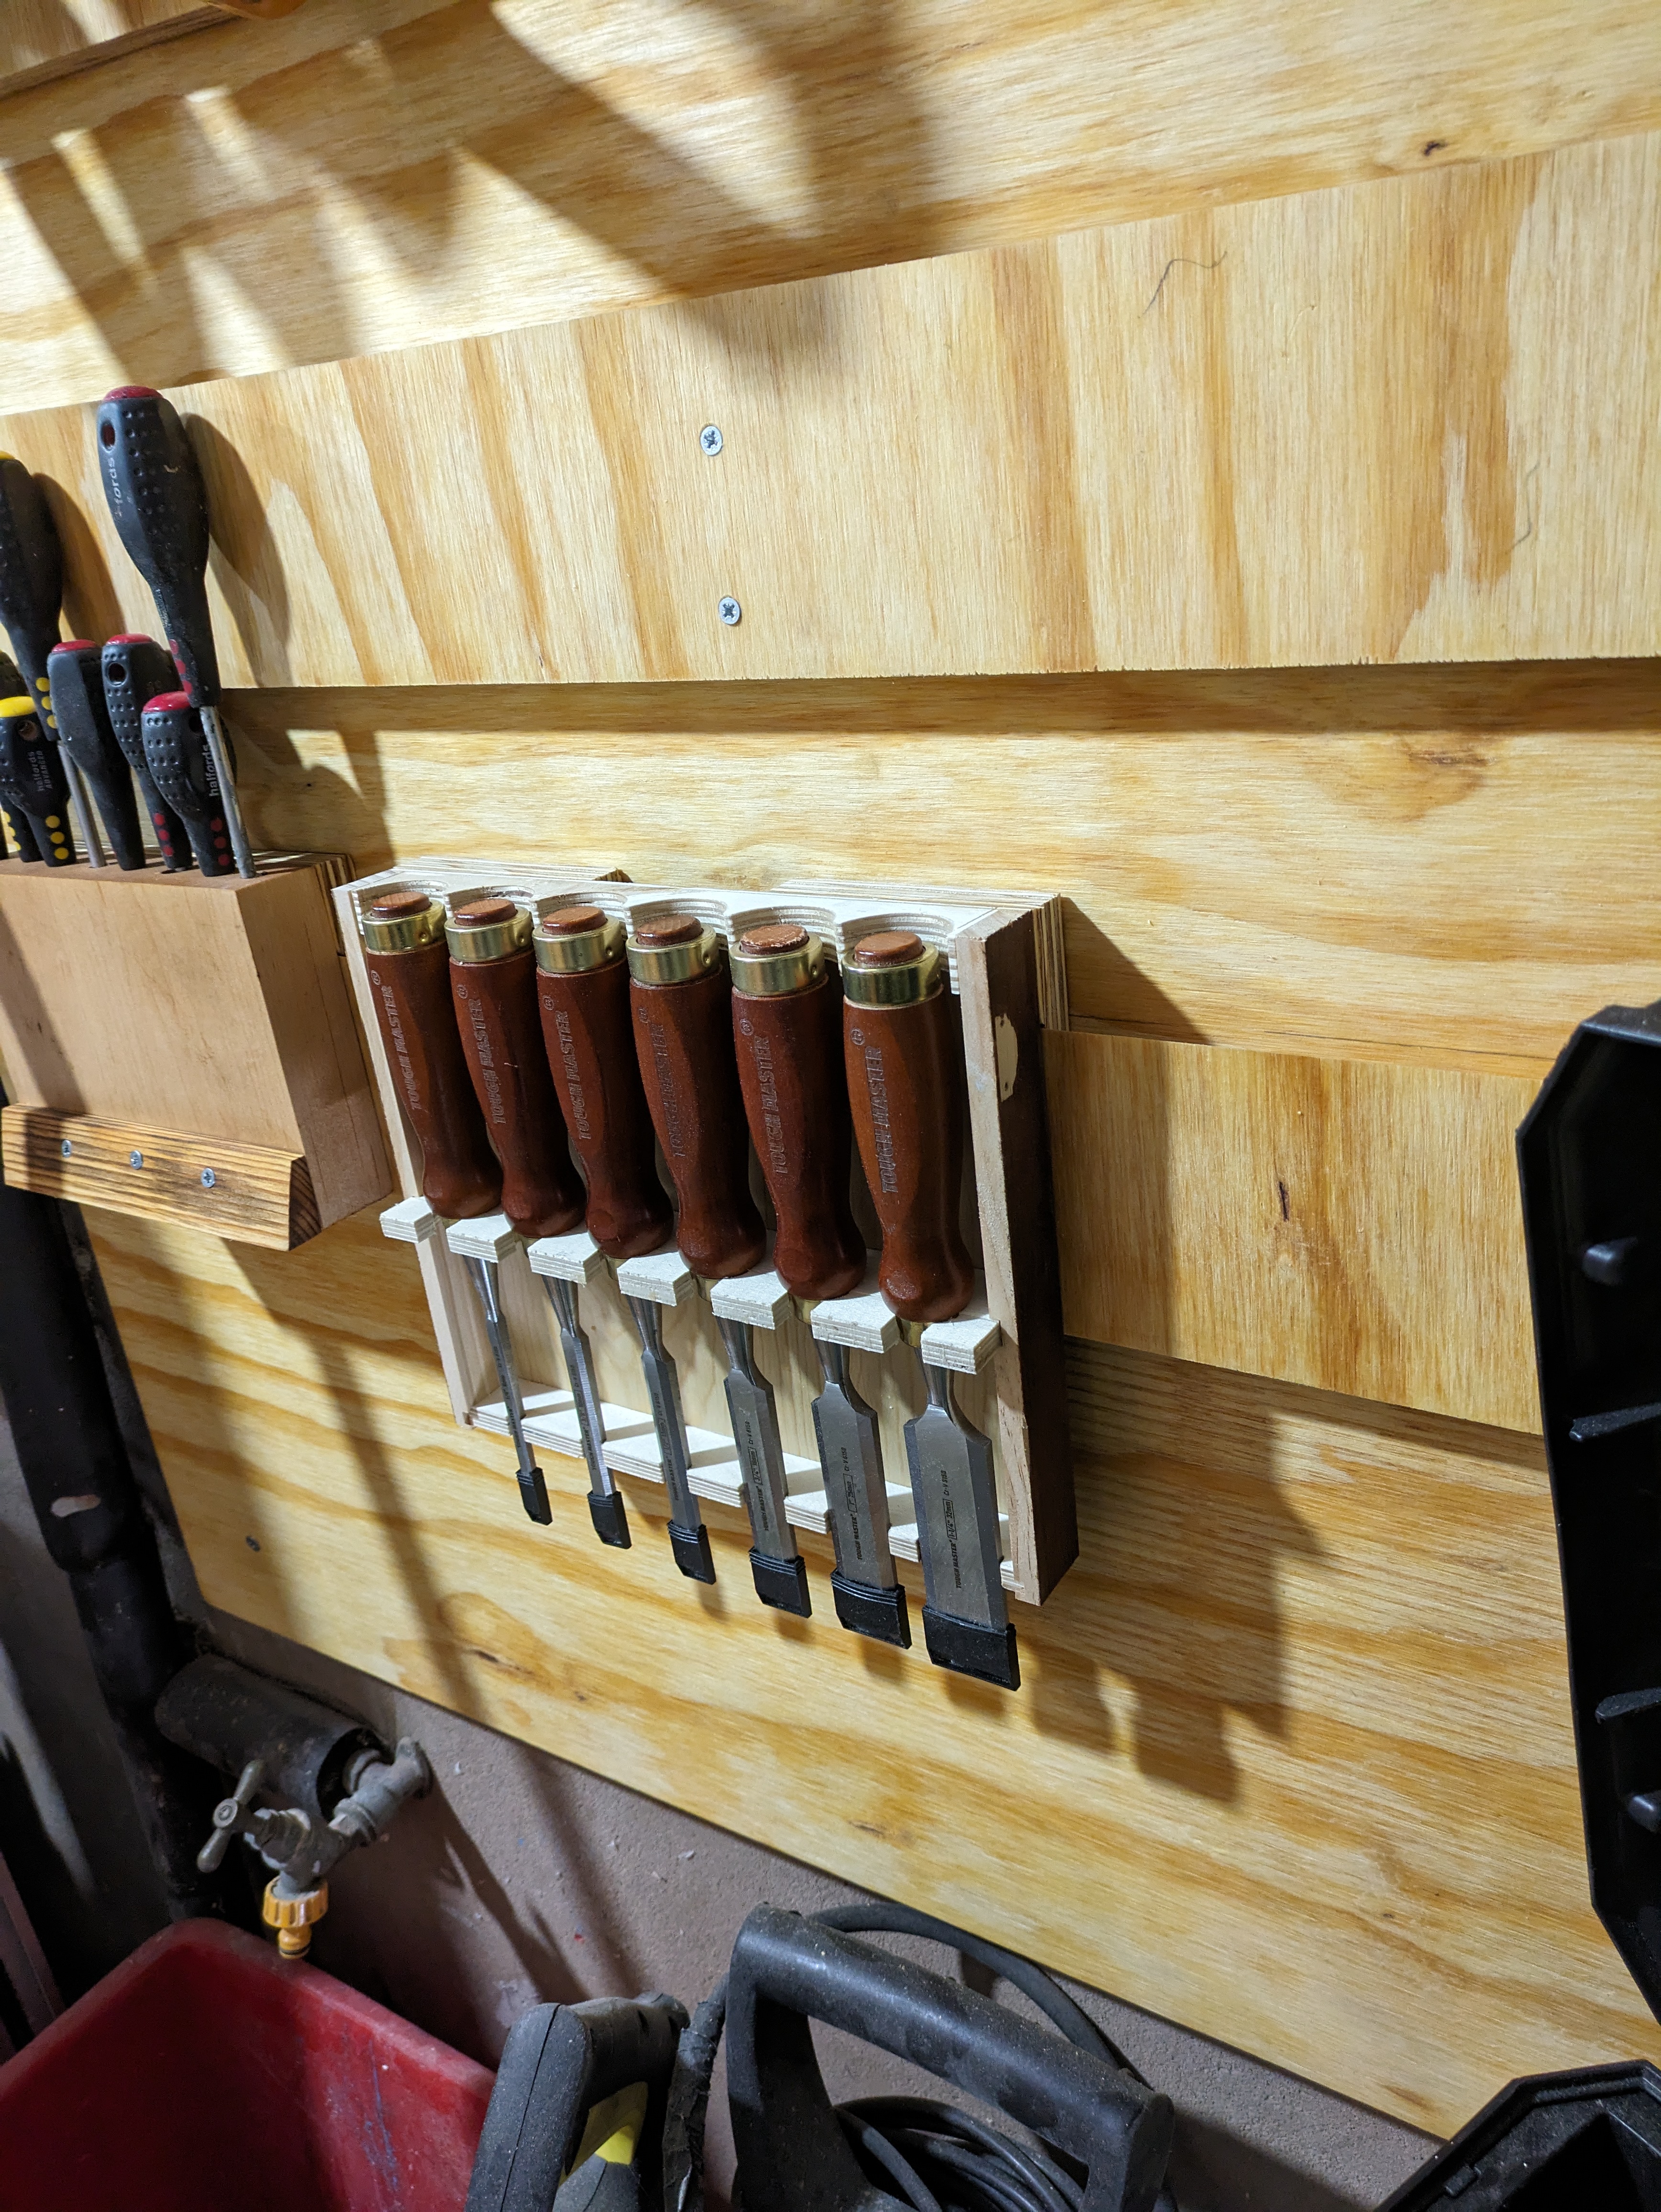
Then I used my chisel box to make a quick tool holder by taking the lid off and adding a collar to it to hold the chisels in place the slapping a 45 degree rail on the back.
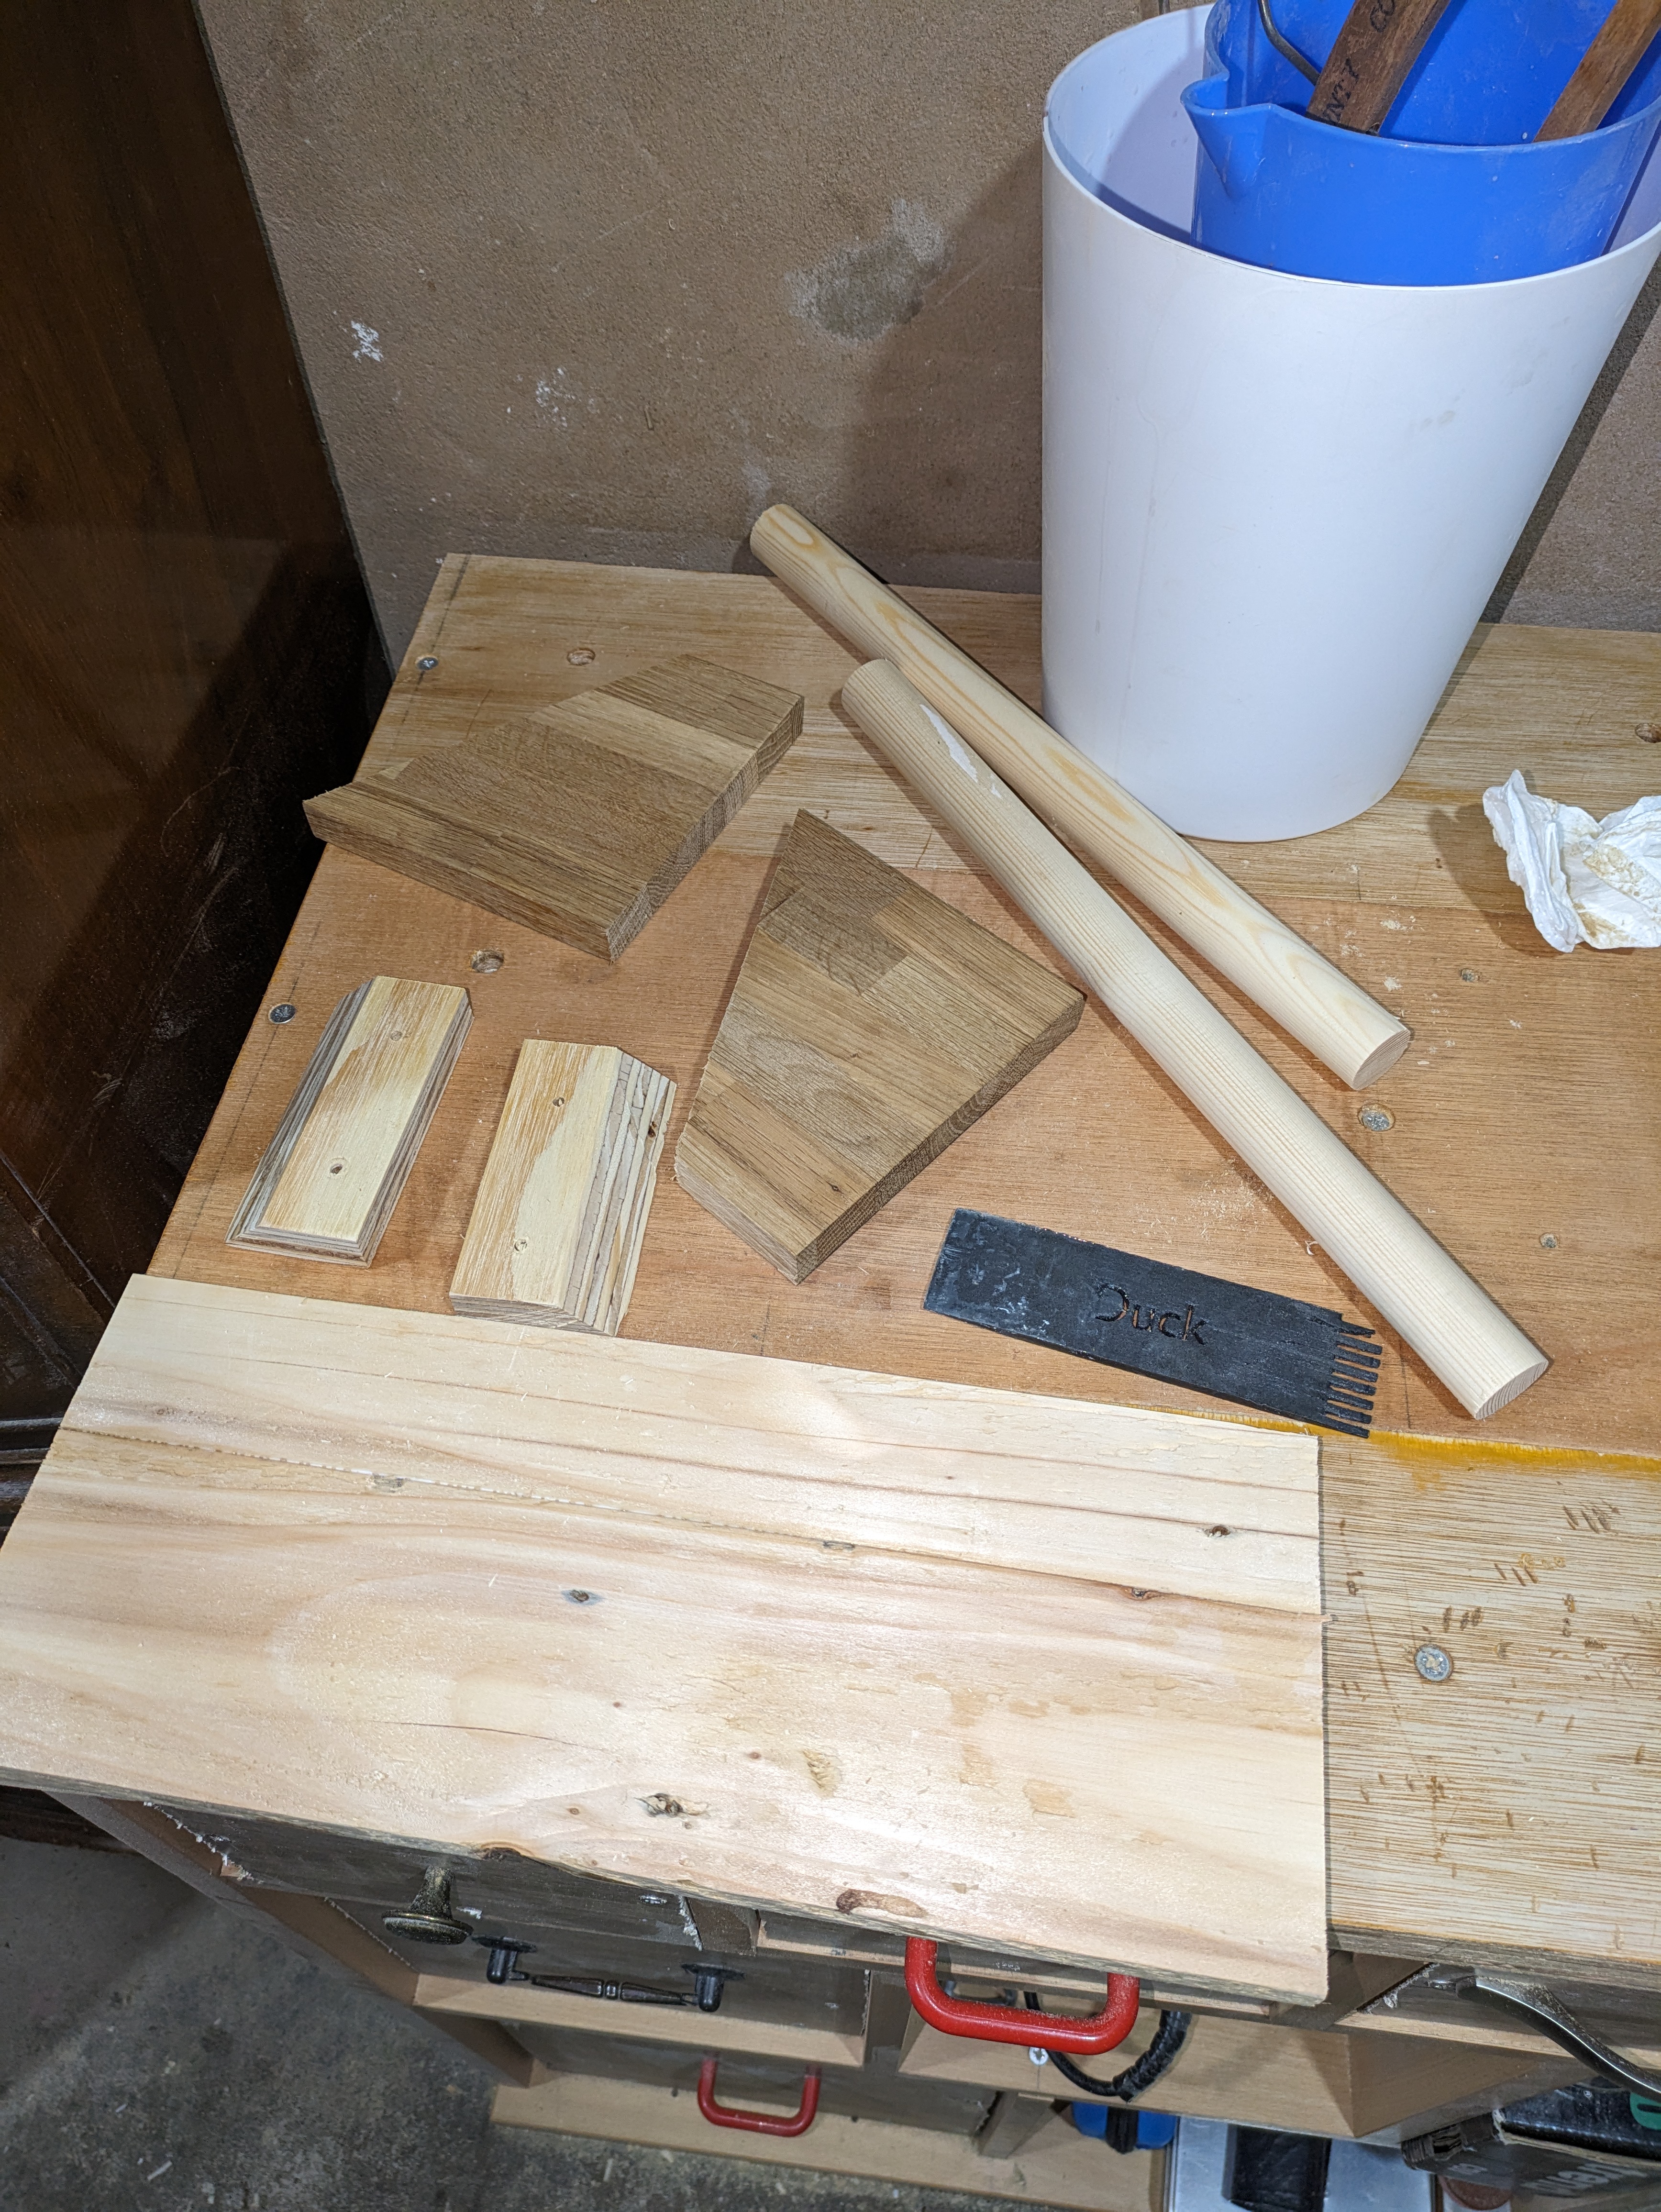
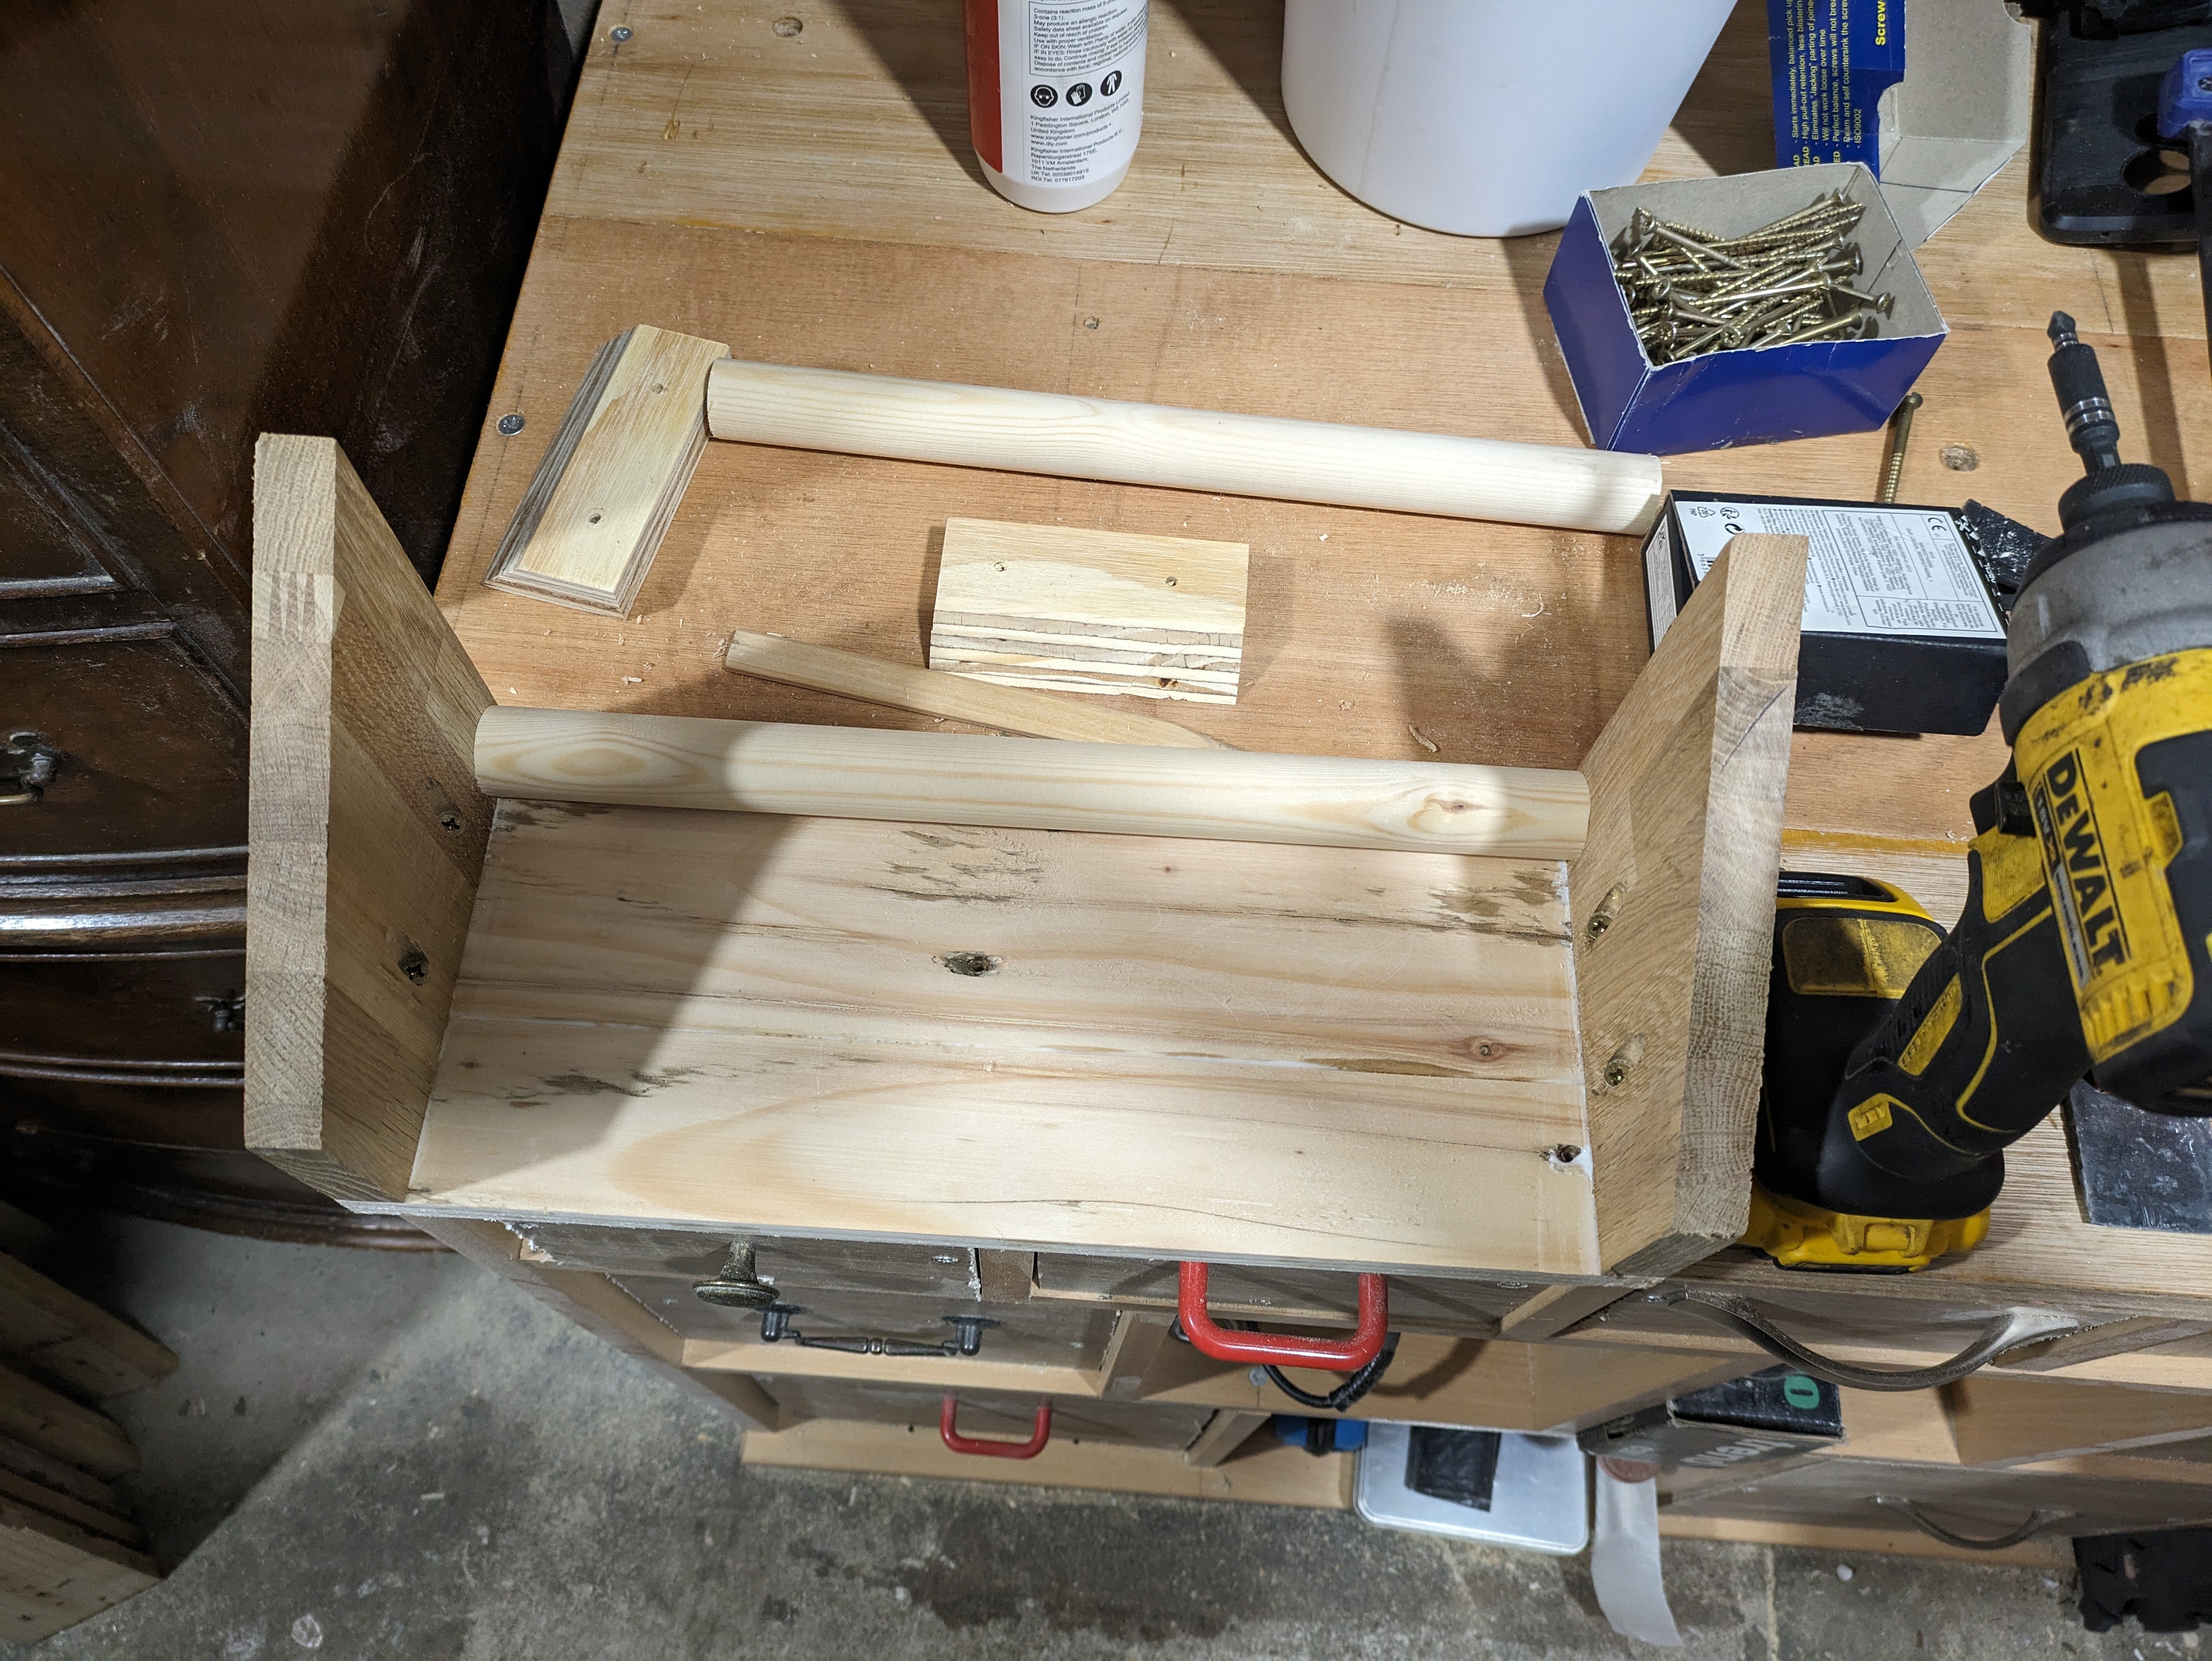
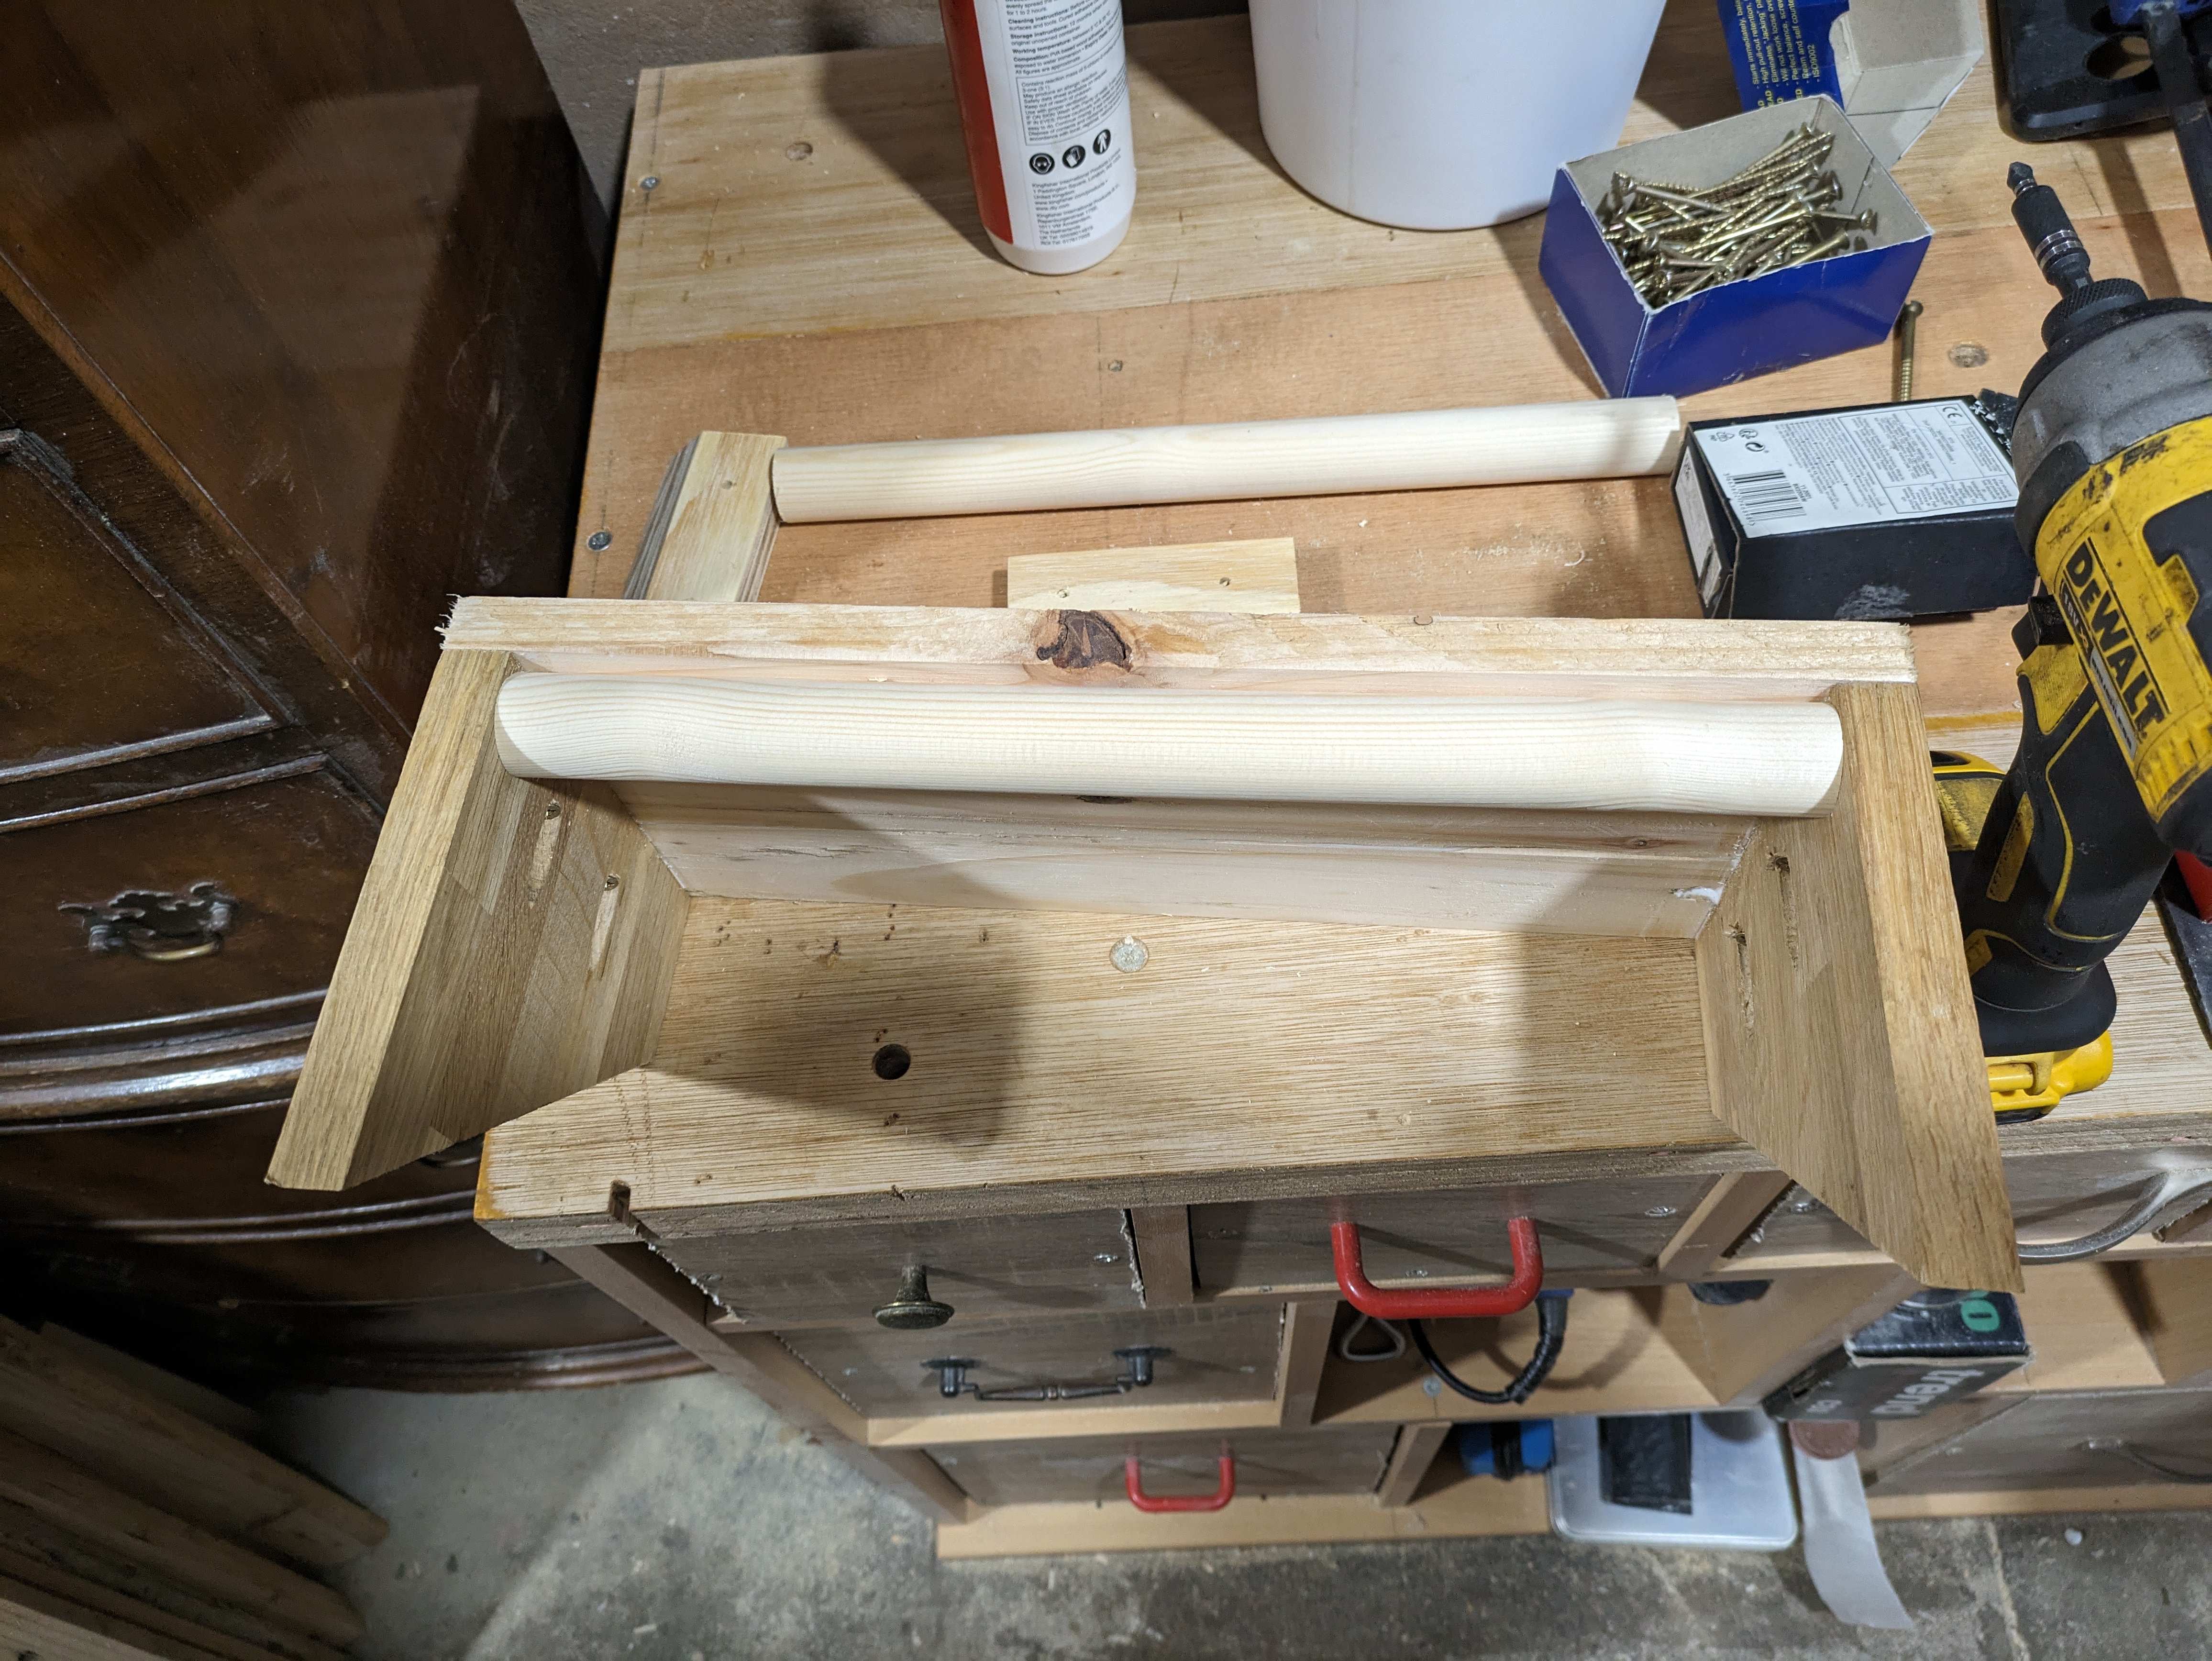
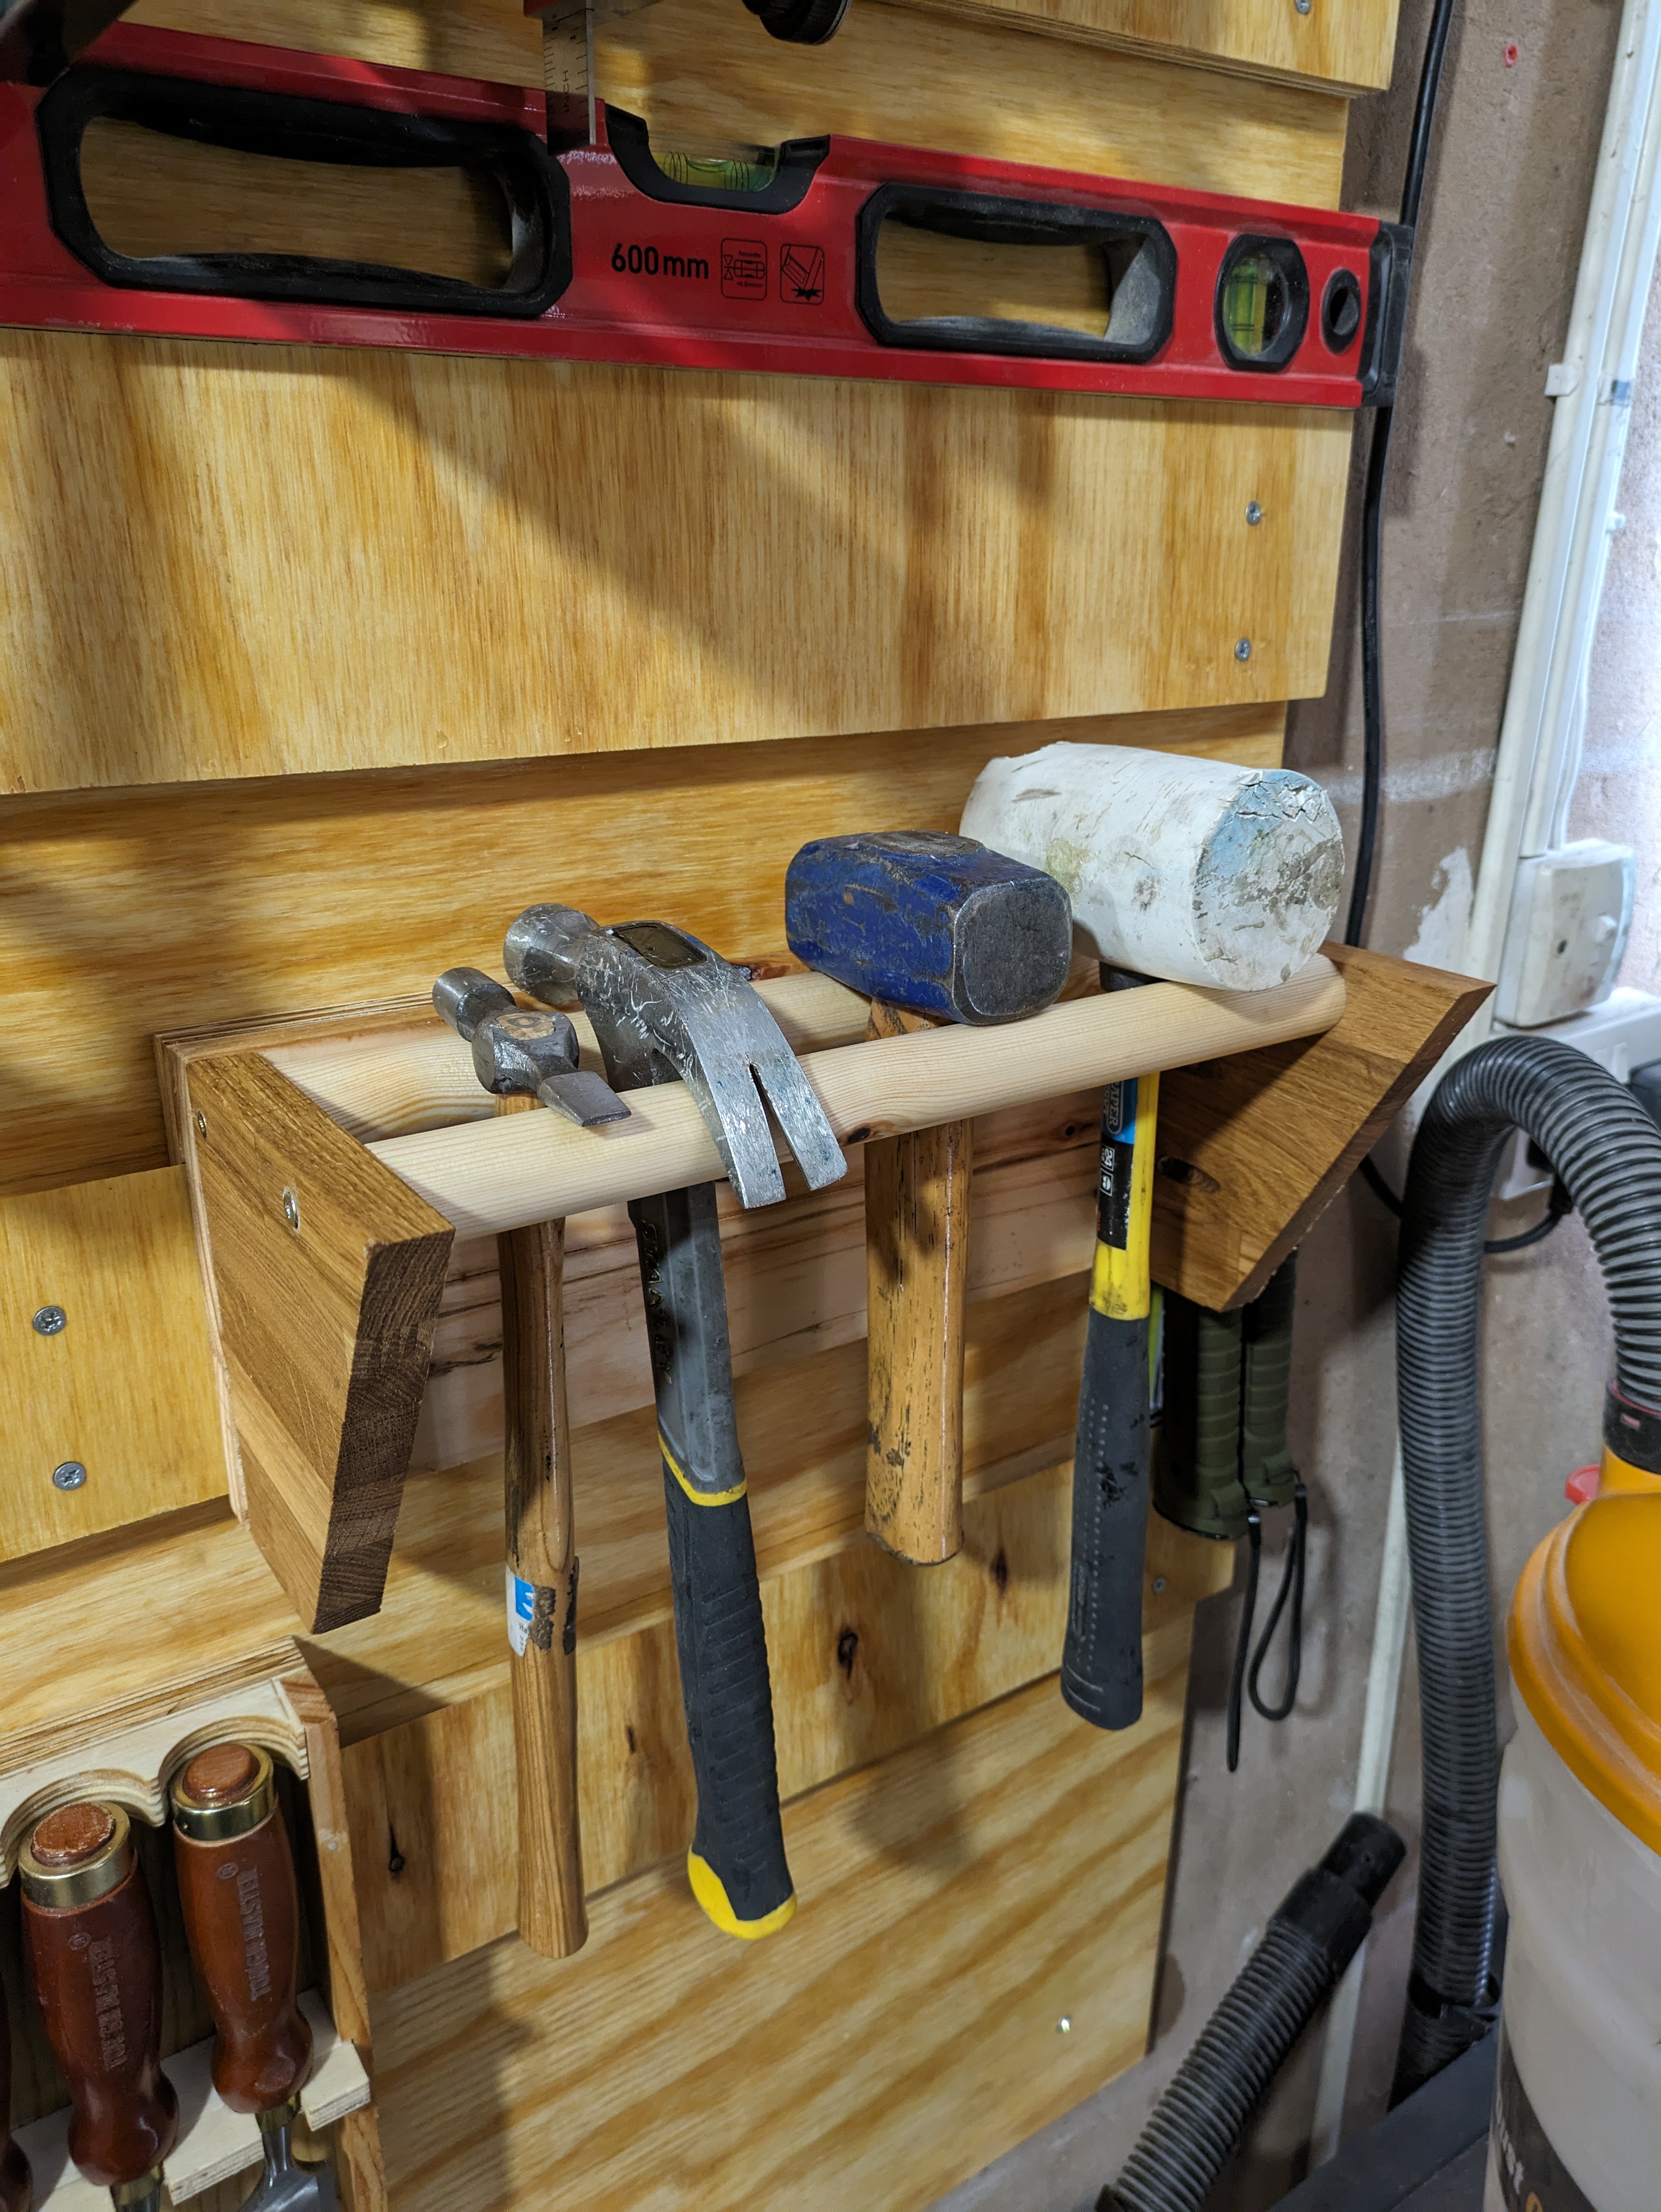
Lastly I made a hammer holder which was made from 3 different off-cuts from various projects. A simple holder with two uncut dowels screwed into an angled back plate. Then the hammer simply slot between the dowels.
All in all it was pretty fun project and it’s made the workshop an easier place to navigate and looks a little more workshopy! There still space for some other tools to go up on the wall and may replicate something similar this down the other end of the garage at some point.

Before 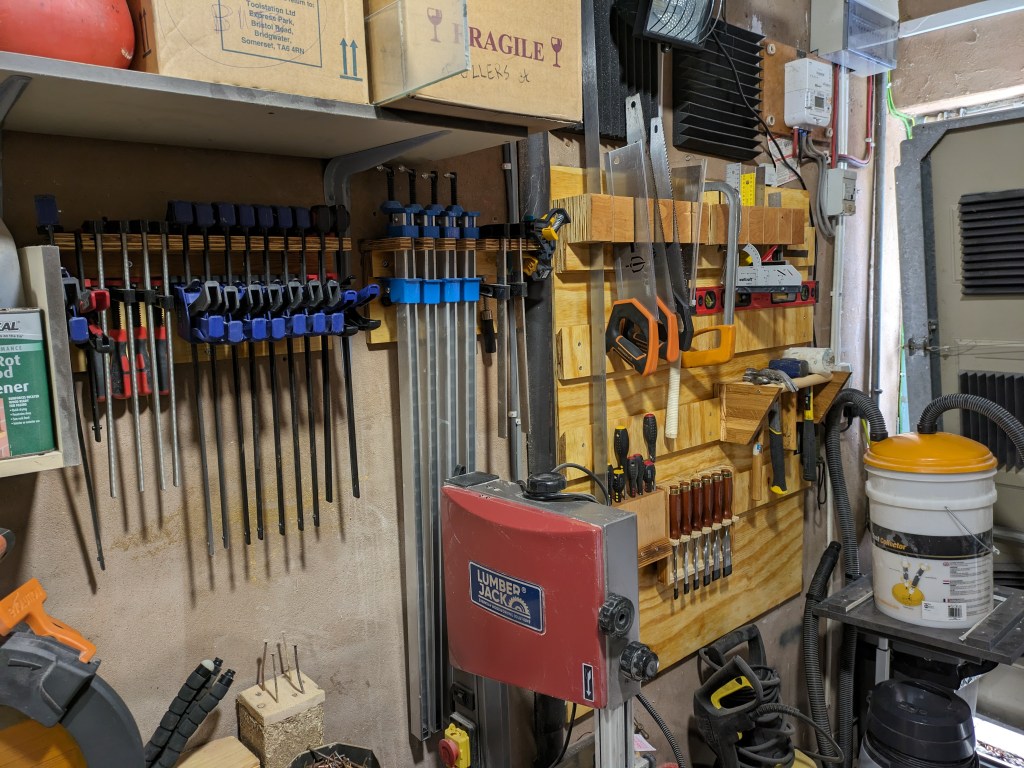
After! -
Mistake table, Mistable, Les Misértables. Part 2
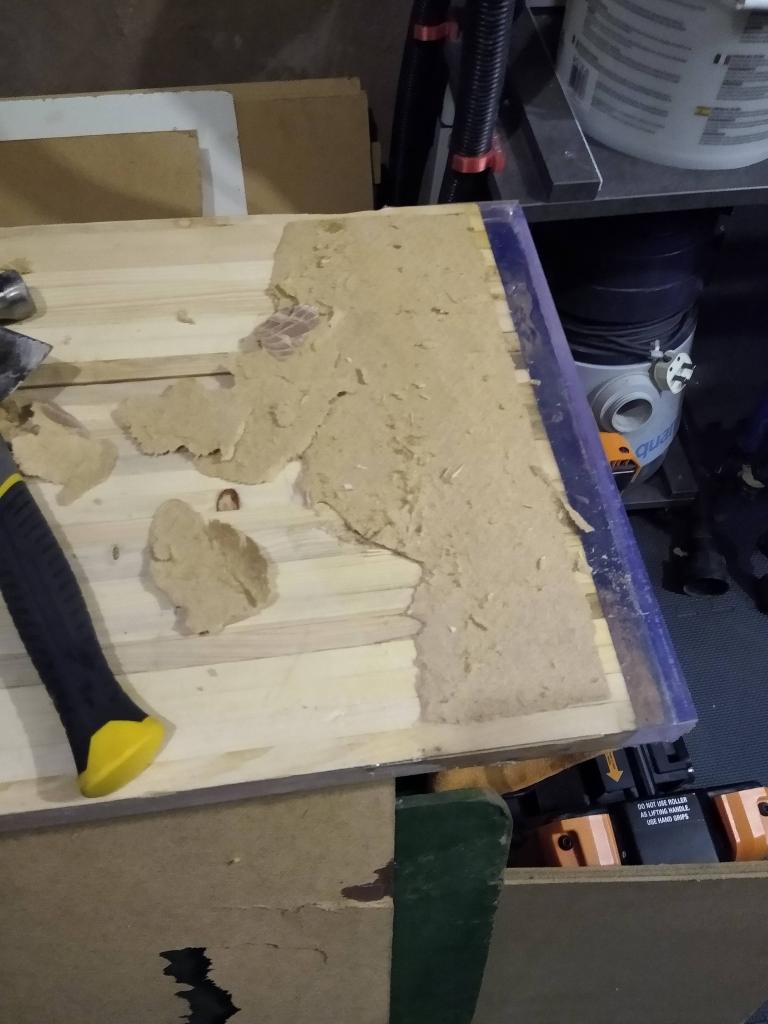
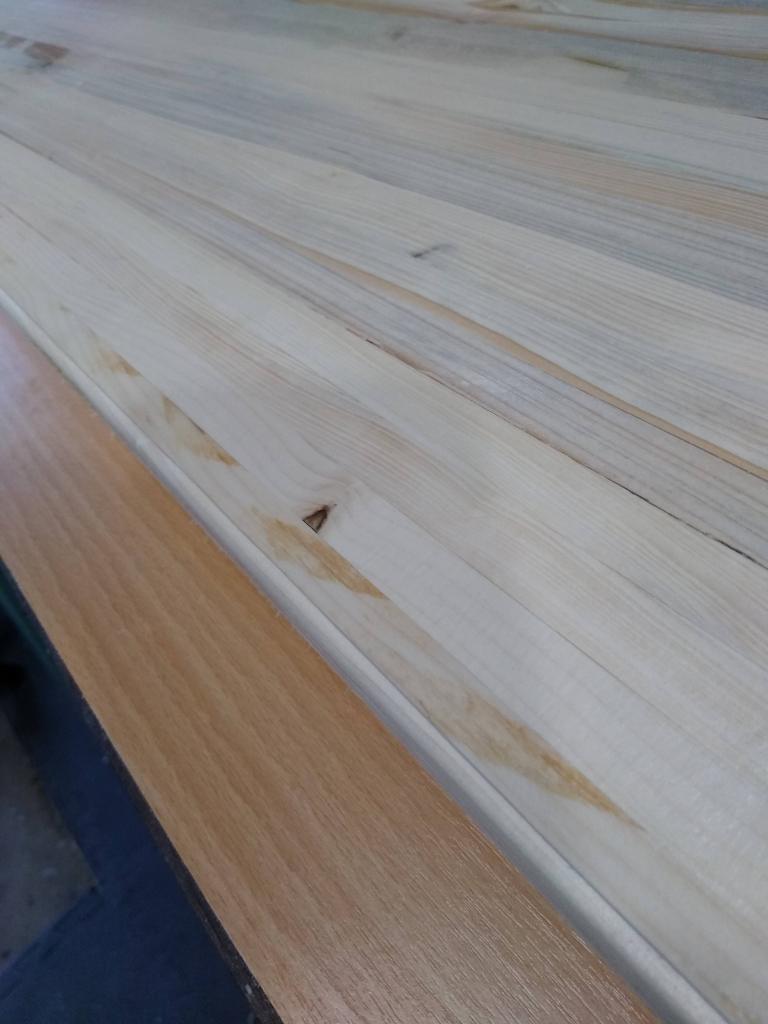
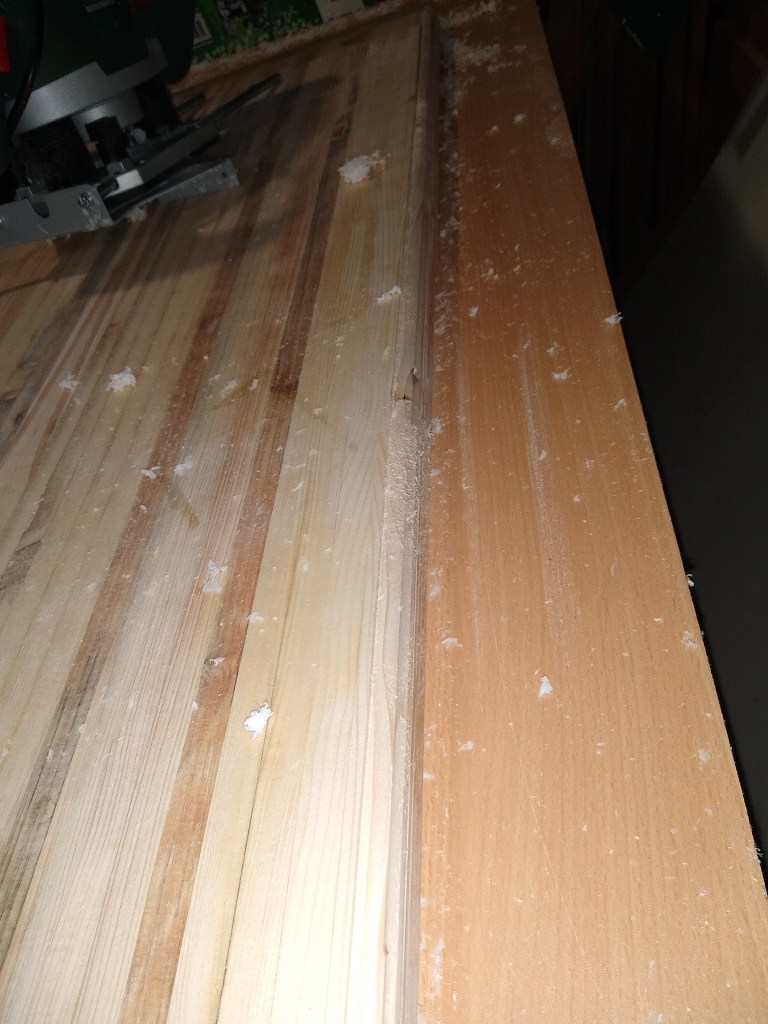
Step 6: After noticing that the ends of the glued-up slats have a slight gap I decided that this could be a good excuse to use some epoxy. Also, there were some bigger voids in between some pieces of wood that epoxy could be used on. This is where things would start to get really messy and complicated.
If there’s one thing that the entire woodworking community seems to agree on is that epoxy is great and should be used on every single project.
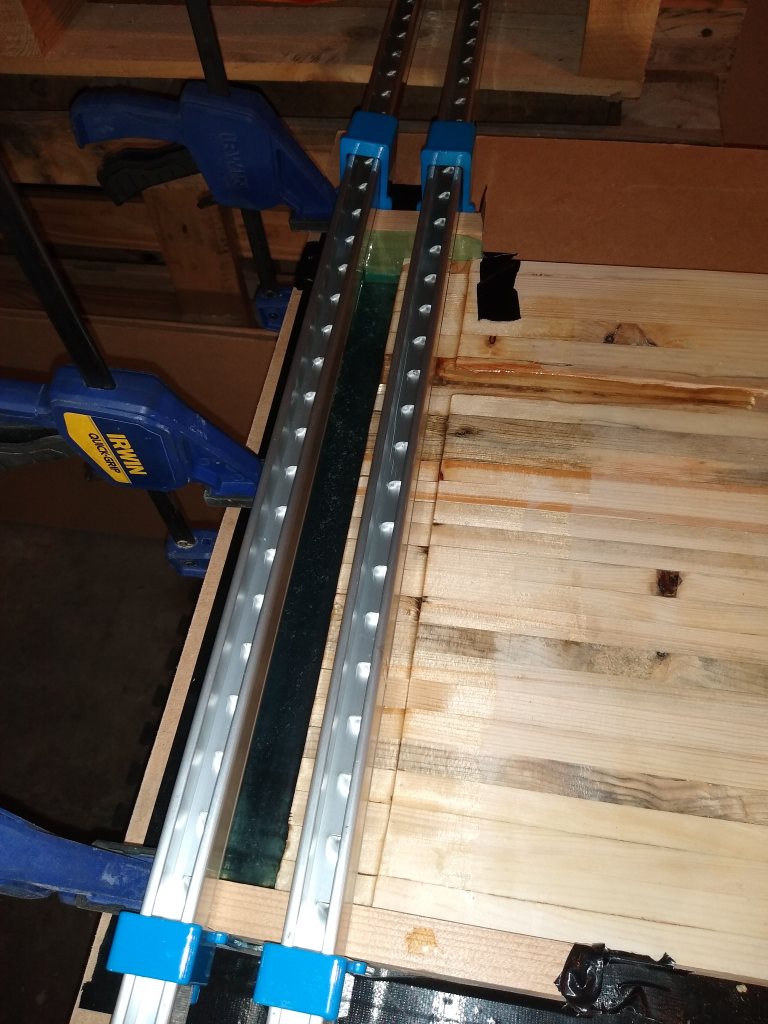
Step 7: Forms. In order to pour epoxy I needed to contain it whilst it was curing in some kind of form. Originally I was just going chisel out and even up the biggest voids to make it more even in depth. Then screw a piece of scrap to each side of the table to make a brim that the epoxy couldn’t pass. Then just fill the void with epoxy and brush it into the hairline gaps. Simples.
Step 8: Buy epoxy, mix up a batch then pour into the voids and cross my fingers. I didn’t cross my fingers enough as my scrap-wood brim with a Sainsburys bag wrapped around it did not make an epoxy proof seal. Weird. It leaked everywhere but it did cure rock solid so at least I got the resin/hardener ratios correct. Looking for silver linings from the multiple balls ups became a necessity to keep my moral up!
I spent some time looking into table top epoxy and ended up watching alot of youtube tutorials and even getting Blacktail studio’s epoxy workshop guide which was very comprehensive.
I settled on this epoxy: https://ebay.us/1fHUxI
Step 9: After failing the first epoxy pour I decided to make it more complicated and add more points of failure. Genius. I vaguely pictured in my head what it would look like with clear epoxy on the end of each side of the table. Like an end cap of epoxy to fill in any gaps and add a little length to the table. This would of course mean a more comprehensive form that was leakproof.
So I decided to change the “Design” a bit to have an overhanging bit of epoxy on each end of the table. I figure this would be a chance to see how well epoxy stuck to the end of pallet wood with no support on one side. Would it just snap off or could it keep its form and strength whilst hanging off the edge of the table?
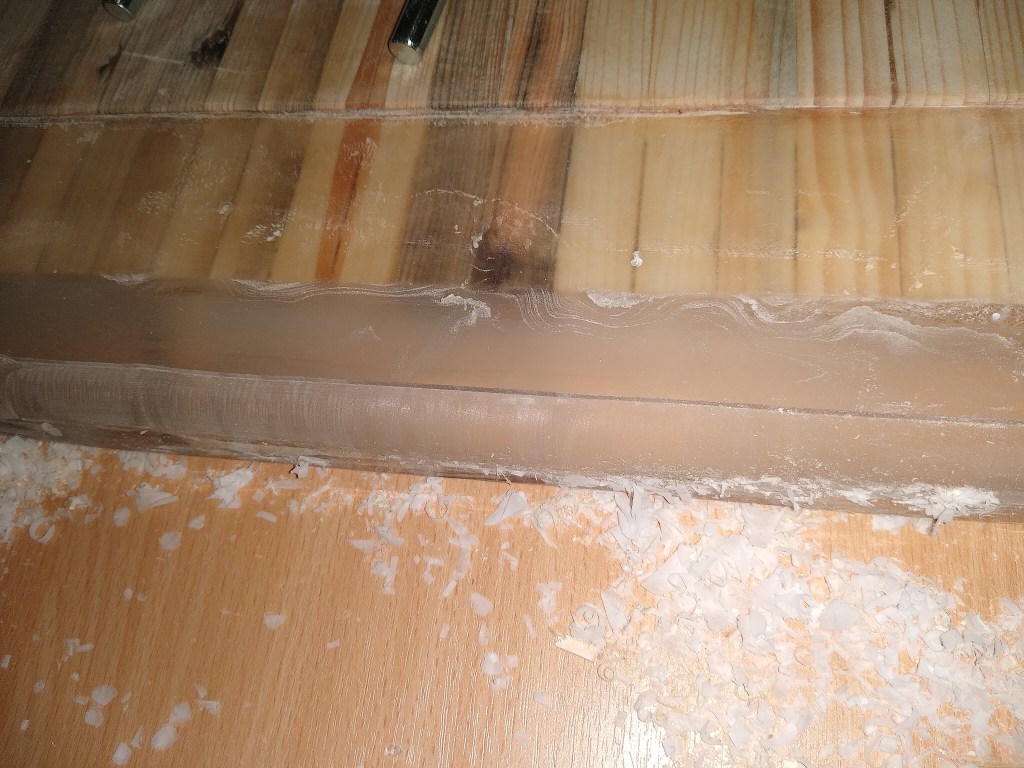
I screwed a couple of bits of wood together to make a C shape that could be clamped to the end of the table and on top of some hardboard. In theory the epoxy would bond to the table but not to the release tape I used on the C shape and hardboard. I’d also used a router (more about that later) to make a small inset section on the end of the table. I left it 24 hours before removing the “form” and my first impression was it had worked!

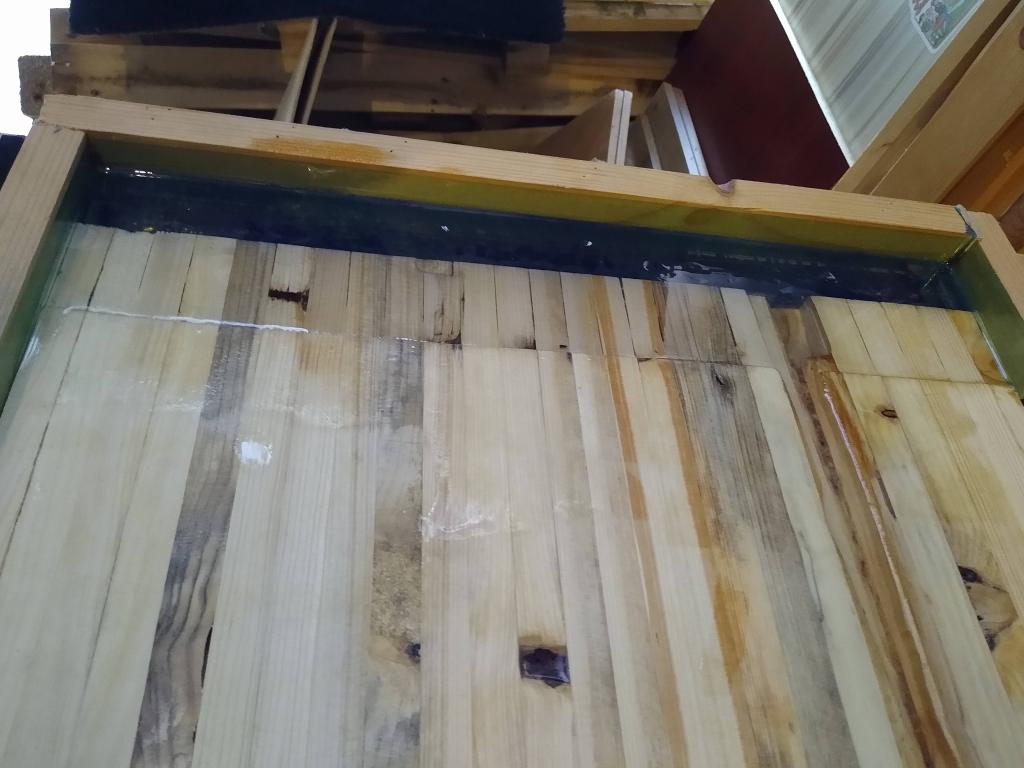

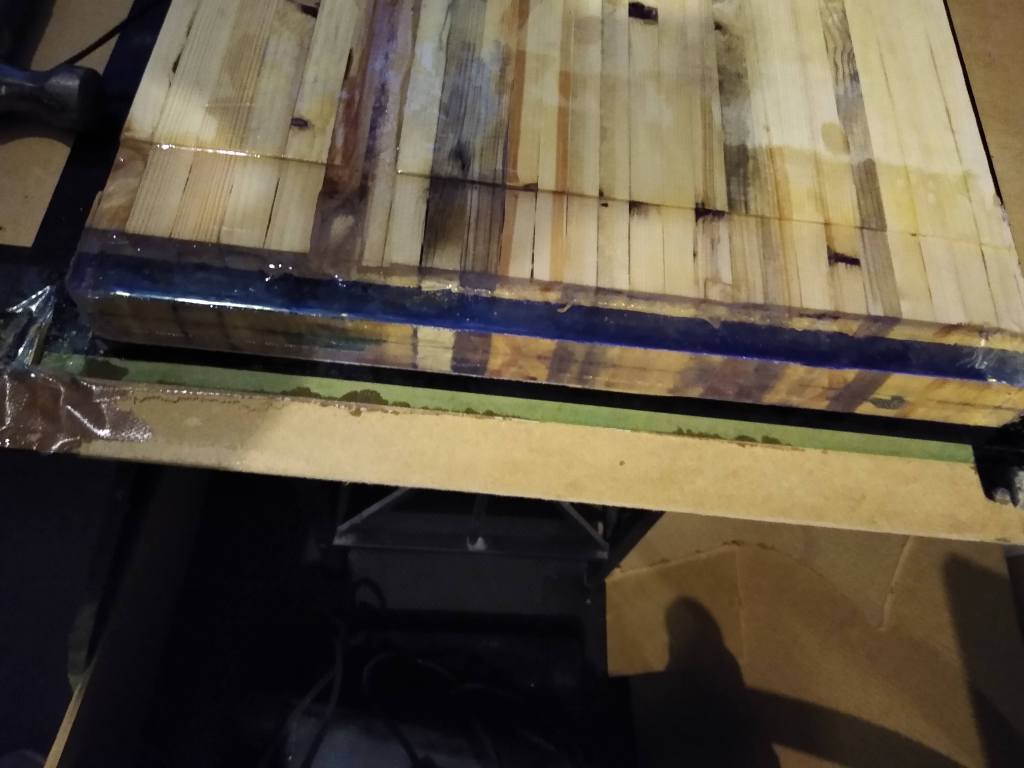
Step 10: Find out my first impression had betrayed me. When I flipped the table over I saw that the epoxy has seeped all across the underside and stuck the hardboard to the table. Next time I will use release tape or release spray on the whole underside.
This resulted in needing to scrape off the stuck hard board and leaked epoxy from the back of the table with a combination of a paint scraper, chisel, orbital sander and a bit of swearing. Tactical swearing gets regularly employed to get me out of jams.

Step 11: After scraping off all the failure from the bottom I realised one end of the table had not cured properly (it was poured at a later time). This was, in part, due to some exceptionally cold conditions in the garage, it was easily below zero overnight which epoxy does not like. After waiting a week it still hadn’t cured (it was gummy) so I decided to cut my losses and scrape/chisel it off.
I had run out of epoxy at this point so needed to buy some more. Cue the next potential mistake, I bought a different epoxy (as it shipped faster). Quick video of the C-shape form set up:
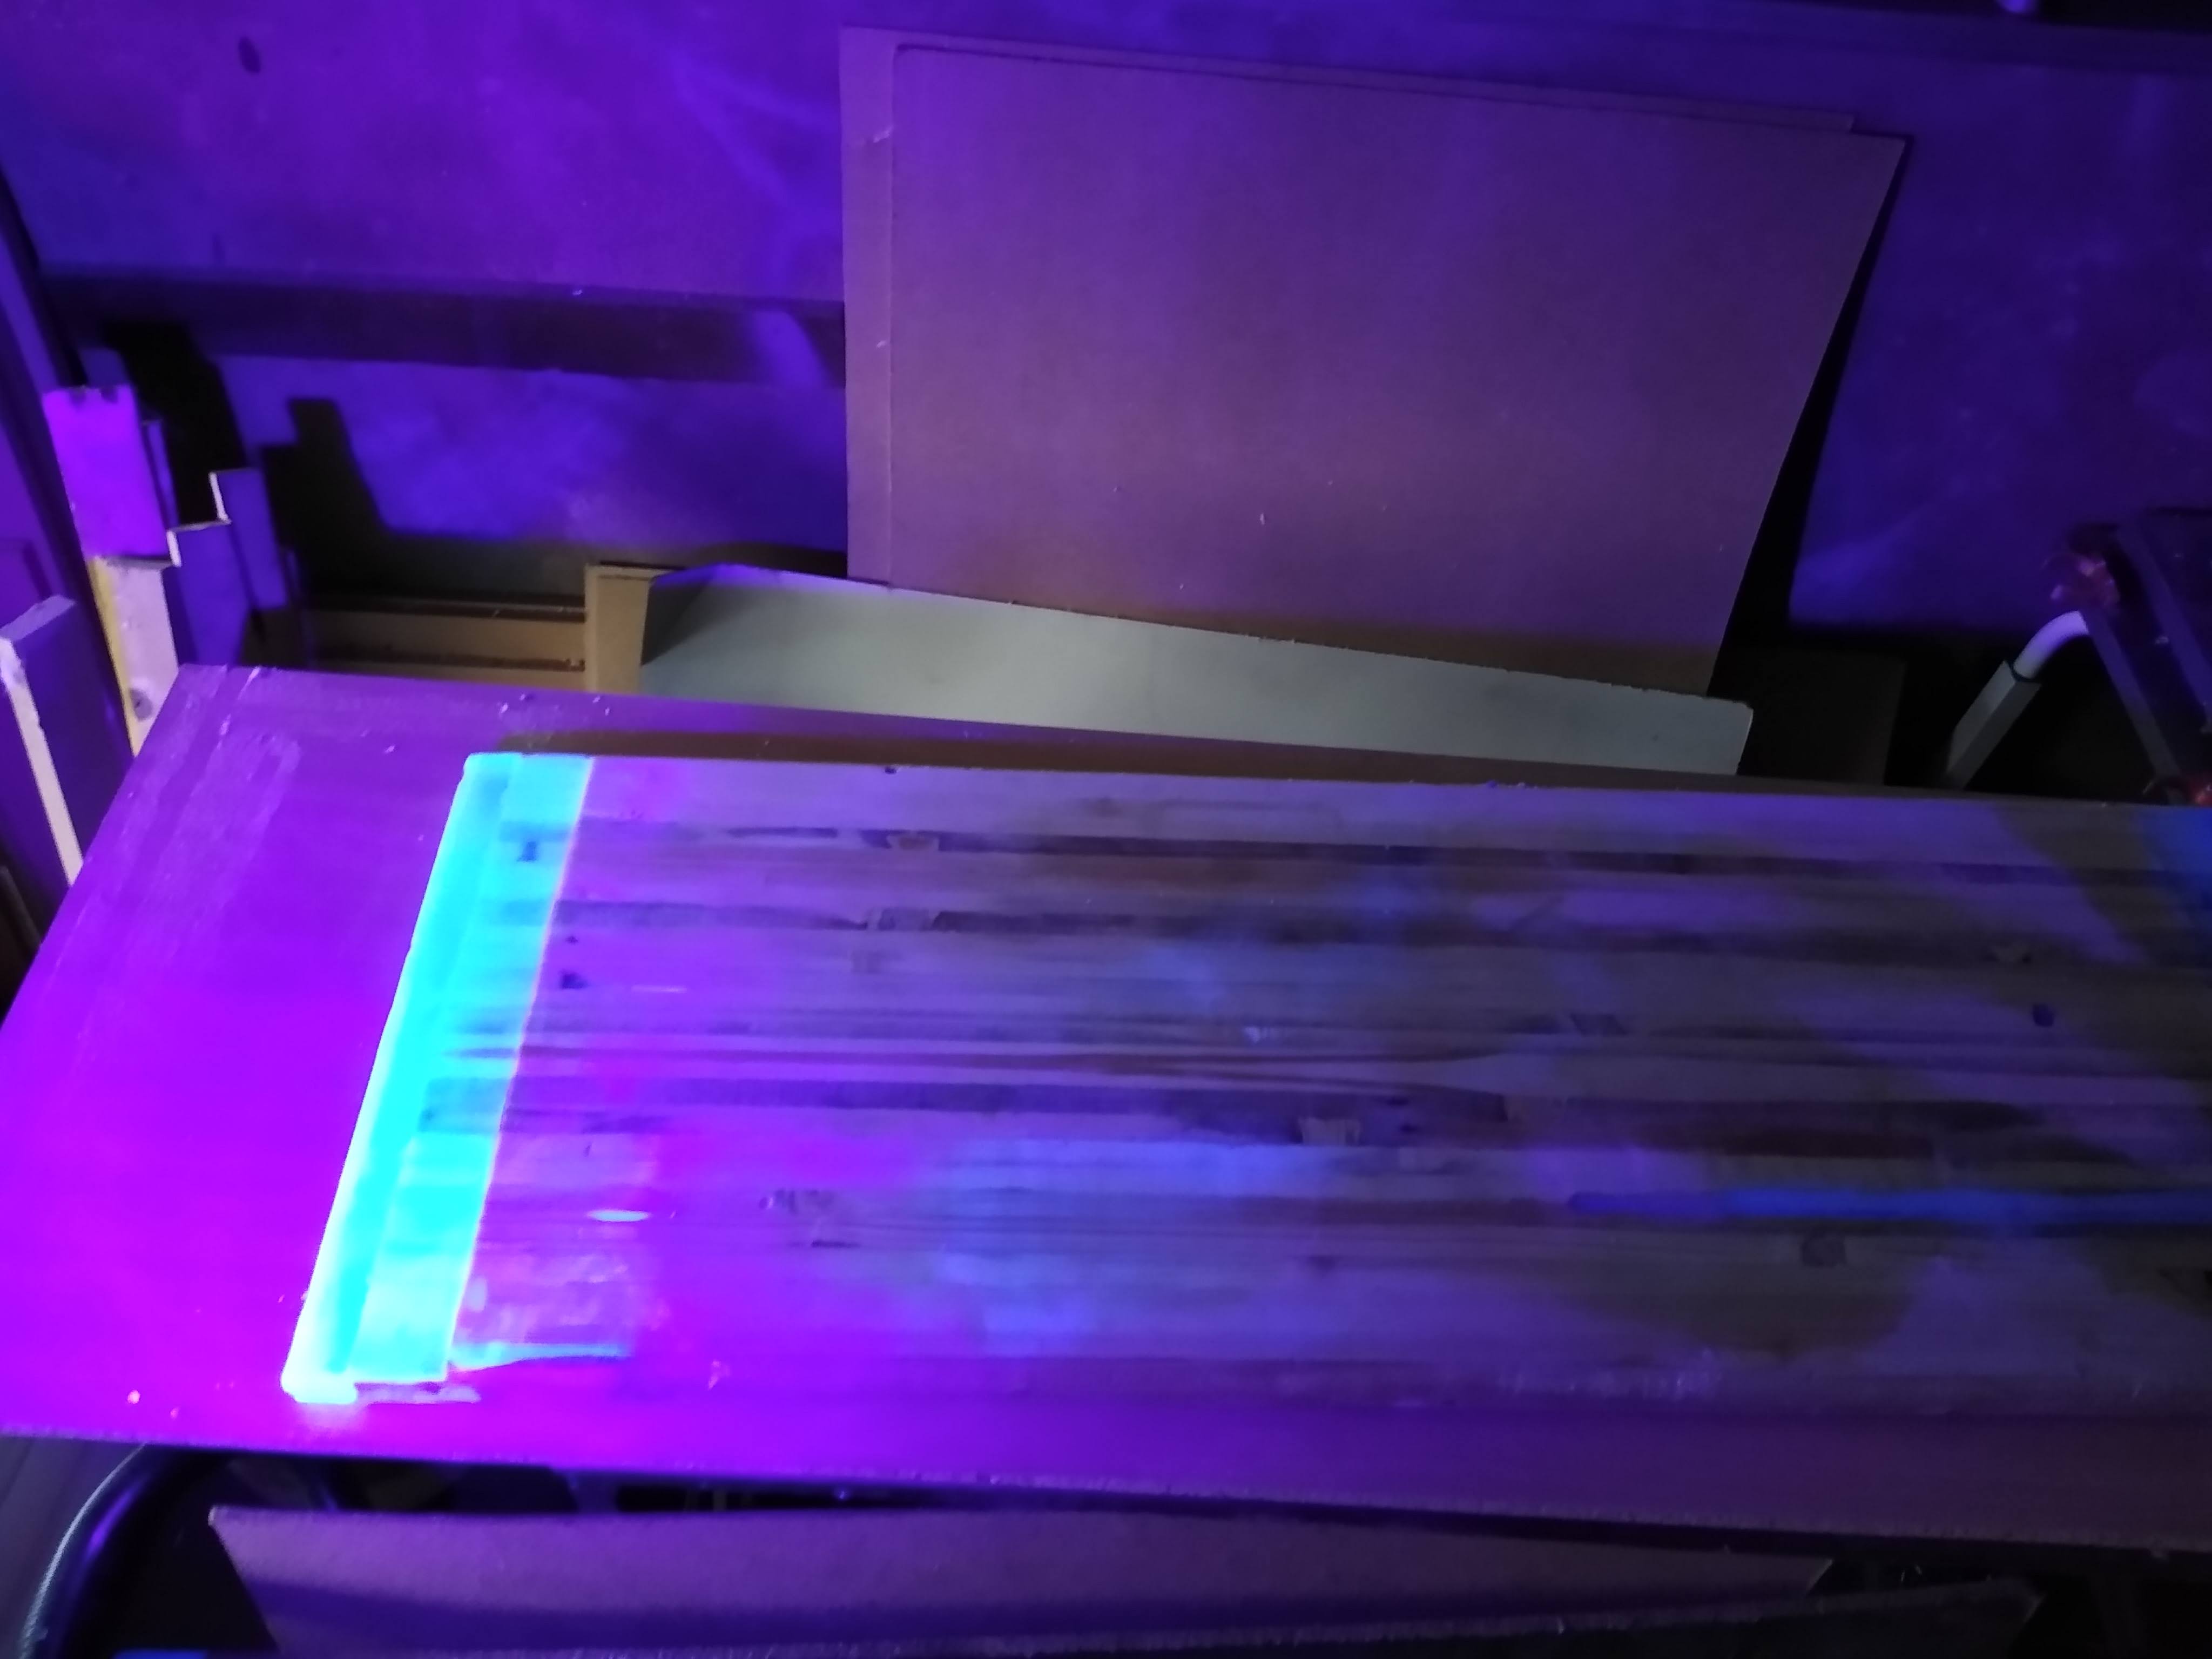
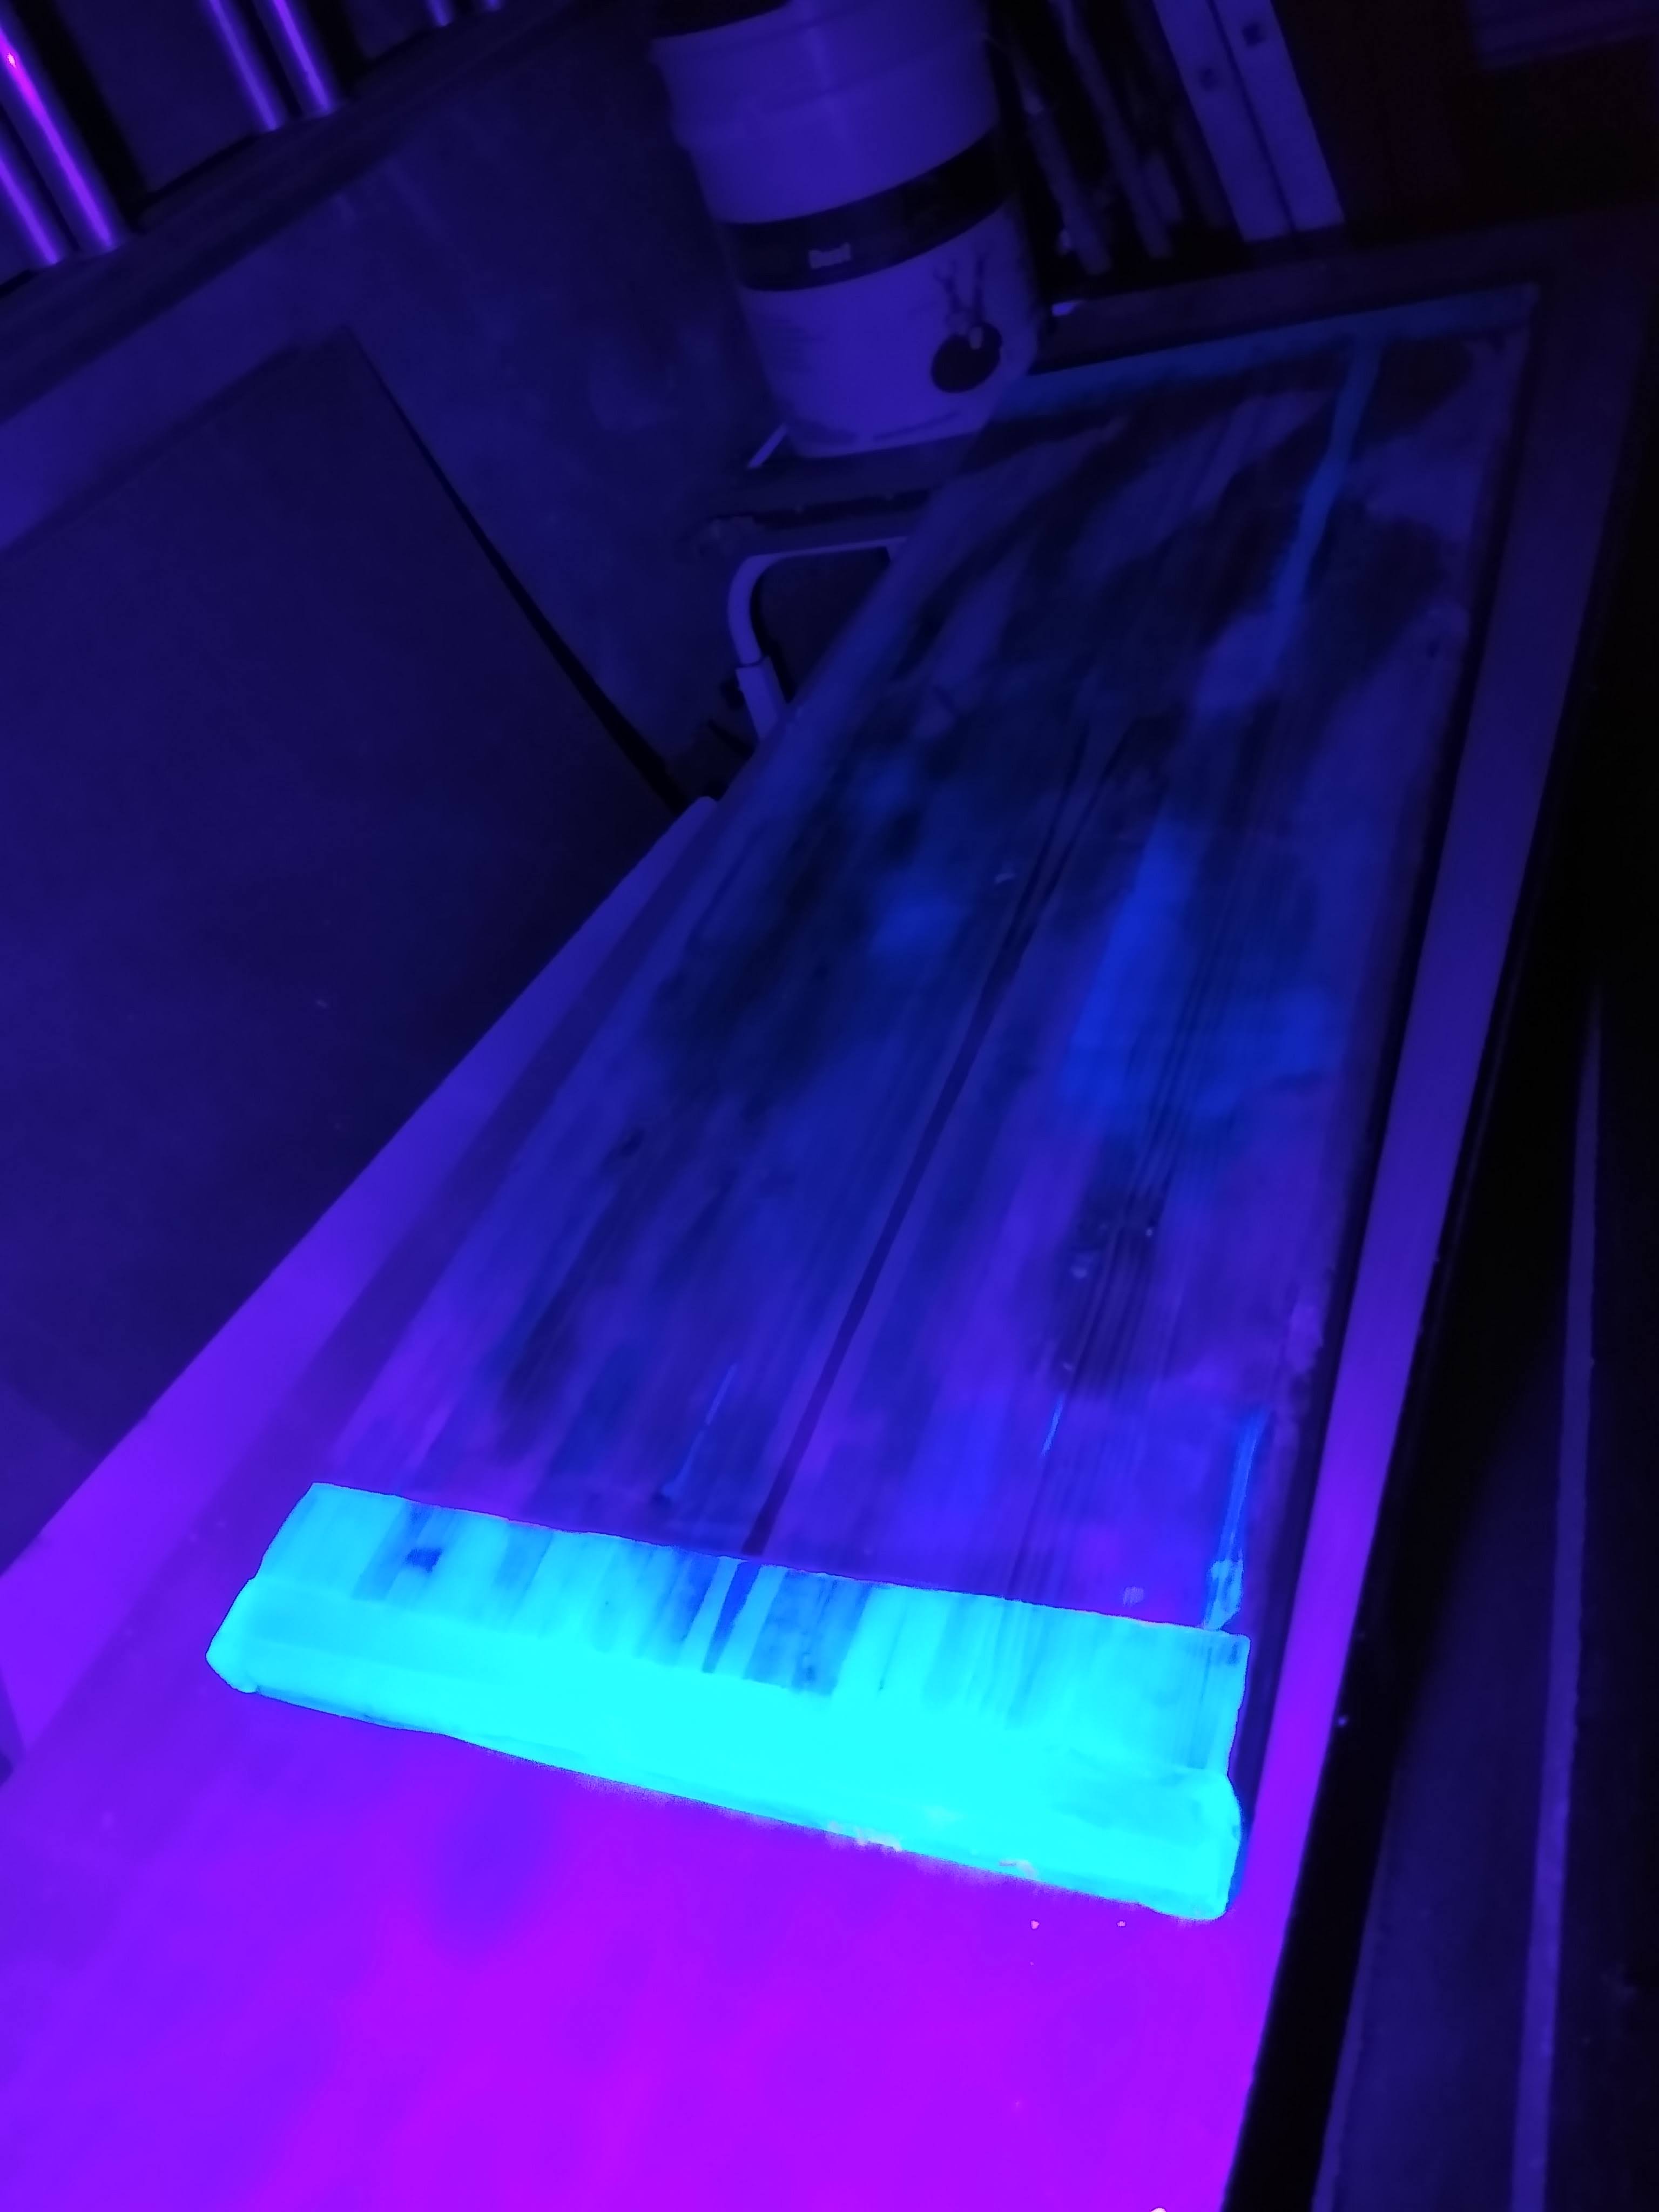
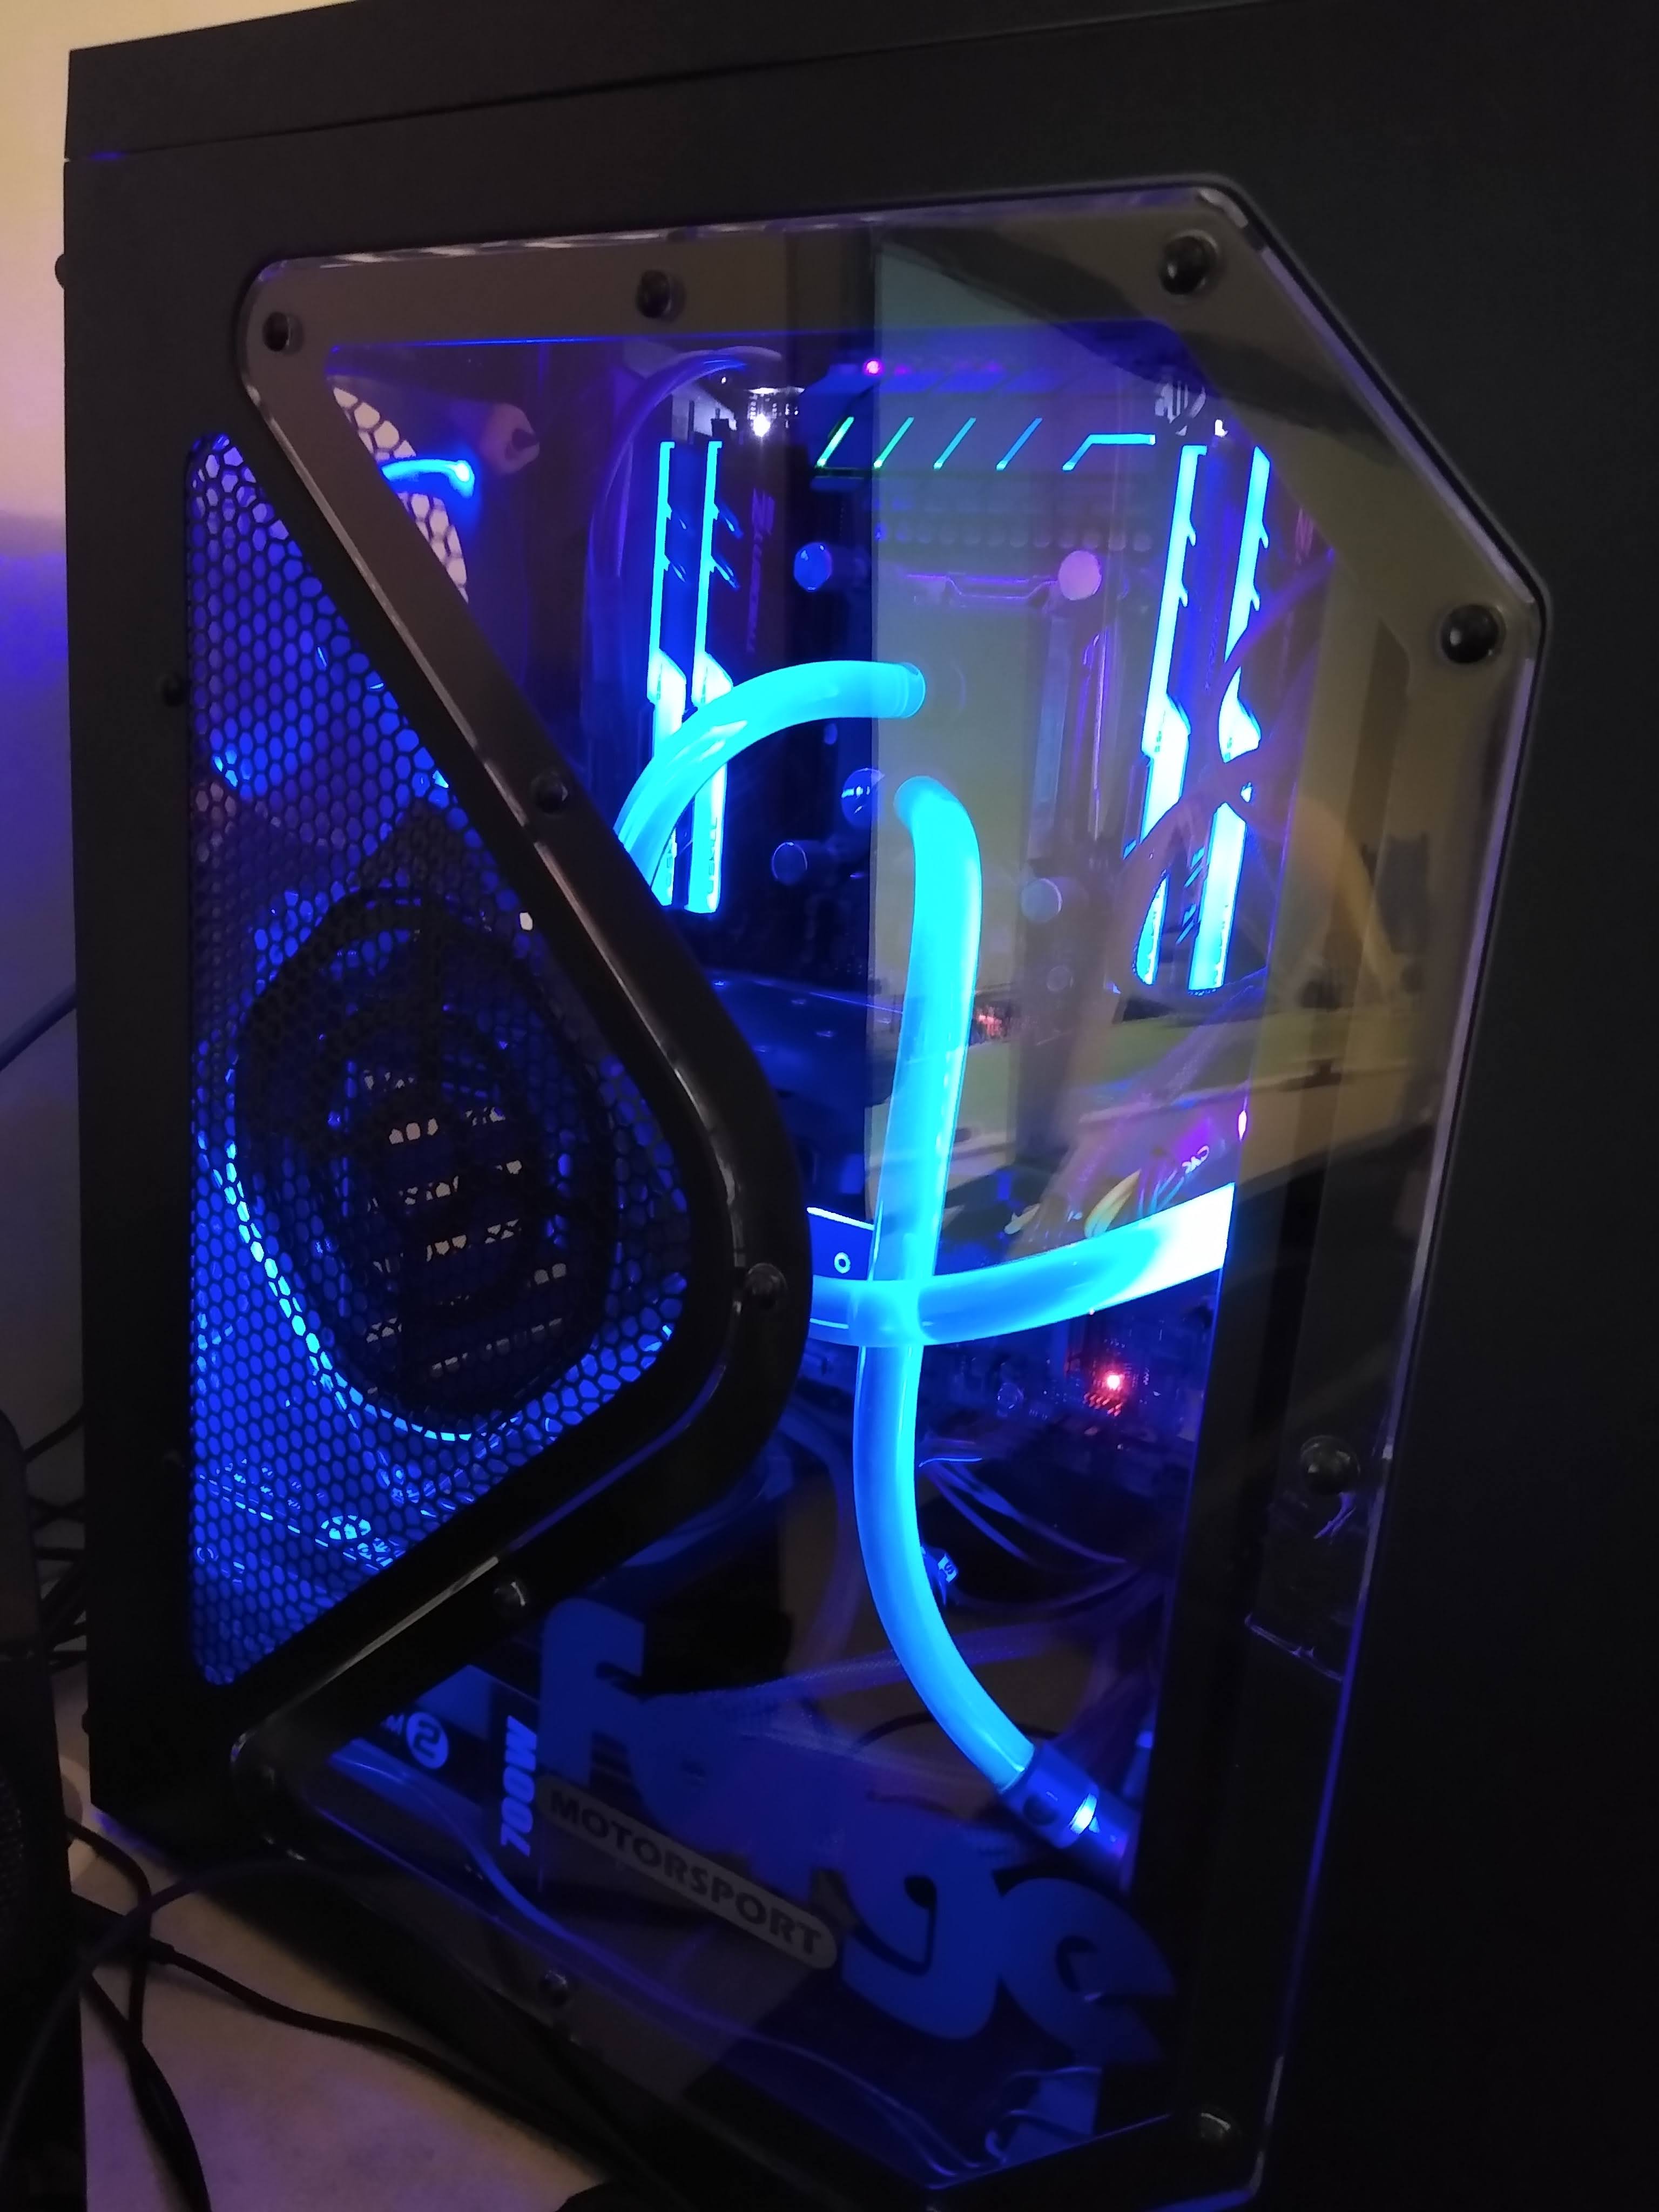
Did I mention it’s UV! Step 12: Re-pour the new epoxy and wait for it to cure. It was still very cold but I made sure to warm the resin a little before mixing and put on a heater in the garage to take the edge off the cold. This seemed to work fine and cured rock solid. For absolutely no reason I had added some UV dye that I had left from a water-cooled PC build. It seemed to still be pretty reactive to UV even though it was 4 years old. Now it kind of matches the PC, and it sparked an idea for a full-size desk. A full-size desk with a UV inlay has been placed on my laterbase.

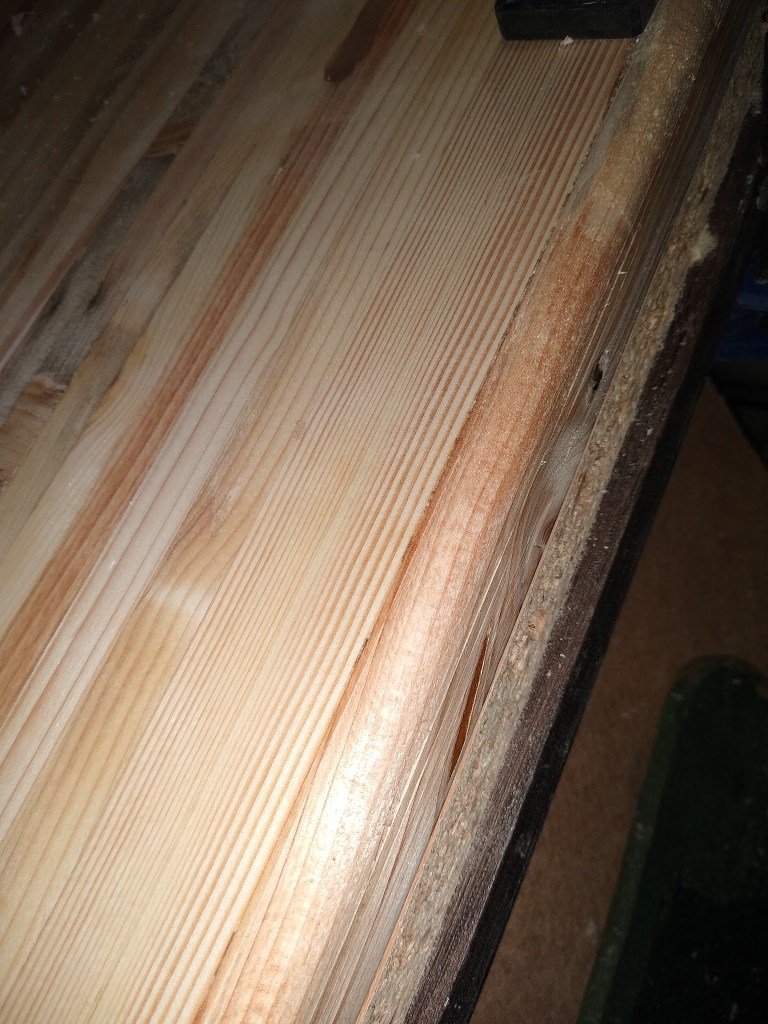
Step 13: Attempt to route out every side of table to get a nice even bevel/chamfer. I got my self a Boshe 1200 AE with a set of cheapo router bits. It was pretty intuitive to use and got it setup in a few mins. A real quick lesson I learnt was to try out the settings on a scrap of wood before jumping straight onto the project piece. The first pass on one side was not deep enough and did not take enough material off, the second attempt took too much material off, but the third attempt was just right. Cut 3 times and don’t measure, the Goldilocks approach to wood working. I found that the router bits also work on the resin but it did leave a scuffed up surface so some more experimenting with different speeds is required.
Router: https://amzn.to/3X9RLC8
Bits: https://amzn.to/3Ydrios

Step 14: Have a moment of questionable cognition and wonder if I could encase the entire table in epoxy. Essentially really leaning into the trial and error nature of this project. As the routing had left some fairly nonuniform finishes, having a new layer of epoxy on top would allow me the opportunity to hone my epoxy routing skills. This would require a proper full-size form which would be a fun thing to build, we’ll get into that on the final part of MTMLM!
-
Mistake table, Mistable, Les Misértables. Part 1
I decided the first thing I would make would be a side table of some description. This was mainly due to having an existing cheap and knackered side table which had some perfectly serviceable legs.
This side table would serve mainly as a learning opportunity to encounter a number of the skills that are required to take a pallet from the side of the road to a functional piece of furniture. I did not really have a plan and decided to let my gut decide how to approach each step. It doesn’t normally let me down, if it feels right then it probably is….probably.
I’ve retrospectively broken the various parts down into steps in the rough order that I did them. Some of them overlapped of-course but it seemed to make more sense to group them together as steps (FYI This is not a guide by any stretch of imagination!)
Step 0: Find pallets and dismantle, I had covered this in a previous post: https://woodenduck.co.uk/2022/10/18/pallet-buster/
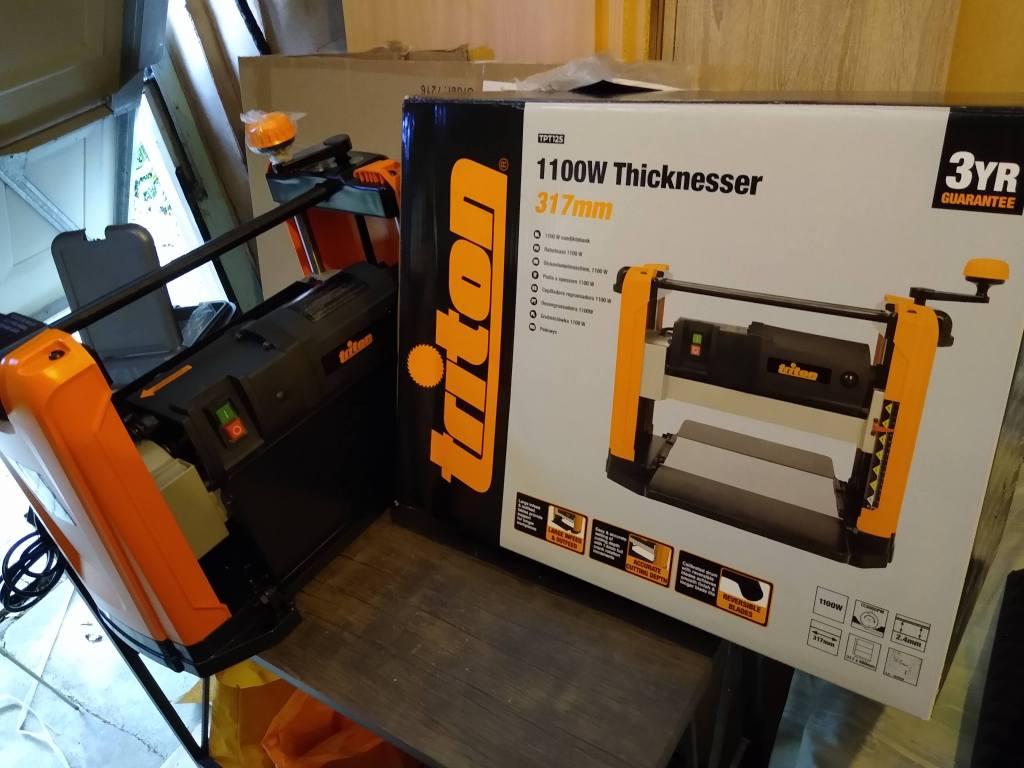
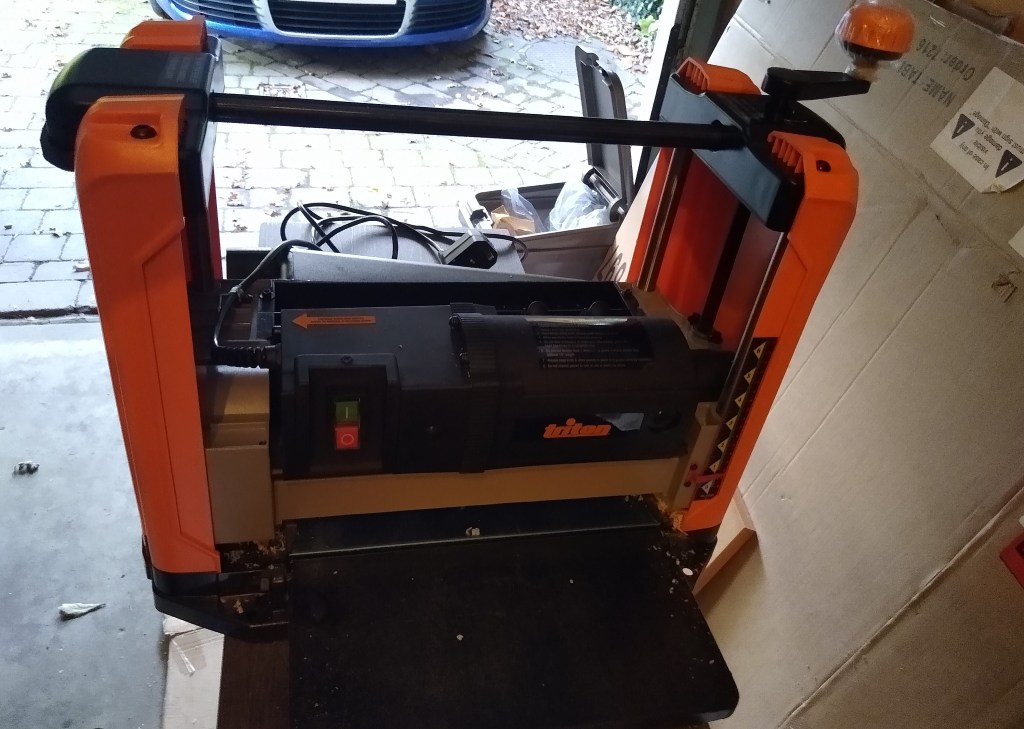
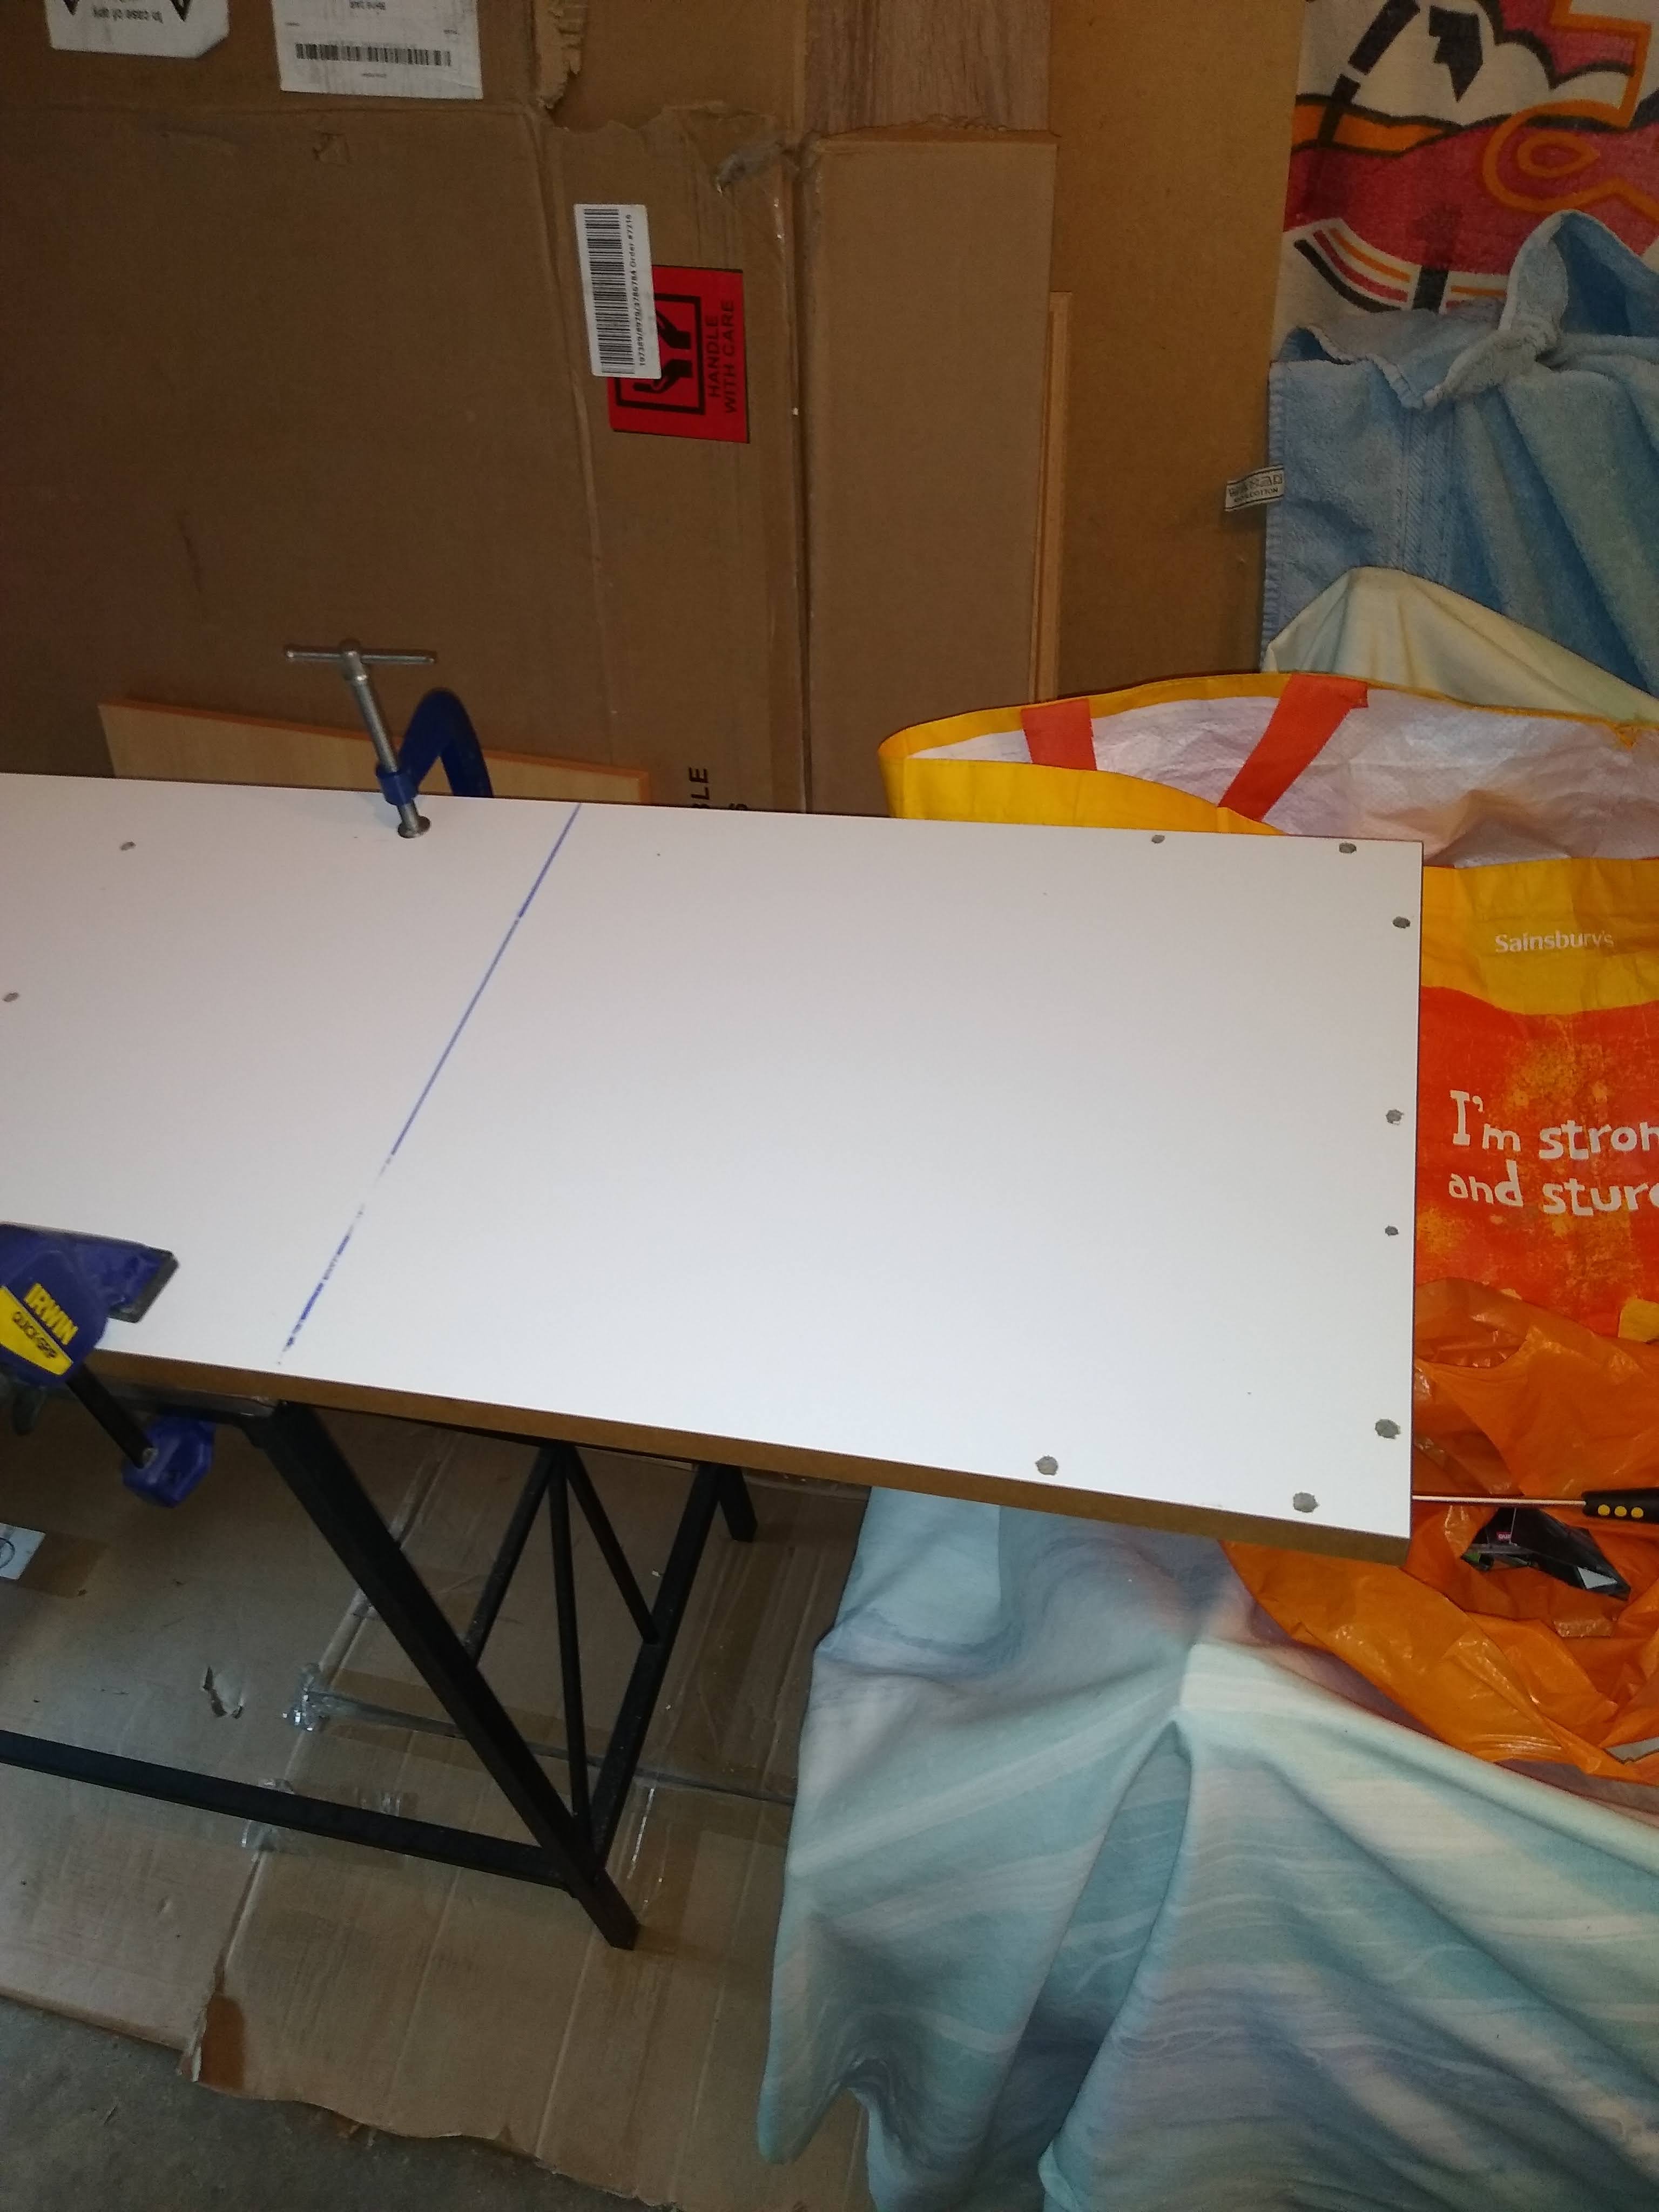
Step 1: Prepare the wood for gluing together. This involved planing the face of each side of wood then ripping each piece in half. I decided fairly early on that I would get a thicknesser and settled on the Triton TPT125. Setting up and using this tool was a piece of cake, however I did learn to properly check the wood for stones and nail remains. I pretty quickly chipped a blade as a buried nail was exposed during a pass. Luckily it was only a tiny chip and all the blades can be flipped over as they are double sided. Later on I invested in a handheld Sealey AK2018 3-in-1 detector, however this proved to be unreliable on small nails. Works great on bigger nails and the voltage detector works. I’m yet to find something better that using my eyeballs.
Triton TPT125: https://amzn.to/3I0n0eJ
Sealey AK2018: https://amzn.to/3HSzxAD
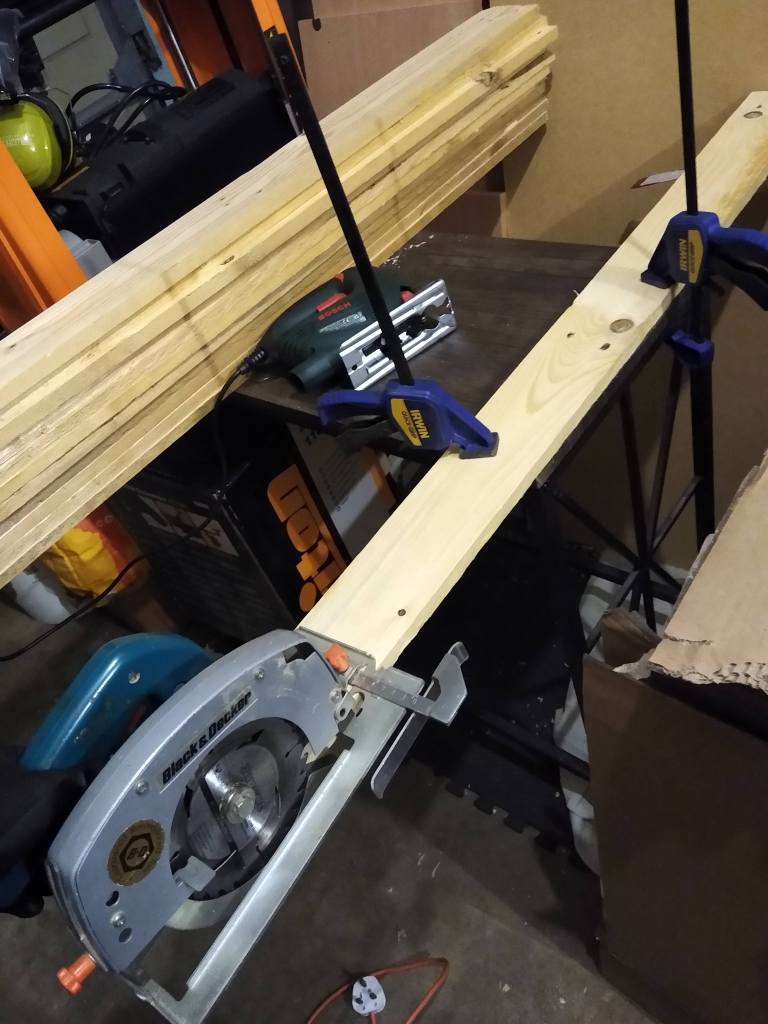
I used circular saw with a guide that was adjusted to cut the wood in half. I quick clamped the wood to a table and flipped the wood at the half way point (as the clamp was in the way). This was sketchy to say the least and I would not recommend it! One day I’ll get a table saw and manifest somewhere to put it.
Step 2: Review my current tools and start buying tools that I probably need. The only “woodworking” tools that I had when starting this journey was a 30 year old jigsaw (that sporadically cuts out), an even older circular saw, a couple of rusty hand saws, a few quick clamps and a drill. All my other tools have been for fixing various broken VW’s so not massively helpful for woodworking.
Buy once, cry once. I now understand what that means! I bought the wrong jigsaw. It works well and is a huge improvement on my old one, with adjustable speed, dust extraction and it’s far quieter, however it can’t be mounted on a track. Alas, something I didn’t check. Not a huge deal as I can probably make a jig, however it would have been better to have it compatible out the box:
It’s a Bosch PST 700 E btw: https://amzn.to/3Dzi2Ti
Step 3: Realise how damn loud the thicknesser is and indiscriminately throw acoustic panels up on every spare bit of wall and ceiling. Also, install a weather strip and silicon strips around garage door as water had been getting in under the door. The first batch of foam panels were vacuum packed and reluctant to expand so I had to use the hair dryer technique. The result was that sounds rebounded less than before, so although -DB was probably more or less the same at least it cut out alot of the echo. Sound isolation is something that I will investigate more further down the line.
Step 4: Realise there is not enough space to swing a pallet buster in the garage. To make some space I sold and donated the old furniture that was taking up space. I also took the opportunity to stick down some el cheapo flooring in a bid to make it slightly nicer and maybe absorb a little bit more reverb.
Not ideal! 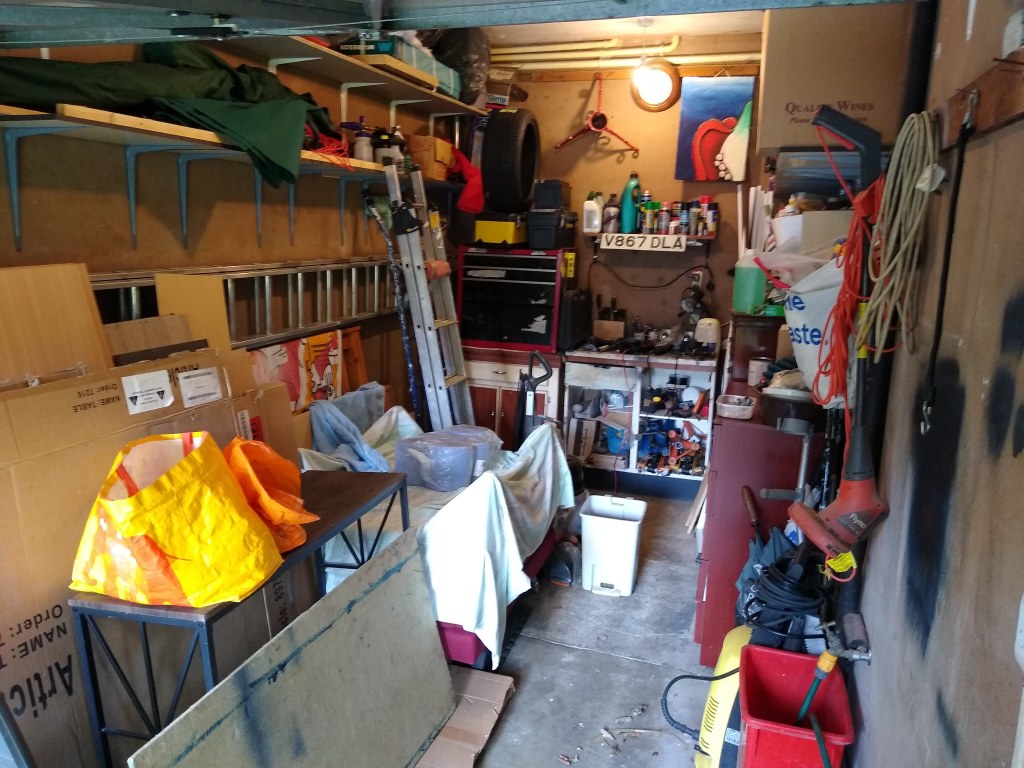
Getting there 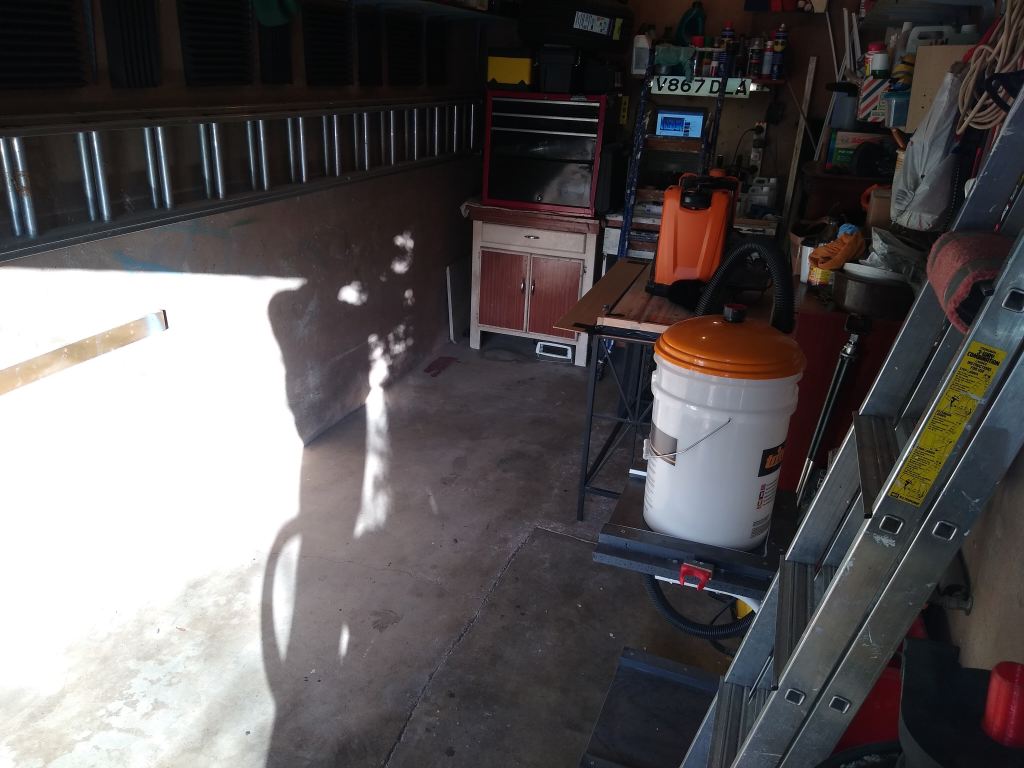
Found the floor 
Space for activities 
That’ll do, 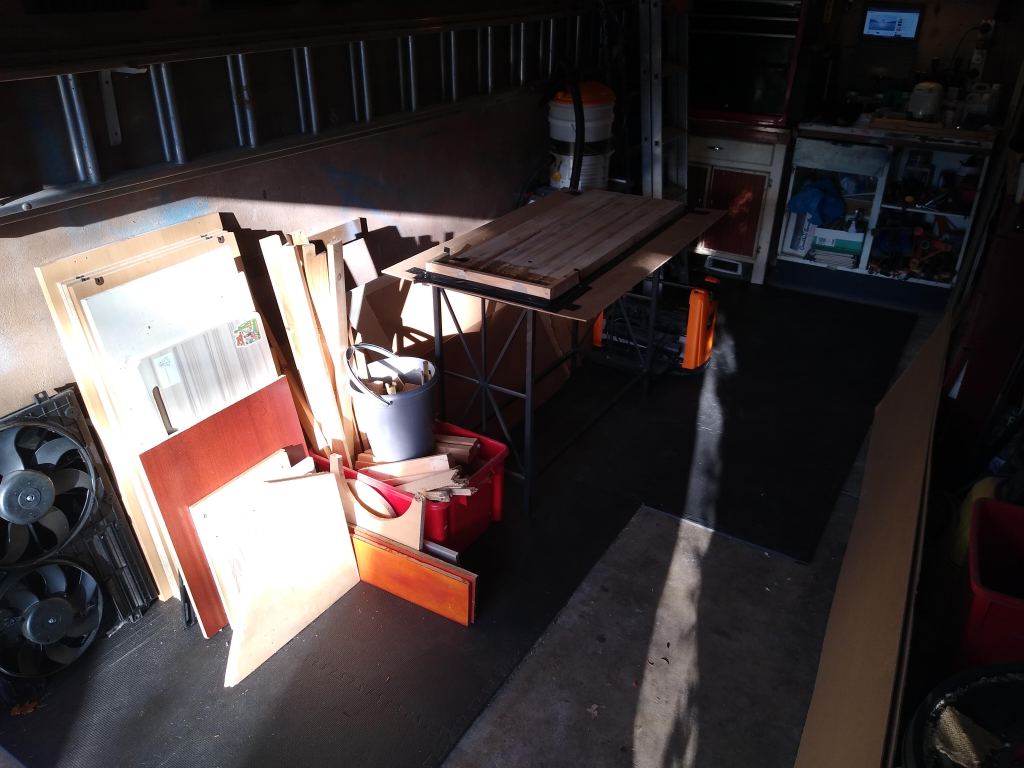
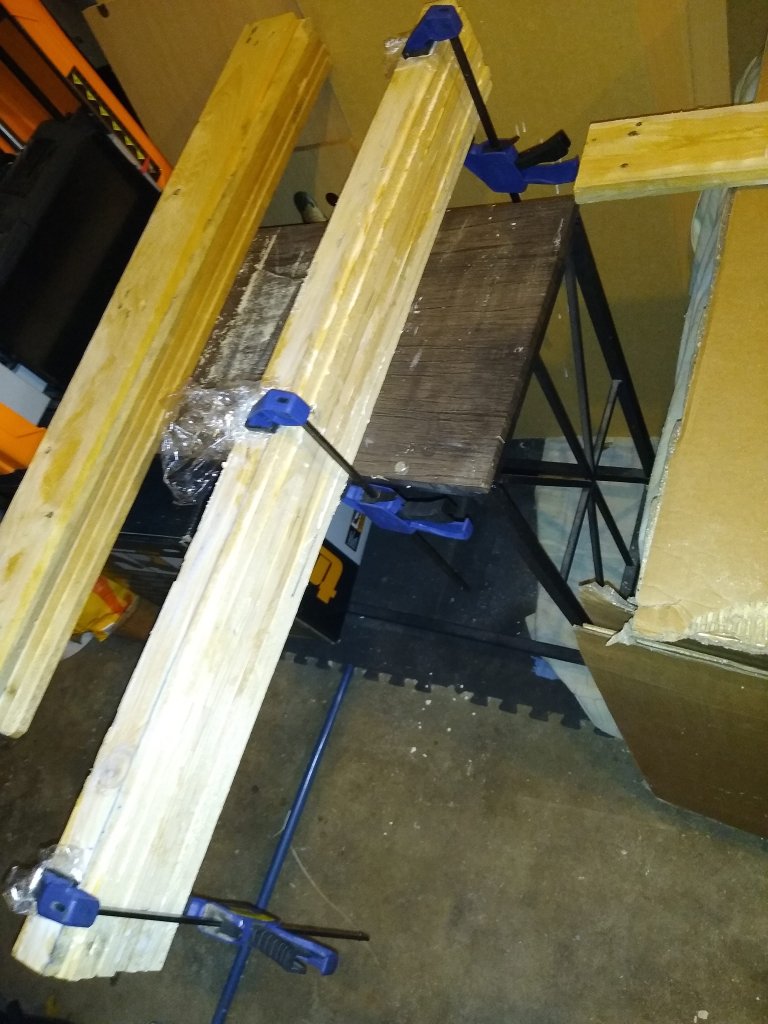
For now…. Step 5: Start gluing up! I knew I wanted to send the glued-up table top through the planer so I needed to make two sections and then attach them afterward. This meant I needed to get some longer clamps, I settled on some cheapish sash clamps from Silverline. They are aluminium and not solid so people often insert a wood into them to strengthen them. Linko: https://amzn.to/3jrlQzf
I simply applied BnQ wood glue to each piece of wood and used an old ice scraper to spread it evenly across the whole length of each piece of wood. Then squared them up on the old side table (as it was flat) and applied the quick clamps.
I sent each section through the planer multiple times as they were not an even thickness due to some questionable circular sawing when ripping the wood in half. When they were the same thickness I trimmed the ends off with the jigsaw. Something I noticed was the ends of each section were not completely flush between each piece of wood. There was a hair line gap (see last two pics) where I believe there was not enough pressure applied during the glue up. This would spawn a lengthy and problematic journey of discovery. But we’ll get to that in MTMLM Part 2!
Section 1 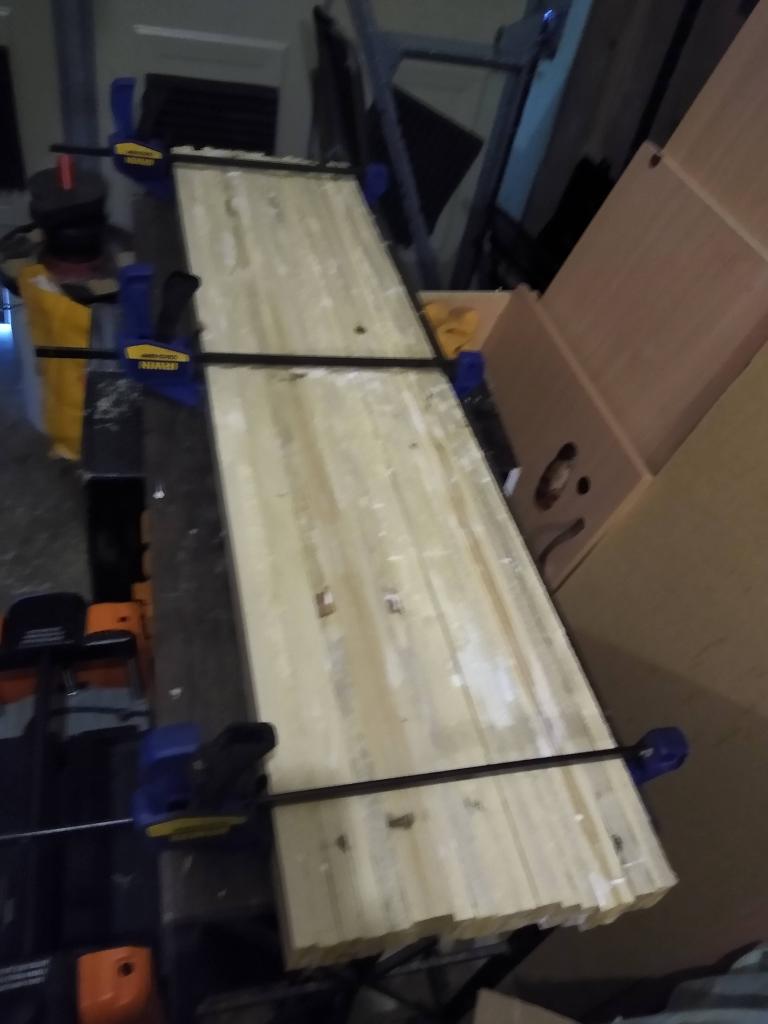
Section 2 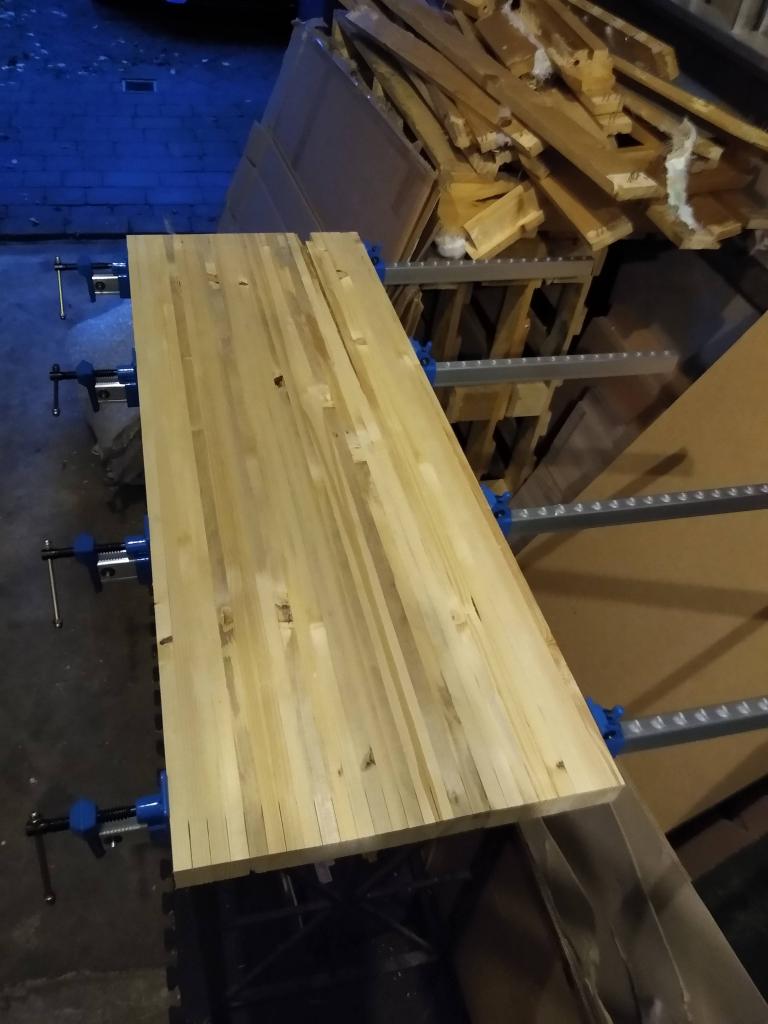
Section 1 & 2 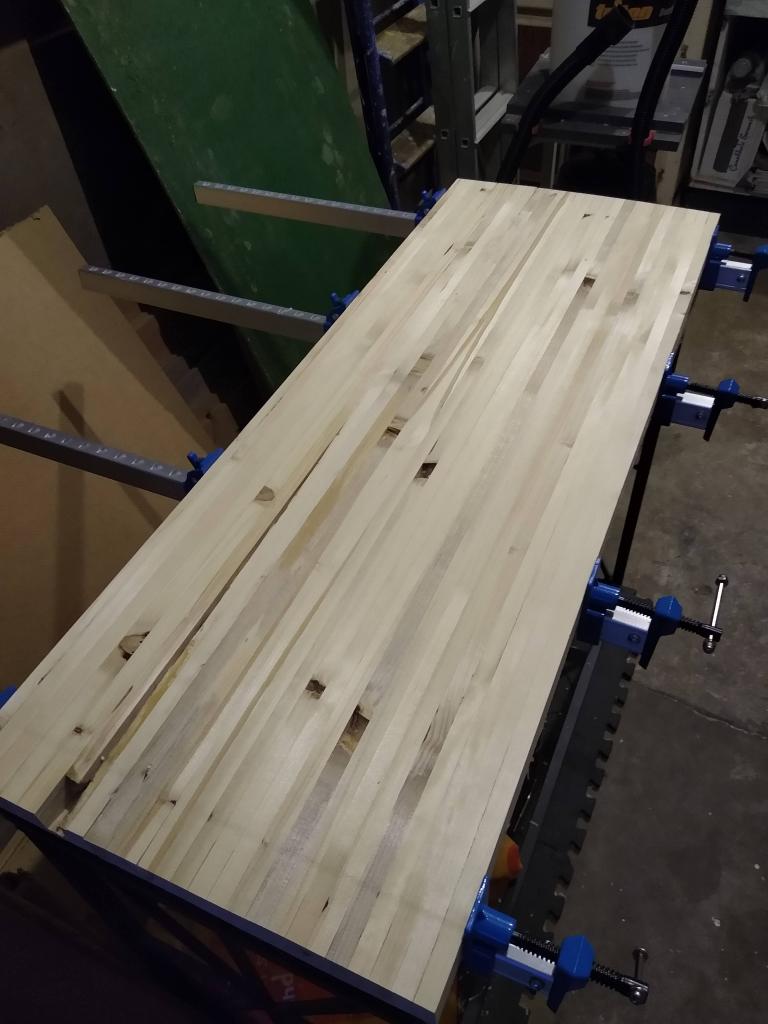
Good start! -
Cyclone Throne
Dealing with sawdust.
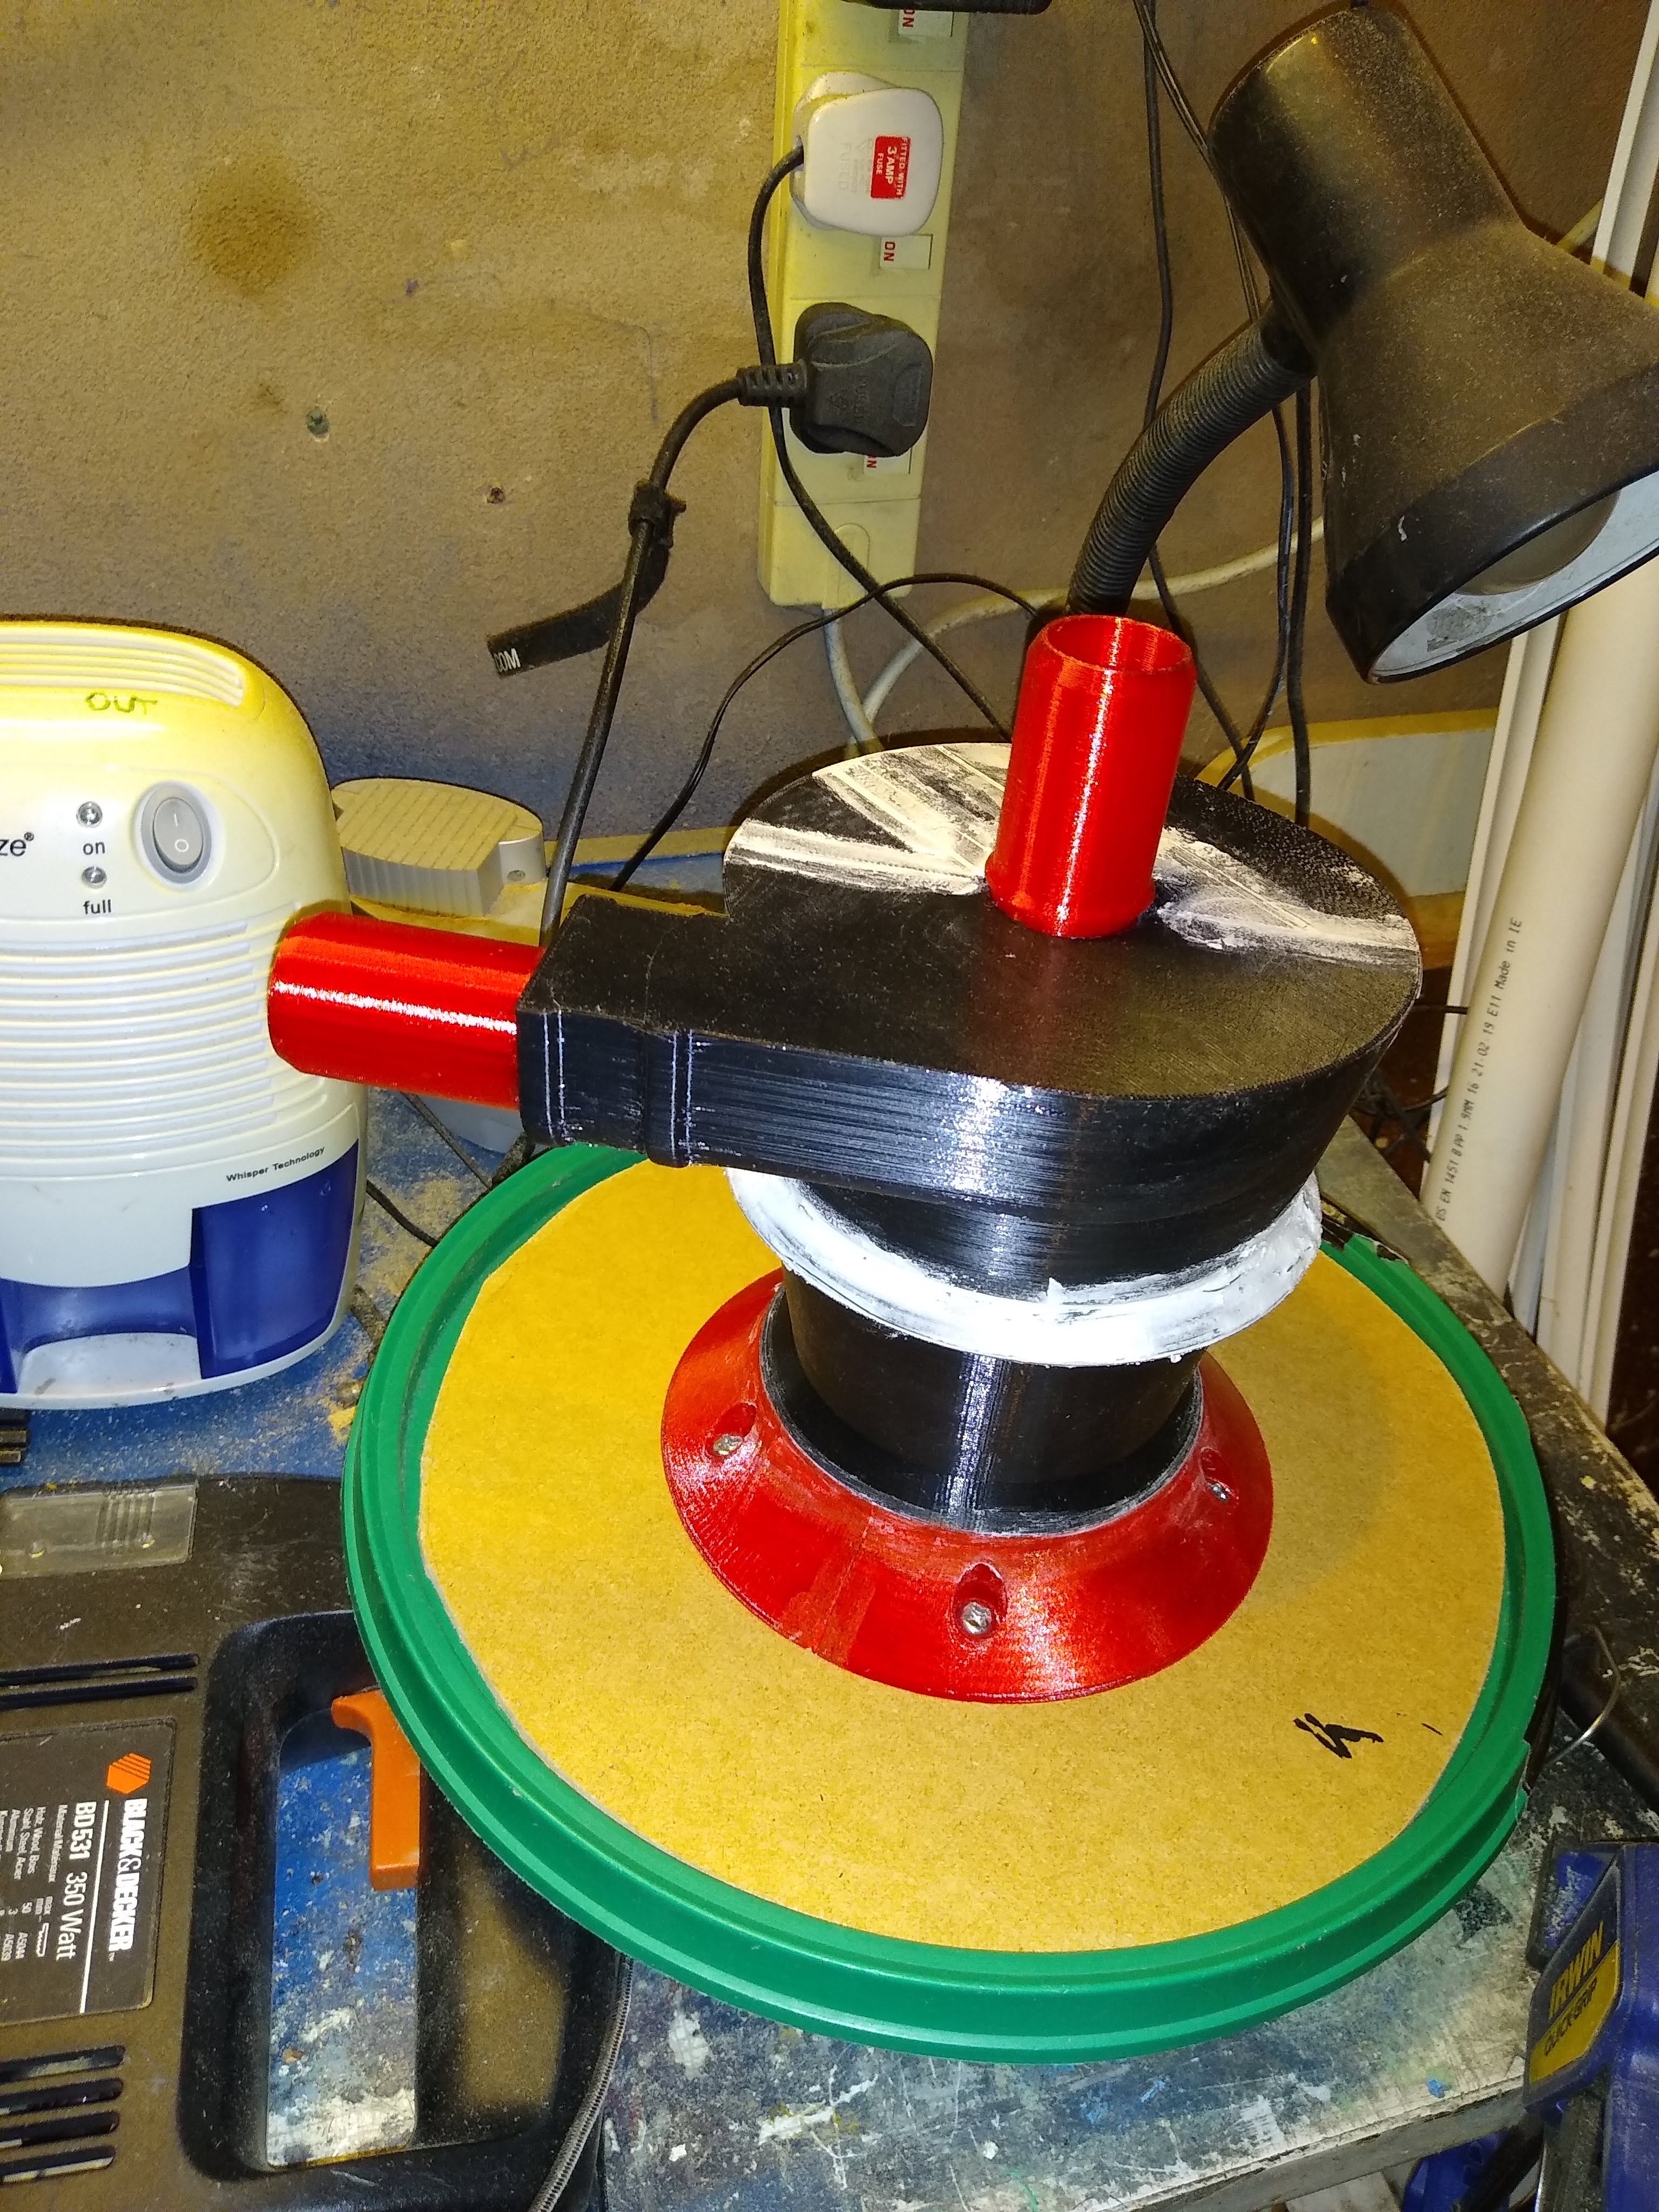
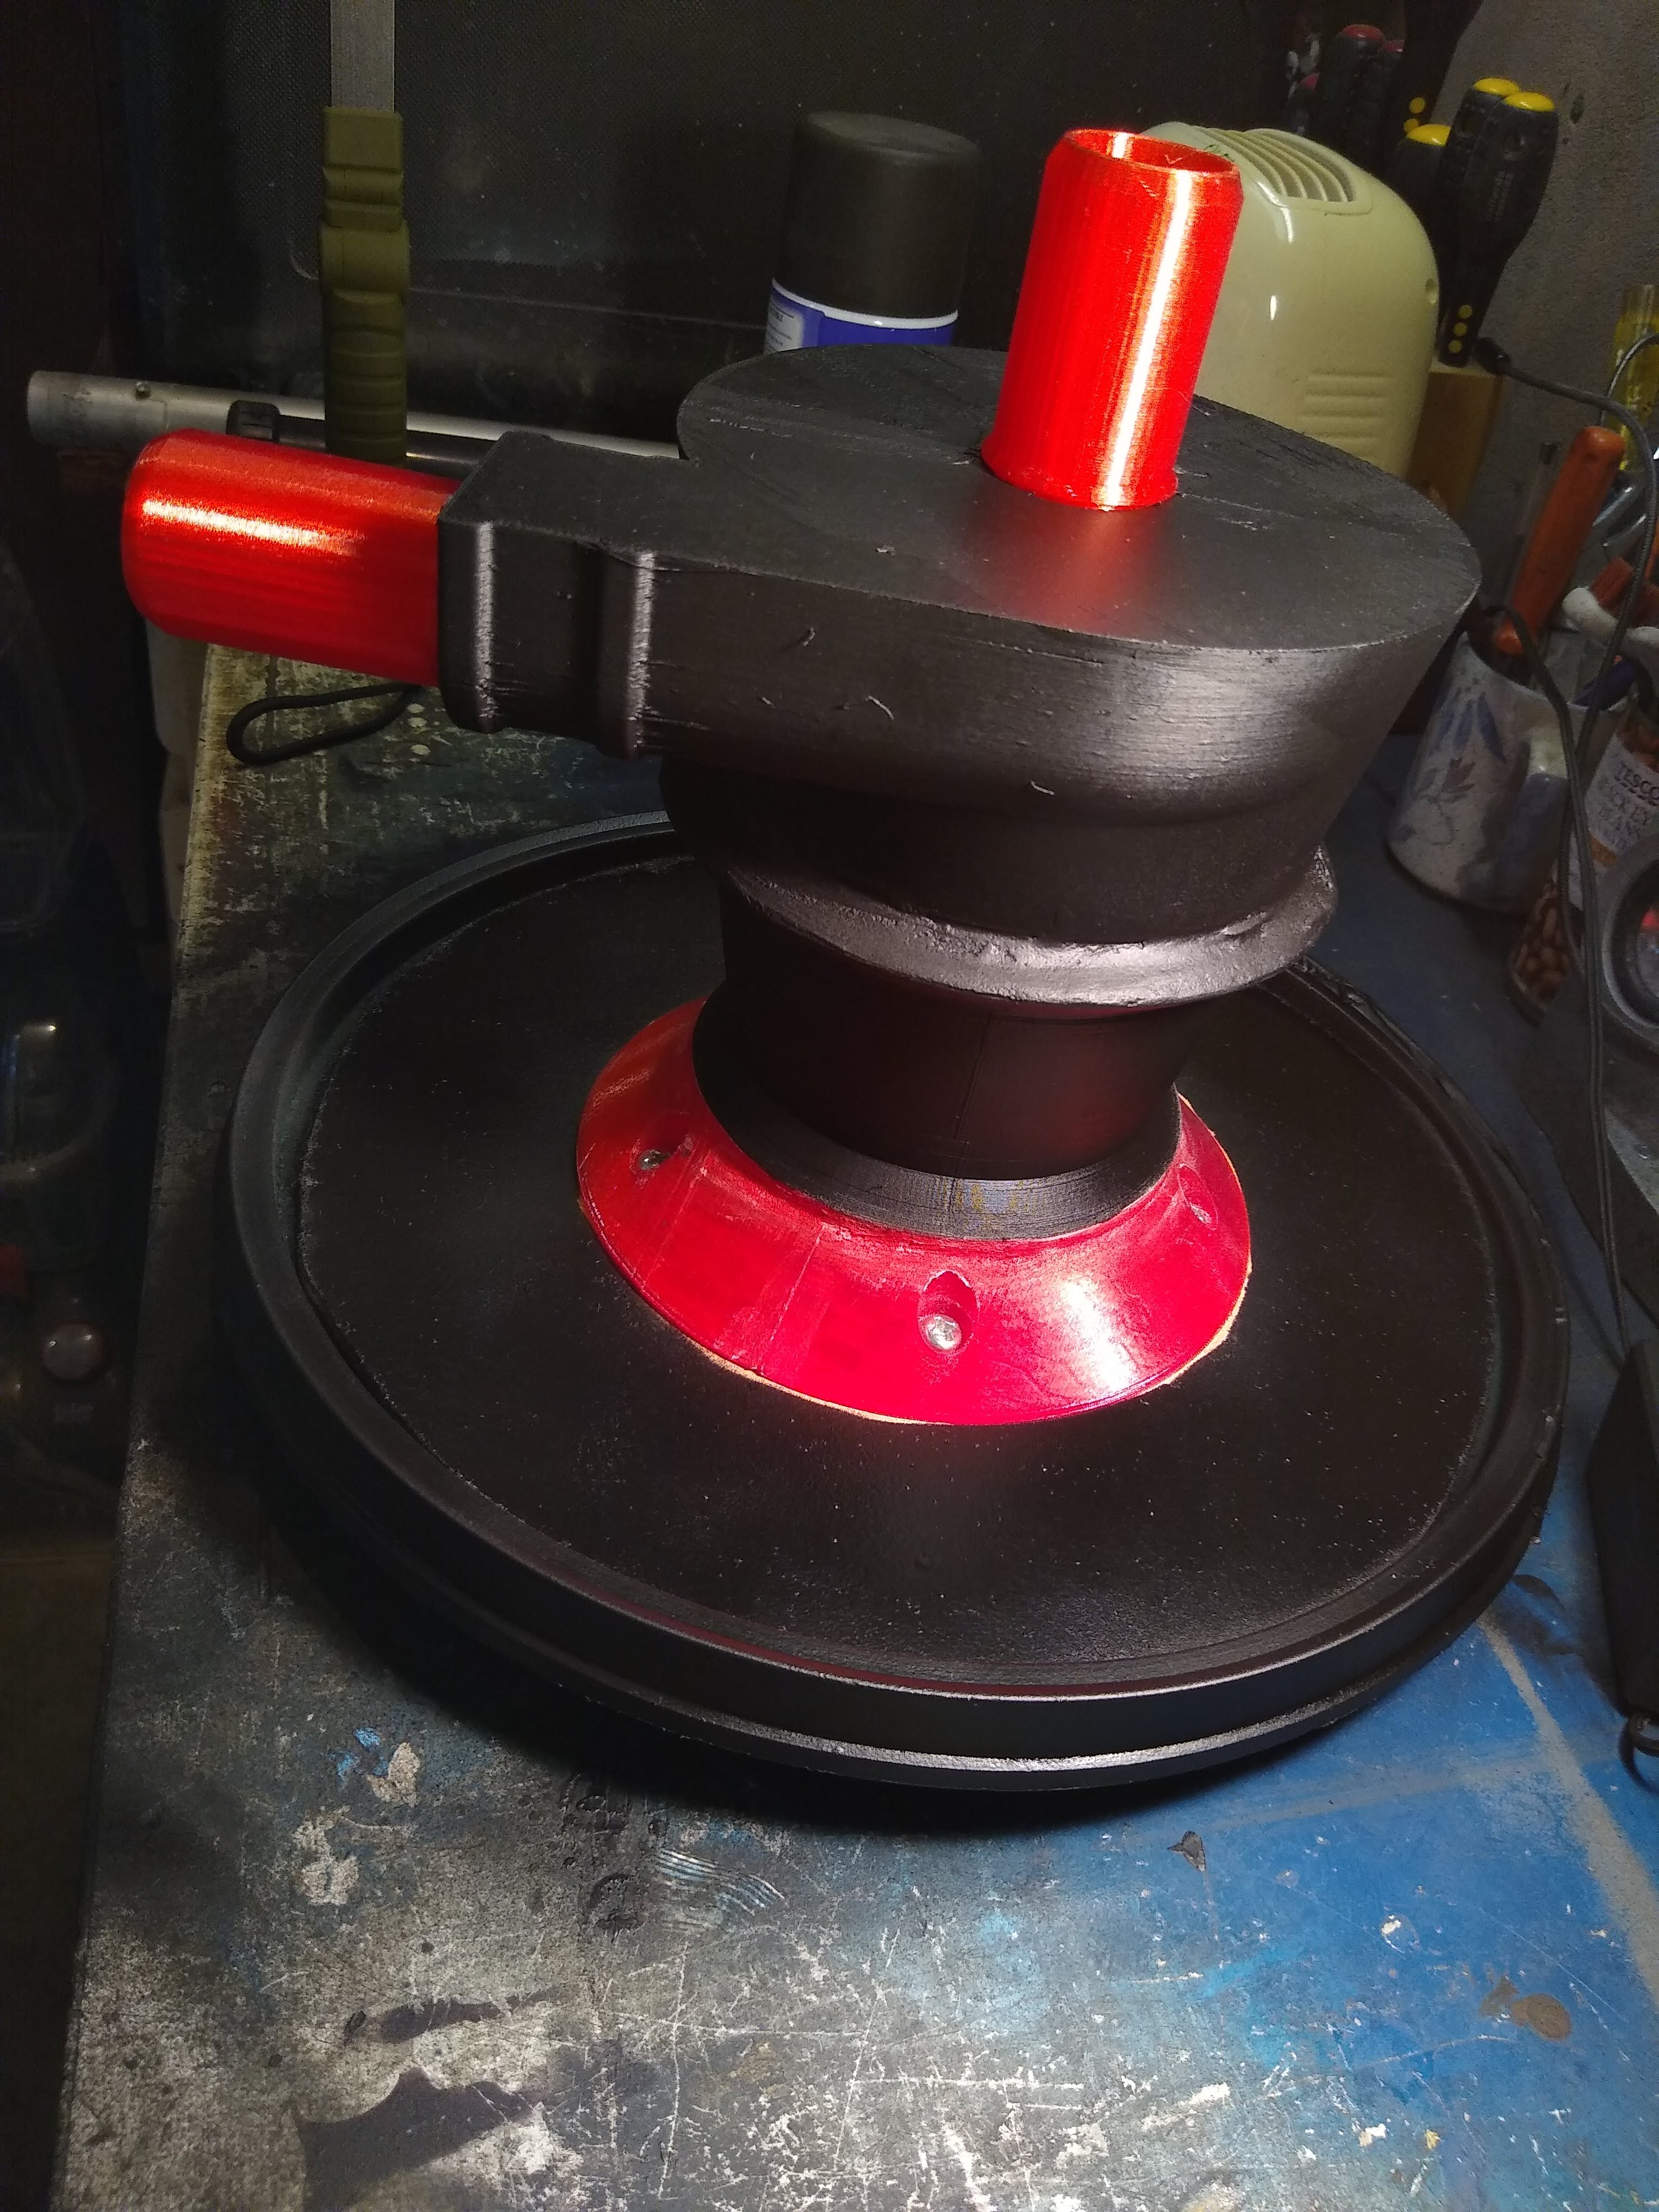
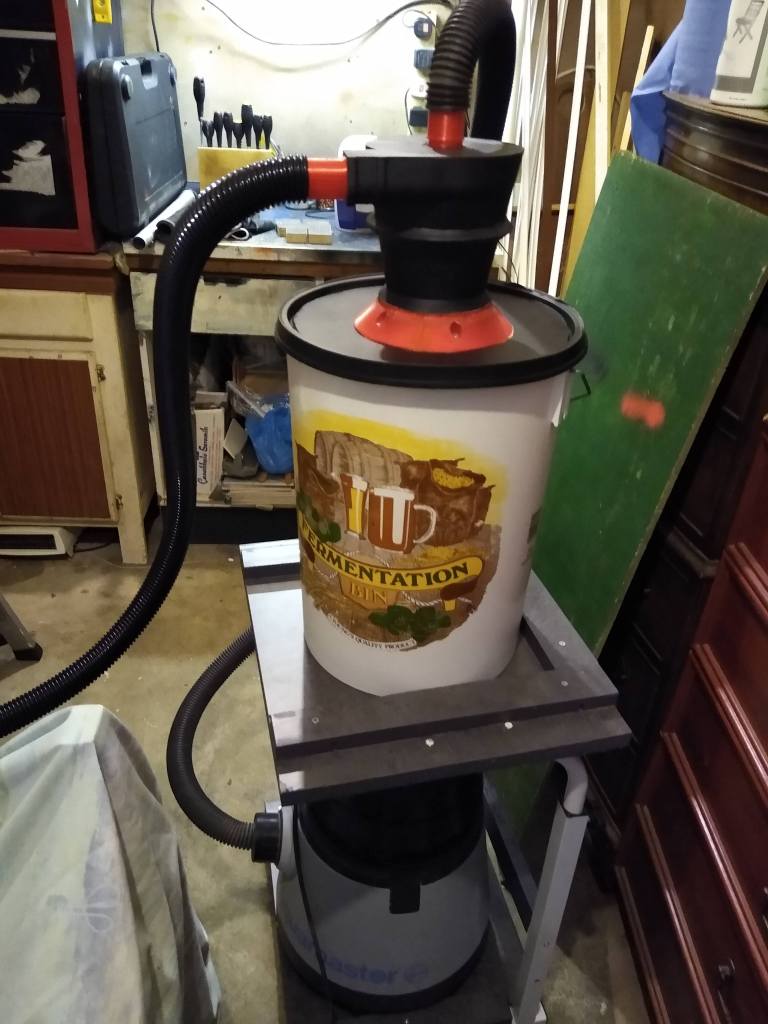
Turns out that messing around with wood is pretty messy. Things get pretty sawdusty, pretty quickly. To get on top of this dusty dilemma I set about assembling a Cyclone Throne.
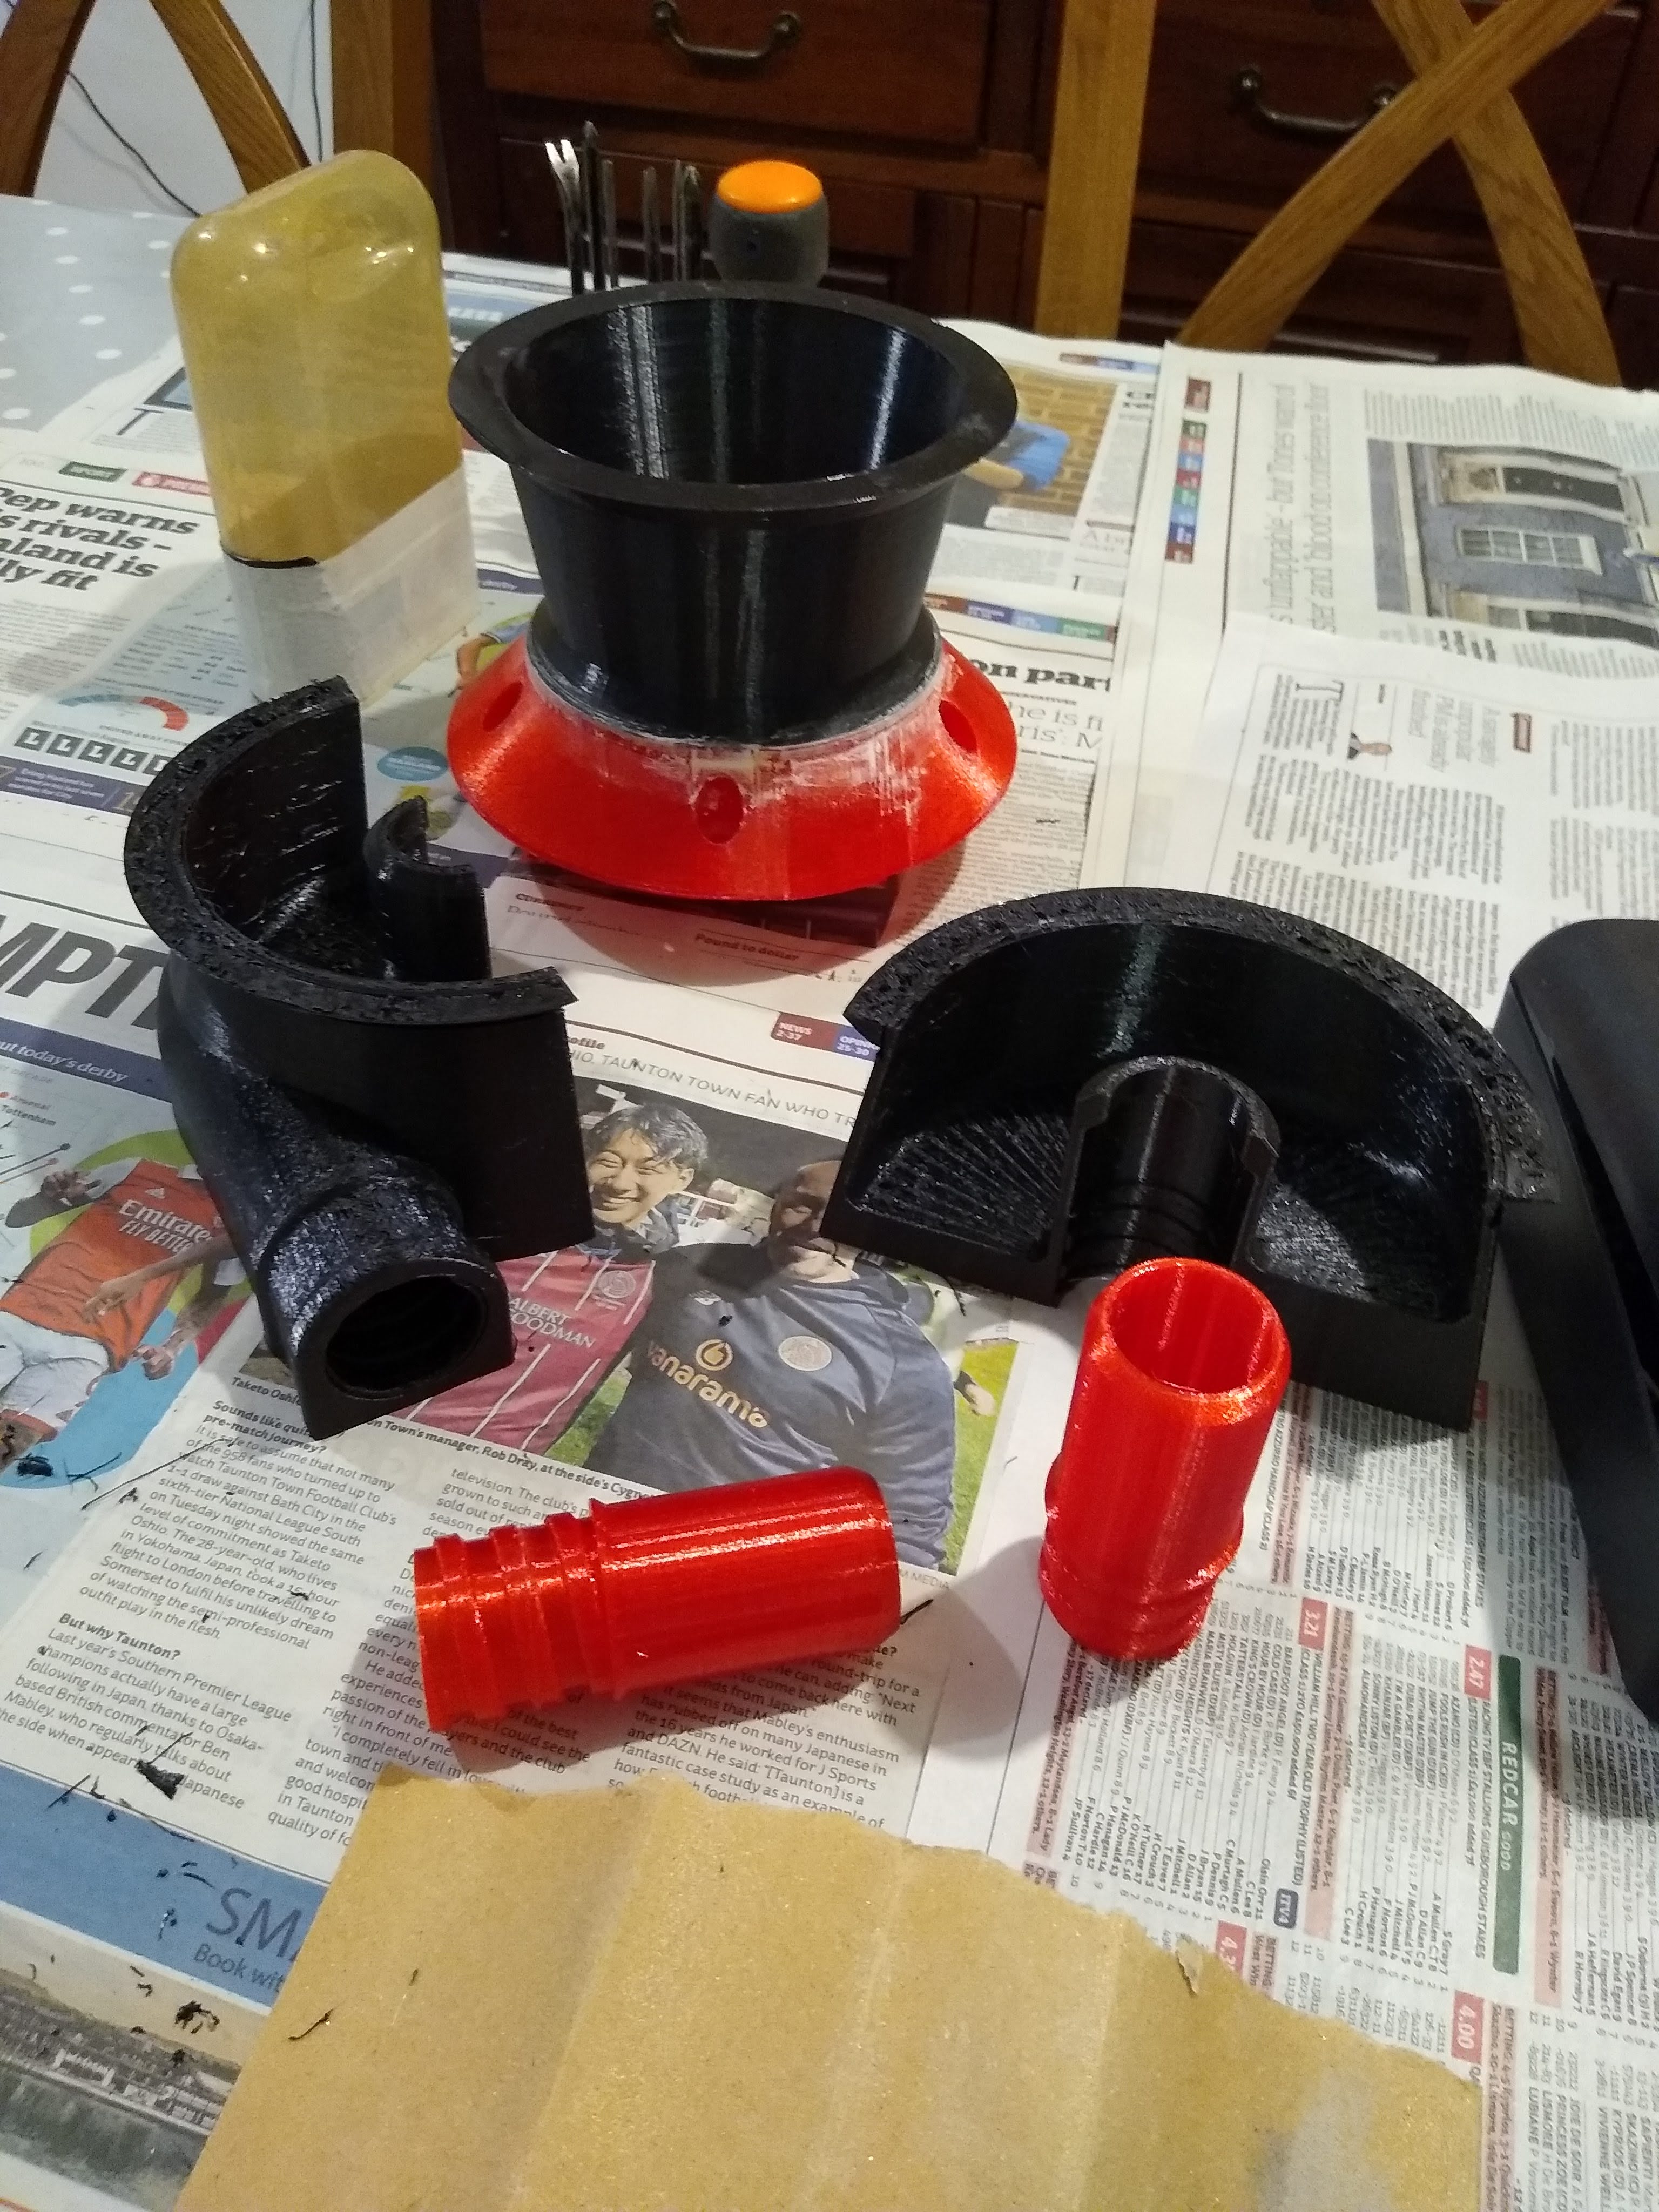
Being partial to a 3D print or two I thought I’d print my own cyclonic dust separator and put together a trolley to house the collecting bin and hoover. How hard could that be?
First things first, I had to find a model on thingiverse then scale and slice it to fit on my printer. And cross my fingers that my opened and very old filament still works.
With my advance video editing skills I put together a few time lapses of the some of the prints:
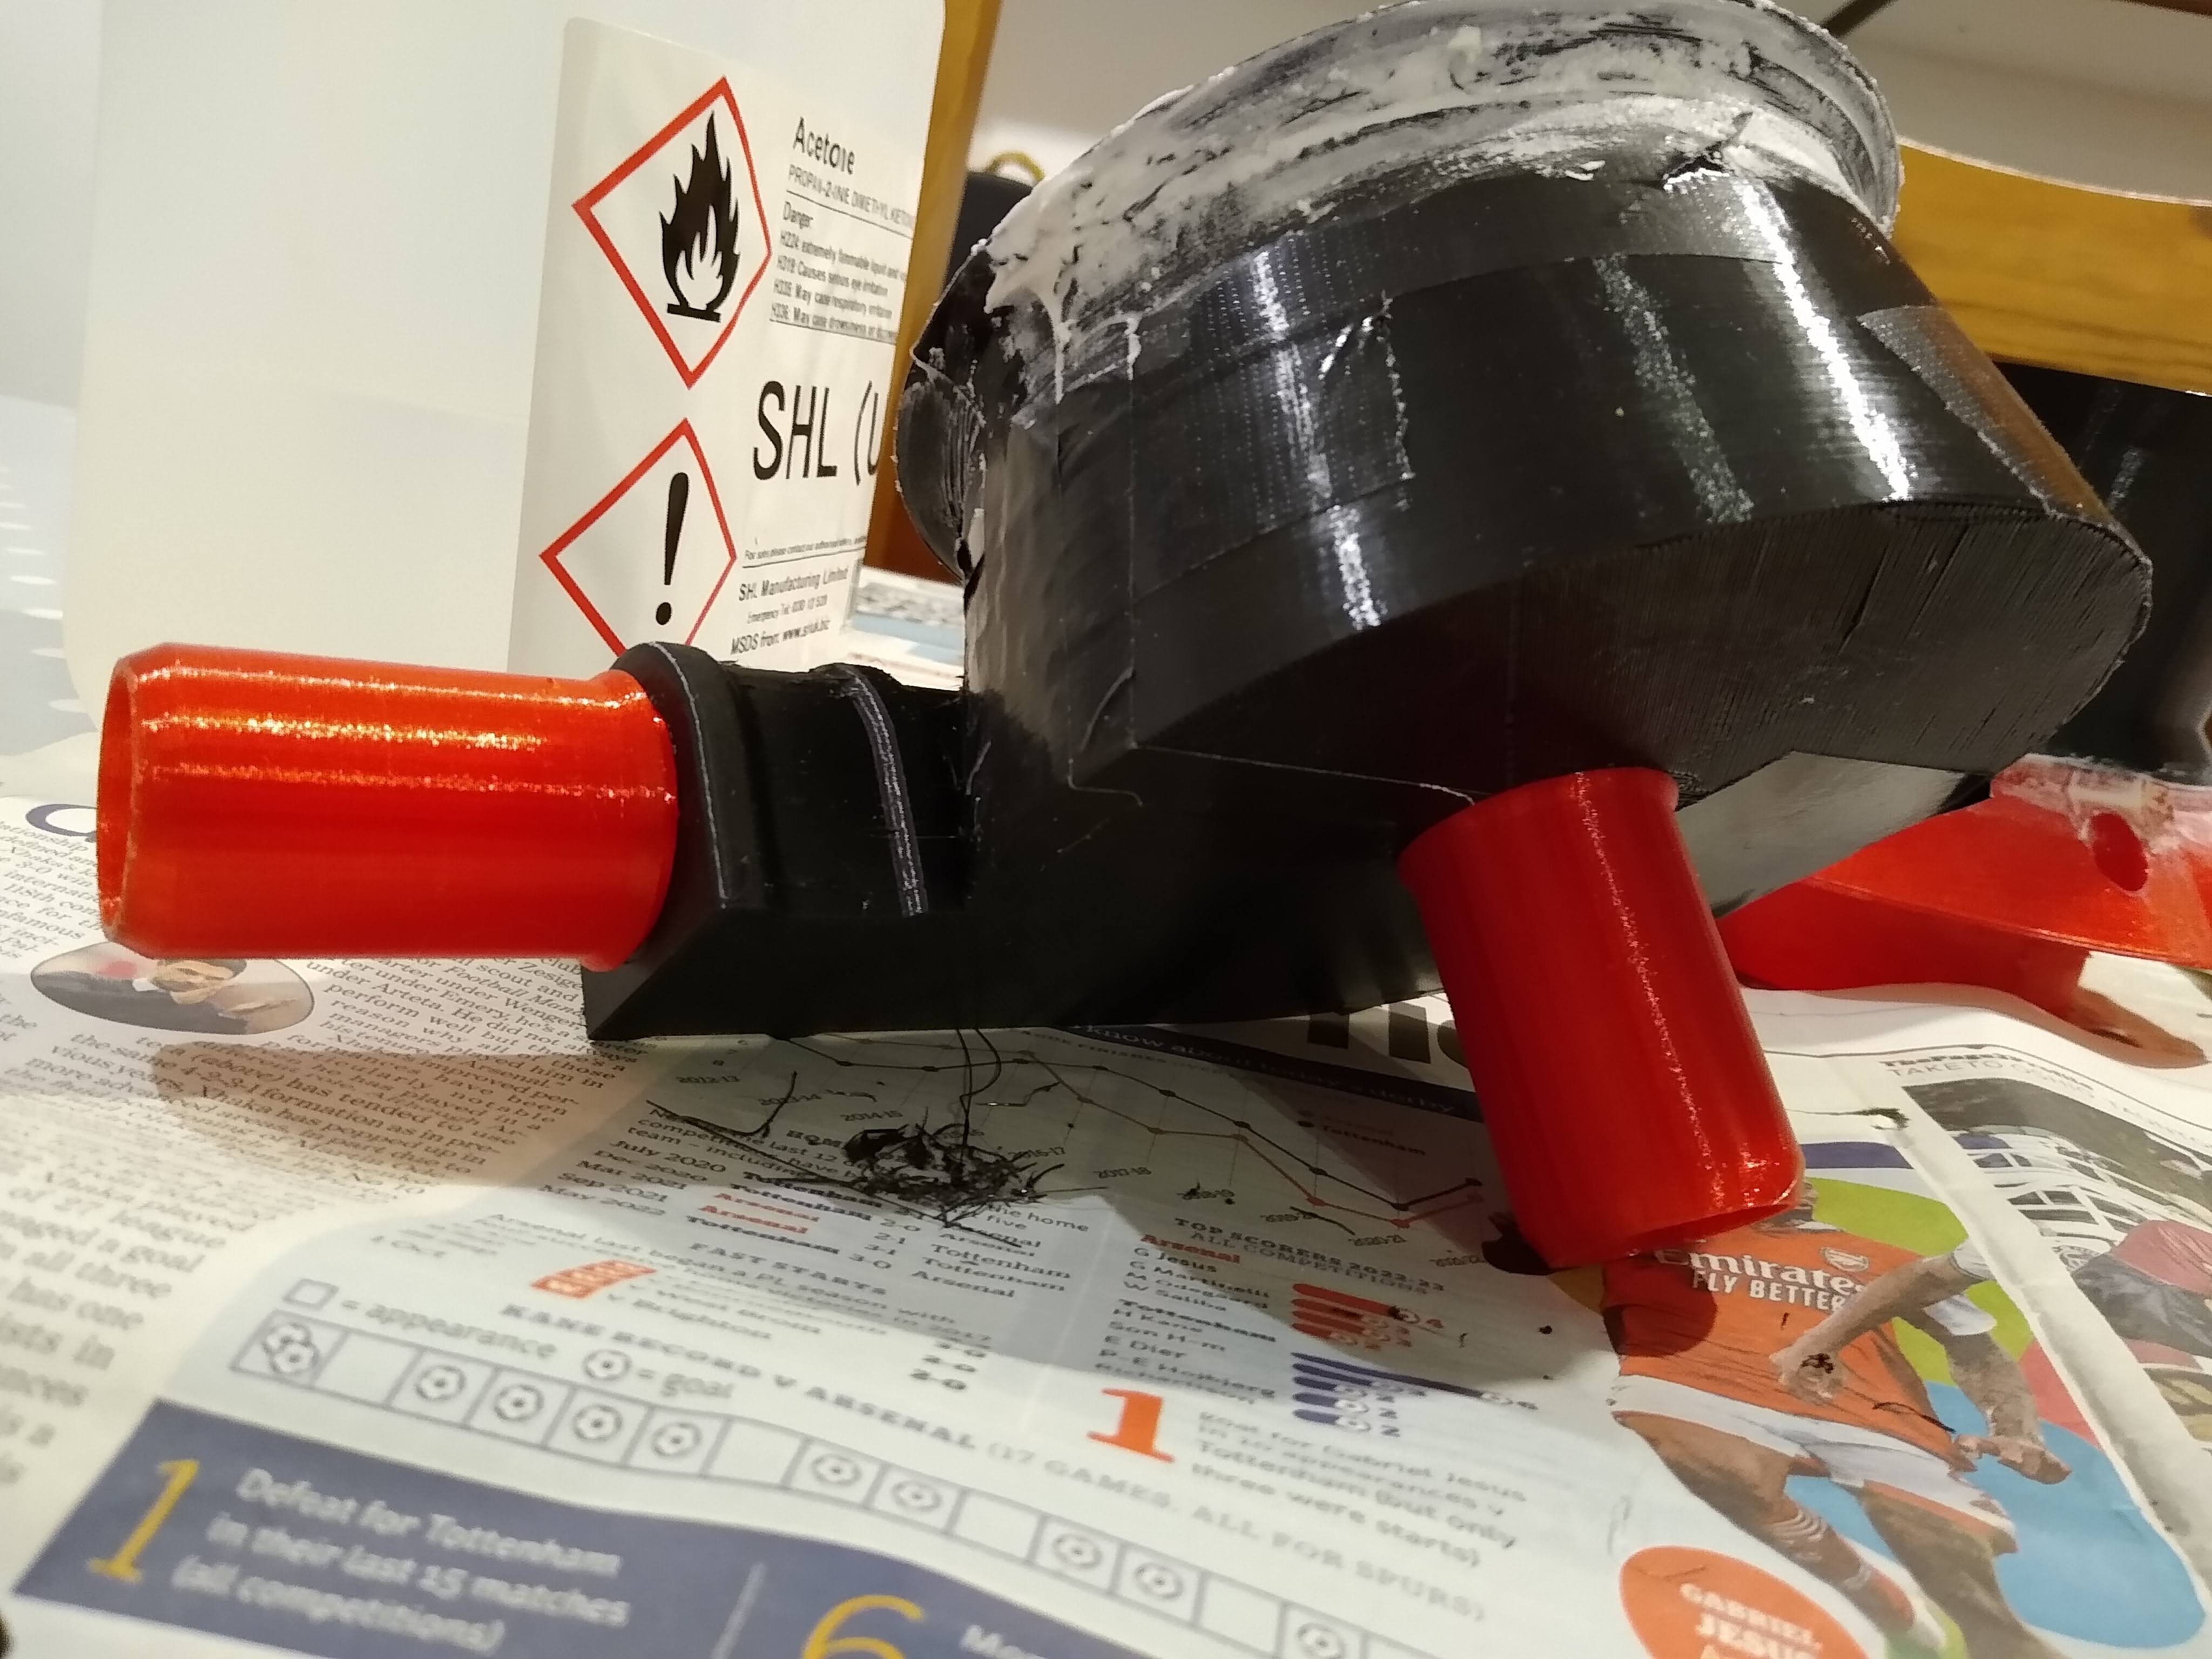
Time lapse fun times After everything had been printed it needed to be glued together and a few gaps had to filled. After a lick of paint and attaching it to an old fermentation bin lid the sawdust collecting bin was complete. A few pics of the process:

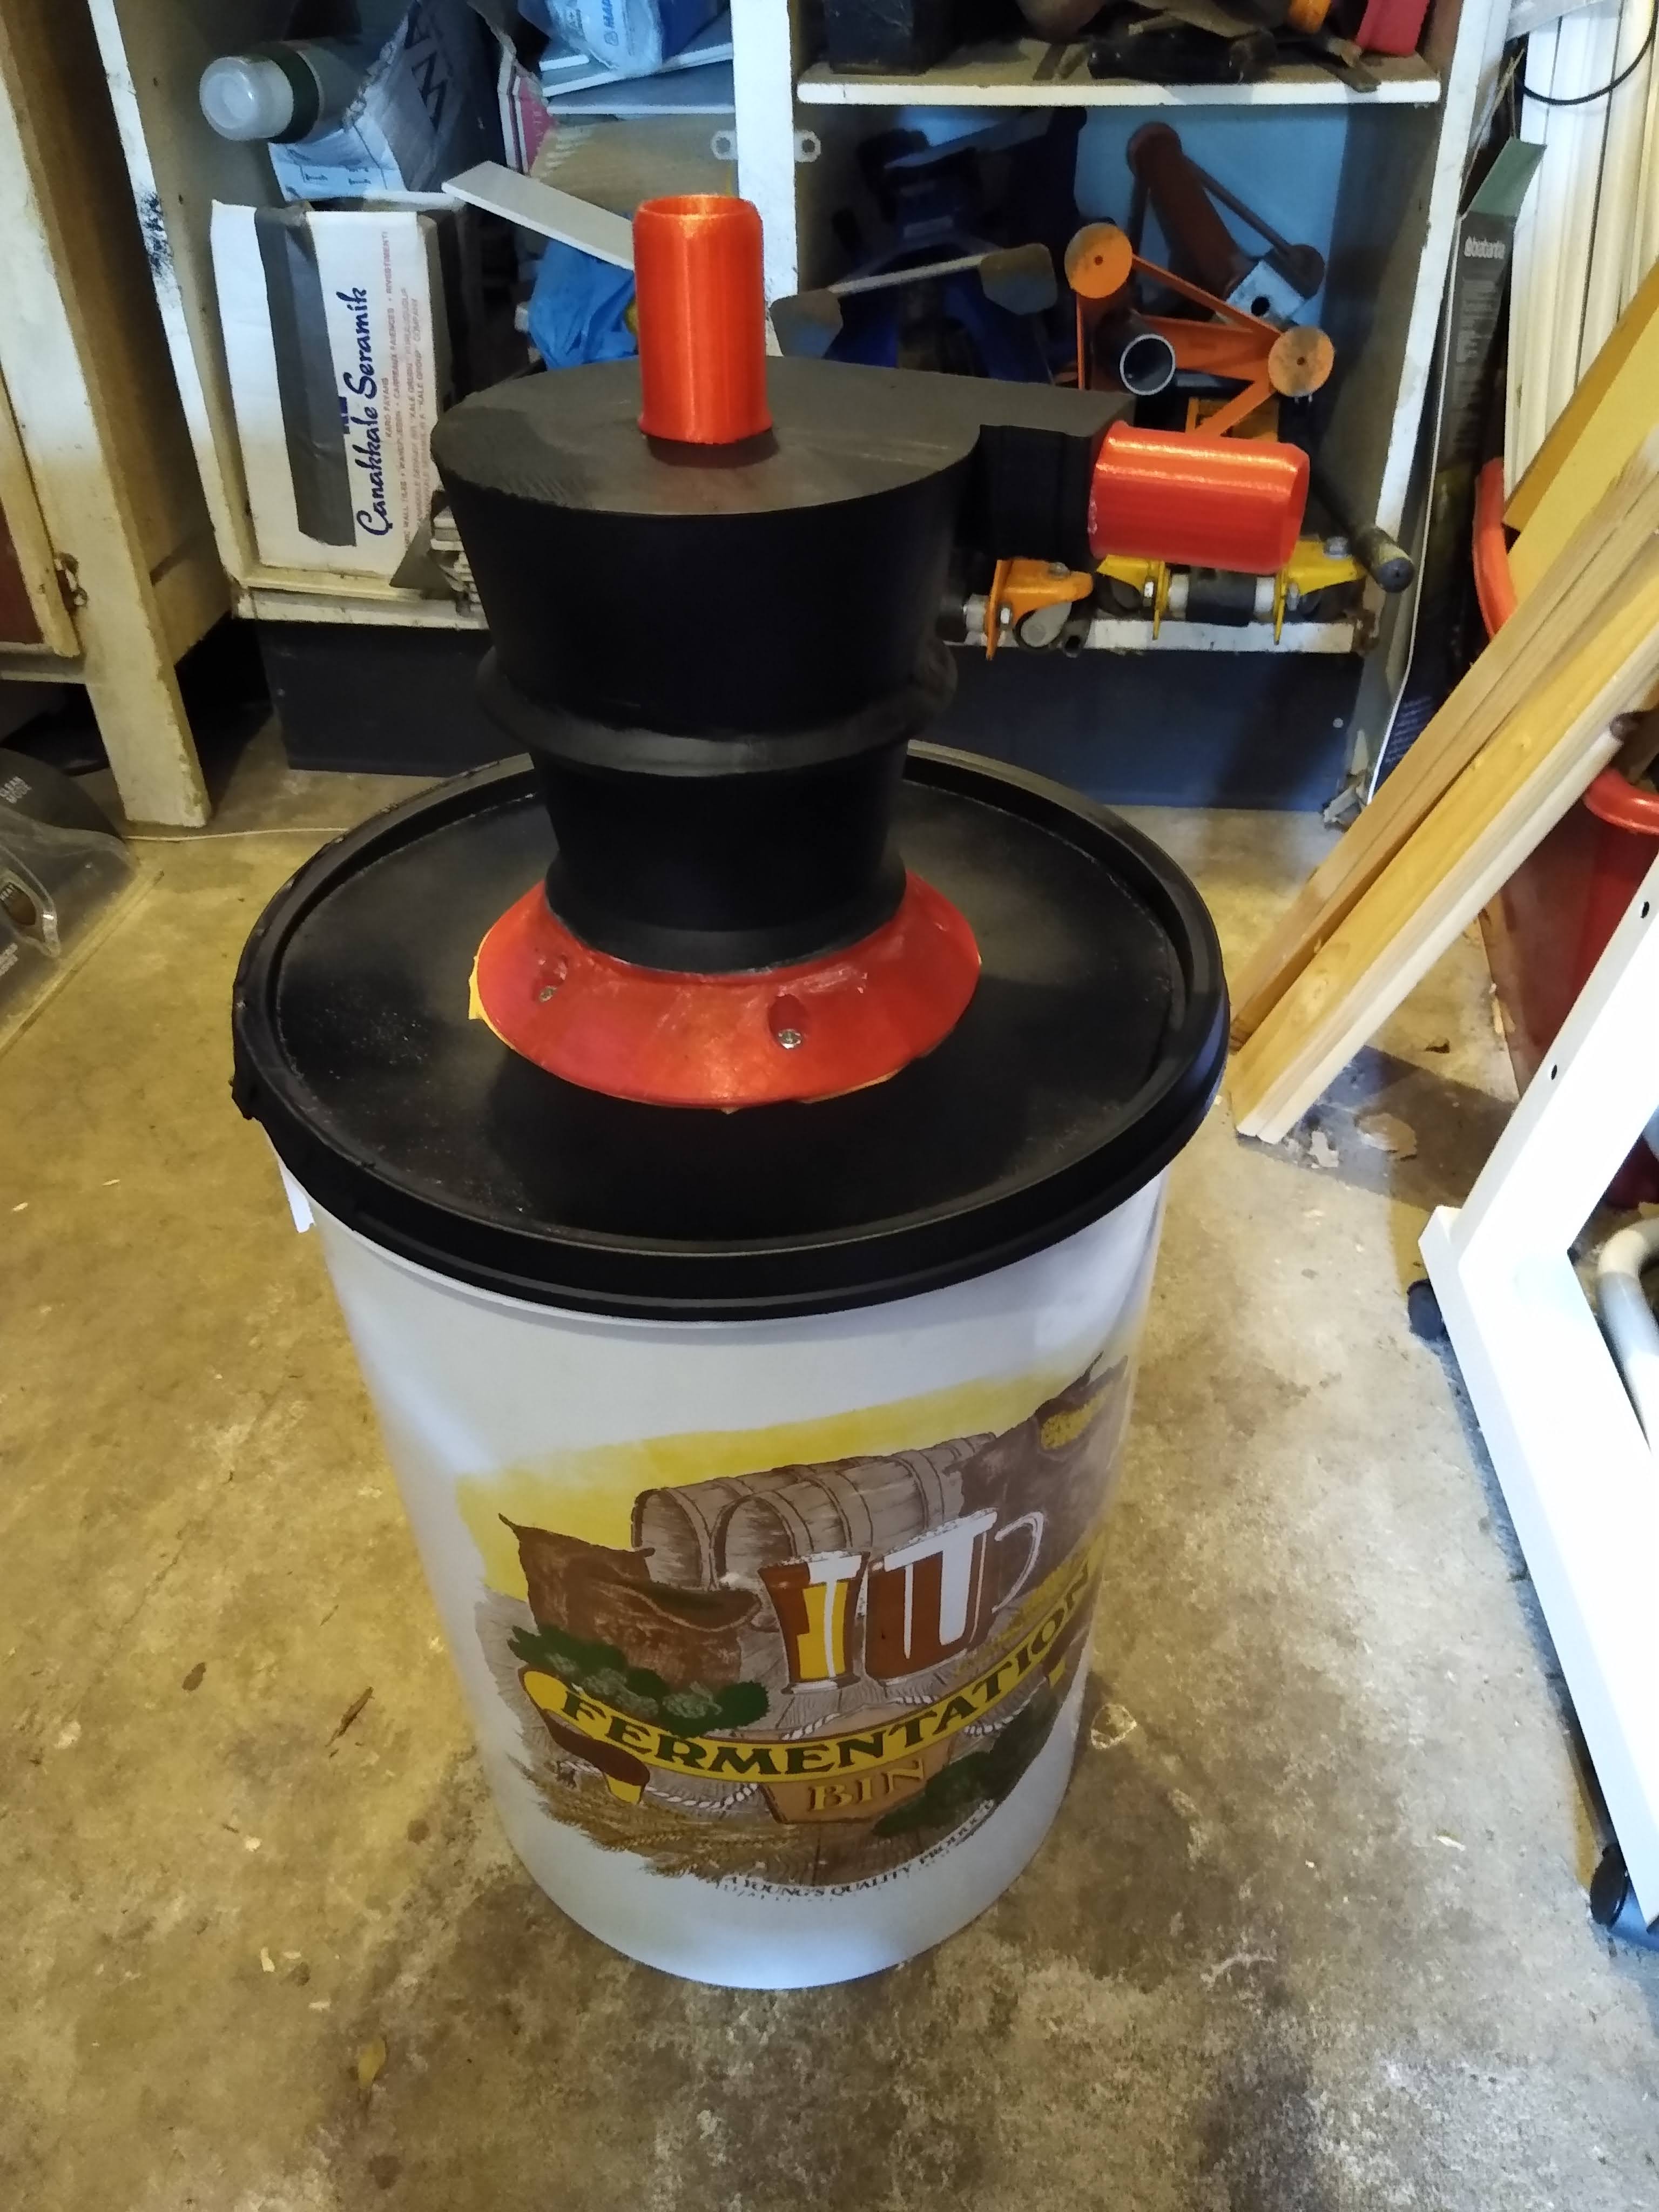
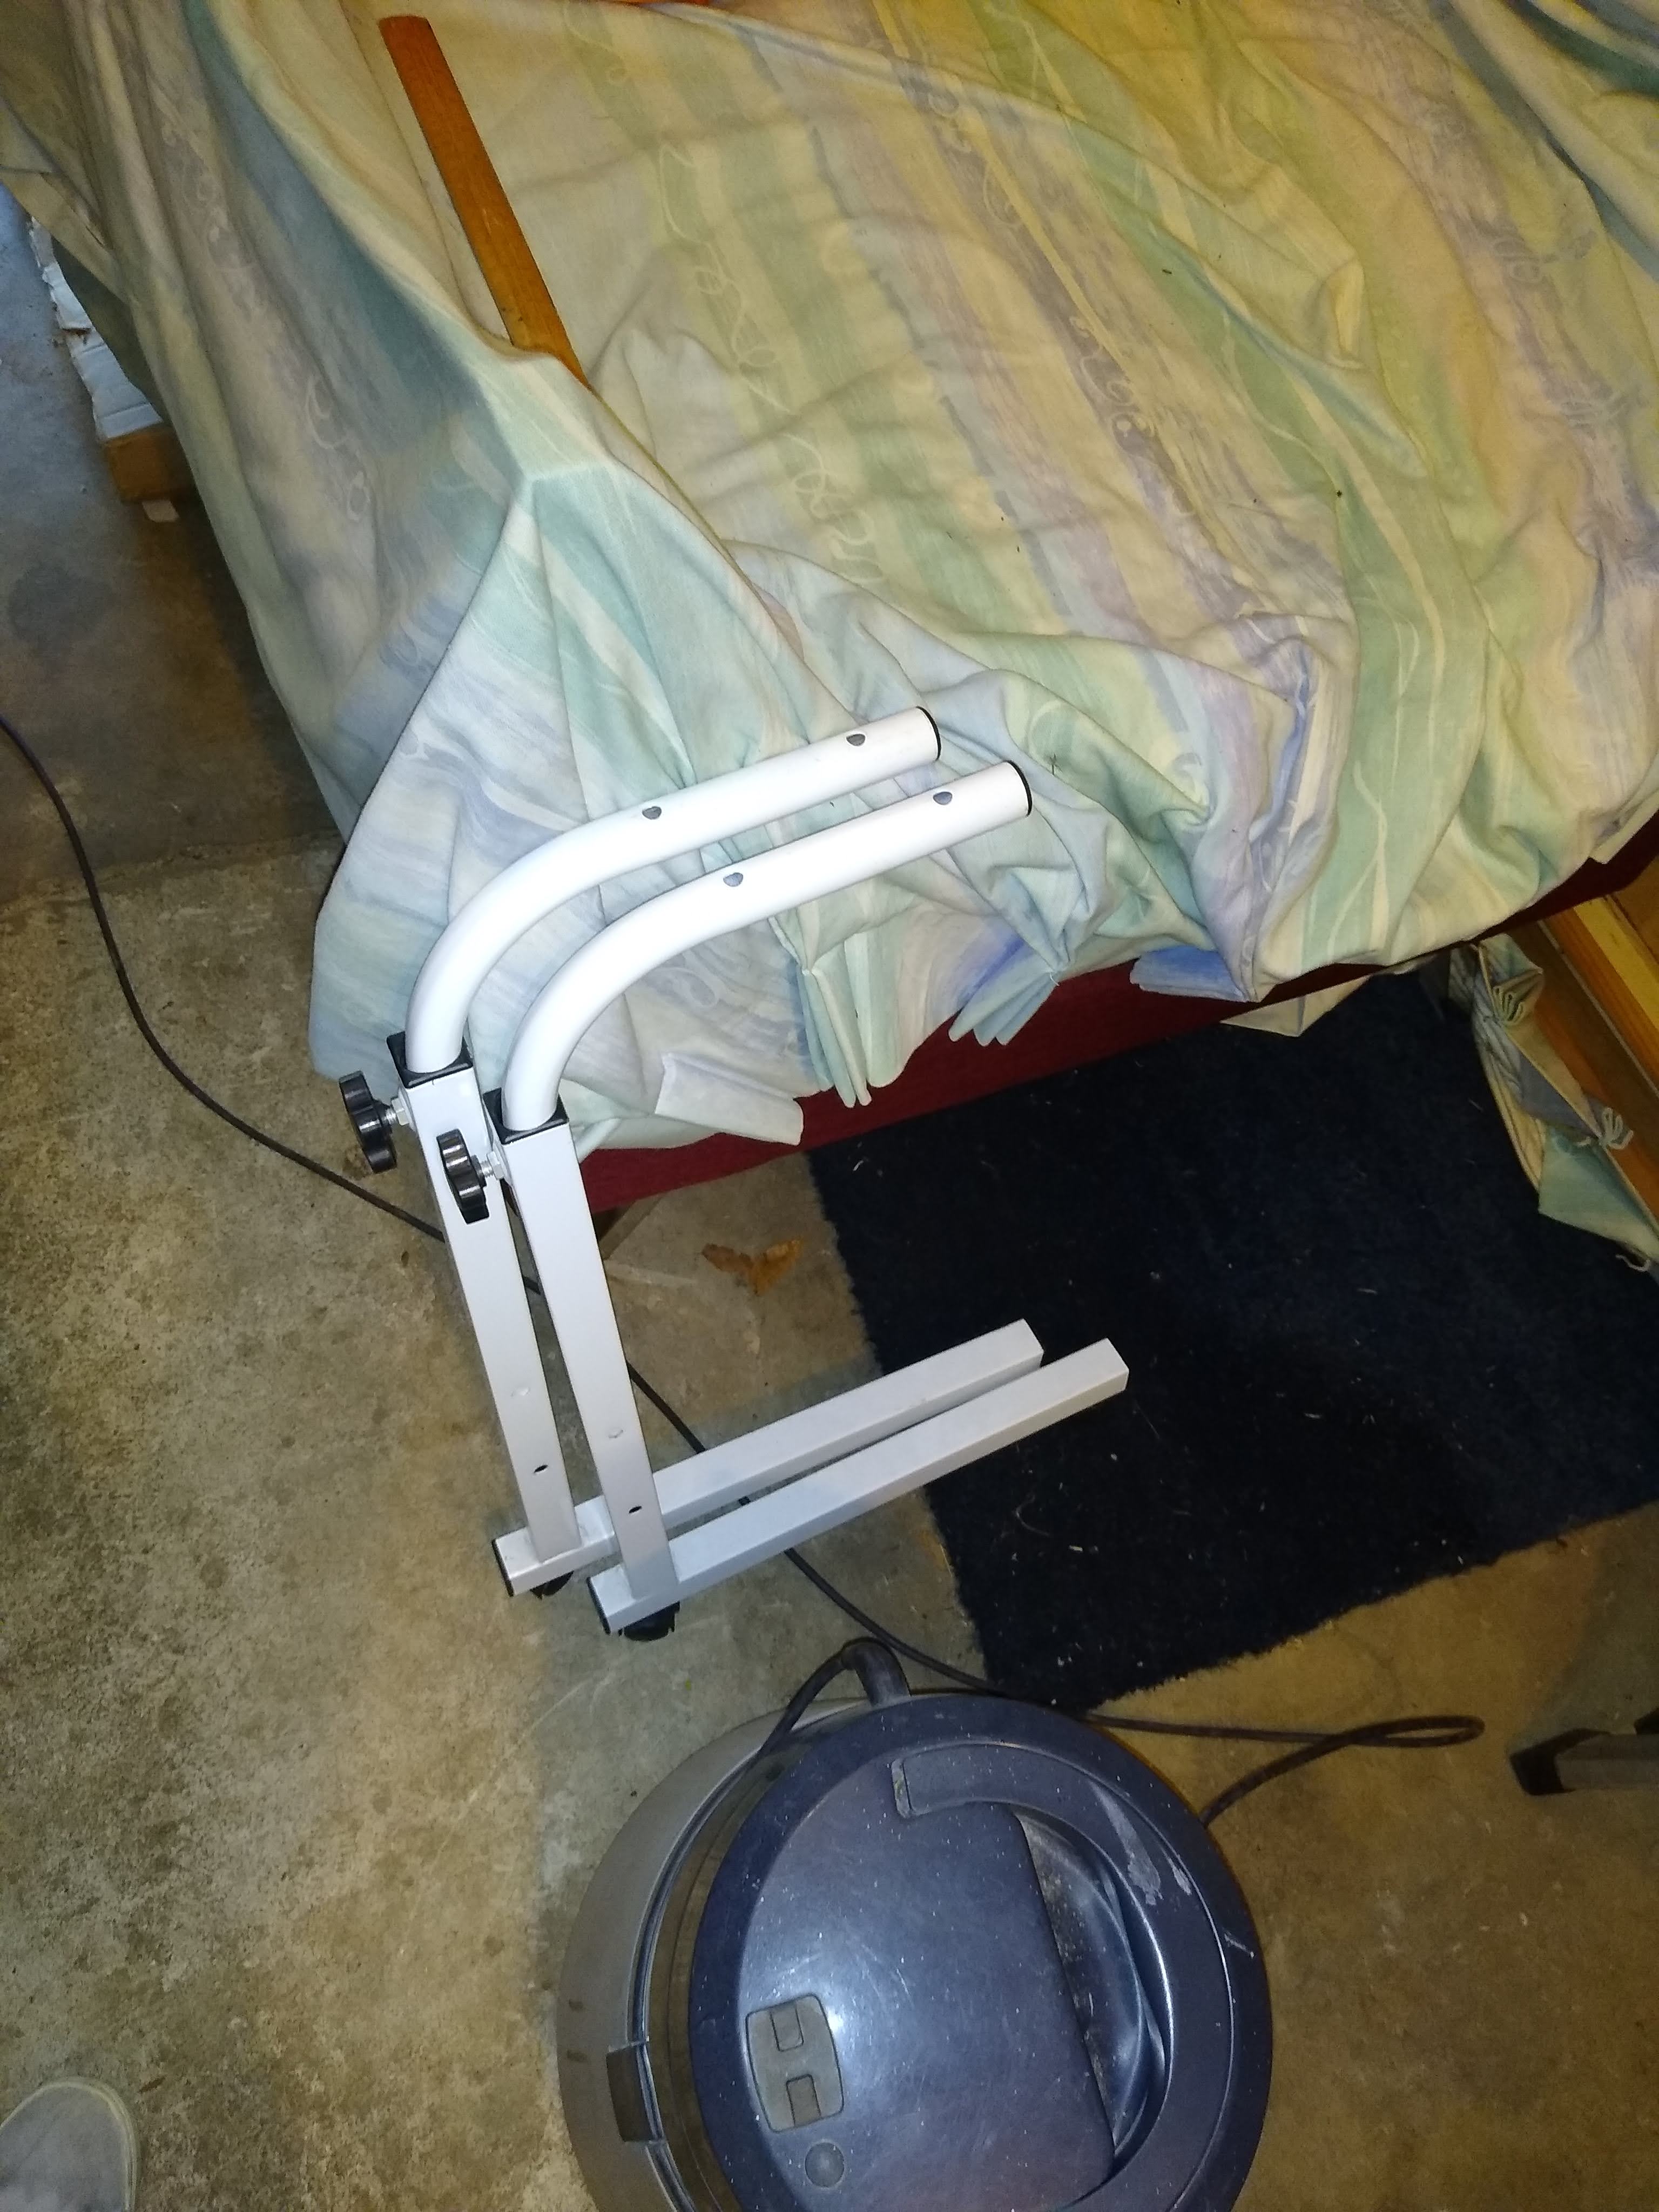
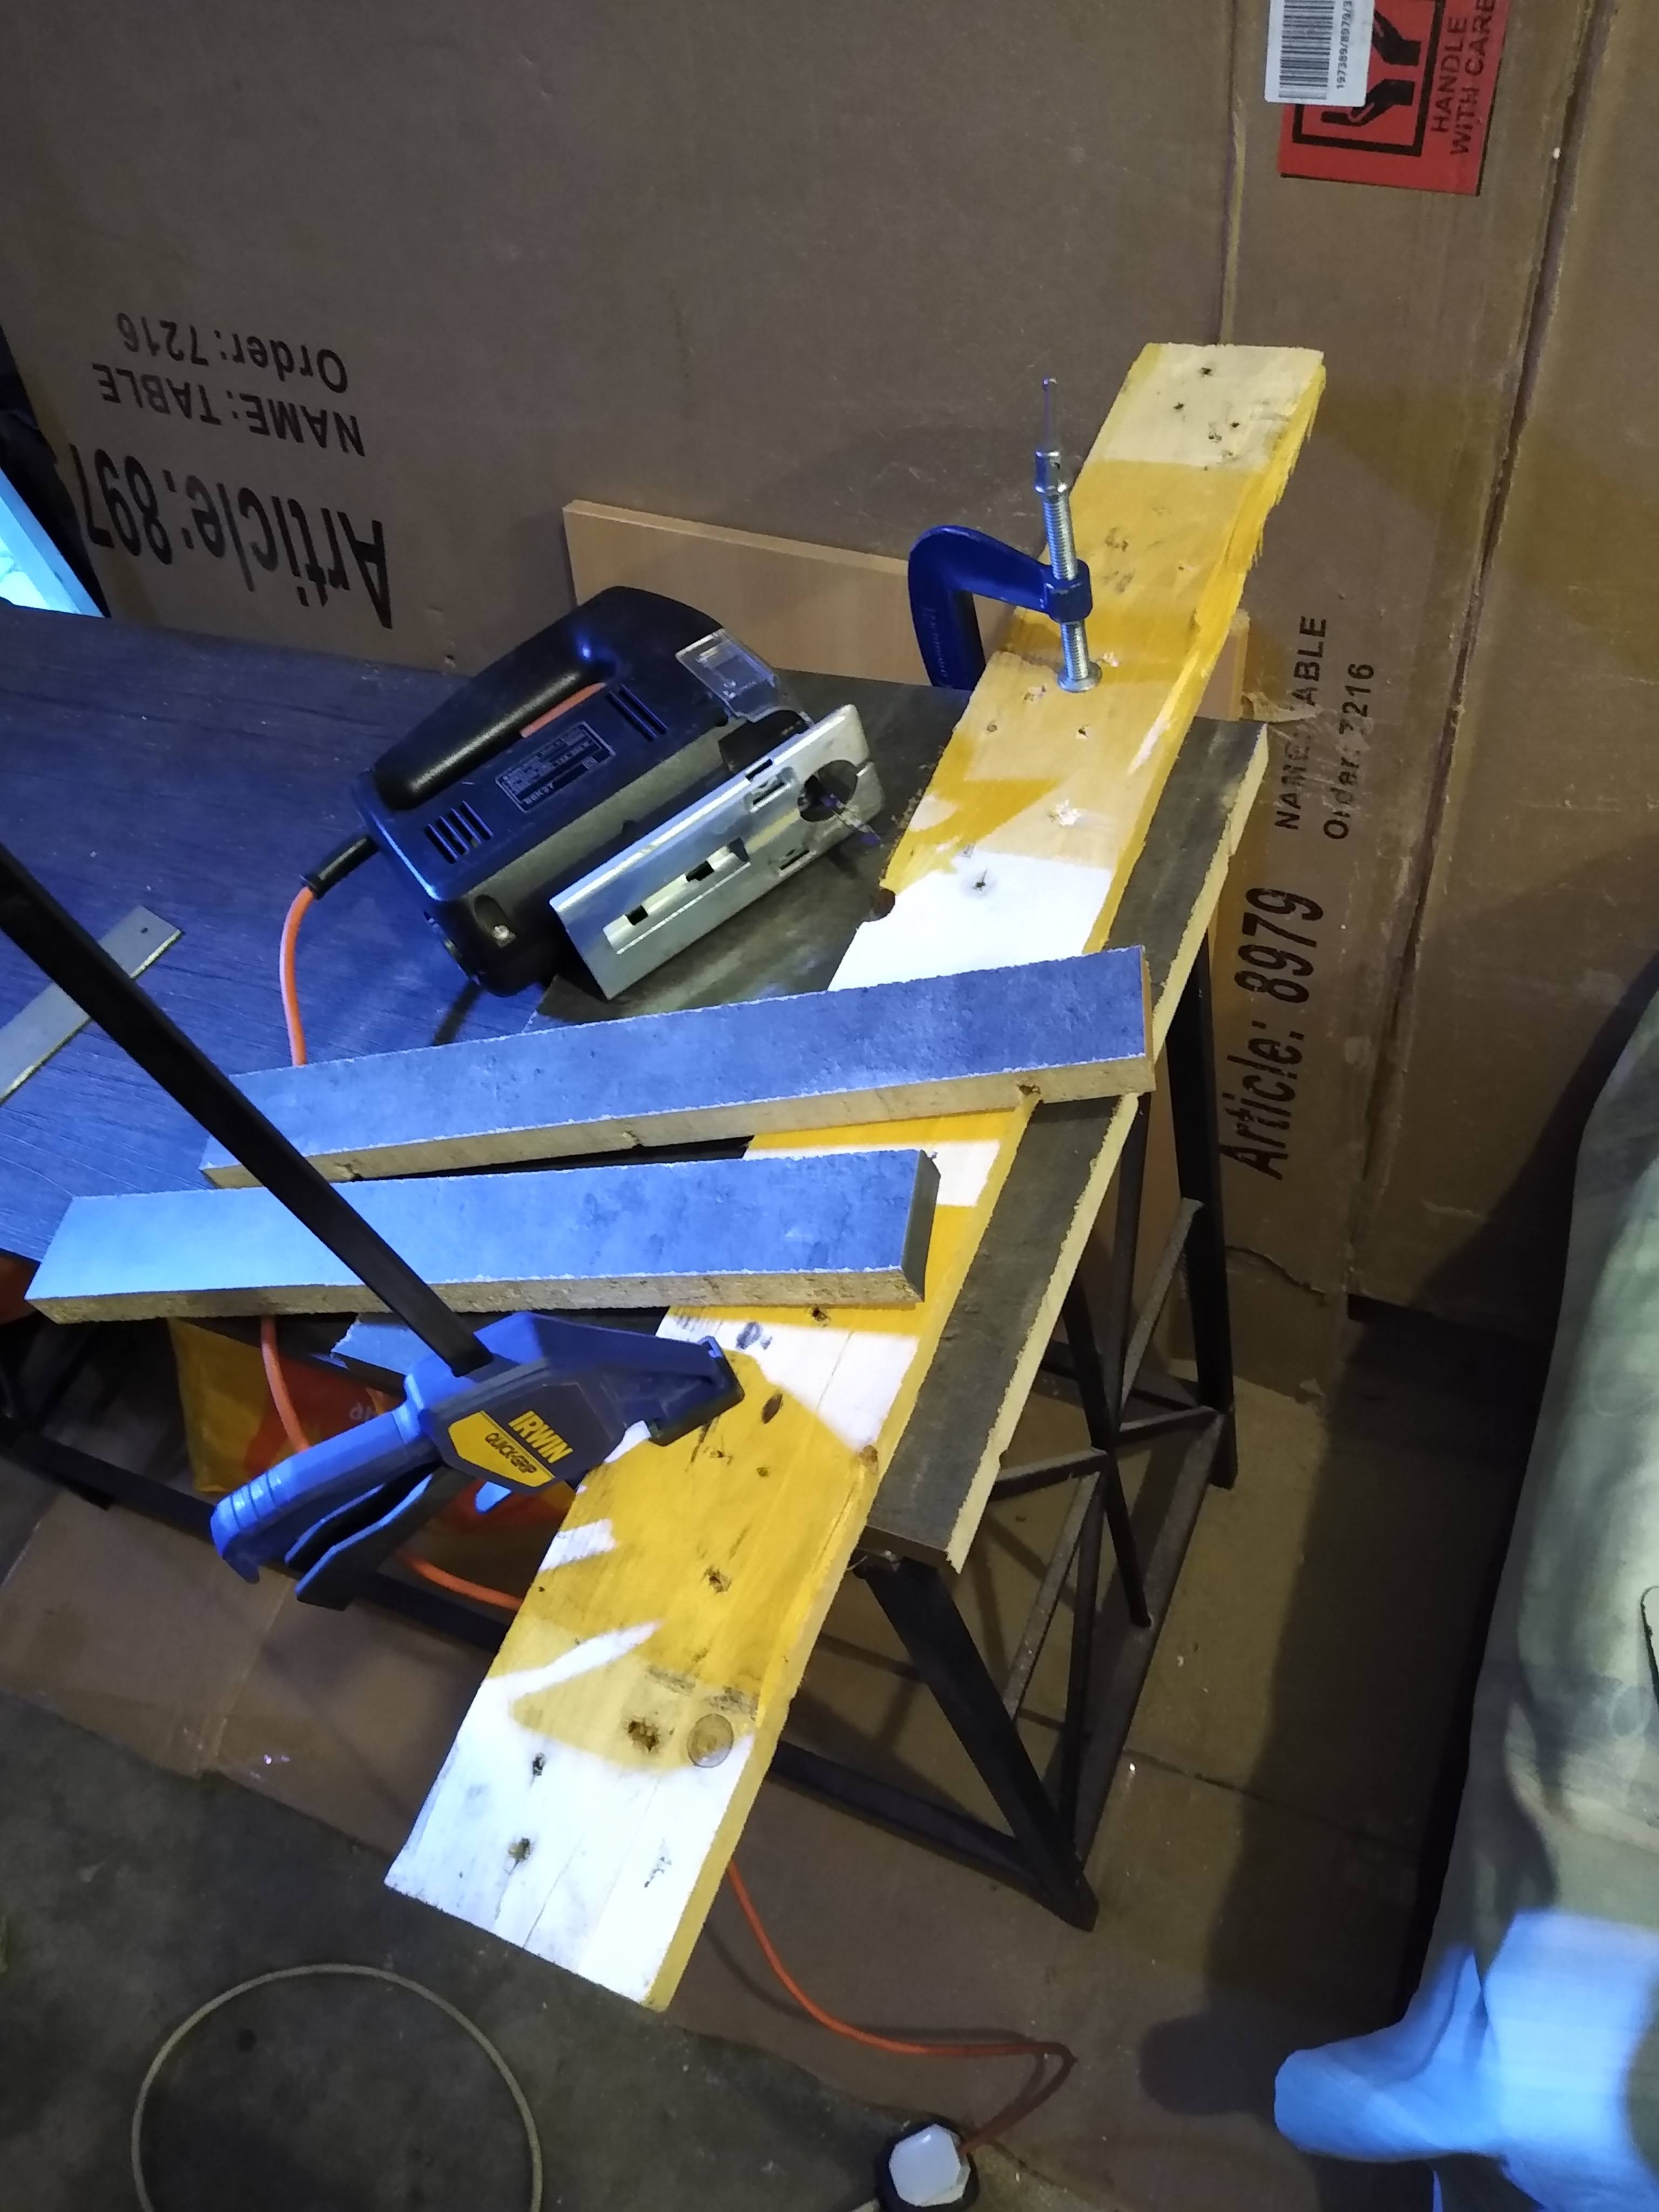
The next step was to make a trolley to fit the hoover and the collection bin. This basically involved cobbling together some mdf and old legs from a desk of some sort. It wasn’t pretty but it kinda worked.


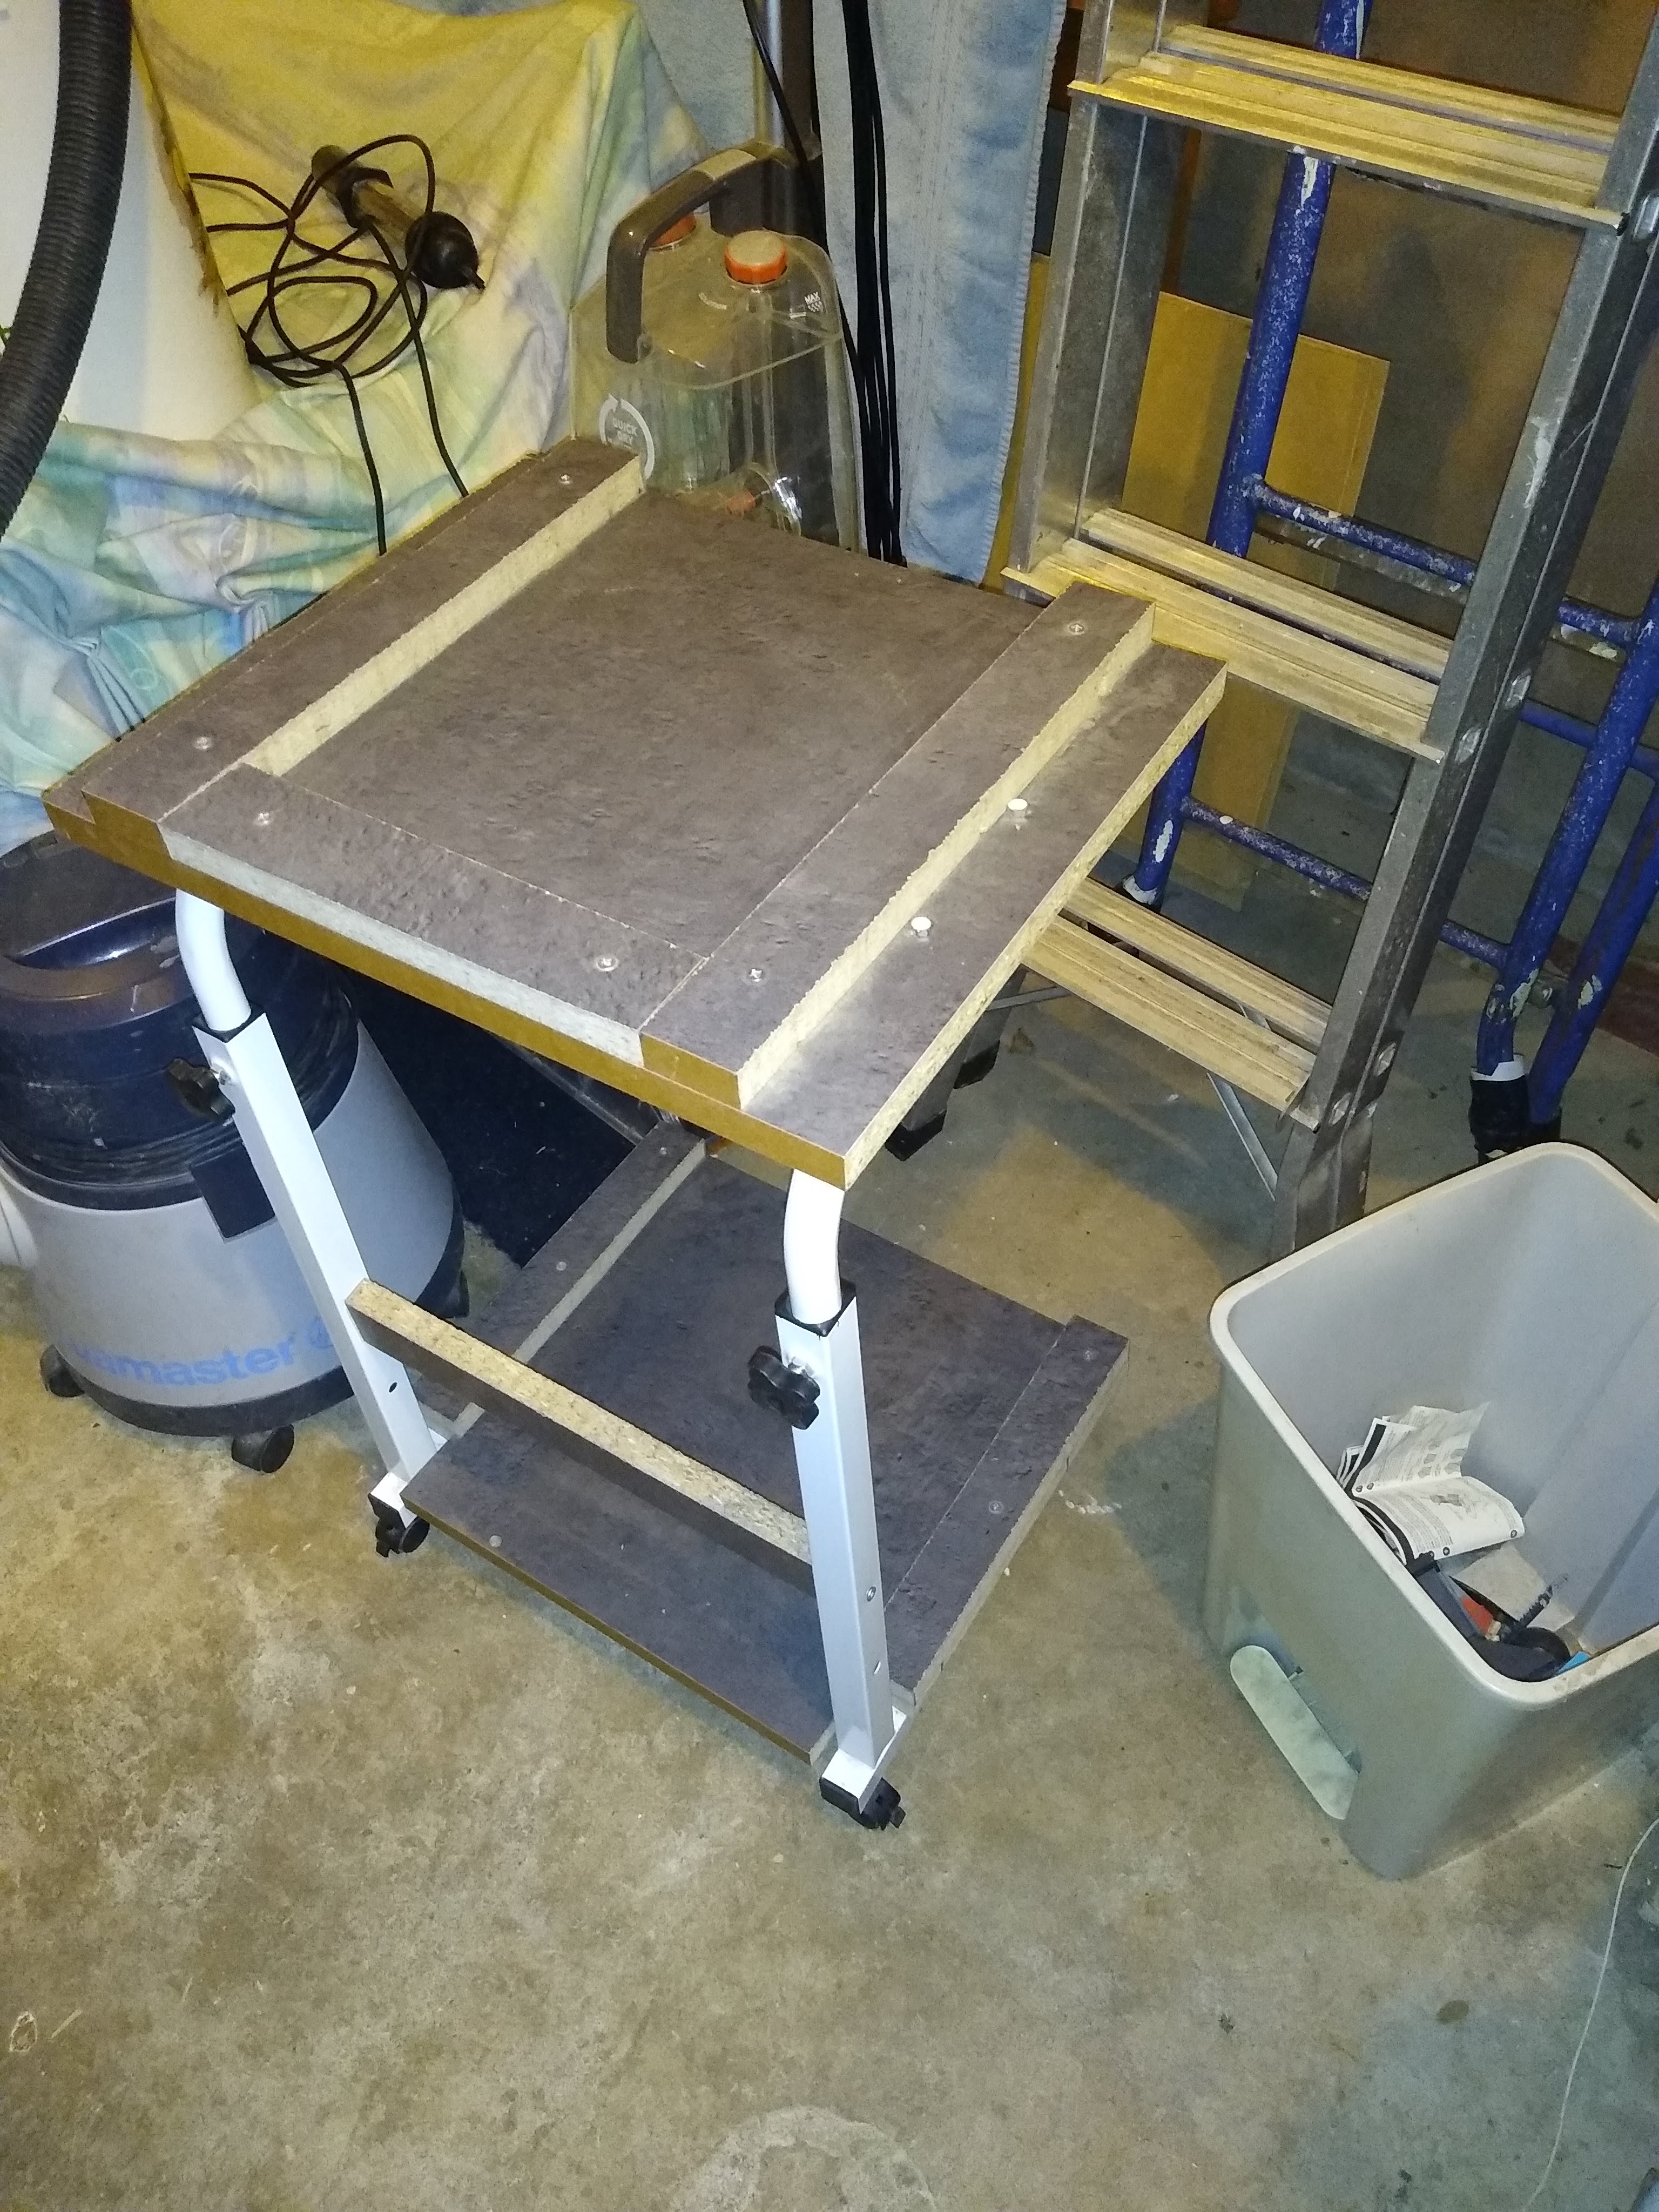
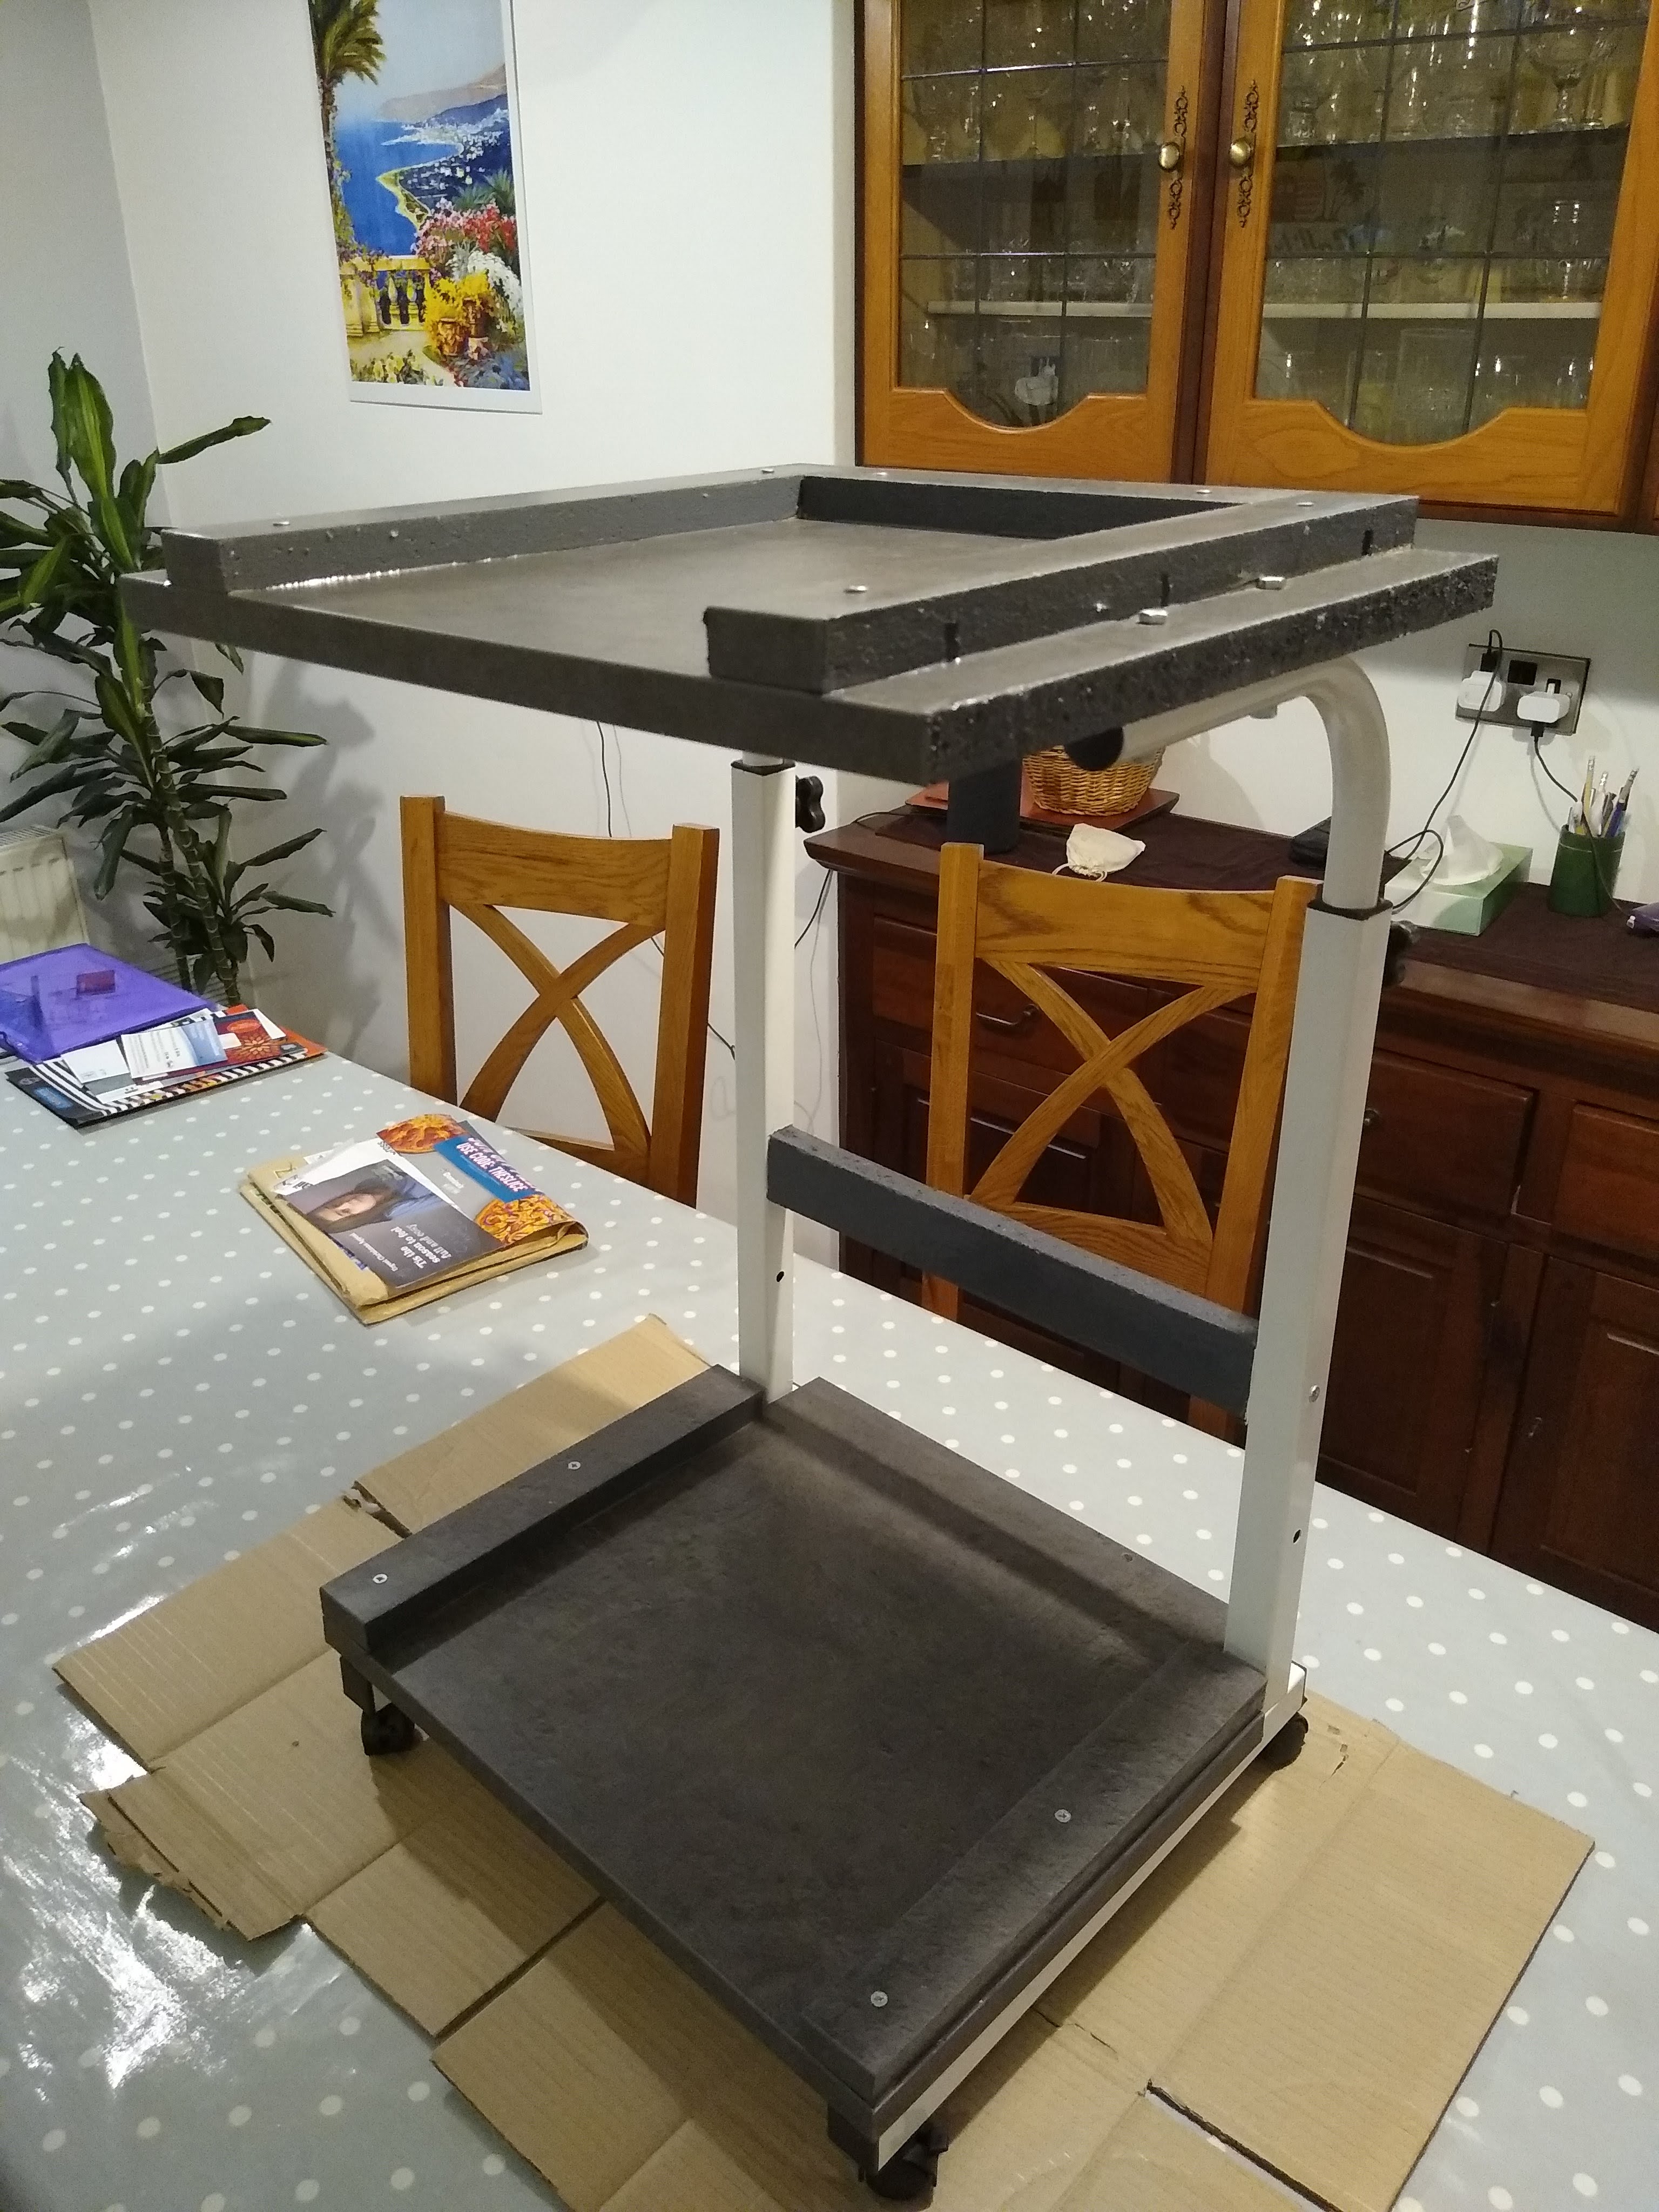
So now it’s time to start making something other than a mess. The final product looked something like this:
-
Pallet Buster
There are a few ways to break pallets down that keep cropping up. One is to saw the good bits of wood out and the other is pry the boards out with some kind of prying bar, AKA a pallet buster. Linko: https://amzn.to/3HHrvtg
The pros and cons of either method don’t seem to be weighted too heavily one way or the other. Sawing the wood out means you’re less likely to split wood, but you sacrifice the length of wood. Prying the wood apart means you can end up with the full length board but you can split wood in the process. I figured owning a pallet buster could double up as useful anti-zombie weapon so it seemed the obvious choice.

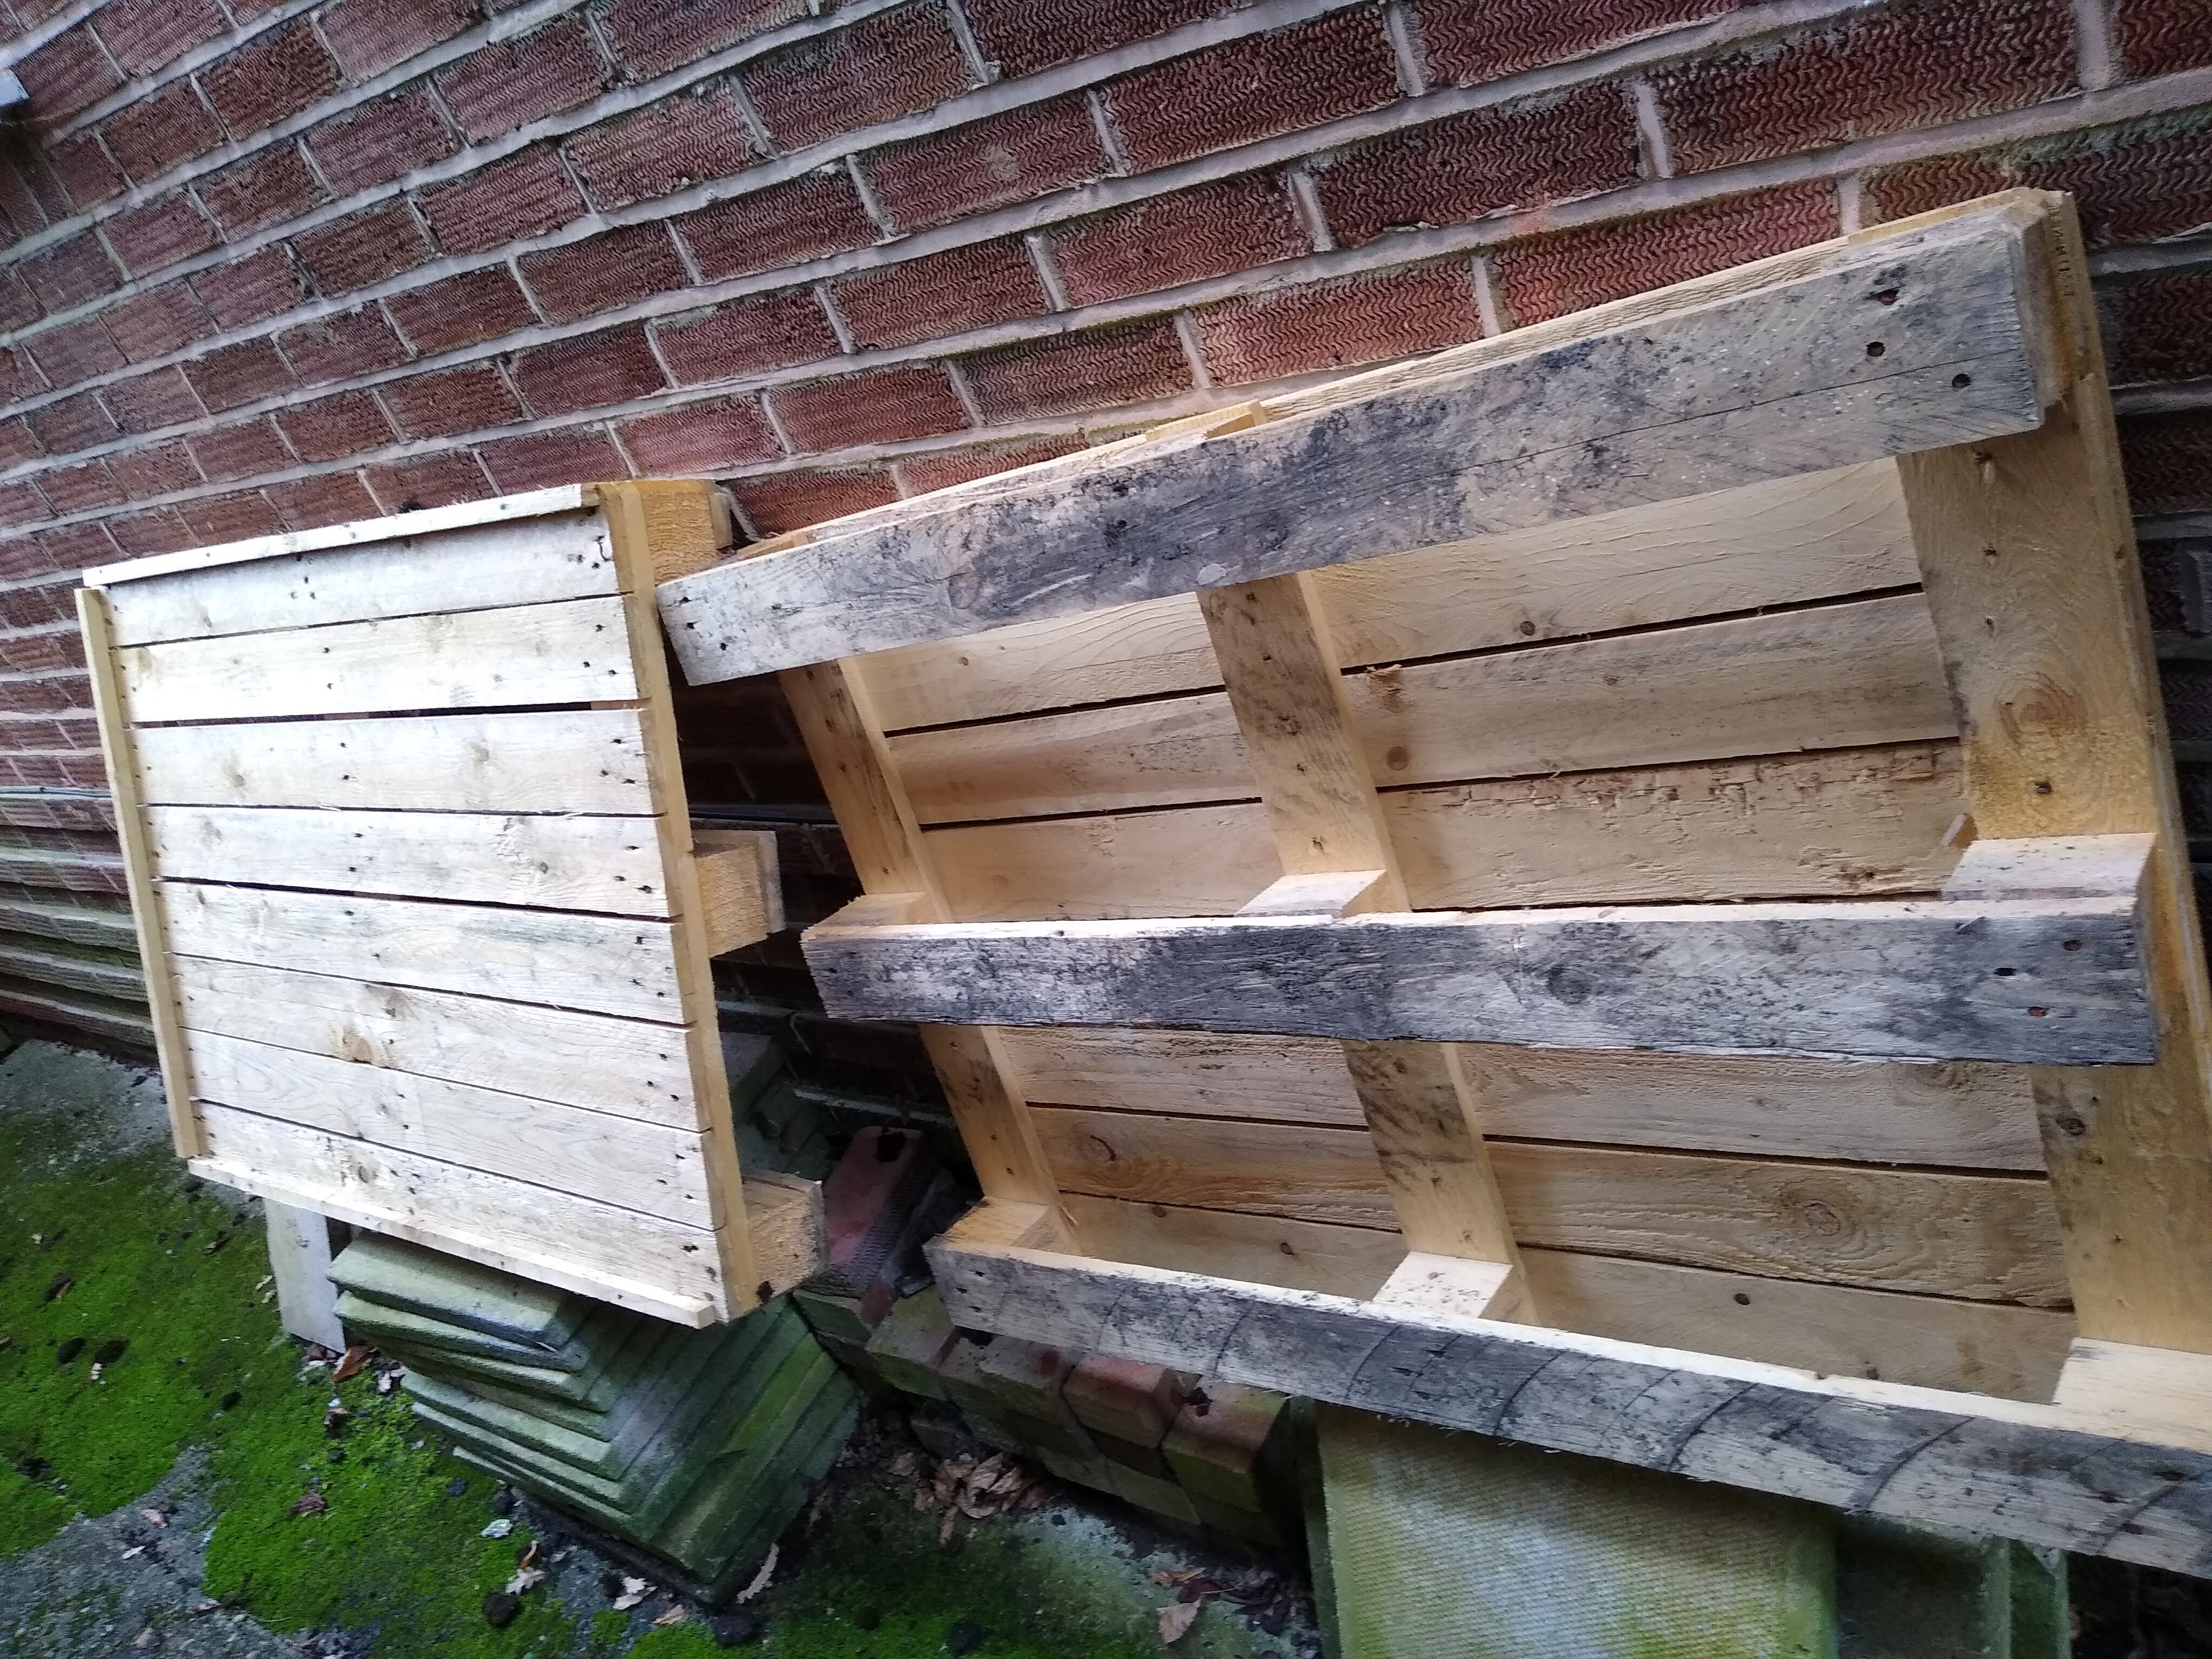
Zombie Buster There are plenty of guides out there on pallet busting but none seem to have be for pallets with the boards that are almost flush with each other. This made it tricky to get the pointy end between the boards or pry on one board at a time.

I got there eventually though and only partially split a few of the boards. De nailing with a regular hammer by bashing 2 shades of sheet out of them took some time and will certainly be looking for another method. But overall I’m fairly pleased with the resulting yield. I wonder how easily they could be reconstructed into pallets again?
Pallet no more -
So I’ve got some pallets
Got to start somewhere
Said pallets After being incapacitated for a few weeks I found my self going down many youtube rabbit holes but I kept coming back to various wood working channels. From smaller channels like Jesper Makes & Dainer Made to bigger ones like Blacktail studios and Crafted Workshop.
The idea of using discarded pallets to create new furniture is very appealing so many hours were spent on pallet research. Namely the types of wood and the treatments that they are subjected to before being used for shipping (Montreal Protocol). It’s a whole thing as it turns out!
Being unusually motivated by this vague recycled furniture idea I was keen to get started. The only problem is, I’ve got no experience, no work shop and only a handful of janky old tools.
But you’ve got to start somewhere, So I got some pallets.
To be precise, IPPC approved, Italian, Heat Treated, pallets (probably pine).
The Wooden Duck
Proudly powered by WordPress
